Buffalo Plaid Potholders

Crisp air, falling leaves, and a big pot of soup to warm you up…

Just a few of the reasons I love Fall.

So while you’re warming things up…

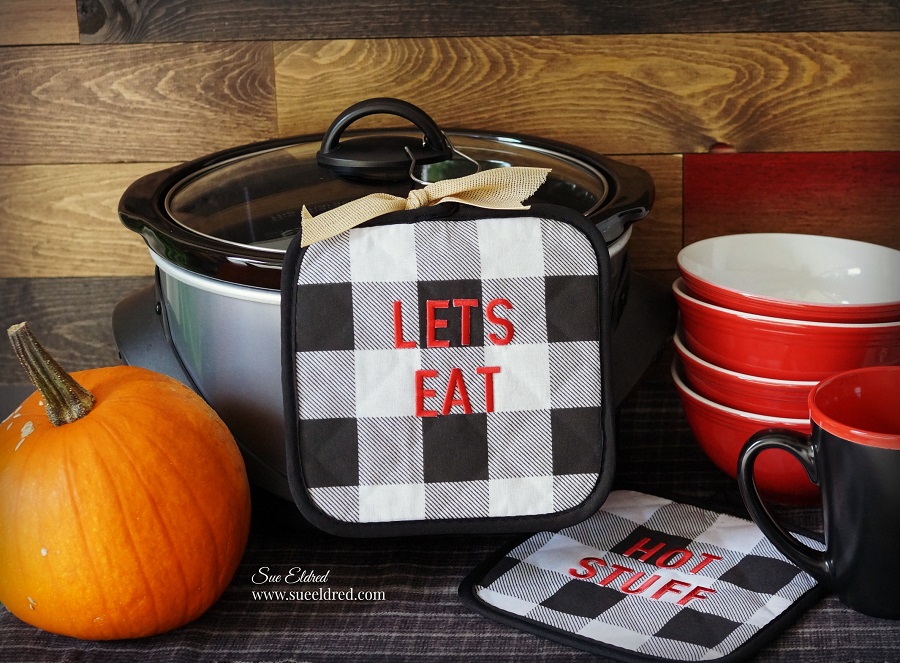
Warm up your plain potholder and add a little personality with Joy Iron-On Embroidered letters.

Supplies needed:

  • Joy Iron-On Embroidered Letters
  • Cotton Potholders
  • Iron
  • Pressing Cloth

Directions:

  1. Remove letters from the sheet.
  2. Position letters shiny side down on potholder.
  3. Cover letters with a clean cloth.
  4. With firm pressure iron cloth over the letters for 30 seconds.
  5. Turn potholder over and iron the reverse side for an additional 30 seconds.
  6. Allow to cool 1 minute before using.

 You can find a wide selection of Joy® embroidered iron-on letters and alphabet sheets in different sizes at your local craft stores!

“This is a sponsored post.  As a member of the Joy® Design Team I have been provided product and compensation in exchange for my creative ideas.  The views and opinions are my own.

Shop Your Fav Brands at Scrapbook.com

*Disclosure:  This blog uses ads and affiliate links.  If you choose to make a purchase using one of the links, I receive a small commission (at no additional cost to you) that helps offset the costs of maintaining this blog.  Thanks for your support!

Shared Kindness…

 (project tutorial at Bottom of Post)

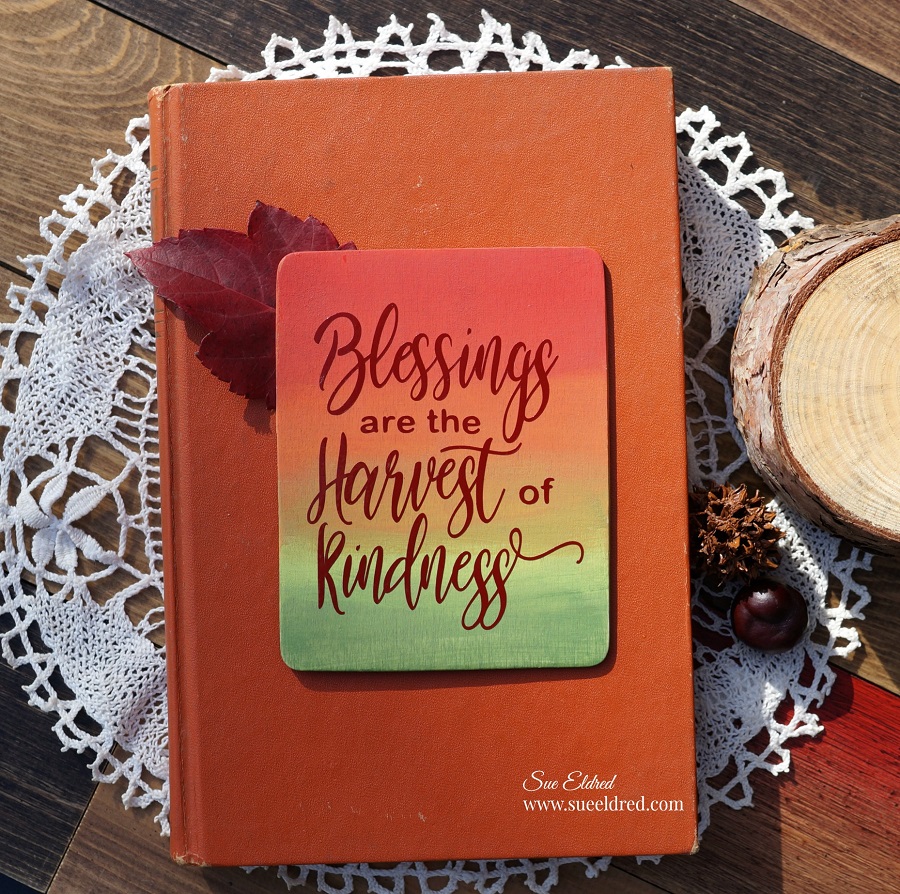
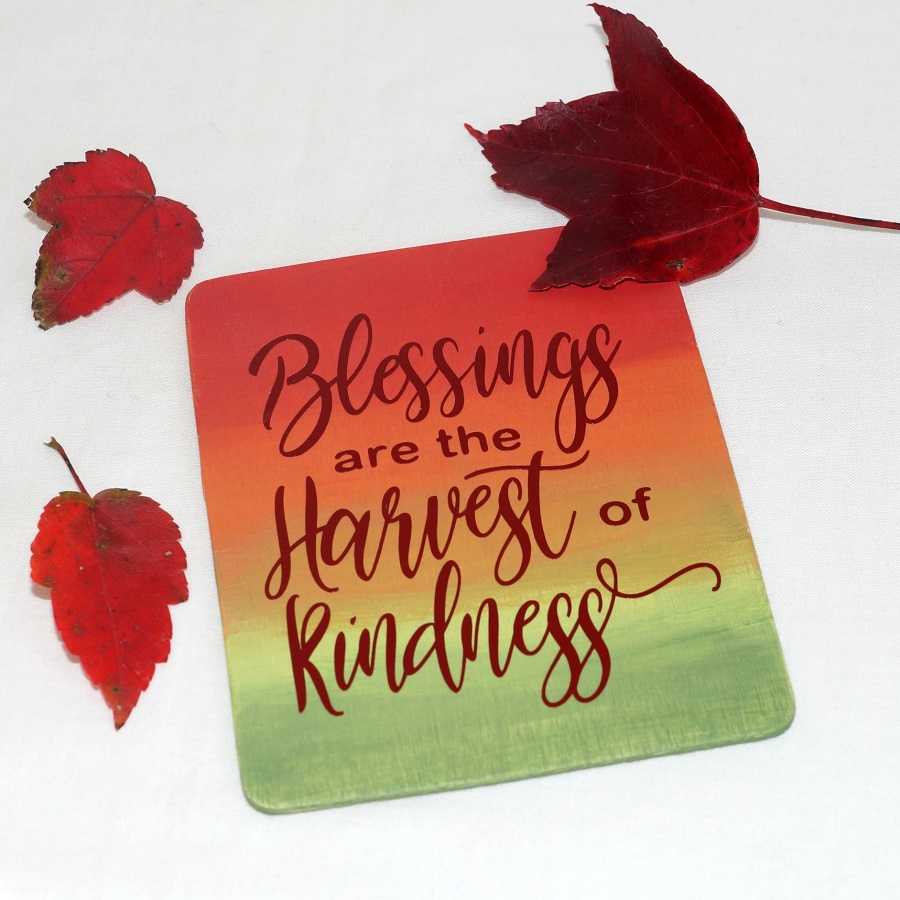
Blessings are the Harvest of Kindness

When I create, I create projects for a variety of reasons. 

Sometimes the project helps me tell a story. 

This particular project reminded me of a sweet exchange that happened between

my mom and a stranger several years ago. 

Just a reminder… World Kindness Day is November 13th. 

Please take a moment to spread a little kindness.

Shared kindness…

After eating lunch with my parents and sister at the local Steak and Shake,

Dad got up to pay the bill at the counter.  I stayed back to help Mom. 

When Mom got up, she noticed a lady sitting at a nearby table and said, “I know her”. 

Mom was in later stages of dementia, so I questioned her, “I don’t think we do Mom” I said. 

As I was trying to get her to leave, she said:  “I want to talk to her, I know her.” 

The lady must have heard us and looked up.  I quietly asked, “Does she know you?” 

Mom had worked at a school for many years, and she knew a lot of people that I didn’t.

The lady shook her head no.

Then without missing a beat, the lady got up, put my mom’s hand in hers and said:

“So, you think you know me?” and introduced herself.

After Mom struggled to get her name out, the woman smiled and said, “so nice to meet you”.

And with that, my mom was happy and left the restaurant with a smile on her face.

It only took a minute for this sweet woman to make a difference.

Mom’s been gone for a while now, but It’s something I’ve never forgotten.

To create the Wood Plaque…

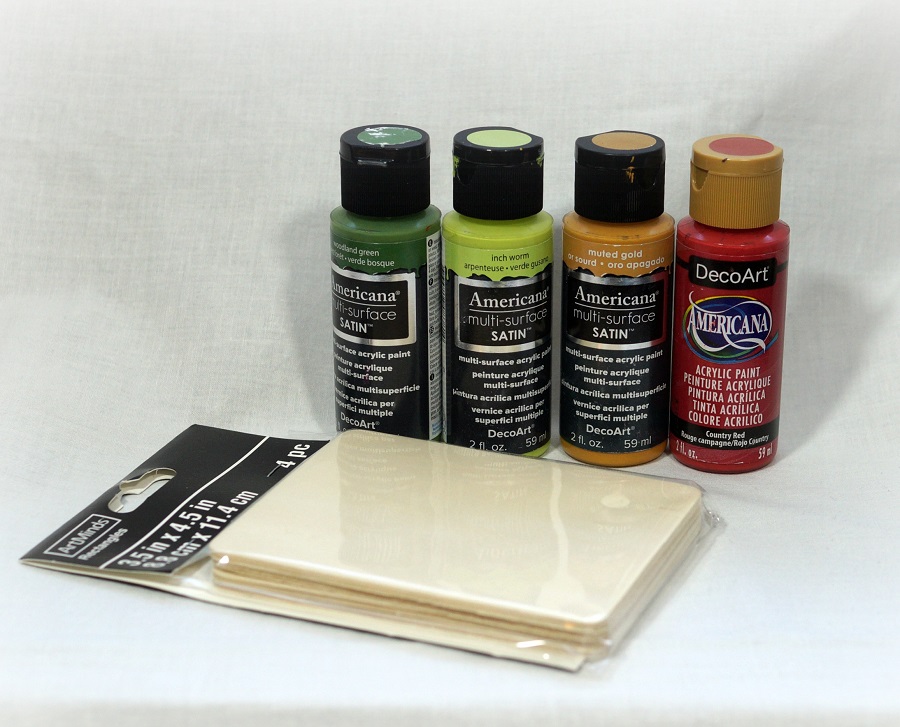
Supplies used:                                  (*affiliate link)

*Disclosure:  This blog uses ads and affiliate links.  If you choose to make a purchase using one of the links, I receive a small commission (at no additional cost to you) that helps offset the costs of maintaining this blog.  Thanks for your support!

Directions:

  • Lightly sand the wooden rectangle with the sanding block to prepare the surface for paint.
  • Paint four horizontal autumn hued stripes on the wood.
  • With a flat dry brush blend the colors together to create a “Fall Rainbow”.
  • Lightly sand over the painted surface to smooth the grain of the wood.

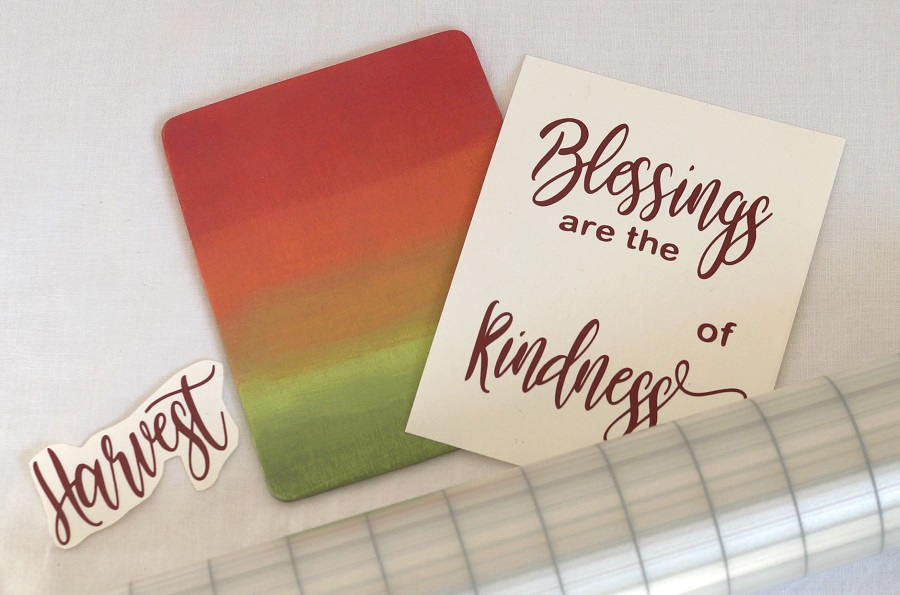
  • Using an electronic die cutting machine, I cut the words.
  • Using a weeding tool carefully remove the negative spaces in and around the letters.
  • Place a piece of Vinyl Transfer Tape* over the letters.  Rub over the letters using a vinyl scraper tool to help the vinyl cling
  • Apply words onto a small wood rectangle.


“This is a sponsored post.  As a member of the StyleTechCraft Design Team I have been provided product and compensation in exchange for my creative ideas.  The views and opinions are my own.

You can now find the full line of StyletechCraft online at ATSM.

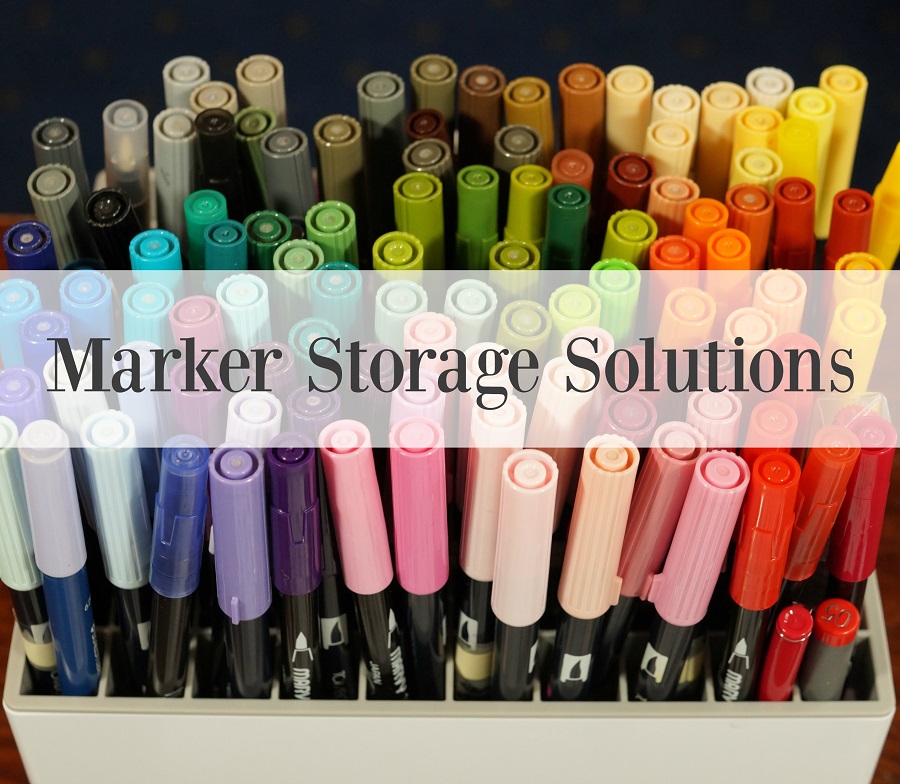
Let’s talk about Marker Storage

Happy National Craft Week!

Saturday was National Card Making Day and now we have National Craft Week?

Be still my crafty little heart.   (I thought every week was craft week.)

Since we’re talking all things “crafty” this week, I’d like to ask you a personal question.

How do you store your markers?

When it comes to markers, we all have our opinions and preference on which are our favorite.

Lately, I’ve been curious on how everyone stores their markers and what works best for you.

I started rubber stamping in the mid 90’s and slowly built up quite a collection of Art Markers.

Personally, I have been using Tombow Markers for over 20 years and some markers in my

collection are almost as old.   (and they still works)

Up until recently my marker storage system was just about as old as my collection.

A wobbly little holder (with a slight lean) and an extra basket for the overflow.

It worked but it wasn’t quite as efficient as I wanted it to be.

Recently, I started doing a lot more cardmaking and using my markers again.

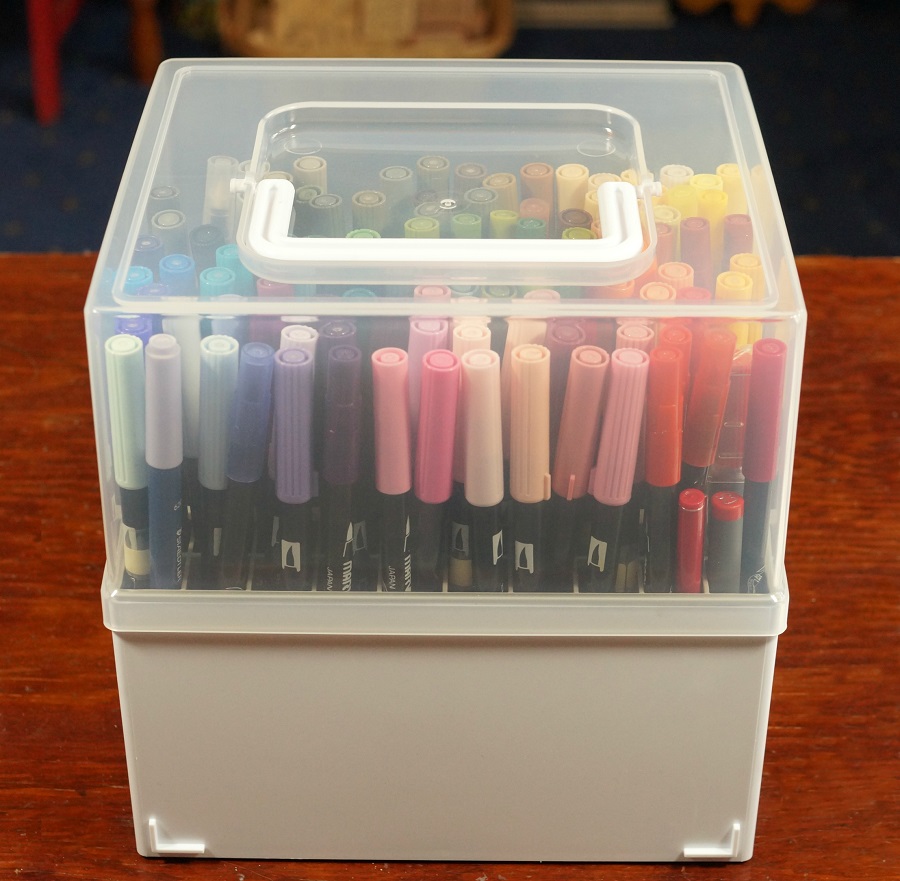
That’s when I requested the Expandable Marker Accordion* from Deflecto.

It is the ultimate in marker storage and portability!

It has 80 slots that hold markers, but, because my Tombow and Marvy markers

are skinnier than Copic markers, I can easily put two markers in each slot.

Disclosure…“This is a sponsored post.  As a member of the Deflecto Design Team I have been provided compensation and product in exchange for my creative ideas.  The views and opinions are my own.

The Expandable Marker Accordion* comes with a clear lid that easily snaps in place and a

handle that makes it easy to take your markers with you to classes and crops.

It keeps everything secure.

And…depending on your work space

you can use it in a straight line, a U shape, as a cube or in my favorite, a zig zag pattern.

Whatever combination works best for you and the project that you’re working on.

Not just another marker holder…

Let’s talk another option.

Maybe you’re just starting out your marker collection or you need a little more flexibility with

your marker storage, you might like Deflecto’s Interlocking Marker Organizer*.

This little marker holder can be used solo or because it has a interlocking design it can be

connected to additional units making it perfect whether you use it upright or horizontal.

And the best part…

The Interlocking Marker Organizer* also fits into the Deflecto Stackable Caddy Organizer.

You can fit six marker organizers into the Stackable Caddy for the Ultimate Grab and Go.

So many great options to fit your crafting style.

Disclosure:  This blog uses affiliate links.  If you choose to make a purchase using one of the links, I receive a small commission (at no additional cost to you) that helps offset the costs of maintaining this blog.  Thanks for your support!

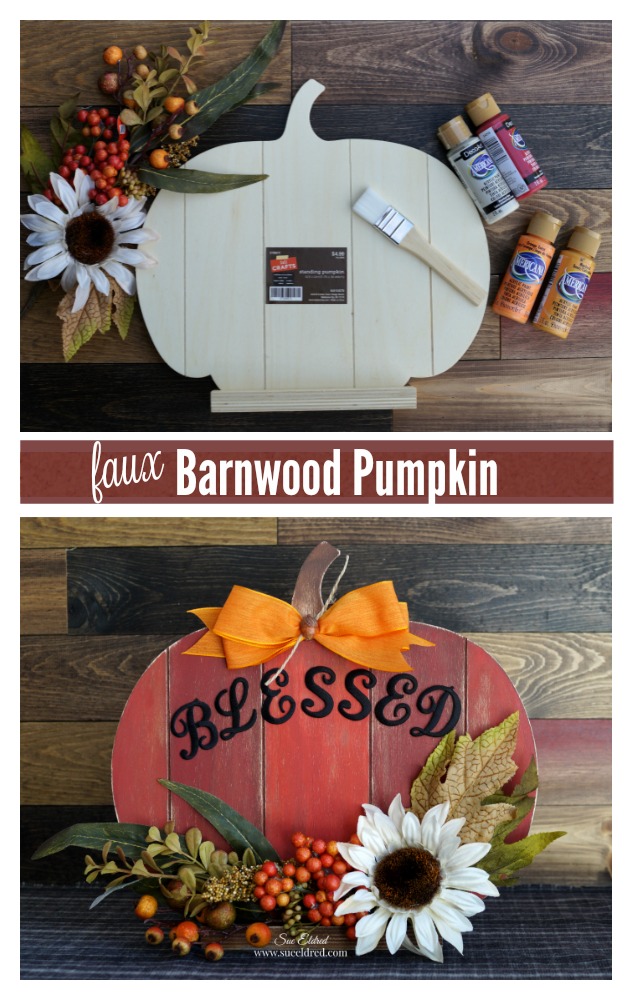
Faux Barn Wood Pumpkin

Add a little Joy to your Fall Home Décor with this quick and easy Fall Centerpiece.

I wanted to make something new to decorate my mantel for fall this year.

So…I made a quick (or not so quick) trip to my local Hobby Lobby.

While there, I found this unfinished wood pumpkin and a fall floral pick (among other things).

It went together really quick.   I had it painted and put together in no time.

To be honest, the project didn’t turn out exactly how I envisioned in my head,

I think it turned out better.  (my original thought was to paint it in soft muted fall colors)

The best part of the whole process was…

this simple wood painted pumpkin inspired my son to spend the next few hours arranging

and rearranging my mantels until he got them just perfect.  (and that makes me happy!)

Faux Barn Wood Pumpkin Supplies Needed:

Shop Your Fav Brands at Scrapbook.com

*Disclosure… This blog uses ads and affiliate links.  If you choose to make a purchase using one of the links, I receive a small commission (at no additional cost to you) that helps offset the costs of maintaining this blog.  Thanks for your support!

Create the look of old barn wood using a wood pumpkin cut-out and acyrlic paint.

Directions:

  • Paint the wood pumpkin with brown acrylic paint.  Make sure to get down into the grooves.
  • After the brown paint has dried paint the sections of the pumpkin with alternating colors.
  • Sand the pumpkin with a fine grit sandpaper* to distress and smooth the wood.

Glue the embroidered letters and floral pick onto the wood pumpkin with Beacon 3 in 1 Glue*.

Faux Barn Wood Pumpkin

  • Create a bow with sheer ribbon tied in the center with twine and glue onto the top of the pumpkin for the finishing touch.

A quick and easy Fall Centerpiece for my mantel.  

You can find a wide selection of Joy® embroidered iron-on letters 

and alphabet sheets in different sizes at your local craft stores.  

“This is a sponsored post.  As a member of the Joy® Design Team I have been provided product and compensation in exchange for my creative ideas.  The views and opinions are my own.

Pin Me

Mini Treat Jars for Fall Parties

Mini Treat Jars for Fall

Impress your guests with this quick and easy table favor.

Create the perfect extra touch for your next Fall party or Get-Together.

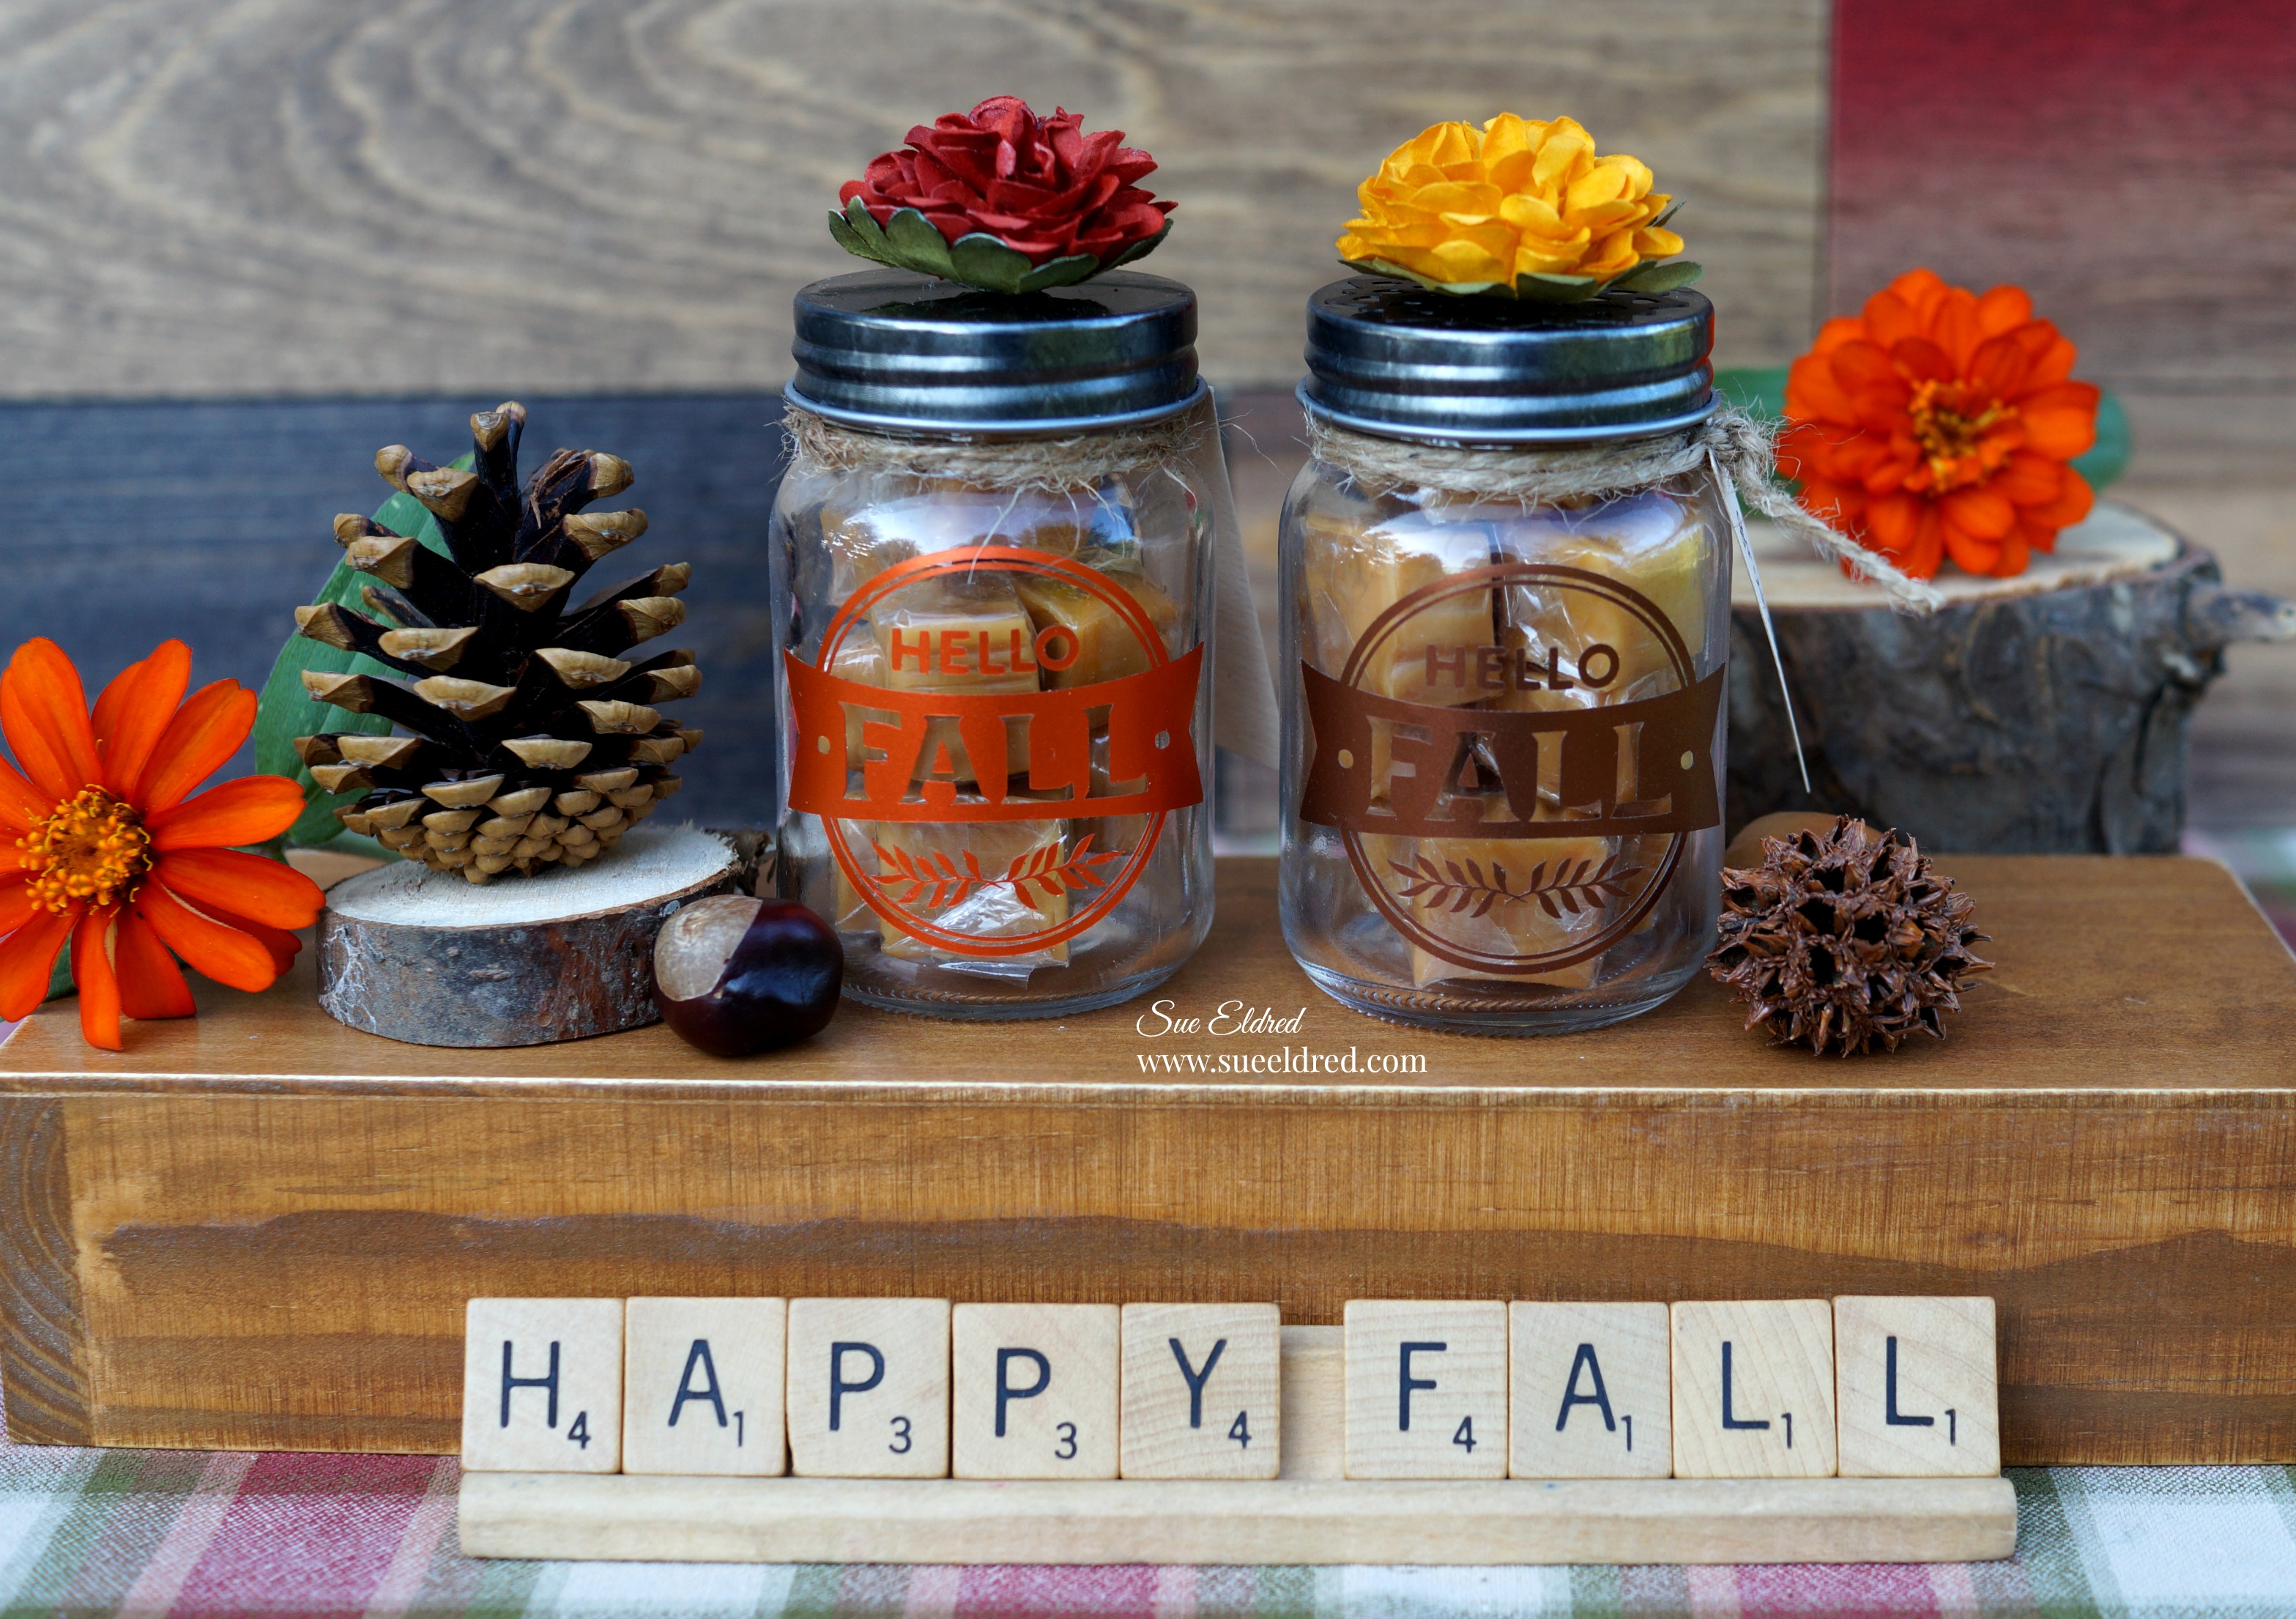
I found these adorable mini mason jars at Michaels the other day and fell in love.

If you know me at all, you know I love anything miniature.

I just knew they would be perfect for filling with little treats.

To create the label for the jar…I used a Silhouette Cameo Electronic Die Cutting Machine*

and StyleTechCraft Orange and Bronze Luster Vinyl* to cut out the cute “Hello Fall” SVG file

from Jillibean Soup.   I used my StyleTechCraft weeding tool to remove the background pieces

of my image.  I transferred the “Hello Fall” label using StyleTechCraft Grid Transfer Tape*

*Disclosure… This blog uses ads and affiliate links.  If you choose to make a purchase using one of the links, I receive a small commission (at no additional cost to you) that helps offset the costs of maintaining this blog.  Thanks for your support!

After filling the jar with wrapped caramels…

I wrapped the rim on the jar with twine and tied on a small tag.

I glued a paper marigold (which I found at Hobby Lobby) on the top of the jar.

Cute little party favors to place by each guests plate.

My project is part of the Fall Blog Hop with Designer Craft Connection and StyleTechCraft vinyl.

If you would like to see more Fall projects hop on over to the Designer Crafts Connection Blog

to see the full list of designers.

 Styletech Craft products brought to you by ATSM Craft

“This is a sponsored post.  As a member of the StyleTechCraft Design Team I have been provided product in exchange for my creative ideas.  The views and opinions are my own.

Barn Art

If you had a newly remodeled little red barn…

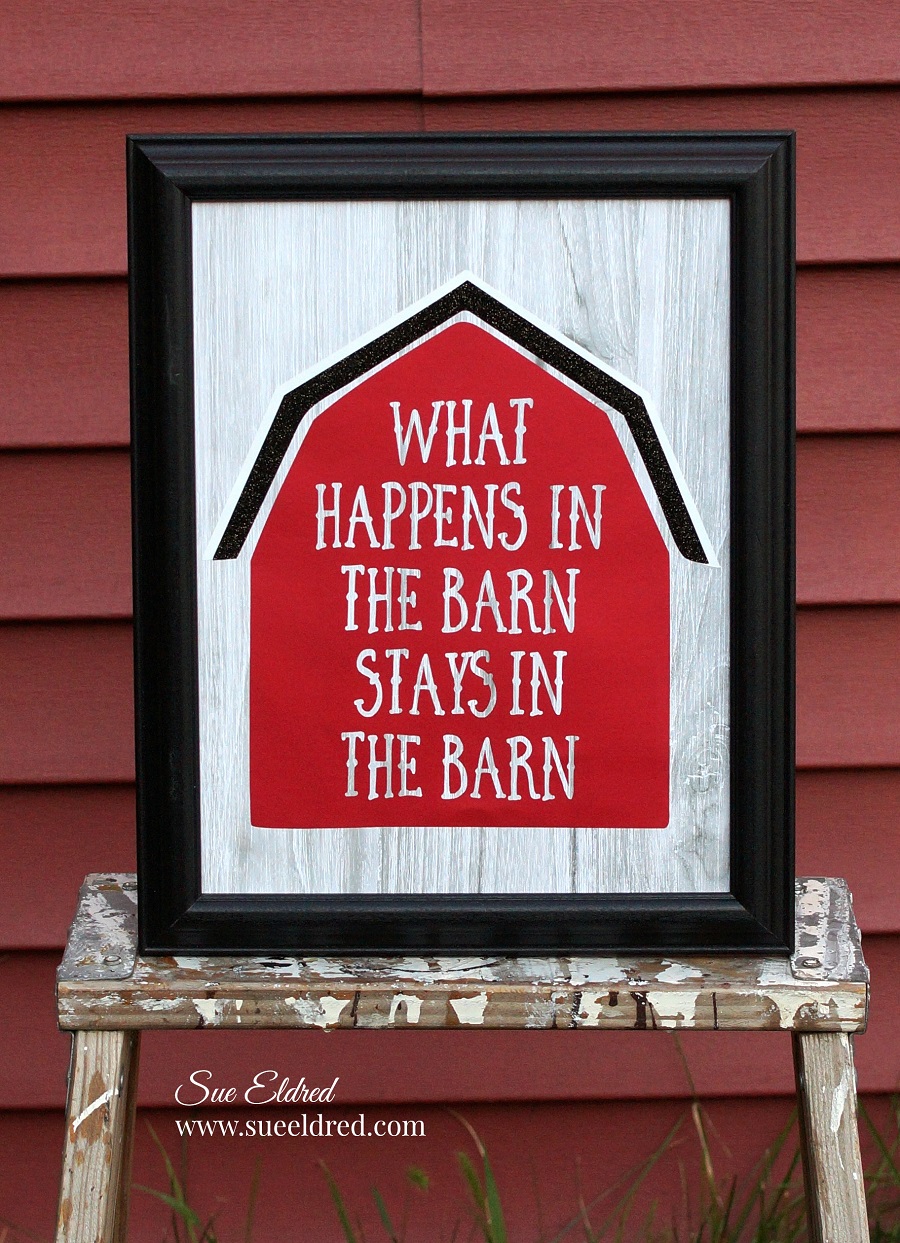
would you make Barn Art for its newly painted walls?

Our newly remodeled little red barn is finally done and it’s looking really good. 

(maybe even cute)

So…I decided to make it some art using my Silhouette Cameo Electronic Die Cutting

Machine* and luster vinyl from StyleTechCraft.  A simple little project and fun sign that’ll

adorn the barn walls along with the old personalized license plates that I found.

*Disclosure:  This blog uses affiliate links.  If you choose to make a purchase using one of the links, I receive a small commission (at no additional cost to you) that helps offset the costs of maintaining this blog.  Thanks for your support!

I will be posting the complete barn remodel in the next week or two.

Here’s a sneak peek until I do.

Don’t you just love this old weathervane?

It had been sitting in the barn for years just waiting to be polished up good as new.

“This is a sponsored post.  As a member of the StyleTechCraft Design Team I have been provided product and compensation in exchange for my creative ideas.  The views and opinions are my own.

Shop Your Fav Brands at Scrapbook.com

Little Red Barn

The Little Red Barn…

Every summer we take on a new project and this summer has been all about the barn.

Our old barn was built in two sections and one of the sections was in pretty bad shape.

We tore down the rickety part and have been rebuilding the other half.

My only requirement for the new barn was that I wanted it red.  (and maybe a few other changes)

I’ll save the Barn Make-Over for another post.

*Disclosure… “This is a sponsored post.  I have been provided product in exchange for my creative ideas.  The views and opinions are my own.”

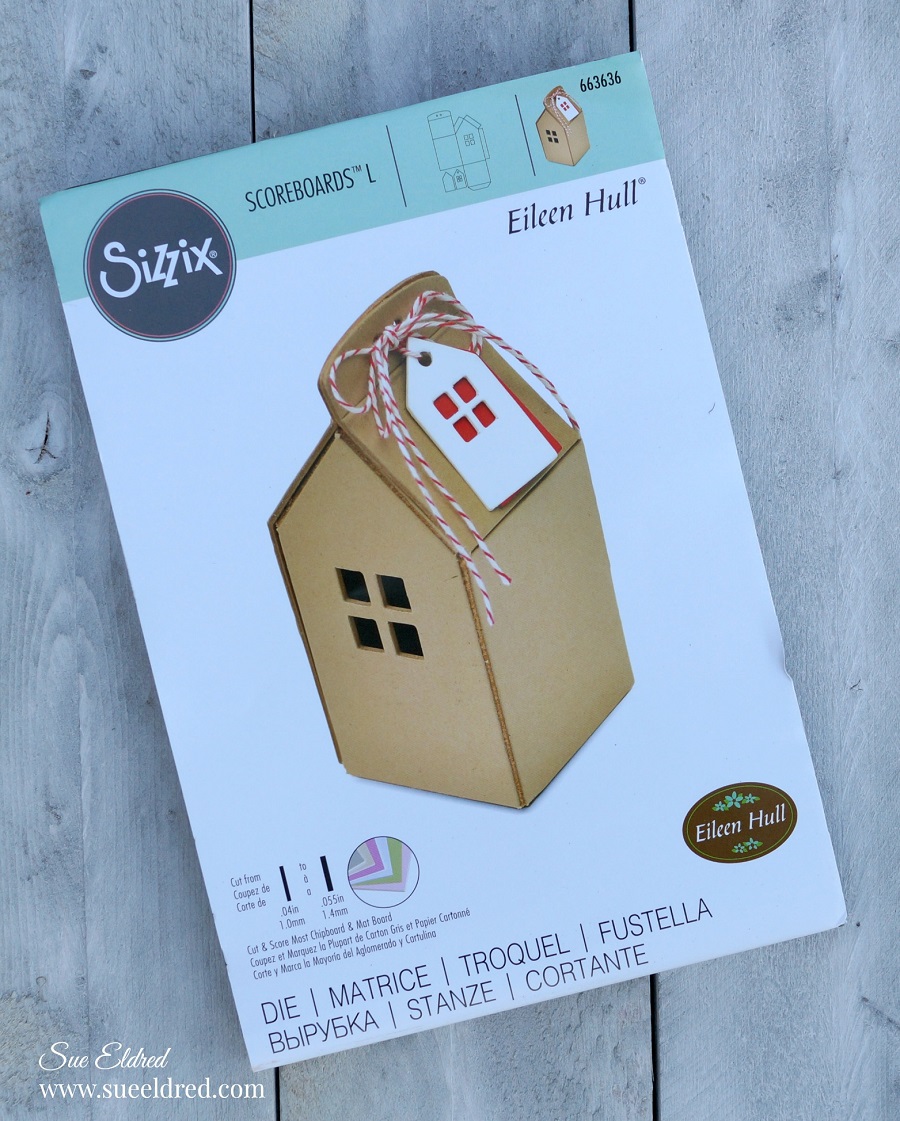
So… when I received Eileen Hull’s House Ornament Die* naturally I saw a barn.   

I guess I’m in full barn mode.

I made a few adjustments to the die-cut house, like removing the top section for tying and

adding a roof made from black corrugated paper.

I added a couple barn doors cut from chipboard and added a thin piece of corrugated

paper over top for an awning.

The bottom of the house opens up and would look cute with a tea light glowing inside.

*Disclosure:  This blog uses affiliate links.  If you choose to make a purchase using one of the links, I receive a small commission (at no additional cost to you) that helps offset the costs of maintaining this blog.  Thanks for your support!

The die also comes with a little tag to hang from the top of the house.

I added a little awning over the window.  So many possibilities.

This house die* is quickly becoming my new favorite die.

I can’t wait to create another house (or two) all decked out  for Christmas.

First Day Back to School Signs

Watch out Kindergarten here I come!

The first day of school is a big deal.  Especially when it’s your first day of Kindergarten.

My grandson is going into Kindergarten this year and will be riding the bus with his big brother.

It’s a really big deal.

So… I decided to make him something  special.

Using my Silhouette Cameo Electronic Die Cutting Machine* and a variety of fun colors of

adhesive gloss craft vinyl from StyleTechCraft…I made a cute two-sided sign for them

(or Mom) to use for those First Day of School pictures.

StyleTechCraft has a large selection of adhesive vinyl colors to choose from.

*Disclosure:  This blog uses affiliate links.  If you choose to make a purchase using one of the links, I receive a small commission (at no additional cost to you) that helps offset the costs of maintaining this blog.  Thanks for your support!

On the second side of the sign I made a few adjustments to my Silhouette Back to School

SVG cut file and added lines instead of dots.  (too many dots for me)

Using a chalk marker or chalk you can reuse the sign for many years to come.

FYI…The base of the sign is a wood cut out from Adornit which I painted using DecoArt Chalkboard Paint*.

“This is a sponsored post.  As a member of the StyleTechCraft Design Team I have been provided product and compensation in exchange for my creative ideas.  The views and opinions are my own.

Shop Your Fav Brands at Scrapbook.com

Nick’s New Swim Team Jacket

Nick joined the swim team this summer and I couldn’t be more proud of him.

I got to watch him at a few of the swim meets and was so impressed on his abilities.

He’s always loved being in water and has really become quite the swimmer.

I’m not sure I’d make it across the width of the pool let alone the length.

He even swims the 100 meter race.  (4 lengths of the pool for us non-swimmers)

Not bad for an 8 year old.

He’s so proud of his swim gear.  (Isn’t he handsome?)

But…his new Super Cool Swim Team Jacket didn’t come with the option for personalization.

Joy® Embroidered Iron-On Monogram letters to the rescue.

For his Swim Team Jacket we used:

  • One Super Cool New Swim Team Jacket

  • Joy® Baby Monogram Iron On Embroidered Letters

  • Iron and pressing cloth

Directions:

  1. Check Garment care label before choosing which setting to set your iron.

  2. Remove letters from sheet.  Position letters with shiny side down on jacket.

  3. Cover letters with fine cloth.  With firm pressure iron cloth over the letters for 25 seconds.

  4. Turn jacket inside out and iron the back of the letters for 25 seconds.

  5. Allow to cool for 1 minute before handling.

Joy® iron-on embroidered letters and appliqués can be found at your local craft stores!

“This is a sponsored post.  As a member of the Joy® Design Team I have been provided product and compensation in exchange for my creative ideas.  The views and opinions are my own.

Shop Your Fav Brands at Scrapbook.com

*Disclosure:  This blog uses ads and affiliate links.  If you choose to make a purchase using one of the links, I receive a small commission (at no additional cost to you) that helps offset the costs of maintaining this blog.  Thanks for your support!

Crossover II Fabric & Paper Cutting System

Recently, I was asked by The Maker’s Movement to try out the Crossover II Fabric & Paper Cutting System* to see how I liked it.  (Always anxious to try something new, I quickly agreed.)

*Disclosure… “This is a sponsored post.  I have been provided product in exchange for my creative ideas.  The views and opinions are my own.”

The machine is compact and portable.  Easy to store and carry.

You can use the Crossover II* with thin metal paper dies, fabric dies and steel rule dies.

The Crossover II Fabric and Paper Cutting System*is similar to other manual cutting systems and uses a “sandwich” configuration with three plates.  (included with the machine)

  • White Base Plate
  • Metal Adapter Plate
  • Clear Top Plate

This is my favorite part of the machine, the adjustable rollers and pressure settings. 

This was the real game changer for me.

It adjusts for multiple layers and allows you to be able to cut a variety of thicknesses.

Not just for paper…

the Crossover II Fabric & Paper Cutting System* can cut fabric, faux leather, craft foam,

chipboard, felt and several other materials.

Here’s a quick little video showing the Crossover II Fabric & Paper Cutting System*in action.

Along with the Crossover II Fabric & Paper Cutting System* I received a few dies from

Maker’s Movement to play with as well.

  • MSD205  Hello Spring Stamp & Die Set
  • MOD203  Stitched Rectangles Nested Essentials Die Set
  • SF6  Stacker Flower 6

I created this quick card using paper scraps from Graphic 45 and a combination of the dies

I received from The Maker’s Movement.   I love the tiny foliage stamp I used on the background.

It’s from the Hello Spring Collection.

I liked using the Crossover II Fabric & Paper Cutting System*especially it’s versatility.