A Cup of Attitude

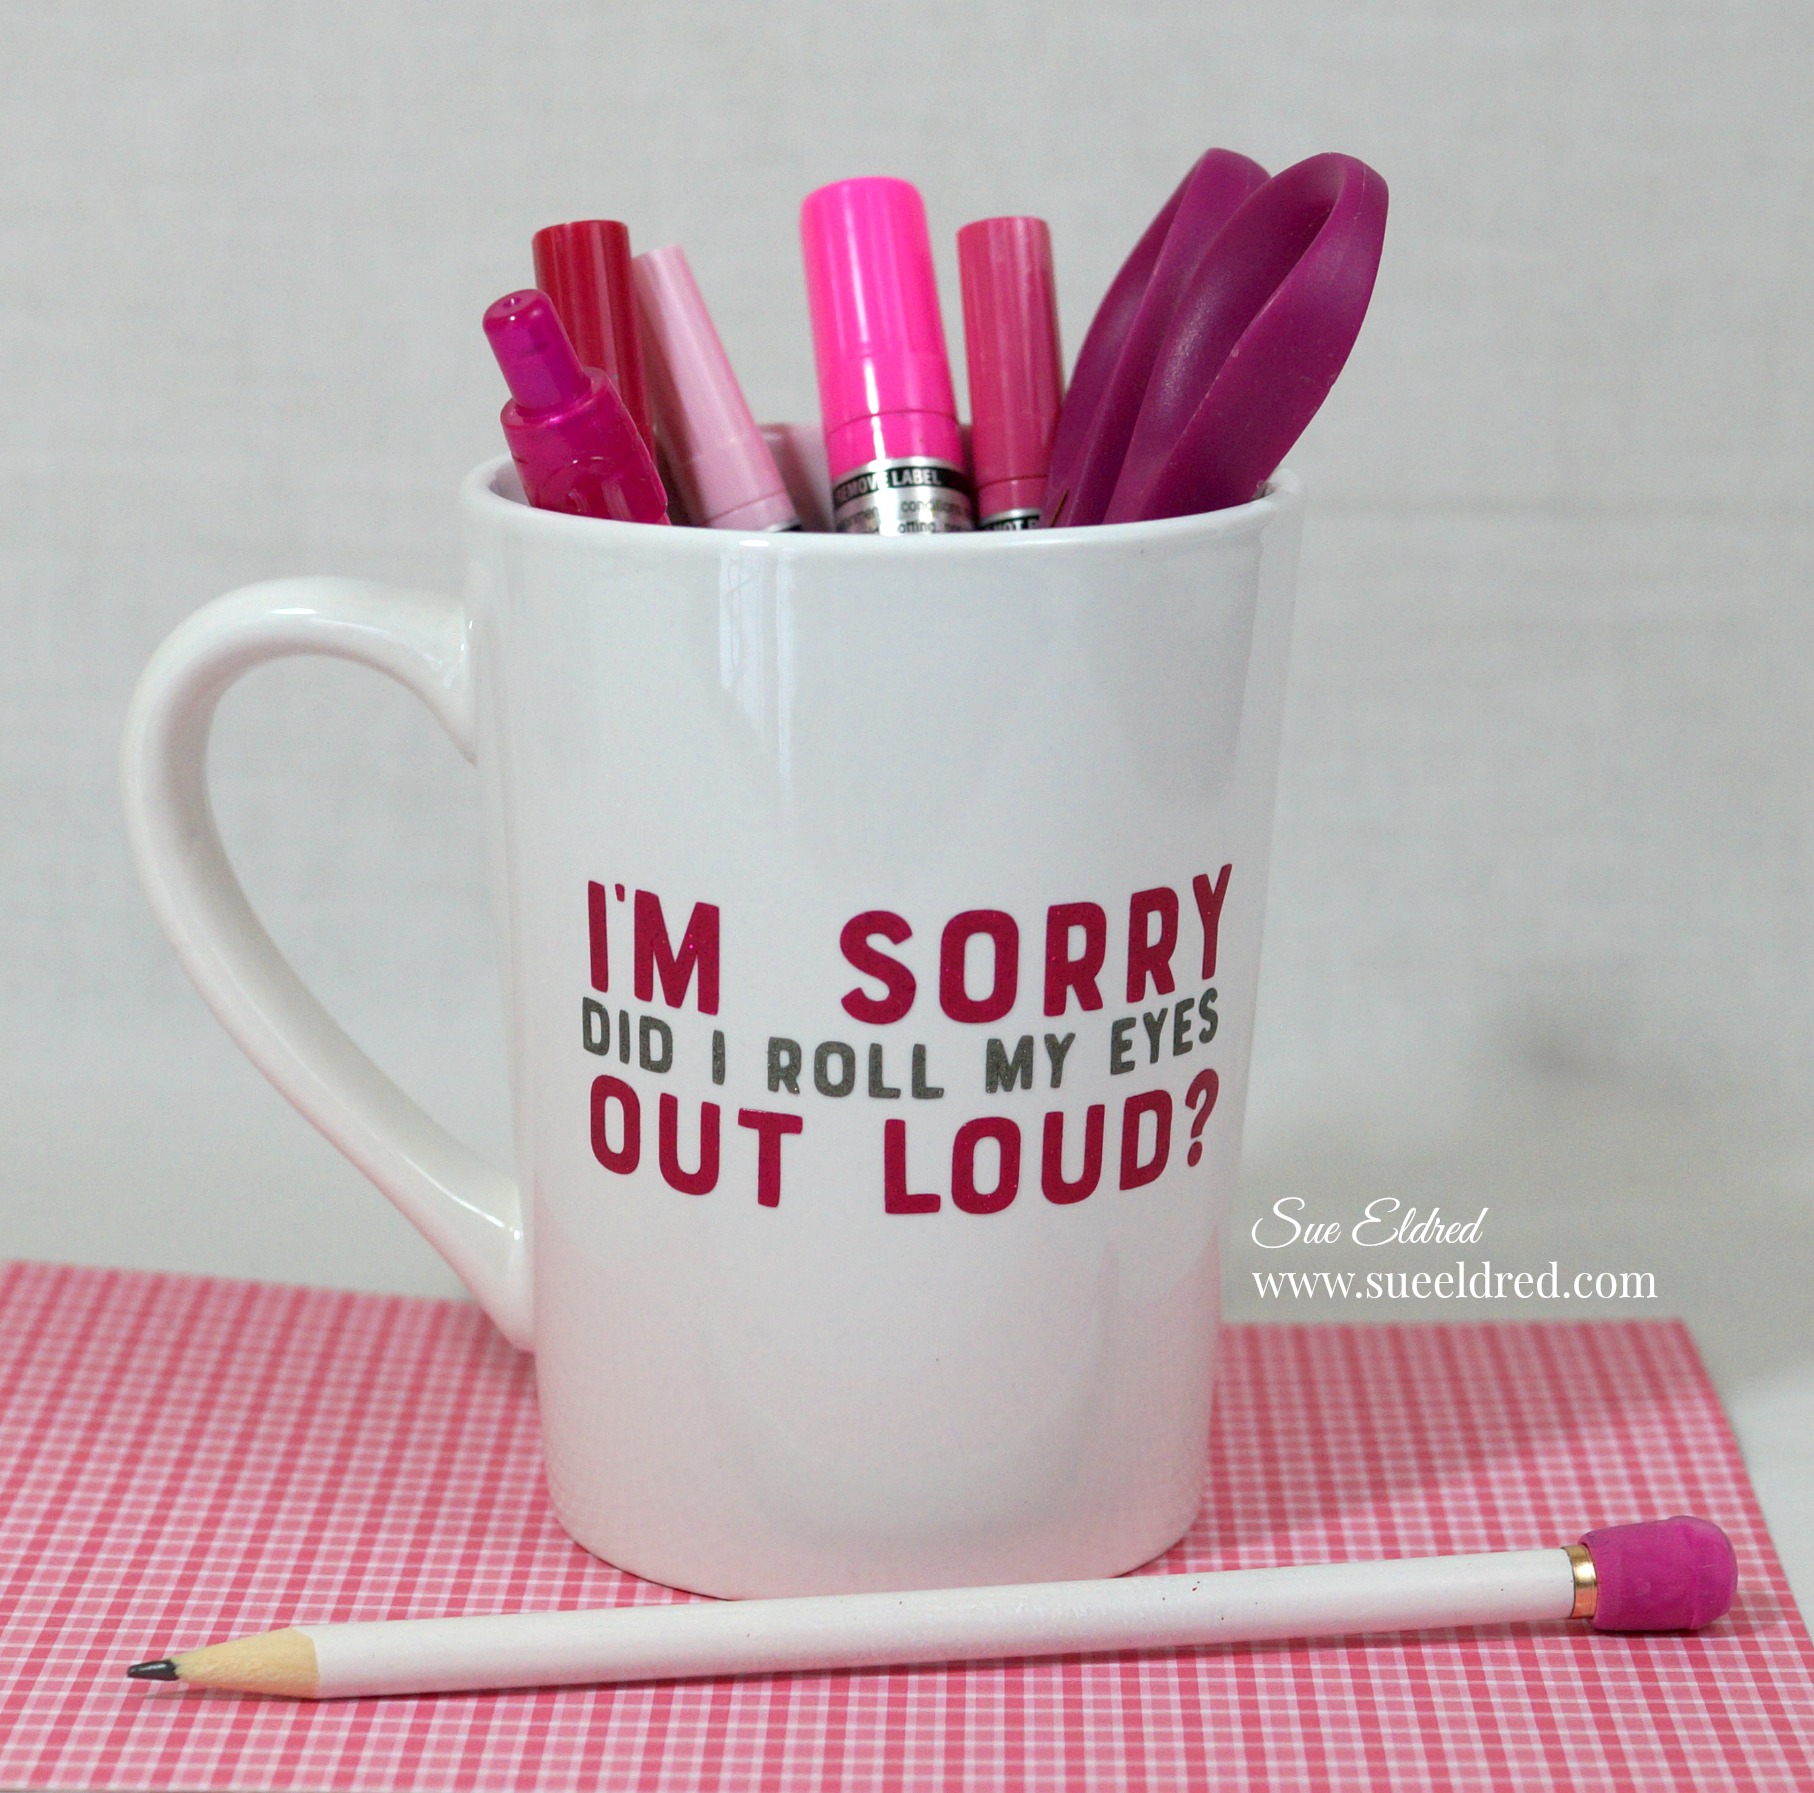
After I finished personalizing my new cup, I proudly ran downstairs to show it to my husband.

“I don’t get it”  was his response.

It’s a cup of Attitude”, I replied.  (I still don’t think he got it.)

I’m generally a very sweet and nice person.  

But sometimes…if you could only hear the snarky comments rolling around in my head,

you just might think otherwise.  I keep it to myself most of the time.  (or at least I try)

The struggle is real.

To personalize my cup…                              (*affiliate links)

  •  I used my Silhouette Cameo* to cut out a cute saying from Jillibean Soup out of translucent

Self Adhesive Glitter Vinyl Sheets- by Styletech from Tape Technologies*

  • I picked up the plain white cup at Dollar Tree* for only $1.00.  (*affiliate link)

Dollar Tree is the perfect place to find inexpensive glassware to personalize with vinyl.

Directions:

  • Clean the cup with warm soapy water to remove any grease or residue.
  • Apply the hot pink glittered  vinyl words onto the cup using a Vinyl Transfer Tape*.
  • Next, add the gray glittered vinyl words.
  • The Vinyl Transfer Tape*  makes it easy to line up the words.
  • Wait 4 days for the adhesive to fully cure before using the cup.
  • It is recommended to hand wash only.  (I have put mine in the dishwasher, just saying.)

If you need to keep your attitude a little more subdued…

the cup also makes a great pen holder.

Shop Your Fav Brands at Scrapbook.com

“This is a sponsored post. As a member of the Tape Technologies Design Team I have been provided product in exchange for my creative ideas, views and opinions.”

*Disclosure:  This blog uses ads and affiliate links.  If you choose to make a purchase using one of the links, I receive a small commission (at no additional cost to you) that helps offset the costs of maintaining this blog.  Thanks for your support!

Shop Amazon Scrapbooking Supplies*

In Case you didn’t Know…

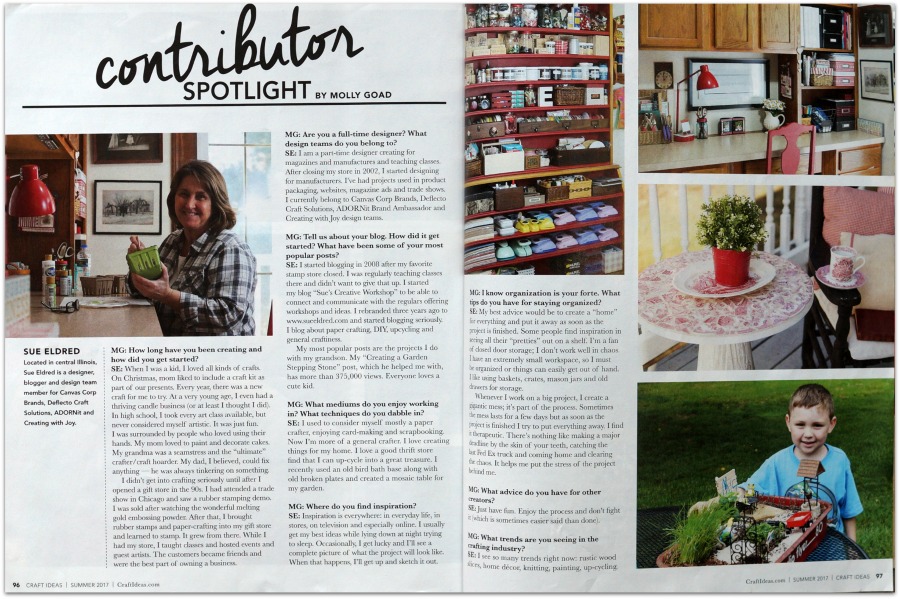
Last year, I was asked to do a Contributor Spotlight for Craft Ideas Summer Issue. 

As intimidating as it felt, it was an honor to be asked for a featured interview.

Unfortunately, my interview was also the last interview. 

The Summer Issue was later decided to be their last issue.
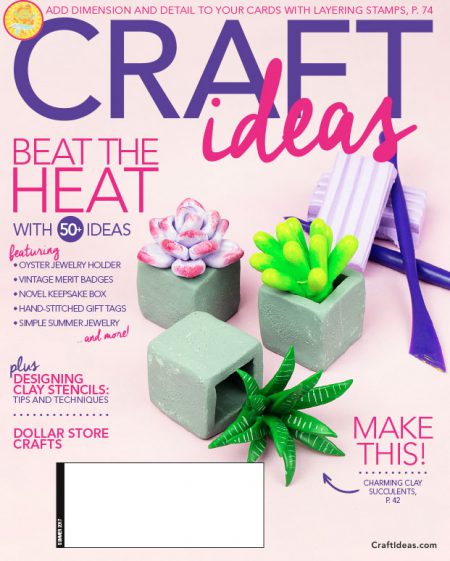
I’ve had several projects featured in Craft Ideas throughout the last several years.

I always enjoyed working with them and was sad to see it end.

I’ve never shared the interview on my blog after it was featured in the magazine…

I thought I might as well share it now for those of you who don’t know.

 1.  How long have you been creating and how did you get started?  

When I was a kid, I loved doing all kinds of crafts.  On Christmas, Mom liked to include a craft kit as part of our presents.  Every year, there was a new craft for me to try.  At a very young age, I even had a thriving candle business for a while (or at least I thought I did).  In High School, I took every Art class available, but never considered myself artistic.  It was just fun. 

I was surrounded by people that loved using their hands.  My Mom loved to paint and decorate cakes.  My Grandma was a seamstress and the “ultimate crafter/craft hoarder”.  My Dad, I believed, could fix anything.  He was always tinkering on something, even the neighborhood kids would bring things for him to fix.   

I didn’t get into crafting seriously until after I opened a gift store in the 90’s.  I had attended a Gift Trade Show in Chicago and saw a rubber stamping demo.   I was sold after watching the wonderful melting gold embossing powder.    After that, I brought rubber stamps and paper-crafting into my gift store and learned to stamp.  It grew from there (any boy did it).   While I had my store, I taught classes, hosted events and guest artists.  The customers became friends and were the best part of owning a business.  

2.  Are you a full-time designer? What design teams do you belong to?

I am a part time designer creating for magazines, manufactures and teaching classes.    After closing my store in 2002, I started designing for manufacturers.  I’ve had projects used in packaging, websites, magazine ads and trade shows.   I currently belong to Xyron, Deflecto Craft Solutions, Tape Technologies and Creating with Joy Design Teams.

3.       Tell us about your blog. How did it get started? What have been some of your most popular posts?  

I started blogging sometime in 2008 after my favorite stamp store closed.   I was regularly teaching classes there and really didn’t want to give that up.   I started my blog
“Sue’s Creative Workshop” to be able to connect and communicate with the regulars offering workshops and ideas.  
I re-branded my blog 4 years ago to www.sueeldred.com and started blogging seriously.  I blog about paper-crafting, DIY, up-cycling and general craftiness.

My most popular posts are the projects I do with my Grandson.   My “Creating a Garden Stepping Stone post, which he helped me with, has had over 450,000 views.  Everyone loves a cute kid. 

4.       What mediums do you enjoy working in? What techniques do you dabble in?

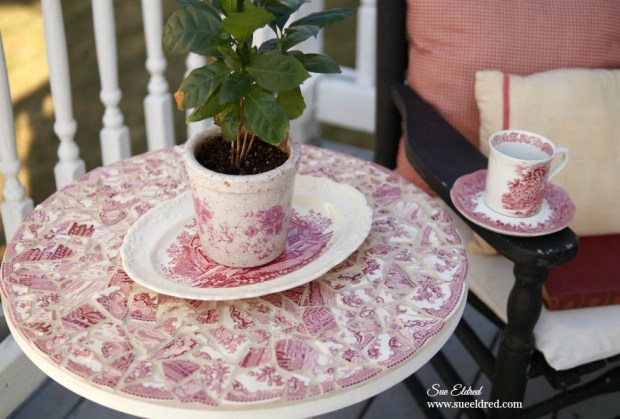
I used to consider myself mostly a paper-crafter, enjoying cardmaking and scrapbooking.  Now I’m more of a general crafter.   I love creating things for my home.  I love a good thrift store find that I can up-cycle into a great treasure.  I recently used an old bird bath base, saved for just the right project, along with old broken plates (left over from “Creating a Garden Stepping Stone”) and created a Mosaic Table for my garden.  

See post here Trash to Treasure Love Story.
5.       Where do you find inspiration?

Inspiration is everywhere:  in everyday life, in stores, on television and especially online.  I usually get my best ideas while lying down at night trying to sleep. Occasionally, I get lucky and I’ll see a complete picture of what the project will look like.  When that happens, I’ll get up and sketch it out.   (I love it when that happens.)
6.       I know organization is your forte. What tips do you have for staying organized?

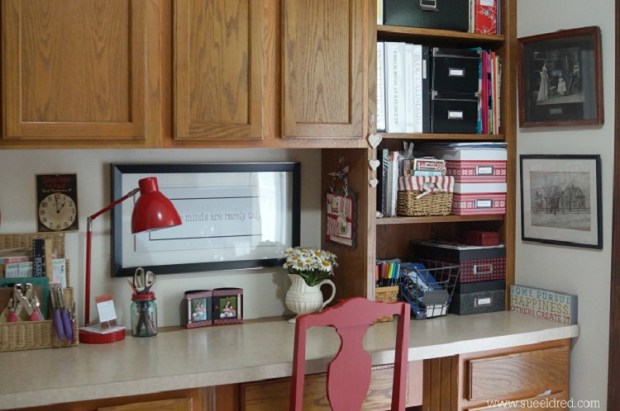
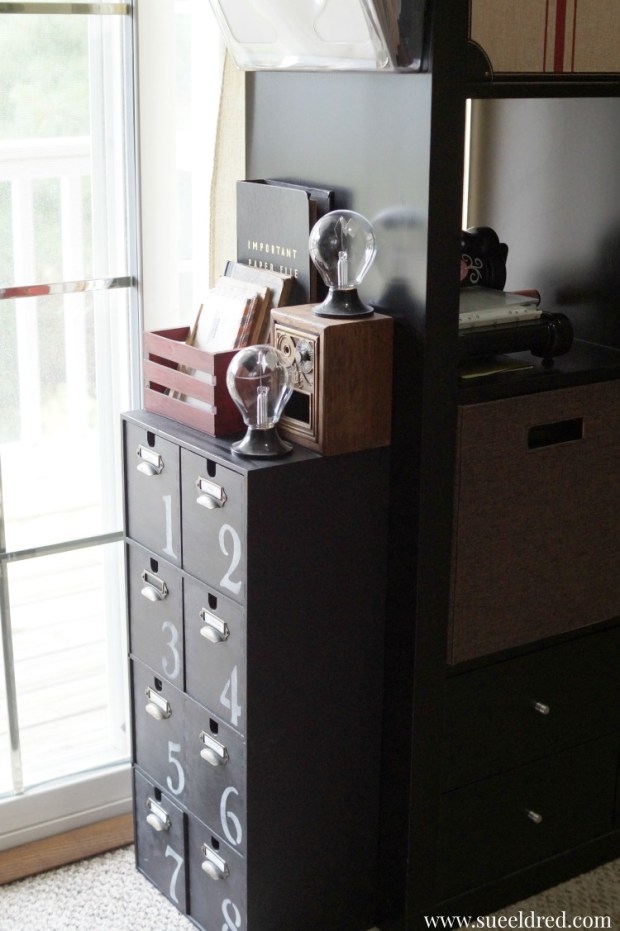
My best advice would be to create a “home” for everything and put it away as soon as the project is finished.  Some people find inspiration in seeing all their “pretties” out on a shelf.  I’m a fan of closed door storage; I don’t work well in chaos.  I have an extremely small work space, so I must be organized or things can easily get out of hand.  I like using baskets, crates, mason jars and old drawers for storage.  Keeping it visually fun and appealing helps me want to keep it clean.   

Whenever I work on a big project, I create a gigantic mess, it’s part of the process.  Sometimes the mess lasts for a few days but as soon as the project is finished I try to put everything away.  I find it therapeutic. There’s nothing like making a major deadline by the skin of your teeth, catching the last Fed Ex truck and coming home and clearing the chaos.  It helps me put the stress of the project behind me.  It clears my mind and puts an end to the deadline.  
7.       What advice do you have for other creators?

 Just have fun.  Enjoy the process and don’t fight it (which is sometimes easier said than done).   

8.       What trends are you seeing in the crafting industry?

I see so many trends right now:  rustic wood slices, home décor, knitting, painting, up-cycling.  I like how Social Media plays a big part in creating a community of sharing and inspiring.  It excites me to see crafting growing in popularity again. 

9.       When you aren’t creating, what do you enjoy doing? (Hobbies, leisure activities, etc.)

I love taking pictures, treasure hunting at thrift stores and estate sales, reading, playing with my grandsons and just being with my family.  In the summer, I love growing flowers, vacations and lazing by the pool.  I’ve got a good life.

10.   List some all-time favorites: book, TV show, movie, song, travel destination, etc.

I’m a hopeless romantic and love reading sweet love stories.  (nothing trashy) I’m a big Debbie Macomber fan.  My favorite movies are “You’ve got Mail” and “The Holiday”, I watch them every time I find it on television.  (My husband always reminds me I own them on DVD.)

 My favorite, can’t miss shows, now are “This is Us” and “Fixer Upper”.  (And… I’m still bummed that they ended “Parenthood”.)   My favorite song is “What a Wonderful World”, sung by Louie Armstrong.

One of my favorite things to do is to sit on the beach under a beach umbrella, listen to music and read a book.  
11.   Tell us about your family. Do they share your love of crafting?

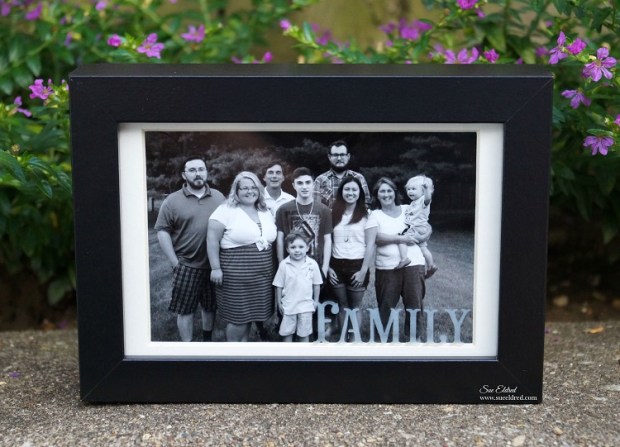
All three of my kids are creative in completely different ways.  My oldest son, is in web design.  My daughter is involved in fashion and my youngest son loves music.  My grandson and daughter-in-law are my partners in crime.     

That concludes the interview…for those of you who didn’t know, now you do.

Shop Your Fav Brands at Scrapbook.com

*Disclaimer:  This post uses ads and affiliate links.  If you choose to make a purchase using one of the links, I receive a small commission (at no additional cost to you) that helps offset the costs of maintaining this blog.  Thanks for your support!

Try Amazon Prime 30-Day Free Trial
“Dyeing” for Spring

Welcome Spring with all your beautiful flowers, warmer days and everything renewed.

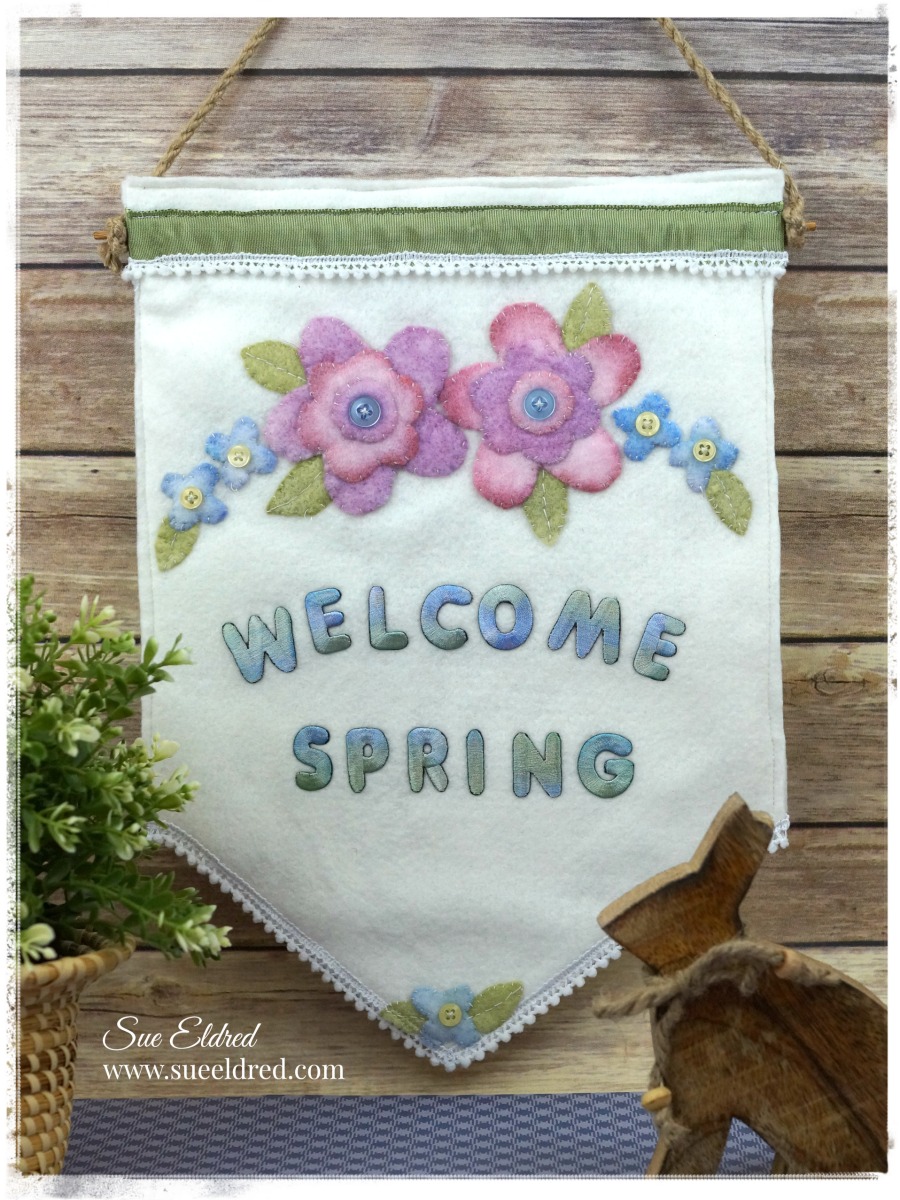
My Welcome Spring Banner turned into a real labor of love.

I began this project with the idea of using fun pink and purple hand cut felt flowers.

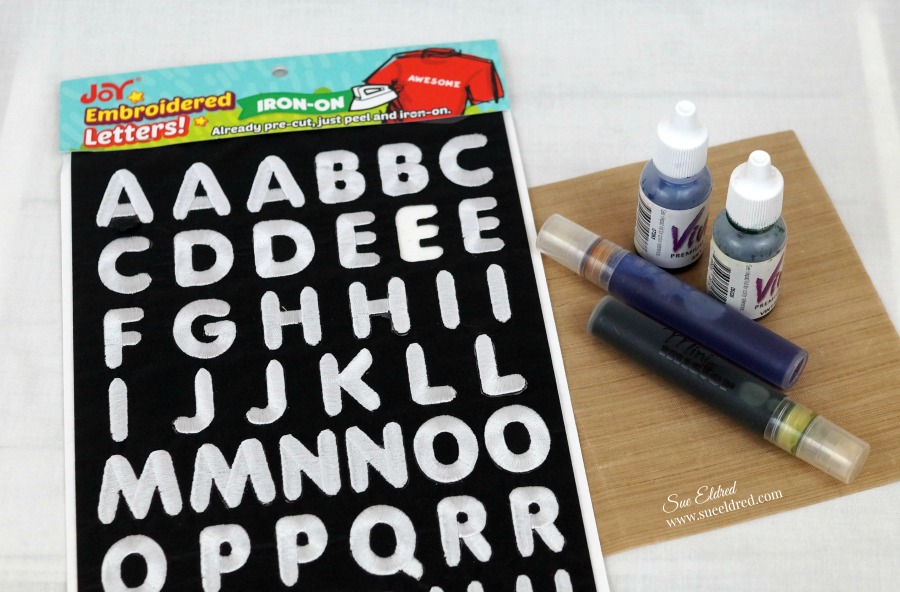
After I cut all the flowers and leaves, I decided to dye the embroidered letters.

The letters turned out so soft and delicate, I needed something softer for the flowers.

So…more flowers and more dyeing!  (make sure to read all the instructions below.)

I could of kept things simple and glued all the flowers in place, but noooo…

instead at the last minute I committed myself to stitching the entire thing.

Let me tell you…I’m not a stitcher!    (But, I am pretty satisfied by the way they turned out.)

To make the Welcome Spring Banner you’ll need:

  1. Add several drops of dye ink to each misting bottle.
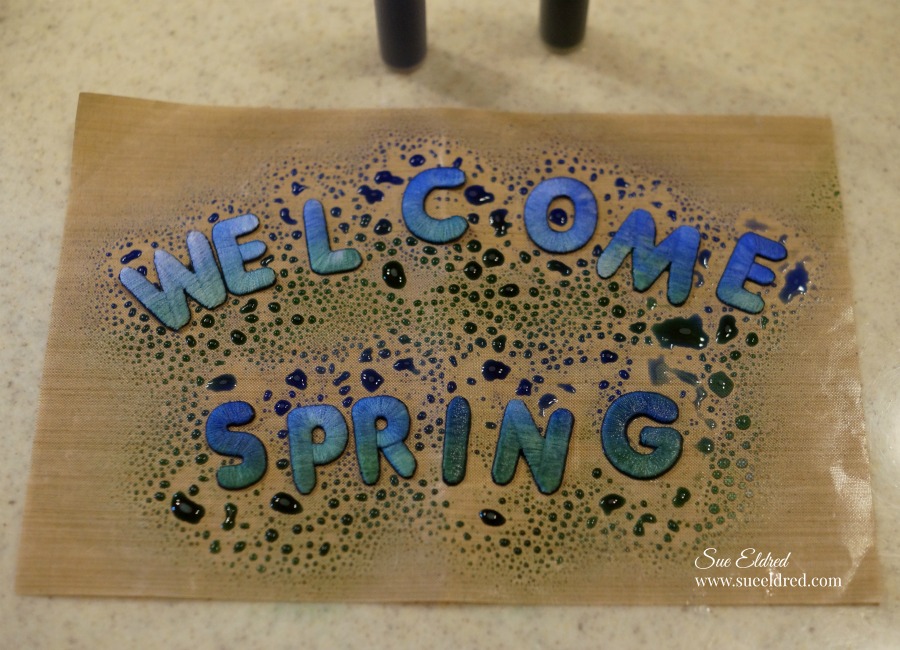
  2. Remove letters from backing sheet and place on a Non Stick Craft Mat* or (wax paper).
  3. Spritz the letters with both blue and green ink for a variegated look.  Allow the ink to soak into the letters then dab away excess ink and water with a paper towel.  Let dry.

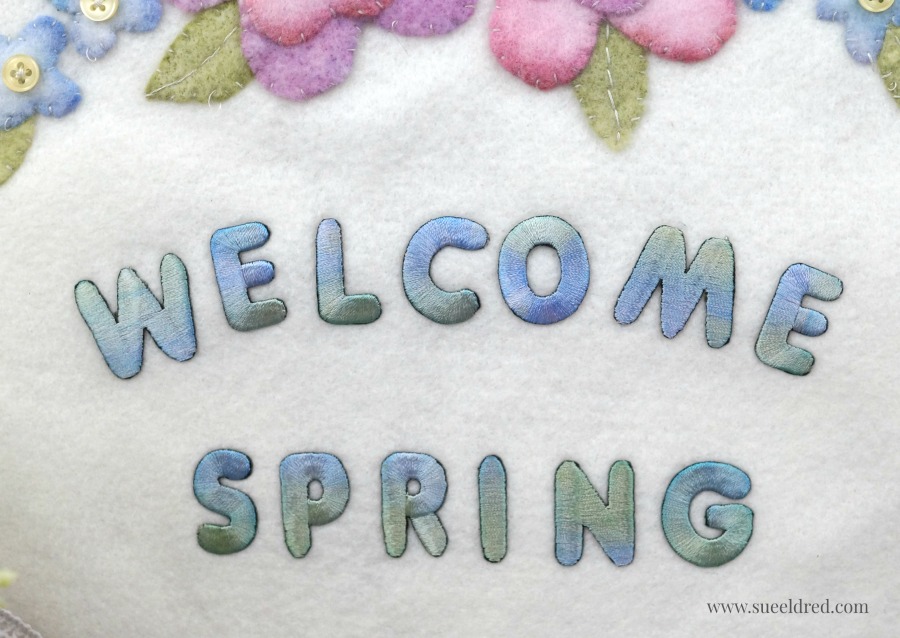
Look at how beautiful the letters dried.  ↓

4.  Create simple, hand drawn flowers (small, medium and large), circle and leaf patterns onto plain white paper.  Cut then trace around the patterns onto white felt.  Cut out.

5.  Spray the leaves green, set aside then spray the flowers and circles one color at a time.  Allow them to dry overnight.

6.  Layer the circle, small flower and large flower on top of each other then stitch in place.  Use a small amount of glue to hold the pieces in place while you stitch.

I love how the ink pooled at the edges of the pink flowers!

7.  To create the banner shape, fold a 10″ x 14″ piece of white felt in half lengthways.  Cut diagonally across the bottom from the center fold to a point about 3″ up from the bottom corner on the outer edges.  Stitch the flowers to the banner using a button at the center of each one.  Tuck leaves underneath the outer edges of the flowers then stitch in place.

8.  Set iron to cotton setting, approx. 350°, or follow garment care label.  Position letters with shiny side down on felt, then iron the letters in place as shown.  Cover letters with a fine cloth.  With firm pressure, iron cloth over the letters for 30 seconds.  Turn banner over and iron the back of the letters for 30 seconds.

9.  Use a sewing machine to stitch the banner to backing material, then stitch trim in place across the top and around the bottom edge if desired.

 If you need to finish your banner in less time, glue the flowers, leaves and trim in place, then use a fusible interfacing to adhere the felt banner to a backing.

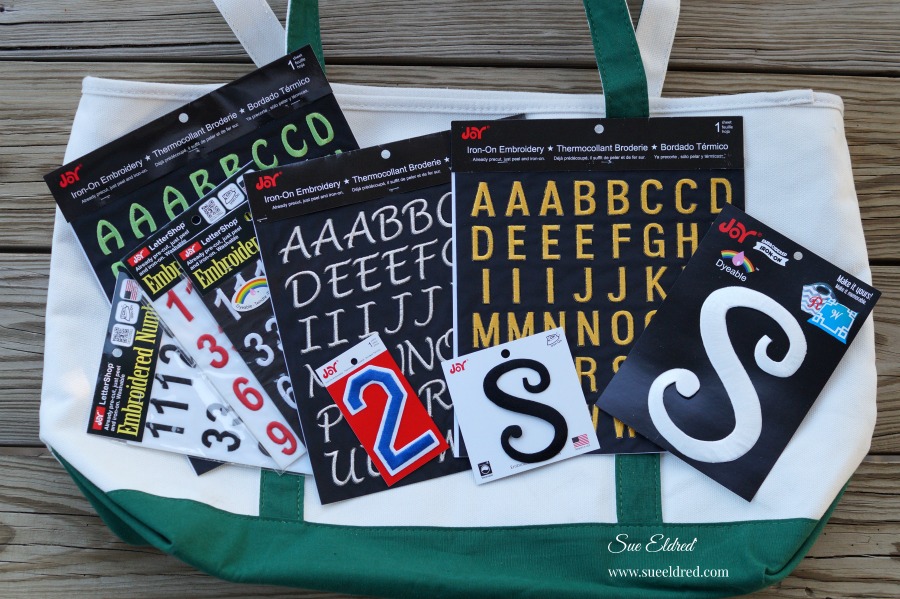
Look for Joy® iron-on embroidered alphabet letter sheets at your local craft store.

My “Welcome Spring” banner was created for and sponsored by Joy SA.

Shop Your Fav Brands at Scrapbook.com

*Disclaimer:  This post uses ads and affiliate links.  If you choose to make a purchase using one of the links, I receive a small commission (at no additional cost to you) that helps offset the costs of maintaining this blog.  Thanks for your support!

Try Amazon Prime 30-Day Free Trial

Make it Personal

Re-purpose a canvas bag and make it personal!

Last year I received a really nice, large and sturdy canvas bag from a event I attended.

While I really do appreciate all the sponsor’s named on that bag…

I knew I use it more if I made it personal.

With Joy Iron-on Embroidered letters personalizing it was a snap…

choosing from the large variety of colors and fonts available wasn’t quite as easy.

Step one…  Remove the sponsor’s iron-on transfer logo with a

XYRON Adhesive Eraser (*affiliate link).

While this may not work for every type of bag, it worked great on this one.

Making it Personal…

  • Set dry iron to cotton setting.
  • Surface of fabric to which letters are to applied should be clean.
  • Cover Letters with a lightweight or sheer pressing cloth.
  • Using firm pressure, iron over letters for 30 seconds.
  • Turn item over, iron on back for 30 seconds.
  • Allow to cool before handling.

Joy® iron-on, embroidered letters are available in a variety of fonts, sizes and colors. White letters can also be colored with dye, paint, markers and more to create custom colors!

“Make it Personal”  was created for and sponsored by Joy SA.

Shop Your Fav Brands at Scrapbook.com

*Disclaimer:  This blog uses ads and affiliate links.  If you choose to make a purchase using one of the links, I receive a small commission (at no additional cost to you) that helps offset the costs of maintaining this blog.  Thanks for your support!

Shop Amazon Scrapbooking Supplies*

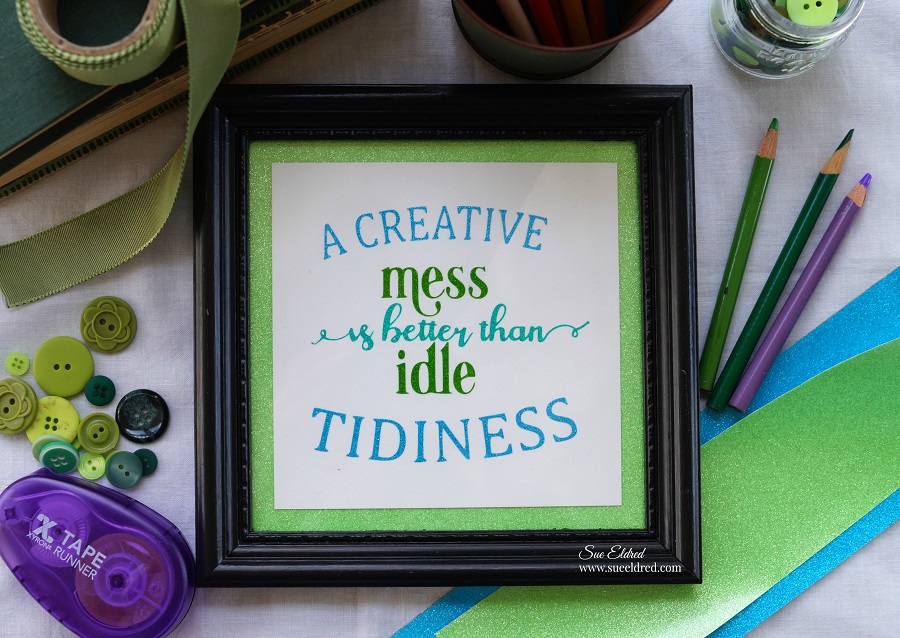
A Creative Mess…

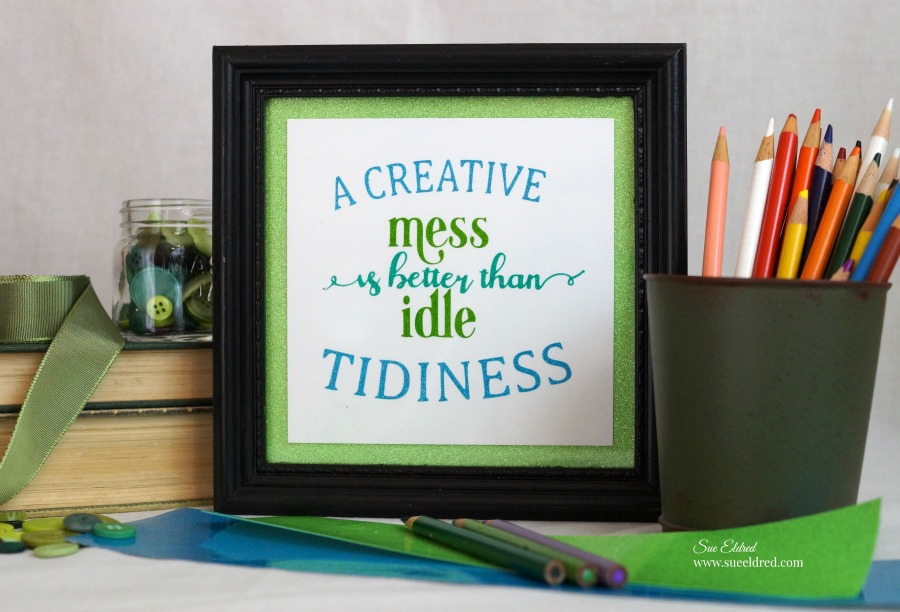
 A Creative Mess is better than idle Tidiness.

I love this saying, it fits me to a tee.

I do like a neat and tidy craft space, but when I’m working on a project, it’s a complete mess.

To create the words…

I created the saying using a design file on my Silhouette CAMEO 3 Wireless Cutting Machine*

using 12″ x 12″ Adhesive Glitter Vinyl Sheets by StyleTech*.  I laid all three of my vinyl colors

down on the cutting mat at the same time and cut my saying with one pass of my machine.

Styletech Craft products brought to you by ATSM Craft 

Disclosure:  This blog uses affiliate links.  If you choose to make a purchase using one of the links, I receive a small commission (at no additional cost to you) that helps offset the costs of maintaining this blog.  Thanks for your support!

I Love Square Frames and a Good Bargain…

I found this 90’s framed print at a garage sale for 25¢ and painted it black.  

I added my words onto a piece of white cardstock using transfer paper.   I adhered the white

cardstock onto an extra piece of glitter vinyl and inserted it into the frame.

A Quick and Easy, Thrifty Home Décor piece for my Crafty Space.

“This is a sponsored post.  As a member of the StyleTechCraft Design Team I have been provided product and compensation in exchange for my creative ideas.  The views and opinions are my own.

Xyron 2018 Design Team

Sorry I haven’t posted much lately.

That stupid influenza bug had me sidelined and wiped out for the last couple of weeks.

It feels good to feel good again.

And now for some Exciting News…

It is such an honor to have been chosen by Xyron to be on their 2018 Xyron Design Team

and work along side these lovely and talented ladies.  It’s going to be a good year!

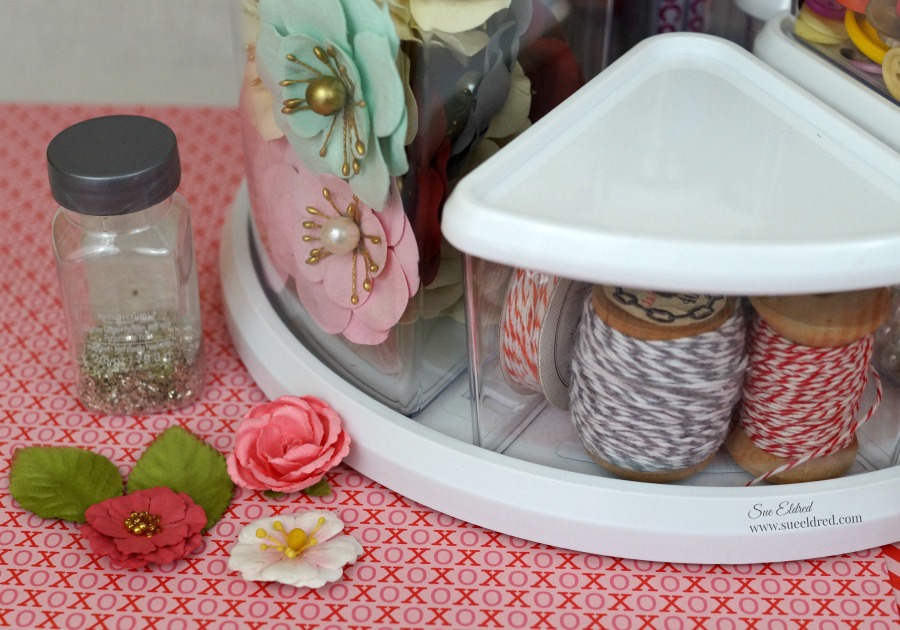
Rotating Embellishment Organizer

Being a paper crafter at heart, I sometimes wonder…

What’s your favorite way to embellish?

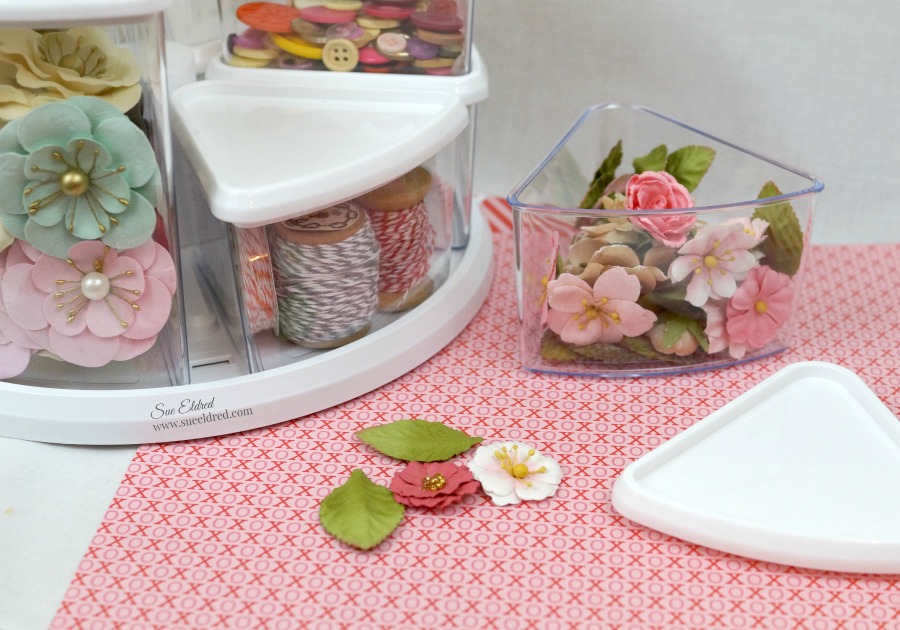
For me it’s flowers, twine, buttons and pearls.

My Rotating Embellishment Organizer also know as Deflecto’s Rotating Carousel Organizer*

is a great way to organize my “go to” embellishments.  (and it looks pretty too.)

The Deflecto Rotating Carousel Organizer with Nine Canisters*   (*affiliate link)

comes with three 6″ bins and six 3″ bins.


It is also available as a Rotating Carousel Organizer with Six 6″ Canisters*.

It’s a great way to organize your supplies.

“This is a sponsored post. As a member of the Deflecto Design Team I have been provided product in exchange for my creative ideas, views and opinions.”

*Disclaimer:  This blog uses ads and affiliate links.  If you choose to make a purchase using one of the links, I receive a small commission (at no additional cost to you) that helps offset the costs of maintaining this blog.  Thanks for your support!

Shop Amazon Scrapbooking Supplies*

How to make a Love Coaster with Easel

A Quick and Easy, DIY, Valentine’s Decoration or Gift.

The “Love Coaster with Easel” is one of the projects that I made at the StyleTechCraft

booth while at Creativation last week.  

Everyone loved how easy it is to make an easel using a clothespin.

Materials Used:              (*affiliate link)

*Disclosure:  This blog uses ads and affiliate links.  If you choose to make a purchase using one of the links, I receive a small commission (at no additional cost to you) that helps offset the costs of maintaining this blog.  Thanks for your support!

To make the Love Coaster…                               

  • You can use Plain White Square Coasters* or…I made my scalloped coaster using a steel rule die and white chipboard.
  • Cut a heart out of Translucent Red Glittered Vinyl from Tape Technologies using a thin metal die.  Apply the glitter heart to the coaster using a transfer paper made for vinyl.
  • Using my Silhouette Cameo Electronic Die Cutting Machine*, I cut the word “love” out of Black Glittered Translucent Vinyl and applied it directly over my heart using transfer paper.
  • I edged the sides of my coaster in silver, using a Silver Leaf Paint Pen*.

How to make an easel using a clothespin.

To make the Easel…

  • Glue a Wooden Clothespin* on the back of the coaster with Rapid Fuse Adhesive*.
  • Pull the clothespin open just enough so that the round metal spring comes slightly out of its groove.  (Some clothespins work better than others so you might need a little luck.)
  • To keep the clothespin from snapping shut…glue the top ends of the clothespin together.

Love Coaster-Sue's Creative Workshop-www.sueeldred.com 1576

A couple of guys at the show made theirs into Valentine’s cards.

I told them all they had to do was add a sweet note inside and, they were set.

Maybe I should have told them including flowers and chocolates is also a good idea.

“This is a sponsored post.  As a member of the StyleTechCraft Design Team I have been provided product and compensation in exchange for my creative ideas.  The views and opinions are my own.

You can now find the full line of StyletechCraft products online at ATSM.

Give the Gift of Amazon Prime*

DIY…Mad for Plaid Baby Bib

Life gets messy sometimes…with this cute little washable flannel bib, it’s ok.

It’s no secret that I love plaid, especially red plaid.

And…since I had red flannel left over from a pillow project,  I decided to make my sweet

grandson a cute little bib.  It never hurts to have a extra bib or two for those times when

he needs to get messy.

This is how I made my “Get Messy” flannel bib…

  • I made a pattern for my flannel bib by folding an old bib in half and laying it “fold to fold” on a folded piece of cardstock.
  • I wanted the new bib to be a little bigger than the original bib, so, I sketched it with pencil marks to extend the pattern.
  • Cut out the pattern and trace two bibs onto the flannel using a black permanent marker.  Cut out bibs from the flannel.
  • Sew bibs together leaving space on one end to turn bib inside out.  Iron bib to make it lay flat.
  • Sew a top seam around bib and to close the open end.
  • Personalize the bib using Iron-on Embroidered letters from Joy SA.
  • Attach Velcro on each end to close bib.

My “Get Messy” bib was created for and sponsored by Joy SA.

Sew Cute Baby Bibs

*Disclaimer:  This post uses ads and affiliate links.  If you choose to make a purchase using one of the links, I receive a small commission (at no additional cost to you) that helps offset the costs of maintaining this blog.  Thanks for your support!

Try Amazon Prime 30-Day Free Trial
Making it Cozy…

Cozy up the house this Winter with a personalized flannel pillow!

When the holidays are “really” over and everything is finally packed away…

it’s time for me to relax, cozy up with a comfy pillow, warm blanket and a good book.

I love to hibernate in the winter.  (I really don’t like the cold)   

That’s when I start layering up the house (and me) with blankets and pillows.

I like it warm and “cozy”.

To make my Cozy pillow you’ll need:

Directions:

  1. With right sides together, sew three sides of the flannel pieces together to create the pillow cover. Turn so the right side is facing out.
  2. Position the letters on the front then, following directions on the back of the package, iron in place using a pressing cloth.  Let cool then turn the pillow cover inside out and iron again from the back.  Let cool for at least one minute, then turn again with the right sides out.
  3. Insert the pillow form then stitch then the pillow cover closed.

My cozy pillow was created for and sponsored by Joy SA.

Joy® iron-on numbers and letters are available in different sizes, colors and fonts at your favorite craft stores…

Try Amazon Prime 30-Day Free Trial

*Disclaimer:  This post uses ads and affiliate links.  If you choose to make a purchase using one of the links, I receive a small commission (at no additional cost to you) that helps offset the costs of maintaining this blog.  Thanks for your support!