Merry Little Sticky Note Holder

Need a inexpensive gift idea to give a teacher or co-worker?

The Merry Little Sticky Note Holder is a quick and easy project that you can make

in just minutes.

How to make a Merry Little Sticky Note Holder

Supplies Needed:                 (*affiliate link)

*Disclaimer:  This post uses ads and affiliate links.  If you choose to make a purchase using one of the links, I receive a small commission (at no additional cost to you) that helps offset the costs of maintaining this blog.  Thanks for your support!

Directions:

  1. Score a 5 ¼” x 9” piece of cardstock at the 2 ¼”, 2 ¾”, 6” and 6 ½” mark.
  2. Fold along scored lines.
  3. Make a ½” guide line on end of the scored cardstock for applying sticker border. Apply a small border on the guide line. Add a second border to the back of the first.
  4. Paint “merry” and “small ornament” from wood cut outs with white acrylic paint.
  5. Wrap red and white twine around top flap and tie ornament and greenery. Glue merry onto front flap.
  6. Add restickable mini tab to the inside of the flap and add sticky notes.

You can purchase the Warm My Heart Sticker Sheet and Christmas Wood Shapes from Adornit.com.

Shop Amazon Scrapbooking Supplies*

A Very Merry Christmas Frame

Everyone in my family thinks of me whenever they see red buffalo plaid…

I’m not sure why?

But seriously… what’s not to love?

To make my Very Merry Christmas Frame…

I picked up a few sheets of the Simple Stories Very Merry line of scrapbook paper

from my local Scrapbook Store.   Along with a few embellishments and a

Deflecto Clear Frame, 8″ x 10″ (597901CR)*     (*affiliate link)

I made a cute and simple Very Merry Christmas frame.

If I decide to change the look next year, I have a great start to an awesome scrapbook layout.

“This is a sponsored post. As a member of the Deflecto Design Team I have been provided product in exchange for my creative ideas, views and opinions.”

Shop Amazon Scrapbooking Supplies*

*Disclaimer:  This post uses ads and affiliate links.  If you choose to make a purchase using one of the links, I receive a small commission (at no additional cost to you) that helps offset the costs of maintaining this blog.  Thanks for your support!

A Trash to Treasure Love Story

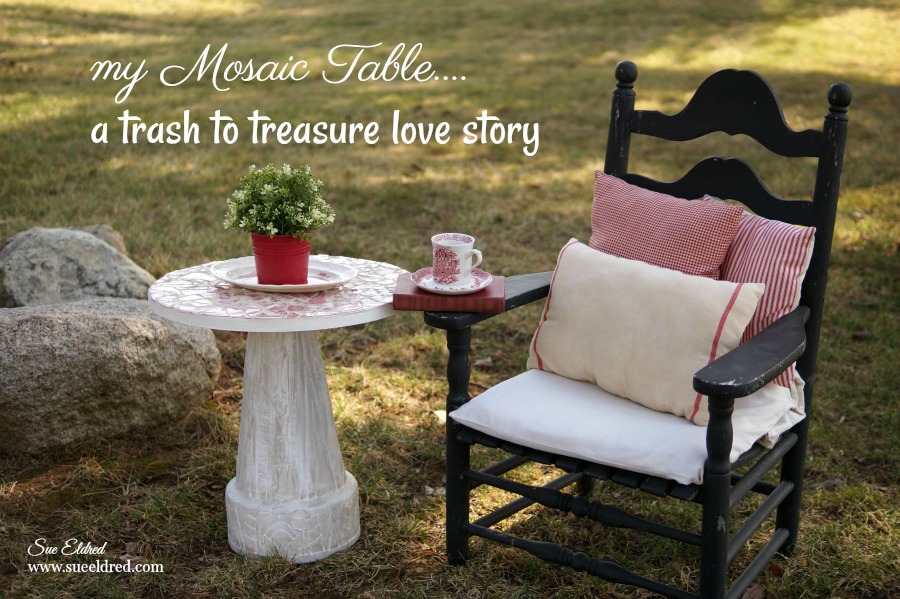
a true trash to treasure love Story.

Have you ever had a project that turned out even better than you envisioned?

A project that was years in the making?

A project that truly leaves you just a little bit smug with yourself?

A true love story.

But… like every good love story, there’s always a plot twist.

Because love doesn’t always turn out the way you plan.

(Make sure to read to the very end.)

This story begins several years ago…

when my sweet daughter found an old set of red toile dishes in a Thrift Store in Wisconsin.

Knowing my Love Affair with Red Toile dishes she couldn’t resist the $25 price tag.

While packing their car for their visit home, my son in law picked up the box to rearrange the

car and the bottom fell out.  Most of the dishes survived.  Several of the large plates did not.

Deciding to turn lemons into Lemonade, I kept the broken plates to make garden stepping

stones with  my grandson, Nicholas.  (one of my most popular posts.)

  Click on picture for project.

Being a “saver”,  I saved the remainder of the broken plates for a future project.

(notice I didn’t use the word hoarder?)

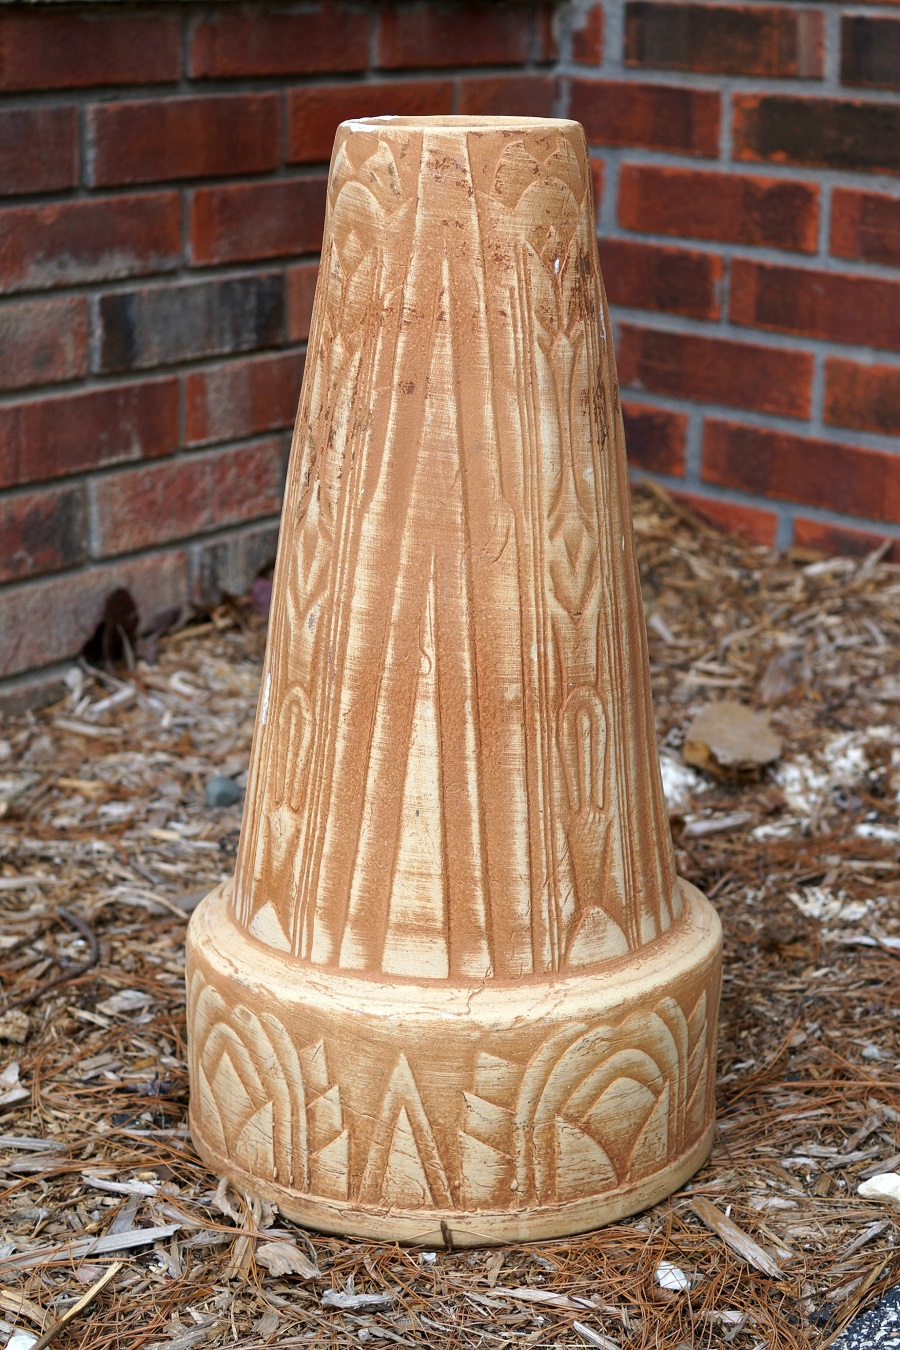
Then there’s the base of a broken bird bath.

I’m ashamed to admit how many years that base has been sitting around.  (it was a lot!)

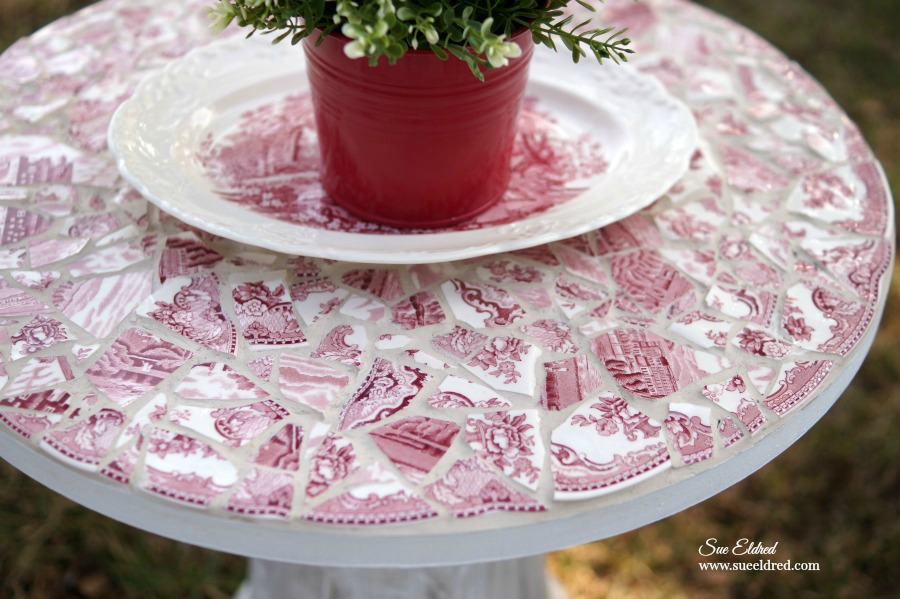
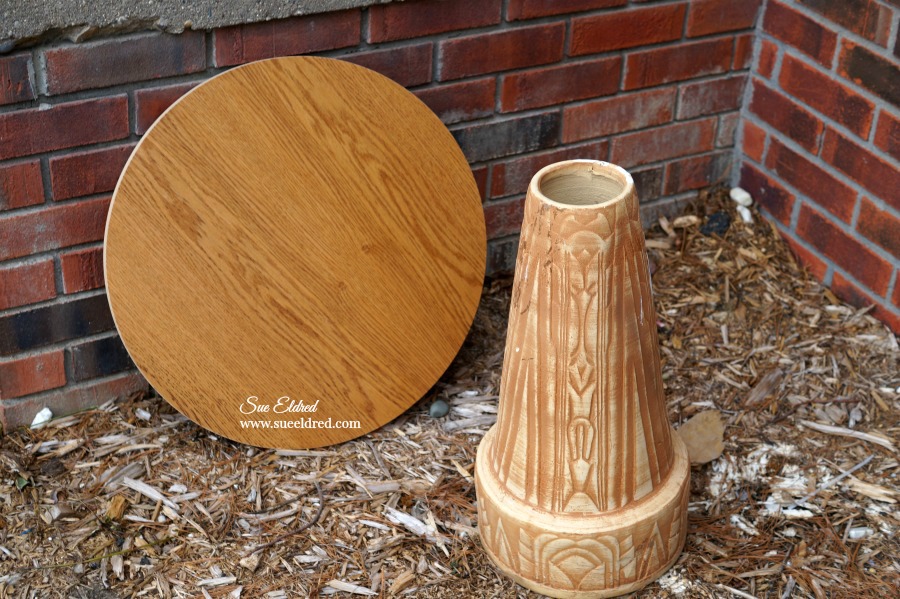
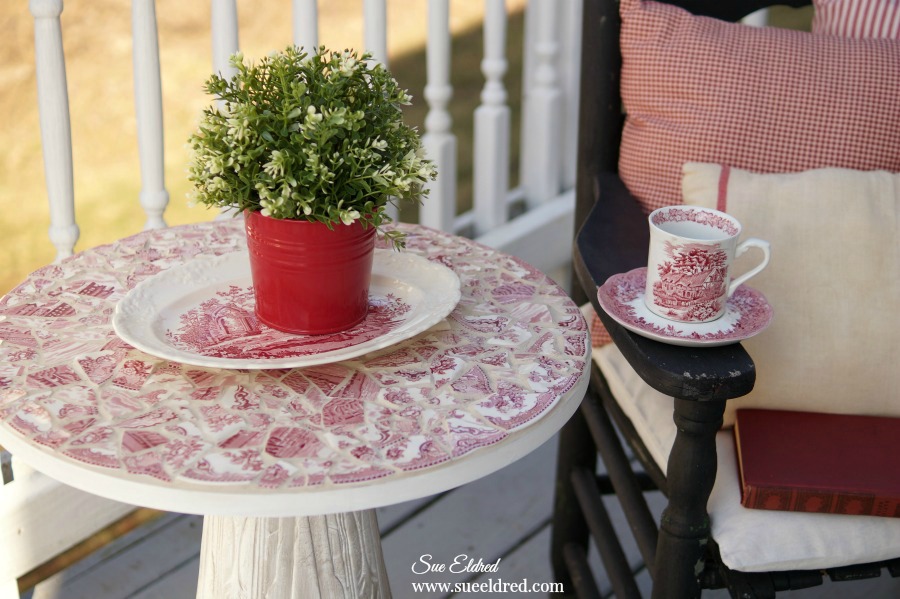
I used the rest of the broken dishes along with the base and a 20″ round wood top cut from

cabinet scraps to make the Mosaic table.

To start my project…

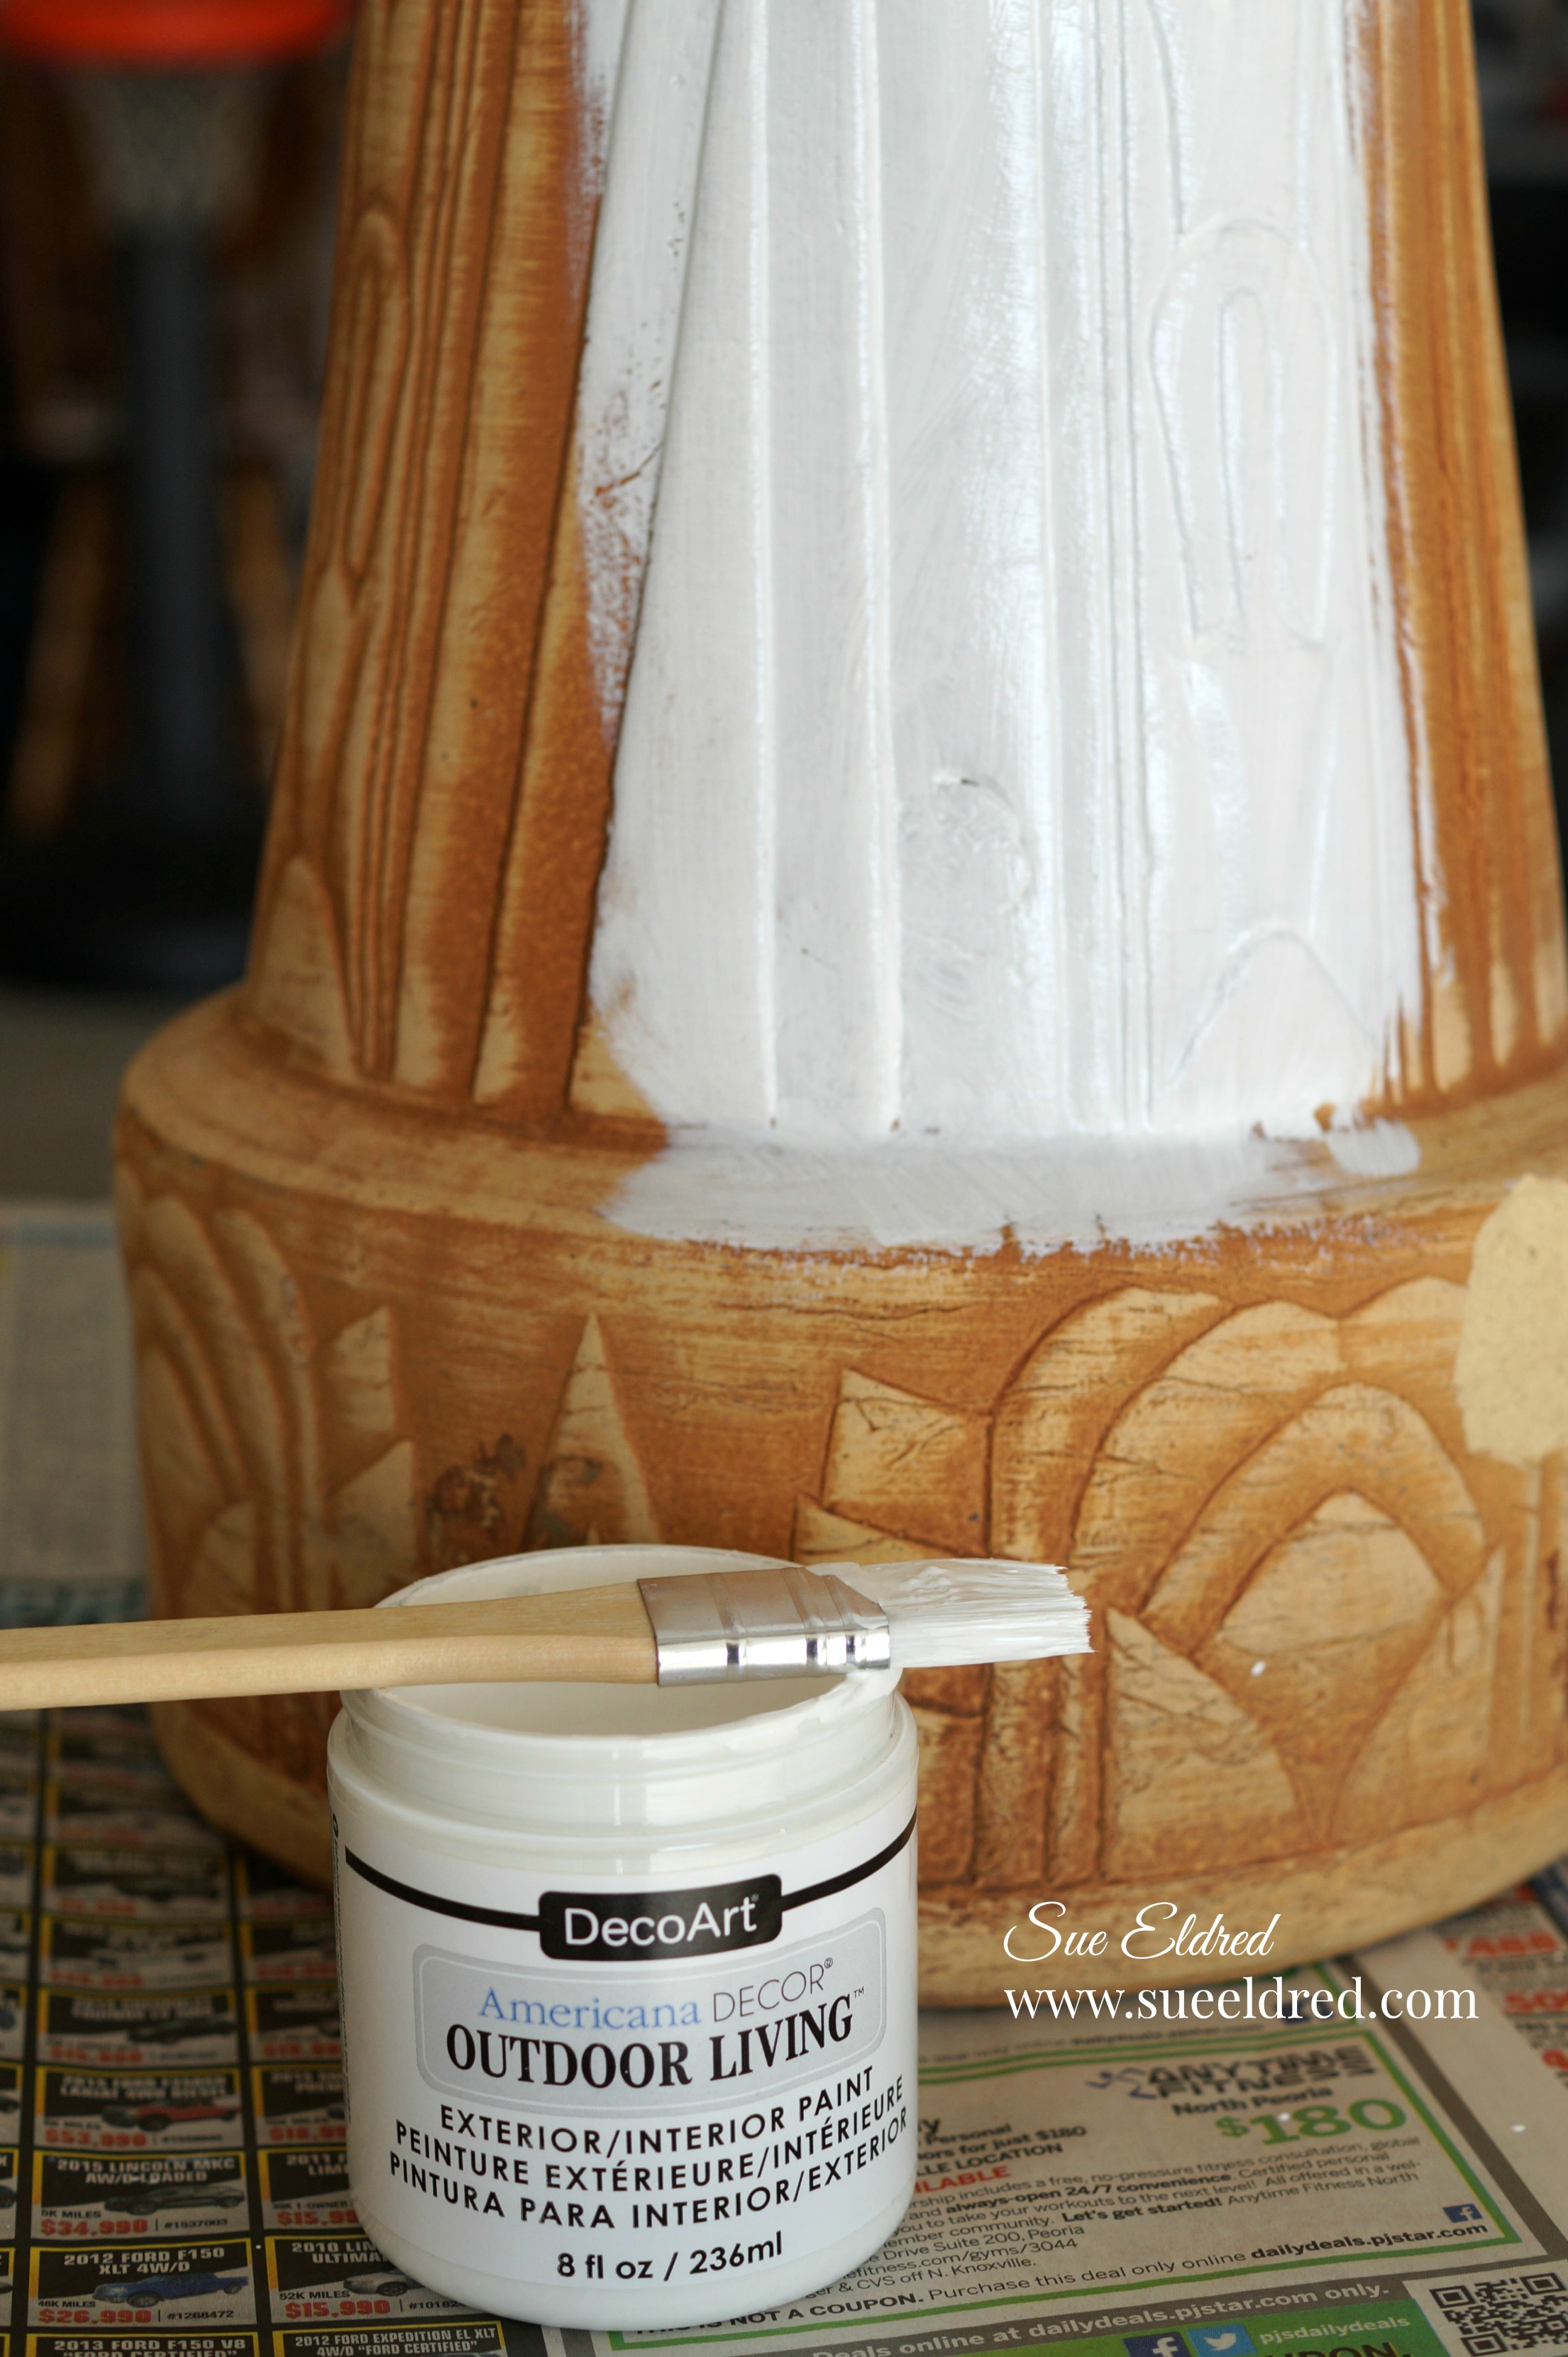
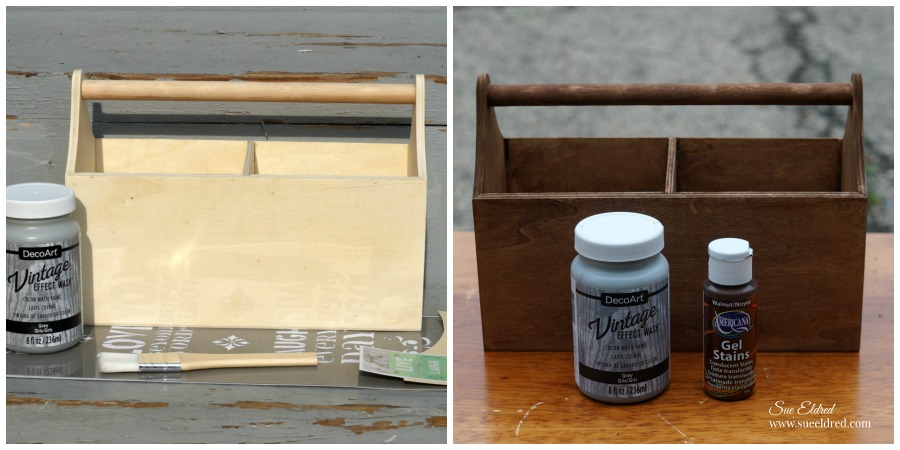
I gave the base a simple cleaning and painted it with Decoart Outdoor Living Paint: picket fence*

After the base was fully dried, I dry brushed the base with  Color Stain in Ash Grey.

To make the mosaic table top…

  • Lightly sand the 20″ wood circle to prime it to accept paint and glue.
  • Paint the sides and bottom of the 20″ wood circle with the white paint used on the base.
  • Glue the broken pieces of china onto the wood base using a good glue specific for mosaic tiles such as Glass, Metal & More Premium Permanent Glue* or Weldbond Multi-Purpose Adhesive Glue*.
  • Try to use flat pieces of china whenever possible.  You can smooth the sharp edges of the china using a Dremel Tool*.  (read product instructions before using)

  • I used unsanded grout because I didn’t want to take the chance of it scratching the china.
  • Mix the grout as directed and follow the package instructions when applying the grout onto the top.
  • Confession Time…I did not smooth the edges of the China before gluing them onto the top.  After the grout had dried,  I decided that some of the pieces were too sharp.   After it was grouted I  went over the sharper pieces with a Dremel tool.  The table isn’t completely flat.  But that doesn’t matter for  how I plan on using the table.
  • Seal Grout with Grout Sealer.

Mosaic Table Product Information:                   (*affiliate link)

Disclaimer:  This blog uses ads and affiliate links.  If you choose to make a purchase using one of the links, I receive a small commission (at no additional cost to you) that helps offset the costs of maintaining this blog.  Thanks for your support!

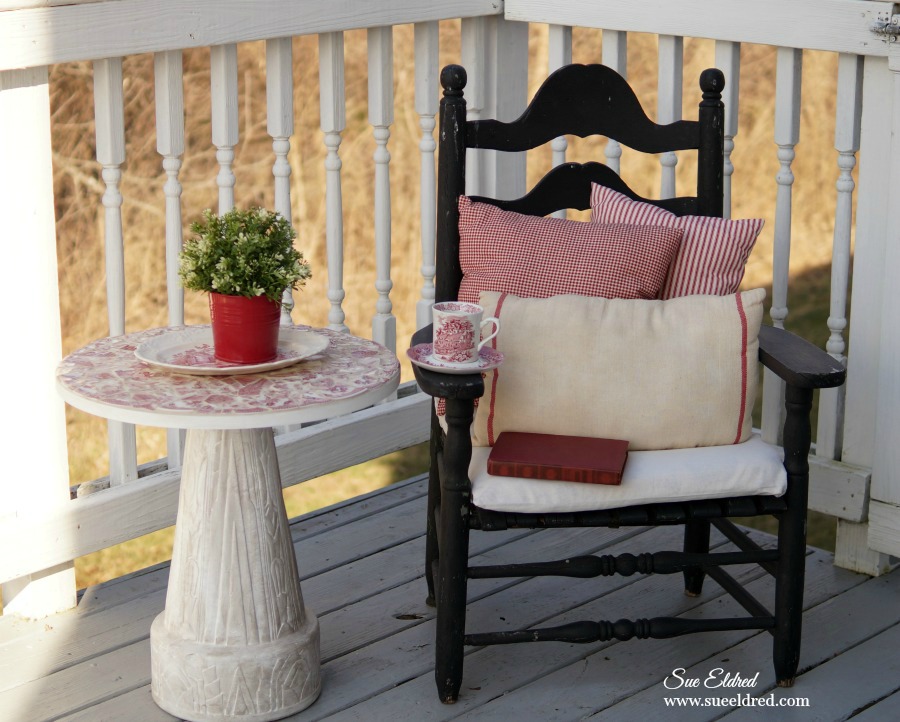
I really loved that table.
It was just the perfect size to sit by a comfy chair with a good book.

And then there’s the sad part…

The Plot Twist…

To be honest… I made this table on a warm week-end in February.

By the time I was staging the table for pictures, the weather was beginning to really cool down.

Being in a hurry to photograph the project,  I didn’t take the time to secure the top

to the base or seal the grout .  I stuck it into the garage to do at a later time.

When I finally got around to finishing the project…

I carefully moved the top so I could seal the grout and then glued the top to the base with

a  strong adhesive.  While the adhesive worked initially, when I went to move it again a few

days later by the top (what was I thinking), the base came crashing down on the garage floor.

To say “I felt defeated” would be a understatement.

That’s one reason…(even though I had a 100 good photo’s)

that I never posted the project  until now.

Why?   Because, I didn’t want to mislead you.

The Happy Ending…

Always resourceful, I did find that I had a 20″ black metal mesh table that the top fit perfectly on

and I didn’t have to worry about securing it.

The table has sat there beautifully on my back deck all summer.

(who am I kidding…it’s still there.)

So the moral to the story would be to find a super duper industrial adhesive.

Or…what I would do now if I had to do it over again.

I would cut a small wood disc that is slightly smaller than the top of the bird bath base so that it

would fit inside.  I would glue the disc (with a really good glue) to the bottom of the wood and

keep it as a removable top.  That would help stabilize the top and make for easy storage.

So remember if you decide to try this at home…. 

Sometimes you have success and sometimes you don’t.

And…sometimes you have a little bit of both.


Don’t Miss a Thing…Make Sure to Follow me


Pin Me  ↓

Grateful for Fall Frame

Grateful for Fall Frame.

When the days and nights start to get a little cooler… I start looking for simple ways to bring

Fall into my home.  One simple way is by adding beautiful graphics found on scrapbook paper

and adding it into a frame.

I made my “Grateful for Fall” frame using the Deflecto 5″ x 7″ Beveled Edge Acrylic Frame* 

and beautiful fall paper from Authentique Bountiful Collection*.  (*affiliate link)

After cutting and matting the fall graphics from the Authentique Bountiful Collection*,

I added resin acorns to the metal knobs with Zots Adhesive Dots*.

Simple Fall Decorating.  (and a simple reminder to be grateful)

“This is a sponsored post. As a member of the Deflecto Design Team I have been provided product in exchange for my creative ideas, views and opinions.”

Zots Adhesive Dots

*Disclaimer:  This post uses ads and affiliate links.  If you choose to make a purchase using one of the links, I receive a small commission (at no additional cost to you) that helps offset the costs of maintaining this blog.  Thanks for your support!

Try Amazon Prime 30-Day Free Trial

Saturday Morning Memo Board

Making Saturdays Special..

Make family time more special with this cute memo board.

Now that the kids are starting to head back to school, weekends are more important than ever.

It’s nice just being together.

Whether I post a reminder about a fun event or a special note to say “I love you,”

this memo board helps me remember that Saturdays should be a little more laid back –

just the way I like it.

To make the Memo board I used…                     (*amazon affiliate link)

Directions:

  1.  Measure and cut the cork tiles to fit inside the frame.
  2. Because my frame was deep, I cut a piece of foam board the same size.  I glued the cork tiles to the foam board using liquid glue.

3.  Lay fabric over cork to determine letter placement.  Gently slide cork from underneath fabric and iron letters.

4. Spray the cork with adhesive and smooth the fabric over it.

5. Tap in a few tack nails inside the back of the frame to hold everything in place.

This project was created for and sponsored by Joy, SA.

Shop Amazon Scrapbooking Supplies*

Disclaimer:  This blog uses ads and affiliate links.  If you choose to make a purchase using one of the links, I receive a small commission (at no additional cost to you) that helps offset the costs of maintaining this blog.  Thanks for your support!


How to Create Quick and Easy Bows

This one’s for my “Bow Challenged” friends…  (you know who you are)

Learn How to Create Quick and Easy Bows using the DecoFun Bowmaker.

Tying beautiful bows doesn’t have to be a challenge anymore…

Thanks to the DecoFun Bowmaker I received to participate in this month’s

Designer Crafts Connection Blog Hop I can now make big beautiful bows

For my project…I decided to give my plain wreath a seasonal update with a new bow.

Step#1  Place Ribbon in Hoops

Step #2  Bring Ribbon Around Rods

I used approx. 3 yards of ribbon, so keep on wrapping.

Step #3 Pinch Ribbon Center & Tie with Wire

For Seasonal Fun…add berries under wire

Glue a Big Wood Button to the center of the bow with Fabri-Tac Permanent Adhesive*.

A Quick and Easy way to add a Big Beautiful Bow to a simple wreath.

The Bowmaker is adjustable and great for weddings, parties, birthdays, holidays and more.

For more DecoFun Bowmaker projects click here.

*Disclaimer:  This post uses ads and affiliate links.  If you choose to make a purchase using one of the links, I receive a small commission (at no additional cost to you) that helps offset the costs of maintaining this blog.  Thanks for your support!

Try Amazon Prime 30-Day Free Trial

Sue and Nick’s Deflecto Craft Caddy Challenge

Deflecto Craft Caddy Challenge…

When I worked in the Deflecto Booth last January at the Creativation Show,

each day of the show Deflecto held a Craft Caddy Challenge.

The challenge was to see who could fill their craft caddy the fastest.

It quickly became extremely competitive.  (but fun!)

The challenge looked like so much fun, I decided to create one of my own.

Of course, I wanted to race someone closer to my own speed.

Nick enjoyed the caddy challenge so much that when my nieces came over to swim later,

he challenged them.  He was a lot faster by then.

Here’s a quick video I made last year showing all the features of the caddy.


The Deflecto Caddy Organizer* is made by Deflecto Craft Solutions are available at Amazon

and now in Target Stores.

 “This is a sponsored post. As a member of the Deflecto Design Team I have been provided product in exchange for my creative ideas, views and opinions.”

Shop Amazon Scrapbooking Supplies*

Disclaimer:  This blog uses ads and affiliate links.  If you choose to make a purchase using one of the links, I receive a small commission (at no additional cost to you) that helps offset the costs of maintaining this blog.  Thanks for your support!

Sharing the Adornit Love…

As my time as an Adornit Ambassador comes to a close at the end of this month…

I wanted to make them a card to let them know how I feel.

Working with them the last few months has been a fun and positive experience.

Thanks, Adornit for the opportunity to work with your wonderful products.

FYI…the card was made with Adornit’s Flamingo Fever Collection.)

Try Amazon Prime 30-Day Free Trial

Disclaimer:  This blog uses ads and affiliate links.  If you choose to make a purchase using one of the links, I receive a small commission (at no additional cost to you) that helps offset the costs of maintaining this blog.  Thanks for your support!

How to Create an Easy Pickled Finish with Vintage Effect Wash

How to create an Easy Pickled Finish with Vintage Effect Wash from Deco Arts.

I had this unfinished wood tote that I wanted to use the new Vintage Effect Wash on.

My first thought was to just give the tote a cool white wash using the paint.

But after further thought and a little experimentation, I decided to warm up the look by

staining it with a Walnut Gel Stain first.  I love the way it turned out.

This would make a great garden tool holder, picnic caddy, or my favorite…a Craft Tote.

DIY Pickled Crate

Supplies Used:                (*affiliate link)

 Directions:

  1. Lightly sand the wood crate if necessary.
  2. Paint or brush crate with DecoArt Americana Walnut Gel Stains Paint*.
  3. Rub off excess stain with soft clean rag.  Allow stain to dry.
  4. Apply Decoart Vintage Effect Wash Grey* onto crate with brush allowing the stain to show through.   Wipe with clean soft rag if necessary.  (It’s that easy!)
  5. If desired, add stenciling onto the crate.
  6. Apply a sealer to protect the finish.

The Love Beyond Words Pickled Crate was sponsored by DecoArts.

Try Amazon Prime 30-Day Free Trial

Disclaimer:  This blog uses ads and affiliate links.  If you choose to make a purchase using one of the links, I receive a small commission (at no additional cost to you) that helps offset the costs of maintaining this blog.  Thanks for your support!

Painting Basics

Architextures Vintage Market Collage

Vintage Market Collage

I had so much fun playing around with the 7 Gypsies Architext Paper Pad*

It’s my new favorite.  It reminds me of going to the Flea Market with my daughter.

So much Vintage Goodness.

The project was basically put together with paper, glue and chipboard.

To begin…I glued the background paper to a thick piece of chipboard for stability.

I can easily add it to an 8″ x 8″  frame later if I want too.

I added several layers of chipboard on the back of each of the images to give dimension.

I also aged each piece by rubbing Vintage Photo Distress Ink* to the edges using a

Ink Blending Tool*.    (*amazon affiliate link)

My favorite piece is the vintage crate.  I added the second layer of chipboard with three small

strips, so that I could leave an opening on the top to add dried flowers from last years garden.

So realistic, it looks like a teeny tiny crate.  I just love it.


                  7 Gypsies Architextures Paper Pad

The Architextures™ Paper Collection was inspired by the all the wonder of found objects, displays, signs, sayings, artwork, creative bliss and sheer beauty found at vintage fairs, flea markets, salvage yards, barn sales, antique shops, old book stores, garage sales, market days and more.

Such a fun collection.  Makes me want to go treasure hunting.

Notice the 7 Gypsies Mini Library Drawer* in the background of the picture?    (so stinkin cute)

The Vintage Market Collage was sponsored by Canvas Corp Brands.

Shop Your Fav Brands at Scrapbook.com

Disclaimer:  This blog uses ads and affiliate links.  If you choose to make a purchase using one of the links, I receive a small commission (at no additional cost to you) that helps offset the costs of maintaining this blog.  Thanks for your support!