DIY Graduation Card and Gift Card Holder

Graduation Card and Gift Card Holder-Sue's Creative Workshop www.sueeldred.com 7576

DIY Graduation Cap Card and Gift Card Holder

How to make personalized graduation cards for the special people in your life.
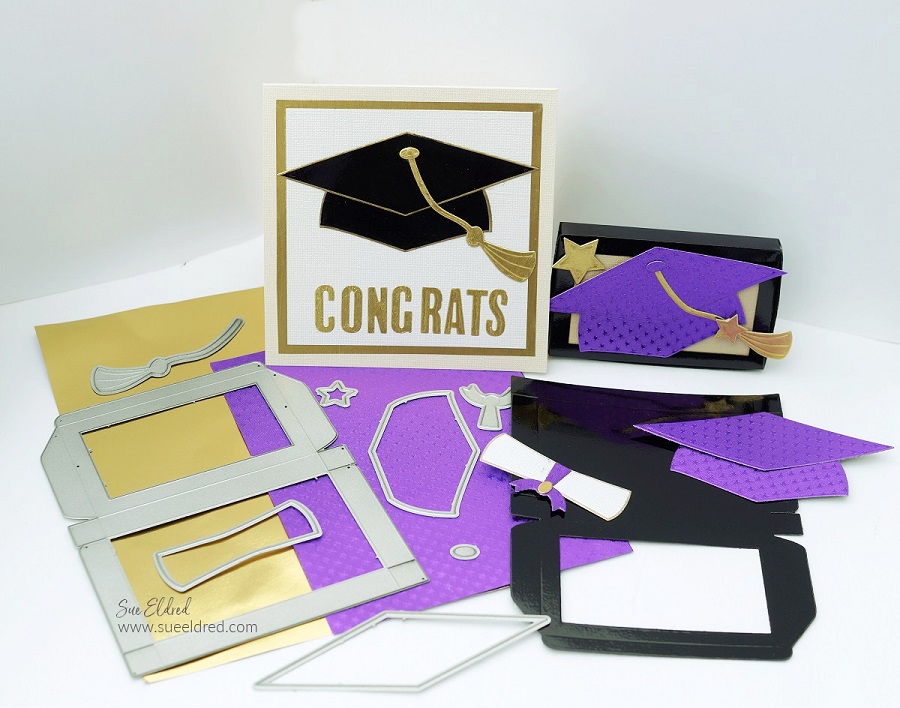
Graduation Card and Gift Card Holder-Sue's Creative Workshop www.sueeldred.com 7743

For the Graduation Card and Card Holder…

I used The Maker’s Movement NEW Graduation Cap Die Set and the NEW Donut Box Gift Card Holder Die Set.

If you are a Card maker/Paper Crafter, make sure to check out all NEW RELEASE Stamp & Die Sets now available. So many cute sets!  (and I promise, I will have more on the donut box later)

Disclosure:  This is a sponsored post  for the Maker’s Movement.  I have been provided product and compensation in exchange for my creative ideas.  The view and opinions are my own.   

Additional Materials Used:                (*affiliate link)

*Disclosure:  This blog uses affiliate links.  If you choose to make a purchase using one of the links, I receive a small commission (at no additional cost to you) that helps offset the costs of maintaining this blog.  Thanks for your support!
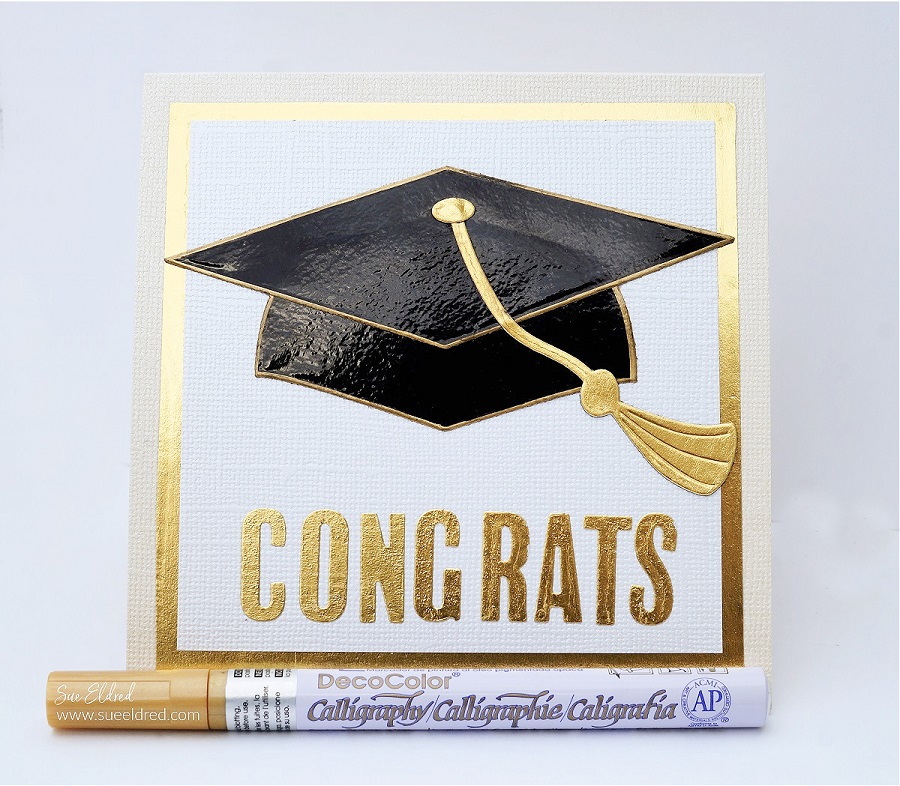
Graduation Hat Card-Sue's Creative Workshop www.sueeldred.com 7720

Directions:

  • The pieces for the Graduation Cap were die-cut out of Black Glossy Cardstock* and edged in gold using a Gold Chisel Tip Calligraphy Pen*.
  • The gold layer for the card is Rinea Foiled Paper which was adhered to the card base using a Tape Runner*.  
  • The tassel and button on the cap were made using the gold foiled paper adhered to cardstock and then die-cut.
Graduation Hat-Xyron Creative Station-Sue's Creative Workshop www.sueeldred.com 7696
  • I used the Xyron Creative Station* to add adhesive to the back of the foiled paper.
  • This picture is when I used the Xyron Creative Station* to add adhesive to the purple foiled paper for the gift cardholder.  
  • I also added adhesive to the gold foiled paper used to create the letters on the front of the card.
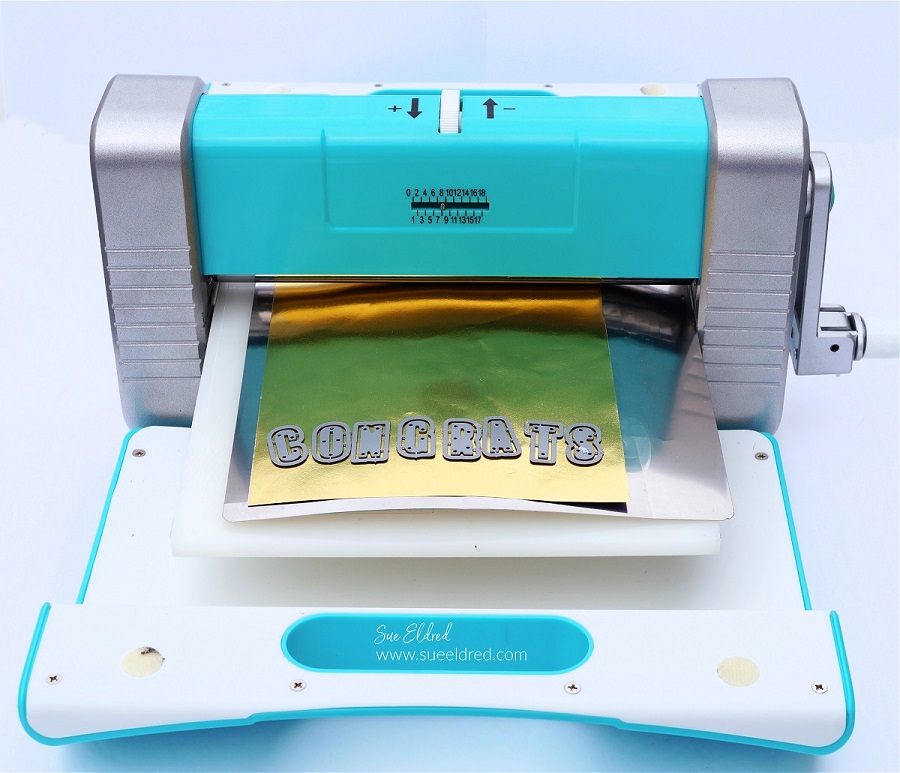
Graduation Hat Card-Crossover II Diecutting Machine-Sue's Creative Workshop www.sueeldred.com 7769
  • Die-cut the gold foiled paper (with adhesive added to the back) using the alphabet die and Crossover II Die-Cutting System*.
  • The adhesive on the back of the foil makes the letters stickers and easy to adhere. 

LETTER ALIGNING TIP…If you’re a perfectionist like I am and want to align the letters as straight as possible. Use Gridded Transfer Paper* to help you line up the letters. Place the front of the foiled letters on the adhesive side of the transfer paper, remove the backing off of the foiled paper and transfer the letters onto the front of the card.

Graduation Hat Gift Card Holder-Sue's Creative Workshop www.sueeldred.com 7603

To Make the Graduation Cap Gift Card Holder:

  • To make my gift card personal, I chose to make my graduation cap purple to honor the school colors of this year’s graduate.
  • Add adhesive to the back of the foiled paper using the Xyron Creative Station*.  (see previous picture)
  • Die-cut the pieces of the graduation cap using the Crossover II Die-Cutting System*.
  • Die-cut the base of the gift card holder out of black glossy cardstock and the New Donut Box Die.
  • Fold the box on the score lines and adhere to side tabs to create the box.  
  • Adhere a small piece of paper on the inside of the box to finish creating the lid.  
  • Adhere the Graduation Cap pieces onto the top of the box.  If you would like a little dimension, add 3D Adhesive Foam Squares to the back of the cap before adding it to the box.
Graduation Hat Gift Card Holder-Sue's Creative Workshop www.sueeldred.com 7646
  • Add a little personality on the inside of the box with graduation-themed scrapbook paper.  
  • Insert candy, gift card, or cash for a graduation gift they’re sure to love.

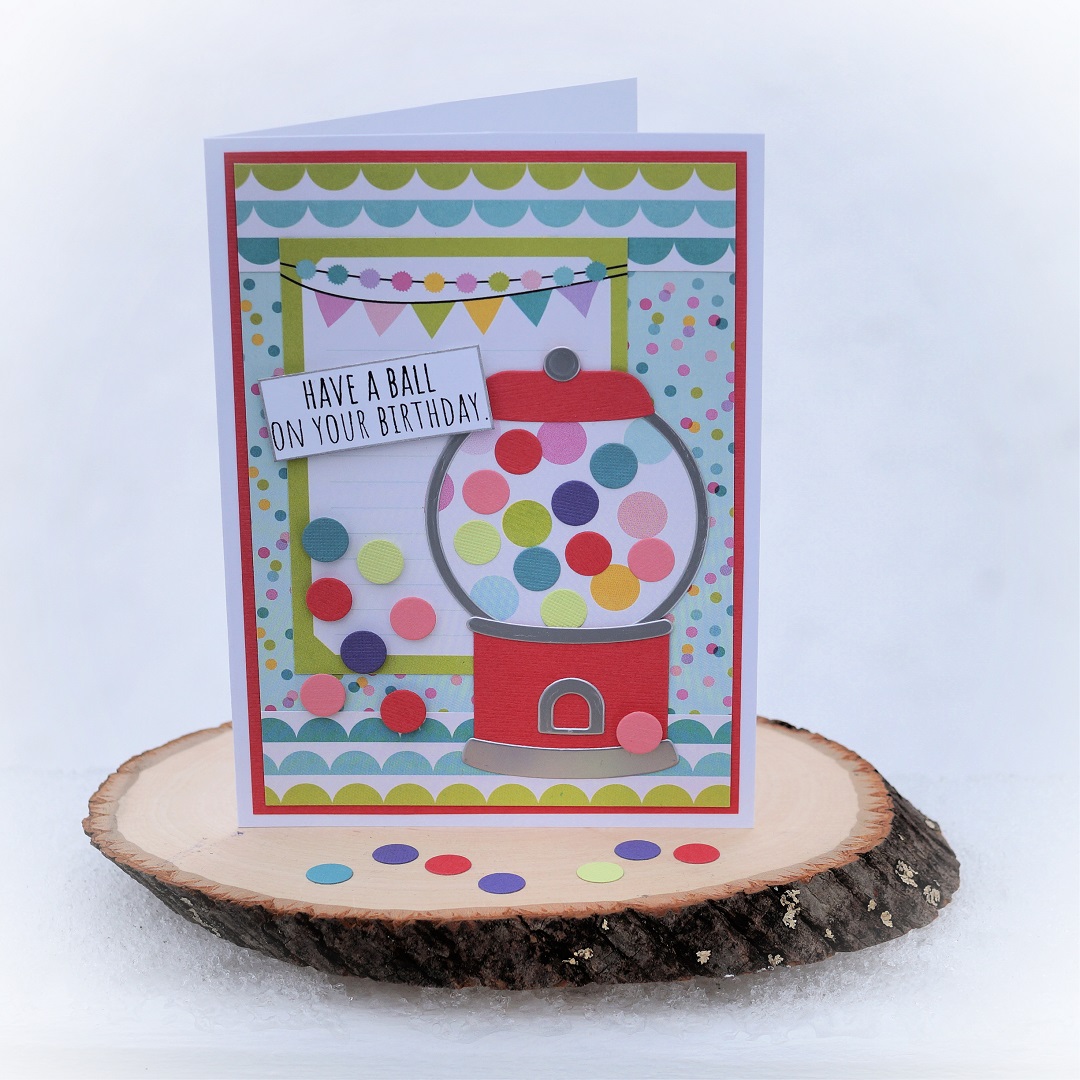
Gumball Machine Birthday Card

What kid doesn’t love Gumballs?

Create an adorable Gumball Machine Birthday Card using the New Gumball Stamp

and Die set from The Maker’s Movement.

Disclosure:  This is a sponsored post  for the Maker’s Movement.  I have been provided product
and compensation in exchange for my creative ideas.  The view and opinions are my own.

Materials Used to Create the Gumball Machine Birthday Card:    (*affiliate link)

*Disclosure:  This blog uses affiliate links.  If you choose to make a purchase using one of the links, I receive a small commission (at no additional cost to you) that helps offset the costs of maintaining this blog.  Thanks for your support!

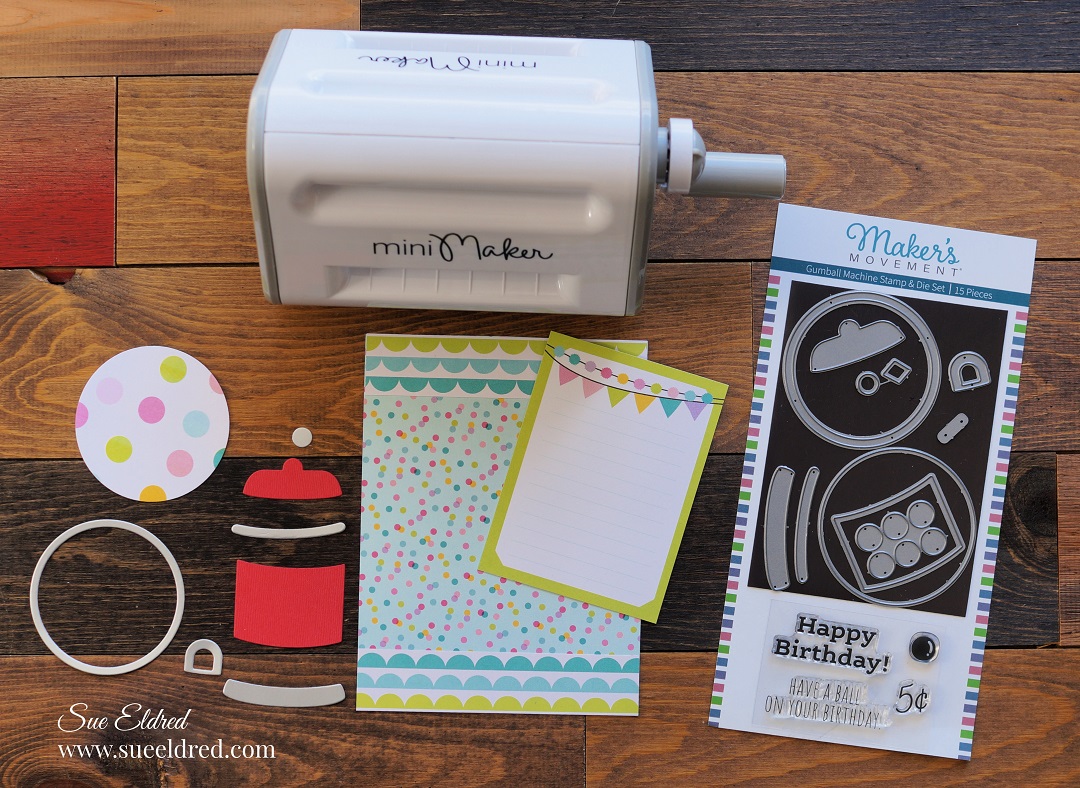
The Gumball Machine Stamp & Die Set features all the pieces you need to create an adorable

gumball machine. The two coordinated globe glass container shapes let you make perfect

shapes for shaker cards. You can add sequins, shaker sprinkles, and other embellishments to
add more fun to your craft project. This set is great for making birthday cards, greeting cards,

and gift tags.

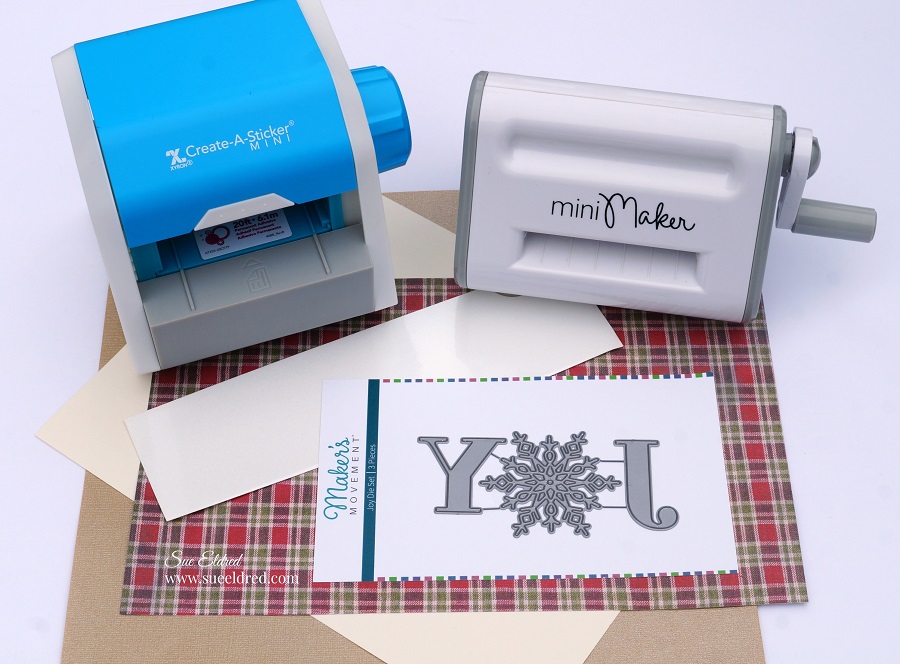
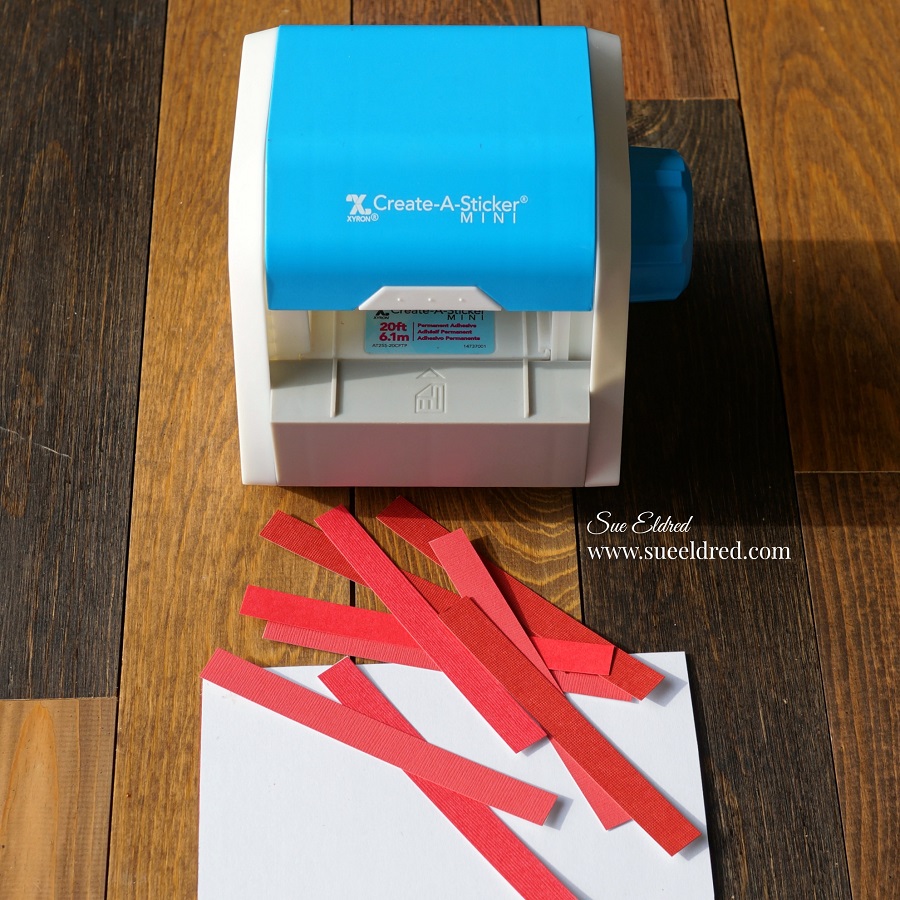
  • TIP…When I am die-cutting small pieces, I like to run the paper through the Xyron Create-A-Sticker Machine* to add adhesive to the back before cutting them out.  It makes all the little pieces stickers and makes assembling the card a breeze.
  • I used the Mini Maker Die-Cutting Machine to die-cut out the pieces.  While you won’t use it for all your die-cutting needs, I love the compact size on my workspace.

I’ve been struggling lately with lighting, and the winter grays don’t help.

I used the newly fallen snow as my white background.

If you look closely, you may notice the snow crystals underneath the wood slice.

I can’t wait until Spring!

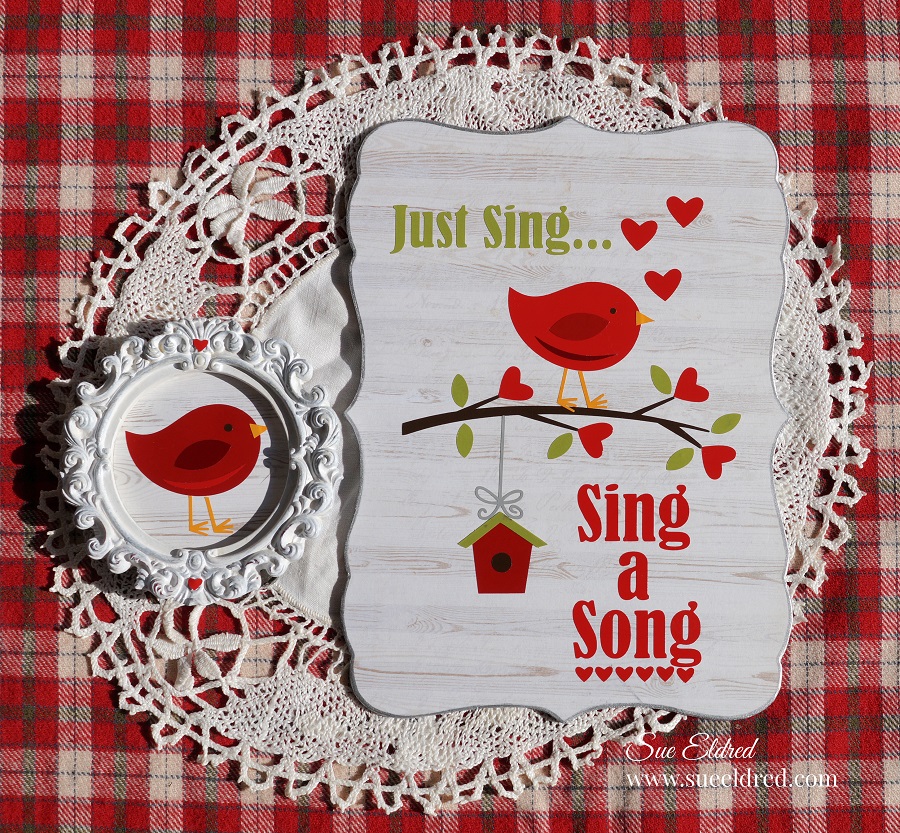
Cute Valentine/Spring Décor with Vinyl

Creating Cute Valentine/Spring Décor with StyleTechCraft Vinyl.

Did you ever get a song stuck in your head while working on a project?

I’m showing my age here, but this Karen Carpenter song kept going through my mind while

I was putting together the Bird on the Branch and, I just had to create the words to go with it.

“This is a sponsored post.  As a member of the StyleTechCraft Design Team I have been provided product and compensation in exchange for my creative ideas.  The views and opinions are my own.

I love creating projects for my home using vinyl. 

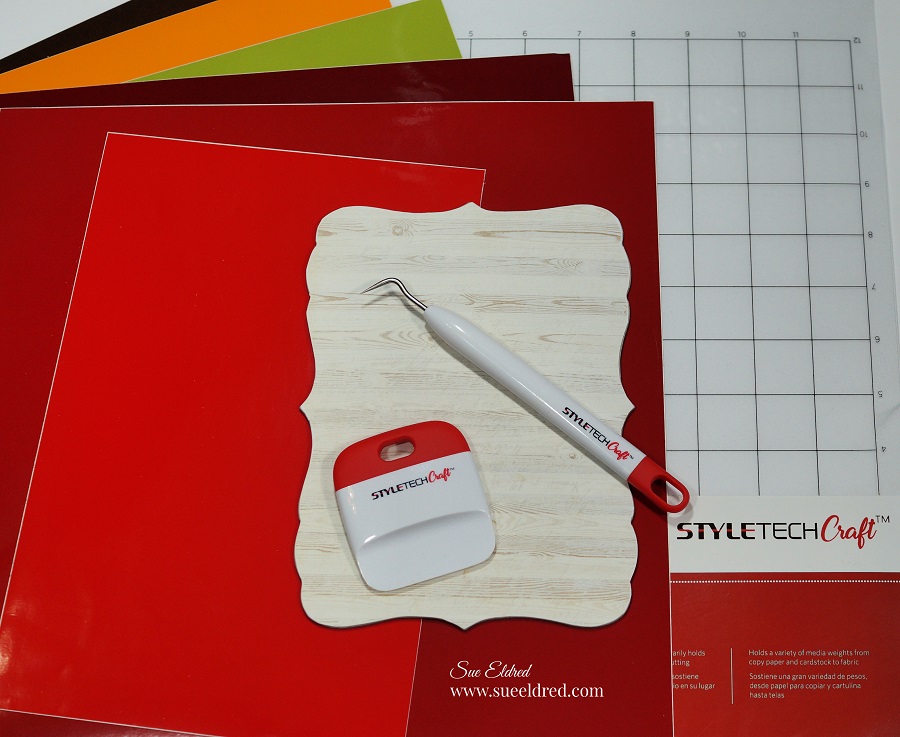
My favorite vinyl is the Glossy Craft Vinyl from StyleTechCraft.

There are so many great color choices to choose from.

Materials Used to make the Valentine Projects:              (*affiliate links)

*Disclosure:  This blog uses affiliate links.  If you choose to make a purchase using one of the links, I receive a small commission (at no additional cost to you) that helps offset the costs of maintaining this blog.  Thanks for your support!

Project Details:

  • I used a 5″ x 7″ decorative piece of chipboard that I’d had around for a while.
  • I cut a piece of woodgrain paper a little larger than the chipboard.  
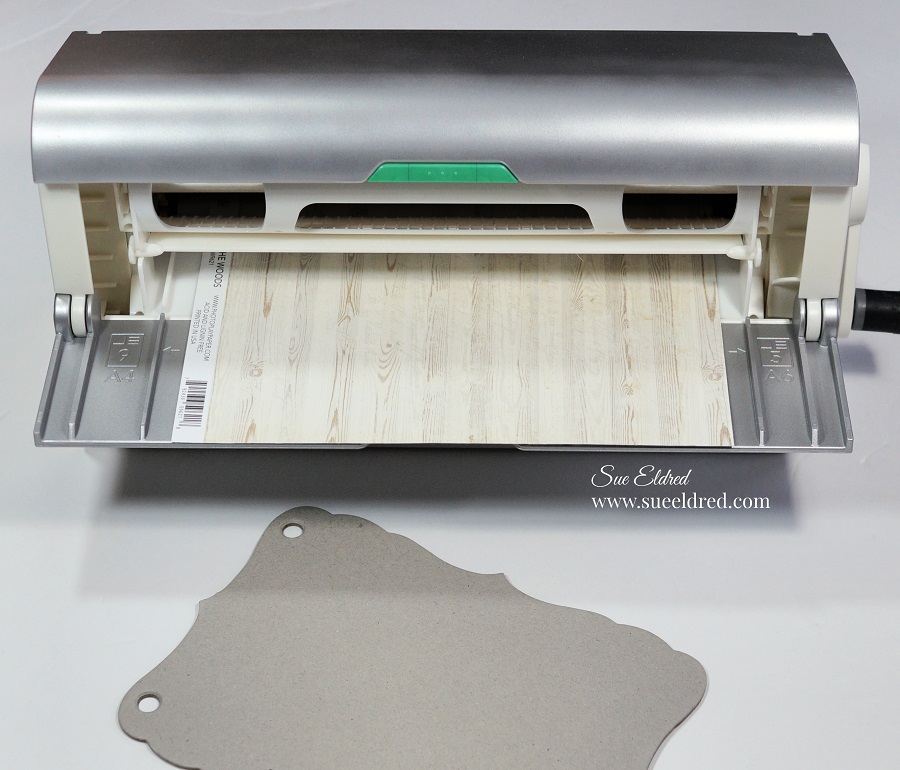
  • Place the paper in the Xyron Creative Station* design side up through. As you turn the handle, it runs through the machine and adds a complete layer of adhesive onto the back of the paper.

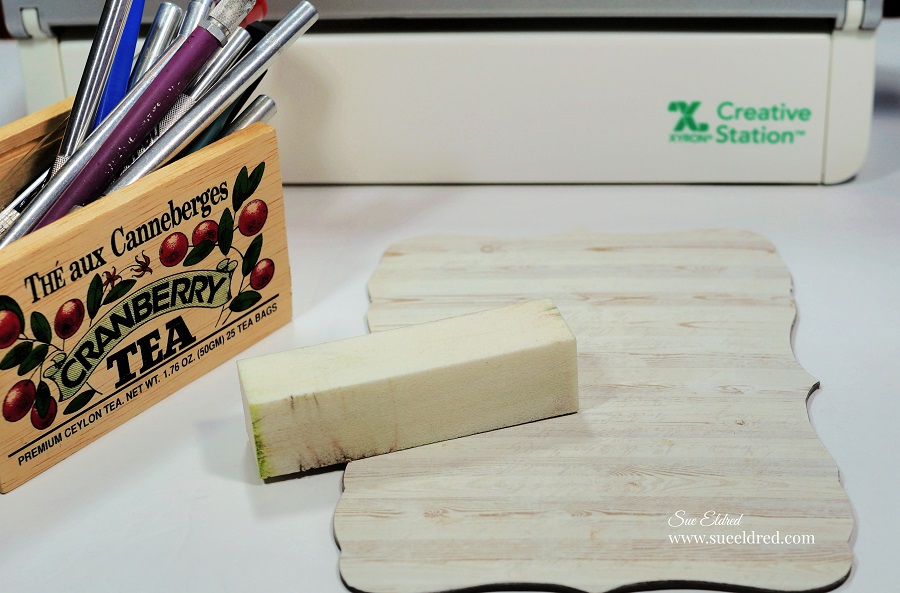
  • Adhere the paper to the chipboard and cut away the excess using a craft knife and cutting mat.
  • Use a fine Sanding Block* to smooth out the edges of the chipboard.

  • I used my Silhouette Cameo Electronic Die Cutting Machine* and the “Bird on the Branch” SVG file to create my design.
  • I sized the image to fit onto my chipboard and cut the various layers of the red in three shades to make a cardinal.  
  • After weeding the excess vinyl from around my images, I transferred them onto the chipboard using the Clear Transfer Tape*.
  • After having the song stuck in my head, I decided to create a few words for my sign.
  • For added detail, I went around the edge of my sign with a Silver Leafing Pen*.

  • I cut an extra little cardinal to fit inside a small circle frame and added small red hearts on the top and bottom.
  • To complete my decorations, I added my small faux heart topiary to a reddish metal and added the words “choose happy” in Olive vinyl.

I have Cute Valentines Decorations that will take me into Spring.  (and maybe longer)

Making Valentines with New Slimline Essentials

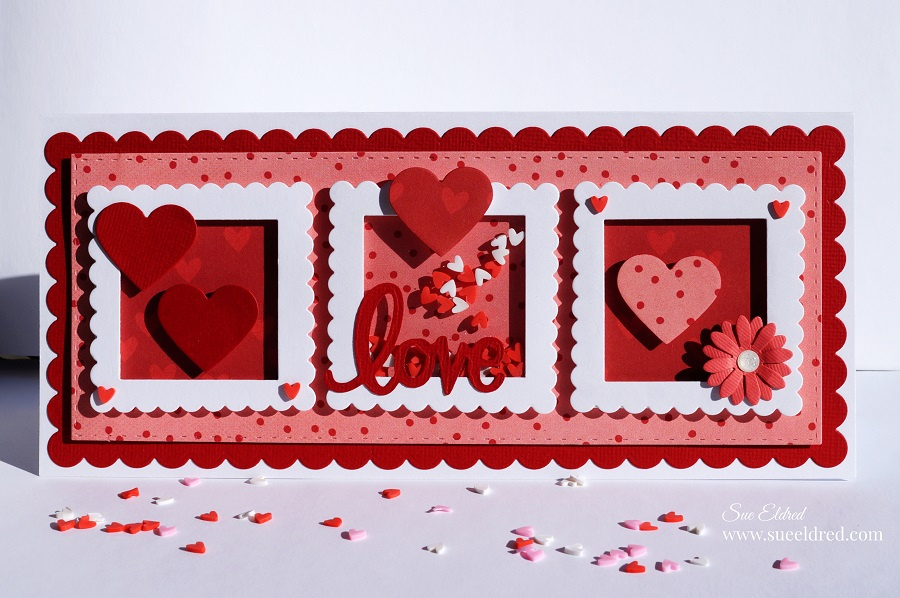
Happy Valentine’s Day Slimline Card

I’m jumping on the Slimline Card Craze with the help of the New Slimline Essentials Die Set

from The Maker’s Movement.

What’s a Slimline Card? 

Basically, a Slimline Card is a tall card that fits into a business-size envelope.

The Slimline Essentials Die Set takes all the guesswork out of cutting the layers and makes

assembling your card a breeze.

Disclosure:  This is a sponsored post  for the Maker’s Movement.  I have been provided product
and compensation in exchange for my creative ideas.  The view and opinions are my own.

Materials Used:   (*affiliate link)

*Disclosure:  This blog uses affiliate links.  If you choose to make a purchase using one of the links, I receive a small commission (at no additional cost to you) that helps offset the costs of maintaining this blog.  Thanks for your support!

Directions:

  • Die-cut all the layers for the card using the Slimline Essentials Die.
  • Cut three white scalloped squares.
  • Center the small square die in the middle of the scallop square.  Put a small piece of washi tape over the die to keep it in place.  Die-cut to create a small, scalloped frame.

  • Place a piece of double-sided craft foam onto the square foam cutter die to cut small foam squares to use under the scallop frames.

To Create a Center Shaker Element.

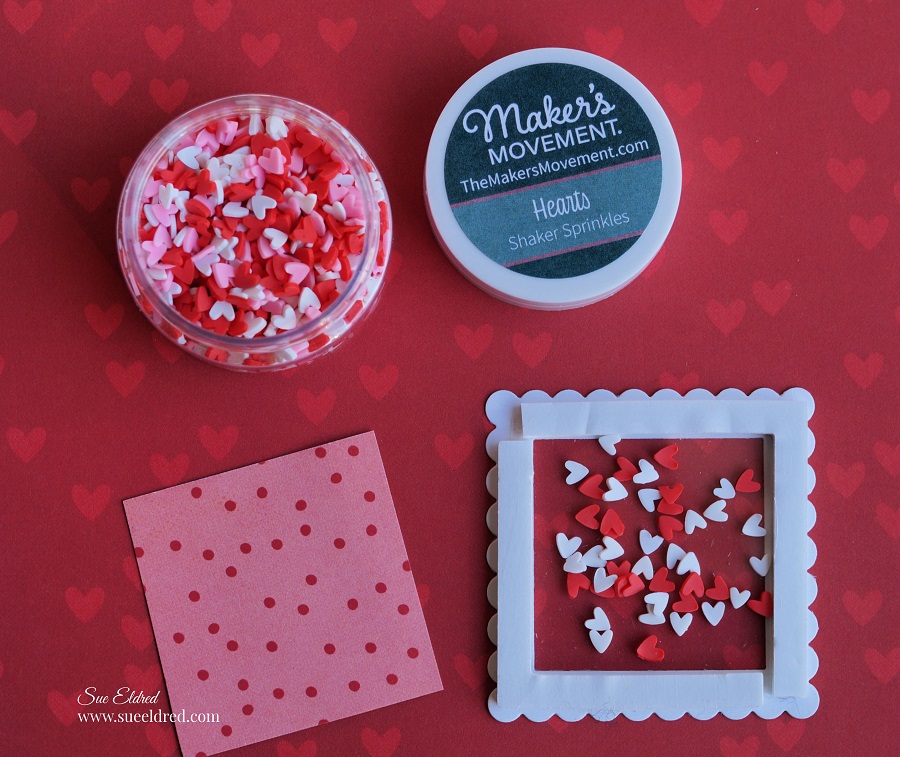
  • Adhere a small piece of clear acetate to fit over the opening of the frame.
  • Because the foam frames didn’t match the frame I created, I cut the foam frames on the corners and placed them over the acetate.
  • Using only red and white heart sprinkles, fill the inside of the frame with the sprinkles. Be careful not to overfill so that there is room to shake.
  • Remove the protective lining on the foam and place a small piece of scrapbook paper over the foam.

  • Embellish the front of the card using hearts popped up with double-sided adhesive foam and the word “love” die-cut using the “Special Delivery” die set.

I love a clean and simple monochromatic card.  (and so much fun to make)

Elegant and Easy Holiday Card

How to Make an Elegant and Easy Monochromatic Holiday Card.

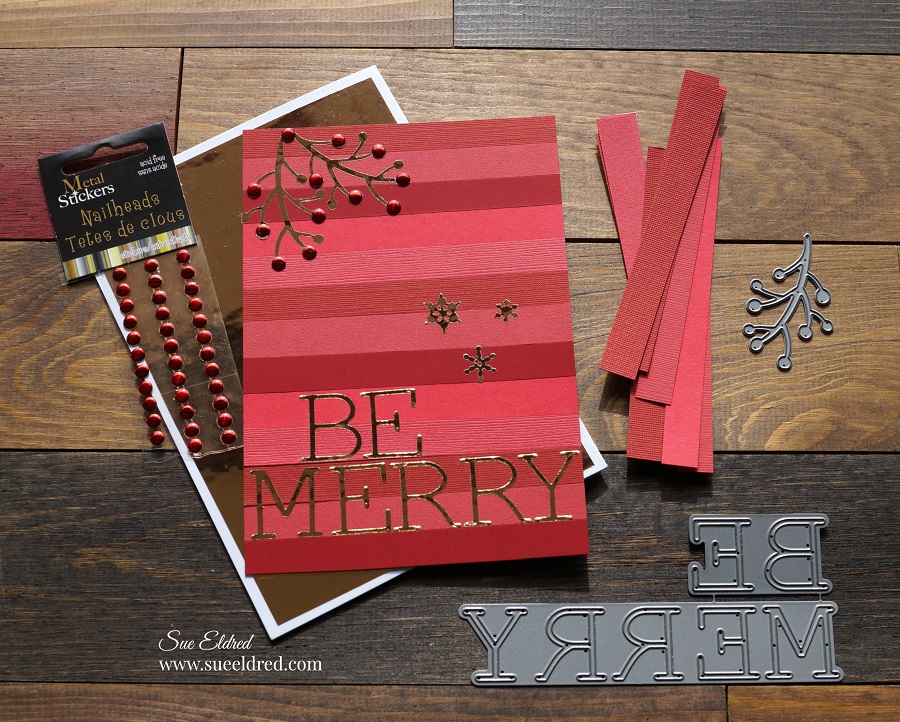
When it comes to making cards for the Holidays, two words come to mind, elegant and easy.  This Merry little card is both.  With a few simple tricks and tips, this card is a snap to make.

Disclosure:  This is a sponsored post  for the Maker’s Movement.  I have been provided product
and compensation in exchange for my creative ideas.  The view and opinions are my own.

Materials Used:                        (*affiliate links)

*Disclosure:  This blog uses affiliate links.  If you choose to make a purchase using one of the links, I receive a small commission (at no additional cost to you) that helps offset the costs of maintaining this blog.  Thanks for your support!

Directions:

  • Choose several different shades of red cardstock.  (I used four.)  Cut into 2 1/2″ x 4 1/2″ strips.
  • To make assembly easy.  I used the Xyron Create a Sticker to add adhesive to the back of the strips of cardstock.
  • Trim the larger strips into 1/2″ x 4 1/2″ smaller strips.
  • Cut a 4 1/2″ x 6 1/2″ piece of red cardstock to use as the base.  Starting at the top, add the strips of red cardstock to the base.
  • Die-cut two branches using the Winter Foliage Die Set and Gold Chrome Vinyl.
  • Die-cut small snowflakes using the gold chrome vinyl and the snowflakes found in the Snow Globe Die Set.
  • Die-cut the words “Be Merry” using gold chrome Vinyl and the Be Merry Die Set.
  • Remove the white protective backing from the vinyl and use as stickers to decorate the front of the card.  I used the edge of the cardstock strip to help me line up the words.
  • Add red metal nailhead sticker embellishments onto the branch.
  • Cut a 4 3/4″ x 6 3/4″ piece of Chrome Adhesive Vinyl and adhere to a white 5″ x 7″ card.
  • Adhere the striped card front to the card base.

Holiday Joy Christmas Card

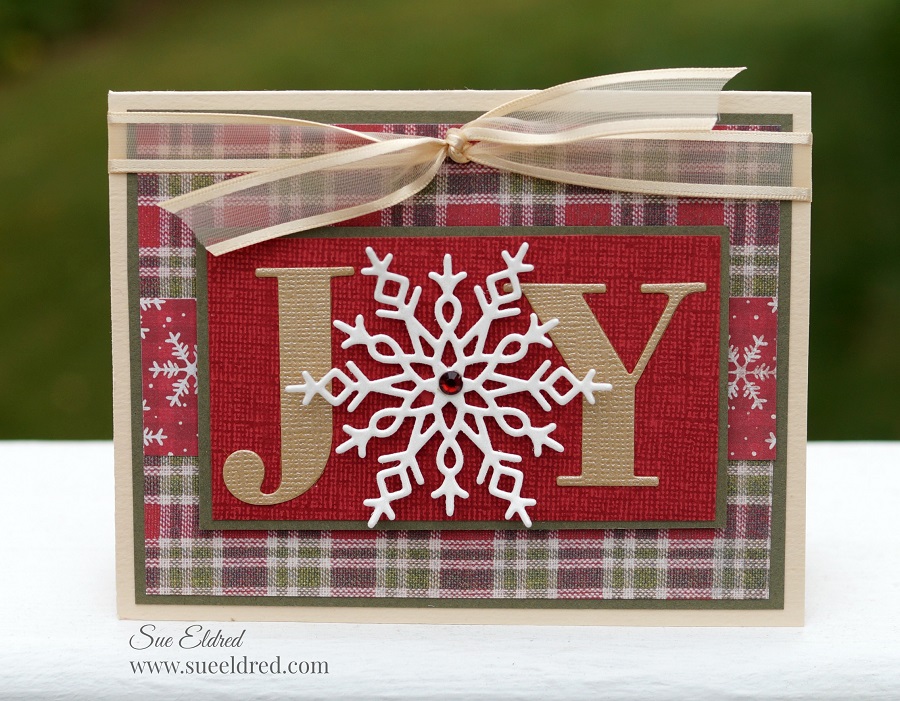
A little Holiday Joy Christmas Card to brighten up your day.

If you like making your own Christmas cards and have a lot to make,

this quick and easy card might be a great choice.

I’m thinking, this simple little card is the one I’ll send this year.

Disclosure:  This is a sponsored post  for the Maker’s Movement.  I have been provided product
and compensation in exchange for my creative ideas.  The view and opinions are my own.

Supplies Used:             (*affiliate links)

*Disclosure:  This blog uses affiliate links.  If you choose to make a purchase using one of the links,  I receive a small commission (at no additional cost to you) that helps offset the costs of maintaining this blog.  Thanks for your support!

Card Details….

  • To make my snowflake stand out more. I took a small piece of white ultra metallic glitter vinyl and adhered it to a piece of cream cardstock before die-cutting the snowflake. You can’t tell by the picture, but the snowflake has a glittery shimmer.
  • I like to use the Xyron Create-A-Sticker*to add adhesive on the back of the gold cardstock before die-cutting the letters.  It makes assembling the card a breeze.
  • The finished card size is 4 1/4″ x 5 1/2″.

Holiday Snow Globe Cards

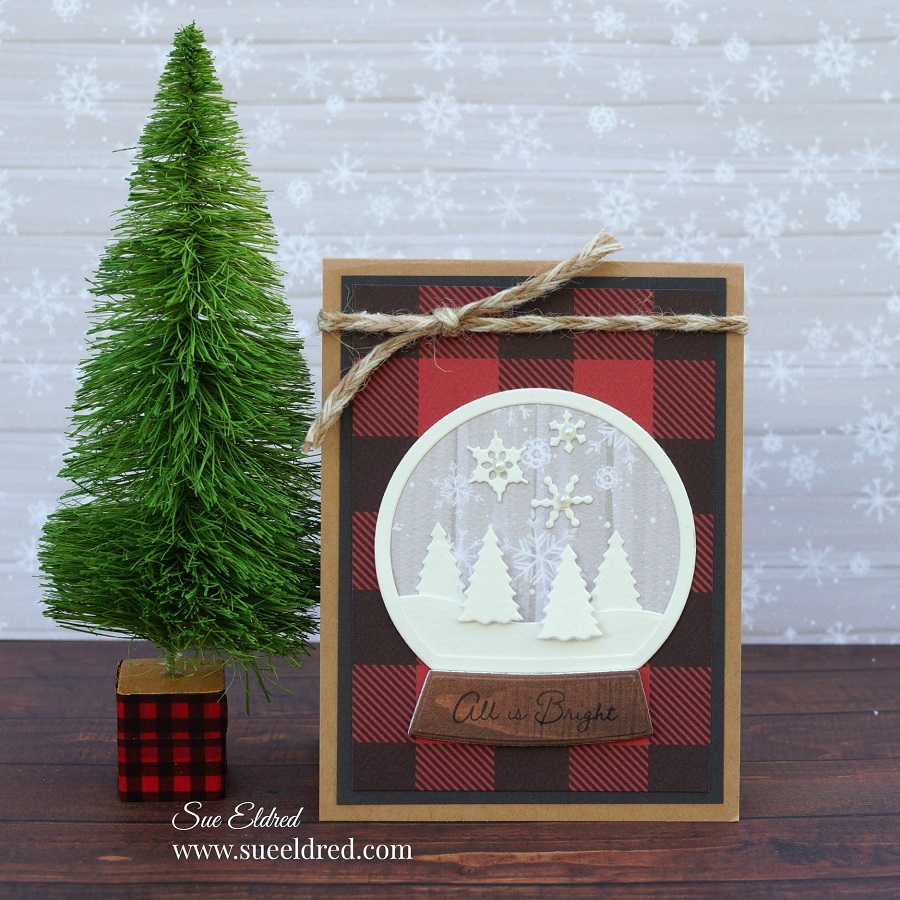
Whether you like a classic style or cute, holiday snow globes are just fun.

Especially when they are made into cards that you can send.

For my cards, I used the Snow Globe stamp and die set from The Maker’s Movement

to make two snow globe cards with two different styles.

Both of these cards could also be made into a cute little shaker cards. 

Disclosure:  This is a sponsored post  for Maker’s Movement.  I have been provided product
and compensation in exchange for my creative ideas.  The view and opinions are my own.

Penguin Snow Globe Card

  • Stamp the penguin on watercolor paper with a black permanent ink pad.
  • Use markers, colored pencils, or watercolor to color in the image.
  • Use the coordinating die to cut out the penguin.
  • I like to use the Xyron Creative Station* to add adhesive onto my decorative scrapbook paper before die-cutting  fine detailed pieces. It makes adhering to detailed pieces like the snow globe outline so much easier to adhere to.
  • For the base of the snow globe.  I adhered a small piece of woodgrain scrapbook paper onto a small piece of double-sided adhesive craft foam.
  • Run the woodgrain/foam piece through the Crossover II die-cutting machine* to create a think foam base.
  • Add a couple of thin foam mounting squares* to the back of the penguin before adding him to the card.
  • Adhere all your pieces together and stamp a little greeting on the top of the card.

*Disclosure:  This blog uses affiliate links.  If you choose to make a purchase using one of the links,  I receive a small commission (at no additional cost to you) that helps offset the costs of maintaining this blog.  Thanks for your support!

Supplies Used on Cards:       (*affiliate links)

Winter Wonderland Snow Globe Card

Create  the soft look of freshly fallen snow with this Winter  Wonderland Snow Globe.

I love how different this card is.  (can you tell it’s my favorite)

It’s made similar to the Penguin Snow Globe.  The two trees in the middle are popped up using

thin foam mounting squares* to give the forest dimension.

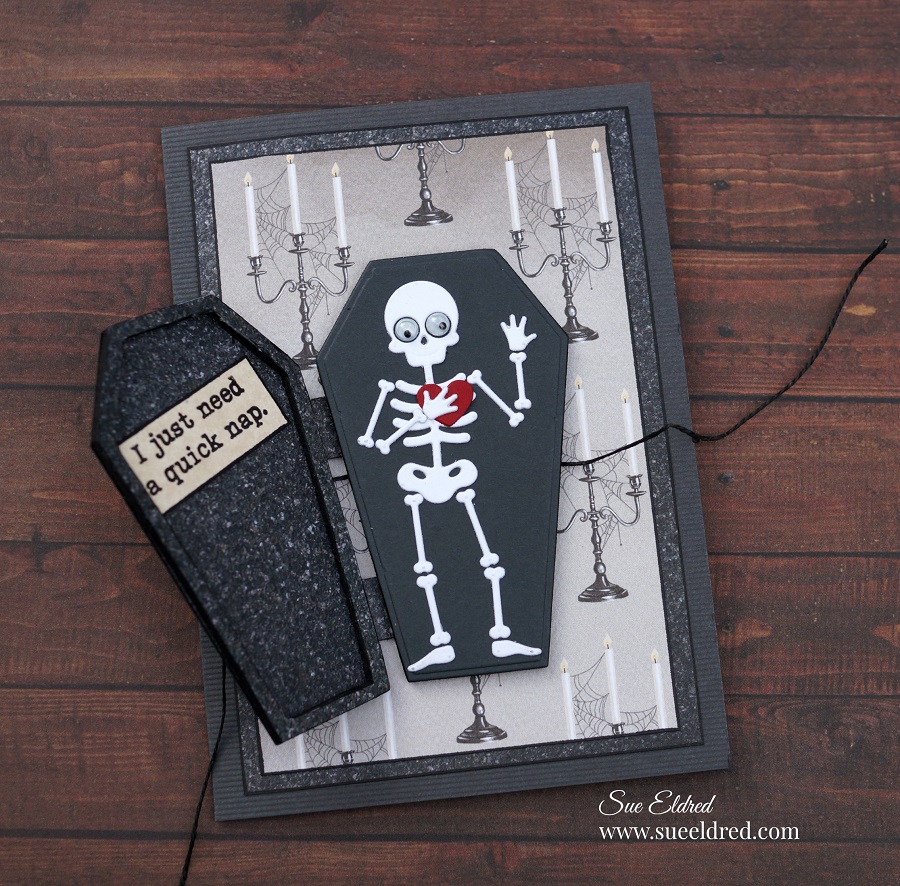
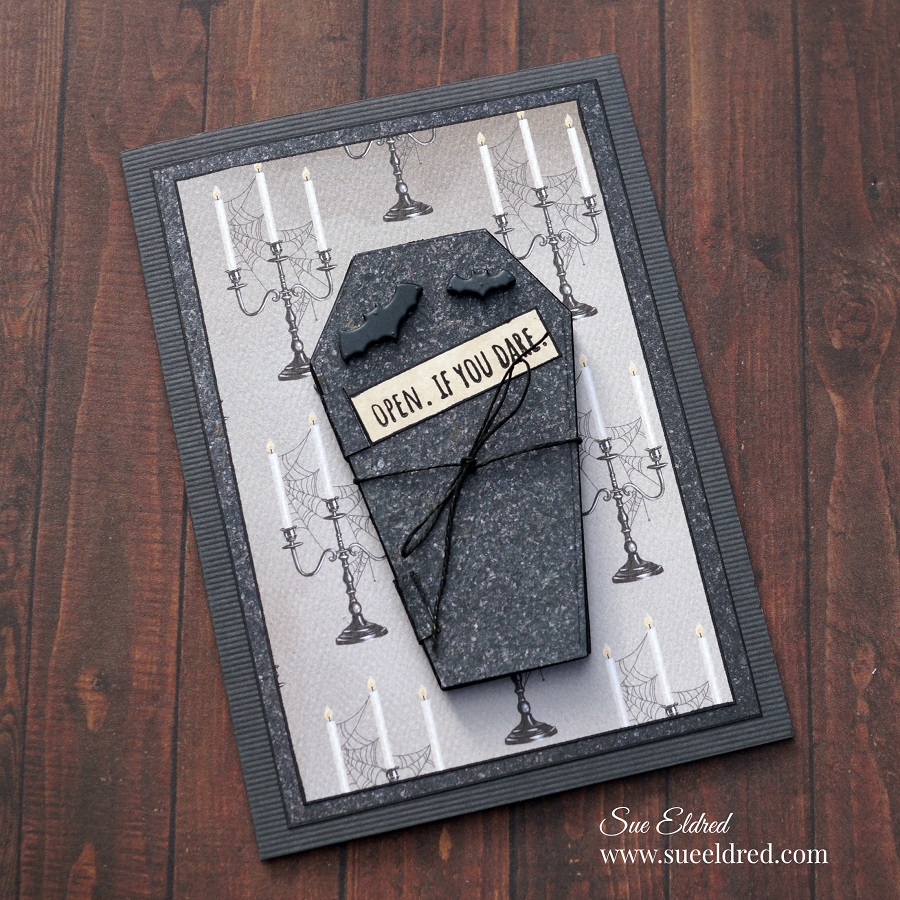
Spooky Scary Halloween Card

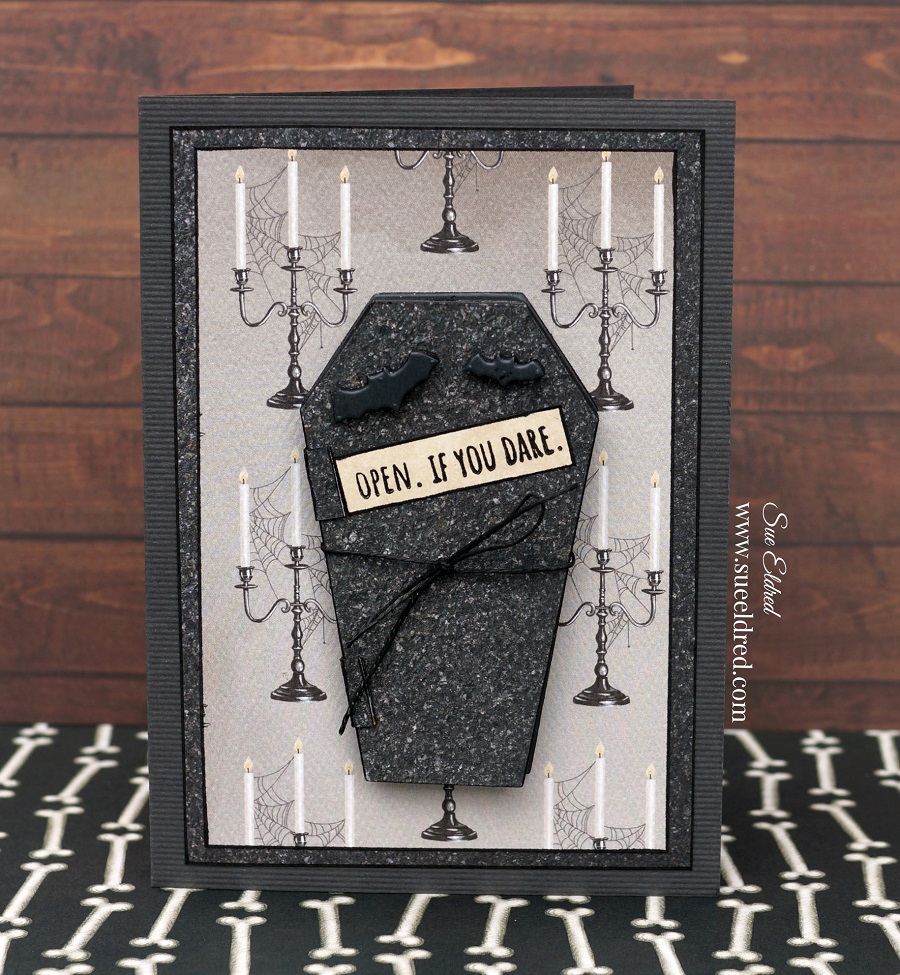
Open if You Dare!

Here’s a spooky card for all you Halloween Lovers.

If you love a card with dimension, this card has a lot of spooky goodness.

The Spooky Scary Halloween Card was made using the “Spooky Scary” stamp and die set* from

The Maker’s Movement.

Disclosure:  This is a sponsored post.  I have been provided product and compensation in exchange for my creative ideas.  The view and opinions are my own.

Materials Used:            (*affiliate link)

*Disclosure:  This blog uses affiliate links.  If you choose to make a purchase using one of the links, I receive a small commission (at no additional cost to you) that helps offset the costs of maintaining this blog.  Thanks for your support!
My process for making cards sometimes changes as I sit down to create.  I was getting into this

one and decided to forgo all the step-by-step pictures.  Instead, I will give you lots of details.

Here’s one tip I highly suggest.  (Especially with the skeleton die.)

Run the white cardstock through the Xyron Create-A-Sticker Machine* before cutting out the

skeleton die.  The Xyron Create-A-Sticker Machine* puts adhesive on the back of the

cardstock, making the skeleton pieces stickers.  By making stickers, adhering the skeleton

to the coffin was so much easier than using liquid glue.

  • I cut a piece of double-sided adhesive foam large enough to cut the casket shape.  I adhered a piece of gray cardstock to one side of the foam before die-cutting.
  • To cut the casket shape.  Place the casket die on the foam and run it through the Crossover II Die-Cutting Machine.  Because the foam is so thick, you may want to run it back and forth a couple of times to make sure the die cuts entirely through the foam.
  • Another good tip…Use a black chisel tip paint marker* to color the sides of the craft foam.

  • The lid of the casket was made by sticking two pieces of black patterned scrapbook paper together and die-cutting the scrapbook paper with the casket die. (I used the Xyron Sticker Maker)
  • Adhere a piece of scrapbook paper onto a piece of adhesive foam.
  • Using the casket outline die, cut a casket outline from the foam. Stick the casket outline on the inside of the lid.
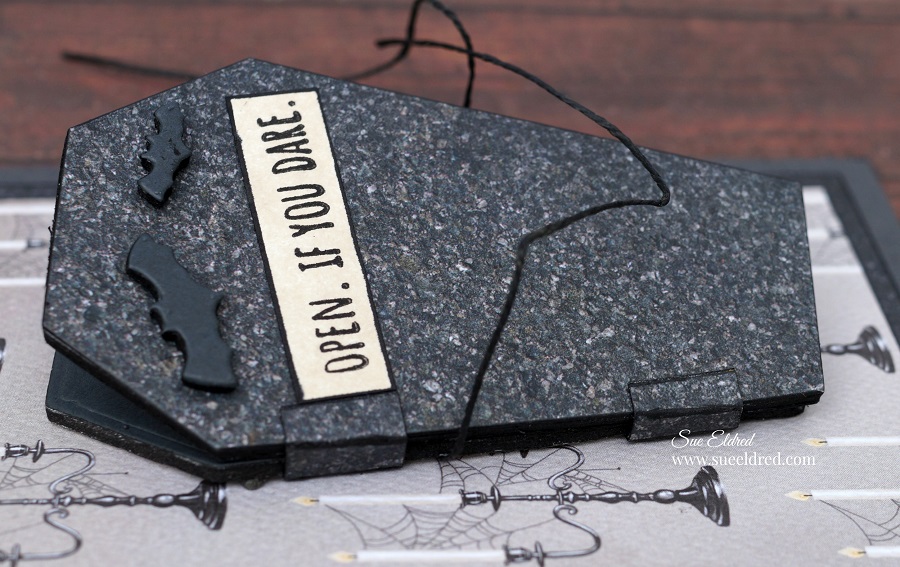
  • Fold two small pieces of paper to use as the hinges. Glue only the top and bottom of the hinges. Not on the side of the casket.

  • Before sticking the casket onto the layered card base, attach a thin black string onto the back of the casket.
  • If you don’t have black string, put a little black paint between your thumb and index finger and run the string through the paint.  Voila, black string.
  • Tie string around the casket to keep the lid closed.

Save

Save

Toil & Trouble Halloween Shaker Card

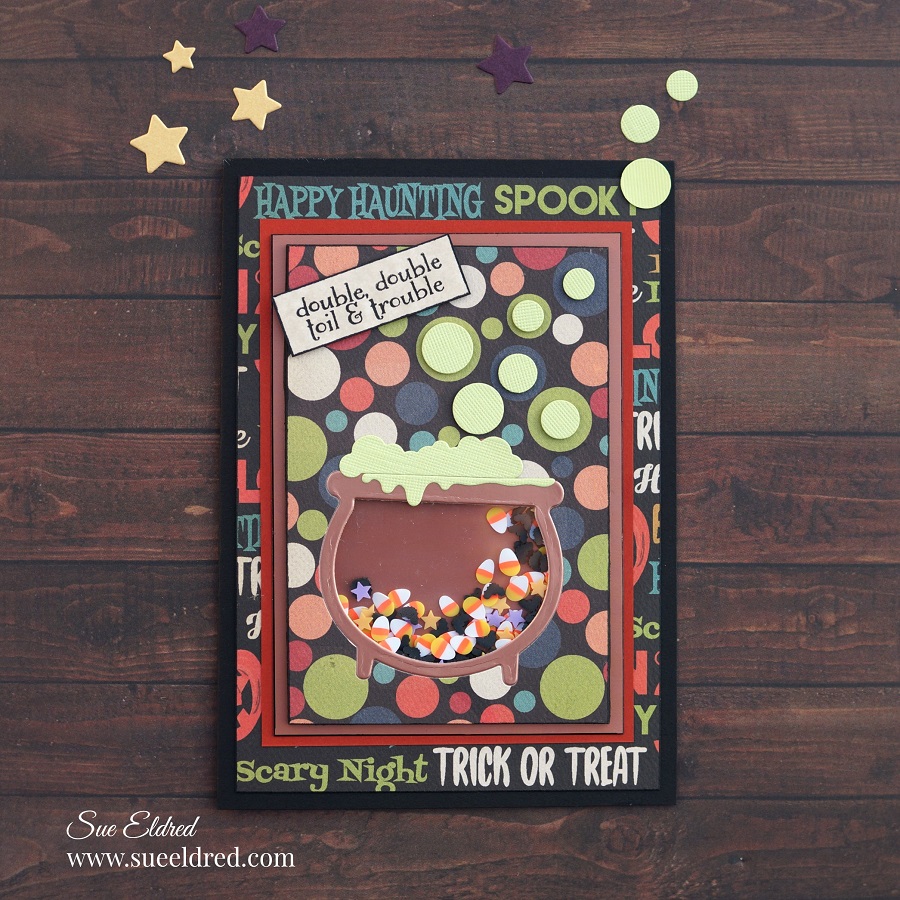
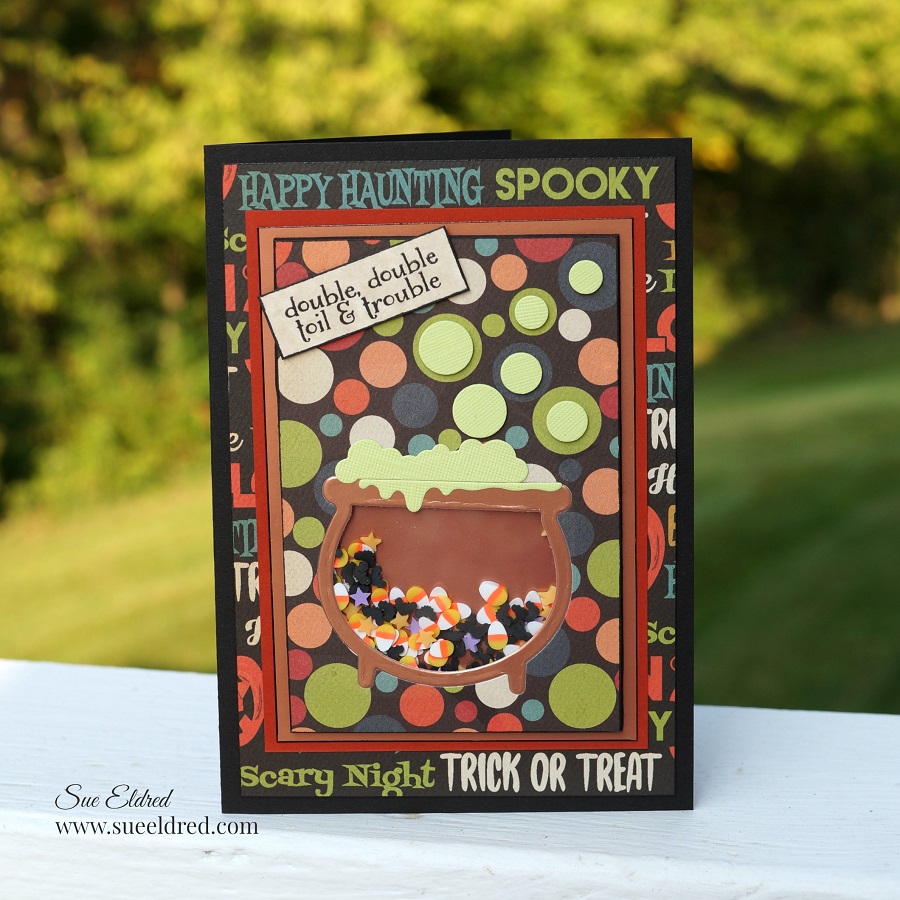
Double, Double Toil & Trouble

I’m mixing up a little Halloween fun in the cauldron with this cute little shaker card.

The shaker card uses the “Witch, please” stamp and die set from the Maker’s Movement.

Disclosure:  This is a sponsored post.  I have been provided product and compensation in exchange for my creative ideas.  The view and opinions are my own.

Materials Used:            (*affiliate link)

*Disclosure:  This blog uses affiliate links.  If you choose to make a purchase using one of the links, I receive a small commission (at no additional cost to you) that helps offset the costs of maintaining this blog.  Thanks for your support!
How to Make a Toil and Trouble Halloween Shaker Card….

There are several different ways to make a shaker card.  (This is how I decided to make this one.)

Directions:

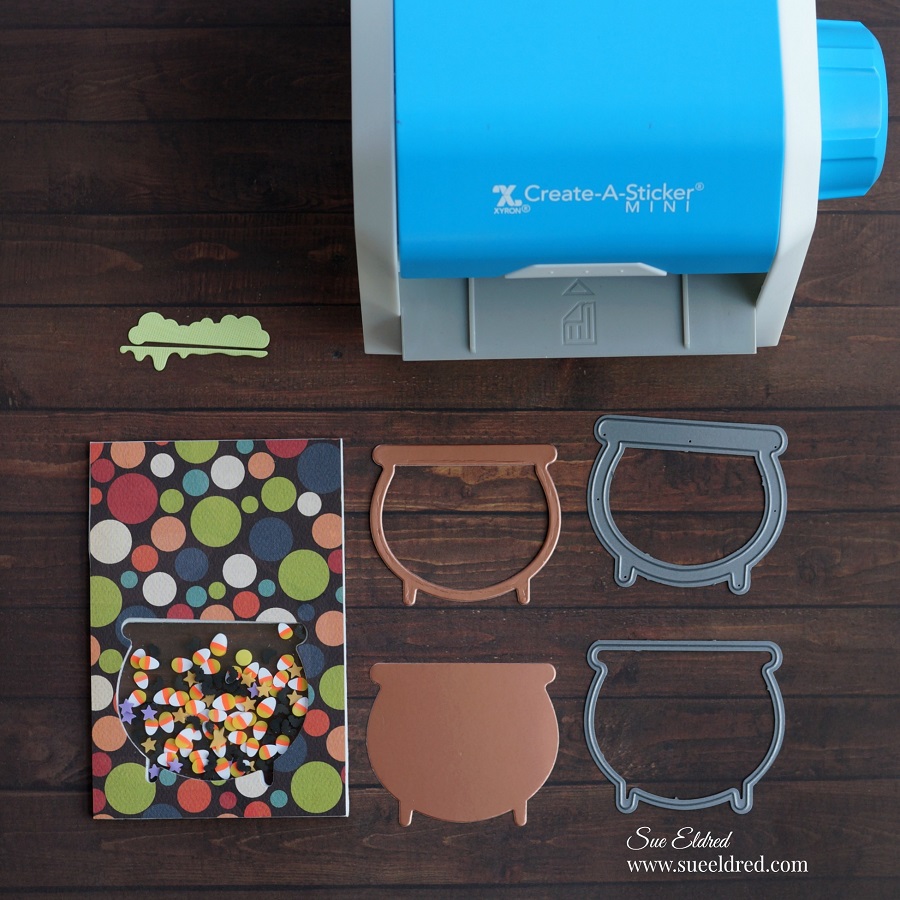
  • Cut a piece of double-sided adhesive craft foam approx. 3-1/4″ x 4-3/4″.
  • Using the caldron outline die, die-cut the caldron shape into the craft foam.
  • Cut a piece of scrapbook paper approx. 4″ x 5-1/2″.  Die-cut the cauldron shape into the scrapbook paper.
  • Cut a small piece of acetate to cover the opening of the caldron.
  • Remove protective coating off the acetate.
  • Remove the protective liner off the double-sided adhesive craft foam.
  • Stick the acetate over the opening.

  • Line up and stick the cauldron opening of the scrapbook paper over the cauldron opening of the craft foam and acetate.
  • Trim the excess paper using a cutting mat and craft knife.

  • Turn the craft foam over and fill the cauldron with Spooky Shaker Sprinkles.  Make sure not to overfill, you want to leave enough room for the sprinkles to shake.
  • Cut a second piece of acetate to cover the cauldron opening.
  • Pull back the protective liner on the craft foam and place the acetate over the opening.

  • This is a little pro tip…I used a black calligraphy paint pen marker to color the sides of my craft foam.  The white core would have just made the foam stand out and not in a good way.  I like to use a black marker to cover the edges of my darker colored paper that would have a white or light core.

  • When using small or thin die-cut shapes, I like to run the paper through the Xyron Create-A-Sticker Maker* before cutting out the shapes.  (It makes it so much easier to apply.)
  • Cut a cauldron outline from glossy copper cardstock and stick onto the acetate.
  • Cut the boiling pot shapes out of light green cardstock and stick on the top of the cauldron.

  • Die-cut small bubbles from the die set and mount using thin black adhesive 3D foam squares* over the various circles of the scrapbook paper.
  • Stamp words in black ink onto a small piece of aged parchment card-stock.  Mount onto the front of the card using thin black foam squares.
  • Remove the protective liner from the back of the craft foam and stick onto a glossy card-stock layer.
  • Add the additional layers onto a black card.

Save

Save

Save

Save

Save

Save

Message in a Bottle Shaker Tags

In continuing with the Beach Theme for July…

I’ve got a couple of cute projects using the Message in a Bottle Stamp and Die Set from

The Maker’s Movement to share with you.

MSD222 Message in a Bottle Stamp and Die Set  

*FTC Disclosure… “This is a sponsored post for The Maker’s Movement.  I have been provided product and compensation in exchange for my creative ideas.  The views and opinions are my own.”

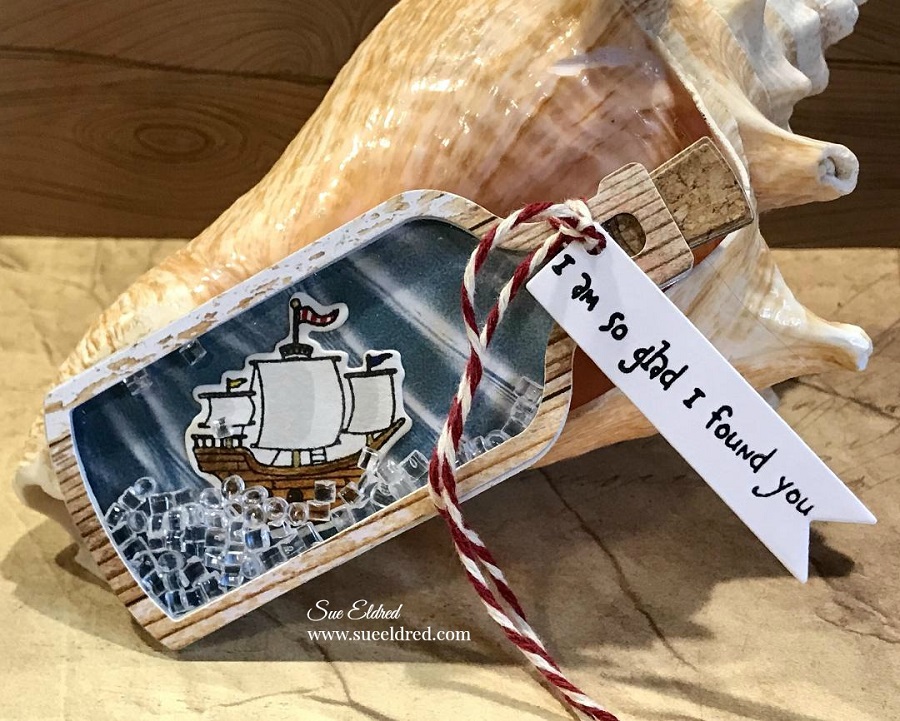
Message in a Bottle Pirate Ship Shaker Tag Directions:

  • Stamp the ship on white watercolor cardstock.
  • Color the ship with Tombow Art Markers.

*Disclosure:  This blog uses ads and affiliate links.  If you choose to make a purchase using one of the links, I receive a small commission (at no additional cost to you) that helps offset the costs of maintaining this blog.  Thanks for your support!
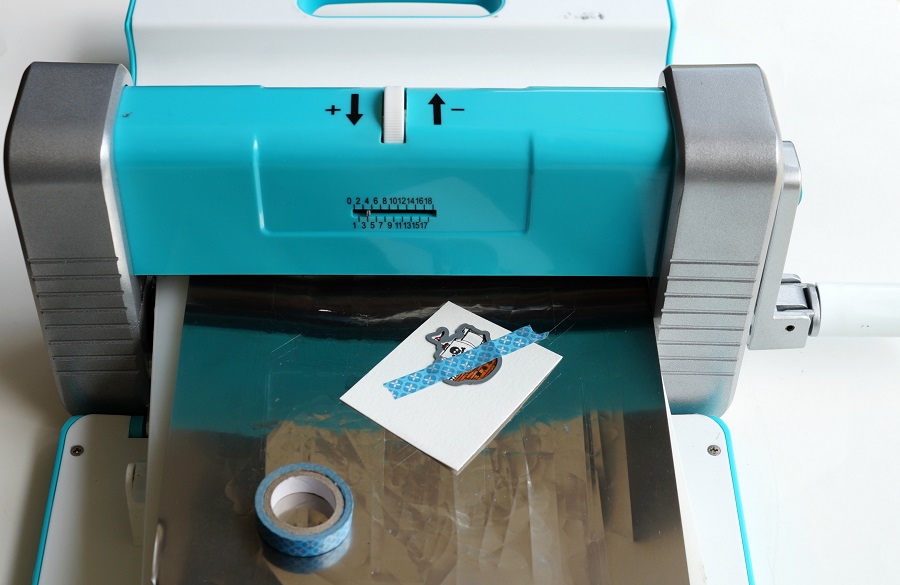
  • Align the ship die over the ship image.  Place a piece of washi tape or removable tape over the die to keep it in place.  Run the die through the Crossover II Die Cutting Machine* to cut out the image.

Aren’t these the cutest little ships?

You can add a skull and crossbones to the sail, or a sweet little heart. (included in the set)

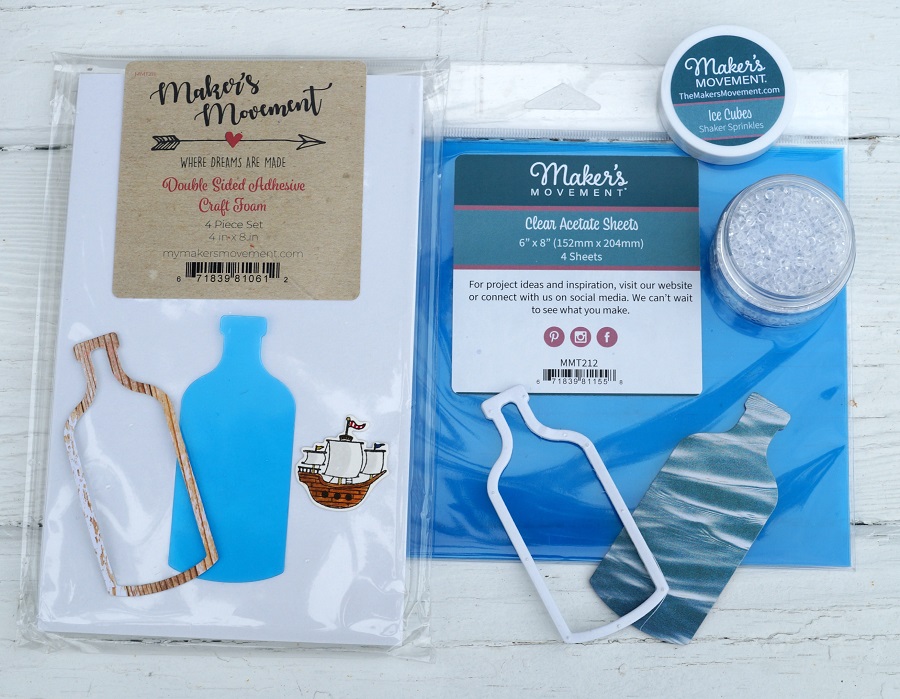
You will need to cut out several pieces to create the Message in a Bottle Shaker Tag.

  • Cut a bottle shape out of clear acetate and a wavy-look scrapbook paper.
  • Place a small piece of distressed woodgrain look scrapbook paper into the Xyron Create-A-Sticker, Sticker Maker* to add adhesive to the backside of the woodgrain paper. Die-cut the woodgrain paper using the Bottle Frame Die. Creating a paper bottle frame sticker makes it easier to use when it comes time to place on the acetate.
  • Cut a second Bottle Frame using the double-sided adhesive foam sheet.

  • Remove one side of the protective blue coating from the acetate bottle.
  • Align and stick bottle frame sticker onto the acetate.
  • Remove the second side of the protective blue coating from the acetate.
  • Use a dryer sheet and rub on the blue wavy bottle die-cut to eliminate static created from the acetate.
  • Align and stick craft foam bottle frame onto the blue bottle die-cut.
  • Adhere die-cut ship in the center of the bottle.

I found a paper that replicated the look of cork.  I used that paper and cut several layers using the cork shaped die and glued them together to create a thick dimensional cork. I made the cork the same thickness of the foam.

  • Cut a piece off the top of the craft foam bottle to make room to place the cork.
  • Add Ice Cube Sprinkles (from the mixed drinks shaker sprinkles) into the well of the bottle frame.
  • Remove the protective coating of the craft foam frame and carefully place the acetate frame over the bottle.

  • Stamp your message on a piece of white cardstock and cut out using the banner die.
  • Punch a small hole at the end. Tie the banner die cut around the neck of the bottle with a piece of red and white twine.

If you’re not into Pirates and Pirate Ships…

the Message in a Bottle Die also makes a perfect Congratulations tag.

Use it for a Wedding, Anniversary, New Home, or Retirement.