Crafting with Kids: Serenity’s Craft Bag

Serenity's Craft Supplies 2

When it comes to craft supplies for some reason people tend to refer to me.

So when I heard that my 5 year old niece was looking for beads and craft supplies for her

birthday, I jumped all over that one.

Serenity's Crafting Supplies 4207

I had a small 8″ x 8″ canvas bag from Canvas Corps and iron-on letters from Creating with Joy.

Who doesn’t like a personalized bag, to let everyone know just who’s bag it is?

I filled Serenity’s bag with a divided container full of beads and gave her paintbrushes,

pom poms, craft stems and pink scissors.  (Things a typical 5 year old might need.)

True story…

Sad Nick Face

One Sunday, my 5 year old grandson, said to me, “Grandma, let’s do a project.”

I looked him straight in the eyes and said…

“Do I look like the kind of Grandma that does projects?”

He gave me the saddest look, not knowing what to say.

Happy Nick Face

When his mom started laughing, a big smile emerged.

I can’t remember if we did a project or not.

DIY Seashell Lamp

DIY Seashell Lamp 5998

Oh…to be by the ocean listening to the waves and picking up shells.

Lately, I’ve been dreaming of summer vacation and relaxing on the beach.  (it’s my happy place!)

Like most people, I love to walk the beach and collect shells.

During the summer, I like to display my shells in a large clear vase on the mantle.

It reminds me of fun summer family vacations.

Last month, when I received the Lighten Up Kit from Etchall®, I thought…

“wouldn’t it make a cute Seashell Lamp to put on the patio to use on those

warm summer nights?”

I used shells collected during our trips to South Carolina.  (some even from the Isle of Palms)

Lamp Close Up 5992

Here’s what I used to make the DIY Seashell Lamp:        (*affiliate link)

Seashell Lamp Collage 2

The shade measures 4″ x 7″.

Directions:

  1. Clean mason the jar to remove all dirt, fingerprints and oil.  Dry with a coffee filter, paper towel, or lint-free cloth.
  2. Mask off a 1″ area around the mason jar with removable painters tape.
  3. Apply a heavy coat of etchall® etching crème to the masked area using the etchall® squeegee.  Leave etching crème on for 15 minutes.  After etching time has elapsed, use the squeegee to return the crème back into the original container for later re-use.
  4. Rinse etched surface with hot water to remove any remaining crème.  Remember to keep crème away from porcelain or ceramic tiles.
  5. Dry mason jar and apply the “relax” peel and stick stencil onto the middle of the first side.  Mask the sides of the stencil with removable painter’s tape.
  6. Using a stencil brush and the multi surface paint, fill in the open areas of the stencil.
  7. Carefully remove stencil and clean before stenciling on the other three sides of the jar.
  8. Fill Jar with sand and shells.
  9. Using the plastic sleeve template, trace onto a piece of burlap. Cut the burlap leaving a 1/2″ allowance around traced template.  Craft Confession:  I tried using a “stick it adhesive sheet” on the burlap first before cutting it out.  It didn’t work.  (see next step)
  10. Use spray adhesive to coat the back of the burlap.  Apply onto the lampshade and trim.
  11. Glue twine around edge of lampshade.

Optional:  The top of the shade is removable so I spray painted it black.

DIY Seashell Lamp 05959

The Lighten Up Kit is pretty easy to customize.  Lots of possibilities.

It comes with a self-illuminating lampshade with LED lights, template and instructions guide.

It uses 3 AA batteries so it’s portable and can be used almost anywhere.

The DIY Seashell Lamp was created for and sponsored by Etchall®.

Shop Your Fav Brands at Scrapbook.com

*Disclosure  This blog uses ads and affiliate links.  If you choose to make a purchase using one of the links, I receive a small commission (at no additional cost to you) that helps offset the costs of maintaining this blog.  Thanks for your support!
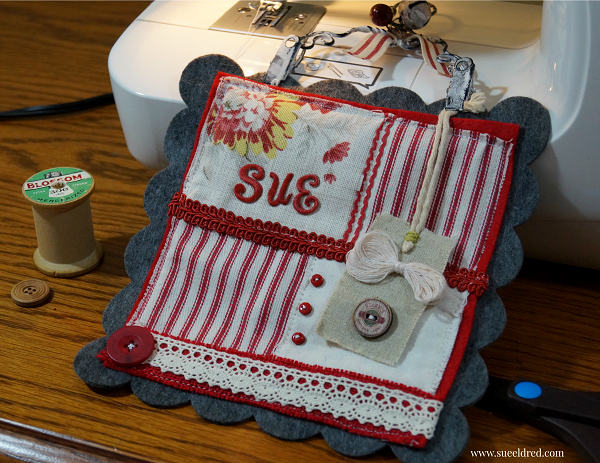
Stitched Sampler

Stitched Sampler

I hate throwing anything away that might possibly be used on a project later.

In an effort to make room and not become a hoarder,

I actually threw these little scraps of fabric away.   (It was hard, I love these prints.)

But…Only minutes later, while I was making a permanent home for my new sewing machine

that I got for Christmas,  (thanks Nick and Bonnie) I got the idea to make a stitched sampler.

What a great use for little pieces of fabric.

Now, bear in mind that this is my first real project on my new machine.

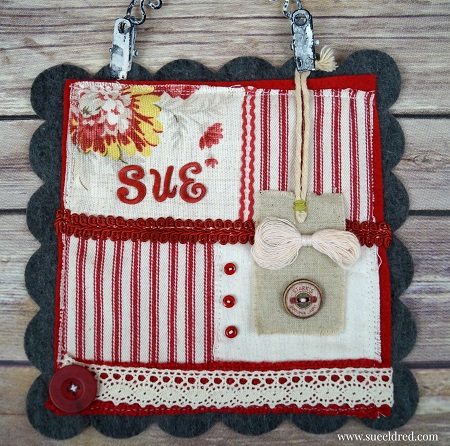
Stitched Sampler Close Up

I misted the iron-on embroidered letters from Joy SA and the white decorative trim with

Tattered Angels Ruby Slipper Chalkboard Mist Paint and stitched to my hearts desire.

I cut a large die-cut square out of premium gray felt using my Accu-cut machine.

I’m pretty please with the way it turned out.

Stitched Sampler 3584

This project was created for and sponsored by Joy SA.

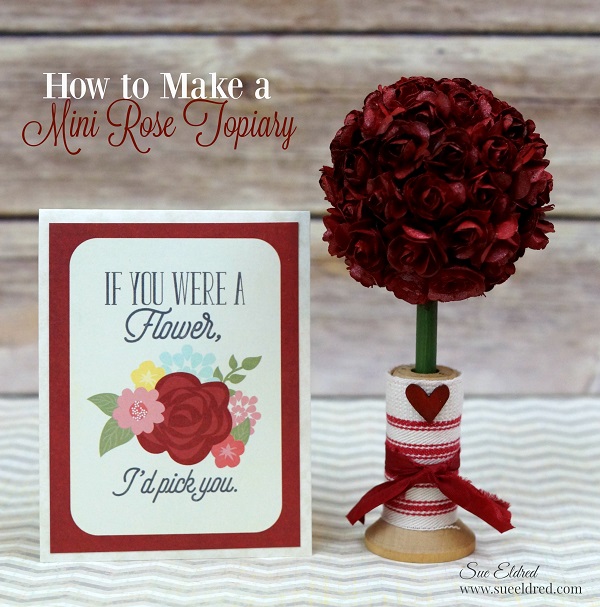
How to Make a Mini Rose Topiary

How to Make a Mini Rose Topiary 04034

Maybe it has something to do with my short stature, but, I have always had a thing for

miniatures.  My momma always told me “Good things come in small packages”.

(which I whole-heartily believed)

The Mini Rose Topiary is a project that can be easily adapted to make larger topiaries.

I just happen to like mine mini.

How to make a Mini Rose Topiary

How to make a Mini Rose Topiary

Here’s what I used:                                                                    (*affiliate link)


Directions:

  1. Spray Roses and small wood heart with the Mistable Paint.   Allow plenty of time to dry.
  2. Paint the 2″ Smoothfoam Ball  and the wood dowel with the green acrylic paint.
  3. Poke hole into the end of the 2″ ball.  Squirt a little glue in the hole and insert the painted dowel.
  4. Starting at the top of the ball.  Glue roses, one by one, onto the ball with a fast drying glue until covered.  After the rose ball is formed, you may want to go back and re-mist the flowers for additional coverage.
  5. Cover the wood spool with the ticking material and glue the end in place.  Tie a small piece of crinkle ribbon around the ticking and glue the wood heart on top.
  6. Insert rose topiary into the small wood spool.

TIP:  Try making a topiary using larger Smoothfoam balls and silk flowers inserted into a pail, vase or containers.

The Mini Rose Topiary was created for and sponsored by Smoothfoam™ The Crafter’s Foam.

"Painting

*Disclaimer:  This post uses ads and affiliate links.  If you choose to make a purchase using one of the links, I receive a small commission (at no additional cost to you) that helps offset the costs of maintaining this blog.  Thanks for your support!
 

add a little LOVE in the bathroom

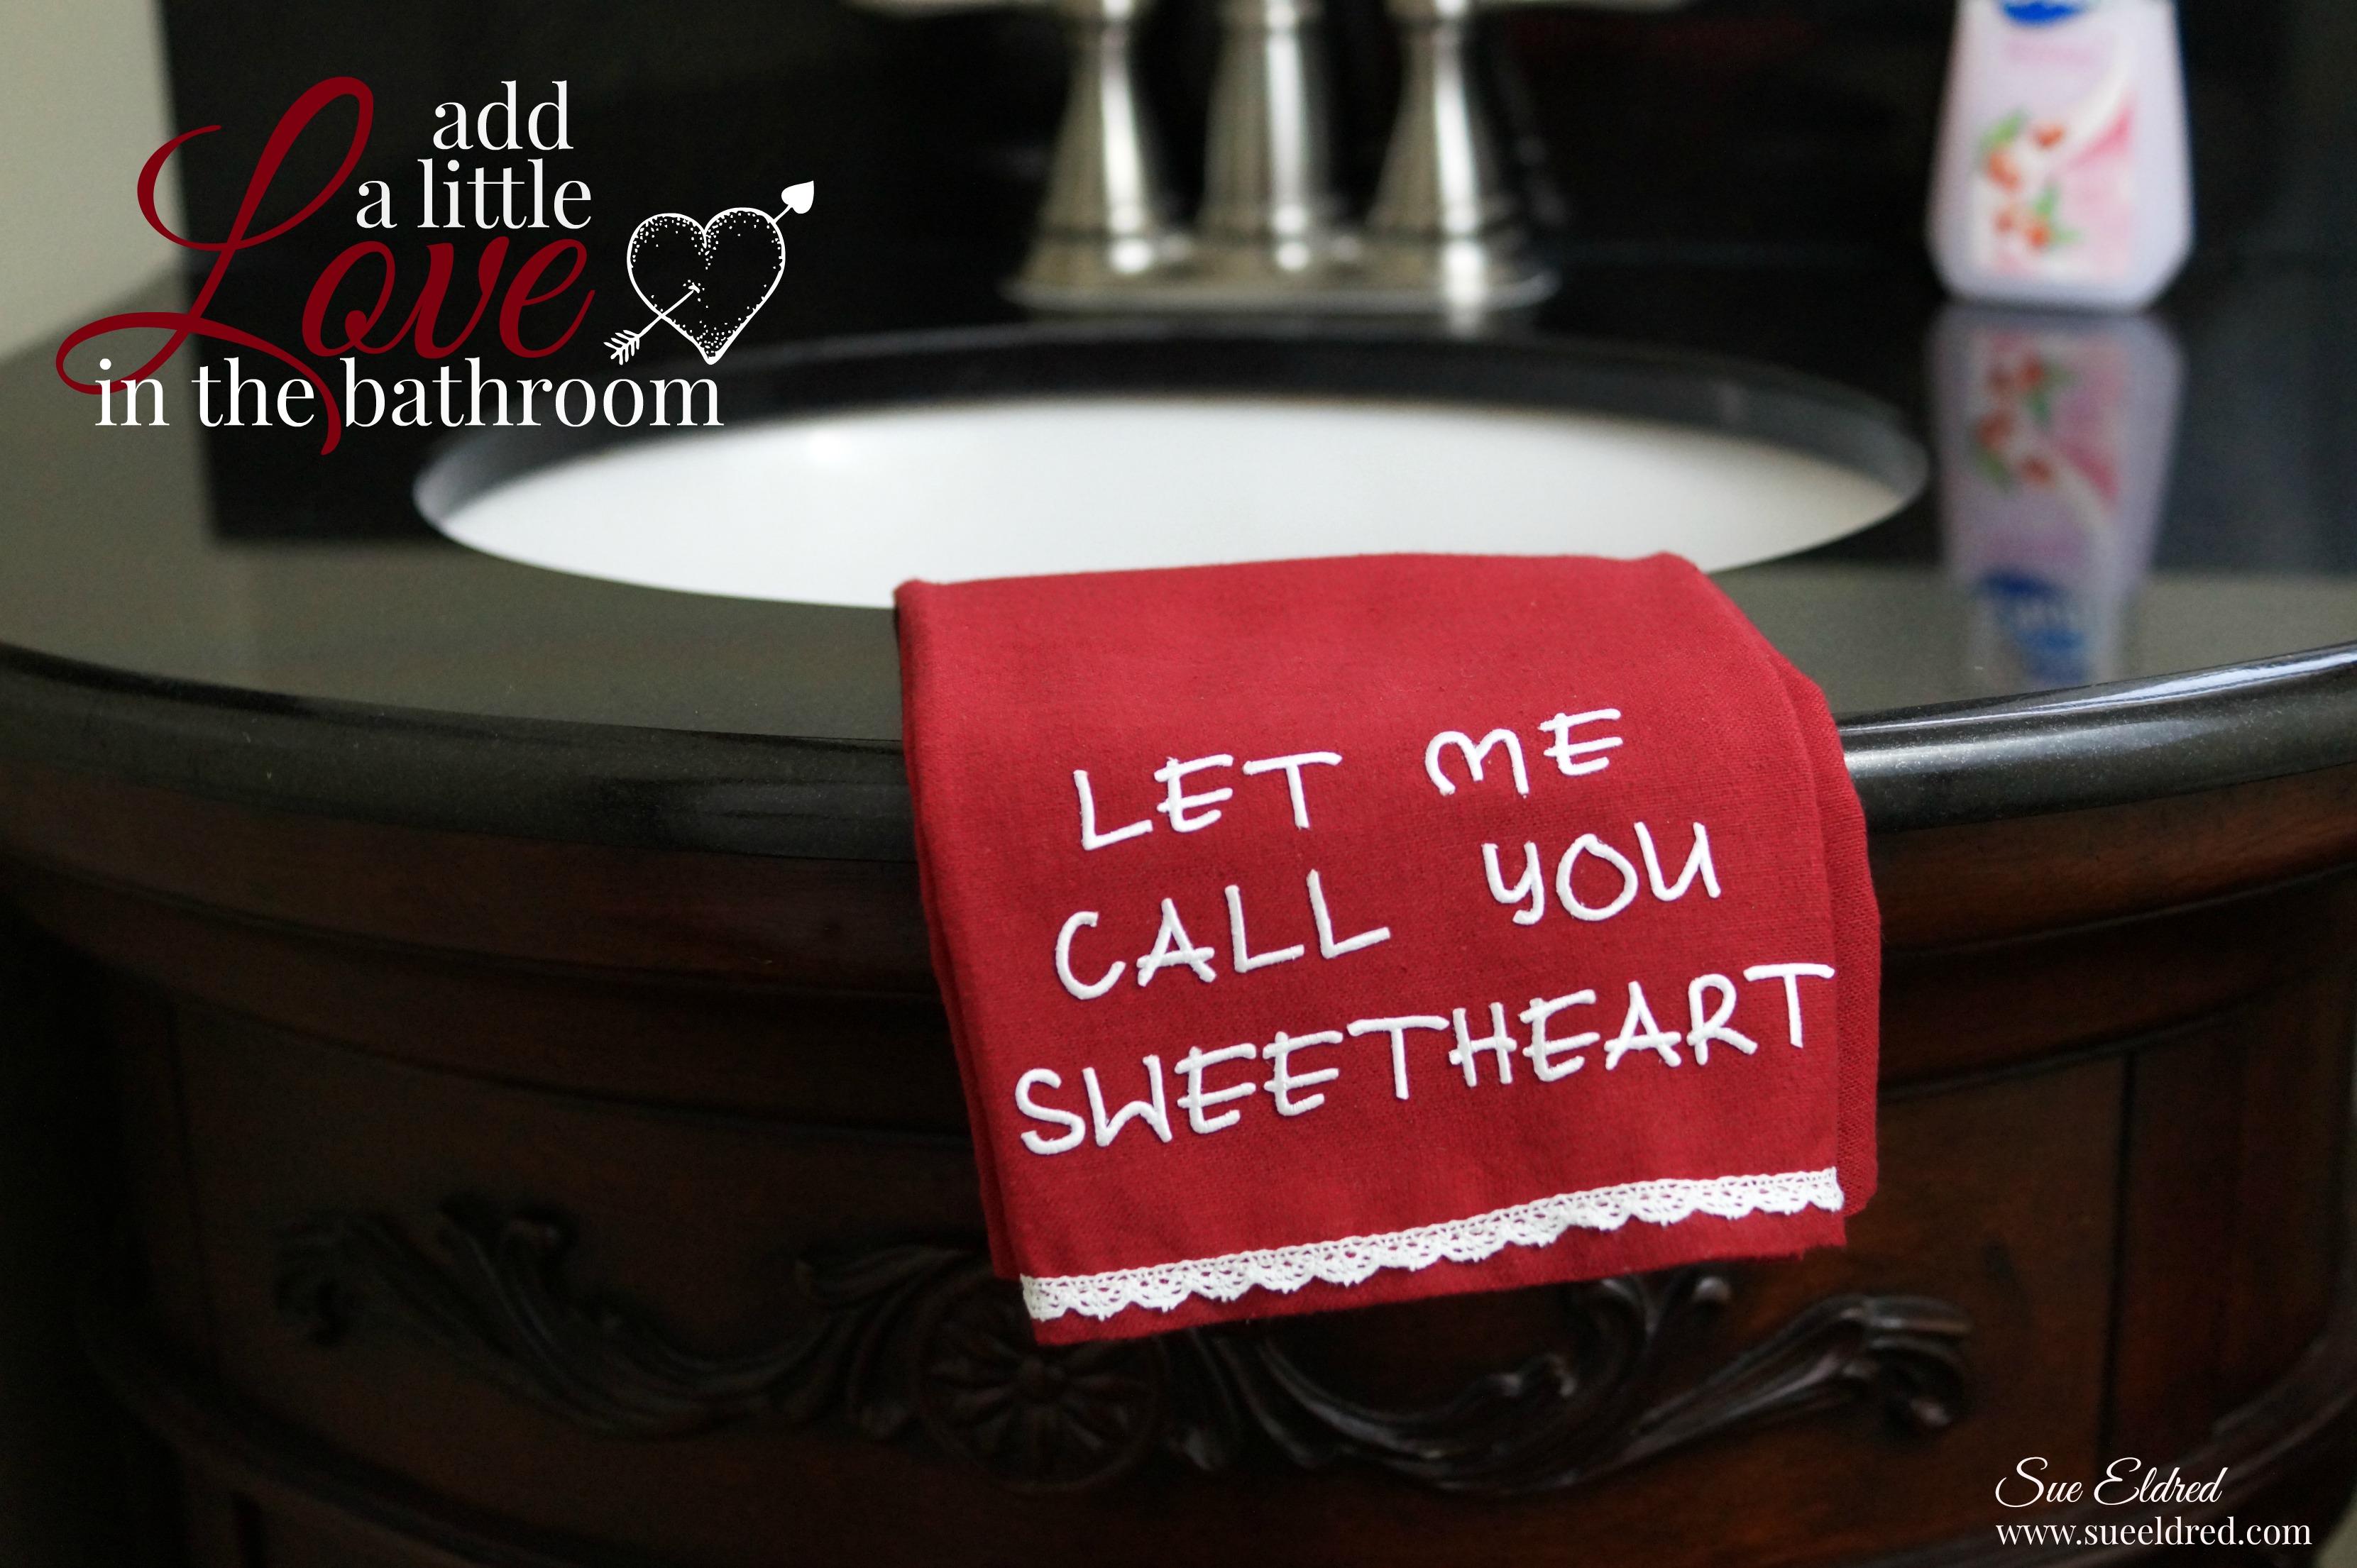
Add a little love in the bathroom 3442

When I was little, my Grandma B loved to sing the song “Let me Call You Sweetheart” to us kids.

It’s a sweet song endeared to my heart.

So… while decorating the house for Valentine’s Day, I thought I’d show my family a little love

by adding a cute embellished hand towel in the powder room.

A perfect way to let them how much they’re loved.

Let me call you sweetheart towel supplies

It’s easy! Use mini Joy embroidered letters to iron-on your message and then sew on a simple lace trim.


This project was created for and Sponsored by Joy S.A. Inc.

DIY No Sew Pillows to Dye for…

A Pillow to Dye For

Recently, I participated with a group of Designers in a Manufacturer Challenge sponsored by

Fairfield World the makers of Pillow Forms, Batting, Poly-fil®… and a whole lot more.

After a little good natured trash talking between the designers, the challenge was dubbed the

“Pillow Fight” and with that it was game on.

Not being much of a seamstress I knew I had to take it in another direction.

Hopefully, what I lack in sewing skills I’m making up for in quantity and possibly inspiration

for other non-sowers like me.

If you happened to see my post, “Tie-Dying with Nick” then you’ll know I’m on a little bit

of a tie-dying kick.  (why stop now?   oh… and make sure to check out the bonus project at the end.)

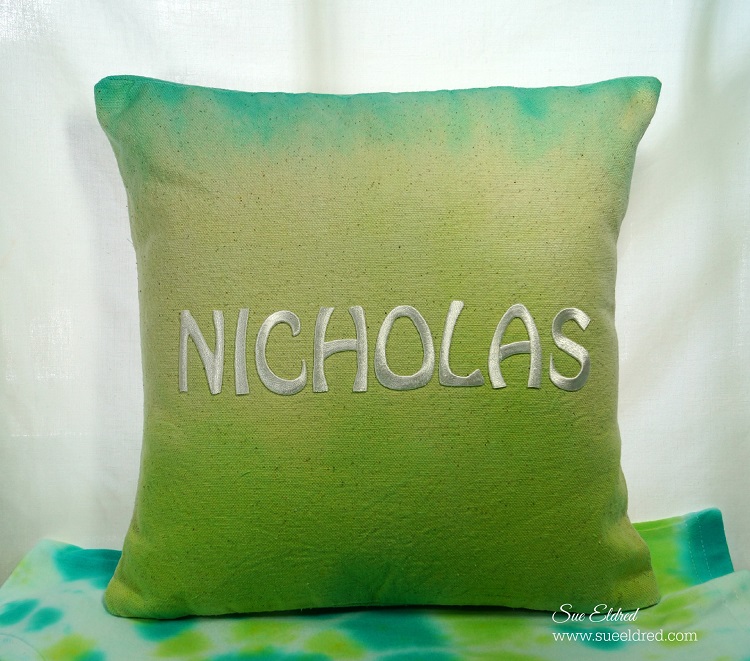
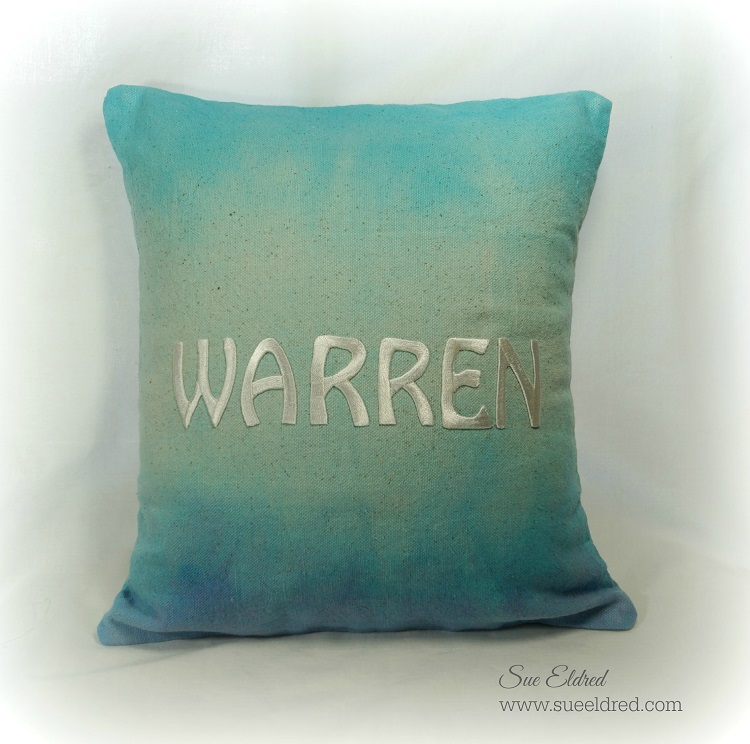
Nick's Tie Dye Pillow 6430Warren's Pillow

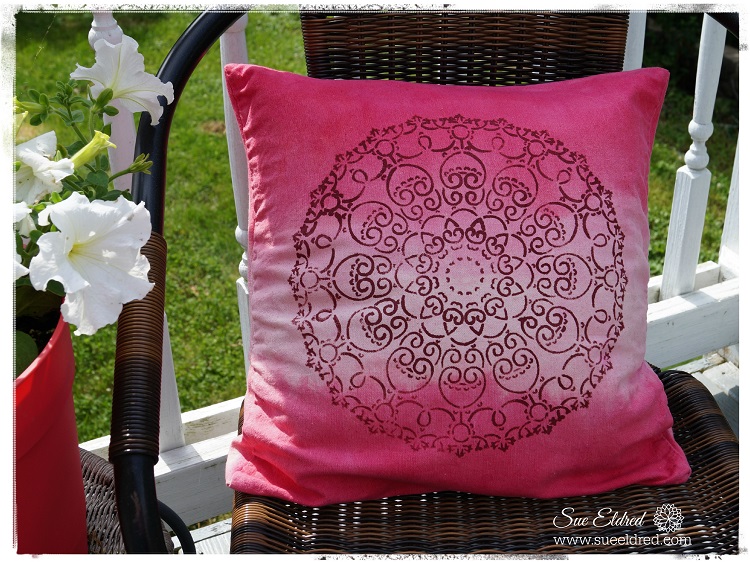
Here are a couple of pillows I made for my grandsons using a one-step tie-dye kit

and the Ombre Technique.  (see instructions below)

It was such a fun and easy project that I let my grandson in on the fun.

Thanks to canvas pillow squares and pillow forms there is no sewing involved.

(The red pillow above also uses the ombre Technique only with one color of dye.)

Iron-On embroidered letters allowed me to easily personalize the pillows for the boys.

Nick and the Ombre Technique

For my No Sew Pillows I used:                                                                  (*amazon affiliate links)

These are the instructions included with the Tulip dye kit.

  1. Apply dye.
  2. Dip brush into dye and apply.
  3. Dip brush into water and apply.
  4. Cover dyed fabric with plastic wrap to keep damp.
  5. Let set for 6-8 hours or longer for intense colors.
  6. Rinse well with water until excess dye is removed.
  7. Fill washer to “large load” setting with hottest water suitable for fabric and a small amount of laundry soap.  Wash and dry separately.  Wash separately for the first few washes.

Directions for Stenciling:

The pattern on the Red Pillow was made using the 12″ Doily Stencil*.

  1. Lay protective paper layer inside the canvas pillow square before stenciling.
  2. Center and tape stencil onto pillow with removable painter’s tape so that the stencil won’t move.
  3. Stenciling is a “dry” brush technique. Using a stencil brush, dip just the tip of your brush into the paint. Tap off excess paint before applying to prevent the paint from seeping under the edges of the stencil.
  4. Apply paint with stencil brush in a straight up and down motion called stippling.
  5. Stuff pillow with pillow form or Poly-fil®.

And for an added bonus… Tie Dyed Socks!!!  (Someone stop me)

Tie Dyed Socks

This project was sponsored by Fairfield World, Canvas Corp Brand, Tulip Brand and DecoArt.

*DisclaimerThis post uses ads and affiliate links.  If you choose to make a purchase using one of the links, I receive a small commission (at no additional cost to you) that helps offset the costs of maintaining this blog.  Thanks for your support!

Join Amazon Kindle Unlimited 30-Day Free Trial*

Christmas Ornaments from Old Kitchen Hardware

Old Kitchen Hardware

I picked up a bag of old kitchen hardware for 50¢ at a Garage Sale.

I can’t resist a good bargain and knew I might even use them someday.

After disassembling and using them on a couple of projects,

I put the rest in a container high on the shelf for another day.


I ran across them again the other day and had an idea…

How would they look with cream spray paint?

I knew I was onto something and let the idea marinate in my head for a day or two.

This is what I came up with and I’m pretty happy with the results.

Shabby Chic Orn 86

For my Ornament:

  • Paint the base plate from old kitchen hardware with cream spray paint.
  • I added silver around the edge using my finger tip and paint from a  Chisel Point Pen Tip Calligraphy Paint Marker, Silver*    (affiliate link)
  • Remove the small wooden base from a small bottle brush tree.  With small pliers bend the remaining wire tip up into the tree.
  • Cut the back of the bottle brush tree to make it flat.
  • Glue tree in place with Beacon Adhesives Zip Dry.*
  • For a little extra sparkle, I rubbed clear glitter glue into the bristles of the tree.  Glue pearl beads and place directly into tree.
  • On the top of the ornament I used a piece cream twill ribbon with an inexpensive plastic star ornament on a silver jump ring.  Tied it in place with a piece of burlap twine and small cream button.
  • I added a silver jingle bell that I painted and distressed with sandpaper and tied on with a satin ribbon.
  • Place the word sticker onto a thin piece of chipboard, trim around sticker, lightly sand the edges for a distressed look and glue into place.

Berry Ornament 91

Here’s a simpler idea.  I love this one too.

I bet your going to start rummaging through that junk drawer in the garage and see what you can find.

Shop Amazon Scrapbooking Supplies*

*Disclaimer:  This post uses ads and affiliate links.  If you choose to make a purchase using one of the links, I receive a small commission (at no additional cost to you) that helps offset the costs of maintaining this blog.  Thanks for your support!

Updated… A New Look for an Old Snowman

Updated Sock Snowman

Last year at my Holiday Workshop we made cute little snowmen out of socks.

They were a big hit.

But… one thing, I noticed when I pulled mine out again this year,

was that they looked a little misshapen.  More like a kidney bean than a snowman.

That was because I used rice for the entire body.  (the rice settled)

My updated snowmen still uses rice in the bottom, it now has fiberfill in the top

so that it doesn’t loose its shape.

I also decided my Snowman was cold, so I re-purposed an old sock for his sweater.

For more Making More Sock Snowmen Ideas you can find them here.

Here’s What You’ll Need:                    (*affiliate Links)

Here’s how I made my Snowman:

  1. Tea dye a new white sock, crew length or bigger.  Or if you have boys you could use one of their dingy ones.  (It’s better not to use a sock with the grey toe and heel.)
  2. Cut the top of the sock off, right around the heel.  (save that for the hat.)
  3. Turn the sock inside out and attach a rubber-band tightly around the top of the sock.  Because rubber bands wear out with time, I added a good squirt of Fabri-Tac Permanent Adhesive* (*affiliate link) in and around the rubber band.  (I left the rubber band on)
  4. Turn the sock right side out and fill sock about 1/2 way with rice.
  5. Fill the remaining portion of the sock with Fairfield Poly-Fil Premium Polyester Fiber*
  6. Use an additional rubber-band to close the sock.  Again, I re-enforced the rubber band with glue.
  7. Tie a piece of twine around sock to create the head.
  8. I used mini black square brads for his eyes, the tip of a bamboo skewer colored orange for his nose and a simple sewn black thread for his mouth.
  9. I used some paper craft sprays to add color to the toe of the sock.  I tied the tip with a piece of red and white twine and finished with a bow.  Roll the edge to create a cuff.  I glued my hat to the top of my snowman with Fabri-Tac Permanent Adhesive*(*affiliate link)
  10. Dress with Snowman with part of an old sock.  Add a couple of buttons for added detail.  A  fringed piece of fabric works great for the scarf.

Shop Your Fav Brands at Scrapbook.com

Disclaimer:  This blog uses ads and affiliate links.  If you choose to make a purchase using one of the links, I receive a small commission (at no additional cost to you) that helps offset the costs of maintaining this blog.  Thanks for your support!

Give the Gift of Amazon Prime*