How to make a Mandala Suncatcher using a Simple Reverse Paint Technique on Acrylic
Are you looking for a fun and easy project to make this summer
that both kids and adults will enjoy.
The Mandala Suncatcher is an easy project that uses a reverse paint technique,
paint markers, and StyleTechCraft vinyl.
![]()
“This is a sponsored post. As a member of the StyleTechCraft Design Team I have been provided product and compensation in exchange for my creative ideas. The views and opinions are my own.

Materials Used: (*affiliate links)
- 4″ Acrylic Circle Tag with Hole*
- StyleTechCraft Black Glossy Vinyl*
- StyleTechCraft Vinyl Transfer Tape*
- StyleTechCraft Vinyl Tools*
- DecoColor Paint Markers (Marvy Uchida)*
- Silhouette Cameo Electronic Die Cutting Machine*
- Mandala SVG Cut File from The Silhouette Store
- Gold and White Cotton Twine*

StyletechCraft products brought to you by ATSM Craft*
*Disclosure: This blog uses ads and affiliate links. If you choose to make a purchase using one of the links, I receive a small commission (at no additional cost to you) that helps offset the costs of maintaining this blog. Thanks for your support!
Directions:
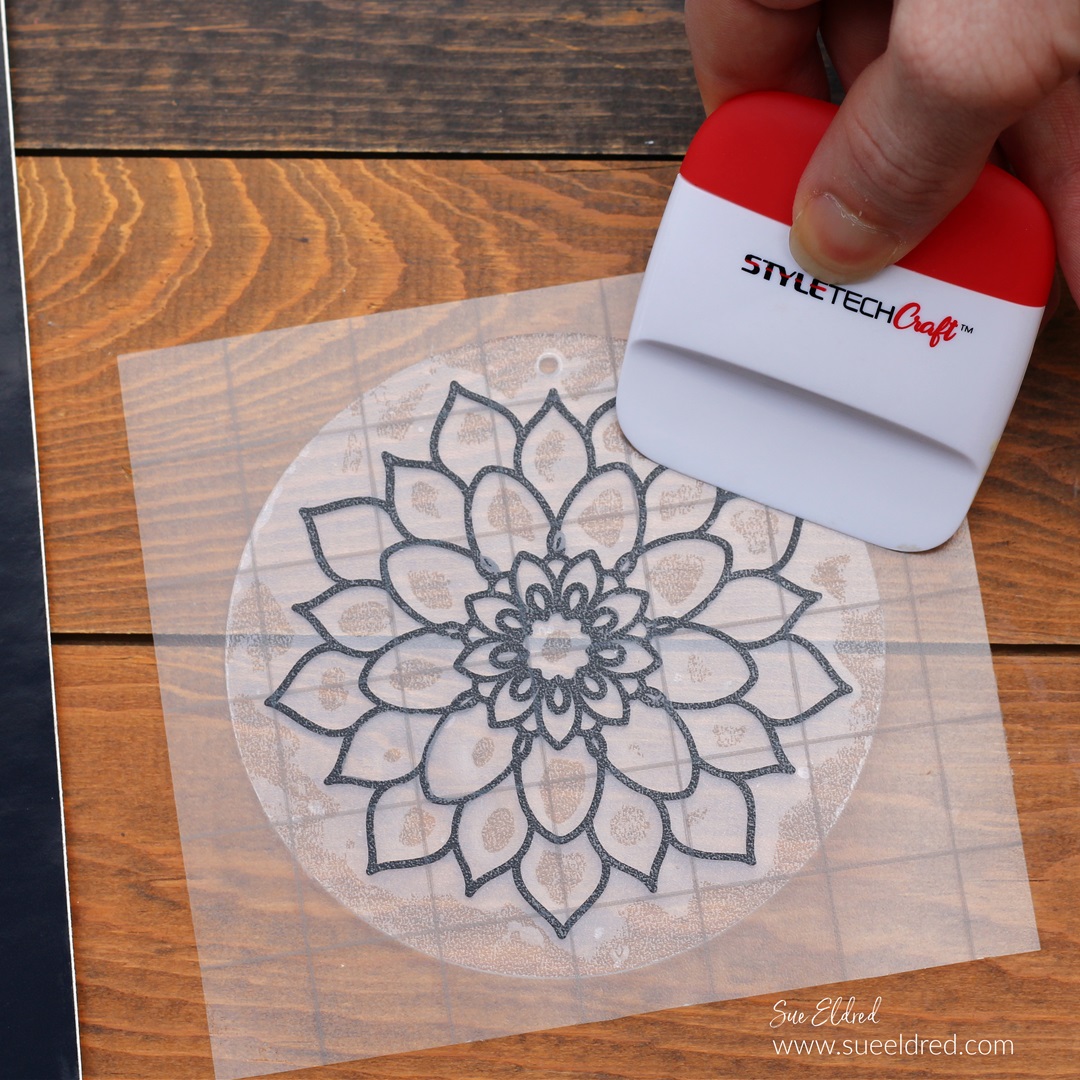
- The mandala design was cut out of black glossy adhesive vinyl using a Silhouette Cameo Electronic Die Cutting Machine*.
- After the design has been cut, remove the excess vinyl in and around the design using a vinyl weeding tool*.
- My acrylic circle* had a protective coating on both sides. Remove the protective layer from one side of the circle. Place vinyl transfer paper over the mandala design. Rub over the design using a vinyl scraper tool to help the vinyl cling to the transfer paper.
- Place the transfer paper with the mandala design centered on the acrylic circle.
- Gently rub over the design and remove the Vinyl Transfer Tape*.

- Turn the acrylic circle over.
- Remove the protective layer on the back of the circle.
- You will do a reverse painting technique on the back of the circle.
- Starting in the center of the design, color using the paint markers.

- Make sure to color to the edge of the lines and get the colors as close as possible.
- Here is the back of the circle with the mandala design colored in.

- I added a gold edge to the suncatcher using a DecoColor Gold Calligraphy Pen*. (I think it helps the design stand out.)
- The best part of the reverse paint technique is that when you flip the circle back over, you’ll have crisp black lines.
- Add gold and white twine to the top of the acrylic circle to hang.
A reverse painting option… for those who don’t have an electronic die-cutter would be to trace a pattern onto the acrylic before painting. (see below↓)

You can see the original Reverse Glass Painting Technique with DecorColor Markers post here.