
Mixed Media Made Simple
In the past, I was intimidated at the thought of doing a Mixed Media project.
I was intrigued but intimidated.
After a few attempts, I found that Mixed media doesn’t have to be intimidating
if you break it down into a few simple steps.
What is Mixed Media?
Mixed Media is a visual art that uses more than one medium or material. Two common examples of mixed media art are assemblages and collages. Different materials include cloth, paper, paint, wood, and found objects.
Here’s the 4 basic steps I use:
- prep canvas
- create background
- add dimension
- composition
When it comes to Mixed Media, I am still a novice. The steps I use are mere suggestions.
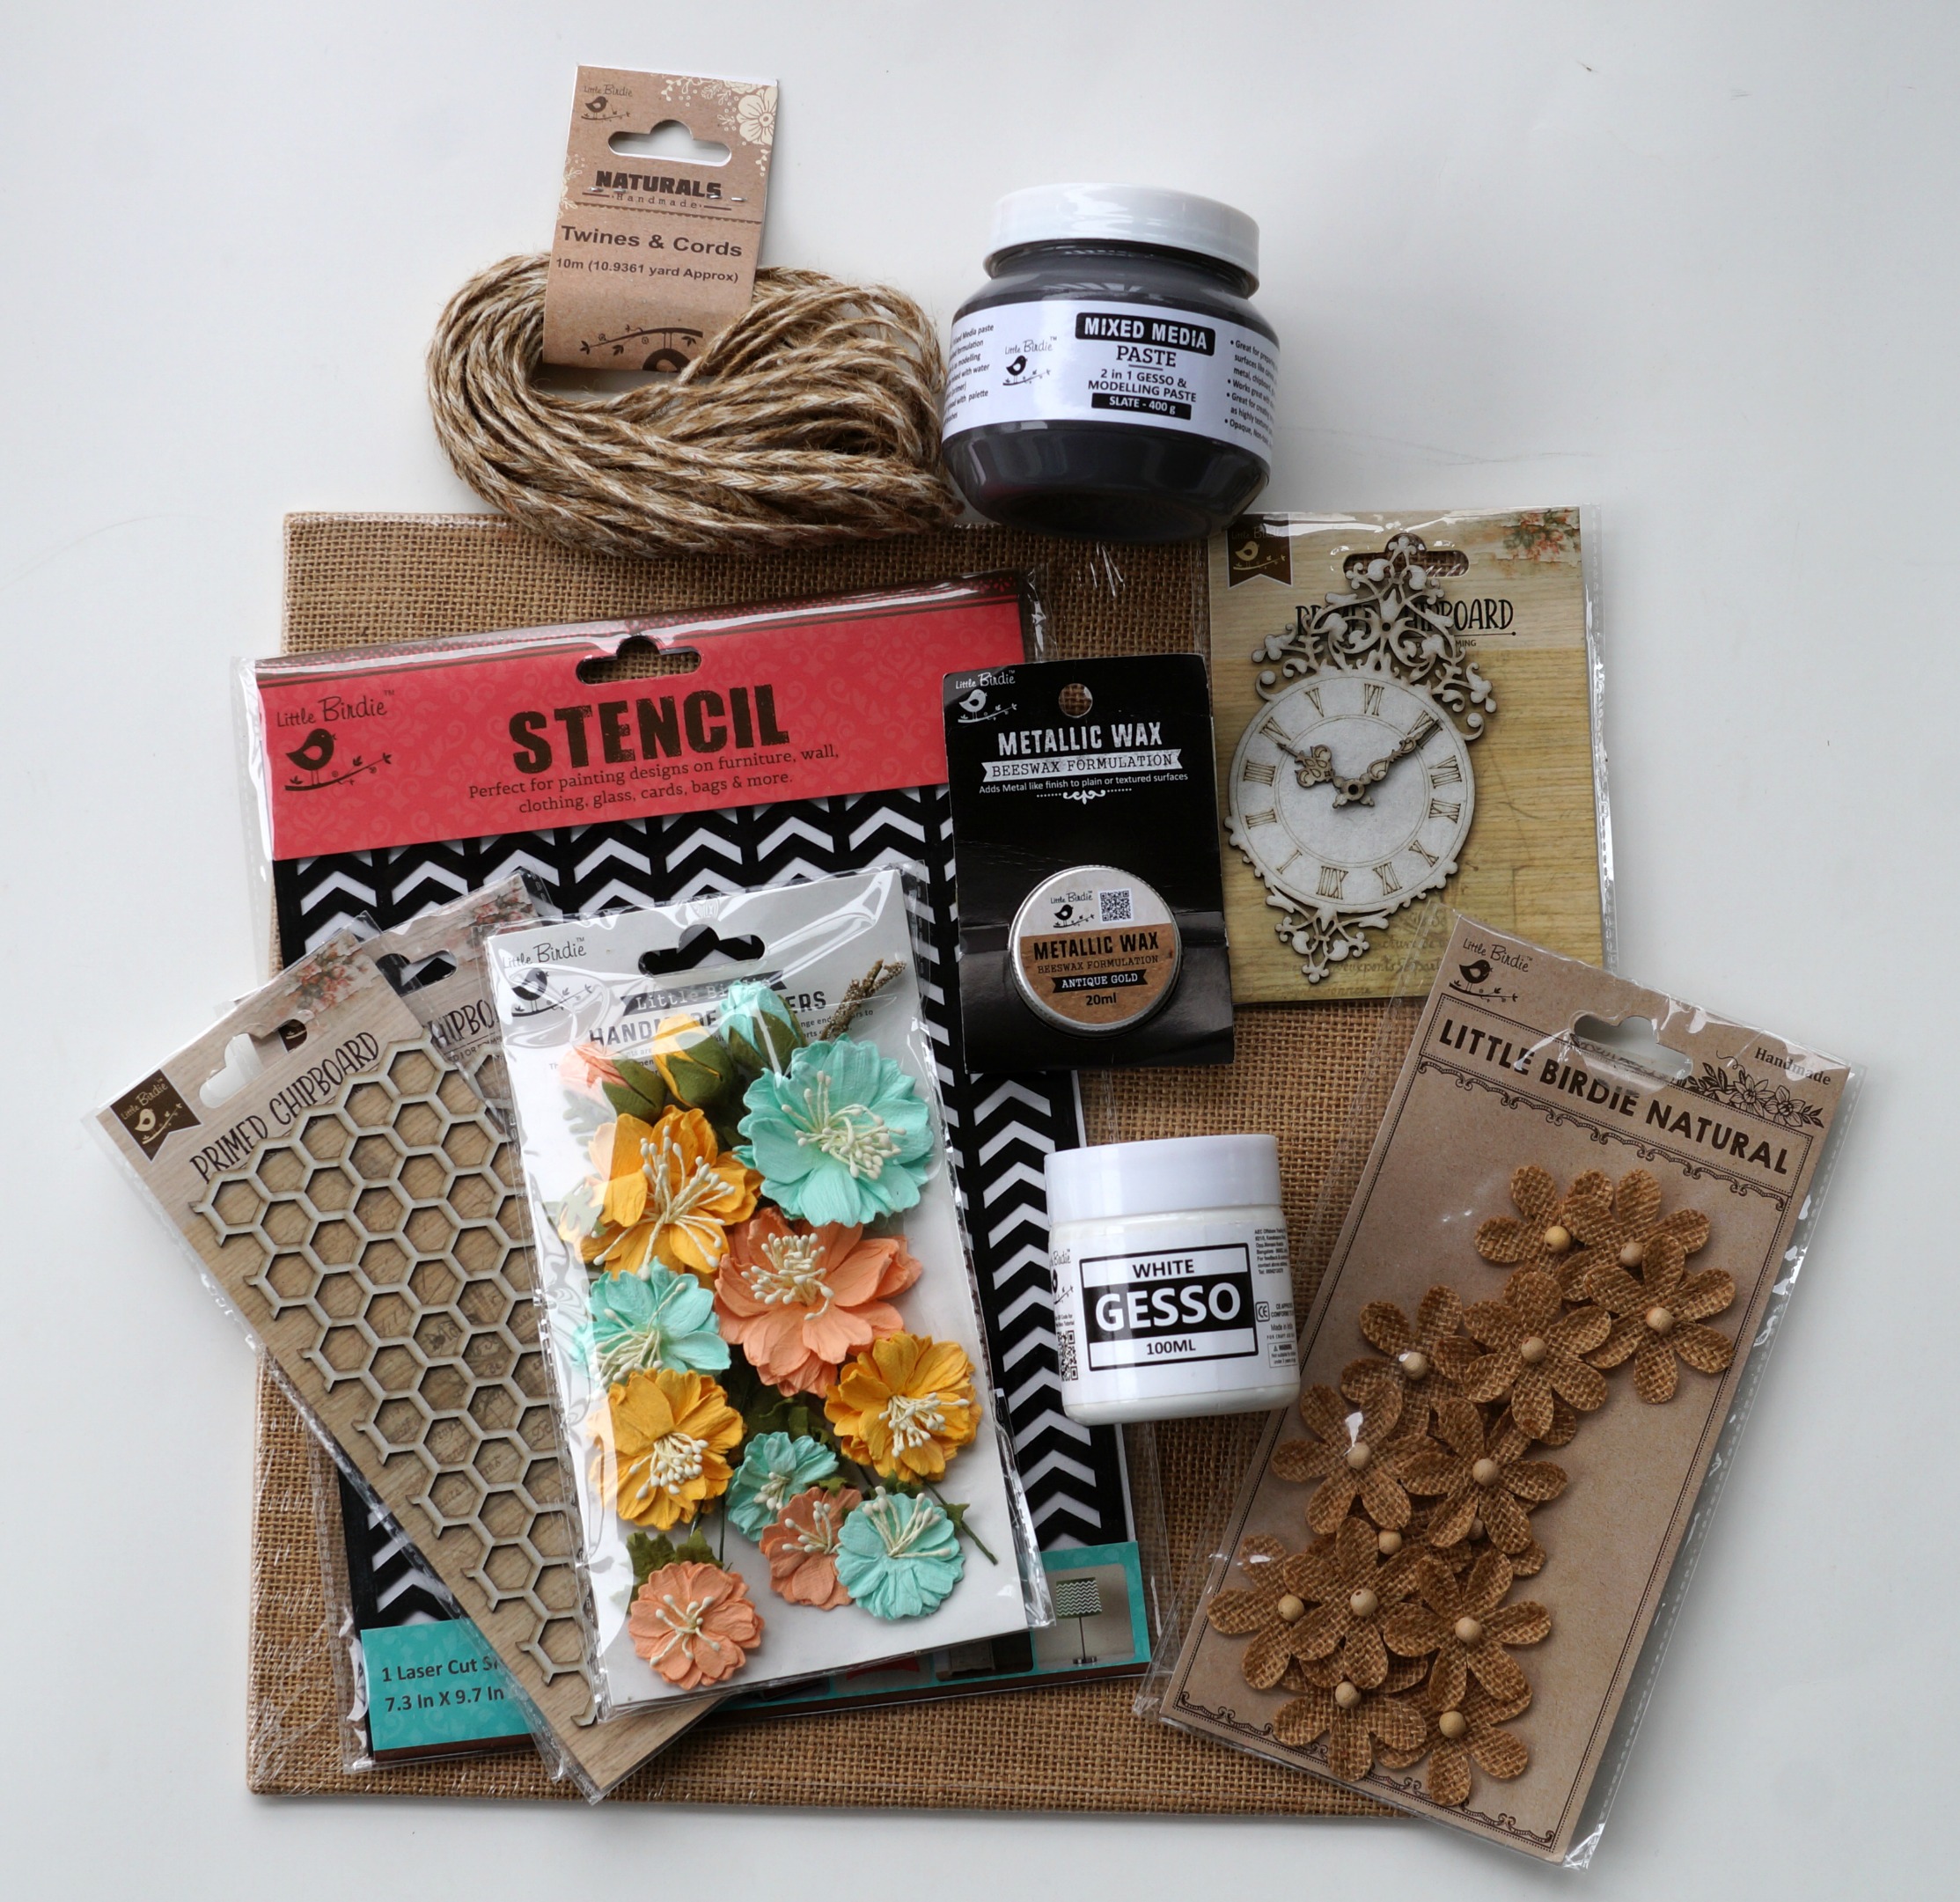
This month, I got the opportunity to work with Little Birdie Crafts in a Blog Hop with fellow designers of the Designer Craft Connection. Little Birdie Crafts has a great selection of handmade flowers, chipboard pieces, stencils, paper and so much more. Right now they have a great sale going on, make sure to check out the Little Birdie Crafts online store.
![]()
These are the Little Birdie Crafts products used:
- 12 x 12 Burlap Art Board (CR73782)
- White Gesso (CR75625)
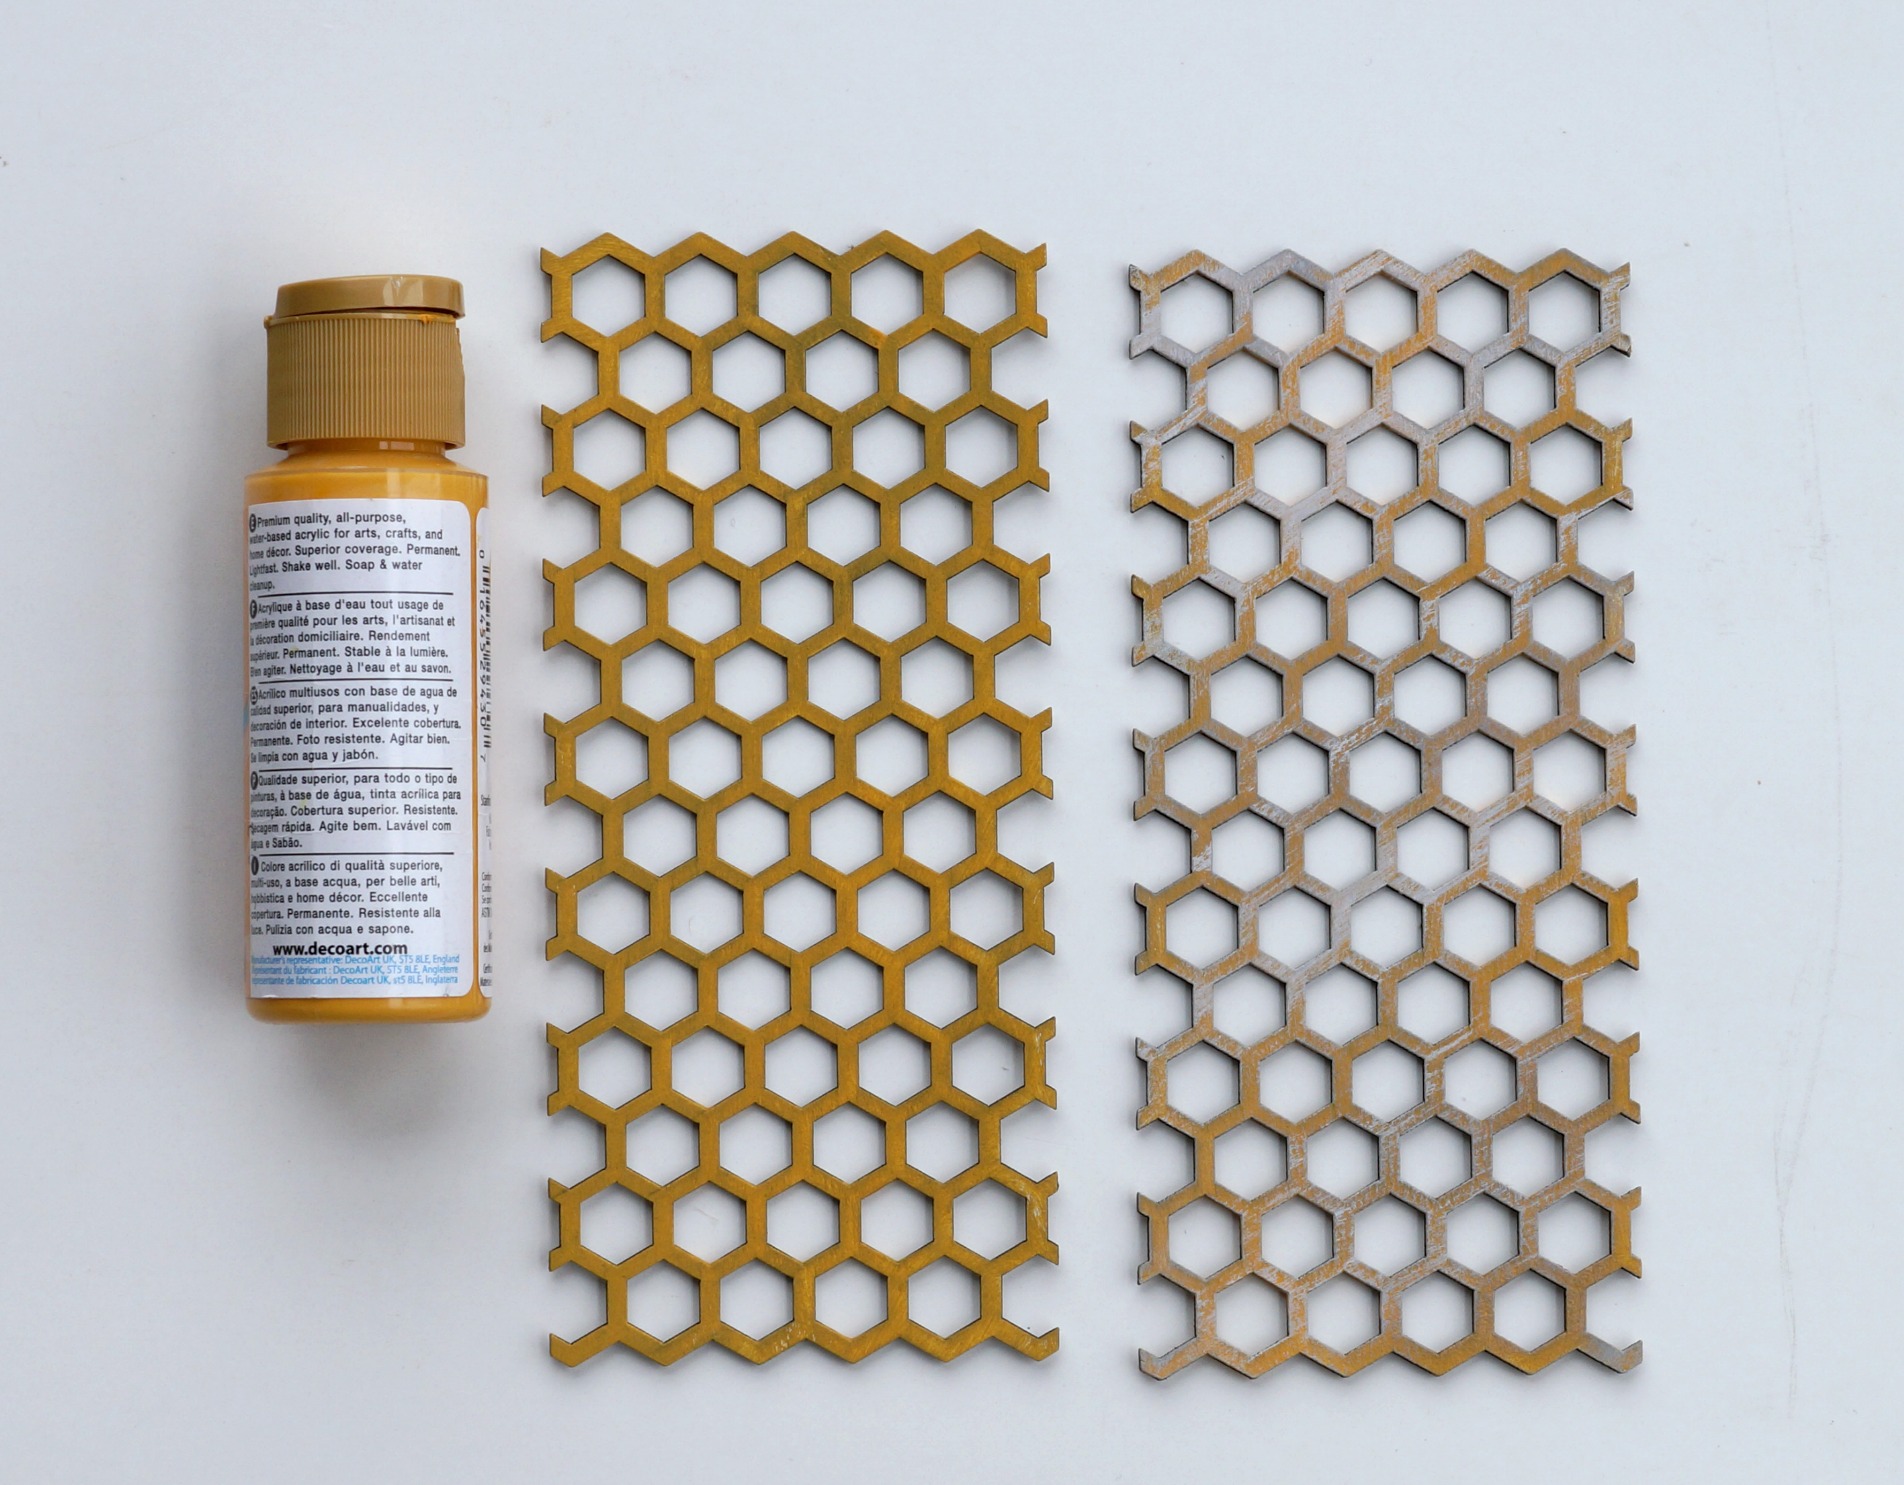
- Antique Gold Metallic Wax (CR79830)
- Mixed Media Paste-Slate (CR79374)
- Natalie Pastel Flowers (CR70092)
- Chipboard Ornate Clock (CR26249)
- 2-Chipboard Honey Comb (CR56011)
- Chevron Stencil (CR64149)
- Jute Braided Twine (CR82268)
Additional Products Used: (*affiliate link)
- Palette Knife*
- Rapidfuse Adhesive*
- Acrylic Paint: White*
, Coral*
, Marigold*
, Aqua*
- Scrabble Tile Holder*
- Tim Holtz Distress Ink Pad, Vintage Photo*
- Ink Blending Tool*
- Vintage Lace
- Mod Podge*
- Removable Painter’s Tape*
- Graphic 45 Garden Goddess 6″ x 6″ paper pad
- Small Heart Die
- Paint Brush
- Chipboard
*Disclosure: This is a sponsored post. I have been provided product in exchange for my creative ideas. The views and opinions are my own. This blog uses ads and affiliate links. If you choose to make a purchase using one of the links, I receive a small commission (at no additional cost to you) that helps offset the costs of maintaining this blog. Thanks for your support!
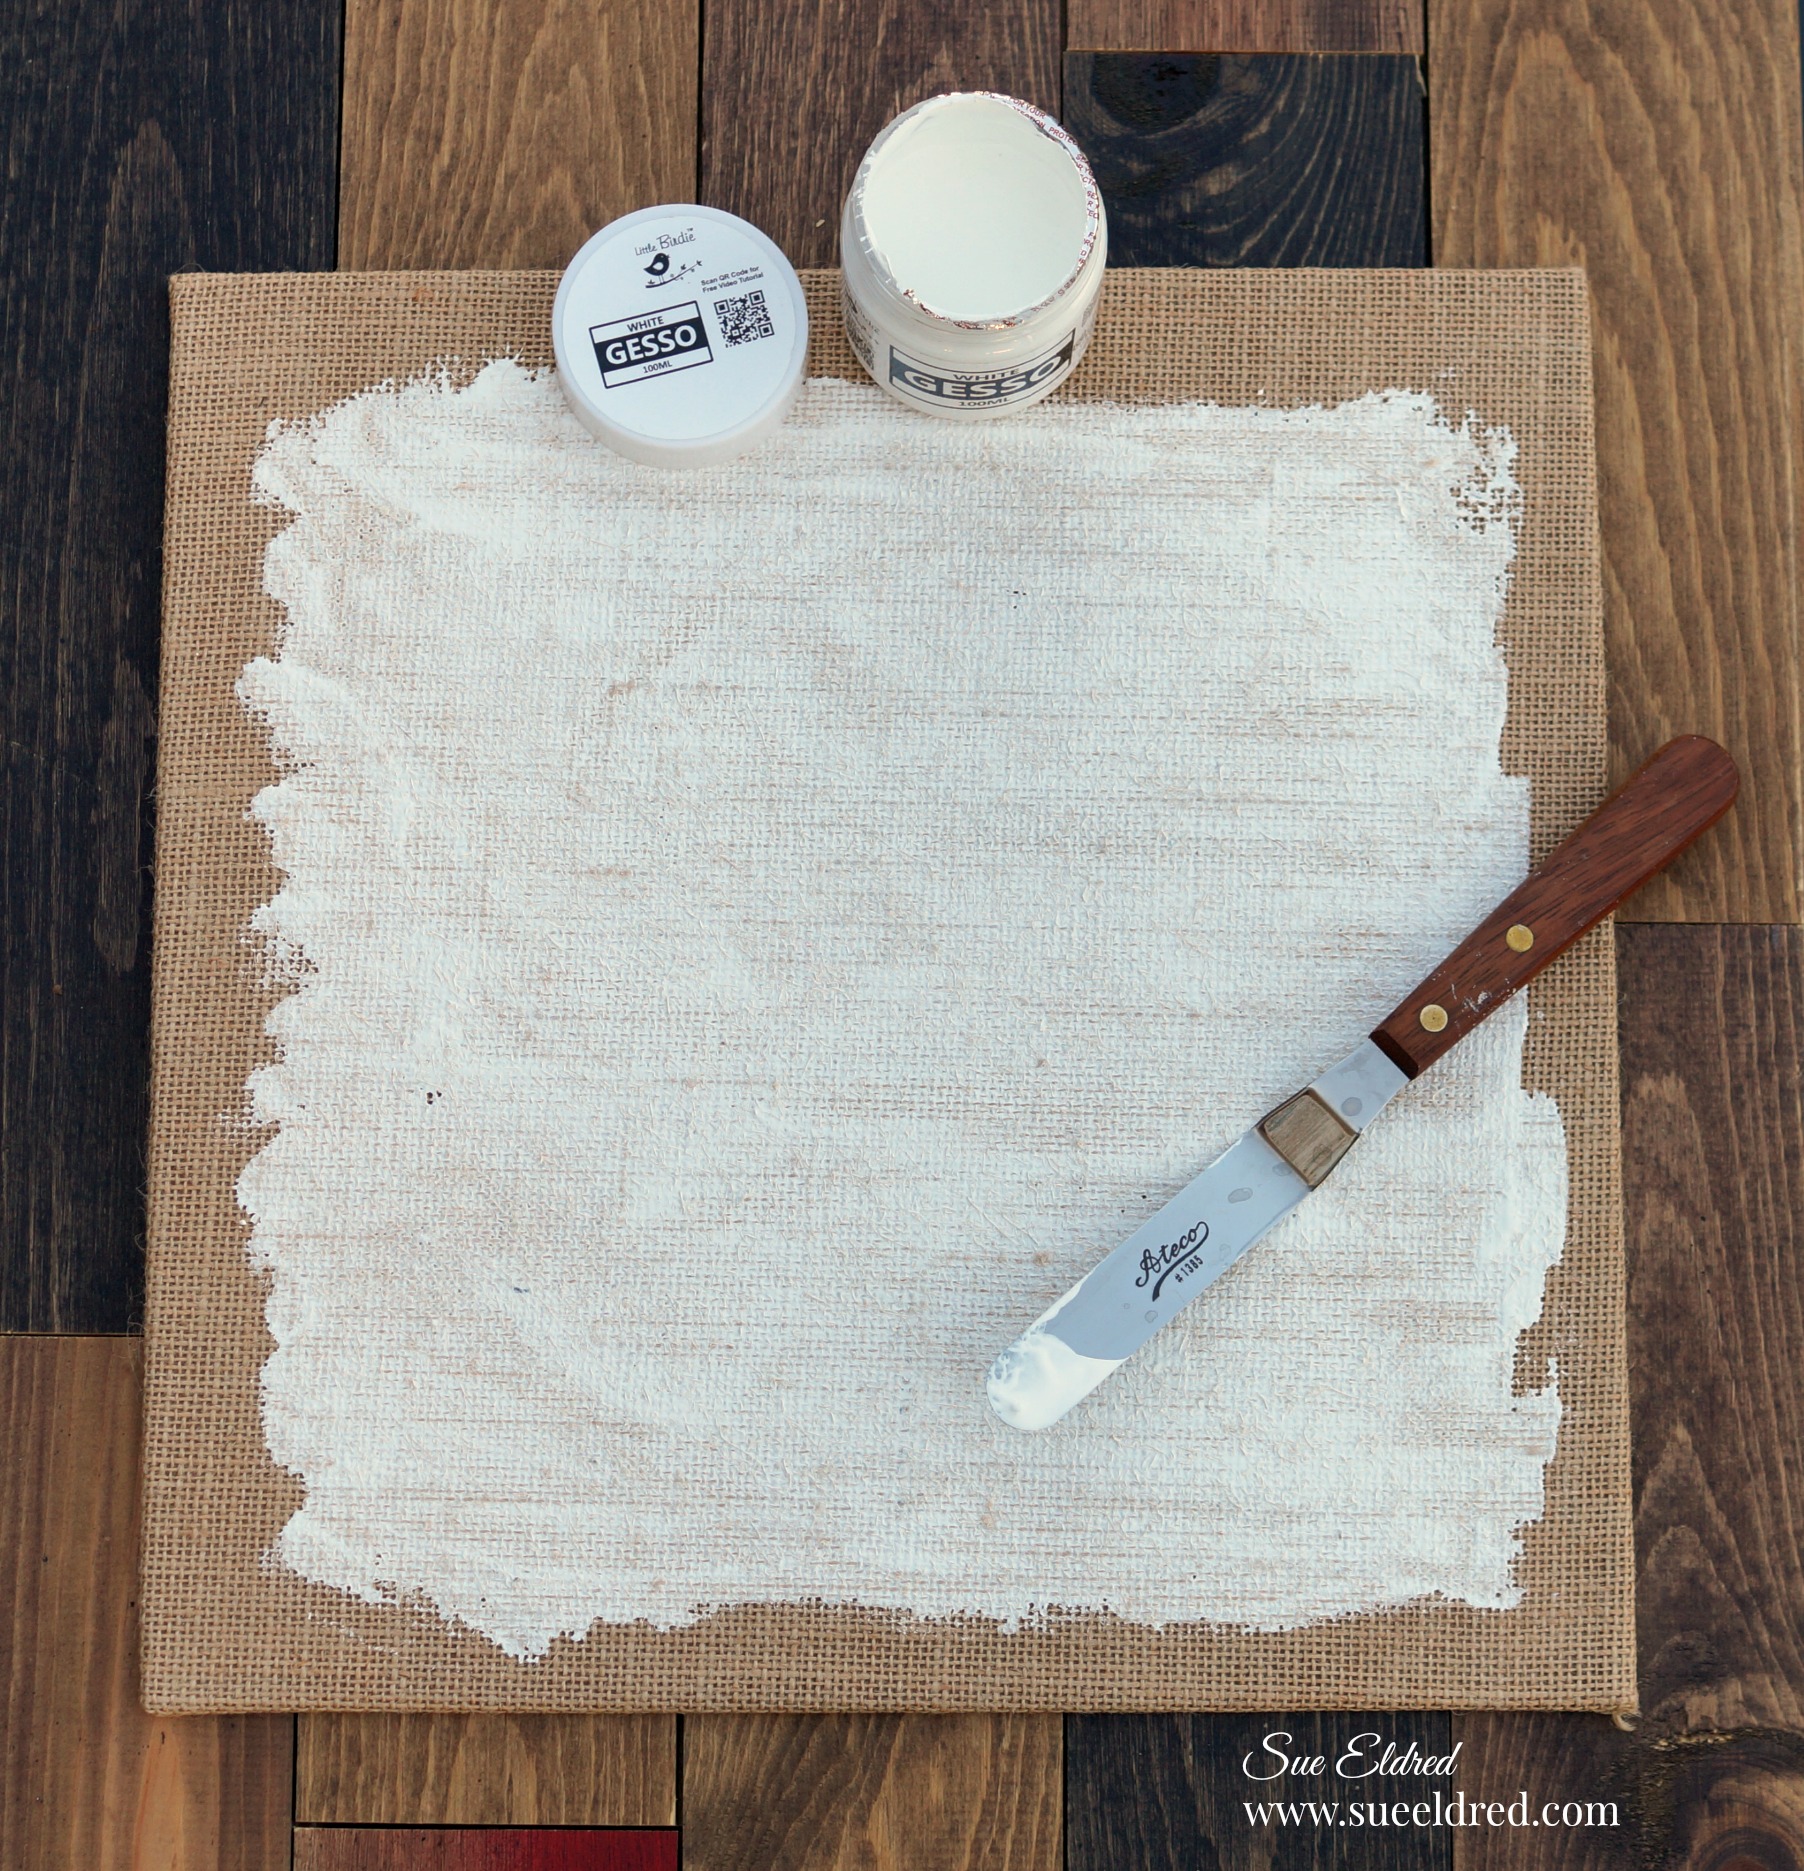
Step One 1
- Prep burlap canvas with gesso using a palette knife or paintbrush to prepare the surface for paint.
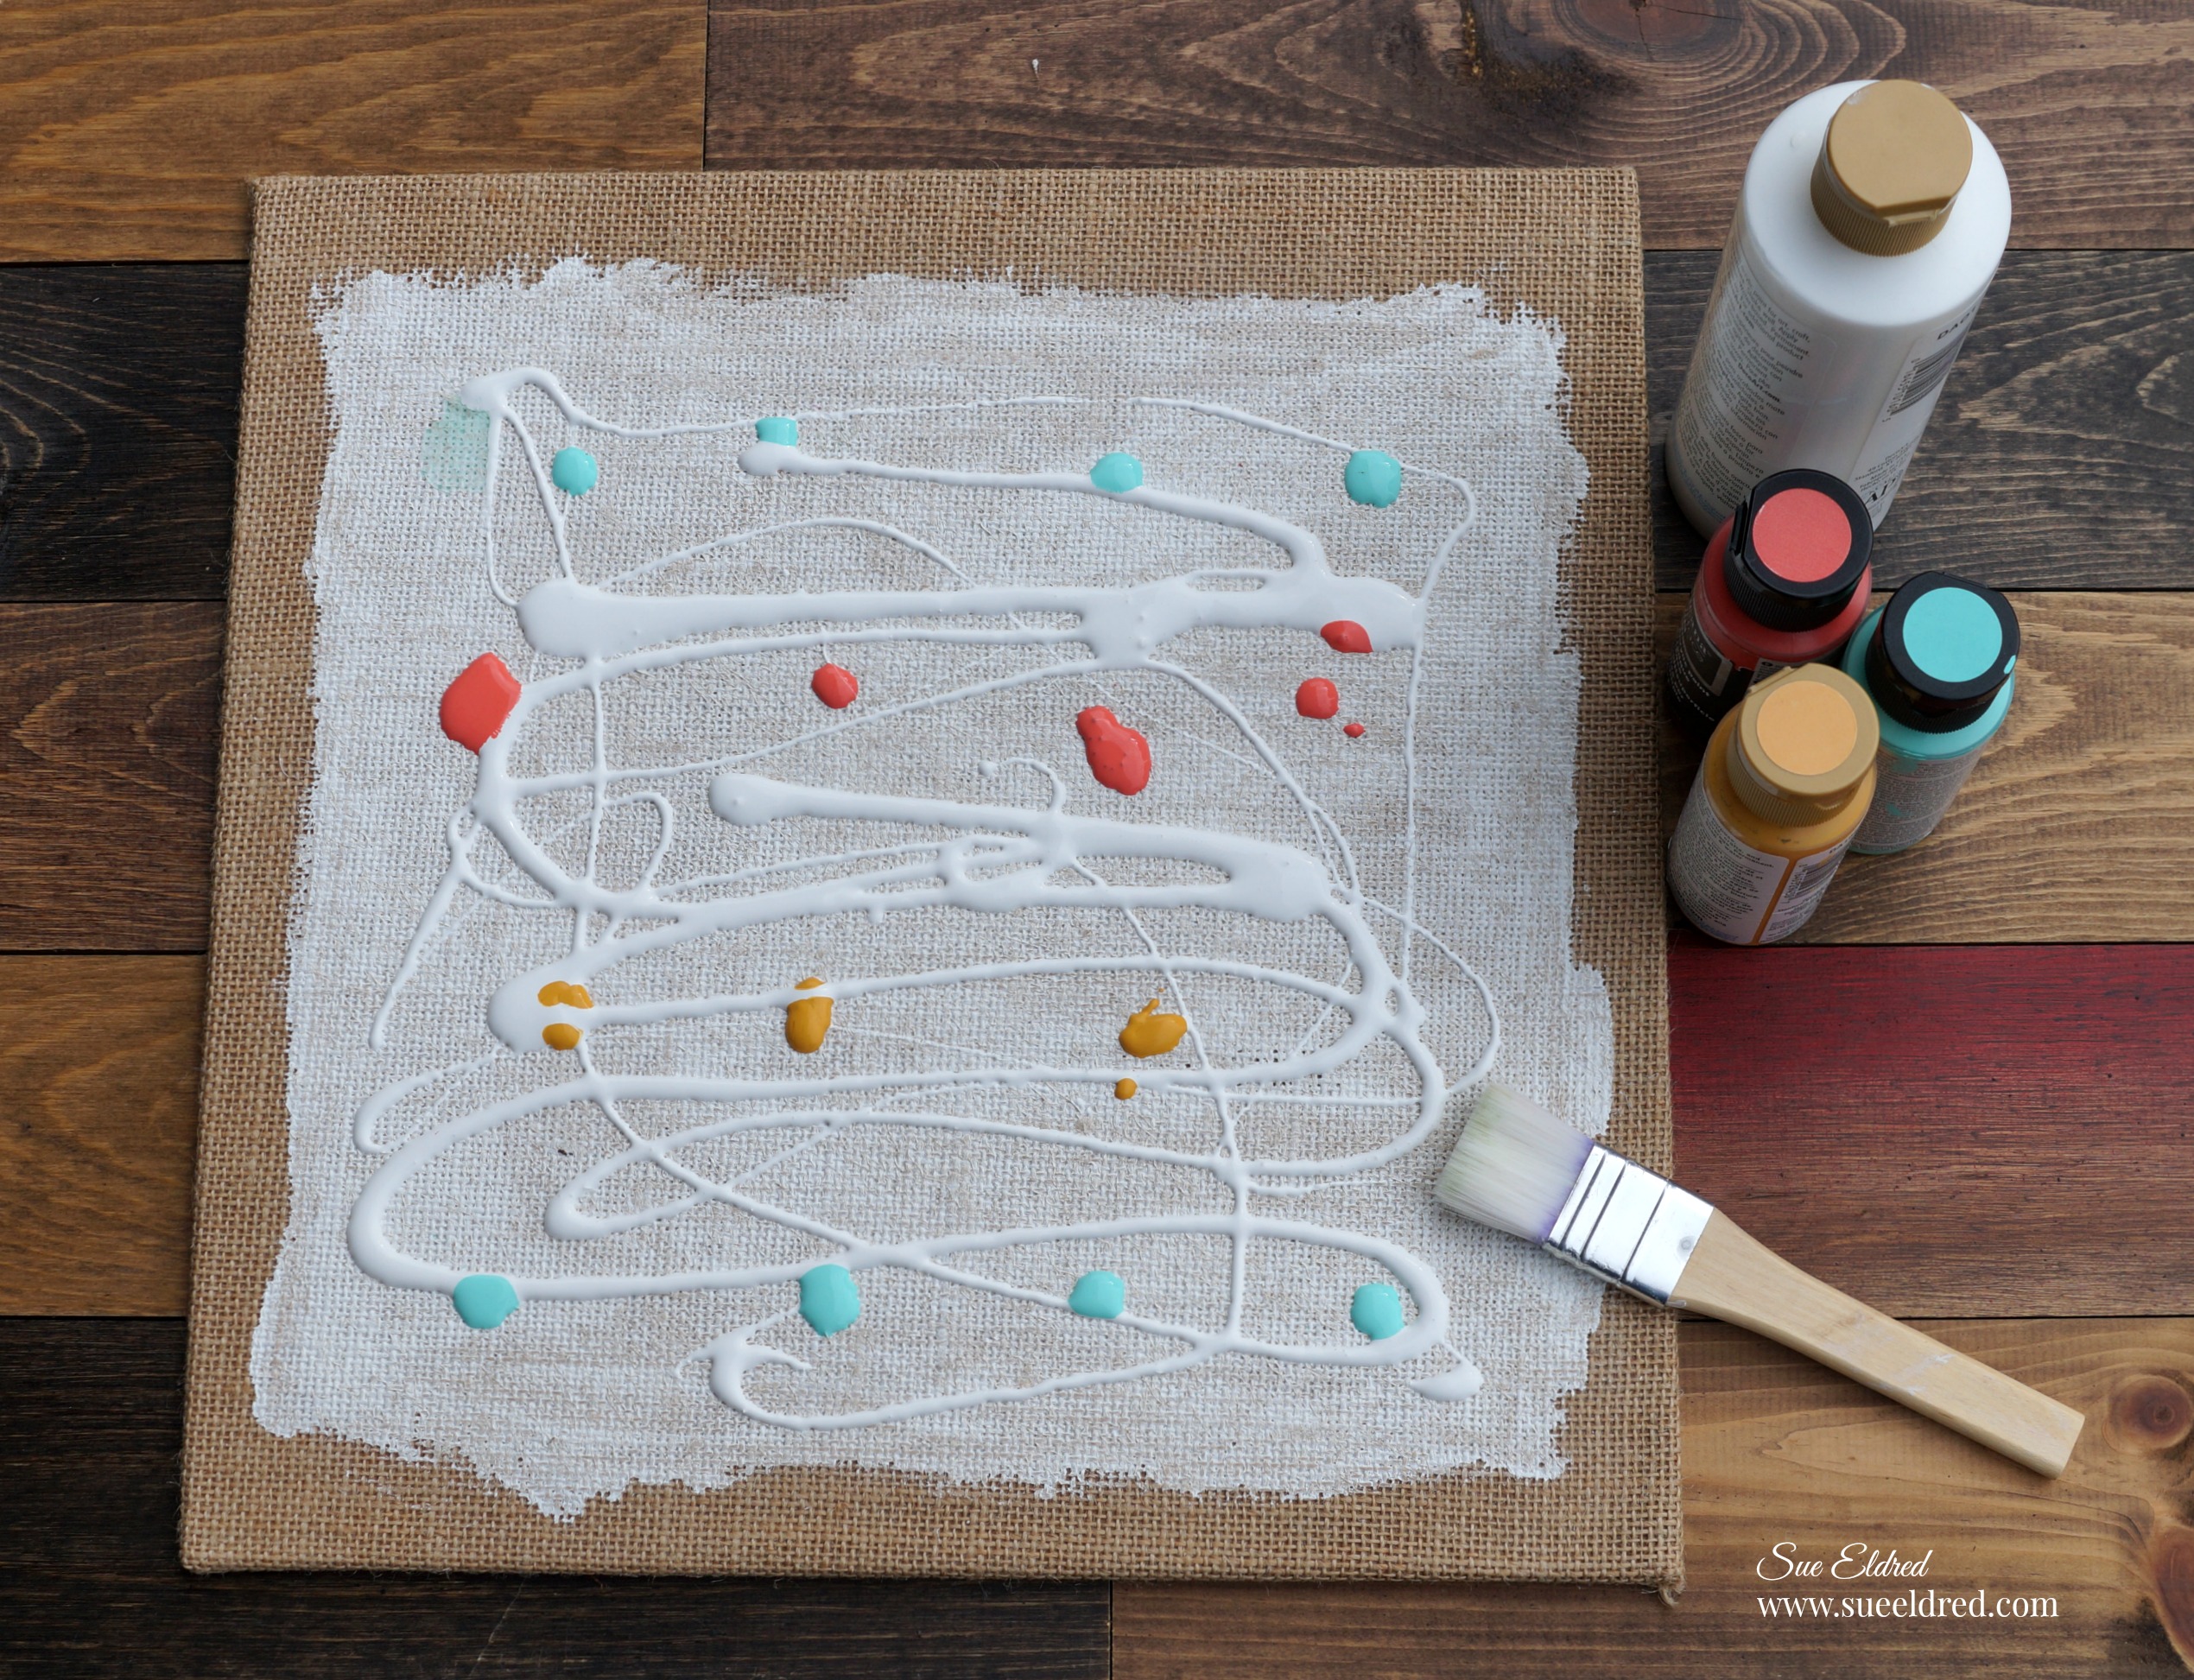
- Add white acrylic paint over the surface of the canvas, and drips of coral, marigold and aqua paint.
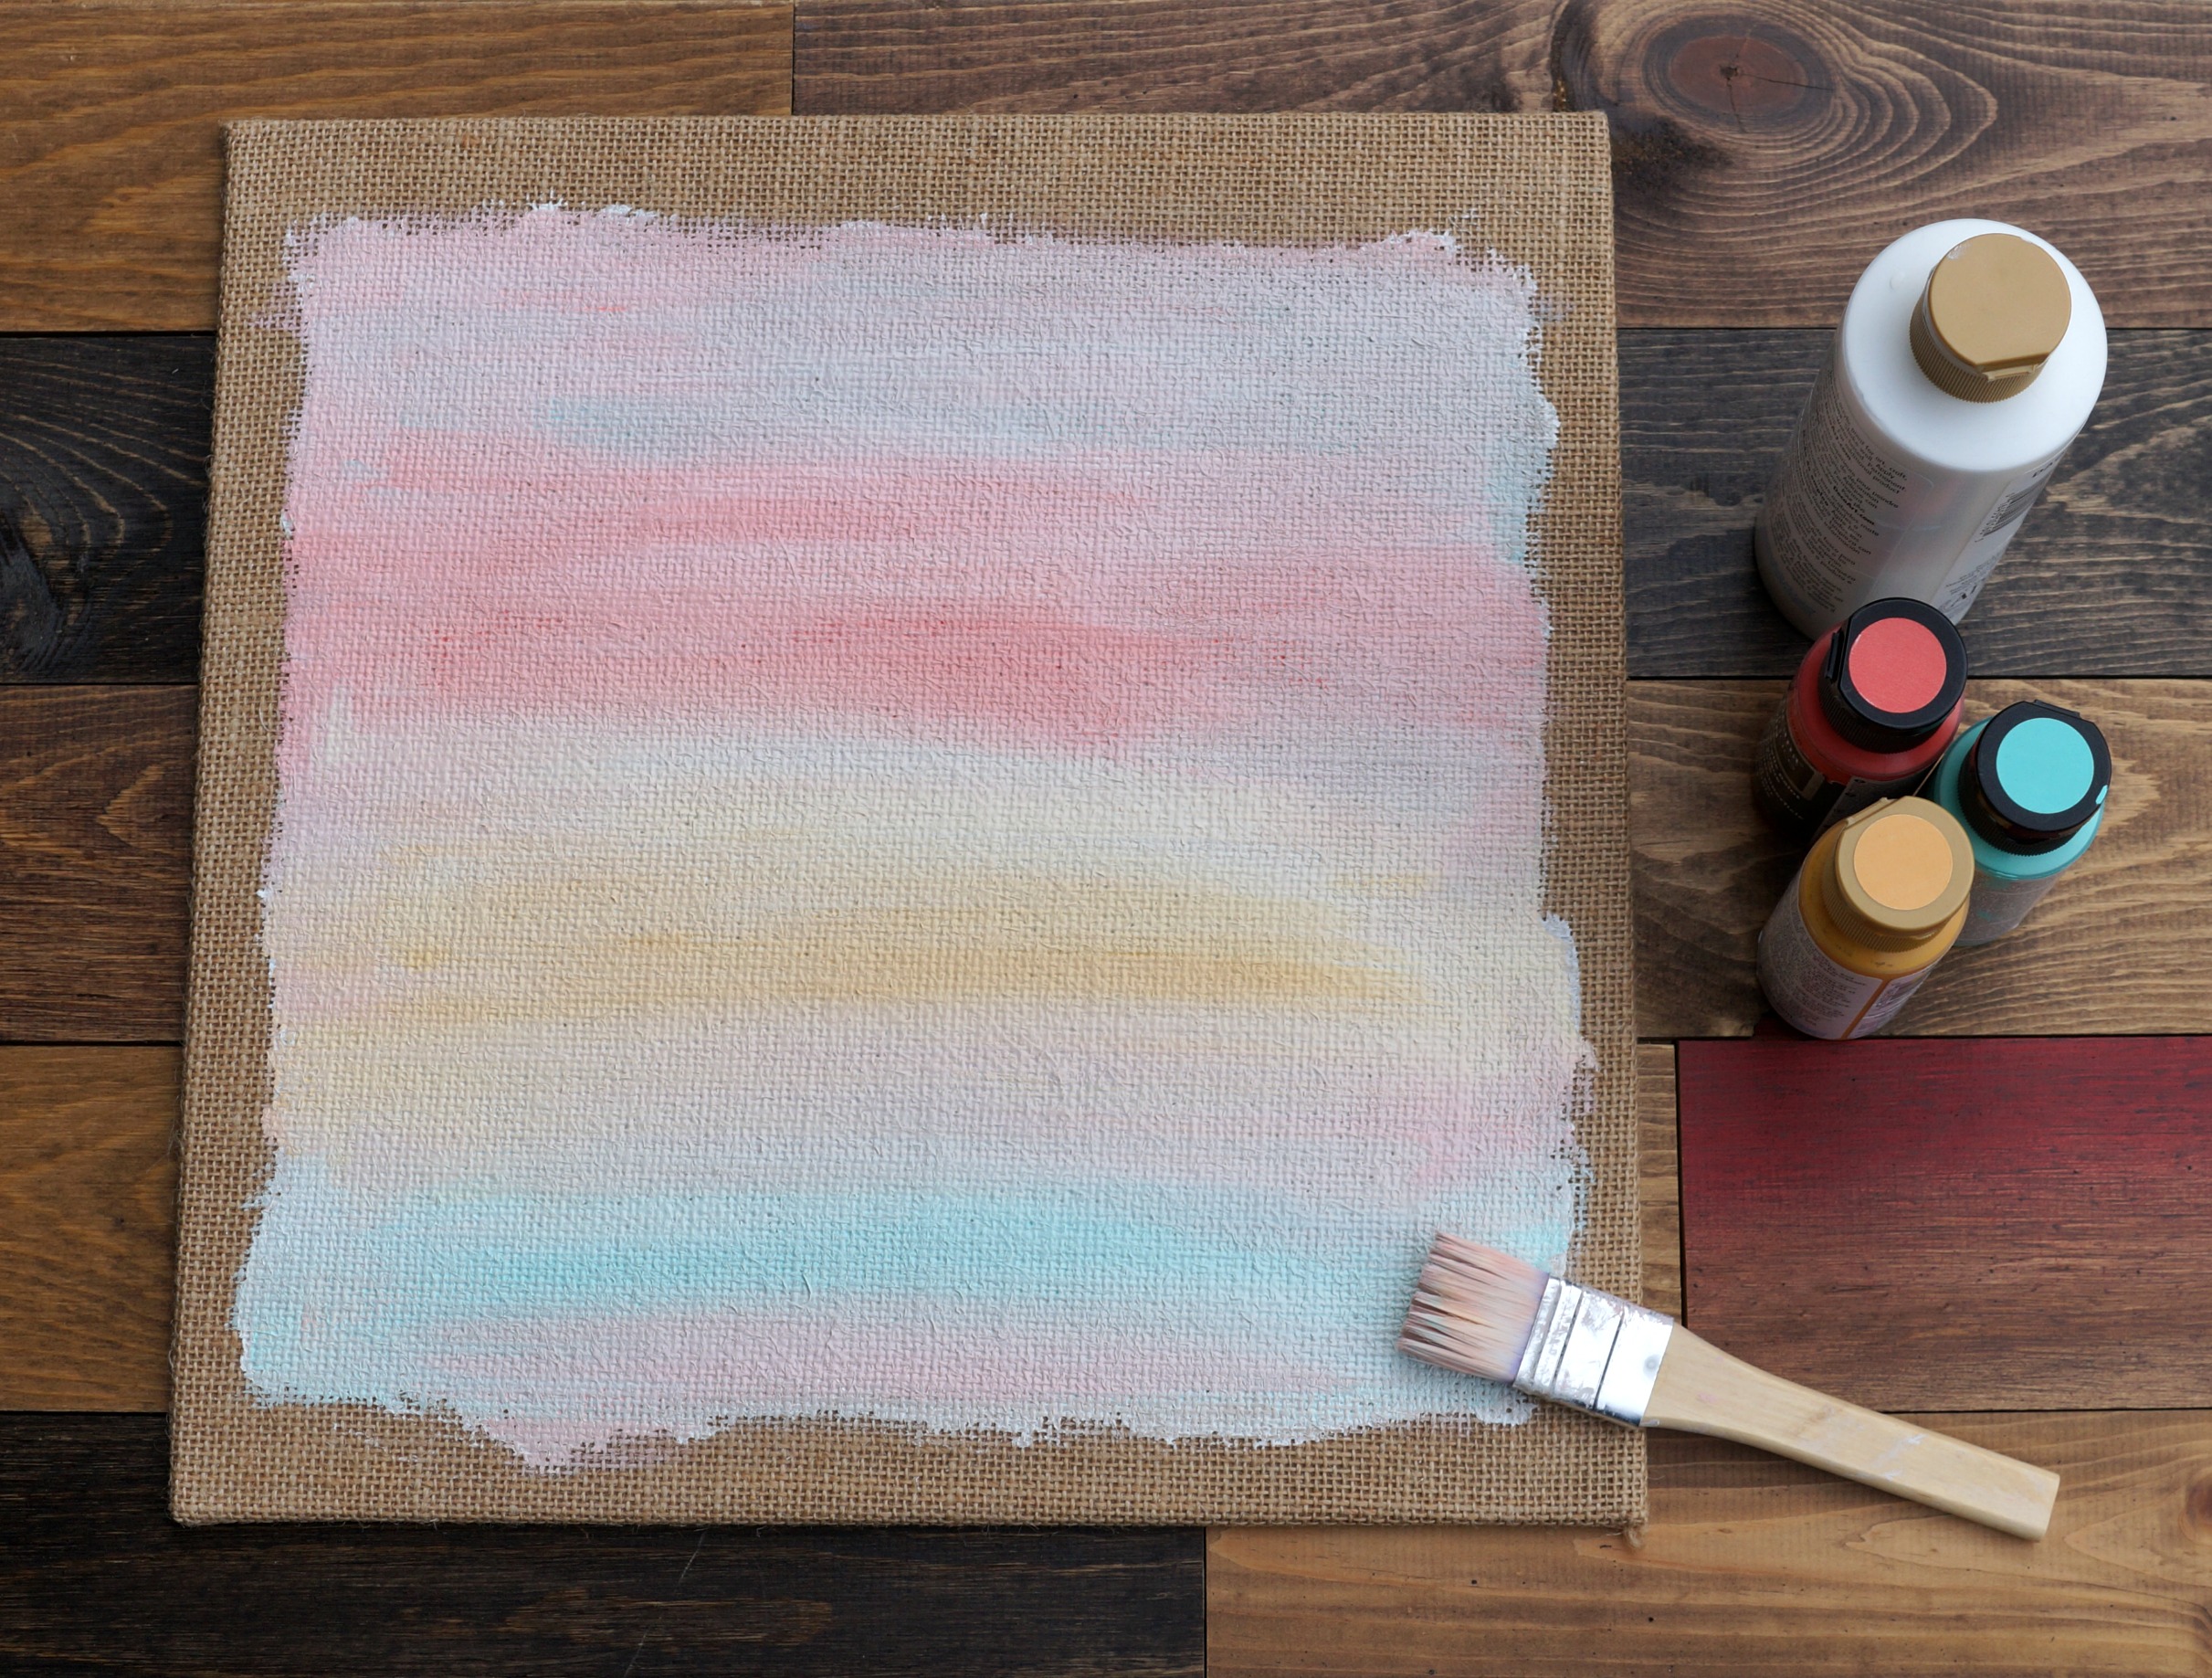
- Blend horizontally across the canvas using a paintbrush to create a soft background.
Starting the process of building the background.
- Paint chipboard honeycomb with marigold paint and dry brush with white acrylic paint.
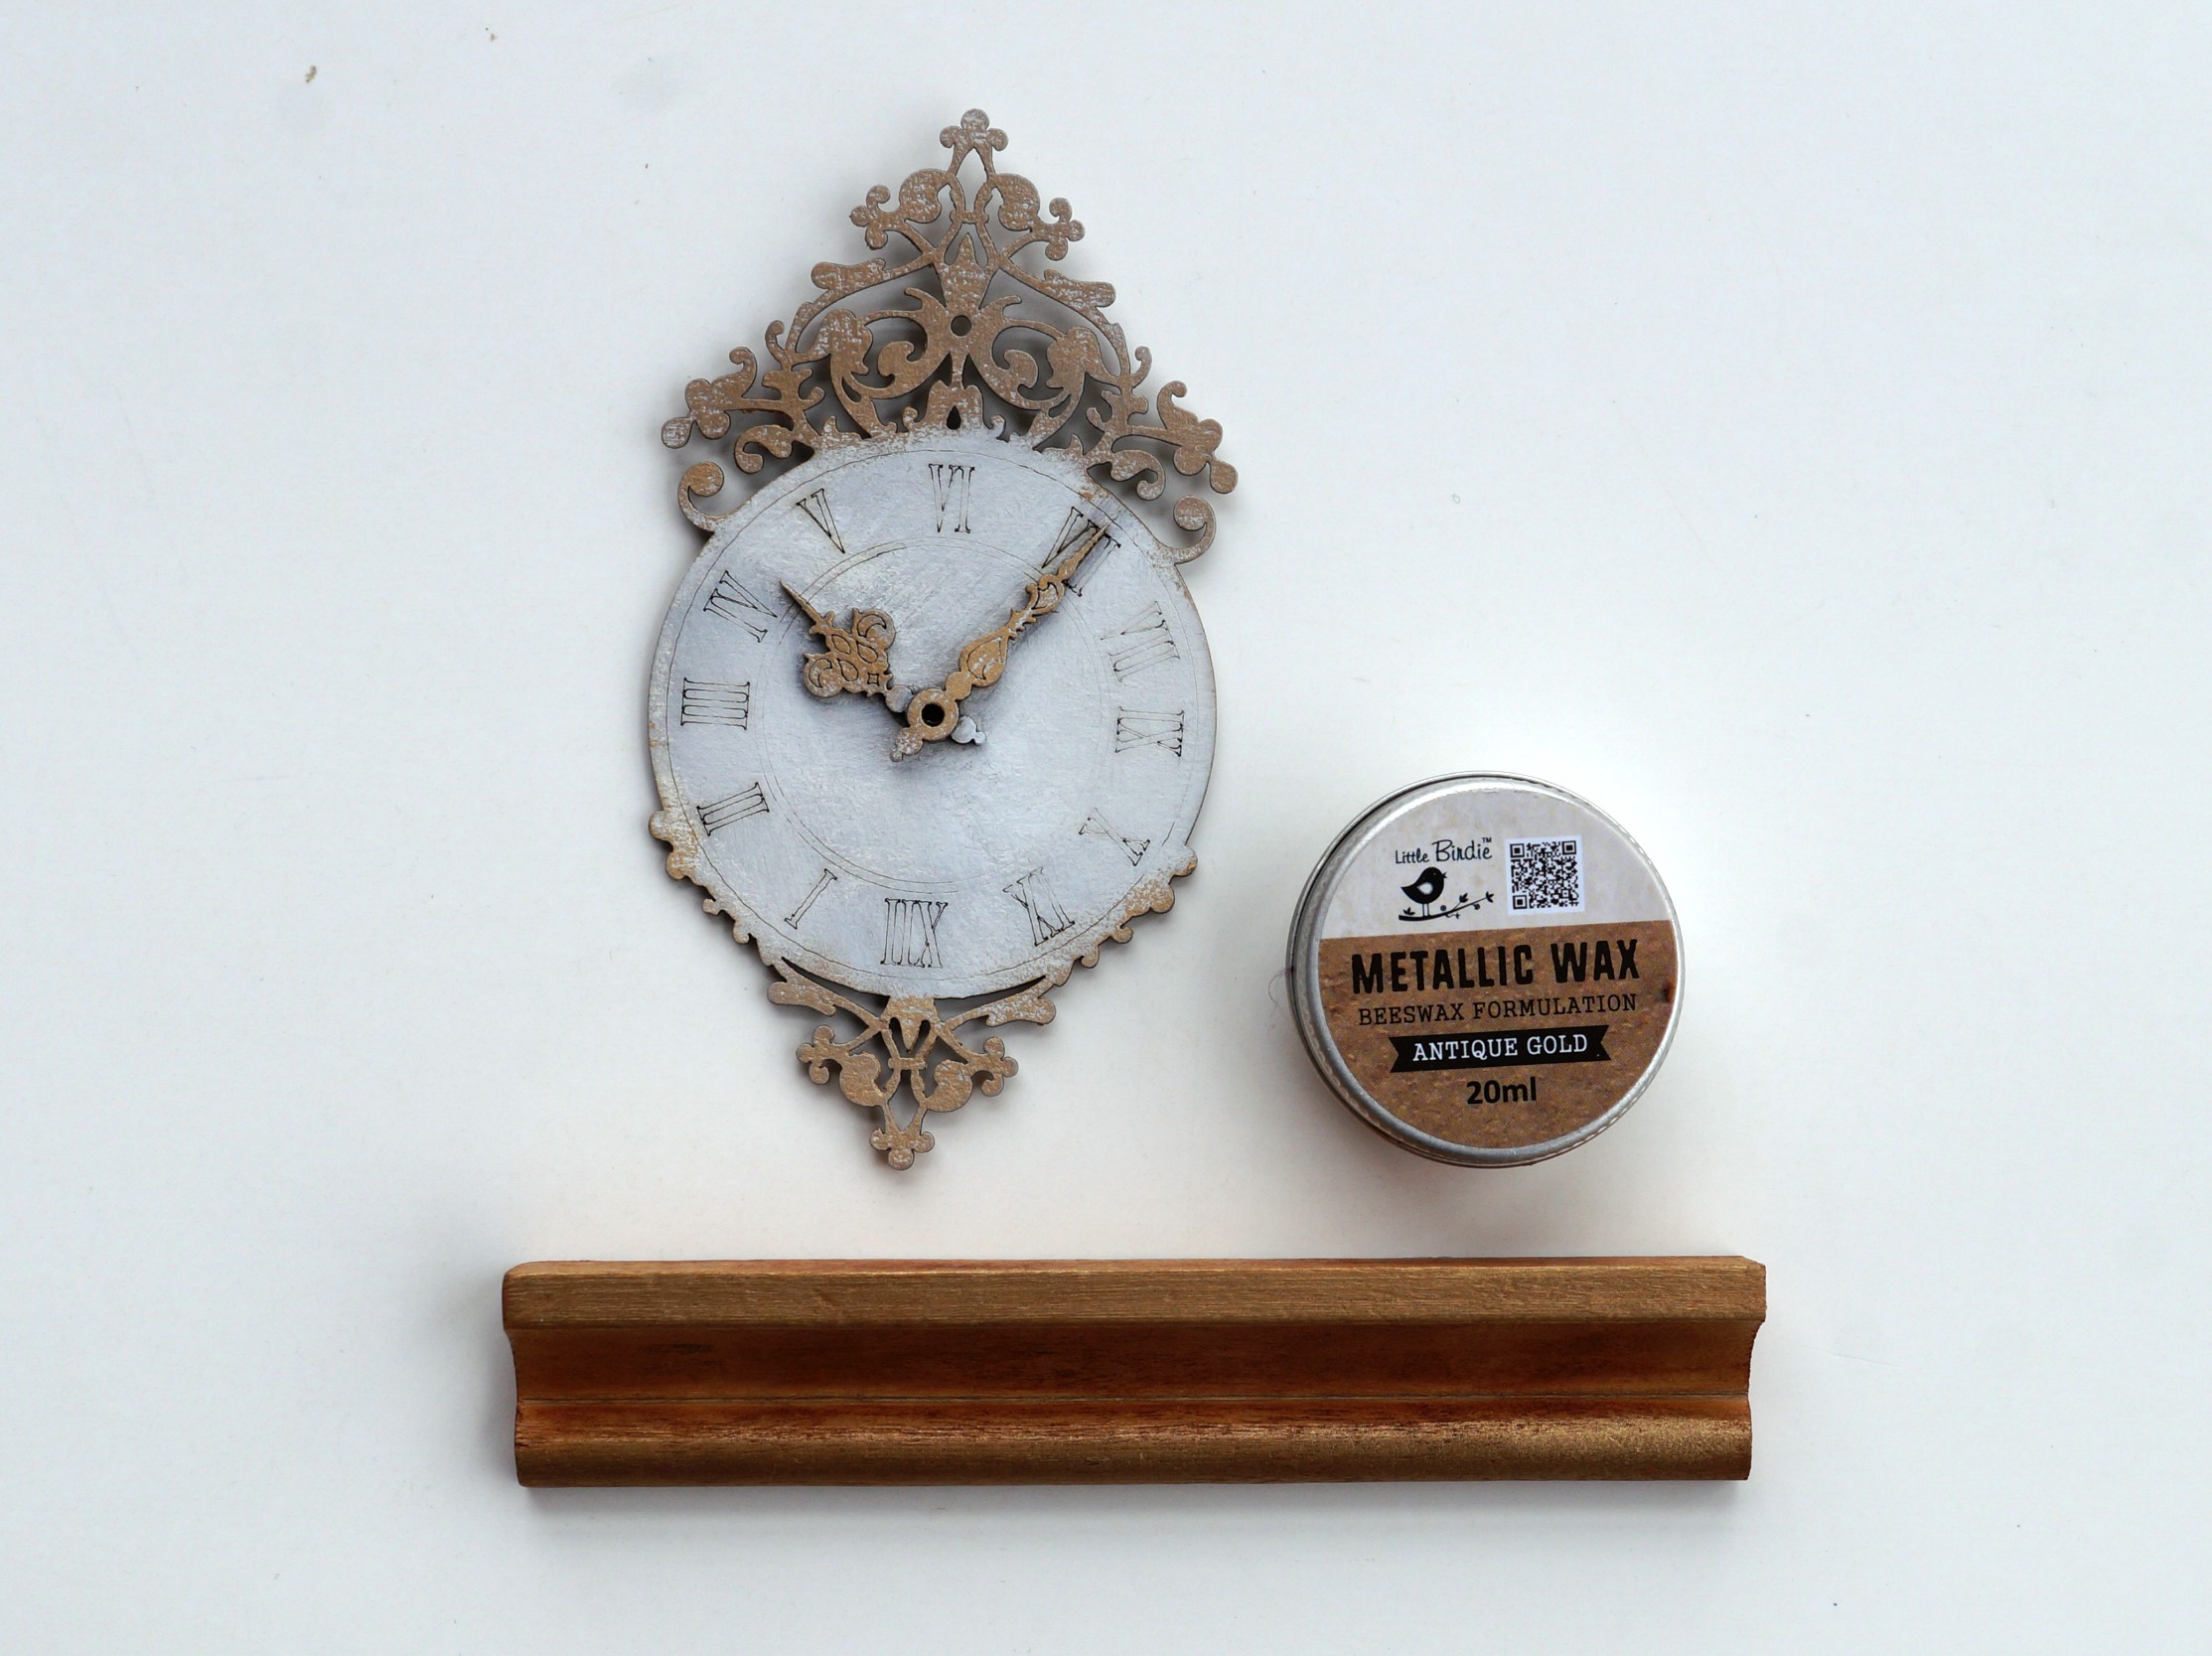
- Lightly paint chipboard clock with white acrylic paint. Rub antique gold metallic wax to accent the ornate edges and hands of the clock.
- The shelf is a scrabble tile holder that was stained using Vintage Photo Ink. It’s hard to see in this picture but the edge of the shelf is accented in the antique gold metallic wax.
Texture and dimension adds interest to the canvas.
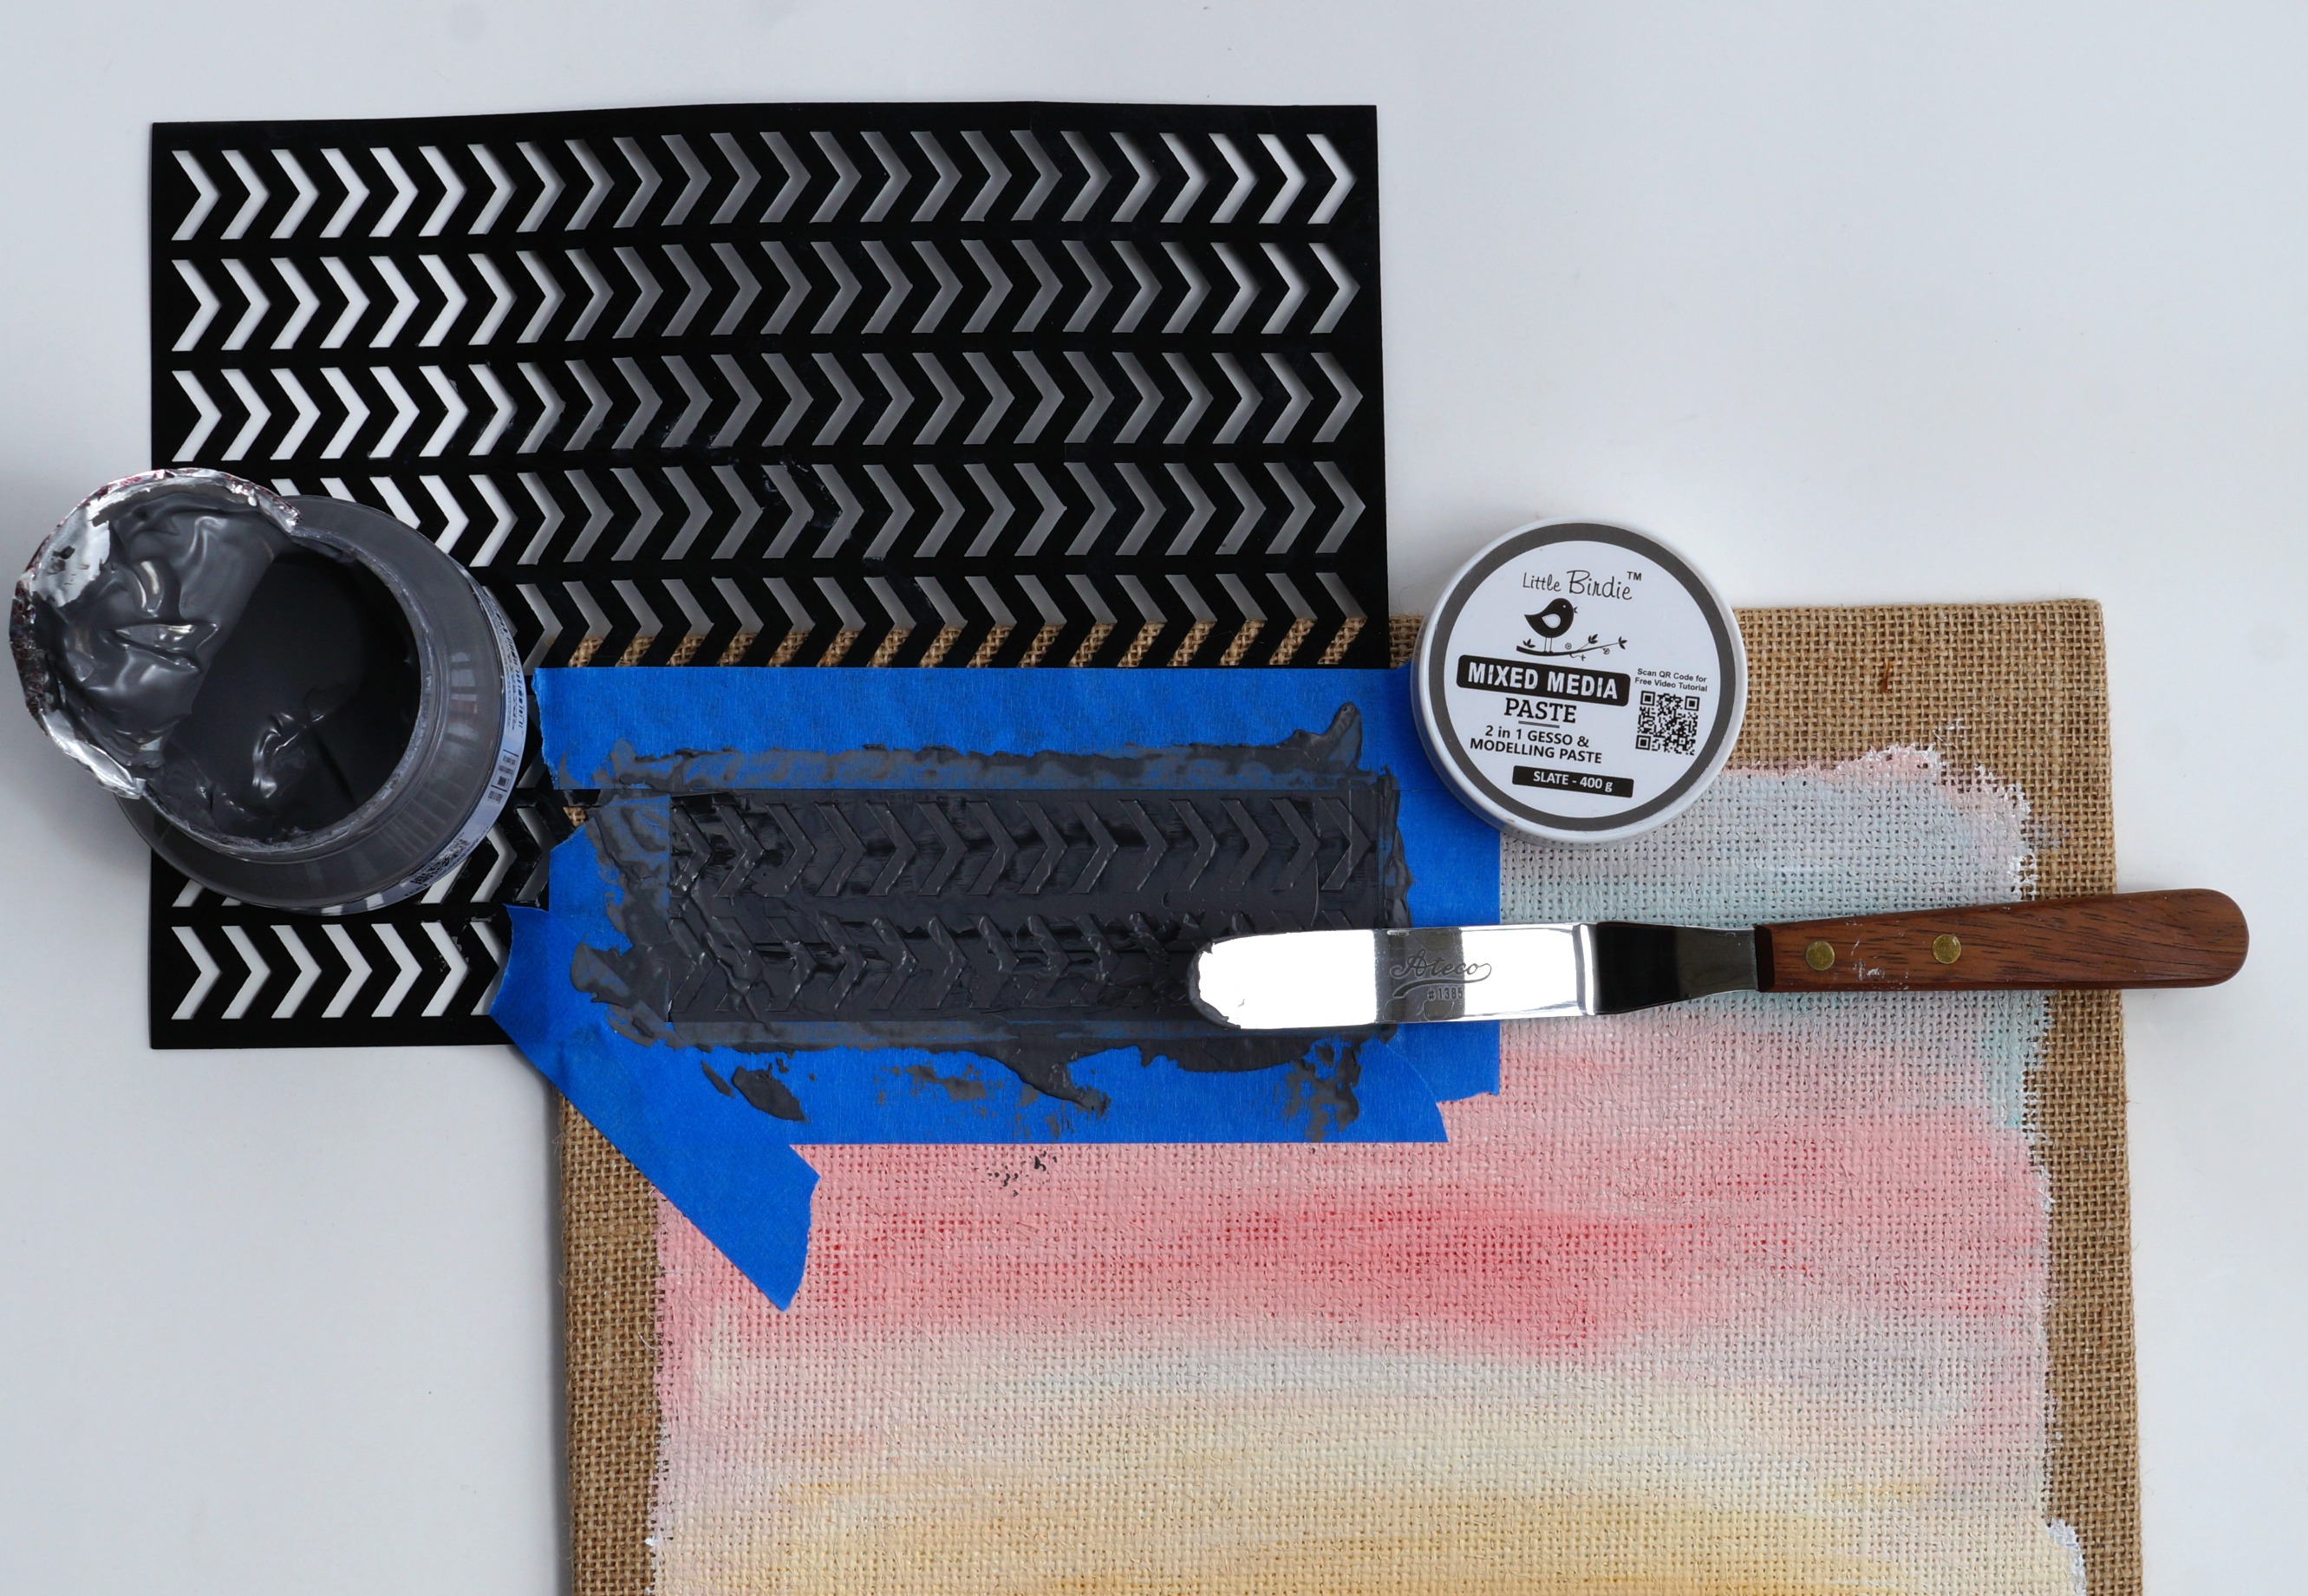
- Tape stencil to board using removable painter’s tape to mask the area that you want to add the mixed media paste. Apply paste in a thin layer onto the board using a palette knife.

Step 2 Building the Background
- Once the texture paste has dried. Go over the paste with a thin layer of white acrylic paint to lighten it. Apply antique gold metallic wax to accent the texture.
- Glue vintage lace onto the canvas using mod podge. Apply a thin layer of mod podge directly to the area on the canvas where I will be adding the lace.
- Stagger the painted chipboard honeycomb onto the board to create interest and glue in place.
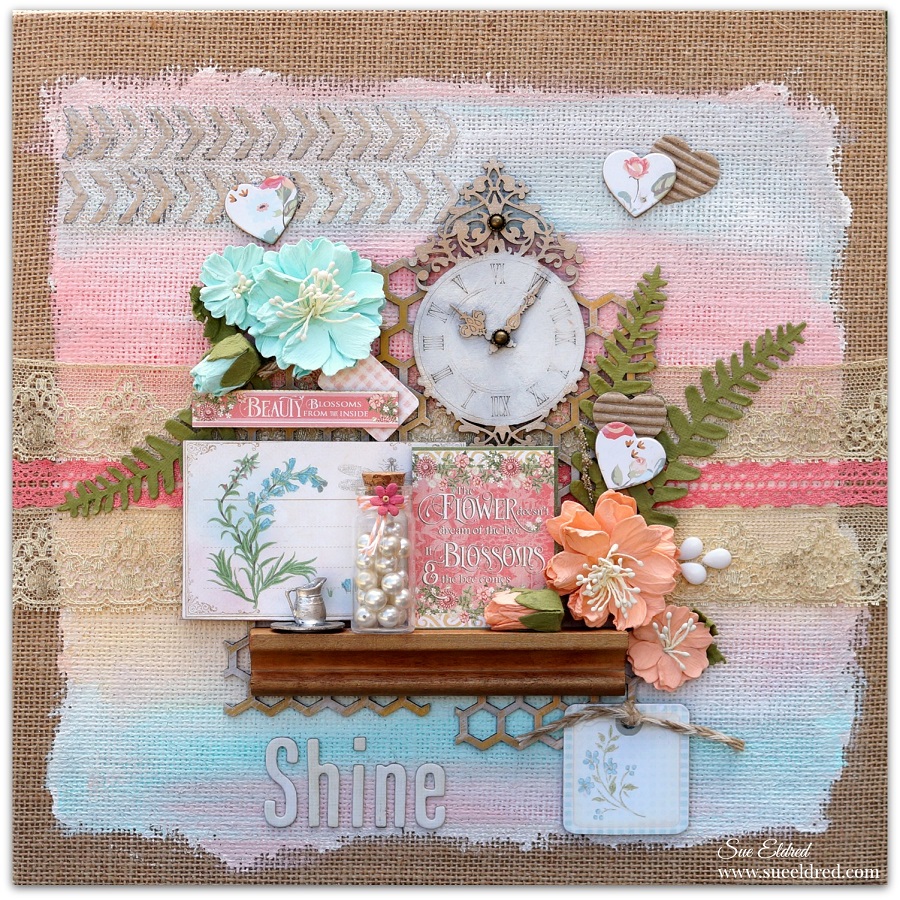
Step 3 and 4 Dimension and Composition
- Create focus. The place where you want the eye to land.
- I like to use an item to anchor my canvas. An anchor can be a photo or in this case the shelf.
- To create stability and dimension…I add chipboard to the back of all my paper pieces.
- Arrange and Rearrange your pieces on the canvas until you are satisfied.
- Glue pieces on canvas using a strong glue. (I always find that I add and edit as I glue.)

For the full list of Designers participating in the Little Birdie Crafts Blog Hop click here.

Stunning Canvas Sue.
a very pretty result!
I love every layer you created! The background colors are beautifully blended. The chipboard and stencil paste add wonderful dimension. The way you arranged it all and dressed it up with florals and bits is perfect! I love the way you repurposed the Scrabble tile rack!
Thank You Susie. You made my day with your sweet comments.
Your step by step is fantastic! I adore your project!