
How to make a Wood Snowflake Ornament.
The Wood Snowflake Ornament is such an easy Holiday project to make.
I picked up the Wood Snowflakes* at Dollar Tree and the 6″ Wood Circles* on Amazon.
Great Idea for Personalization. There’s still time to make a few for Christmas Gifts.
I even made you a short video. (Enjoy!)
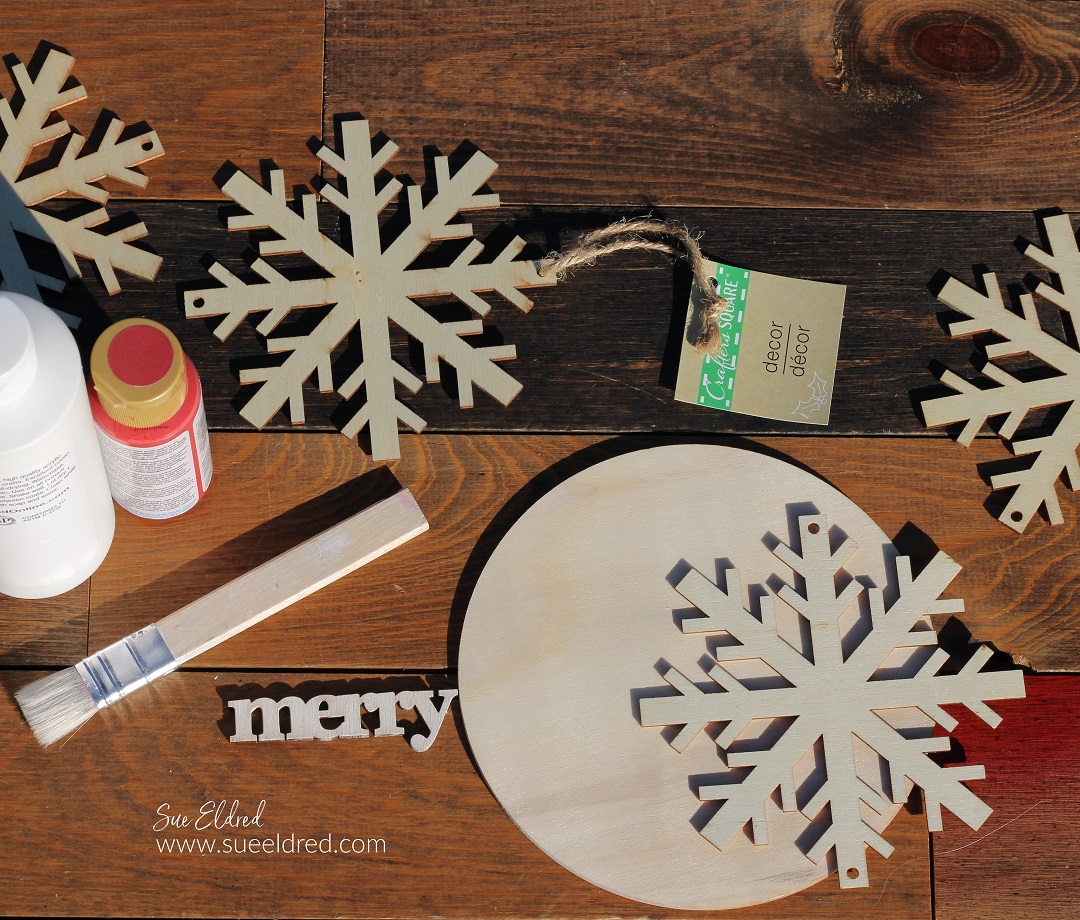
Materials Used: (*affiliate links)
- Wood Snowflake*
- 6″ Wood Circle*
- Navy, White, and Silver Acrylic Paint
- Paintbrush and Old Toothbrush
- Wood Holiday Words (I think I got mine at Michael’s)
- Blue and White Twine*
- Xyron Multi-Stick Glue Gun*
- Sanding Block*
- White Adhesive Enamel Dot*

*Disclosure: This blog uses ads and affiliate links. If you choose to make a purchase using one of the links, I receive a small commission (at no additional cost to you) that helps offset the costs of maintaining this blog. Thanks for your support!

Directions:
- Lightly Sand the Wood Circle with a sanding block to smooth the grain. Wipe the circle to clean off the dust.
- Paint with acrylic paint. To create the ombre background, I started with the darkest shade of paint and continued by adding white paint.
- Rub the toothbrush into a small amount of white paint. Flick the bristles of the paintbrush to sprinkle white flecks of paint onto the background of the wood circle.
- Paint the wood snowflake with white acrylic paint.
- Paint the wood words with silver acrylic paint.
- Glue the Snowflake onto the center of the wood circle.
- Glue the words onto the middle of the snowflakes.
- Adhere white enamel circles onto the ends of the snowflake tips to cover the holes.
- Drill a small hole on the top of the circle for hanging.

Well done!