A Joyful Village

As the Christmas Season gets closer…

I wanted to share this simple little wood project that I made for the “Creating with Joy” blog.

Being Joyful, is my goal not only at Christmas but throughout the entire year.

For my “Joyful Village”…

I  started with some wood trim scrap pieces cut into simple whimsical house shapes.

My pieces measure 4″ x 2″, 3″ x 2 3/4″ and 3 1/2″ x 2 1/4″.

I painted the house with a couple coats of Americana Decor Satin Enamels 8oz-Grey Taupe*.     (*Amazon affiliate link)

After painting the houses…                                                                             (*Amazon Affiliate Links)

      • I created a roof using Black Corrugated Paper*.
      • I added color to my white iron-on embroidered letters by dampening them and rubbing color directly onto the letters using my Distress Mini Ink Pad-Fired Brick*.
      • After the letters are dry, glue the letters onto the houses using a craft glue.
      • I created a mini wreath and mini pine swags using Pine Craft Stems*.
      • I created small number charms by printing the numbers onto white cardstock and punching with a small circle punch.  I added the numbers inside Metal Type Charms by Tim Holtz Idea-ology*.
      • I tied the charms onto the wreath and swags with thin twine and glued them onto the front of the houses along with a little tiny bow.

The village wouldn’t be complete without a cute little red truck.

I picked up the tiny red truck at the Elkhorn Flea Market in Wisconsin and I glued three little

bottle brush trees to the back of the truck.  I rubbed the trees with clear glitter glue

for added sparkle.

This project was sponsored by Joy SA and DecoArts.

Shop Amazon Scrapbooking Supplies*

*Disclaimer:  This post uses ads and affiliate links.  If you choose to make a purchase using one of the links, I receive a small commission (at no additional cost to you) that helps offset the costs of maintaining this blog.  Thanks for your support!

Making More Sock Snowmen

It looks like everyone’s in love with making sock snowman.

They’re really easy to make, with so many ways to add personality

And…I just can’t seem to stop making these cute little guys.

This year, to add to the mix,  I decided to create a Snow family.

Mom, Dad, a couple kids, all made from socks.

Shop Your Fav Brands at Scrapbook.com

Disclaimer:  This blog uses ads and affiliate links.  If you choose to make a purchase using one of the links, I receive a small commission (at no additional cost to you) that helps offset the costs of maintaining this blog.  Thanks for your support!

snow-family-close-up-sues-creative-workshop

Here’s What You’ll Need:                    (*affiliate Links)

Here’s how I made my Snowman:

  1. Tea dye a new white sock, crew length or bigger.  Or if you have boys you could use one of their dingy ones.  (It’s better not to use a sock with the grey toe and heel.)
  2. Cut the top of the sock off, right around the heel.
  3. Turn the sock inside out and attach a rubber-band tightly around the top of the sock.  Because rubber bands wear out with time, I added a good squirt of Beacon Fabri-Tac Permanent Adhesive* in and around the rubber band.  (I left the rubber band on)
  4. Turn the sock right side out and fill sock about 1/2 way with rice.
  5. Fill the remaining portion of the sock with fiber-fill.
  6. Wrap a piece of twine or string tightly around the top of the sock to close the sock.
  7. Tie a piece of twine about 1/3 down around sock to create the head.
  8. I used mini black buttons for his eyes, the tip of a bamboo skewer colored orange for his nose and a simple sewn black thread for his mouth.  I purchased a small felt hat from JoAnn’s Fabrics for Dad’s hat.  I added a band around the hat using a small folded piece of flannel.
  9.  For the flannel hat… Cut a piece of flannel that will go around the head of the snowman.  Create a band on the hat by adding and gluing a fold on the long end of the flannel.  Glue flannel together to create a “tube”.  Allow to fully dry.  Glue onto snowman.  Tie top of the tube with twine to create hat. Trim if needed.
  10. Dress with Snowman with part of an old sock.  Add a couple of buttons for added detail.  A  fringed piece of fabric works great for the scarf.
  11. For the kids… I used the left over piece of sock from the original snowman to create a smaller version.

snowman-couple-with-red-buffalo-plaid-sues-creative-workshop

And because I’m really into Red Buffalo Plaid again this year…

I made this cute little Snow Couple too.

The Snowmen measure approximately 7 1/2″ .

Try Amazon Prime 30-Day Free Trial

Save

DIY…”Merry” Canvas

Make the holidays “Merry” with this mini decorated canvas.

Create frosty, glittery goodness with this fun mini canvas project.

To make the Merry Canvas you’ll need:                                      *affiliate link

*Disclosure… This blog uses ads and affiliate links.  If you choose to make a purchase using one of the links, I receive a small commission (at no additional cost to you) that helps offset the costs of maintaining this blog.  Thanks for your support!

Directions:

  • Wrap twine around canvas and embellish with jingle bells, greenery and bow.

“This is a sponsored post.  As a member of the Joy® Design Team I have been provided product and compensation in exchange for my creative ideas.  The views and opinions are my own.

Holiday Diamond Art

Christmas Carol Set - 25 Favorite Songs, Delicious Holiday Recipes, Party Ideas & More!

Holiday Centerpiece or Party Serving Stand

holiday-centerpiece-sues-creative-workshop-2839

Tis the season for Holiday Parties and decorating…

around my house, it’s starting to kick in full steam.

Instead of stressing out, I try to create items with more than one purpose.

My Holiday Centerpiece also works wonderful as a Party Serving Stand.

holiday-stand-before-sues-creative-workshop-2810

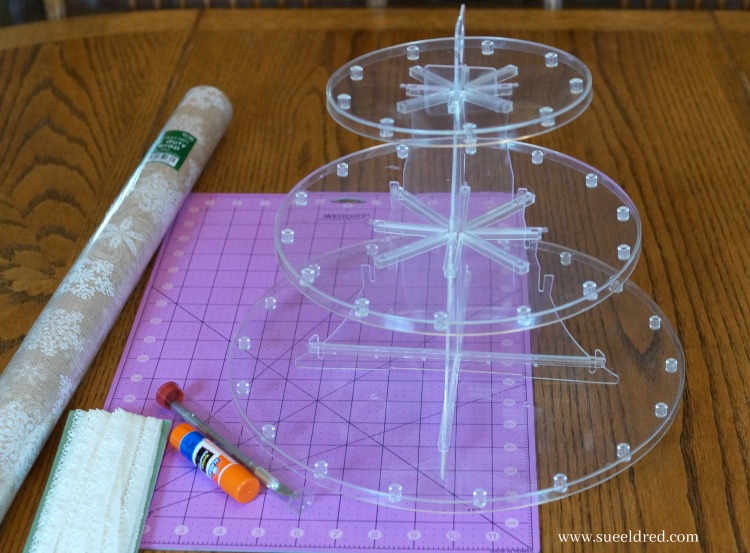
I started with a Deflecto 3 Tier Dessert Stand* (affiliate link),

wrapping paper, glue stick and cutting mat.

holiday-centerpiece-cutting-the-circles-sues-creative-workshop-2812

  • I traced around all three of my circles onto the back of the wrapping paper.
  • Apply the glue stick generously around and inside the circle.  Lay circle onto wrapping paper and smooth out any air bubbles.  (The nice thing about using wrapping paper and a glue stick is that you can easily remove the paper and glue by soaking stand in warm water.)
  • Trim around circle and inside channels using a craft knife and cutting mat.

holiday-stand-close-up-sues-creative-workshop-2822

  • Glue lace around the outside of each circle and assemble stand.

holiday-adjustable-3-tier-stand-sues-creative-workshop-2826

Add ribbon and holly berries and you’re ready for a party.

holiday-centerpiece-sues-creative-workshop2841

Or add small ornaments and decorations for a fun Holiday Centerpiece.

“This is a sponsored post. As a member of the Deflecto Design Team I have been provided product in exchange for my creative ideas, views and opinions.”

Disclaimer:  This blog uses ads and affiliate links.  If you choose to make a purchase using one of the links, I receive a small commission (at no additional cost to you) that helps offset the costs of maintaining this blog.  Thanks for your support!

Try Amazon Prime 30-Day Free Trial

Joy Shadow Box Tray

joy-shadow-box-tray-8609

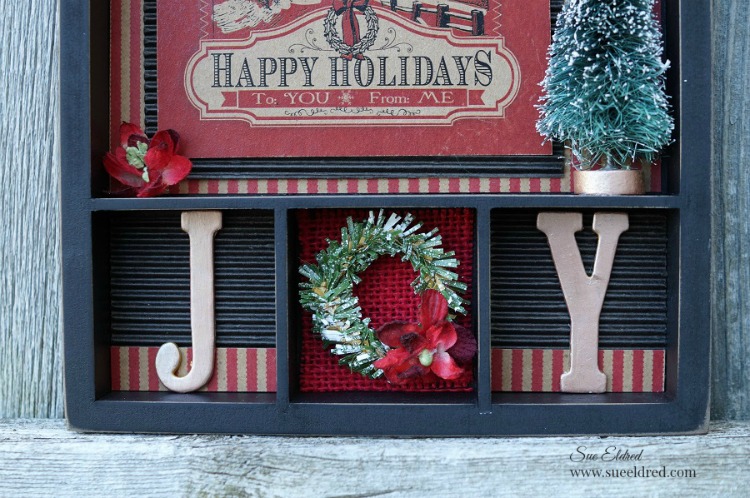
A simple Shadow Box that would be cute as Holiday Décor or used as a gift.

The “Happy Holidays” graphic would be cute replaced with a Holiday photo.

This project also uses a simple paint technique for old hardware.


Here’s what I used for my Shadow Box Tray:   

(*including amazon affiliate links)


Tips to make your project easier:

flicking-paint-8566

  • Add Snowy effect by flicking white acrylic paint onto the pine craft stem using an old paintbrush.

hardware-8570

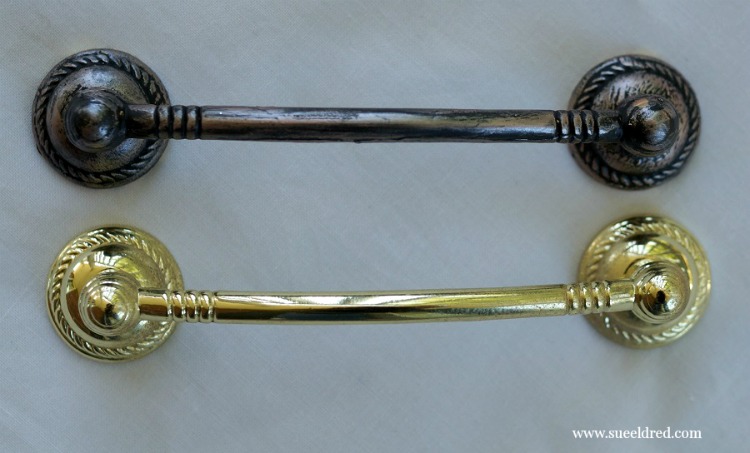
  • Paint the brass hardware with black spray paint.  Once the paint is dry, rub Rose Gold Metallic Lustre over hardware for an aged vintage look.

joy-shadow-box-tray-close-up-sues-creative-workshop

  • For a cohesive look…rub Rose Gold Metallic Lustre onto the chipboard letters and the wood disc on the tree.
  • Cut the back of the bottle brush tree flat so that it fits snuggly into the tray.


This project was sponsored by Canvas Corp Brands and DecoArts.

I am an Amazon Affiliate.  If you choose to make a purchase using an Amazon link, I receive a small commission that helps offset the cost of running this blog.  Thank You!

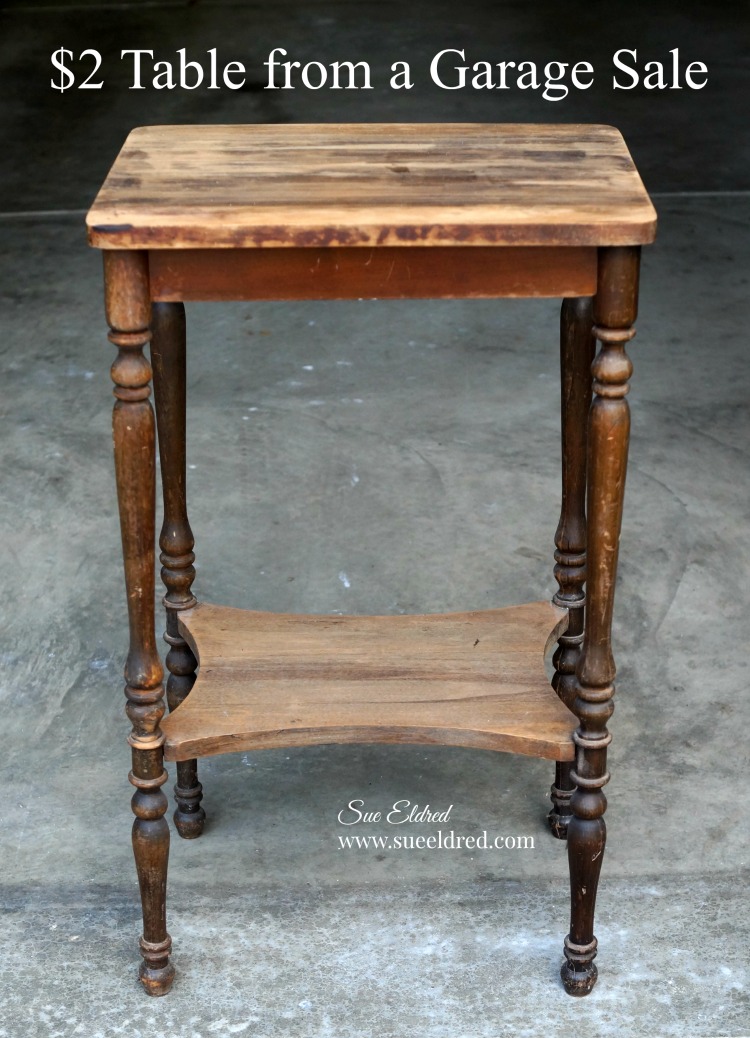
Making a Winterberry Table from a $2 treasure.


winterberry-table-2-2562

Making a Winterberry Table from a $2 Garage Sale treasure.

I almost missed the small cardboard sign leaning up against the mailbox…

I wasn’t completely sure it was even a sale.  So I backed the car up and parked.

You never know what you might find when your out “treasure hunting”.

2-table-from-a-garage-sale-1723

While chatting with the fun older couple, I found out that they had just recently married and moved

into their new home.  They were downsizing and combining both households.

The couple had a lot of good stuff, most of which I didn’t need.

It was on my second look around when I spotted the table and it’s $2 price tag.  (no need to haggle)

deco-art-americana-decor-satin-enamels-deep-ruby

She told me… “I always meant to refinish it.  I put a doily and a basket on it instead.”

I didn’t have the heart to tell her I was planning on painting it.

painting-the-winterberry-table

(this post uses affiliate links)

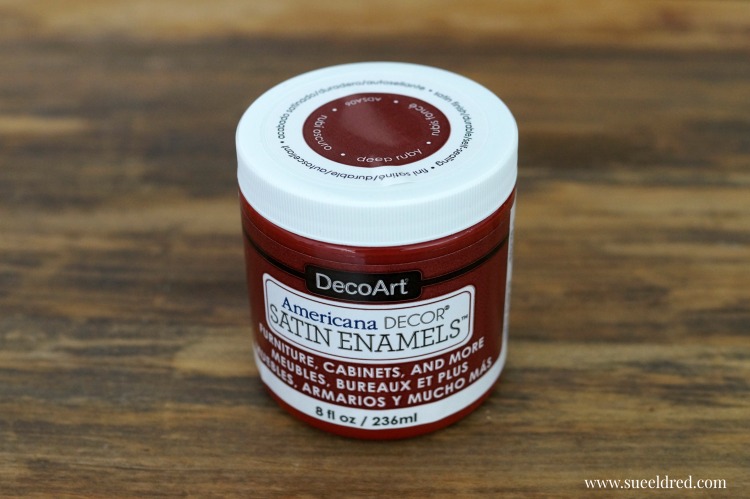
I had just recently received some new paint from DecoArts and thought I’d give it a try.

I gave the table a couple coats of Americana Decor Satin Enamels Deep Ruby*.

I was seriously impressed with how smooth the paint went on and dried.

I didn’t even need to sand between coats.

stenciling-the-winterberry-table-sues-creative-workshop

I decided to stencil the top of the table using my new DecoArt Stencil 6 x 18 in. Winterberries*.

I secured the stencil in place using removable painters tape.

Using a stipple brush…

I applied DecoArt Americana Multi-Surface Satin Acrylic Paint, White Birch*

inside the open stencil areas.

winterberry-table-2509

The Winterberry stencil comes with two 6″ x 18″ stencils which are slightly different.

I used the second stencil to add another berry branch to my table top.

I’m in love with my “new” table.  

For now, the table will be used with my holiday decorating and then after the Holidays it’ll find a

permanent home in the guest room.


The Winterberry Table was sponsored by DecoArts and uses Amazon Affliliate links.

If you choose to purchase an item from Amazon using one of the links, I will receive a small commission which helps offsets the cost of running this blog.  Thank You.

Festive 3-Tier Serving Stand

festive-3-tier-stand-sues-creative-workshop-8638

Create an elegant Holiday serving stand…

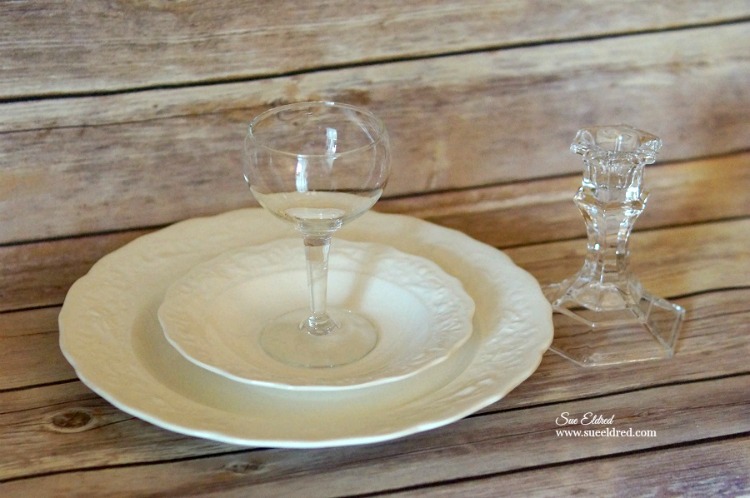
using random thrift store dishes and a Dollar Store candlestick.

Imagine this filled with yummy deserts and treats.

getting-started-sues-creative-workshop

*Disclaimer:  This post uses ads and affiliate links.  If you choose to make a purchase using one of the links, I receive a small commission (at no additional cost to you) that helps offset the costs of maintaining this blog.  Thanks for your support!

Here’s what you’ll need to get started:             (*affiliate link)

Directions:

  • Clean and dry dishes.  Wipe areas where adhesive will be applied with rubbing alcohol to remove any oil left on glass from handling.

gluing-the-candlestick-sues-creative-workshop

  • Run a thin line of adhesive on the top of the glass candlestick and adhere to the bottom of the medium plate.  Let dry.

fill-with-jingle-bells-sues-creative-workshop

  • Place jingle bells into glass cordial. Run thin line of adhesive on top of glass cordial.  Adhere to bottom of the smallest plate.  Let dry.

Shop Your Fav Brands at Scrapbook.com

festive-3-tier-stand-separate-pieces-sues-creative-workshop

  • Adhere bottom of glass cordial to center of the medium plate.
  • Adhere bottom of glass candlestick to top center of largest plate.

plain-stand-sues-creative-workshop

TIP… Use as three separate pieces or adhere together to create one elegant serving stand.

Try Amazon Prime 30-Day Free Trial

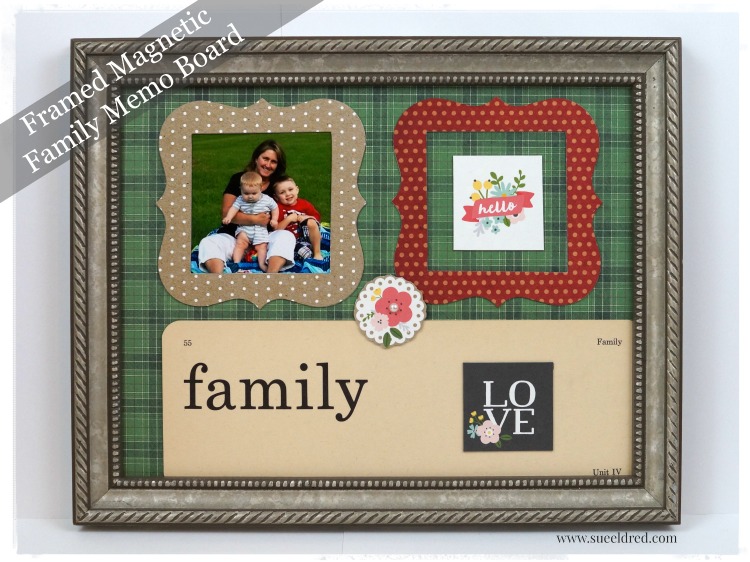
Framed Magnetic Family Memo Board

framed-magnetic-family-memo-board-2001

A decorative alternative to the family refrigerator.

This picture of me with my grandsons is one of my favorite photos.

It’s been hanging around on the fridge for a couple of years now.

I decided to make a Framed Magnetic Memo Board that I can hang on the wall and swap out photo’s

in the magnetic frames when ever I feel like it.

framed-magnetic-family-memo-board-2005

  • I started with an old picture frame with the glass removed.
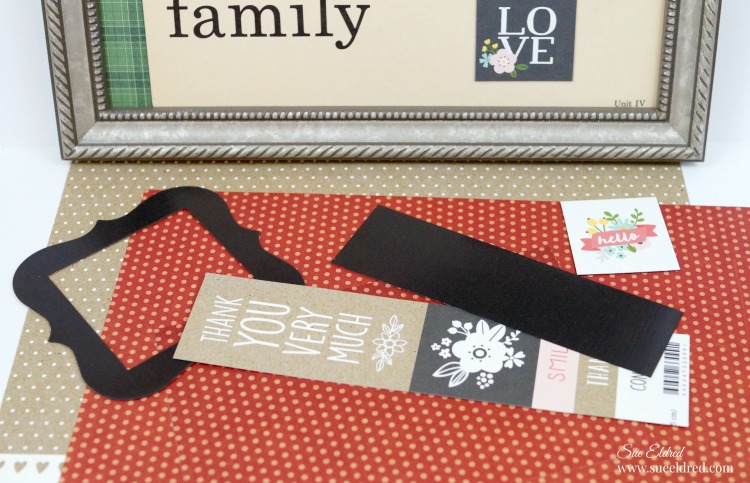
  • I adhered the Magnetic Craft Sheet from Deflecto using double sided adhesive on the frame backing with the black magnetic side up.
  • Next, I covered the black magnetic sheet with a “thin” piece of plaid scrapbook paper and inserted it back into the frame.  (TIP:  using thin paper is the key to the magnetic sheets sticking together)
  • To make the frames:  Cover magnetic sheets with scrapbook paper. Cut magnetic sheet with craft knife and mat or use a wood die cut frame to cut out the frames.
  • You can also create small word magnets using scrapbook paper and the magnetic craft sheets.

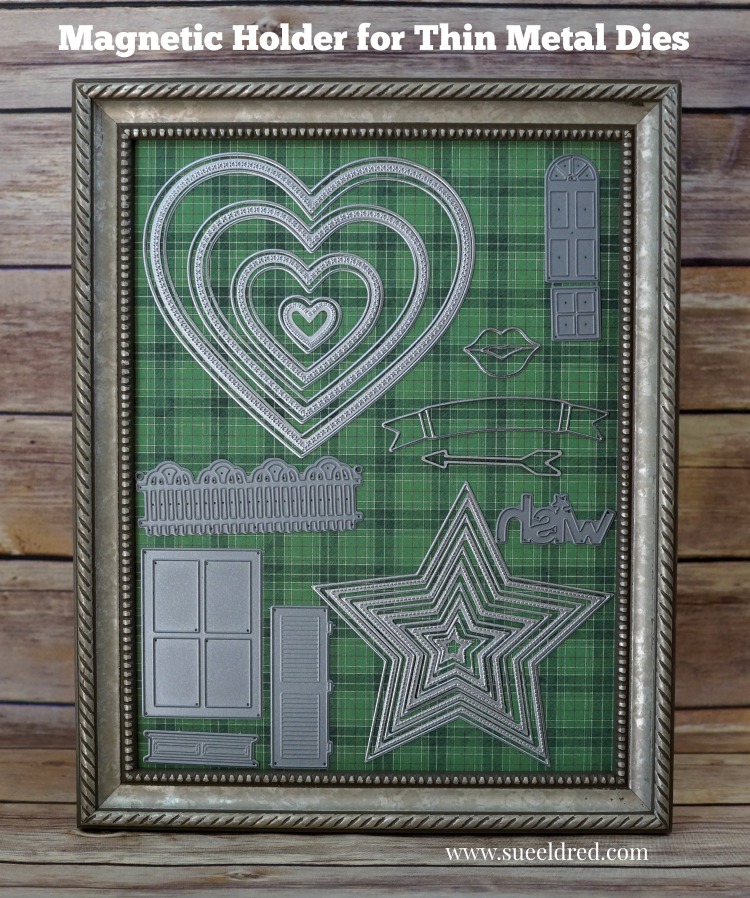
magnetic-holder-for-thin-metal-dies-sues-creative-workshop

Thin metal dies will not work to cut the magnetic sheets, but it would be a great way to store them!

Deflecto Magnetic Craft Sheets, 8″ x 15″, 3-Pack, White (5901)


“This is a sponsored post. As a member of the Deflecto Design Team I have been provided product in exchange for my creative ideas, views and opinions.”

*This post uses Amazon Affiliate links.  I am an Amazon Affiliate.

My Front Porch…all decked out and ready for fall

front-porch-inspiration-1295

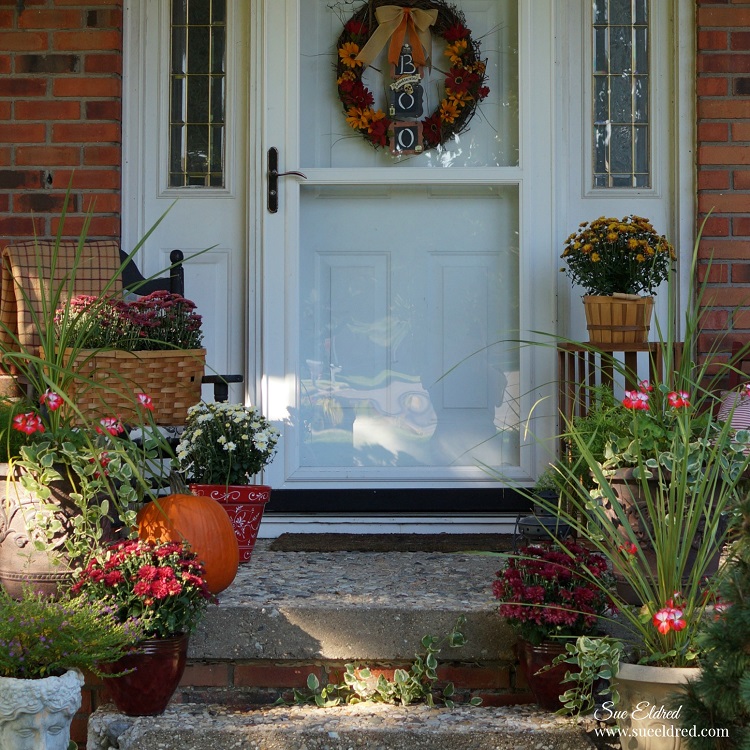
I thought I’d share with you today my Fall Front Porch that I did a few weeks ago.

In past years my Fall Decorating usually included sweeping off the porch, adding a pumpkin or two,

a mum and a wreath on the door.  That was it.  I was done.

fall-front-porch-sues-creative-workshop-1334

This year, thanks to my new “Instagram Obsession”, I was inspired to go all out.

Mind you…

going all out for me does not include 27 pumpkins, 15 mums, a $100 wreath and the most beautiful

looking dog you’d ever see.   Like a few of the amazing front porches I saw.  (trust me I counted)

I kept mine a little more simple, a little more doable, with out breaking the bank.

fall-front-porch-sues-creative-workshop-1314

I stared with things I had on hand.

A combination of things picked up at Garage Sales, Thrift Stores, Auctions, Estate Sales and a few items

I’ve had for over 20 years.

Sometimes I wonder, am I a collector or hoarder?

But…I always say “it’s not hoarding if you use them”.  (Right?)

fall-front-porch-sues-creative-workshop-1333

Since some of my summer flowers are still doing good, I had to add them to the mix.

I’ve had this poinsettia since last winter.  I hope I can make it turn red again.

fall-front-porch-sues-creative-workshop-1336

I love this old black chair.

I purchased it over 20 years ago at a antique store and hated to admit to my husband I paid $20 for it.

I’ve only repainted it once in all those years.

fall-front-porch-sues-creative-workshop-1391

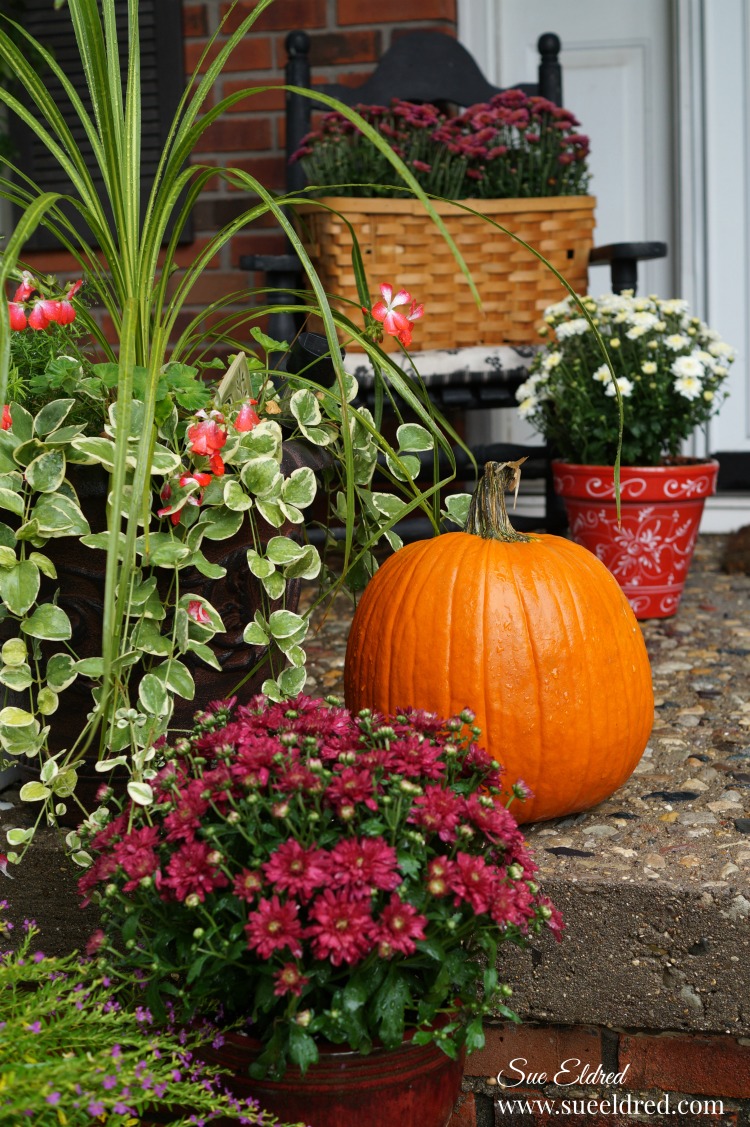
Mums are a fairly cheap addition to the mix.  I purchased 7 mums at $4 dollars each.

The price of a really good pizza dinner.

fall-front-porch-sues-creative-workshop-1360

I replaced the scraggily summer plants with mums in pots I already had.

fall-front-porch-sues-creative-workshop-1375

I kept it simple with only one pumpkin which will be carved by next week-end.

fall-front-porch-sues-creative-workshop-1308

The Wood Crate was a new garage sale treasure this year for $1.50.

The lantern I believe I picked up for $1 and the little red chair was a Thrift Store find at $3.00.

You got to keep you eyes open to all the possibilities of these treasures offer.

My daughter-in-law told me “I never find these kind of things”.

The trick to good finds is you have to go and go often.  I love the hunt.

fall-front-porch-sues-creative-workshop-1398

When it comes to my front porch, the only complaint I have is the size.

I wish it was wider and didn’t have an aggregate floor.  (really hard on bare feet)

fall-front-porch-sues-creative-workshop-1356

I really enjoy how it turned out.

Who knows, maybe next year I’ll have 27 pumpkins and 15 mums.

autum-wreath-and-boo-door-hanger-sues-creative-workshop-1256

You can read about the post on how to make the Autumn Wreath and Boo Door Hanger here.

Boo Door Hanger and Autumn Wreath

autum-wreath-and-boo-door-hanger-sues-creative-workshop-1256

The plan was to make the “Boo Door Hanger” and the “Autumn Wreath”

as two separate projects with two separate blog posts.

But… while I was working on decorating my front porch for Fall,

I tried them together and decided I liked it.

The “Boo Door Hanger” is a separate piece that I can remove after Halloween.

fall-wreath-supplies-sues-creative-workshop

I assembled the wreath using a grapevine wreath, a couple of fall silk floral bouquets, ribbon and my

hot melt glue gun.  After cutting the stems apart from the bouquet, I played around with the

arrangement of the flowers and glued them in place.

A simple bow glued into place finished off the Autumn Wreath.

The entire project took less than a half hour.

sign-tags-stickers-and-paper-1119

The Boo Door Hanger was a little more involved…

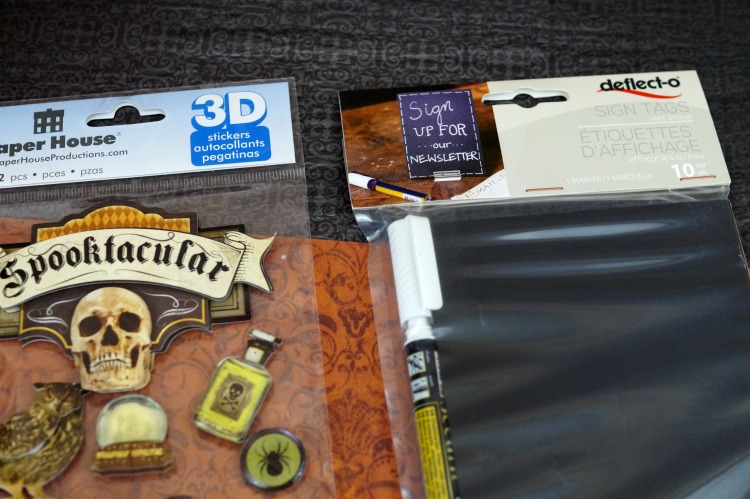
I used Black Sign Tags that come with a White Wet Erase Marker from Deflecto Craft Solutions

and Halloween paper and stickers from Paper House Productions.

die-cut-frames-1124

I applied the Halloween paper onto thin chipboard and cut out three die-cut frames.

I cut the sign tags just slightly bigger than the opening of the frame and adhered it to the back.

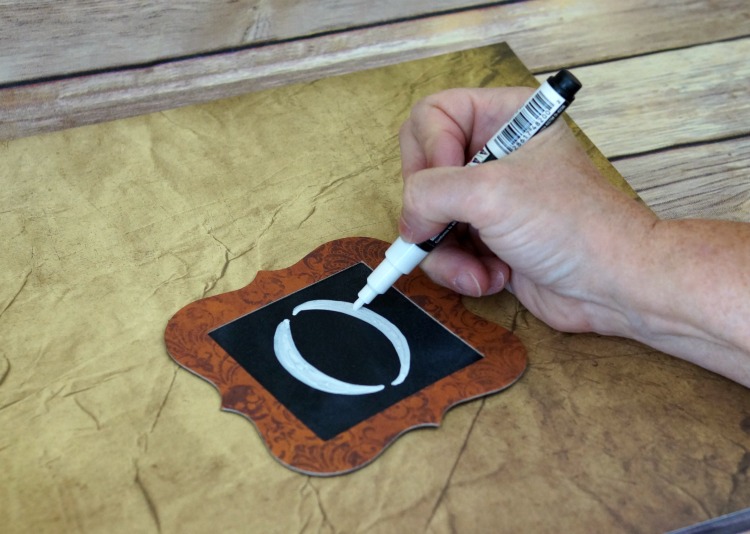
drawing-the-letters-with-the-chalk-marker-1125

I drew in my letters using the white dry erase pen.

Make a mistake?  Just wipe the sign tag with a damp paper towel and start over.

boo-door-hanger-close-up-1127

I punched two holes in the top and bottom of the first two frames and the top only of the last frame.

I added a black eyelet to each hole and connected the frames with small garment pins.

boo-door-hanger-1129

I embellished each frame with Spooktacular 3D Stickers from Paper House Productions.


“This is a sponsored post. As a member of the Paper House Productions and Deflecto Design Team I have been provided product in exchange for my creative ideas, views and opinions.”