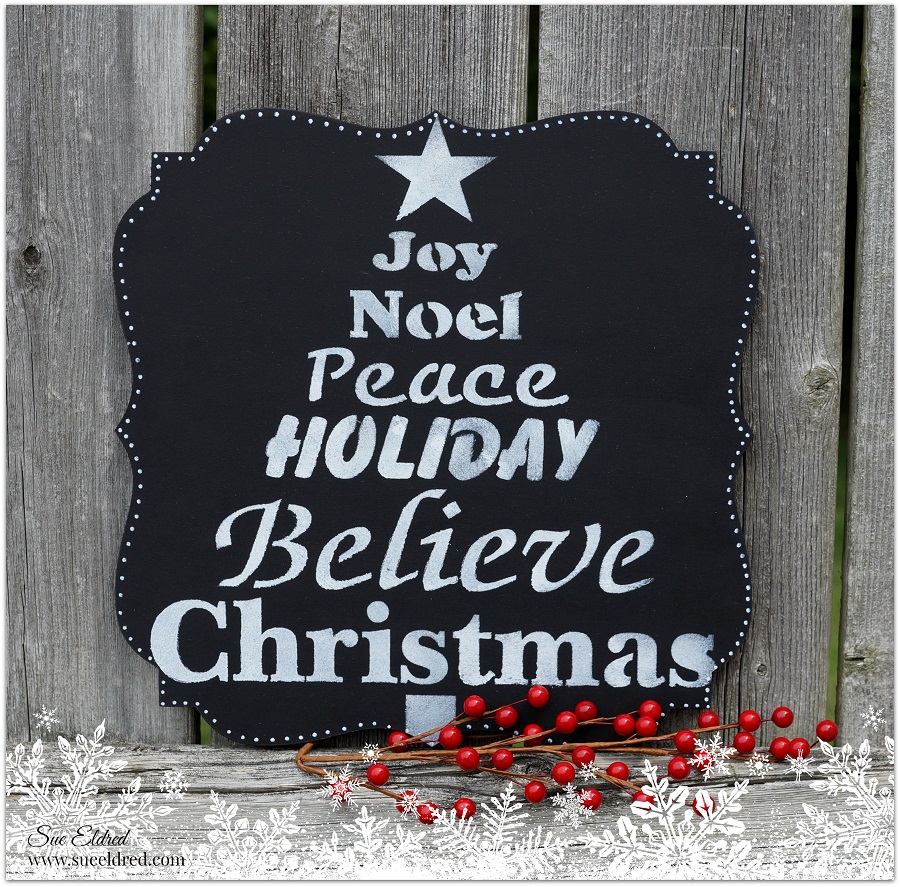
DIY…Christmas Chalkboard

DIY…Christmas Chalkboard

Christmas in July…

Last week it was so hot that when I went out at 9:00 in the evening to water my flowers it

was hard to breath.  It was so hot that our unheated pool felt like bath water.

Summer’s in full swing and vacation (for me) is fast approaching.

And with all the things I could or should be doing, I felt like making a Christmas Chalkboard.

It’s not too early?  Is it?

The Christmas Chalkboard is really easy to make…

and would be a wonderful gift for those of you thinking ahead.

And if you’d like…you could make it a two sided chalkboard and really get creative.


Here’s how I made the Christmas Chalkboard…  

Disclaimer:  This blog uses ads and affiliate links.  If you choose to make a purchase using one of the links, I receive a small commission (at no additional cost to you) that helps offset the costs of maintaining this blog.  Thanks for your support!

Guest Room Closet Make-Over equals More Crafty Storage

When your grown child moves out and gets married…

sometimes it takes awhile years to get all the crap stuff out of their old room.

After my daughter got married, I decided to make her room into a Guest Room.

Every time they’d make the trip back home,  I’d guilt her into taking a little bit

more of her stuff home.
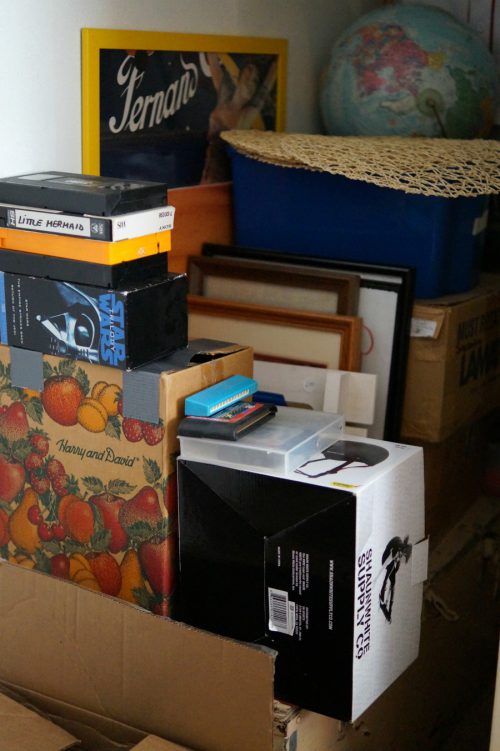
Eventually, I stacked all the remaining stuff neatly in the closet.

When my her little brother entered his teen years and would clean his room…

Where do you think it went?  You guessed it, in the Guest Room closet.
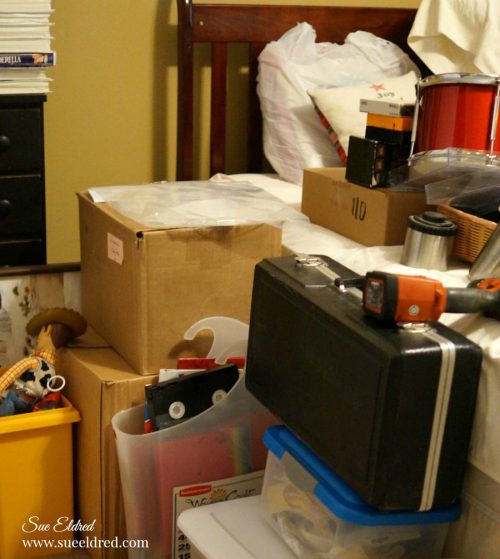
This year I finally decided to claim that space for my own.

Have I ever mentioned that I’m a spoiled crafter?

With all the wonderful things I receive in being part of a design team…

I have a lot of stuff that just won’t fit into my 8″ x 10″ office/workshop space.

After a lot of purging and last month’s Neighborhood Garage Sale…

the last of the junk is mostly gone and I’m finally finished.  (for now at least)

The first thing I did was after emptying the closet was to add this large

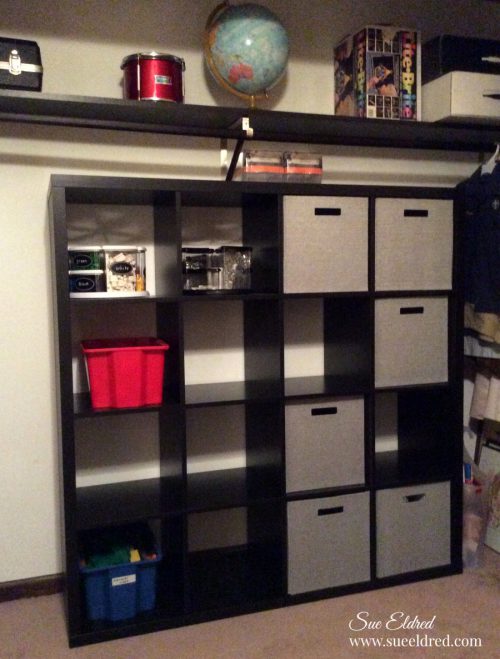
IKEA Kallax Bookcase Room Divider*.  (amazon affiliate link)

I forgot to take into consideration the upper shelf brackets when measuring the closet

to make sure the cubby unit would fit.  So…instead of just moving the ugly old metal shelf,

we added a nice wood shelf to match.  This picture was taken while my husband still had

the doors removed.  (sorry about the blurry picture)  The doors we’re such a pain to put

back on that I never got a finished picture of the closet with the doors off.
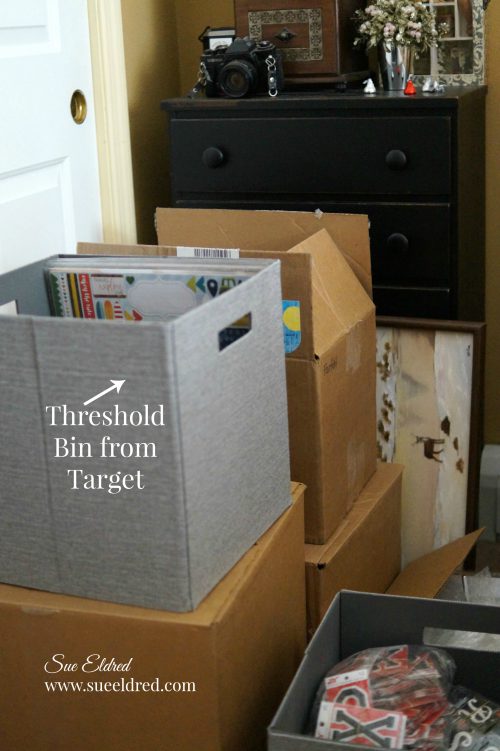
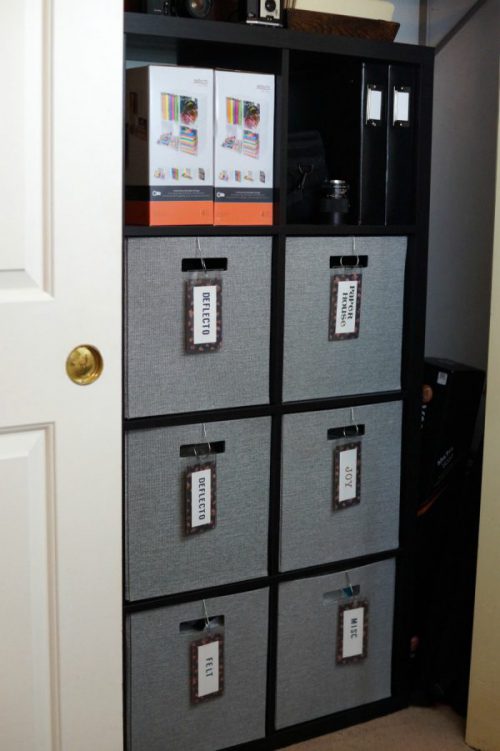
We also got 6 of these Threshold 13″ Fabric Cube Storage Bin* from Target.

I love using bins.  Everything’s neatly contained and it looks pretty.

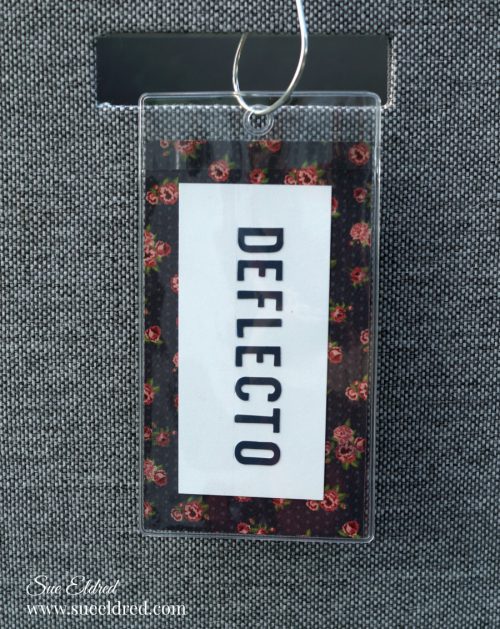
I labeled each bin using these Small Flexible Pouches* and Pear Clips* from Deflecto.

Besides all the extra storage…I now have room for finished albums, camera bag and more.

The space on the side of the unit I use for storing my lighting equipment and tripod.
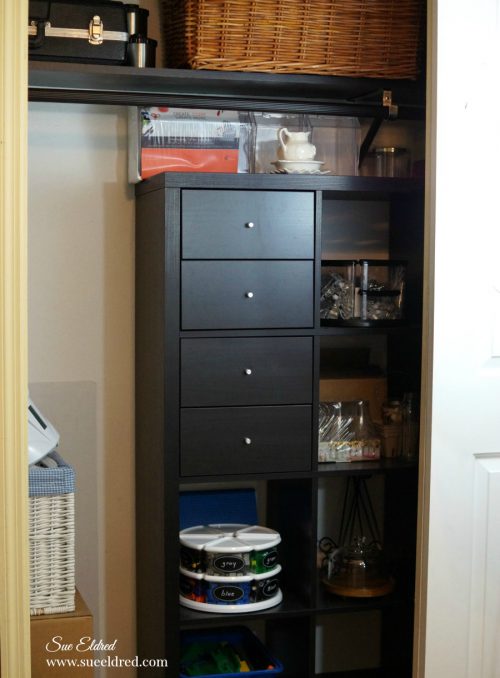
We also purchased two sets of drawer inserts for the Ikea Kallax Bookcase Room Divider.

(Ikea Insert with 2 drawers, black brown*)  I love having the drawer inserts for smaller items.

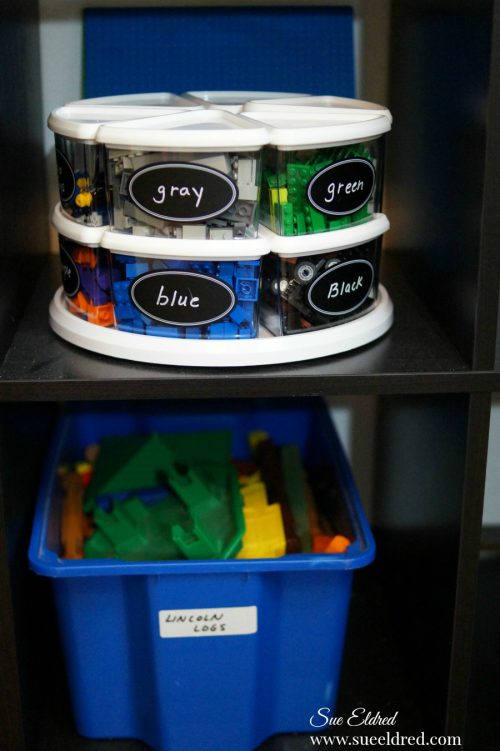
You may have noticed there’s still a few toys left in the closet.  (always a work in progress)

I used the Deflecto Rotating Carousel Organizer* for my Lego storage.  (the boys love it)

For now, the Guest Room Closet is done.  I will admit that this has been a several month

process.  It feels so good to have my extra stuff organized and easy to find.

 “This is a sponsored post. As a member of the Deflecto Design Team I have been provided product in exchange for my creative ideas, views and opinions.”

Shop Amazon Scrapbooking Supplies*

Disclaimer:  This blog uses ads and affiliate links.  If you choose to make a purchase using one of the links, I receive a small commission (at no additional cost to you) that helps offset the costs of maintaining this blog.  Thanks for your support!
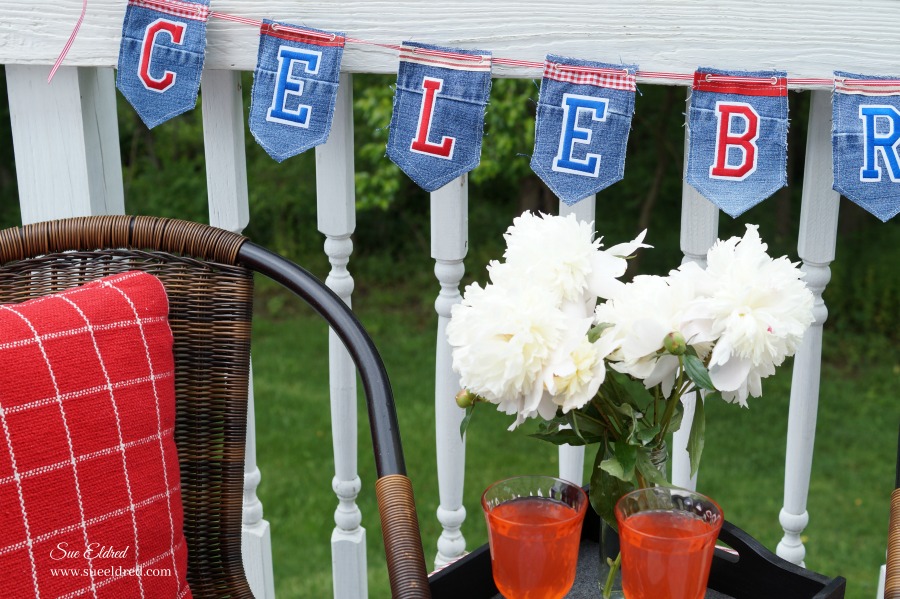
“Celebrate” with a Banner made from old blue jeans

Create a banner using Joy Embroidered Iron On Letters and old blue jeans.

When inspiration hits in the middle of the night, it usually ends of being one of my favorite

kind of projects.  (This one  was fun.)  

Got any old worn blue jeans ready to be thrown out?

I started with my old blue jeans and 3″ Iron-on Embroidered Varsity Letters from Joy

in red and blue.

I created a 3 1/2″ x 5 1/2″ banner pattern using grid paper and traced it onto the jeans.

To add a little interest…I incorporated the seams from the sides of the jeans to use for the

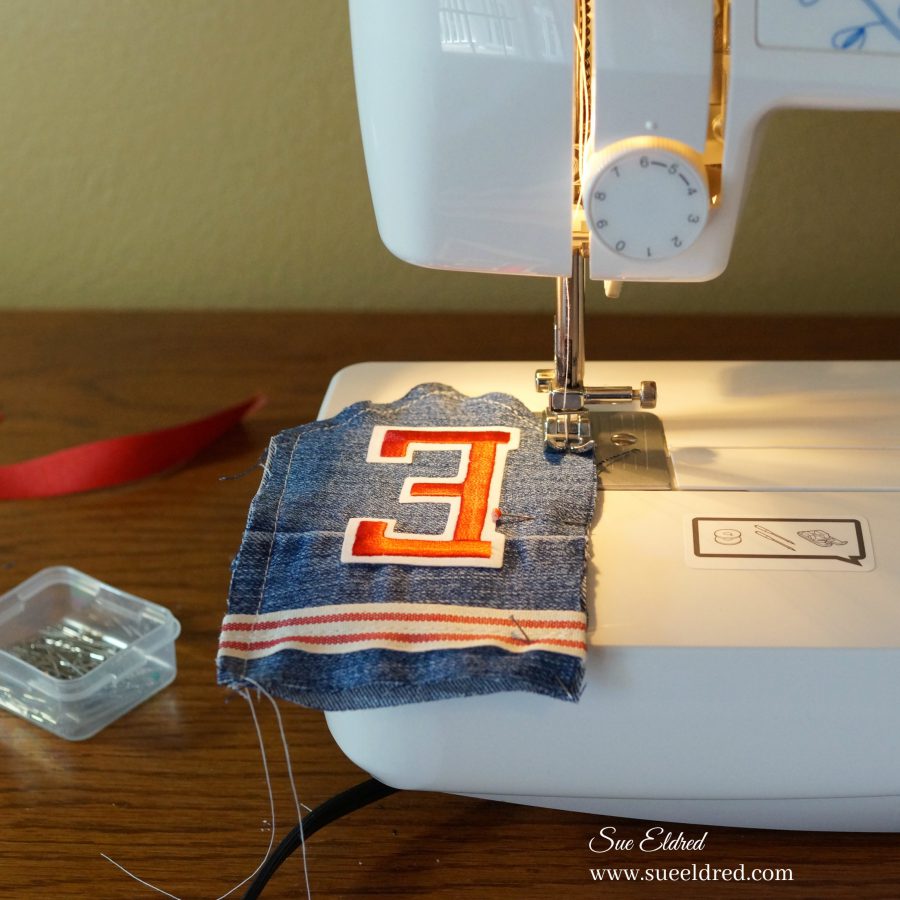
front of the banner.  For the word “C-E-L-E-B-R-A-T-E”  I cut 9 banners for the front with

seams and 9 plain ones to use to line the back of the banner.

The Iron-on Embroidered Varsity letters are sticky backed so I went ahead and placed

them onto the front of my banners before sewing.

Next came my jar of red ribbon scraps.  (I love red so much, I have a jar just for “red”)

I sewed the ribbon scraps onto the tops of each banner.

I then sandwiched the front with a plain back and simply sewed around each banner with

my sewing machine.  After the third banner, I finally got smart and started using straight pins.

As you can tell, I was going for a casual simple look.  (that’s my story and I’m sticking to it)

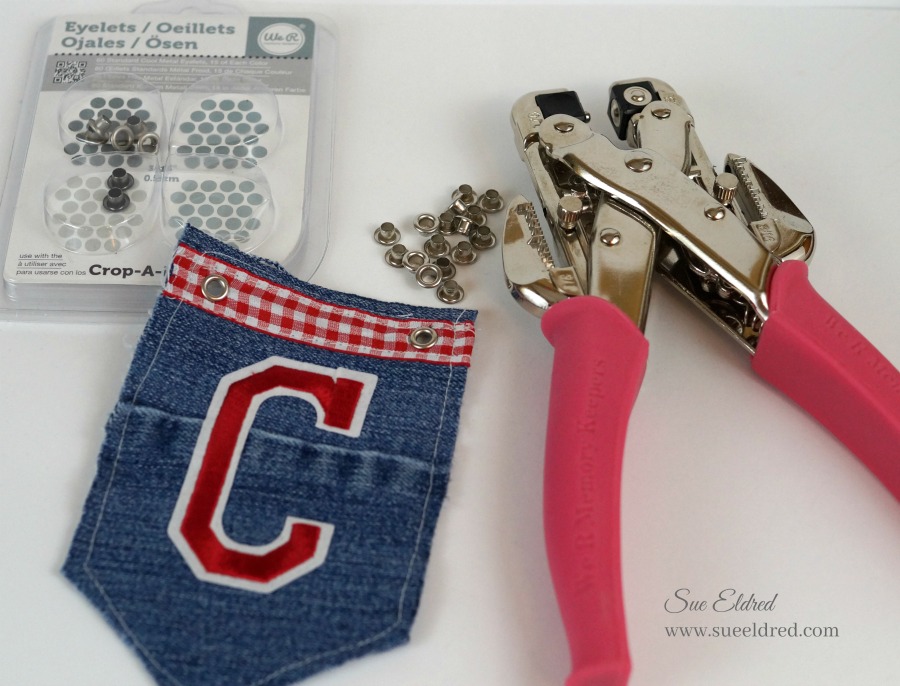
After I was finished sewing all my banners, I used my We R Memory Keepers Crop-A-Dile*

to punch two holes.  (I used the 3/16″ sized hole.)

I used We R Memory Keepers Eyelets Cool Metal* (affiliate link) for my eyelets.

Did you know that the  Crop-A-Dile* easily goes through both layers of jeans.

Join Amazon Kindle Unlimited 30-Day Free Trial

Disclaimer:  This blog uses ads and affiliate links.  If you choose to make a purchase using one of the links, I receive a small commission (at no additional cost to you) that helps offset the costs of maintaining this blog.  Thanks for your support!
 

The “Celebrate” banner was created for and sponsored by Joy.

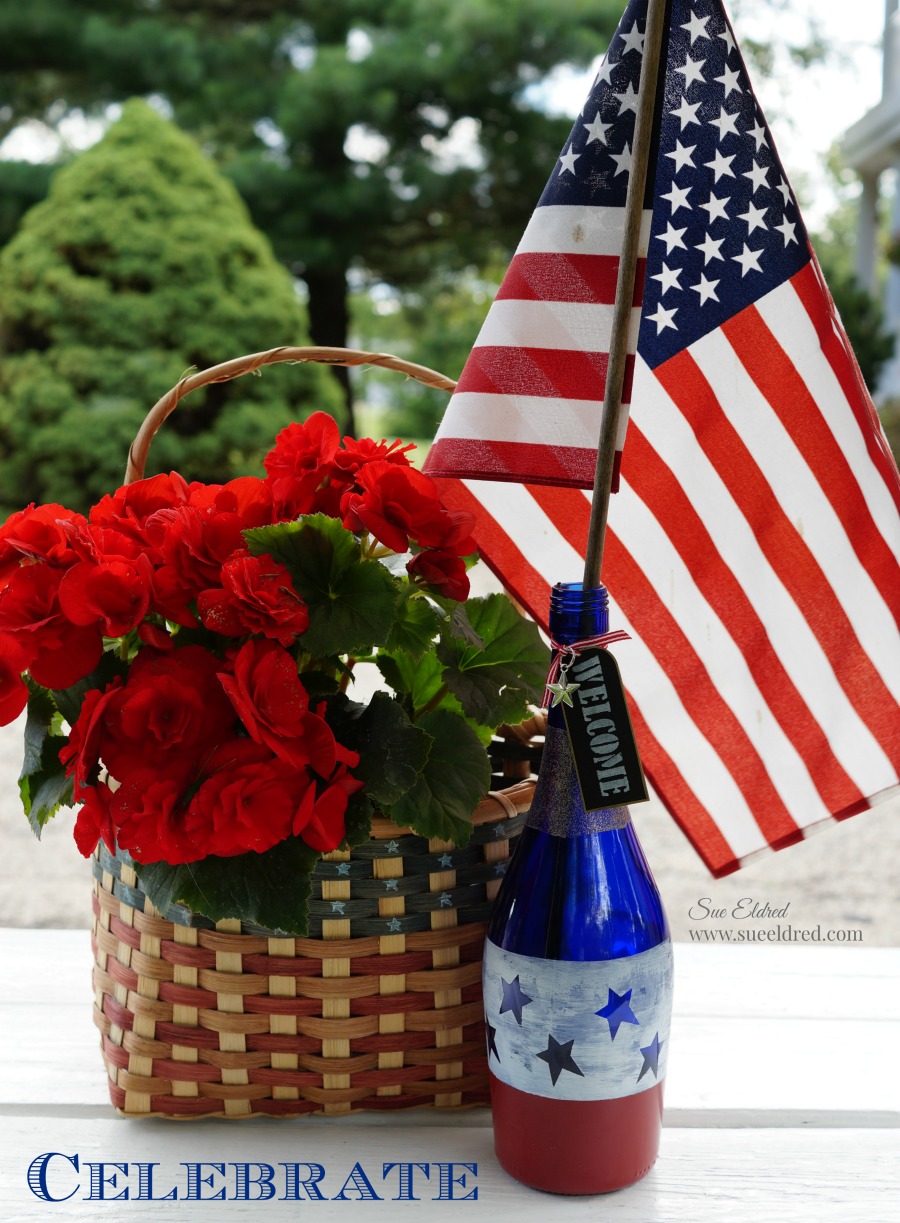
How to make a Patriotic Red, White and Blue Etched Wine Bottle

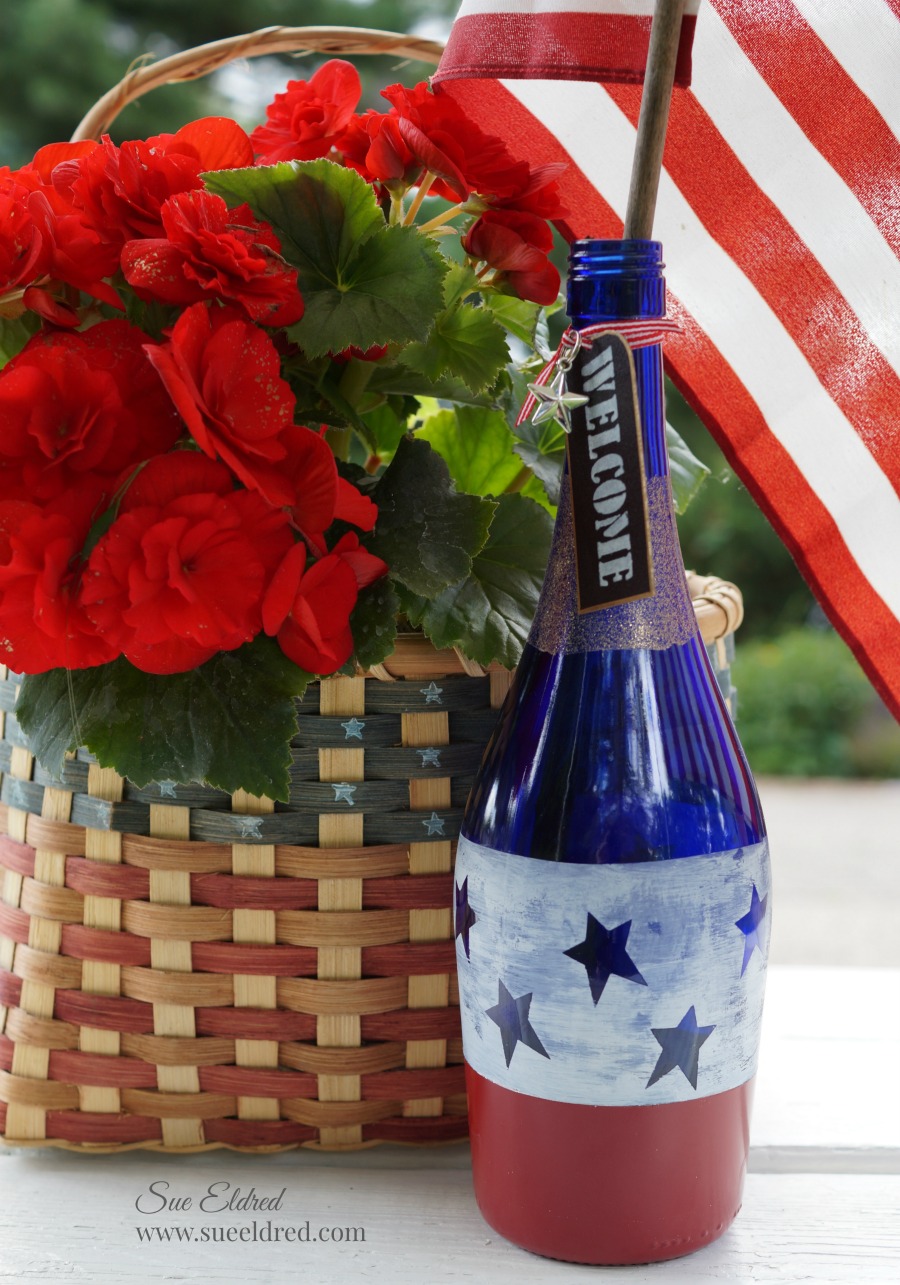
Celebrate the holidays with a Red, White and Blue Etched Wine Bottle.

I’m getting ready for a Americana Crafternoon this week-end with a fun group of ladies

and thought I’d make up a few decorations.  As luck would have it, I just happened to

have an empty blue wine bottle.   I thought to myself, that would make a perfect vase.

I added red flowers to a 50 cent Garage Sale-Flag Basket and now I have a festive display.

Shop Dollar Tree for Red White & Blue Party Supplies*                      (*affiliate link)

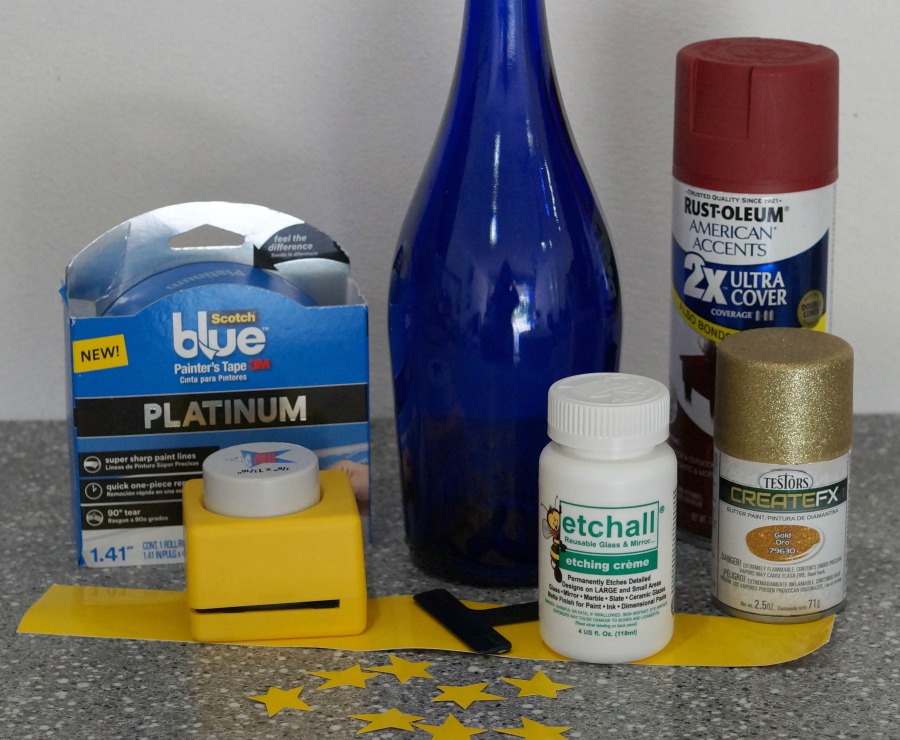
To make the Red, White and Blue Etched Wine Bottle I used…             (*amazon affiliate links)

Directions:

  1.  Clean and remove the label off a blue glass wine bottle with warm soapy water.  (Dry)


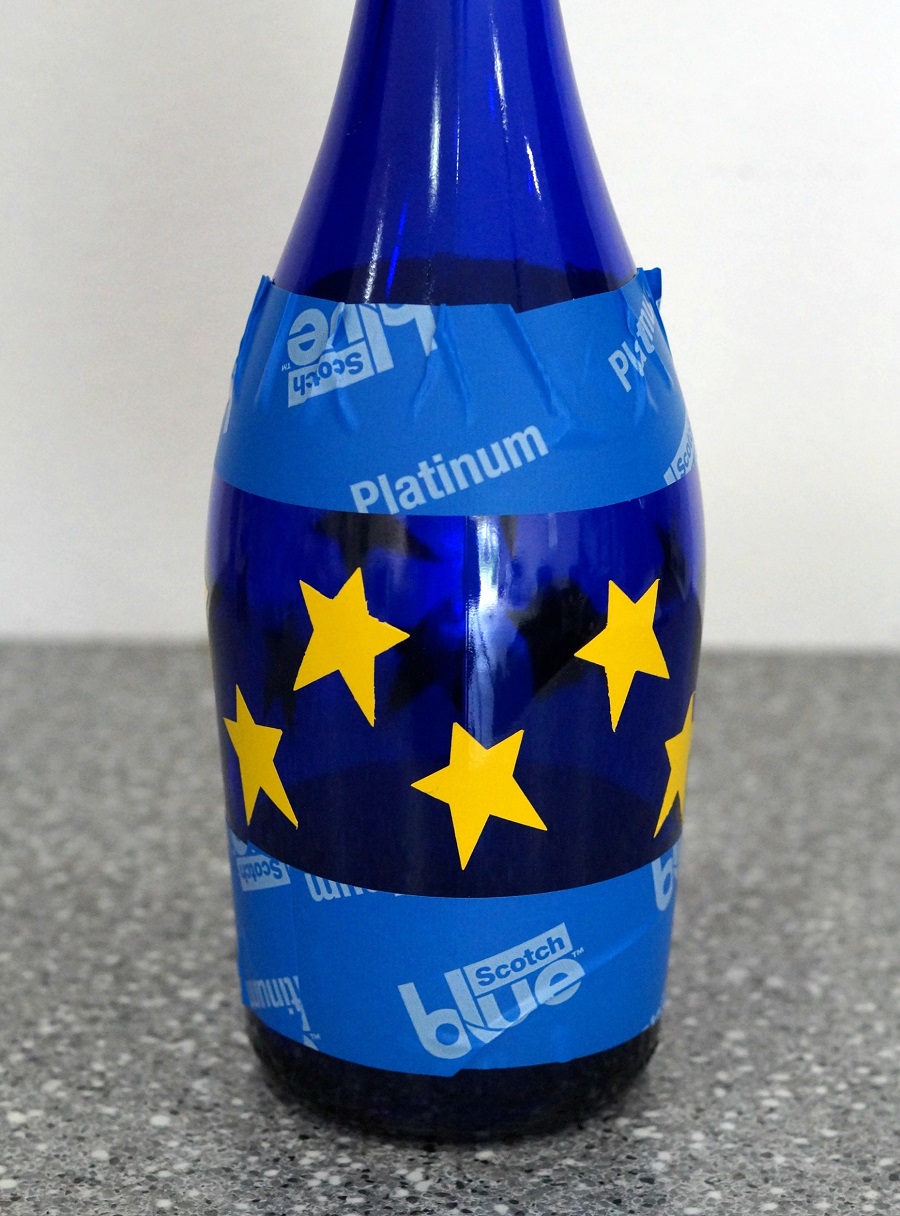
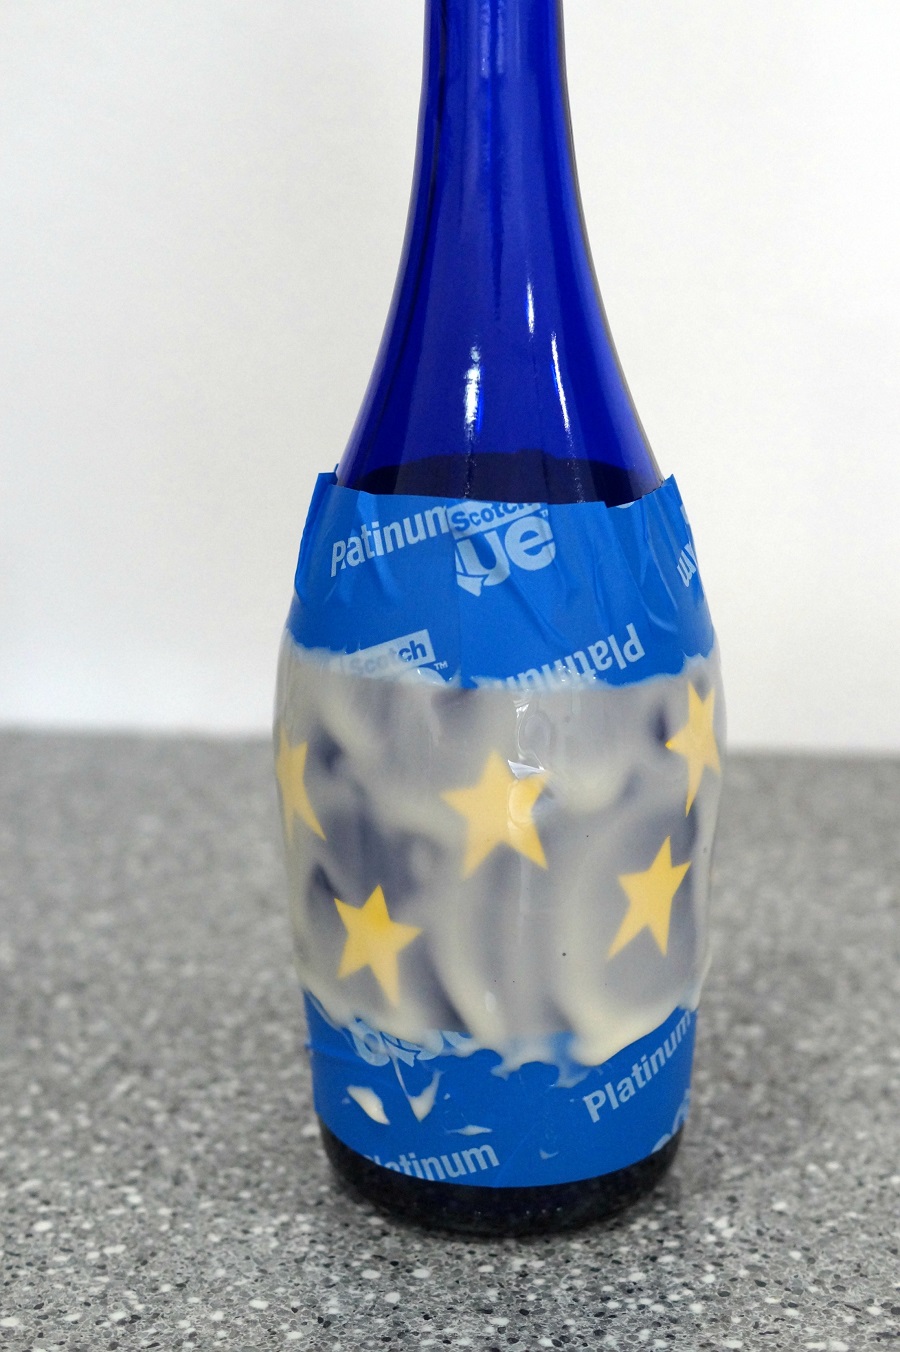
2.  Mask off a 2 ½ to 3 inch section on the center of the wine bottle with blue painter’s tape.  Burnish the edges of the tape with your fingertip, the tape should lay flat against the bottle.

3.  Punch stars out of the etchall etchmask*.  Remove backing from the stars and stick randomly on the bottle.  Burnish the stars with your fingertips onto the bottle.

4.  Apply a heavy coat of etchall Etching Crème*   onto the bottle using the squeegee.

5.  Let crème sit for 15 minutes.  (You will need to keep an eye on the bottle to make sure etching crème doesn’t run past the blue painter’s tape.)  Scrape excess etching crème from the bottle and return the extra etching crème back into the bottle. It’s reusable.

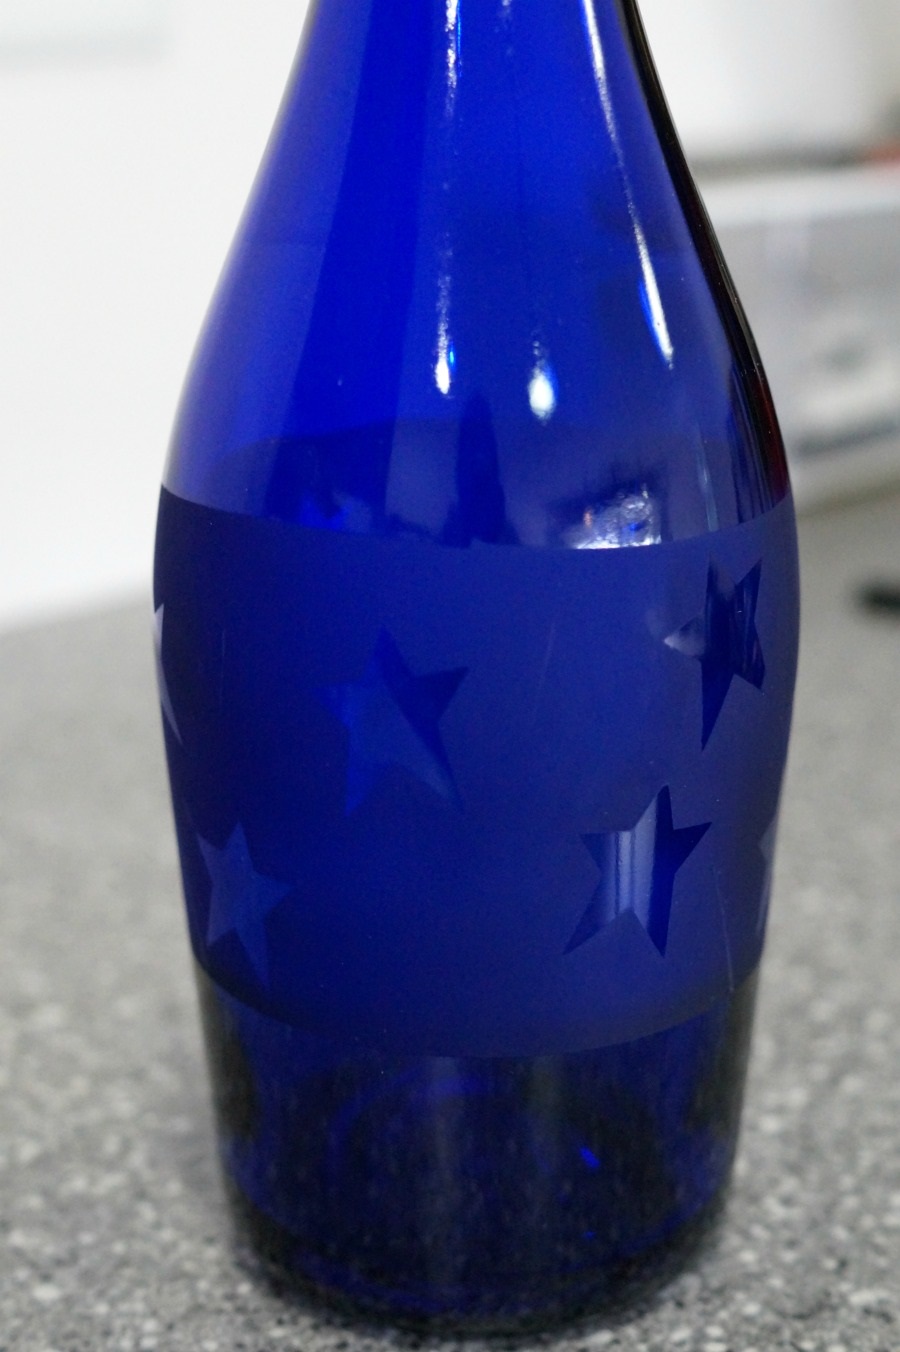
6.  Rinse bottle with warm water to clean.  Remember to keep crème away from porcelain or ceramic tiles.  Remove tape and stars and dry.  The bottle will have a nice subtle etching.

7.  While I liked the subtle look… I decided I wanted something a little bit brighter for my patriotic bottle.   I dried brushed white acrylic paint over the etched surface.  Wipe off excess paint with a damp cloth for a white washed look.  The paint only sticks to the etched surface.  (How cool it that.)  It really makes the stars pop.

8.  Re-mask the bottle with the blue painter’s tape, this time covering the etched surface.  Paint the bottom of the bottle with the colonial red spray paint.

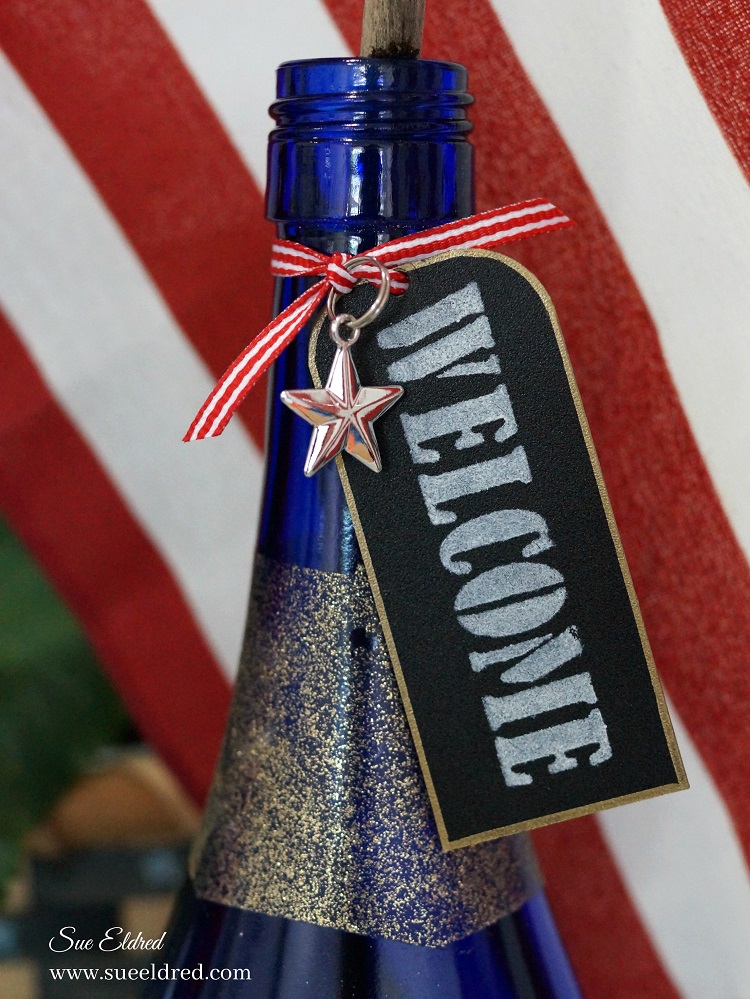
10.  Mask a small section on the top of the bottle and spray with gold spray paint.

11.  Cut a small black vinyl rectangle and round two of the corners with the corner punch.

12.  Stencil the word “welcome” from the family words stencil onto the black vinyl using a stencil brush and the multi-surface acrylic paint.

13.  Use the gold paint pen to add a thin border around the black vinyl tag.  Punch a small hole on the top of the tag and tie onto the neck of the bottle with ribbon.

Enjoy the party with friends.  (maybe even empty another blue wine bottle)


Don’t Miss a Thing…Make Sure to Follow me.

Shop Your Fav Brands at Scrapbook.com

Disclaimer:  This blog uses ads and affiliate links.  If you choose to make a purchase using one of the links, I receive a small commission (at no additional cost to you) that helps offset the costs of maintaining this blog.  Thanks for your support!

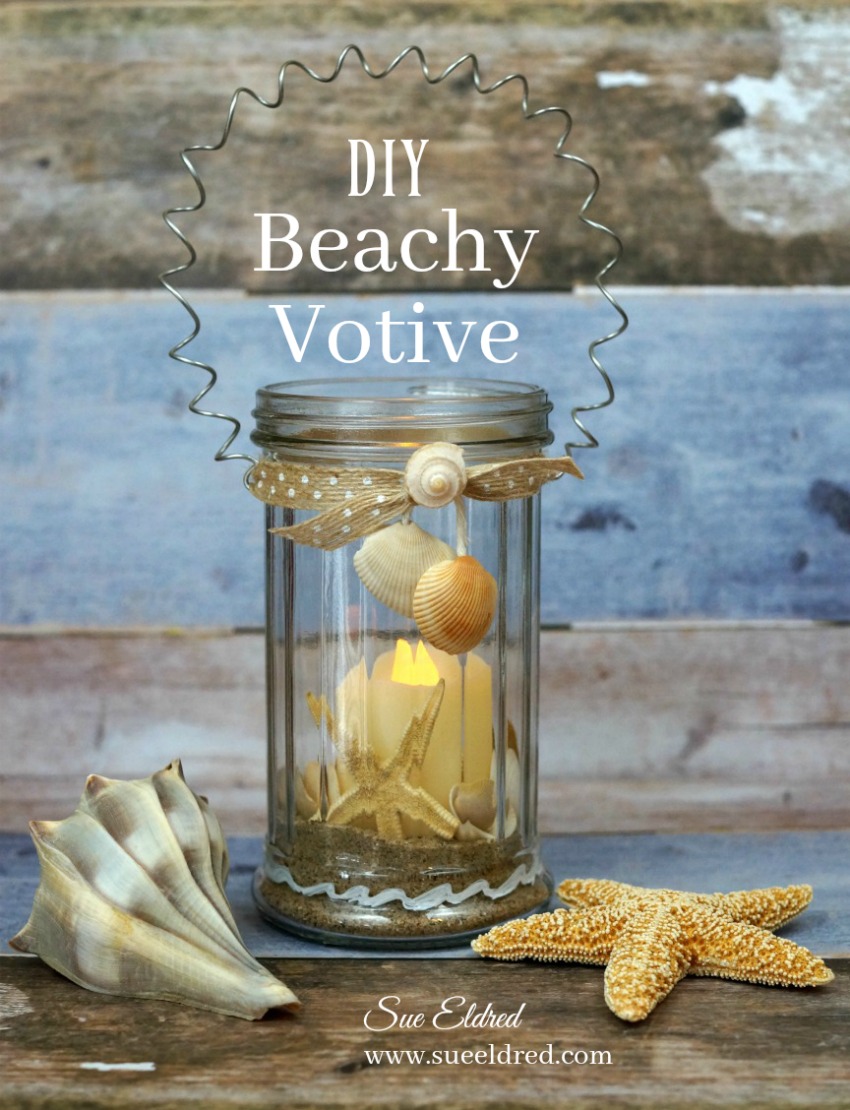
Create a Beach Votive with a few Dollar Store Treasures.

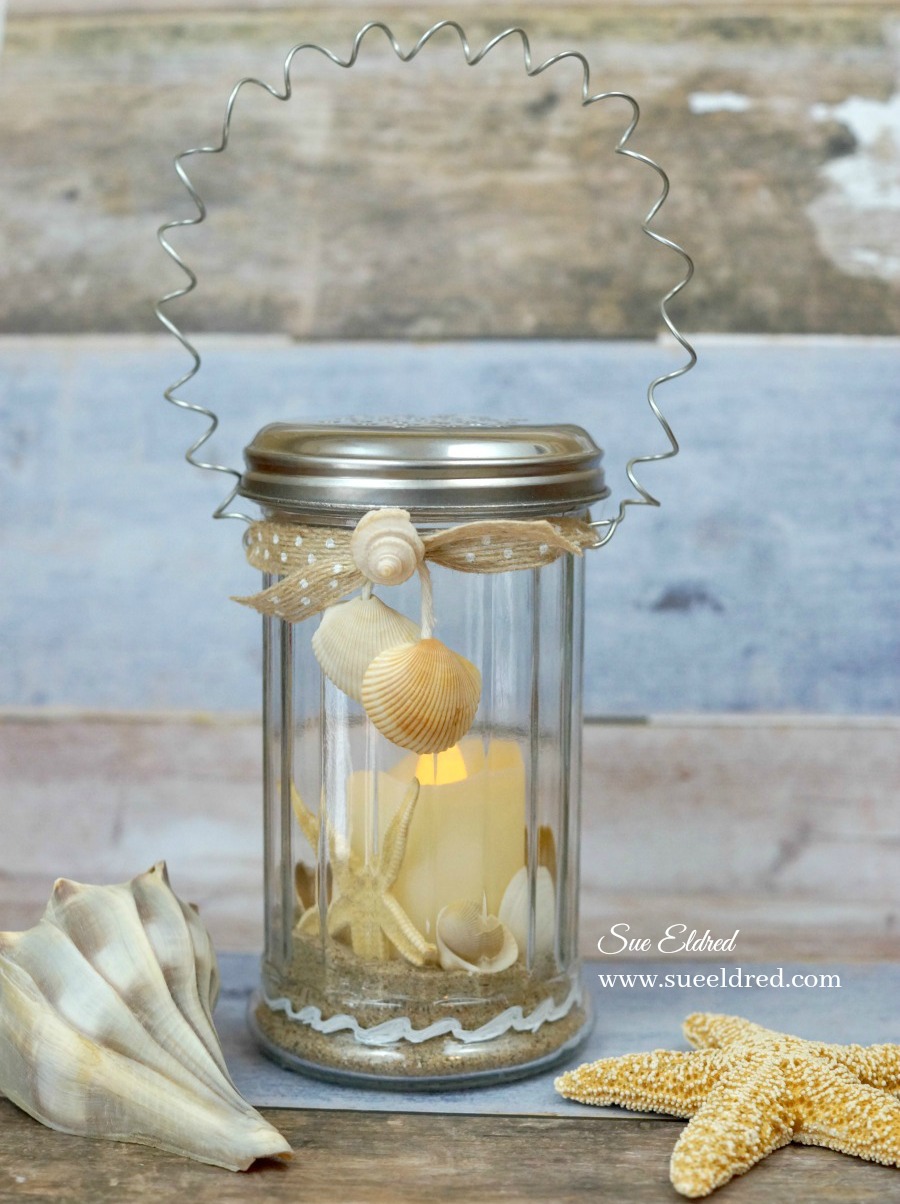
Create a Beachy Votive with a few Dollar Store treasures.

A cheap and easy beachy decoration.

A great way to display those small shells collected on vacation.

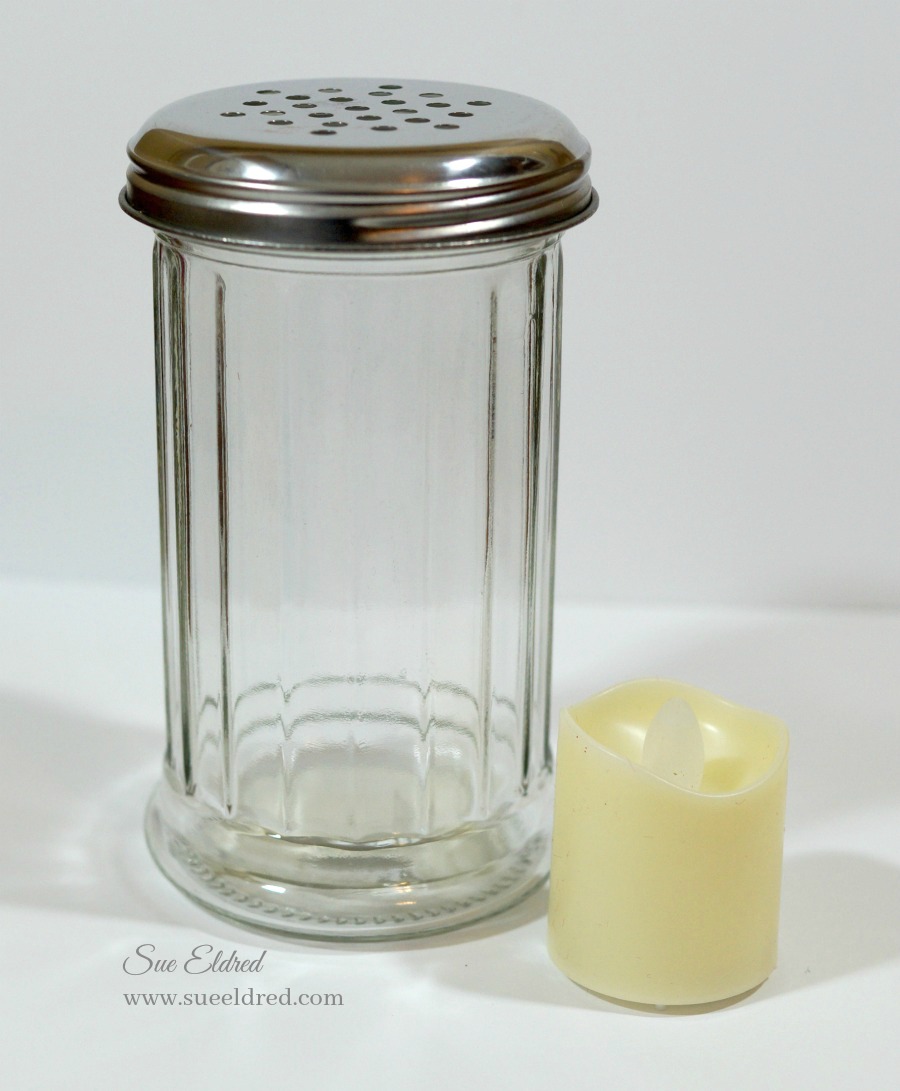
I purchased the Parmesan Cheese Shaker* and a Flameless Candle Votive*

To make the Beachy Votive here’s what I used:                             (*affiliate link)
Disclaimer:  This blog uses ads and affiliate links.  If you choose to make a purchase using one of the links, I receive a small commission (at no additional cost to you) that helps offset the costs of maintaining this blog.  Thanks for your support!

Directions:

  • Wrap wire around a pencil for a spiral handle.

  • Using the needle nose pliers, make a small loop on each end of the wire.

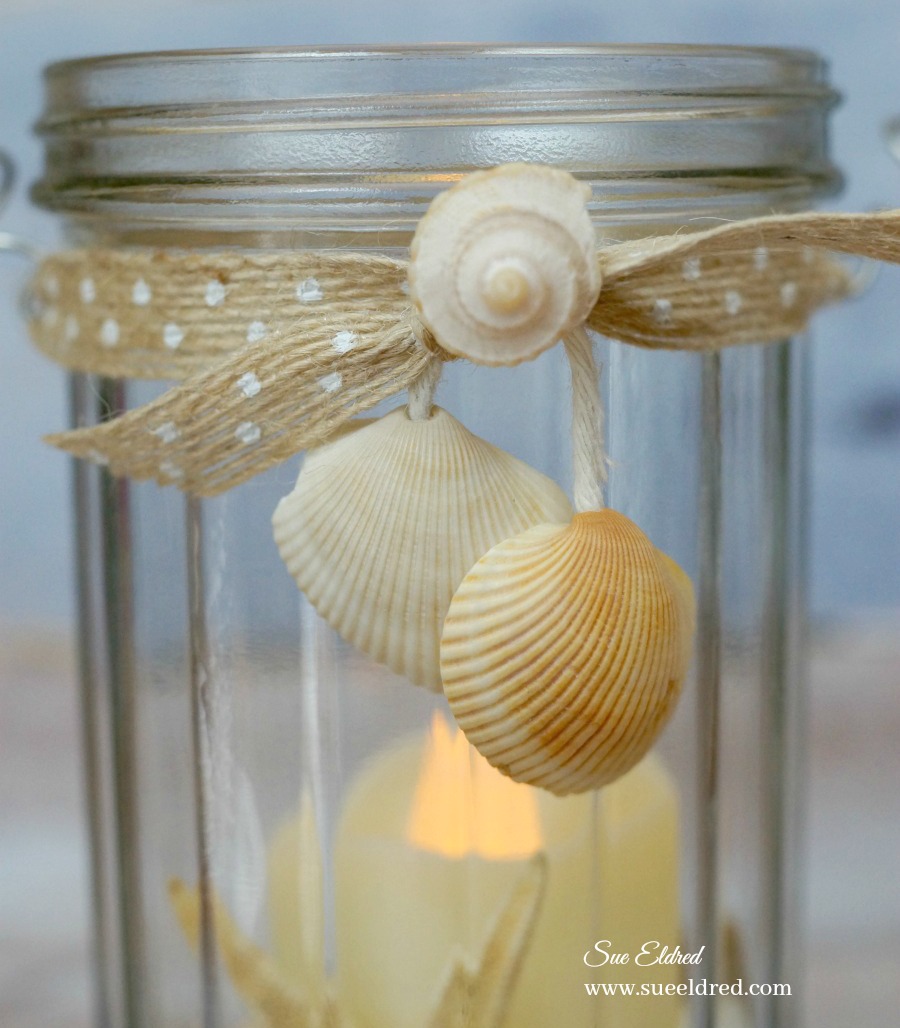
  • Find two small shells with natural holes on the end.  Tie them together with a small piece of string.

  • Thread burlap ribbon through both looped ends of the wire and tie around the top of the parmesan shaker.  Add shells on string as you knot the ribbon.
  • Glue top of broken shell onto the knot of the burlap ribbon with Beacon Fabri-Tac Permanent Adhesive*.
  • Add approx. 1″ of sand into the parmesan shaker.  Add small votive and shells.

The Beachy Votive looks good with or without the lid.

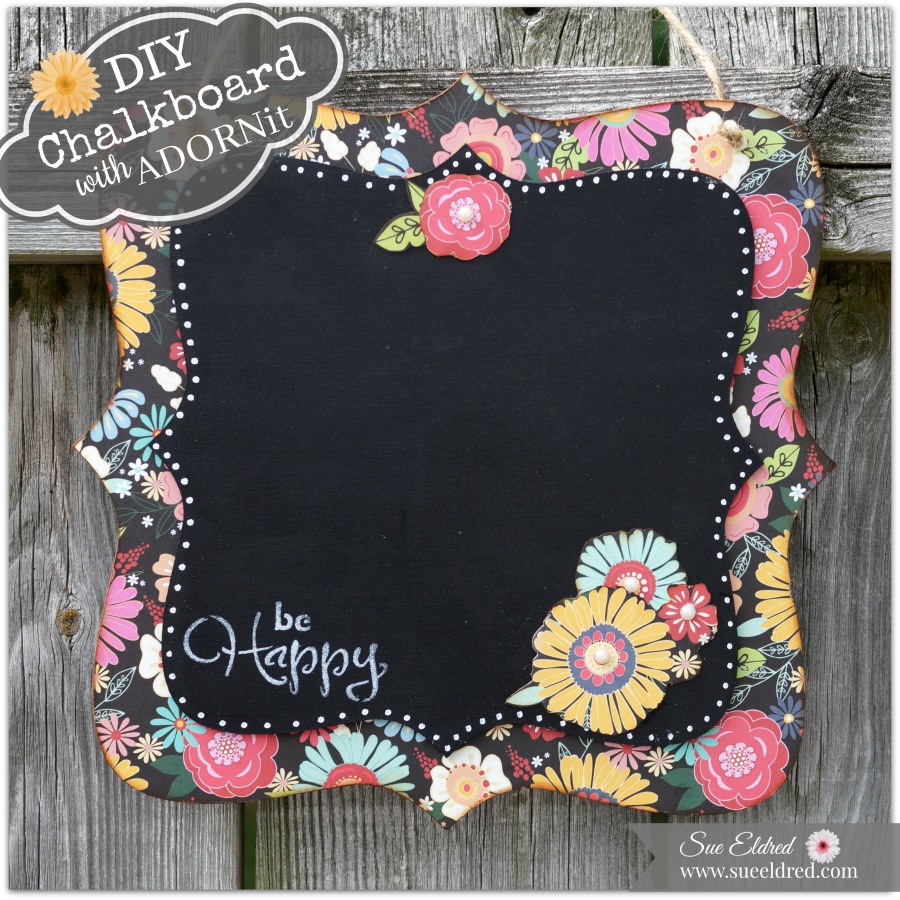
How to make a Floral Chalkboard

DIY Chalkboard with Adornit…

The Floral Chalkboard makes a fun decorative Home Décor piece and is really easy to make.

To make the Floral Chalkboard you’ll need…        (*affiliate links)

Shop Your Fav Brands at Scrapbook.com

Directions:

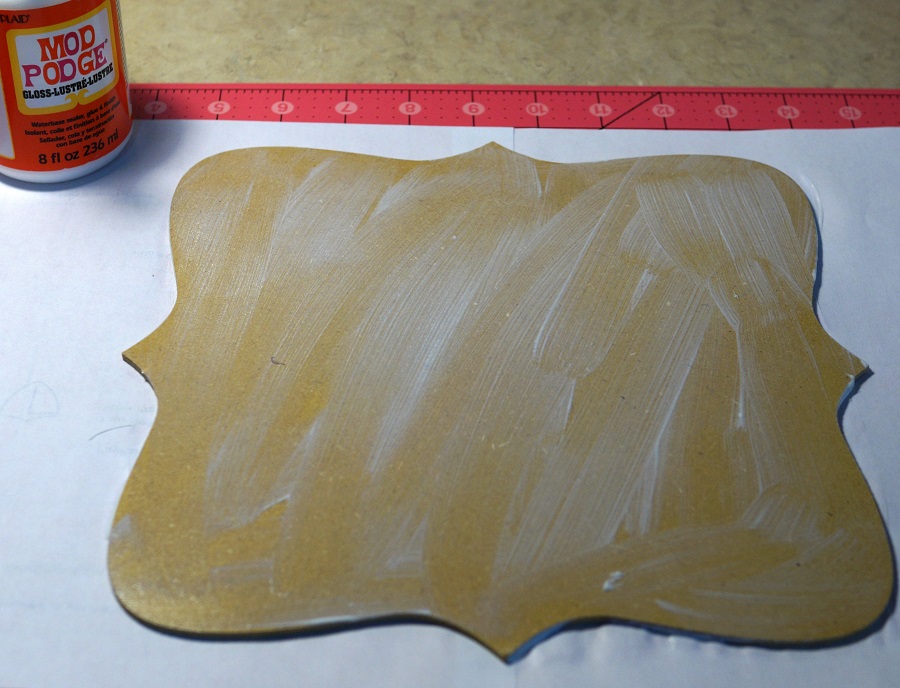
  1. Apply an even coat of Mod Podge* over the larger Wood Bracket shape.  Lay decorative scrapbook paper over shape and smooth with your hand.

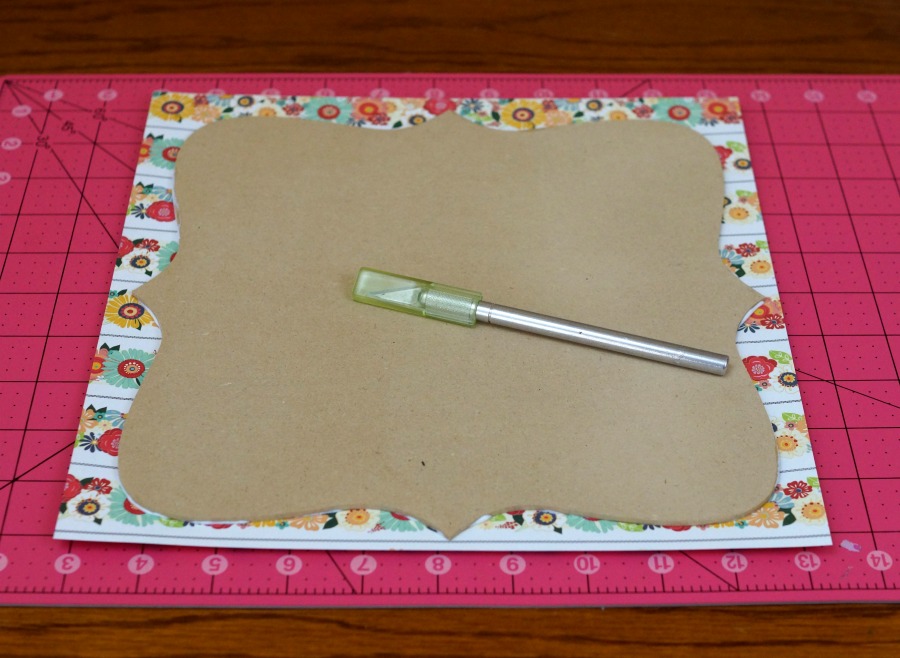
2.  Using an x-acto knife and cutting mat, cut excess paper away from the Wood Bracket.

3.  Rub Vintage Photo Distress Ink*onto the outside edges of the wood shape using the Ink Blending Tool*.

4.   Paint the smaller wood shape with the Black Chalkboard Paint*.  Add small white dots around the outside of the wood shape with the white paint marker*.

5.  Stencil the words “be Happy” onto the chalkboard using white acrylic paint and the Deco Art Americana Decor Stencil, Inspiration*.

6.  Cut a few flower shapes using the second sheet of scrapbook paper.  Apply a thin coat of Mod Podge* to the back of the flowers and glue to the front of the chalkboard.  Add decorative pearl embellishments to the inside of the flowers.

7.  Glue chalkboard to the front of the floral base using Beacon’s Quick Grip All-Purpose Permanent Adhesive*.

8.  Drill two holes on the top of the chalkboard and add Twine* for hanging.


This Chalkboard was sponsored by Adornit as an“it girl” Ambassador.

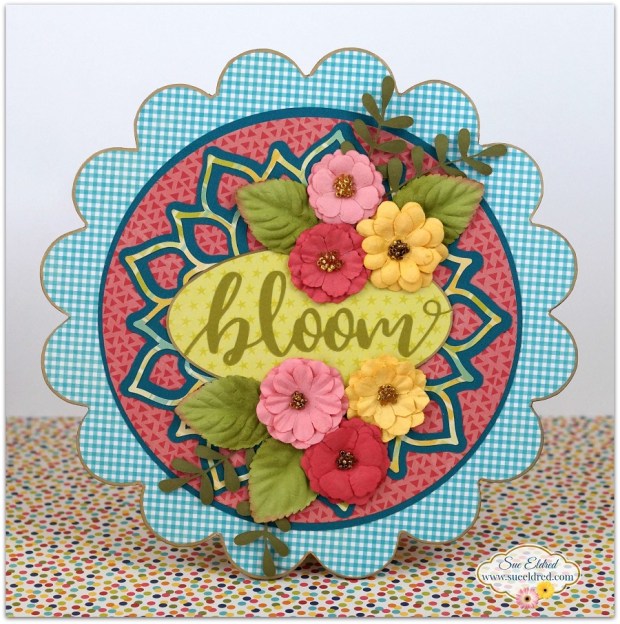
If you liked the Floral Chalkboard, you might also like the DIY Bloom Floral Plaque.

You can see the full tutorial here.


Don’t Miss a Thing…Make Sure to Follow me

Shop Amazon Scrapbooking Supplies*

*Disclosure:  This blog uses ads and affiliate links.  If you choose to make a purchase using one of the links, I receive a small commission (at no additional cost to you) that helps offset the costs of maintaining this blog.  Thanks for your support!


How to make a Chippy Window for Spring

Happy Spring!

To celebrate the first day of Spring I’m sharing how I made this cute little Chippy Window.

To make the Chippy Window…

I started with a 7gypsies 8×8 Shadowbox Insert that I painted with white acrylic paint


To achieve the look of an aged, worn, old chipped painted window…

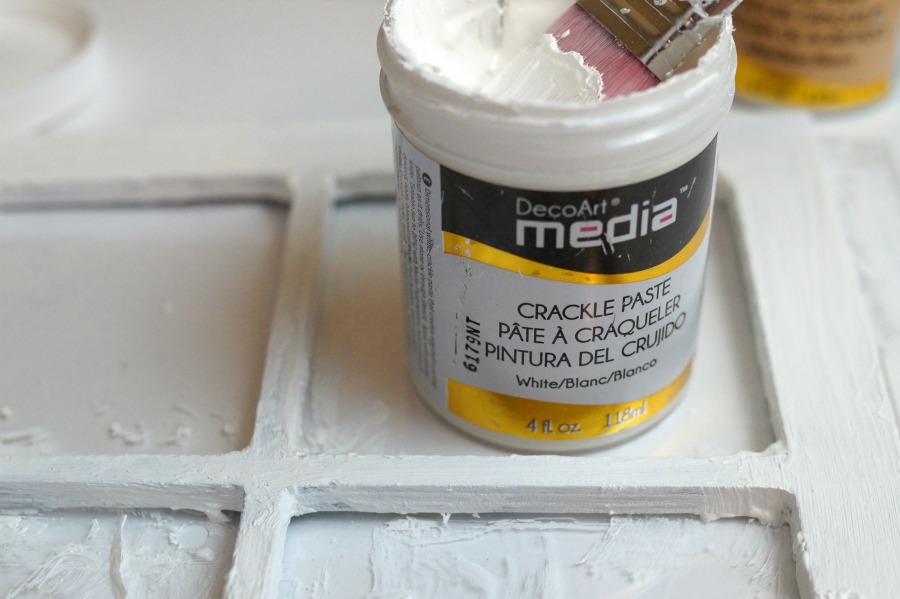
I alternated layers of Deco Art Media White Crackle Paint* and

Deco Art Media White Crackle Paste* from DecoArt.

Allow plenty of drying time between each coat.

*Disclosure:  This blog uses ads and affiliate links.  If you choose to make a purchase using one of the links, I receive a small commission (at no additional cost to you) that helps offset the costs of maintaining this blog.  Thanks for your support!

For the background of the window…                                                                          

I cut a piece of 7 3/4″ x 7 3/4″ decorative scrapbook paper and adhered it to a thick piece of

mat-board.  I cut down  a couple of 3″ x 4″ journaling cards from the

“Tealightful” collection from Pebbles Inc. and adhered it to the back of the window

frame before attaching the covered mat-board.  Because the mat board is heavy,

I used a Beacon Adhesive Quick Grip Glue* to attach it to the frame.

I added loop screws onto each side of the window frame approx. 1/2″ in and added a thin chain

to the loop screws for hanging.  Ribbon would also work.

To create the floral swag…

I snipped a few sprigs of artificial flowers and attached them together in the center with

a thin floral wire.  I tied a simple bow to cover the wire.

I attached the floral swag and wood embellishments to the front of the frame with

Beacon Adhesive Quick Grip Glue*   

FYI…I found the “Welcome” and “Butterfly” embellishments at Michaels.

I added the Spring Window to the center of a wreath and hung it on the front door.

I found the greenery wreath yesterday at Homegoods.  It was just what I was looking for,

the perfect backdrop for my Chippy Spring Window.

FYI…Having a problem finding a window pane to use or would like one that’s even bigger?

  (*affiliate link)

Hampton Art Jillibean Soup Mix The Media Window Frame-14 X16 White* 

Shop Your Fav Brands at Scrapbook.com


Sue’s Favorite Projects of 2016

best-of-2016

Do you ever wonder which of my projects are my favorite?

Like most DIY people, I try really hard with all (or most all) of my projects…

some of my projects are a hit and some are a miss.

And some are just my favorite…

So… I decided to share them again with you.  (just in case you might have missed one)

Enjoy!

Click on post titles for project instructions

Ad→ CreateForLess.com - Create More, Spend Less

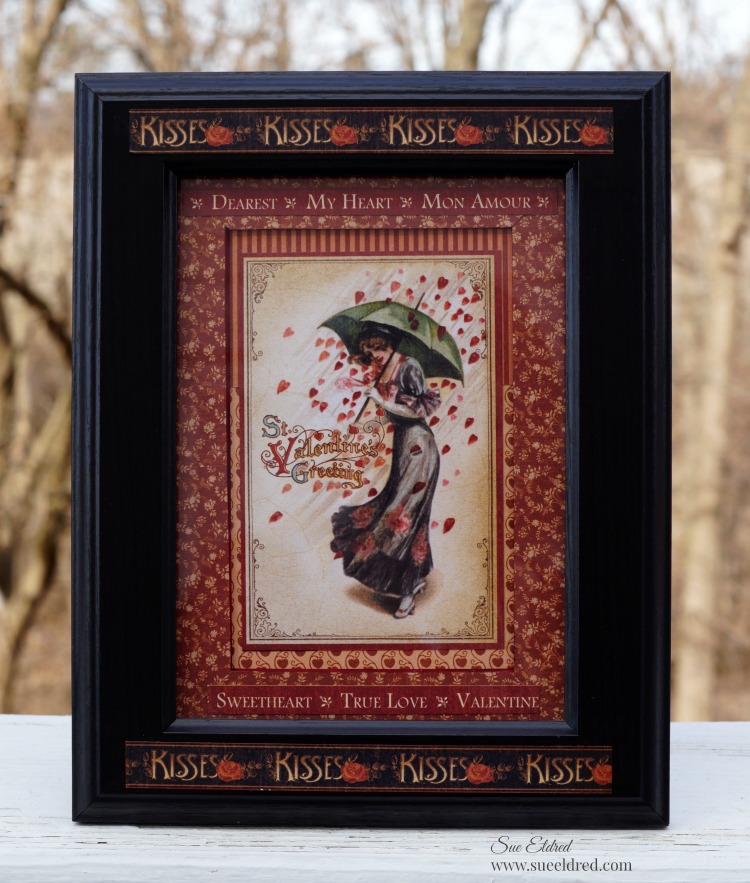
Graphic 45…”A Place in Time” Valentine Frame

graphic-45-valentines-frame-sues-creative-workshop-4157

A little throw back Thursday…

to one of my favorite Valentine projects.  (made 4 years ago)

On the frame, I used Graphic 45’s “Place in Time” collection and a little cut and paste .

Which is now available as a Deluxe Collector Edition. 

(*affiliate link)
Graphic 45 4501470 Deluxe Collectors Edition Place In Time
*I am an Amazon Affiliate.  If you choose to purchase from Amazon using the above link, I receive a small commission that helps offset the cost of running this blog.

Splatter Painting

splatter-painting-4001

After working in the booths all day on Saturday and Sunday at the Creativation Show,

I decided on Monday I was going to take some time to do something fun.

splatter-painting-4006

At the show they had a clear acrylic booth set up called the “Splatter Room”.

It was sponsored by Pinspiration, 3M and DecoArts.  (so much fun!)

splatter-painting-4002

Dressed in a hazmat suit and goggles…

I went to town choosing paint and splattering it onto a 12″ x 12″ canvas.

Oh, what a glorious mess.  It was the highlight of my day.

splatter-painting-4008

Here’s my finished Art.  (still need to remove the masking)

I already have it hanging on the wall.

If you ever get the chance to do some Splattering.  I highly recommend it.


I’m home from Phoenix, but I haven’t had the chance to sift through all the pictures and stuff I brought home.  I will be sharing my journey in the next day or two.