Autumn Woods Pop-Up card and Fall Collage

Autumn Woods Pop Up Card 096

One of the best things about being on a design team is the opportunity to work with awesome

products.  When I got my last box of goodies from Paper House Productions I instantly fell

in love with the Autumn Woods Collection.

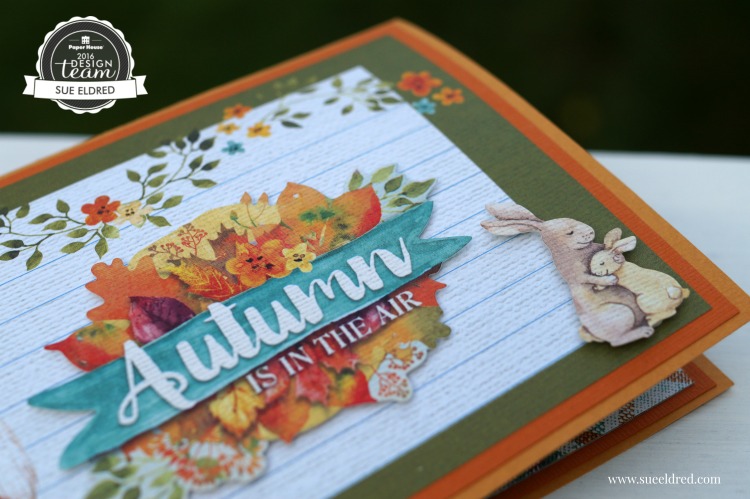
Autumn Woods Pop Up Card 083

The sweet water colored woodland animals are cute without being to cutesy.

I knew as soon as I saw them that they needed to be made into a pop-up card.

Autumn Woods Pop Up Card 084

Tips…

  • I apply baby powder on the back of my stickers with a small paintbrush to remove the tackiness.  That way I can use my stickers like die-cuts.
  • On the front of the card:  I love adding dimension… so under the “Autumn is in the Air” and the “bunnies” I used 3-D foam mounting squares.
  • Add even more dimension to the inside of your pop up card by adding thin foam mounting squares to the stickers “tree” and  “autumn woods” and strategically placing them on the background.
  • I created a couple of pop-up steps for my forest friends.

Autumn Woods Collage 115

While cleaning up the Autumn Woods scraps laying on my desk, I decided to make a Fall

Collage using a rummage sale frame I picked up last month for next to nothing.
Autumn Woods Pop Up Card 0099

All in all… I would have to say that the Autumn Woods Collection has to be my favorite

Paper House Productions collection so far.  (at least for the time being)

Here’s the list of the Paper House Products I used:

These projects were created for and sponsored by Paper House Productions.

Disclaimer:  This blog uses ads and affiliate links.  If you choose to make a purchase using one of the links, I receive a small commission (at no additional cost to you) that helps offset the costs of maintaining this blog.  Thanks for your support!

Shop Amazon Scrapbooking Supplies*

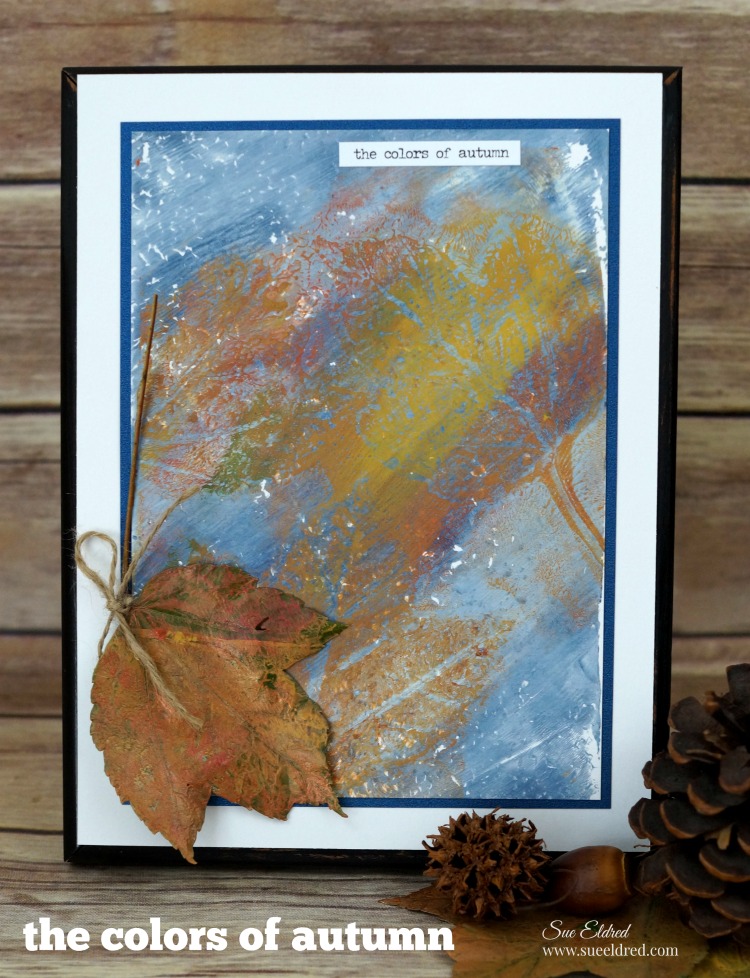
Gel Press and the Colors of Autumn

the-colors-of-autumn-print-using-gel-press

The first time I watched a video of someone using a Gel Press I was completely intrigued.

The project they were making was artsy, colorful, very cool and it looked like so much fun.

When I got the chance to participate in the Designer Craft Connection monthly design challenge

and receive a Gel Press plate for “free”… I was more than excited.

gel-press-supplies-sues-creative-workshop

Never heard of a Gel Press?    (Well…It’s just about the coolest thing.)

The Gel Press is a reusable Gel Printing Plate.

Gelatin printing is a form of mono-printing in which a gelatin slab is used as a printing plate to create a variety of images and backgrounds using acrylic paint.  Simple to use.  Ready for Printing.

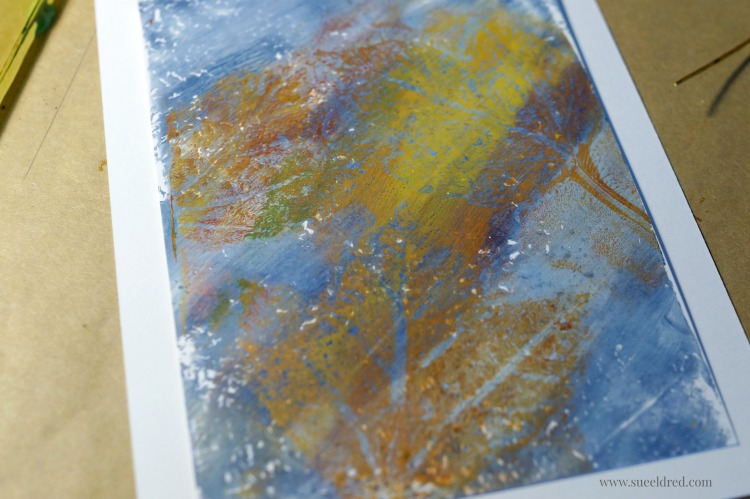
the-colors-of-autumn

Here’s how I created “The Colors of Autumn Print”…

Supplies Needed:

Directions:

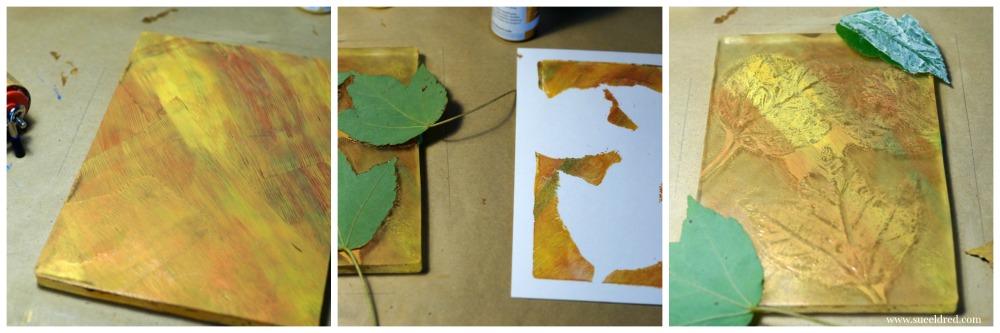
making-a-gel-press-background

  • Remove clear protective film from your gel press.  Apply paint to the exposed Gel Plate.
  • Roll paint on as a thin layer with brayer.
  • Create design by pressing textured item into wet paint.
  • Lay paper onto painted surface.
  • Gently rub paper with hands to create a transfer image onto the paper.
  • I traced guidelines around the paper onto my scratch paper to make it easier to line up the second printing.
  • Pull paper away from printing plate to reveal your background.

creating-the-leaf-background-on-the-gel-press-sues-creative-workshop

  • I created a second background just like the first by using fall colors.
  • I placed 3 leaves into the paint.
  • I place a second piece of white paper over the gel press and pressed.  This removes most of the paint from the background.  Leaving the paint underneath the leaves.
  • Remove leaves from the gel press.  I masked the corners with a couple of additional leaves.
  • Lay the first blue background paper over the press.  Lining the paper up with the guidelines.
  • Gently rub paper with hands to create a transfer image onto the paper.
  • Pull paper away from printing plate to reveal your leaf prints.

autumn-background

  • Mat print and embellish with “the colors of autumn” chit chat sticker.

the-colors-of-autumn-sneak-peek-815

The “Colors of Autumn Print” was created for and sponsored by Gel Press.

gel-press-logo

Make sure to check out the video on the Gel Press site.


*This post uses Amazon Affiliate links.  I am a Amazon Affiliate.  If you choose to purchase an item from Amazon by clinking on the product link, I will receive a small commission that helps offset the cost of running this blog.


Old Frame Make-Over from last Friday’s treasure hunt.

When I asked what the price was for the old terra pot, she paused and said “a quarter”.

When I asked her how much for the next item, she said “a quarter”.

It didn’t take long for me to realize that this was going to be fun.

By the time I put my pile on the table she said “a dollar……..ummm fifty?”

I love a good treasure hunt.

Especially when it’s ran by an old lady who just wants to get rid of everything.

old-metal-frames-23

Honestly, I wasn’t completely sure about these heavy metal frames when I first picked them up.

But…at a quarter how could I go wrong?

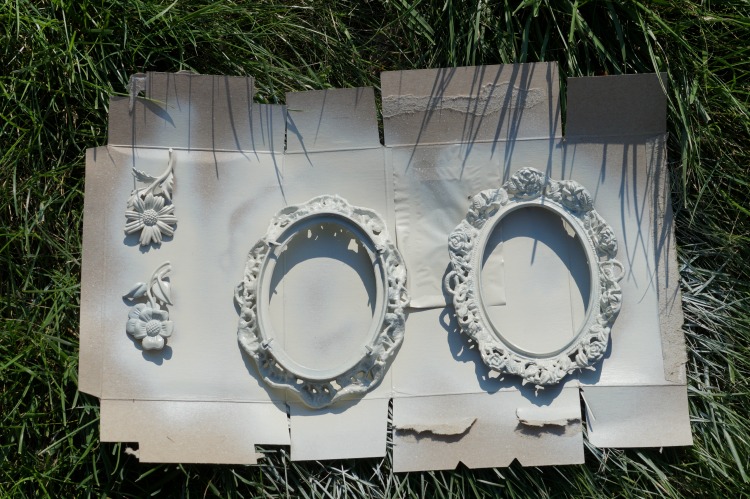
painting-the-metal-frames

Armed with a can of off-white spray paint…

I deconstructed the frames and gave everything a couple coats of paint.

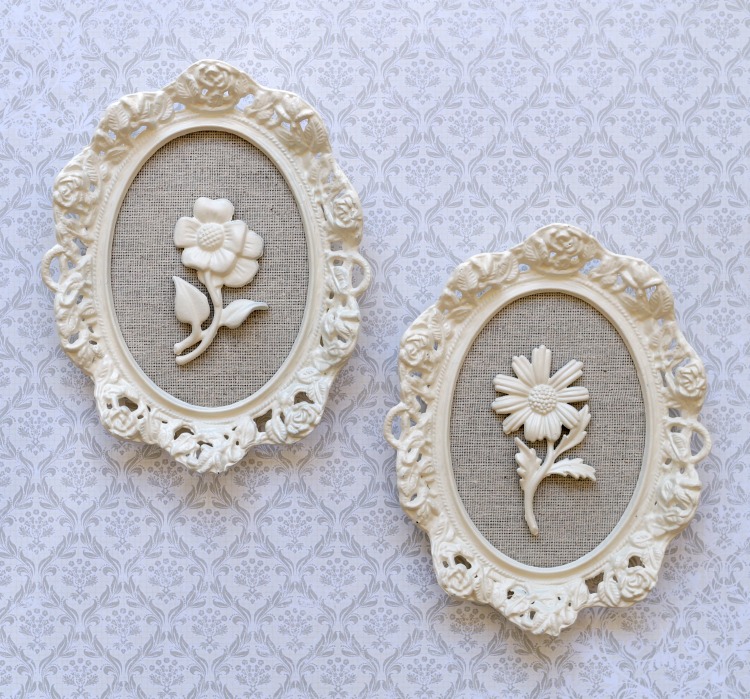
old-metal-frames-make-over-sues-creative-workshop-265

I sprayed the black velvet matting with spray adhesive and applied a piece of a woven tan fabric.

I marked the two holes in the matting where the metal flowers had been previously.

I was able to use the prongs on the back of the metal flowers to line them up exactly where they

had been before.  (so easy)

I trimmed the excess fabric from around the matting and re-inserted everything back into the frame.

old-metal-frame-make-over

A super simple project with a modern up-dated look.


DIY Canvas: What the World needs now…

What the world needs now canvas 9097

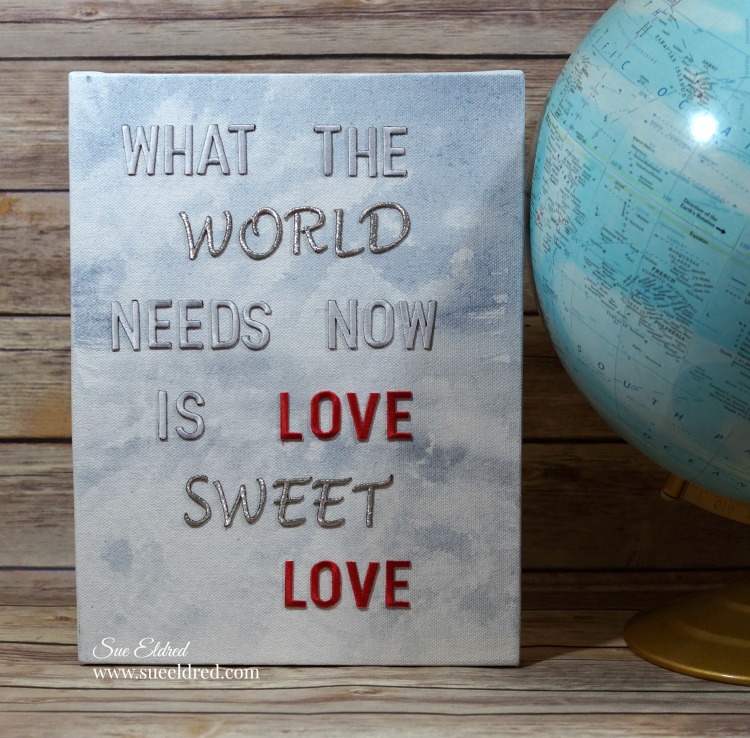
A Quick and Easy DIY canvas and a throw back to the 1960’s.

What the World needs now canvas 9121

Song Trivia:

The song “What the World needs Now is Love” was first recorded in 1965…

and was written by Hal Davis with the music composed by Burt Bacharach.

What the world needs now canvas and letters 9059

To make a canvas you’ll need…

  • 8″ x 10″ white canvas
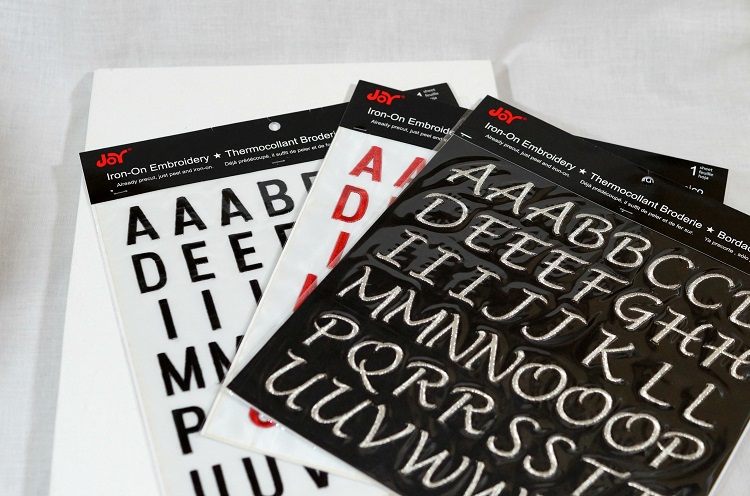
  • Iron Embroidered Letters from Joy SA
  • Blue Acrylic Paint
  • Paintbrush
  • Water
  • Craft Adhesive
  • Clean Soft Rag or White Paper Towel

painted canvas 9073

Directions:

  • Using watered down acrylic paint I created a light watercolor wash on the canvas.
  • To create the cloudy look, I dabbed the painting, while the background was still wet, with a clean towel to remove portions of the paint.
  • After the canvas has fully dried, arrange letters on canvas.
  • Draw light pencil marks on the canvas to keep your lines straight.
  • Adhere to canvas with adhesive.

What the world needs now canvas 9090

This canvas was created for and sponsored by Joy SA.

How to Mist and Stencil a Mixed Media Pillow

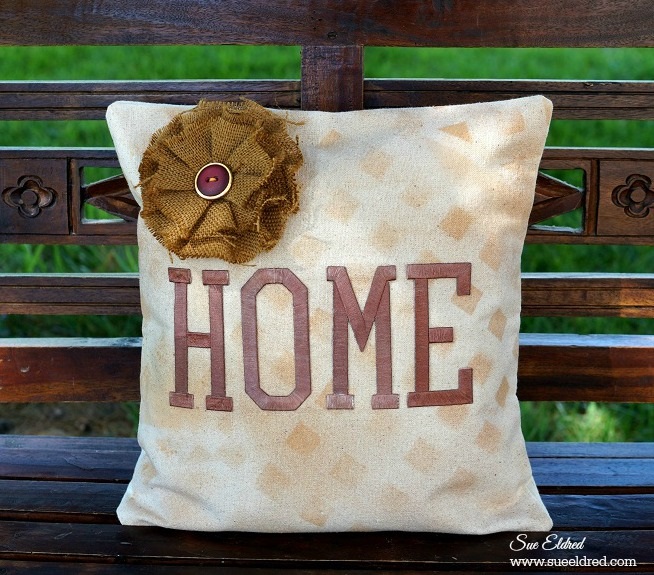
Home Pillow for Joy 6602

I enjoy making pillows.

Especially when it’s a quick and easy “no sew” pillow with a twist.

How about a little misting and stenciling with Tattered Angels Glimmer Mists?

Home Pillow for Joy Project Supplies Close Up 5805

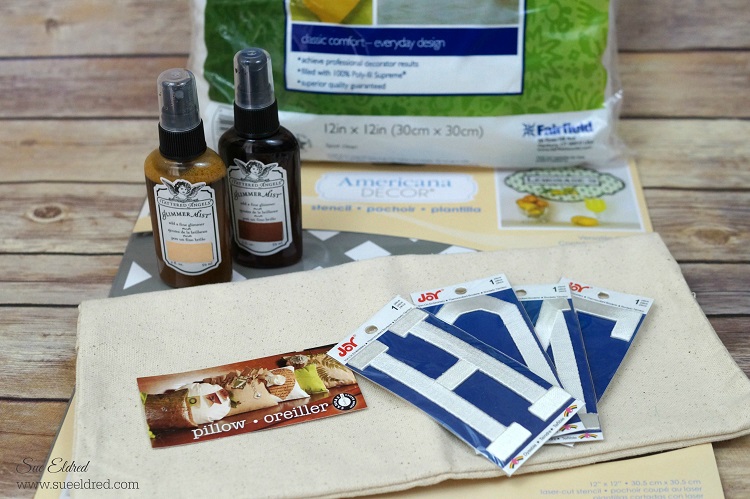
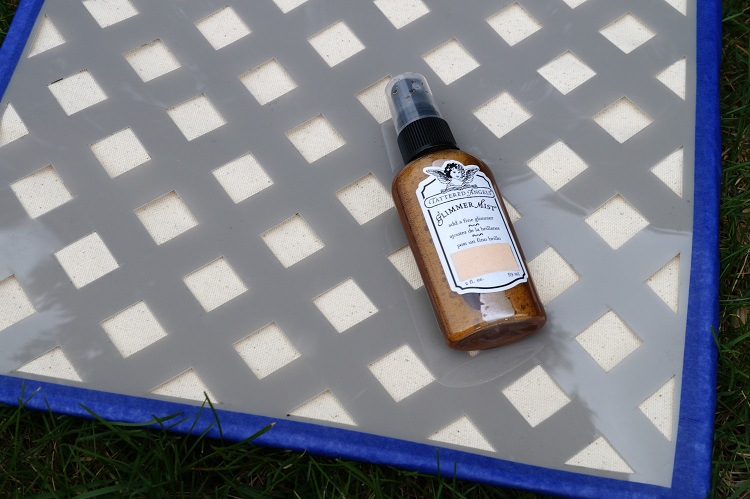
I started my project off with a 12″ plain canvas pillow cover, versatile check stencil (see end of post),

Tattered Angels Glimmer Mists and large iron-on embroidered letters from Joy.

masking the stencil 5818

Using removable painter’s tape, I taped the stencil onto the canvas.

I wanted my pillow to have a subtle background so I lightly sprayed with Tattered Angels

Crushed Shells Glimmer Mist.

Because the pillow is decorative, I’m not worried about the spray being washable.

Home 5820

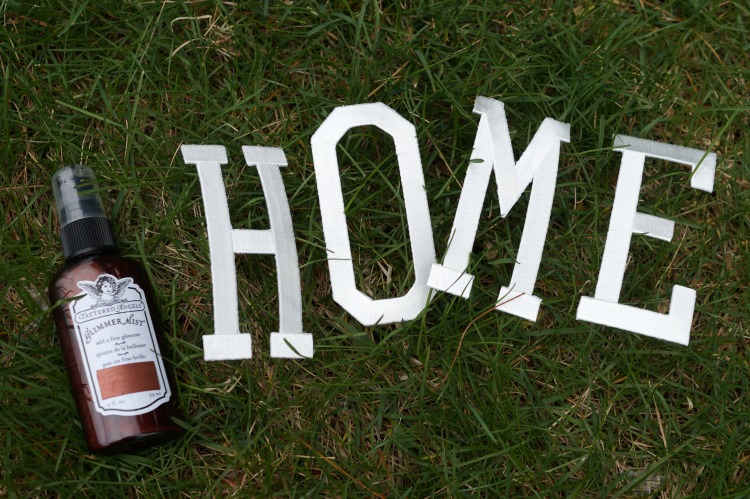
I used large Iron-on letters from Joy to spell out the word “Home”.

Spraying the letters5824

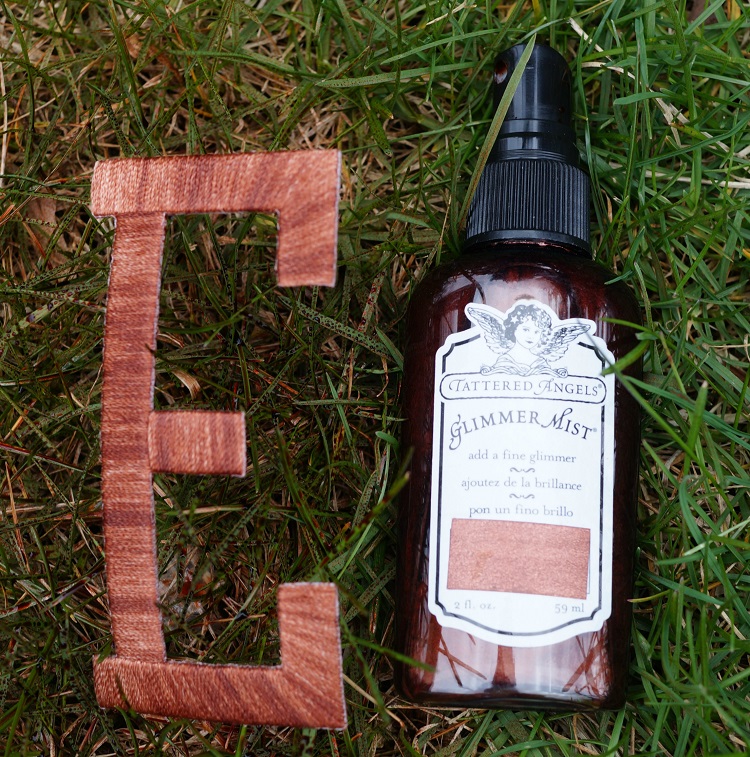
To customize the plain white letters, I sprayed them with Coffee Shop Glimmer Mist for contrast.

ironing 6395

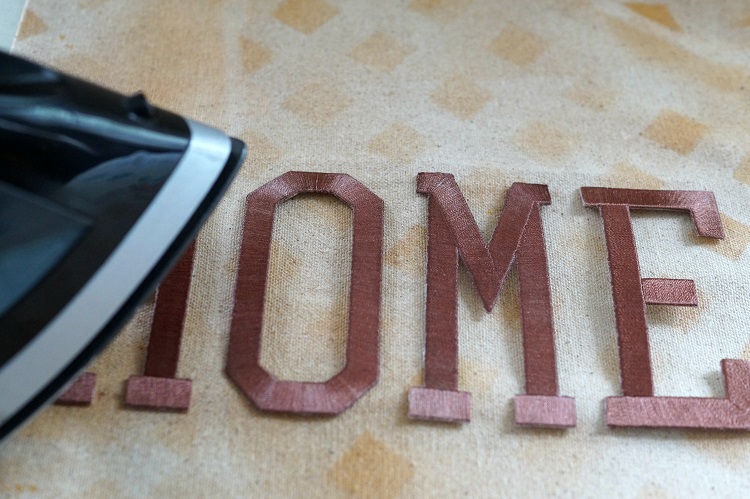
Allow the letters to fully dry before arranging onto the pillow.  Cover the letters with a cotton cloth

and iron for about 30 seconds.  I ironed it again from the back of the fabric for another 30 seconds.

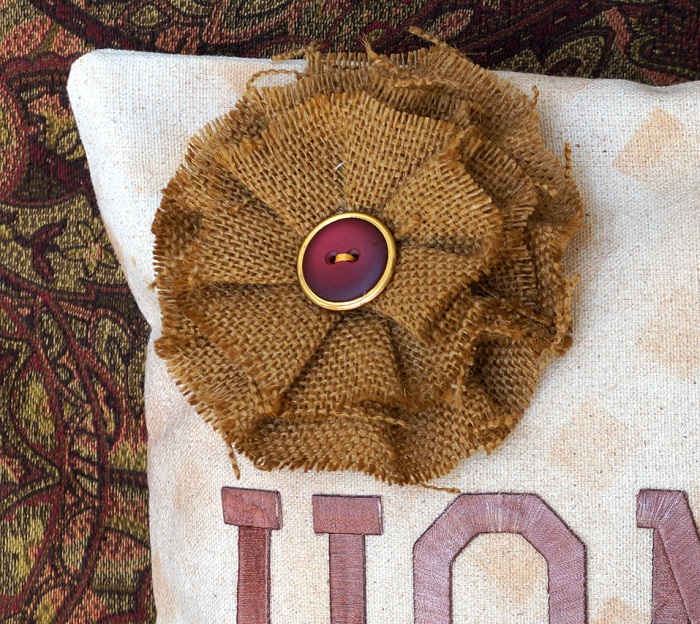
Burlap Flower

I added an old button to the center of a burlap flower from Canvas Corp Brands

and glued it onto the corner of my pillow with Fabri Tac Glue.

I used a 12″ pillow form from Fairfield World to stuff the pillow.


Deco Art DECADS.20 Americana Decor Stencil Versatile Checks*


This project was created for the Creating with Joy Blog and was sponsored by Canvas Corp Brands, Deco Arts, Fairfield World, Beacon Adhesives and Joy SA.

*This post uses affiliate links.

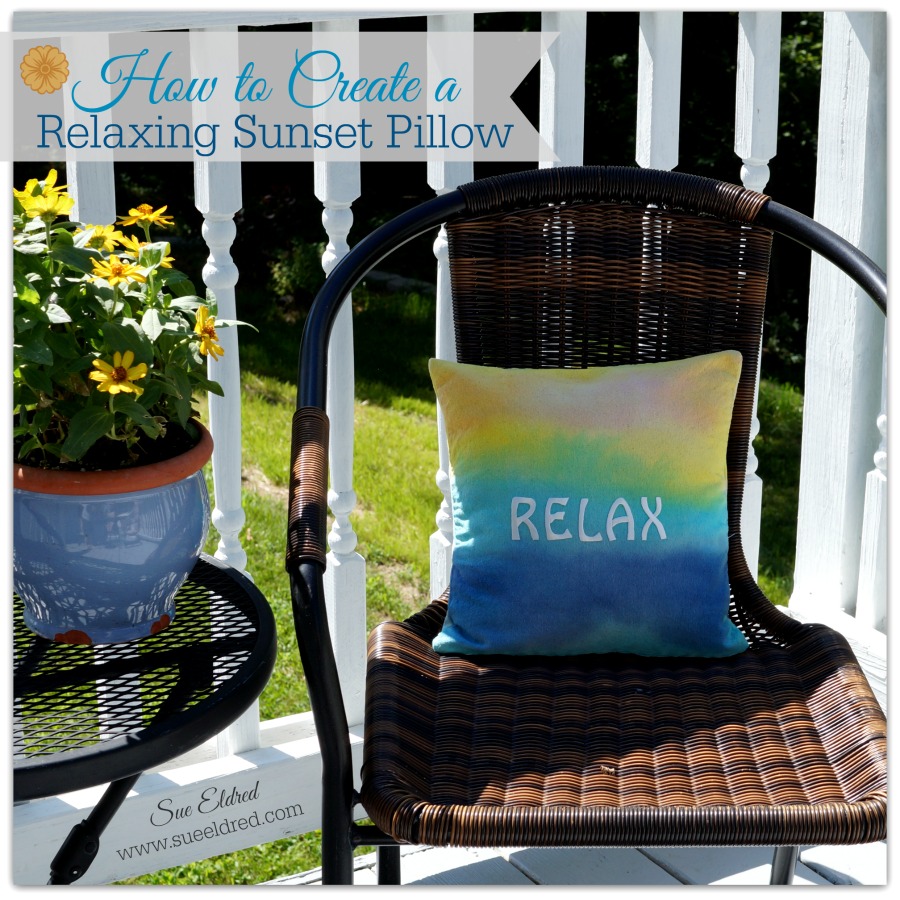
How to Create a Relaxing Sunset Pillow

How to create a Relaxing Sunset Pillow 9318

There’s something about a beautiful sunset that always stops me in my tracks.

No matter how many I’ve seen, I still marvel at all the vibrant, beautiful colors.

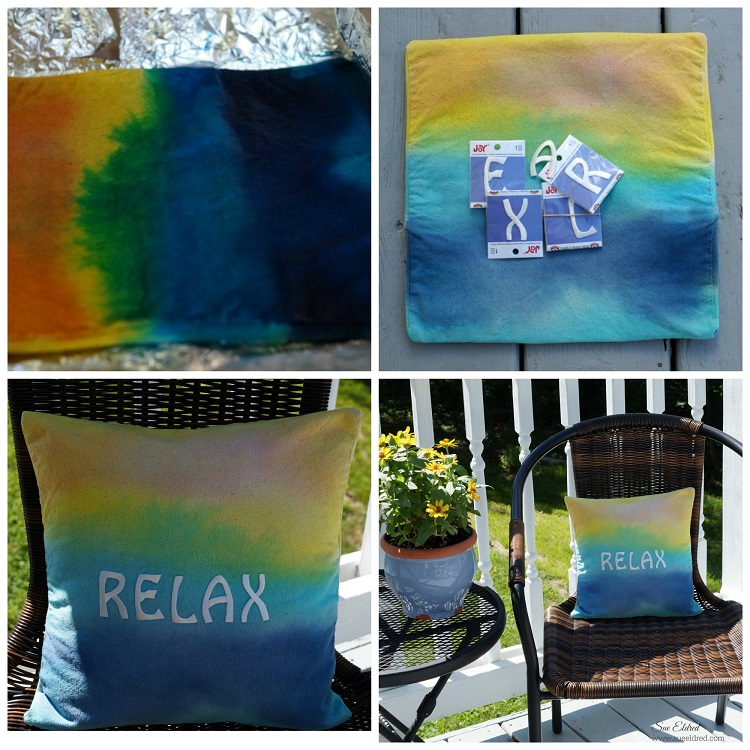
How to make a Relaxing Sunset Pillow Collage

After all the fun we had making the Patriotic Tied Dyed Shirts for the 4th of July…

I decided to create a color wash dyed pillow with the colors you might see during a beautiful sunset.

With the help of my 2 year old Grandson this is how we made the pillow:

  1. We used the Rainbow Tie Dye Kit from Tulip that comes with pre-measured squirt bottles.  All you need to do is add water to the bottles and shake to mix.
  2. Squirt dye onto 12″ canvas pillow square one color at a time starting at the top.
  3. Dip medium/large paintbrush into water and brush the dye to spread the color.
  4. Continue with the others colors until canvas pillow square is covered.
  5. Note:  When using a helper who’s only 2 1/2 things can get really wet.  (he had fun)
  6. Cover dyed fabric with plastic wrap to keep damp.
  7. Let set for 6-8 hours or longer for intense colors.  (we waited around 2 hours)
  8. Rinse well with water until excess dye is removed.
  9. Fill washer to “large load” setting with hottest water suitable for fabric and a small amount of laundry soap.  Wash and dry separately.  (Wash separately for the first few washes.)
  10. Iron the canvas pillow square to get out excess wrinkles.
  11. To add the word “relax”, I used iron-on embroidered letters from Joy.  It’s quick and easy – just preheat your iron to the cotton setting, cover the letters with a cotton cloth and iron for about 30 seconds.  I ironed it again from the back of the fabric for another 30 seconds.
  12. Stuff pillow with a 12″ pillow form.


Tulip One-Step 5 Color Tie-Dye Kits Rainbow*   (affiliate link)

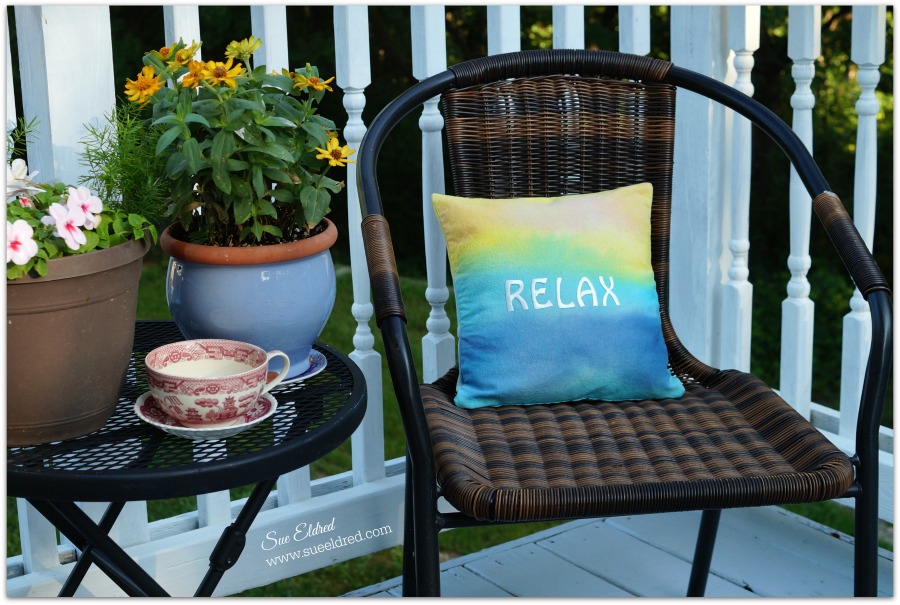
Relaxing Sunset pillow 9321

*Disclaimer:  This post uses ads and affiliate links.  If you choose to make a purchase using one of the links, I receive a small commission (at no additional cost to you) that helps offset the costs of maintaining this blog.  Thanks for your support!

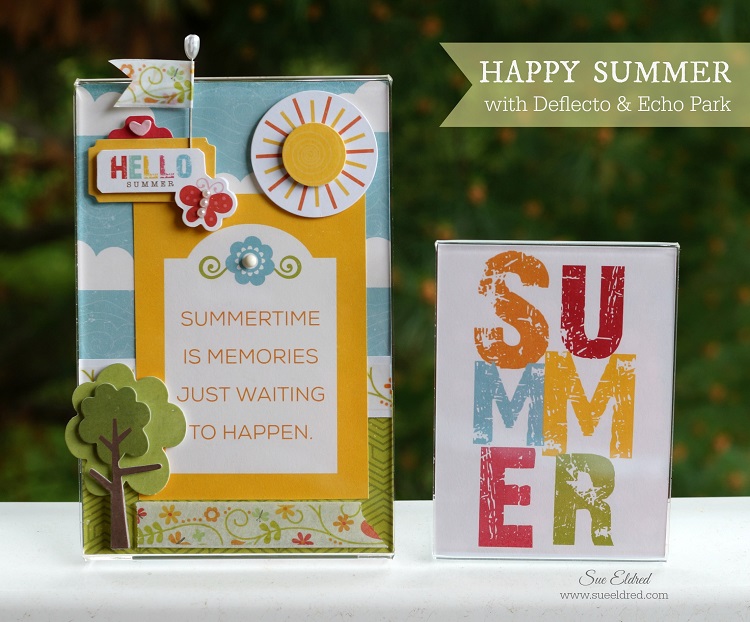
Happy Summer Frame

Happy Summer 8047

I’m really starting to love this new summer schedule.

Everything seems a little more laid back.

I feel like I’m getting lazier by the minute.

But honestly, I’ve been busier this week than I have in a while.

This week has been full of gardening, cooking out, a couple of really cold dips in the pool,

movies, shopping, a soft ball game and to end out the week…

dance recitals and a retirement party.

And… I don’t want to miss a thing.

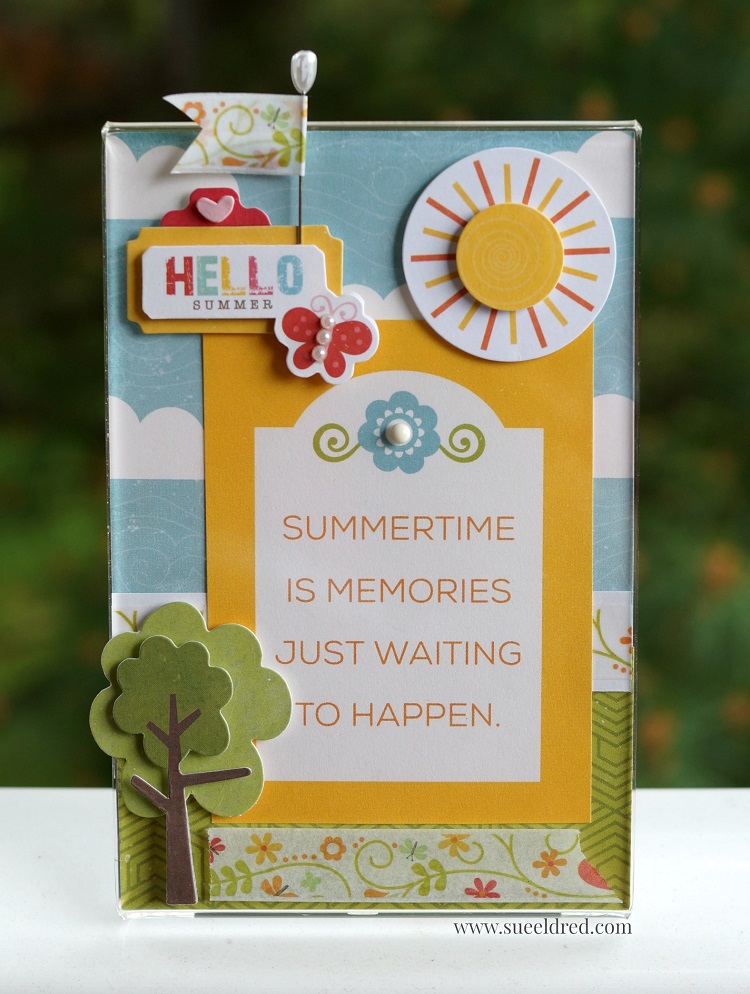
Summertime really is Memories just waiting to happen.

Hello Summer Frame 8046

In case your wondering…

The Happy Summer Frame was made using clear acrylic frames from Deflecto Craft Solutions

and the “Echo Park Collection Kit 12″”X12″”-Happy Summer”*.

  (affiliate link)

“This is a sponsored post. As a member of the Deflecto Design Team I have been
provided product in exchange for my creative ideas, views and opinions.”

Join Amazon Kindle Unlimited 30-Day Free Trial

Disclaimer:  This blog uses ads and affiliate links.  If you choose to make a purchase using one of the links, I receive a small commission (at no additional cost to you) that helps offset the costs of maintaining this blog.  Thanks for your support!

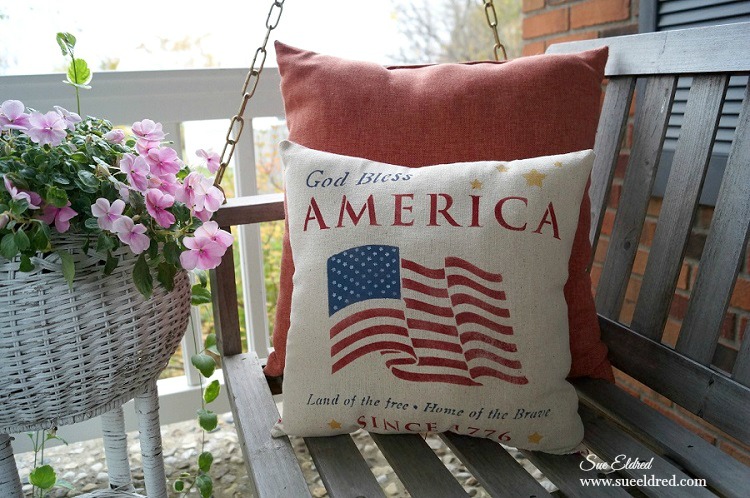
A little Americana for your front porch swing

The quickest way to spruce up the front porch swing for summer is with new pillows.

And if your a little bit handy and have a sewing machine why not try making a few of your own.

When it comes to sewing I’m very simple and it doesn’t get much easier than this.

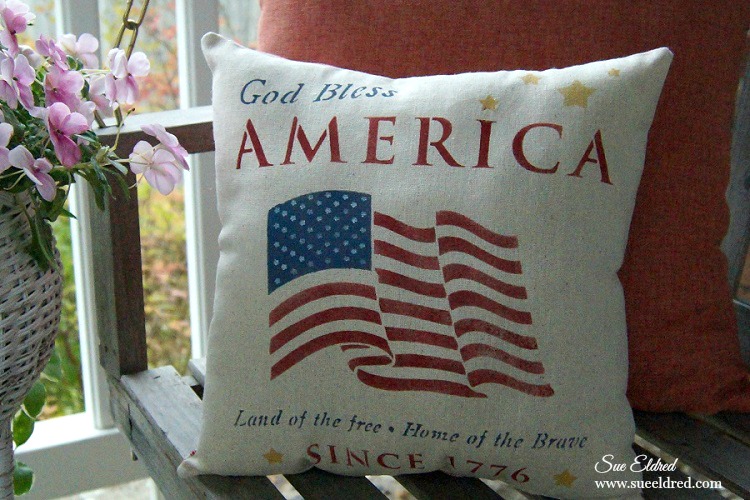
A simple stenciled and stitched pillow.

Deco Arts has so many 12″ stencils in a variety of patterns, you’re sure to find one you’d love.

Supplies 270 2

DecoArts® Products Used:                           (*affiliate link)

  • ADS16 American Tribute Stencil*
  • Americana® Multi-Surface Satin Acrylics: Dark Scarlet, Cotton Ball, Night Sky
  • Splendid Gold Dazzling Metallics® Acrylic Paint

Additional Products:

Directions:

  1. Lay paper under muslin fabric before stenciling.
  2. Center and tape stencil onto muslin with removable painter’s tape so that the stencil won’t move.
  3. Work one color at a time and mask off with painter’s tape the areas that won’t be painted.
  4. Remove the “star section” of the flag using a craft knife and set aside.
  5. Stenciling is a “dry” brush technique. Using a stencil brush, dip just the tip of your brush into the paint. Tap off excess paint before applying to prevent the paint from seeping under the edges of the stencil.
  6. Apply paint with stencil brush in a straight up and down motion called stippling.
  7. Once you’ve added the red, blue and gold colors. Replace the star section of the flag back onto the stencil and stencil the stars with white paint.
  8. Create a simple pillow by sewing the muslin onto the red and cream ticking fabric.
  9. Stuff pillow with Poly-fil®.

God Bless America Pillow 572 2

This project was sponsored by DecoArts.

Disclosure:  This blog uses ads and affiliate links.  If you choose to make a purchase using one of the links, I receive a small commission (at no additional cost to you) that helps offset the costs of maintaining this blog.  Thanks for your support!
Americana Ribbon Wreath

How to Create a Americana Ribbon Wreath…

I’ve been concentrating a lot on sprucing up my front porch for Summer.

To complete the look, my front door needed a fresh fun new wreath.

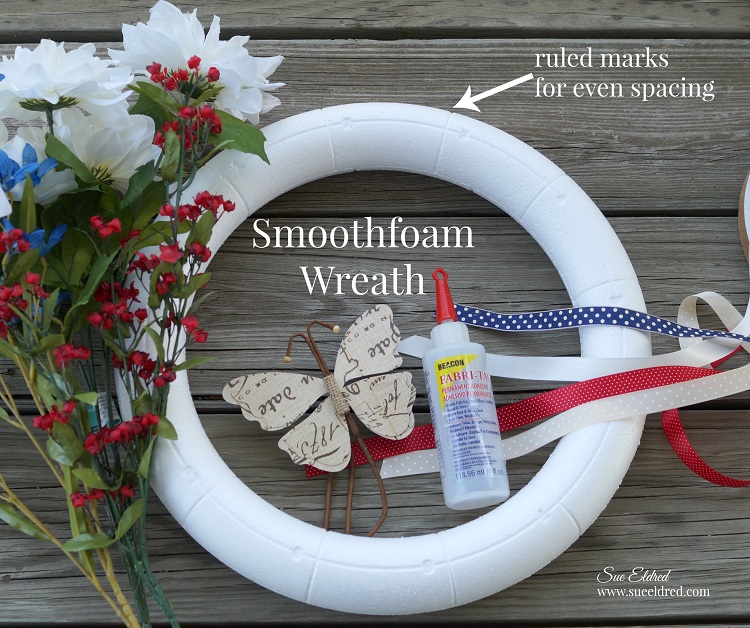
I created a Summer themed Americana Wreath using one of the ruled wreaths* from Smoothfoam.             (*affiliate link)

Smoothfoam Ruled Wreaths make design and layout easy. 

They molded lines and numbers into the foam to make design and layout simple.

Even on one side, odd on the other.

The wreaths come in several sizes… 8″, 10″, 12″, 14″.

Proudly Made in the USA 

wrapped wreath 7502

How to make the Americana Ribbon Wreath

  • I used the 14″ ruled wreath.
  • Glue one end of the ribbon down onto the foam wreath and wrap the ribbon tightly around the first section.  Glue second end of the ribbon in place before starting second color. (I used Beacon Fabri-Tac Permanent Adhesive* to glue my ribbon in place.)
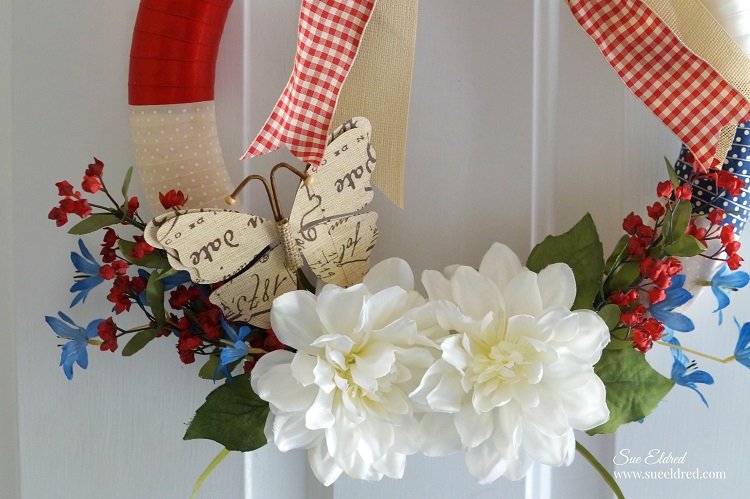
  • Using a thin floral wire, wire the small floral stems onto the base of the wreath.
  • Glue larger flowers and leaves onto the wreath over the wire.
  • Add large stemmed butterfly and ribbon to hang.

So many possibilities.

Close Up 7505

The Americana Wreath was sponsored by Smoothfoam™, the crafter’s foam.

Shop Your Fav Brands at Scrapbook.com

*Disclosure:  This blog uses ads and affiliate links.  If you choose to make a purchase using one of the links, I receive a small commission (at no additional cost to you) that helps offset the costs of maintaining this blog.  Thanks for your support!

Join Amazon Kindle Unlimited 30-Day Free Trial

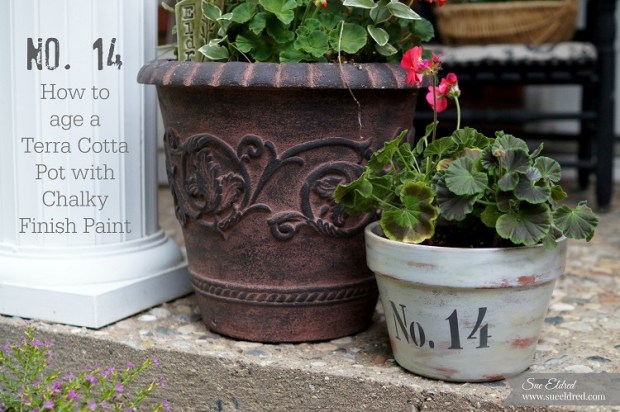
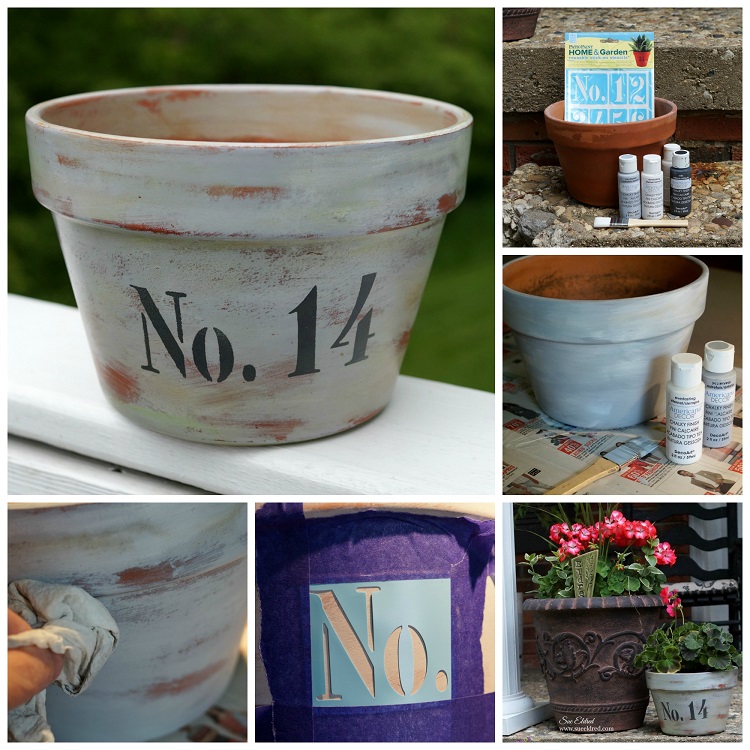
No. 14 How to age a Terra Cotta Pot with Chalky Finish Paint

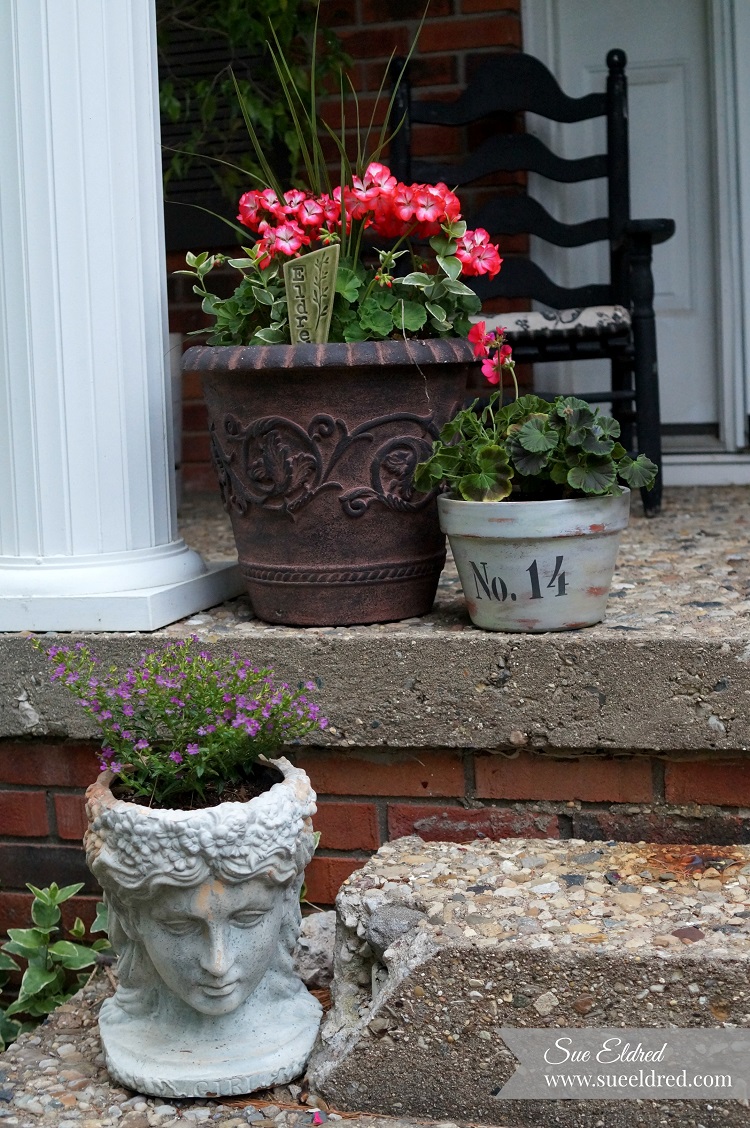
It’s front porch sitting time…

Time for sitting on the porch swing, sipping a glass of iced tea and relaxing the evening away.

But before I can relax, I need to finish putting flowers in containers and I need to give a couple

of old boring terra cotta pots a little sprucing up with a little paint and stencils.

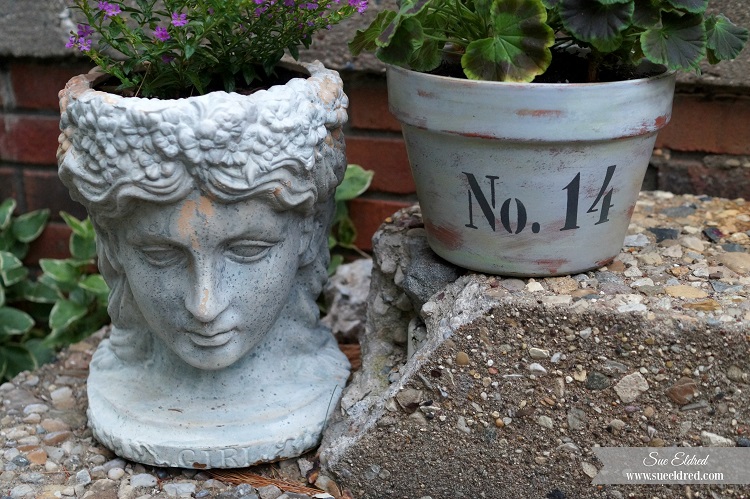
I decided to give this plain terra cotta pot an aged looked with

Americana Décor Chalky Finish Paint from DecoArt.

Terra Cotta Pot Close Up 7478

How to age a Terra Cotta Pot with Chalky Finish Paint

Supplies Used:                                                                (*affiliate link)

Terra Cotta Pot Collage

Directions:

  1. Paint the terra cotta pot with “yesteryear” (gray) chalky finish paint.  I gave the pot some white highlights with “everlasting” chalky finish paint.
  2. Wipe the pot with a clean soft damp cloth (or white paper towel) to remove some of the paint.
  3. To give the pot a mossy look… Dry brush “new life” (green) chalky finish paint around the base of the pot, under the ridge and on the top edge.  Soften the green paint by wiping with a damp cloth if needed.
  4. Apply reusable stick on stencils to painted pot.  Mask around the stencil with removable painter’s tape.  Use a stipple brush to apply “relic” Chalky Finish paint inside open stencil area.
  5. Remove stencil.
  6. Lightly sand pot with extra fine sand paper.
  7. Apply Americana® Décor “golden brown” crème wax over pot using a clean lint free cloth.  Wipe with cloth to create an aged look.

Shop Your Fav Brands at Scrapbook.com

Front Porch 2

This post was sponsored by the good folks at DecoArt.

Join Amazon Kindle Unlimited 30-Day Free Trial

Disclosure:  This blog uses ads and affiliate links.  If you choose to make a purchase using one of the links, I receive a small commission (at no additional cost to you) that helps offset the costs of maintaining this blog.  Thanks for your support!