New Use for an Old Basket

On the Porch 2

Need a quick front porch project…

Got any old baskets lying around the house?
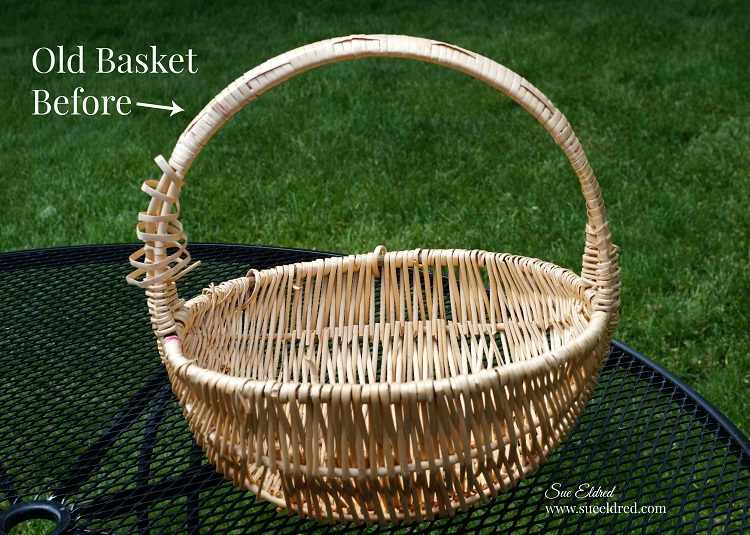
Old Basket Before 7232

I’m a total sucker when it comes to baskets.  (a basket case one might say)

I’ve got quite the collection, I use them all over the house.

During my Spring Cleaning…this basket was headed for the trash when I decided to

repurpose it.  I love the look of flowers in baskets.  I had nothing to lose.

I can always throw it away later if it doesn’t wear well this summer.  (look at how rough it is)

quick fix 7242

I gave the handle of the basket a quick fix with some craft glue held together with a binder clip.
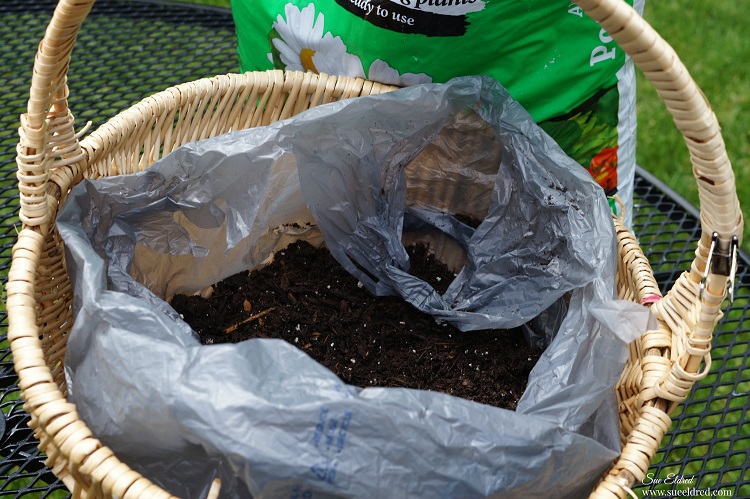
plastic bag and adding potting soil 7244

I used a thin grocery store bag to line the basket and keep the dirt in place.

You might want to poke a few small holes in the bag for drainage.

ready to plant 7251

Once you’ve filled the basket with dirt, tuck the remaining bag neatly around the sides

of the basket.

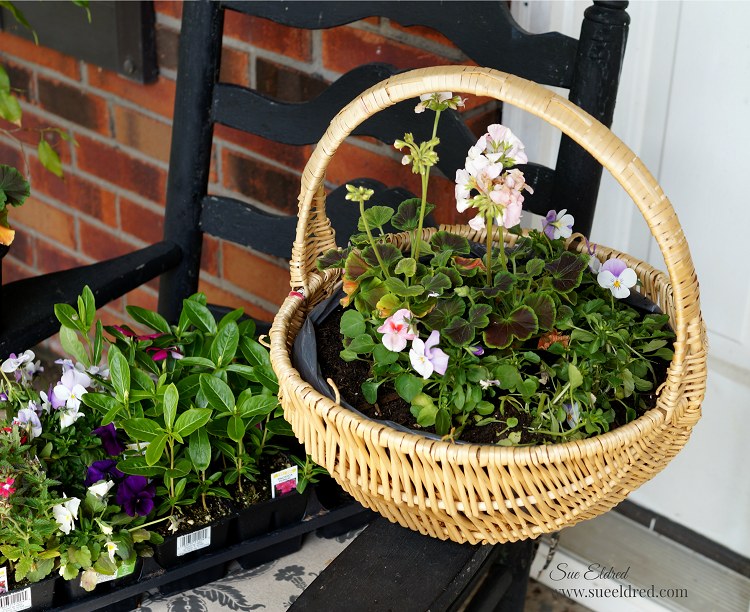
flowers 7250

My basket will be on a shaded front porch. 

I chose flowers that will grow well in shade.

I started with a couple larger pink geraniums and filled with smaller pink impatiens

and purple violas.

Shop Your Fav Brands at Scrapbook.com

TIP:  Don’t pack the basket so full that the flowers don’t have room to grow.

New Look for an Old Basket

Now that Garage Sale season is upon us.

You may want to keep a look out for a cheap basket or two.

That is… if you don’t have any old baskets lying around waiting to be rescued.

Join Amazon Kindle Unlimited 30-Day Free Trial

*Disclosure:  This blog uses ads and affiliate links.  If you choose to make a purchase using one of the links, I receive a small commission (at no additional cost to you) that helps offset the costs of maintaining this blog.  Thanks for your support!

Mini Floral Wreath

Mini Floral Wreath 7122

I get some of my best creative inspiration late at night…

I was planning on making a card using these 3-D puffy stickers from Paper House Productions

when a light bulb moment happened and I decided to make a wreath instead.

I’m really happy with the way it turned out, a little different and very easy to make.

Tip:  Use a good craft glue to adhere the stickers to the ribbon.

Mini Floral Wreath Collage

Paper House Productions Stickers Used:

Additional Supplies:

How to make a Mini Floral Wreath using 3D Puffy Stickers:

  1. Wrap wreath with satin ribbon.
  2. Start with the large pansy flowers and glue evenly around wreath.
  3. Fill in wreath by gluing on the smaller flowers, butterflies and leaves. (The leaves are from the lady bug sticker sheet.)
  4. Tie a thin silver ribbon around wreath to use as a hanger.
  5. Make a bow from the sheer ribbon and glue onto the top of the wreath.

This is a sponsored post. As a member of the Paper House Productions Design Team.

Join Amazon Kindle Unlimited 30-Day Free Trial

Disclaimer:  This blog uses ads and affiliate links.  If you choose to make a purchase using one of the links, I receive a small commission (at no additional cost to you) that helps offset the costs of maintaining this blog.  Thanks for your support!

DIY Up-cycled Jar…a little trash to treasure

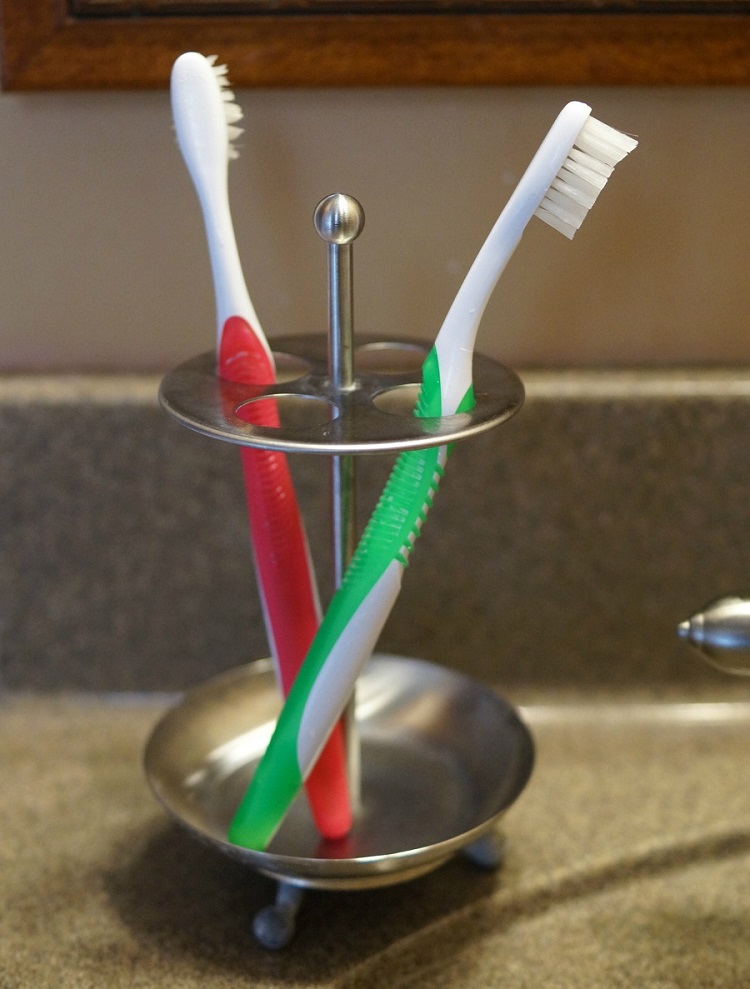
Ikea Toothbrush Holder

I was about to throw away this inexpensive toothbrush holder

(from IKEA) while cleaning my bathroom, when I got the idea.  I’m always looking for items

to use as a base on repurposed projects and thought this was perfect for a quick project.

Inspiration and ideas can be found anytime, anywhere…

even while cleaning your bathroom.
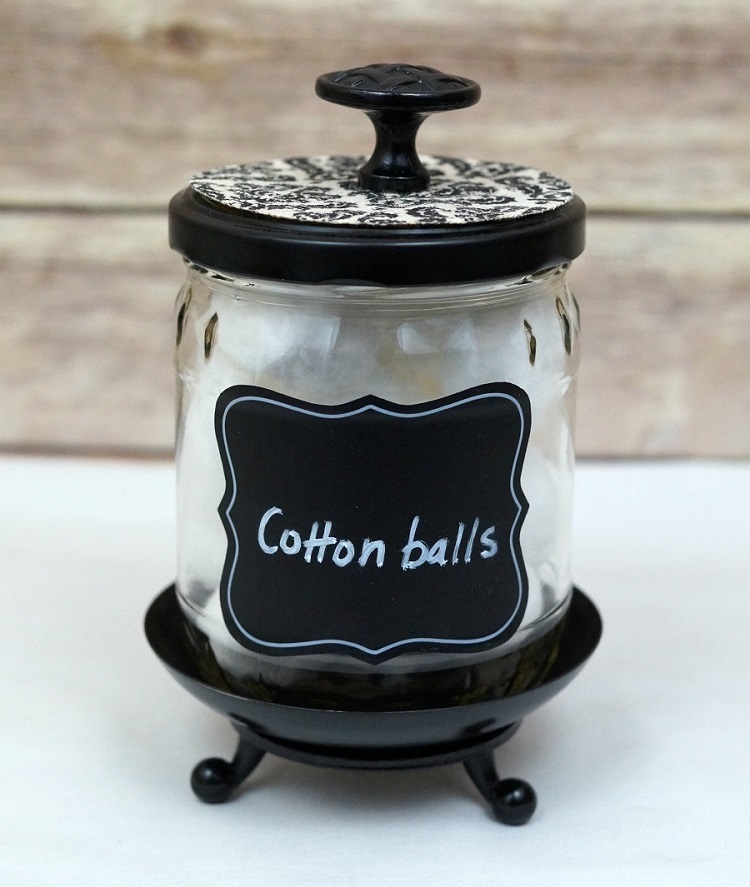
Upcycled Jar and Toothbrush Holder 3964Upcycled Jar and Toothbrush Holder 3988
Great Storage or Gift Idea.  So many ways to customize using items destined for the trash.

How to make an Up-Cycled Jar…

Materials Used:                                            (affiliate links)

Upcycled Jar Collage

Directions:
  1. Disassemble toothbrush holder.  Set aside the top portion of the holder for future projects.
  2. Paint the bottom of the holder, the lid of the jar and the cabinet knob with black semi-gloss spray paint.
  3. Glue the bottom of the jar to the painted base.
  4. Cut a circle from the decorative paper and adhere it to the top of the lid.
  5. Glue knob onto the center of the lid.
  6. Add chalkboard label to front of the jar.

craft-ideas-garden-2016

The DIY Up-cycled Jar was featured in  2016 Craft Ideas Garden Issue. (page 72)

This project was created for and sponsored by Craft Ideas Magazine.

Check out Craft Ideas Magazine for Craft Ideas for Every Occasion, Every Skill Level.

Join Amazon Kindle Unlimited 30-Day Free Trial*

Disclaimer:  This blog uses ads and affiliate links.  If you choose to make a purchase using one of the links, I receive a small commission (at no additional cost to you) that helps offset the costs of maintaining this blog.  Thanks for your support!

Create a Simple Vase Centerpiece

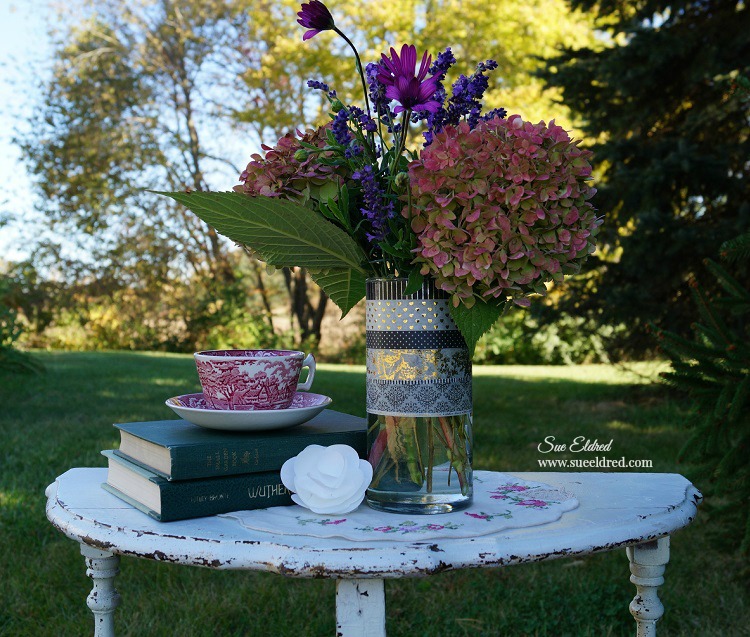
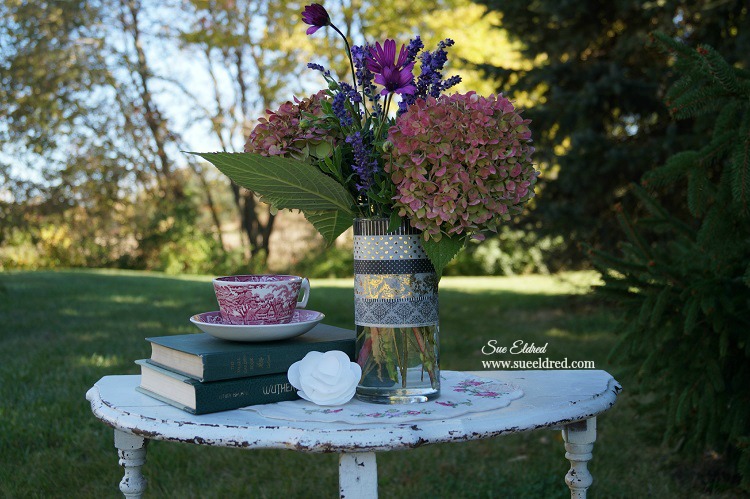
Washi Tape Vase and Flowers 2

Want to make a great impression but don’t have a lot of time? 

Here’s a quick and easy centerpiece project for your next party or gathering?

Washi Tape and Vase

I put together this simple vase using Washi Tape I received from Little B LLC

and an inexpensive dollar store cylinder vase.

TIP:  I drew a line with a permanent marker halfway down the vase to use as a starting point to keep everything neat and all my lines straight.  Simply wrap the vase with the washi tape.  (it’s that easy)    It only takes a few minutes to create an elegant look.

Washi Tape Vase Close Up

Next…I filled it with fresh flowers cut from my garden.

Or pick up a bouquet at the grocery store.

It would be great centerpiece vase for Weddings, Showers or any special gatherings.

It’s a temporary idea with elegant results. 

Here’s the list of the Little B Decorative Tape Used:

  • 100435 Silver Foil Black Pin Stripe
  • 100562 Gold Foil Hearts
  • 100047 Blk w/Sm Wht Polka Dots
  • 100443 Gold Foil Toile
  • 100344 Black and White Stripe
  • 100011 Damask Black/White
  • 100563 Gold Foil Love

A Quick and Easy DIY Gift for Her

Quick and Easy Gift for her 6988

Need a quick and easy gift for Mom or that new Grad in your life?

plain pink pencil cup 7023

 Deflect-O Photo Frame Pencil Cup*                                      (*affiliate link)

This pretty pink pencil cup from Deflecto is cute all by itself.

But add some decorative washi tape, a couple small pieces of decorative paper and

a few random stickers and you have a special gift ready to give.

♥ Make it extra special and add a couple photos of you and her together. ♥

Pink Pencil Cup Close Up 7013

I wish I could tell you where to find this cute pink rosebud washi tape.

My daughter gave it to me as a mother’s day gift a few years ago.

I’m sure with the huge variety of washi tape available you’ll find one just as nice.

Pink Pencil Cup 7009

If pink’s not your style?

Here’s a project I did last year using Deflecto’s Black pencil cup. ↓

Quick & Easy Washi Tape Make Over 7014

Quick & Easy Washi Tape Make-Over

“This is a sponsored post. As a member of the Deflecto Design Team I have been
provided product in exchange for my creative ideas, views and opinions.”

 AD↓

*Disclaimer:  This post uses ads and affiliate links.  If you choose to make a purchase using one of the links, I receive a small commission (at no additional cost to you) that helps offset the costs of maintaining this blog.  Thanks for your support!

Join Amazon Kindle Unlimited 30-Day Free Trial

DIY Seashell Lamp

DIY Seashell Lamp 5998

Oh…to be by the ocean listening to the waves and picking up shells.

Lately, I’ve been dreaming of summer vacation and relaxing on the beach.  (it’s my happy place!)

Like most people, I love to walk the beach and collect shells.

During the summer, I like to display my shells in a large clear vase on the mantle.

It reminds me of fun summer family vacations.

Last month, when I received the Lighten Up Kit from Etchall®, I thought…

“wouldn’t it make a cute Seashell Lamp to put on the patio to use on those

warm summer nights?”

I used shells collected during our trips to South Carolina.  (some even from the Isle of Palms)

Lamp Close Up 5992

Here’s what I used to make the DIY Seashell Lamp:        (*affiliate link)

Seashell Lamp Collage 2

The shade measures 4″ x 7″.

Directions:

  1. Clean mason the jar to remove all dirt, fingerprints and oil.  Dry with a coffee filter, paper towel, or lint-free cloth.
  2. Mask off a 1″ area around the mason jar with removable painters tape.
  3. Apply a heavy coat of etchall® etching crème to the masked area using the etchall® squeegee.  Leave etching crème on for 15 minutes.  After etching time has elapsed, use the squeegee to return the crème back into the original container for later re-use.
  4. Rinse etched surface with hot water to remove any remaining crème.  Remember to keep crème away from porcelain or ceramic tiles.
  5. Dry mason jar and apply the “relax” peel and stick stencil onto the middle of the first side.  Mask the sides of the stencil with removable painter’s tape.
  6. Using a stencil brush and the multi surface paint, fill in the open areas of the stencil.
  7. Carefully remove stencil and clean before stenciling on the other three sides of the jar.
  8. Fill Jar with sand and shells.
  9. Using the plastic sleeve template, trace onto a piece of burlap. Cut the burlap leaving a 1/2″ allowance around traced template.  Craft Confession:  I tried using a “stick it adhesive sheet” on the burlap first before cutting it out.  It didn’t work.  (see next step)
  10. Use spray adhesive to coat the back of the burlap.  Apply onto the lampshade and trim.
  11. Glue twine around edge of lampshade.

Optional:  The top of the shade is removable so I spray painted it black.

DIY Seashell Lamp 05959

The Lighten Up Kit is pretty easy to customize.  Lots of possibilities.

It comes with a self-illuminating lampshade with LED lights, template and instructions guide.

It uses 3 AA batteries so it’s portable and can be used almost anywhere.

The DIY Seashell Lamp was created for and sponsored by Etchall®.

Shop Your Fav Brands at Scrapbook.com

*Disclosure  This blog uses ads and affiliate links.  If you choose to make a purchase using one of the links, I receive a small commission (at no additional cost to you) that helps offset the costs of maintaining this blog.  Thanks for your support!

Making a place for Dad’s coffee

Making a place for Dad's Coffee 5605

Dad comes over every Monday, Wednesday and Thursday evenings for dinner.

It’s our weekly ritual.

He arrives at 5:30, sits in the leather chair closest to the television, in time for the evening news.

While he watches the news, I make dinner.  That’s the routine.

Dad sits in that particular chair so he can read the closed captioning.

Unfortunately, that’s the one chair that doesn’t have an end table.

Occasionally… he’ll give me a hard time telling me I need a table so he can put his coffee

cup down.  Problem is there’s no room to put one there.

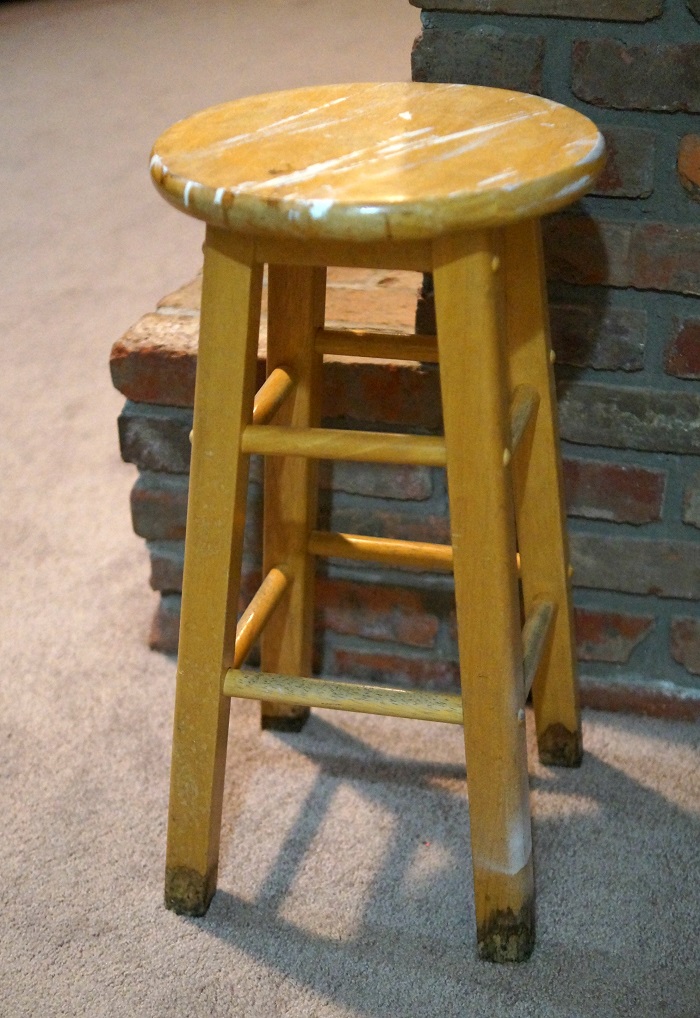
old stool 5552

Problem Solved…

I noticed this old stool down in the basement, paint splattered and water stained.  (a little ugly)

A make-over was in order and I knew exactly what I wanted to do.

I wish you could of saw the smile when I told him why I did this.  (I had to sneak the first picture)

He thought it was perfect.

Easily put away when not in use.

*Disclosure:  This blog uses ads and affiliate links.  If you choose to make a purchase using one of the links, I receive a small commission (at no additional cost to you) that helps offset the costs of maintaining this blog.  Thanks for your support!

Finished Stool with coffee cup 5592

Old Stool Make-0ver Products Used:                                                   (*affiliate link)

*FTC Disclosure… “This is a sponsored post.  I have been provided product in exchange for my creative ideas.  The views and opinions are my own.”

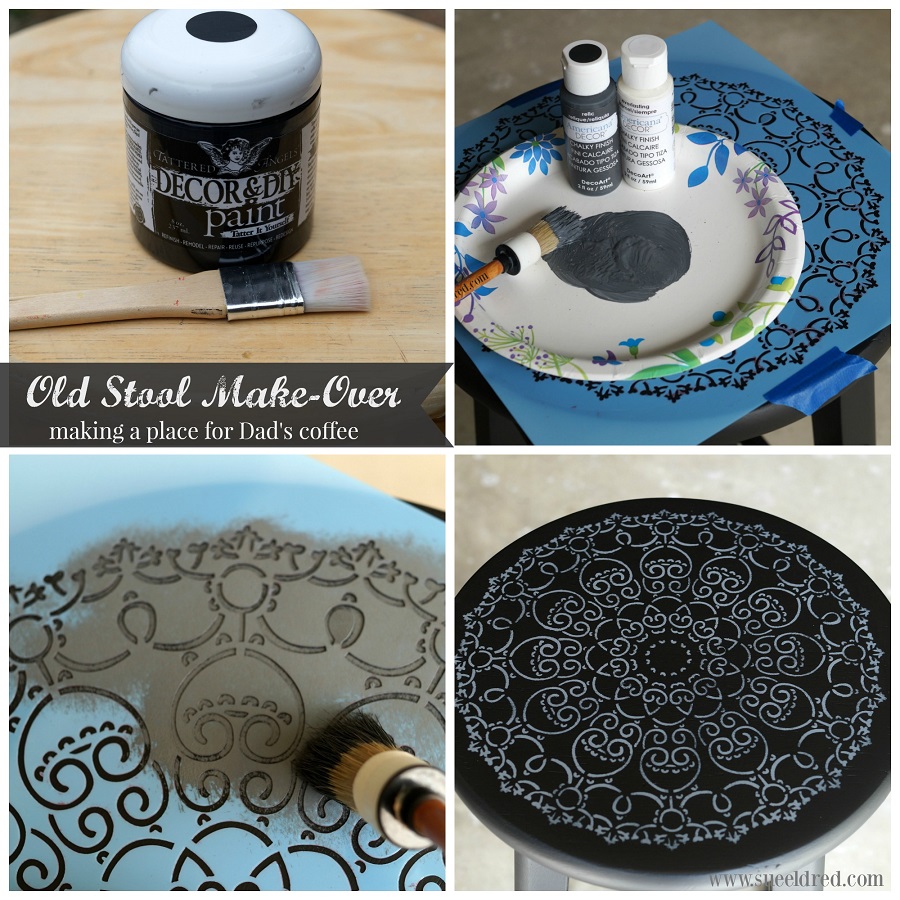
Old Stool Make Over Steps

Directions:

  1. I gave the top of the table a quick sanding with my palm sander to smooth out the paint splatters.  (I could of sanded the legs but I was lazy.)
  2. I used Tattered Angels Decor and DIY, Ebony*, I love that you don’t need to do any sanding or priming.  I love the smooth matte finish that it gives.  I gave the table 2 coats of paint and some touch ups.
  3. Allow the paint to fully dry and cure before starting the stenciling.
  4. I custom mixed Americana Décor Chalky Finish paint relic and everlasting for a light contrast to the ebony black finish.
  5. Center the stencil onto the middle of the stool and tape down the edges with removable painter’s tape to keep the stencil from moving.
  6. Use stipple brush to apply Chalky Finish paint inside open stencil areas.
  7. Remove Stencil.
  8. For the time being, I’ve decided to leave the stool as is.  You may want to apply a finishing wax to help protect the paint.


Don’t Miss a Thing…Make Sure to Follow me

Shop Amazon Scrapbooking Supplies*

Stitched Sampler

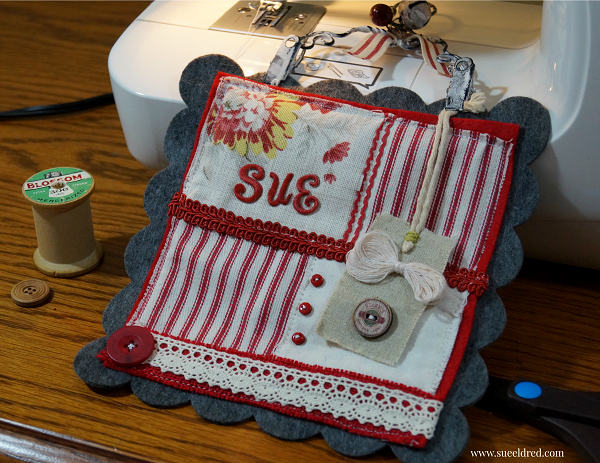
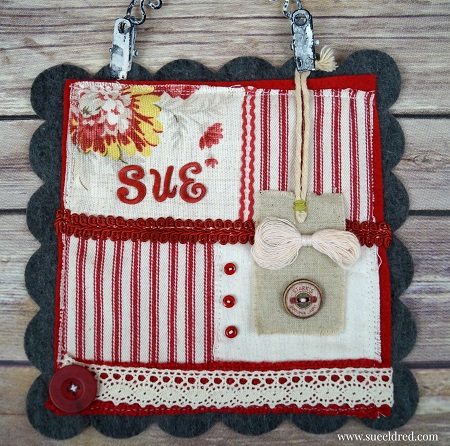
Stitched Sampler

I hate throwing anything away that might possibly be used on a project later.

In an effort to make room and not become a hoarder,

I actually threw these little scraps of fabric away.   (It was hard, I love these prints.)

But…Only minutes later, while I was making a permanent home for my new sewing machine

that I got for Christmas,  (thanks Nick and Bonnie) I got the idea to make a stitched sampler.

What a great use for little pieces of fabric.

Now, bear in mind that this is my first real project on my new machine.

Stitched Sampler Close Up

I misted the iron-on embroidered letters from Joy SA and the white decorative trim with

Tattered Angels Ruby Slipper Chalkboard Mist Paint and stitched to my hearts desire.

I cut a large die-cut square out of premium gray felt using my Accu-cut machine.

I’m pretty please with the way it turned out.

Stitched Sampler 3584

This project was created for and sponsored by Joy SA.

When your Spring Mantel needs a pop of Red…

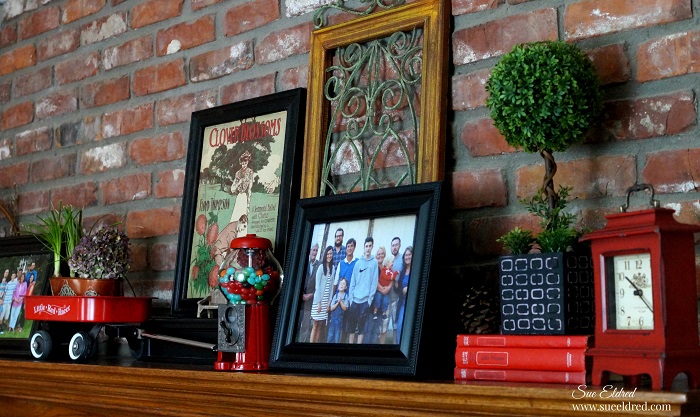
Spring Mantel

With the beautiful days we had in February…

My Spring Fever has set in big time.

Last week-end, I removed any and all remnants of Winter Decorating and re-did my Mantel for Spring.

little red racer

Inspired by a picture a friend posted online,

I ran upstairs and grabbed my little red racer from my office.

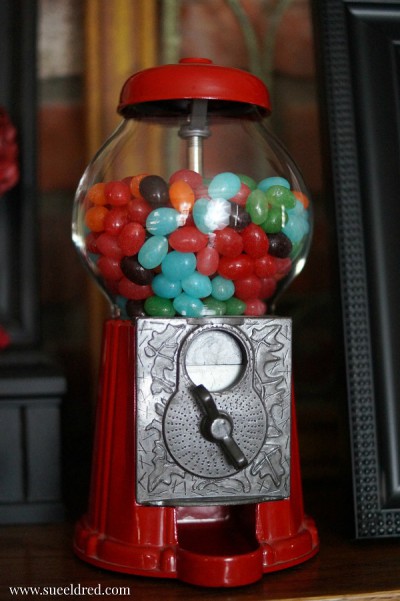
Gumball machine

There’s been a lot of serious jelly bean eating out of this old gumballs machine.

I added a second bag this week.  This could be a problem 🙂

Spring Mantel

Any one who knows me even just a little knows my decorating philosophy…

“Every room needs a pop of red.”

Now, I’m wishing and thinking warm thoughts.

Graphic 45… A Time to Celebrate Frame

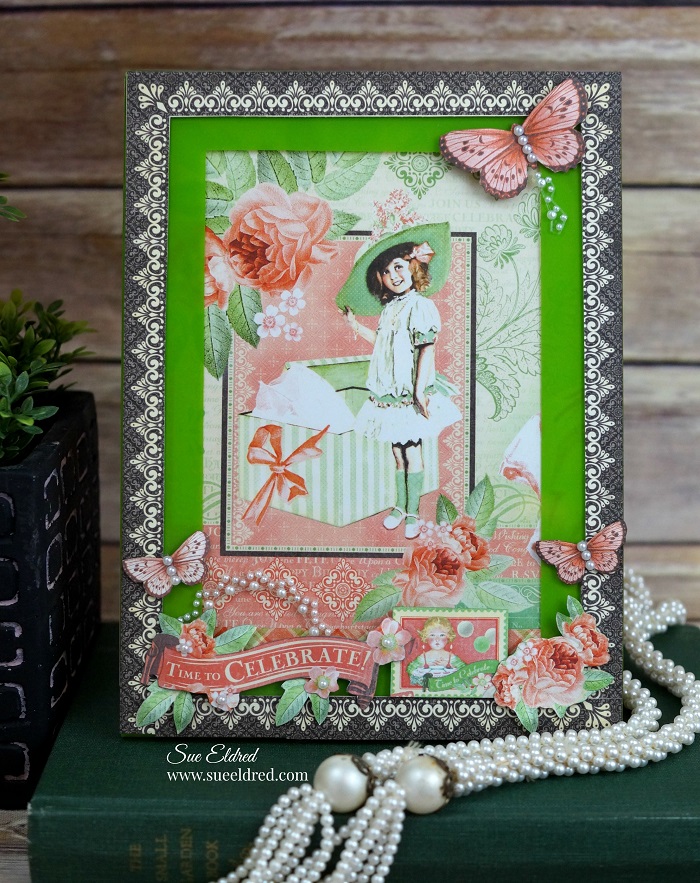
Time to Celebrate 4599

I have a hard time resisting the beautiful patterns of Graphic 45 paper and love using

it in my creations whenever possible. The other day, while I was shopping at my local

Scrapbook Store  I picked up a few sheets of the “Time to Celebrate Collection”.

I thought it would be perfect for a Spring Frame I wanted to make.  I couldn’t decide on

which way I wanted to go with the frame so I created two looks for the same frame.

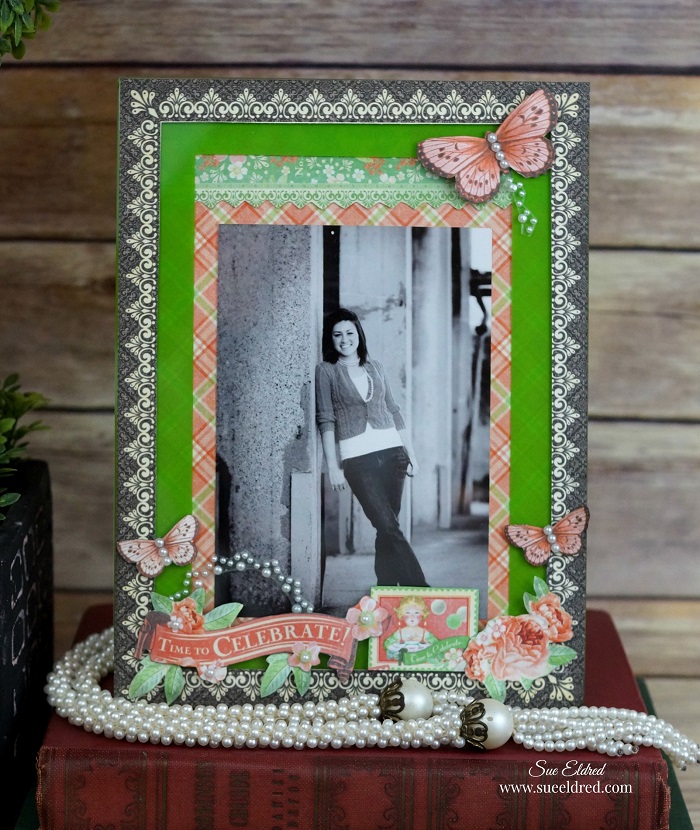
Time to Celebrate Frame 4709

For a slightly more contemporary look….

I used a older black and white picture of my daughter.  (I love the contract.)

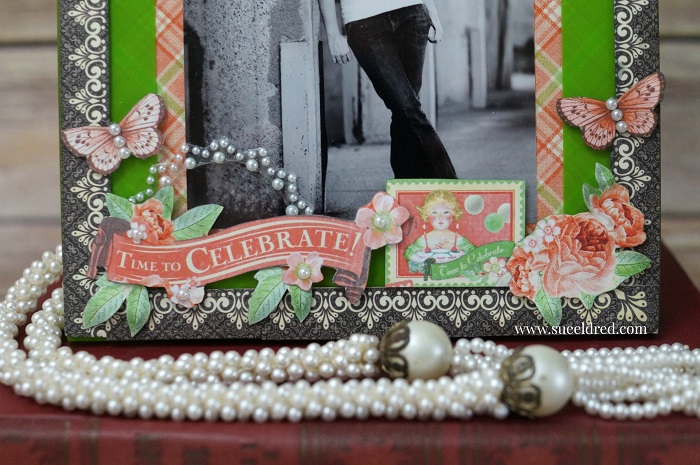
Time to Celebrate Frame Close Up 4835

There’s a bit of fussy cutting involved with this frame.

I used the border on the Time to Celebrate paper to create a border around my green frame.

Then, I started cutting out the butterflies and flowers, giving them slight bends with my fingers

before layering them onto the frame with foam mounting squares.

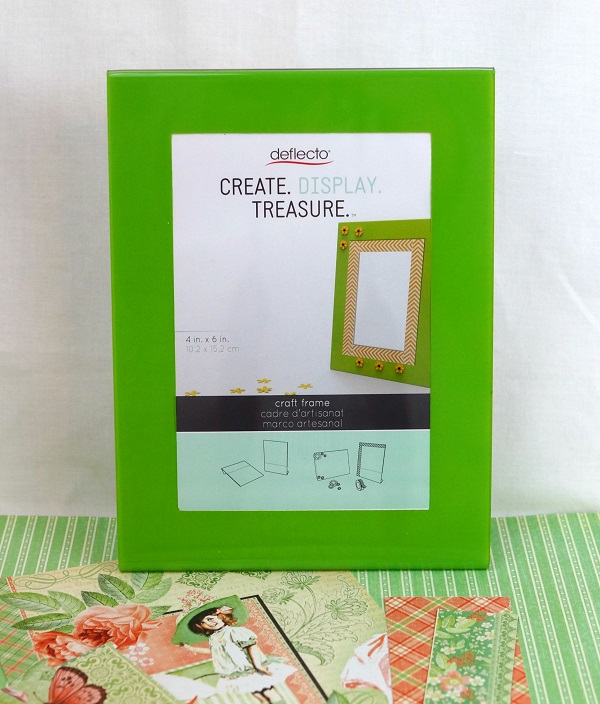
The finished frame is 6″ x 8″ and is made to hold a 4″ x 6″ picture.

Green Craft Frame 2

Here’s what I used:

Deflecto Craft Frame, Green Border, 4x 6 Inches (69574CR)

I used two sheets of paper from Graphic 45’s “Time to Celebrate” collection.


Graphic 45 Time To Celebrate Paper Pad, 12 by 12-Inch(available on Amazon*)


“This is a sponsored post. As a member of the Deflecto Design Team I have been
provided product in exchange for my creative ideas, views and opinions.”

*This post uses Amazon Affiliate links.  I am an Amazon Affiliate