Yippee Hooray…a boys birthday card

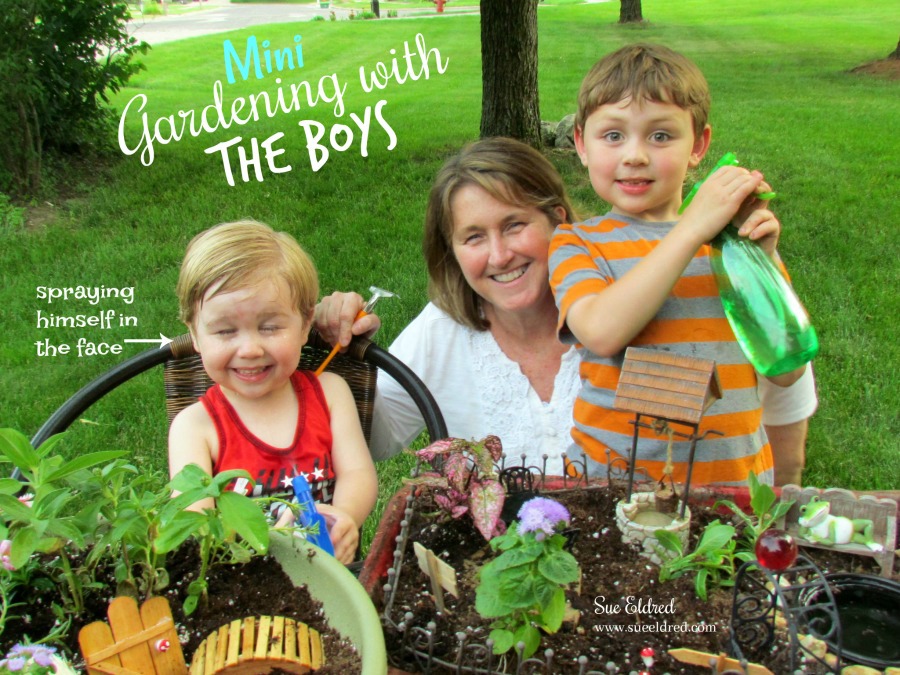
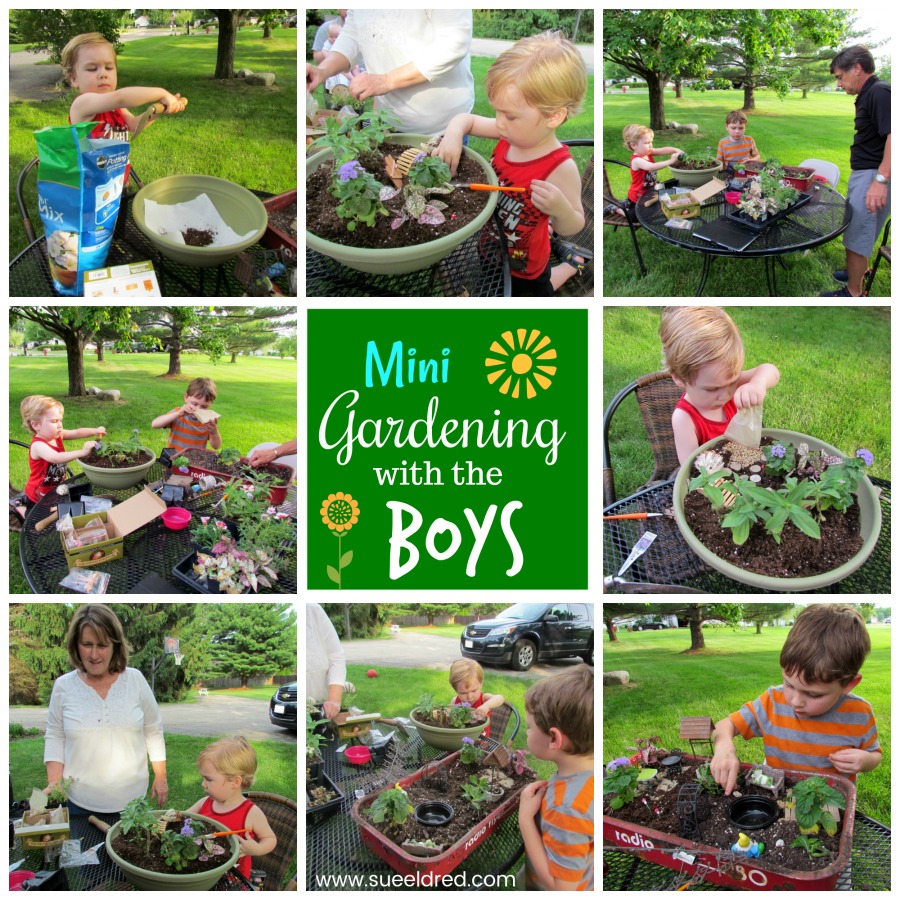
A fun little card to celebrate a special guys 5th birthday.

The three boys on the card represents my three grandsons.

This week the Xyron Design Team has teamed up with Waffle Flower Stamps & Dies

for some fun projects.  Waffle Flower sent me this cute stamp set called “yippee”.

It’s a perfect stamp set to use for kids cards.

Here’s what I used on my card:                                   (*affiliate link)

  • I stamped a birthday celebration scene using the three boys to represent my three grandsons on white watercolor paper.
  • I colored the stamped image in using my art markers.

There are so many cute kids and components with this stamp set.

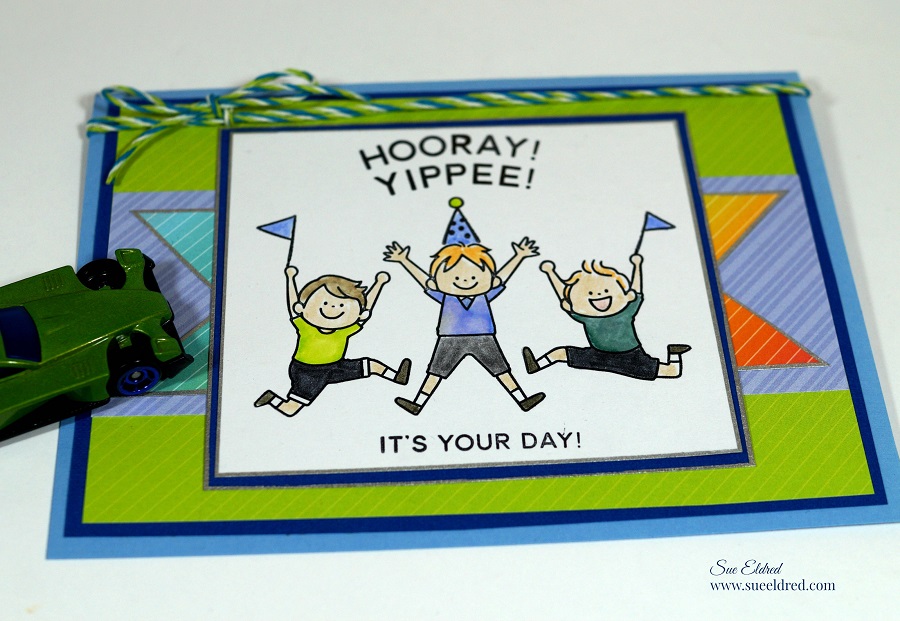
  • I used a silver paint marker to edge around the stamped image to make it stand out more.
  • The card and layers were quickly put together using my xyron tape runner.
  • Wrap a couple strands of green and blue twine around the card front and tie with a bow.

A simple little card perfect for celebrating all your special days.

“This is a sponsored post.  As a member of the Xyron Design Team I have been provided product and compensation in exchange for my creative ideas.  The views and opinions are my own.

Shop Your Fav Brands at Scrapbook.com

*Disclosure:  This blog uses affiliate links.  If you choose to make a purchase using one of the links, I receive a small commission (at no additional cost to you) that helps offset the costs of maintaining this blog.  Thanks for your support!

Gnome Gardening with Boys

Gnome Gardening with boys can be kind of tricky.

You need to be extremely prepared and very patient.

It’s messy and everything moves real quickly.

Earlier this summer the boys and I created Gnome Gardens.

It’s our annual tradition.  (Nicholas and I’ve been doing this for 5 years)

Thanks to some wonderful supplies donated by Leisure Arts, Inc.

and a few left over items from previous gardens we had a wonderful time and a lot of fun.

Leisure Arts Mini Garden Supplies…        (*affiliate link)

LeisureArts.com has a fun selection to choose from.

For our Gnome Gardens I like to use succulents, plants specific for mini gardens

and plants that won’t get too big.  And of course good potting soil!

Spray bottles are also a must.  (beware you might WILL get wet!)

Making the Gnome Gardens are a fun way to spend time with the boys.

The boys get to plant, water, watch the plants grow and play with the gnomes.

It’s very educational.

Nick’s Gnome Garden

For Nick’s Gnome Garden we used an old broken down wagon. 

It’s fun to use unconventional items when Gnome Gardening.

Warren’s Gnome Garden

For Warren’s Gnome Garden we used a simple round planter bowl. 

I think it turned out real cute. 

I’m still on the look-out for something a little bit different for his garden next year.

All and all it’s fun, rewarding and hopefully something they’ll remember in the future.

Maybe, just maybe, I’m installing a love of gardening.

Emerson the Littlest Brother  (maybe next year)

Nick and Grandma’s very first mini garden (Read about it HERE!)

A Special Thanks to Leisure Arts for providing the Mini Garden Supplies. 

We think you’re awesome!

Shop Your Fav Brands at Scrapbook.com

*Disclosure:  This blog uses ads and affiliate links.  If you choose to make a purchase using one of the links, I receive a small commission (at no additional cost to you) that helps offset the costs of maintaining this blog.  Thanks for your support!

BTS Vinyl Pouch

BTS Pouch made with StyleTech Vinyl…

A little BTS project to make with the bigger kids.

I wanted my project to be bright, fun and colorful so I used

Styletech Fluorescent Craft Vinyl from Tape Technologies.

How to make the BTS Vinyl Pouch…                                                           (*affiliate link)

  • Cut two pieces of self adhesive vinyl 4 1/2″ x 8″.
  • Cut a piece of cardstock the same size.
  • Using Vinyl Transfer Tape*, apply vinyl onto cardstock.  Turn cardstock over and add second piece of vinyl onto the back of the cardstock.
  • Smooth out any air bubbles with Bone Folder*.
  • Trim vinyl and cardstock piece to 4″ x 7 1/2″.
  • Score vinyl using a Scoring Board* 2 3/4″ and 5 1/2″.  Fold pouch on creases.
  • Cut 1″ strips of vinyl.
  • Cut vinyl to size and score 1/2″ down the strip.  Use strips to cover sides of pouch.
  • Cut additional strips to decorate pouch.
  • Cut small flowers using Sizzix Triplits Dies ~ Flower 2* to embellish.
  • Add Doodlebug Adhesive Enamel Sprinkles* in center of flower.

  • Punch small hole in top corner and add book ring.
  • On the inside add a piece of hook and loop tape.
  • Use a corner round punch to round the corners of the flap.

For more fun, try making a larger pencil pouch.

“This is a sponsored post.  As a member of the Tape Technologies Design Team I have been provided product and compensation in exchange for my creative ideas.  The views and opinions are my own.

Shop Your Fav Brands at Scrapbook.com

*Disclosure:  This blog uses ads and affiliate links.  If you choose to make a purchase using one of the links, I receive a small commission (at no additional cost to you) that helps offset the costs of maintaining this blog.  Thanks for your support!

My Little Soccer Fan

Now that Spring Soccer Season is upon us and both big brothers are playing soccer….

this little guy finds himself spending a lot of time sitting on the sidelines.

Or running off onto the field.  (he really gets into the game)

He needed a “Game Day” shirt to support his big brothers.

Are you a Super Fan…Do you have your shirt ready?

With Joy® Iron-on Embroidered Letters you’ll be ready for Game Day in no time.

 To make the “Little Soccer Fan” shirt you will need:

  • Iron On Embroidered Letters – Cooper White
  • Iron On Embroidered Letters – LetterShop White
  • Cotton T-Shirt
  1. Set iron to cotton setting, approx. 350°, or follow garment care label.
  2. Remove letters from sheet.
  3. Remove protective covering from the Cooper White letters then position on the t-shirt.
  4. Cover letters with a fine cloth.  With firm pressure, iron over the letters for 30 seconds.
  5. Turn t-shirt inside out and iron the back of the letters for 30 seconds.
  6. Allow to cool for 1 minute before handling.

Look for Joy® iron-on embroidered alphabet letter sheets at your local craft store.

My “Little Soccer Fan” shirt was created for and sponsored by Joy SA.

Shop Your Fav Brands at Scrapbook.com

*Disclaimer:  This post uses ads and affiliate links.  If you choose to make a purchase using one of the links, I receive a small commission (at no additional cost to you) that helps offset the costs of maintaining this blog.  Thanks for your support!

Try Amazon Prime 30-Day Free Trial

a boy and his cars…

I have this sweet boy in my life that loves cars.

Hotwheels to be exact.  (he’s very brand loyal)

Whenever he walks in my house he puts out his hand to show me the car of the day.

“Grandma, I have a new car to show you, you’re going to love this”…

This one’s Split Vision.  He’s aerodynamic and he goes really fast.”

I imagine he’s going to be a Race Car Driver or something equally cool when he gets older.

This kid always has a car with him wherever he goes.

I watched him at his big brother’s Spring Concert roll his car along the bleachers,

checking to see if it would fit under the boot heel of the guy sitting next to me.

To him… everything’s a potential ramp or tunnel.

For my Deflecto Design Team project this month, I decided to “think like he does” and make

a Deflecto 12″ x 12″ Clear Craft Picture Frame* into a “super cool” ramp for my grandson.

(*Affiliate Link)

I gave the Deflecto Frame* a light sanding with an extra fine sanding block to help the paint

adhere better.  Then, I painted the frame with Rust-Oleum Chalkboard Black Spray Paint*.

I used my Silhouette Cameo* and Glitter Vinyl* from Tape Technologies to create

the words and stripes for “our” new ramp.

Shop Your Fav Brands at Scrapbook.com

And… because you always need more storage for your cars.

I made him a new car box using a Deflecto Stackable Cube Organizer*.

“This is a sponsored post. As a member of the Deflecto Design Team I have been provided product in exchange for my creative ideas, views and opinions.”

*Disclosure:  This blog uses ads and affiliate links.  If you choose to make a purchase using one of the links, I receive a small commission (at no additional cost to you) that helps offset the costs of maintaining this blog.  Thanks for your support!

Shop Amazon Scrapbooking Supplies*

Sweet Baby BOO!

My sweet little grandson will be celebrating his first Halloween soon…

Inspired by our newest game, I decided to make him a cute little shirt to wear.

With the help of Iron-on Embroidered letters from Joy making the shirt was super easy.

  • prewash cotton t-shirt
  • set iron to cotton setting
  • position letters with shiny side down on garment
  • cover letters with a fine cloth
  • with firm pressure iron cloth over the letters for 25 seconds
  • turn shirt inside out and iron the back of the letters for 25 seconds
  • allow to cool for 1 minute before cooling

Isn’t he adorable?

Looking at this picture, I’m thinking really big googly eyes would look cute inside the “O’s”.

My “Sweet Baby Boo” shirt was created for and sponsored by Joy SA.

*Disclaimer:  This post uses ads and affiliate links.  If you choose to make a purchase using one of the links, I receive a small commission (at no additional cost to you) that helps offset the costs of maintaining this blog.  Thanks for your support!

Try Amazon Prime 30-Day Free Trial

Tie Dyed Emoji Socks

Looking for a fun Summer project to do with the kids?

How about one of a kind Tie-Dyed Emoji socks?

This kids are going to love this!

To make the Tie-Dyed Emoji Socks this is what you’ll need…

I tried three different ways to dye my socks.

  • First, I just squirted dye directly onto the socks.  (red and blue pair)
  • Next, I rubber banded two socks together.  (yellowish pair)
  • Then, I tried rubber banding the socks separately.  (purplish  pair)

I think I like the socks rubber banded together best.  (yellowish pair)

To Dye the Socks…

  1. Add water to the pre-measured squirt bottles.
  2. Rubber-band socks and apply dye.
  3. Let set for 6-8 hours, then rinse – waiting is the hardest part!
  4. Make sure to wear gloves!  (I didn’t)
  5. Wash and Dry socks.

6.  Iron On Emoji patches on opposite sides of the socks.    Very COOL Socks!

The Tie-Dyed Emoji Socks were created for and sponsored by Joy.

Disclaimer:  This blog uses ads and affiliate links.  If you choose to make a purchase using one of the links, I receive a small commission (at no additional cost to you) that helps offset the costs of maintaining this blog.  Thanks for your support!

Shop Amazon Scrapbooking Supplies*

Jazz Up your Flip Flops with Patent Leather Paint

Old or New…Jazz Up your flip flops with Patent Leather Paint from Deco Arts.

While attending the Creativation show in Phoenix earlier this year, I received a bottle

of “new” Garnet patent leather paint to play with.  You could say, I was smitten.

This paint was so fun and easy to work with.

 A quick and easy way to jazz up old or new flip flops.  (also pumps and purses)

To jazz up your flip flops you’ll need…              (*amazon affiliate link)

Directions:

  1. If using old flip flops… Make sure to wipe flip flops well with damp towel to remove any dirt or dust.
  2. Apply patent leather paint evenly with a soft-bristled brush.  The paint will have a slight tacky feel as it is drying.
  3. Apply 2-3 coats of paint to get the desired coverage.  Allow paint to dry between coats.
  4. Cut the shank off the back of the button with Wire Cutter*.
  5. Adhere the button onto the front of the flip flops using Quick Grip Adhesive*.
  6. Allow paint to cure 24-48 hours before using.

Next… Get a pedicure and ENJOY!

The Jazzed Up Flip Flops were created for Craft Ideas Magazine’s Summer 2017 issue.

Shop Your Fav Brands at Scrapbook.com

Shop Amazon Scrapbooking Supplies*

Disclaimer:  This blog uses ads and affiliate links.  If you choose to make a purchase using one of the links, I receive a small commission (at no additional cost to you) that helps offset the costs of maintaining this blog.  Thanks for your support!

Mini Gardening with the Boys

Several years back when Nicholas was a little bit older than Warren we started our annual

tradition of creating a mini garden.  Now that Warren is 3, I decided that this year,

he needed to make one of his own.  I found this cute Woodland Garden Kit* (affiliate link)

from LeisureArts.com.  It was a great start for Warren’s garden.

(LeisureArts.com was generous and sent me a Woodland Garden Kit to use in this post.)

The kit retails for $12.99 and comes with so many cute accessories to add to your mini garden.

A great value, cheaper than buying everything separately.

I had all the supplies and plants ready to go and the boys quickly got started on their gardens.

They loved digging in the dirt, putting in the flowers and decorating their gardens.

We added a hedgehog, garden gate, bridge, mushrooms, wood slices, rocks and cute little

garden signs.  (All included in the Woodland Garden kit.)

We were having so much fun, even Grandpa joined in on the fun.

Mini gardens make such a fun family project.

I do believe Warren’s favorite part was the water bottle. 

He loved spraying everything, including himself.

Nicholas was more serious about his mini garden.  (this is his 4th year making one)

You can read about and see Nick’s first garden here.

Warren and Nick’s Mini Gardens

I love doing special these projects with the boys.   After the mini gardens were finished, they

ran around the yard spraying each other (and occasionally me) with the water bottles.

They keep life fun!

FYI…  LeisureArts.com also has a Fairy Garden Kit in addition to the Woodland Garden Kit.

and for more Summer fun from Leisure Arts…  (click on picture below)

Friendship Bracelets

Disclaimer:  This blog uses ads and affiliate links.  If you choose to make a purchase using one of the links, I receive a small commission (at no additional cost to you) that helps offset the costs of maintaining this blog.  Thanks for your support!

Adult Coloring Book - BIG

for the love of reading… “Books for Nick”

My grandson Nick learned to read this year in Kindergarten.

This new ability has renewed his love of books.

Not just any old book will do, it has to be a chapter book.

To keep Nick from rummaging through all the bookshelves…

I created a small book stand for him to use with all the age appropriate books

I’ve saved through the years.  (He hasn’t seen it yet, I think he’s going to like it.)

To create Nick’s bookstand…

I used a Square Display Riser* (affiliate link) from a set of 3 acrylic risers I received from

Deflecto as part of my monthly Design Team box.

I covered the outside of the Square Display Riser* with ScotchBlue Platinum Painter’s Tape*.

I sprayed the inside of the Square Display Riser*

with Rust-Oleum Painter’s Touch Multi Purpose Spray Paint*.

I die-cut a scalloped square from black chalkboard vinyl (Sign Tags w/Wet Erase Marker)

and roughed it up with extra fine sandpaper for better paint adhesion.

I then painted the vinyl square with green spray paint.

For the Mini Chalkboard…

  • I cut a smaller piece of the black chalkboard vinyl and punched holes on each of the four corners to add decorative brads before gluing with Beacon’s Quick Grip Glue* onto the painted scalloped square.
  • I glued the completed scalloped square onto the Square Display Riser*.
  • The mini chalkboard is a great place to write encouraging reminders.

 “This is a sponsored post. As a member of the Deflecto Design Team I have been provided product in exchange for my creative ideas, views and opinions.”

For more summer fun… click on ad below.

Slimer

Disclaimer:  This blog uses ads and affiliate links.  If you choose to make a purchase using one of the links, I receive a small commission (at no additional cost to you) that helps offset the costs of maintaining this blog.  Thanks for your support!

Join Amazon Kindle Unlimited 30-Day Free Trial