Graphic 45…”A Place in Time” Valentine Frame

graphic-45-valentines-frame-sues-creative-workshop-4157

A little throw back Thursday…

to one of my favorite Valentine projects.  (made 4 years ago)

On the frame, I used Graphic 45’s “Place in Time” collection and a little cut and paste .

Which is now available as a Deluxe Collector Edition. 

(*affiliate link)
Graphic 45 4501470 Deluxe Collectors Edition Place In Time
*I am an Amazon Affiliate.  If you choose to purchase from Amazon using the above link, I receive a small commission that helps offset the cost of running this blog.

a little Valentine Love

valentines-frame-sues-creative-workshop-4136

When I flipped over the calendar this morning it hit me.

Less than 2 weeks until Valentine’s Day.

After all these years…

it’s still fun to throw a few hearts around to make sure he doesn’t forget.

I created this cute little Valentine’s decoration using a clear 4″ x 6″

acrylic craft frame from Deflecto Craft Solutions, scrapbook paper and stickers.

The sticker in the middle says “I belong with you & you belong with me”.

I think he’ll get the hint.


“This is a sponsored post. As a member of the Deflecto Design Team I have been provided product in exchange for my creative ideas, views and opinions.”


Planning on Getting Organized

planning-on-getting-organized-3609

If I were the type to make New Years Resolutions…

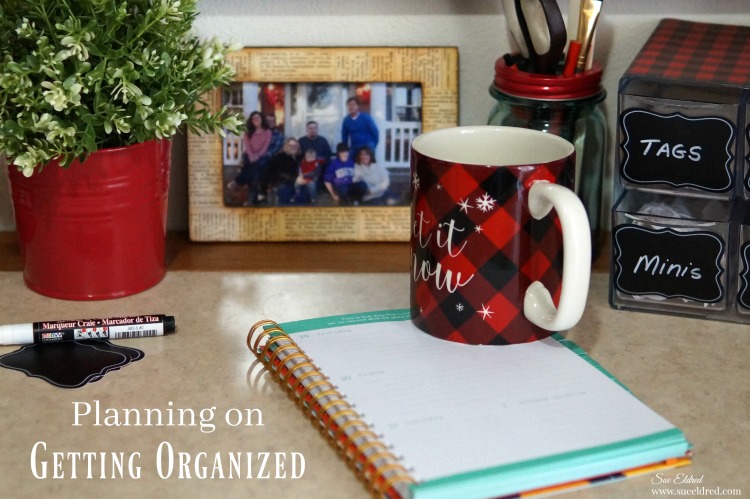
One of my goals would be to GET ORGANIZED.

Now that he house is a bit calmer and my to-do list quite a bit shorter,

I’ve been able to work in my office again.

It feels good sitting down, organizing my thoughts, throwing away old notes…

Planning for the New Year.

I’m a planner, a list maker.

I love the clean slate that a new calendar gives.

buffalo-plaid-organizer-close-up-3500(*amazon affiliate link)

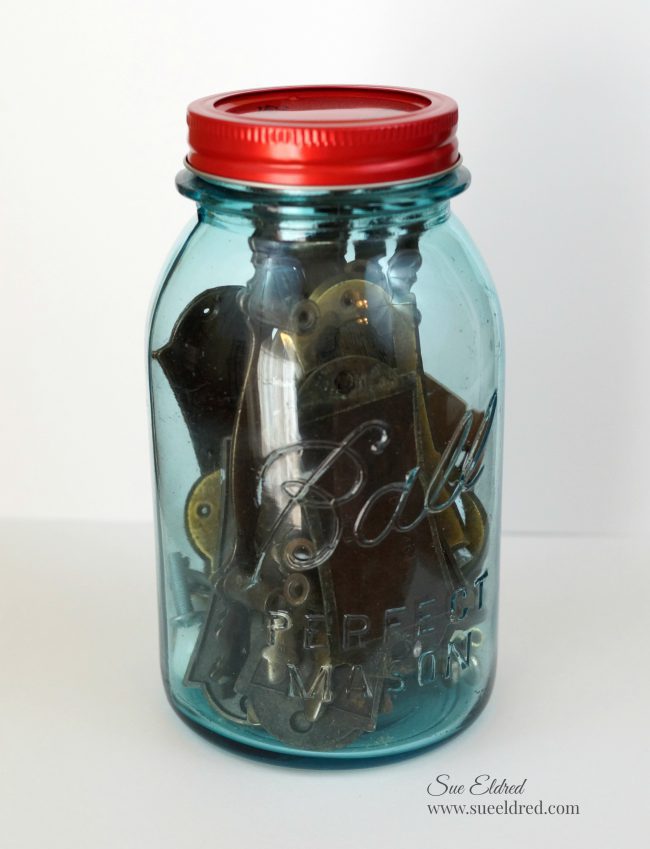
One of the ways I like to organize is by giving items a “home”.

By putting “like” items together everything starts making sense.

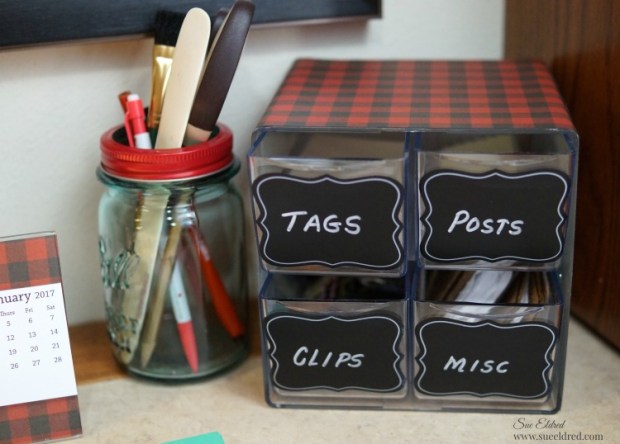
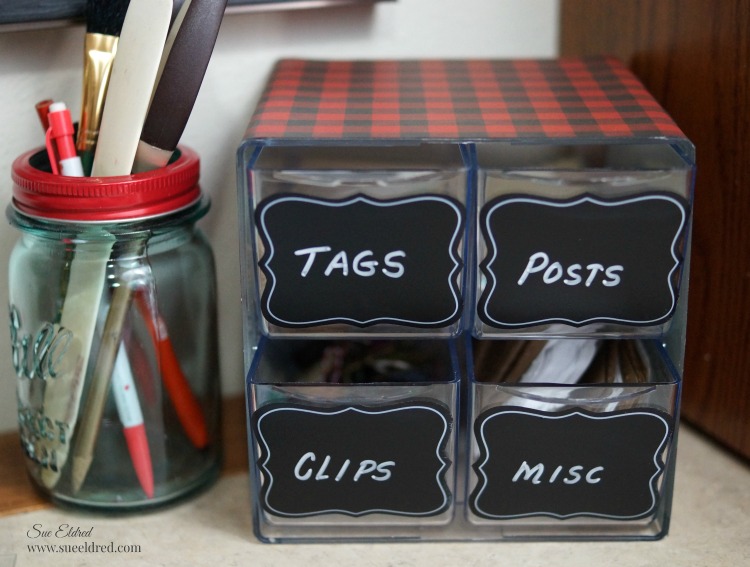
This 4 Drawer Stackable Cube Organizer*  works great for small items on my desk or anywhere

I might need a little organization.  Great in the kitchen, bathroom and even the garage.

buffalo-plaid-organizer-close-up-3520

For fun, I personalized my organizer by adding buffalo plaid scrapbook paper around the outside

and labeling each drawer with chalkboard stickers.

buffalo-plaid-mini-calendar-close-up-3518

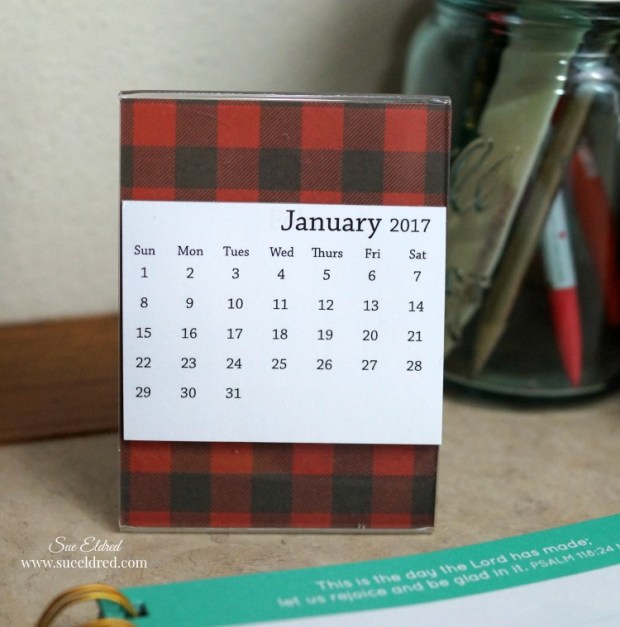
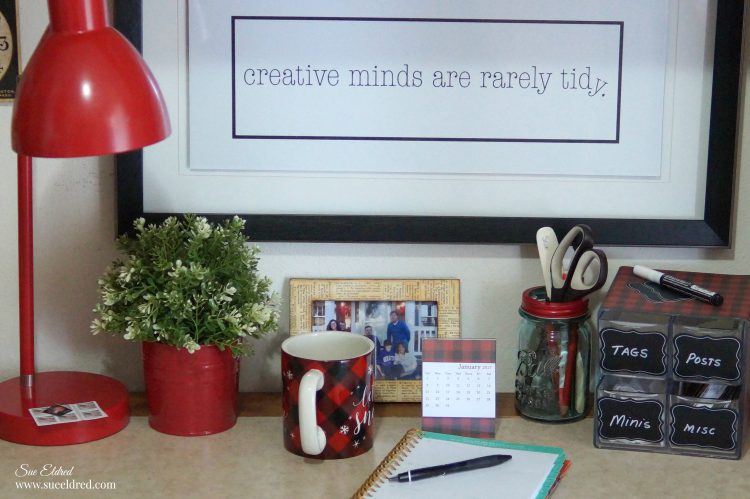
I even made myself a mini desk calendar using a 3″ x 4″ clear acrylic stand, leftover scrapbook

and a cute little calendar from Taylored Expressions.

plaid-let-it-snow-mug-3818

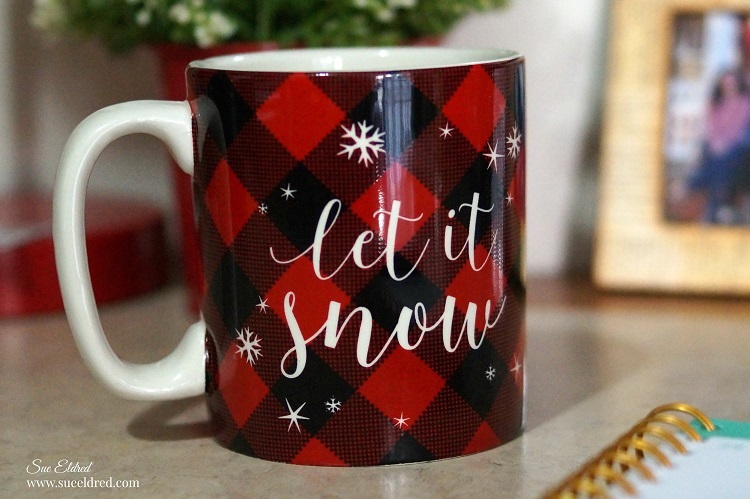
Even my coffee mug matches.

Did I mention I love Buffalo Plaid?

desk-3690

I’m happy when everything is neatly organized.  (not that it always is)

Next up is the closet in my guest room where I keep the extra design team product that

won’t fit in my tiny little office/workspace.

Big job, Big plans.  I’ll keep you posted!


“This is a sponsored post. As a member of the Deflecto Design Team I have been provided product in exchange for my creative ideas, views and opinions.”

*I am a Amazon Affiliate.  If you choose to purchase from Amazon from the above link, I receive a small commission that helps offset the costs of running this blog.  Thanks!

Holiday DIY with Old Kitchen Hardware

old-jar-of-hardware-sues-creative-workshop-3257

I have this old jar of assorted hardware on my shelf in my workshop.

I keep it just in case.  (Why you ask?)

Because I’m a “you never know” type of crafter.

old-hardware-before-sues-creative-workshop-3261

I had picked up a bag of old kitchen hardware at a garage sale a couple years ago

for fifty cents and used it on a few projects and even made a couple of ornaments.

(you can see them here)


While it may be too late for you to make this year…

it’s an idea that you can put away on the shelf, so to speak, for next year.

old-kitchen-hardware-spray-painted-cream-sues-creative-workshop-3263

Here’s how I made my ornament…

After disassembling the hardware, I spray painted the base plate cream.

What a difference spray paint makes.

go-around-edge-of-the-hardware-with-silver-leaf-paint-pen-sues-creative-workshop-3266

I added silver around the edge using a  Chisel Point Calligraphy Paint Marker, Silver*    (*affiliate link)

embellish-the-top-of-the-ornament-with-pine-stem-and-glitter-berry-sues-creative-workshop-3267

I used the small hole at the top of the hardware plate to string red and white twine.

I embellished it with a glitter berry cut from a glitter berry sprig (see previous picture)

wrapped around a small craft pine stem to form a small swag.

I glued the pine swag and small red and white bow to the hardware with

Beacon Adhesives Zip Dry.*

painted-snowflake-sues-creative-workshop-3271   let-it-snow-christmas-ornament-made-from-old-kitchen-hardware-close-up-sues-creative-workshop

I painted a small wood snowflake, found at the craft store, with silver acrylic paint and added

the “let it snow” sticker from Small Talk Stickers by Tim Holtz Idea-ology*.

I added a small red pearl to cover the bottom hole in the hardware and glued the

snowflake on top.

let-it-snow-ornament-made-from-old-kitchen-hardware-sues-creative-workshop-3290

A quick and easy upcycled ornament for the Christmas Tree.

Join Amazon Kindle Unlimited 30-Day Free Trial

Disclaimer:  This blog uses ads and affiliate links.  If you choose to make a purchase using one of the links, I receive a small commission (at no additional cost to you) that helps offset the costs of maintaining this blog.  Thanks for your support!

Christmas Photo Shoot

christmas-card-photo-layout-3140

On a unseasonably warm day in early November…

when my daughter was home visiting,

I made the family sit down for our first ever Christmas Card Photo Shoot.

I had all the props and seating planned out.  It was going to be fun.

With some being less than enthusiastic, this is what I had to deal with…

because of the warmth, my husband would not change into long pants,

my oldest forgot that we were going to be doing this, so he too had on shorts.

Once captured, my youngest grandson would not be in the picture without the

Target Toy Ad and my youngest son insisted on wearing his bandana.

Maybe next year, I’ll go back to making homemade cards. (sounds easier)

Merry Christmas from my family to yours.

christmas-card-photo-layout-close-up-3157


My “Christmas Card Photo Shoot” layout was created with papers and stickers

from Paper House Productions.

The Christmas Card Photo Shoot Layout was created for and sponsored by Paper House Productions.

How to make a Christmas Tree in a Bottle Necklace

mini-tree-in-a-bottle-necklace-sues-creative-workshop-1161

How to make a Christmas Tree in a Bottle Necklace

I got this idea from a project I’d seen made by Tim Holtz.  Of course, I had to find a cheaper way to make it.  I’ve seen small bottles like these at Hobby Lobby with the jewelry supplies.  (I got mine online.)

Very Important…Make sure the base of the tree is small enough to fit in the top of the bottle.

Materials Used:  (*affiliate link)

 Dollar Tree-Everything always $1 – Shop Now*

*Disclaimer:  This post uses ads and affiliate links.  If you choose to make a purchase using one of the links, I receive a small commission (at no additional cost to you) that helps offset the costs of maintaining this blog.  Thanks for your support!

Directions:

  1. Squirt several drops of peeled paint ink* into the mini mister* and dilute it with water.
  2. Place a bleached bottle brush tree onto a protective surface.  Generously spray the tree with the diluted ink.  (You may want to wear rubber gloves.  I took 3 days until the ink came entirely off my fingers.)
  3. After the tree is dry, rub glitter glue* onto the tree.  Allow glitter glue to fully dry before continuing.
  4. Apply a small bit of all-purpose adhesive* onto the end of the Q-tip.  Insert the Q-tip into the bottle and add the glue to the bottom center of the bottle.
  5. Using the reverse grip tweezers, insert the tree into the bottle, and stick onto the glue.
  6. Pour glitter or micro beads into the bottle.
  7. Add a thin layer of adhesive around the side of the cork and place it back into the bottle.
  8. Screw a loop screw onto the top of the cork and add a necklace.

If you’re feeling a little funky…how about making your tree pink or purple? 

If you liked the Christmas Tree in a Bottle here’s another project you might like.

Click here for the Mini Ketchup Bottle Snow Globe Instructions. ↓

A Joyful Village

As the Christmas Season gets closer…

I wanted to share this simple little wood project that I made for the “Creating with Joy” blog.

Being Joyful, is my goal not only at Christmas but throughout the entire year.

For my “Joyful Village”…

I  started with some wood trim scrap pieces cut into simple whimsical house shapes.

My pieces measure 4″ x 2″, 3″ x 2 3/4″ and 3 1/2″ x 2 1/4″.

I painted the house with a couple coats of Americana Decor Satin Enamels 8oz-Grey Taupe*.     (*Amazon affiliate link)

After painting the houses…                                                                             (*Amazon Affiliate Links)

      • I created a roof using Black Corrugated Paper*.
      • I added color to my white iron-on embroidered letters by dampening them and rubbing color directly onto the letters using my Distress Mini Ink Pad-Fired Brick*.
      • After the letters are dry, glue the letters onto the houses using a craft glue.
      • I created a mini wreath and mini pine swags using Pine Craft Stems*.
      • I created small number charms by printing the numbers onto white cardstock and punching with a small circle punch.  I added the numbers inside Metal Type Charms by Tim Holtz Idea-ology*.
      • I tied the charms onto the wreath and swags with thin twine and glued them onto the front of the houses along with a little tiny bow.

The village wouldn’t be complete without a cute little red truck.

I picked up the tiny red truck at the Elkhorn Flea Market in Wisconsin and I glued three little

bottle brush trees to the back of the truck.  I rubbed the trees with clear glitter glue

for added sparkle.

This project was sponsored by Joy SA and DecoArts.

Shop Amazon Scrapbooking Supplies*

*Disclaimer:  This post uses ads and affiliate links.  If you choose to make a purchase using one of the links, I receive a small commission (at no additional cost to you) that helps offset the costs of maintaining this blog.  Thanks for your support!

How to Make Wood Slice Snowmen

how-to-make-woodslice-snowmen-sues-creative-workshop-2854

What to do with a basket of Wood Slices*

This past summer, when my husband was trimming the old pine tree,

I asked him to save a few logs from the branches.

I wasn’t sure then what I was planning to make but I knew I wanted

to save some just in case.

Disclaimer:  This blog uses ads and affiliate links.  If you choose to make a purchase using one of the links, I receive a small commission (at no additional cost to you) that helps offset the costs of maintaining this blog.  Thank You.

basket-of-wood-slices-sues-creative-workshop-1773

I asked my husband to cut wood slices out of the smaller logs using a circular saw.

If you don’t have access to a pine log or don’t feel like cutting Wood Slices*

you can also purchase them online.

woodslices-sues-creative-workshop-1767

I picked out four wood slices of varying sizes.

drilling-the-hole-in-the-woodslice-sues-creative-workshop

I laid out the wood slices to determine placement of how I wanted them to go together.

I drilled small holes on the end of the wood slices with a fine drill bit approx. 1/4-1/2″ into the

end of the wood.

putting-the-woodslice-snowman-together-sues-creative-workshop-2710

Using small dowel rods or bamboo skewers for reinforcement,

I inserted the rods into the holes with a squirt of Wood Glue*

Each wood slice has a small wood dowel piece in between to

hold the snowman together.

drilling-a-hole-in-the-base-sues-creative-workshop

Once the wood slice snowman was completely dry and stable,

I drilled a hole in the center of the largest wood slice to use as my base.

The Snowman is attached to the base using a small dowel and wood glue*.

how-to-make-woodslice-snowmen-2855

To decorate the snowman…

  • Cut a piece of flannel slightly larger than the area around the head.
  • Fold and glue a small cuff using Fabri-Tac Permanent Adhesive*.
  • Glue the ends of the flannel together to create a tall “tube”.
  • Glue tube onto the top of the Wood Slice Snowman’s head,
  • Tie the top of the tube with a piece of string or thread.
  • Trim and fringe the excess fabric on the top of the tube to make it look like a hat tassel.
  • Cut a longer 1″ wide piece of flannel to tie around the neck of the snowman.  Don’t forget to fringe the ends.

wood-slice-reindeer-ornament-sues-creative-workshop-1186

To make a Reindeer Wood Slice Ornament…

  1. Paint the center of the wood slice with black chalkboard paint.
  2. Paint the reindeer cut out with silver acrylic paint.
  3. Glue reindeer onto wood slice with quick dry glue.
  4. Glue glitter holly berries embellishment onto reindeer.
  5. I used a push pin to start a small hole on the end of the wood slice.
  6. Screw a loop screw into the hole and add a ribbon to hang.

For more Wood Slice Projects Click on the Pictures below.


Don’t Miss a Thing…Make Sure to Follow me

Give the Gift of Amazon Prime*

Save

Two of my Favorite Snowman Projects

Snowball Fight 2

Sharing two of my all time favorite Snowman Projects…

This little guy is perfect for those times when it’s too cold to go outside and play.

Snowball Fight 3249

If you’re not loving the cold…

Here’s a snowball fight you can have while snuggling up inside.

Snowball Fight Supplies

Here’s what’s you’ll need:                                                 (*affiliate link)

Directions:

  1. Cut the 2″ Smoothfoam ball in half.  Cut the top off the rounded side of one of the balls.
  2. Poke two holes into the bottom of the Snowman body using the craft pick.  Break a toothpick in half, dip ends into craft glue and insert in holes.  Attach the sliced ball onto the Snowman body.
  3. Apply Snow-tex with palette knife over the newly formed Snowman and the 6″ disc.  Allow both to dry fully.
  4. To Create a Snowball Wall… Poke holes into the 1″ balls with the craft pick.  Insert toothpick halves with craft glue on the ends into balls.   Build wall by sticking the balls together.
  5. Apply Snow-tex onto wall using the palette knife.  (Allow to dry.)
  6. Create scene by attaching snowman and wall onto the disc.  Reinforce the pieces with toothpicks and craft glue.
  7. For a shimmery snowy glow…paint all the pieces with Crystal Craft Twinkles paint.  (Allow to fully dry.)
  8. Add shadows to the snowman and snowballs by gently applying vintage photo ink using a stipple brush.
  9. To Create the Snowman Hat… Measure and cut fabric to fit around snowman head.  Fold over and glue one of the long edges of the fabric to create a brim.  Glue fabric ends together to create a tube.  Tie top of the tube with a piece of string, cut excess fabric off top of the tube and fray the ends by making small cuts with the scissors.  Glue to the top of the Snowman head.
  10. Add arms to the Snowman using small twigs.  Warm him up with a fabric scarf and mittens cut from the fabric scraps.
  11. For the Snowman’s Face… Use two small black micro brads inserted into the snowman face for the eyes.  Paint the tip of a bamboo skewer with orange paint, cut and insert into the face for the nose.  Add a smile to the snowman’s face using a extra fine black paint marker.
  12. Make a small snowball using a small pieced of paper wadded up and covered with Snow-tex.  Glue finished and dried snowball onto mitten.

Snowball Fight Close Up 3194

Another one of my Favorite Snowman Projects was titled “How to make a Snowman”.

Smoothfoam Snowman 887

Making a Snowman is pretty easy.  All it takes is a little patience and time.

(and a few ingredients)

snowman parts

Here’s what you’ll need to make a Snowman:                               (*affiliate link)

Directions:

  1. Cut a small section off the bottom of the 4″ Smoothfoam ball so that it sits flat.
  2. Cut a couple of 3″ sections from the bamboo skewer.  Stick the skewer into the center of the 2″ and 3″ Smoothfoam balls.
  3. Add craft glue to the ends of the skewers before sticking the three balls together to form the snowman base.  (Allow glue to fully dry before continuing to the next step)
  4. Using a palette knife, smooth Snow-tex over Snowman base.  Here’s where the patience comes in… Allow a couple of hours for the Snow-tex to completely dry.
  5. Paint the entire Snowman base with white acrylic paint.  This fills in and helps cover any area missed by the Snow-tex.
  6. For a Frosty Look…paint the Snowman base with Craft Twinkles Glitter Paint.
  7. Cut a thin strip of grey felt and glue around the base of the hat to create a band.  Glue holly embellishment onto band to cover seam.  Glue to the top of the Snowman head.
  8. Cut a strip of gingham fabric and tie around neck.  Cut small slits into the ends of fabric for fringe.
  9. Use two small black brads inserted into the head for the eyes.  Use five micro black brads insert as the mouth.
  10. Cut the pointed end from a bamboo skewer and paint with orange paint.  Stick into head for the nose.

put a stick in it

Here’s a Close up of Mr. Snowman.  Isn’t he Handsome?

Snoman Face

These projects was created for and sponsored by Smoothfoam and also sponsored by DecoArt.

Smoothfoam Snowman Side view

*Disclaimer:  This post uses ads and affiliate links.  If you choose to make a purchase using one of the links, I receive a small commission (at no additional cost to you) that helps offset the costs of maintaining this blog.  Thanks for your support!

Try Amazon Prime 30-Day Free Trial

Reindeer Star Card

reindeer-star-card-sues-creative-workshop

Impress your friends and family this Holiday…

with a gatefold card that looks a lot harder than it really is.

This may not be a beginner card for some, but, I promise it really is not hard.

A few layers and a few simple steps and you’ll be done in no time.

The supply list may seem long…

but you can easily adapt the card with supplies you have on hand.


This is what I Used to make the Reindeer Star Card:                                           (*affiliate link)

Directions:

  1. Cut a piece of cream cardstock 7 1/2″ x 5″.  Score and fold on the 2 1/2″ mark to create a 5″ x 5″ card base with flap.
  2. Cut a piece of red patterned paper 2 1/4″ x 4 3/4″ and adhere to the front of the flap.
  3. Cut a 2 1/4″ x 2 1/4″ piece of light green patterned paper and adhere onto the bottom of the red patterned paper.  Repeat for the inside flap.
  4. Cut a piece of dark green patterned paper 4 3/4″ x 4 3/4″.  Adhere to the inside of the card.
  5. Cut a piece of red plaid paper 2 1/4″ x 4 3/4″ and adhere onto the bottom of the dark green patterned paper.
  6. Add a strip of thin washi tape to the seam of the patterned papers.
  7. Apply White and Gold Foil washi tape to a piece of white cardstock.reindeer-star-card-creating-a-washi-tape-background-sues-creative-workshop
  8. Cut two medium washi tape stars using the star die and Big Shot Cutting/Embossing Machine*.reindeer-star-card-cutting-the-star-dies-sues-creative-workshop
  9. Cut two larger stars from the gold metallic cardstock.reindeer-star-card-opened-sues-creative-workshop
  10. Adhere the first star halfway onto the flap (with the other half hanging over)  Adhere second star directly onto the back of the first star.
  11. Adhere medium washi tape stars onto the middle of the large gold stars.
  12. Cut one small gold cardstock and mount it to the middle of the front washi tape star with thin 3D foam mounting squares.reindeer-star-card-close-up-sues-creative-workshop
  13. Add small “white stag” dimensional sticker to center of the smallest star.  Add a small red adhesive rhinestone to the tip of the stags nose.
  14. Adhere a piece of gold cardstock onto the Stick It Adhesive Sheets*.  Die cut the words “Merry Christmas” using the Christmas Phrases die and stick onto card.
  15. Tie a thin gold ribbon around the flap with a small gold jingle bells and you’re done.

Finished Size:  5” x 5”  (may take additional postage to mail)


This project was sponsored by Little B LLC.

I am an Amazon Affiliate.  If you choose to purchase from Amazon using one of the above links, I will get a small commission that helps offset the costs of running this blog.  Thank You!

Try Amazon Prime 30-Day Free Trial*