
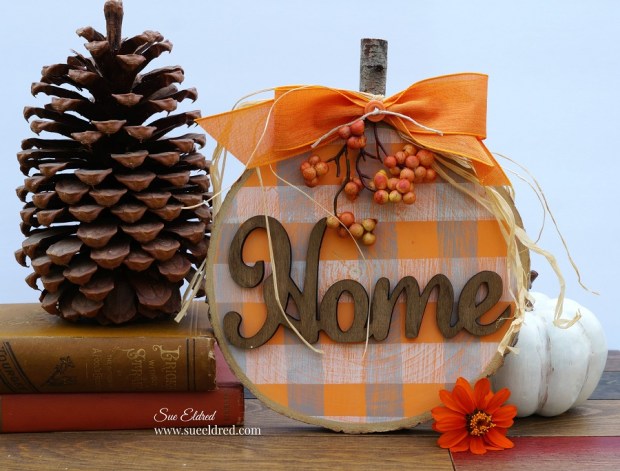
Buffalo Plaid Wood Slice Pumpkin…
Nothing says warm and cozy Fall Décor like Buffalo Plaid and Pumpkins.
Add them together for a cute Fall Home Décor project.

Shop $1 Fall Decor at Dollar Tree!
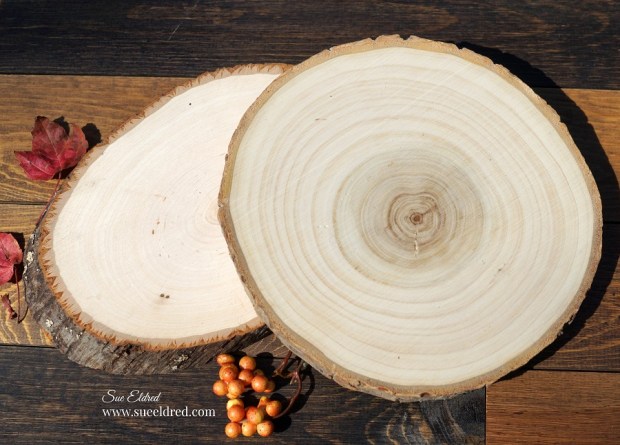
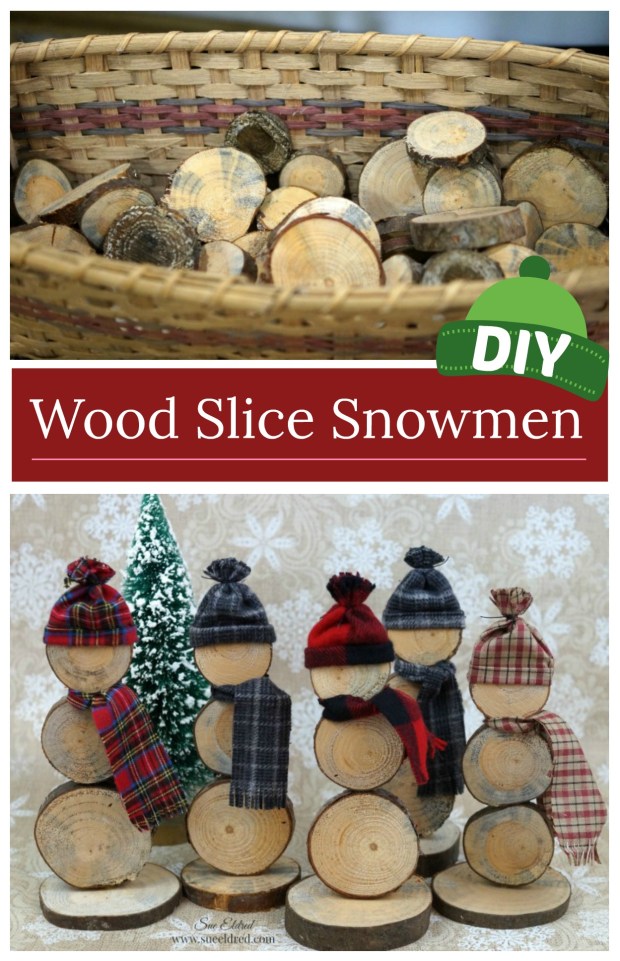
I love using wood slices in projects.
If you’re lucky, and you have lots of trees, chances are you may have a log or two that you
could cut off a slice. If not, with the popularity of wood slices* you can easily find them online,
or in the craft department of your favorite store.
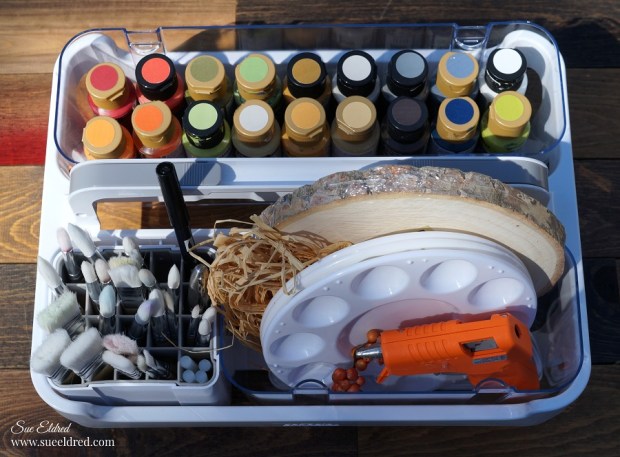
Featured Storage: Deflecto Stackable Caddy Organizer*
If you follow me much at all, you know I love my Deflecto Stackable Caddy Organizer*.
I can easily customize the Caddy by removing the lids, and adding a
Deflecto Interlocking Marker Organizer* for paintbrushes and glue sticks.
Once I fill my Caddy with supplies, I can easily take it outside to work on a lovely day.
![]()
Disclosure: “This is a sponsored post. As a member of the Deflecto Design Team I have been provided product and compensation in exchange for my creative ideas, views and opinions.”
Materials used to make the Buffalo Plaid Pumpkin:
- 7″-8″ Unfinished Round Wood Tree Slice*
- Deco Art Acrylic Paint: Orange Twist, Jack-O-Lantern, White Birch, and Dolphin
- 1″ Removable Painters Tape*
- Paintbrush
- Fine Grit Sandpaper*
or Extra Fine Grit Sanding Sponge*
- Hot Glue Gun*
- Small “Home” Wood Word
- Natural Raffia*
- Ribbon, Button, and Twine
- Deflecto Stackable Caddy Organizer*
- Deflecto Interlocking Marker Organizer*
*Disclosure: This blog uses ads and affiliate links. If you choose to make a purchase using one of the links, I receive a small commission (at no additional cost to you) that helps offset the costs of maintaining this blog. Thanks for your support!
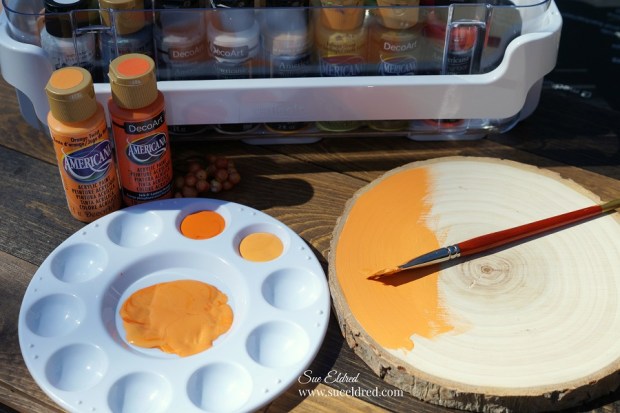
- To get the color I wanted for the base of my pumpkin. I mixed Orange Twist and Jack-O-Lantern acrylic paint.
- Paint just to the inside edge of the pumpkin slice. Leave the outer bark showing.

- Add strips of painter’s tape onto the pumpkin to make stripes. Rub your finger over the tape to make sure that the tape is securely on the pumpkin and has no gaps.
- Paint inside the stripes with a thin coat of white birch acrylic paint. Be careful not to apply the paint too thick. Only one thin coat of paint is needed.
- Remove painter’s tape.
- Allow paint to fully dry before continuing to the next step.

- Rotate the frame 180° and apply the tape in the opposite direction. Make sure the tape is securely down.
- Paint additional stripes with a light coat of dolphin (light gray) acrylic paint.

- Remove the painter’s tape. Allow the paint to dry.
- Lightly sand the wood slice. Sanding brings out the wood-grain and helps to hide any little imperfections.
- Wipe with a clean cloth.

- Cut a small 2″ piece from a tree branch to use for the stem.
- I also used a “home” wood word picked up at the craft store for my pumpkin.
- Hot glue the stem onto the top of the pumpkin. Hot glue the word “Home” on the front of the pumpkin.

- To give my Pumpkin a little extra support while sitting on my mantel, I hot glued a small wood piece (cut from an old scrabble tray) to the back of the pumpkin. Because the wood slice is not perfectly round, you may have to offset it a bit.
- Tie raffia around the stem and hot glue a small button bow with faux fall berries onto the pumpkin. You can find instructions on how to make a button bow here.

Loved the Wood Slice Pumpkin?
Click here for the Wood Slice Snowmen tutorial.


Don’t Miss a Thing…Make Sure to Follow me
