Simple Decorated Linen Bag and Burlap Utensil Holder


Burlap Pouches

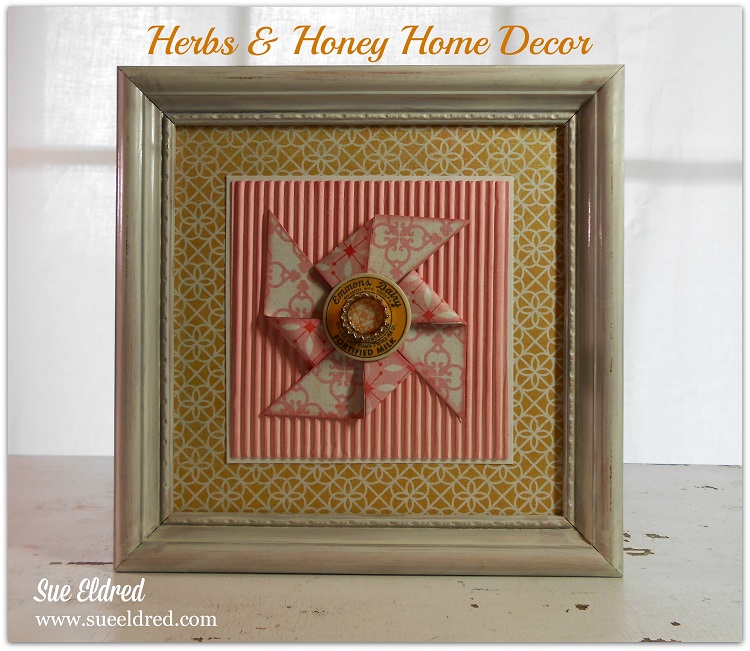
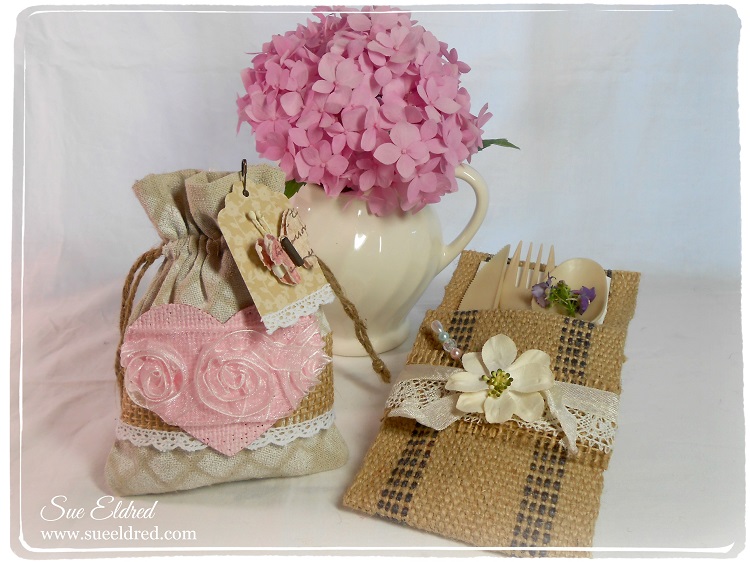
I recently got the opportunity to play along with a group of Designers using some fun burlap products.

I really love working with burlap.  So many ideas, too little time.  Here’s a few of the many things you can make using burlap.

Decorated Muslin Bag w vase

My first project is a simple and elegant idea for decorating a plain muslin bag.

muslin pouch and stencil tools

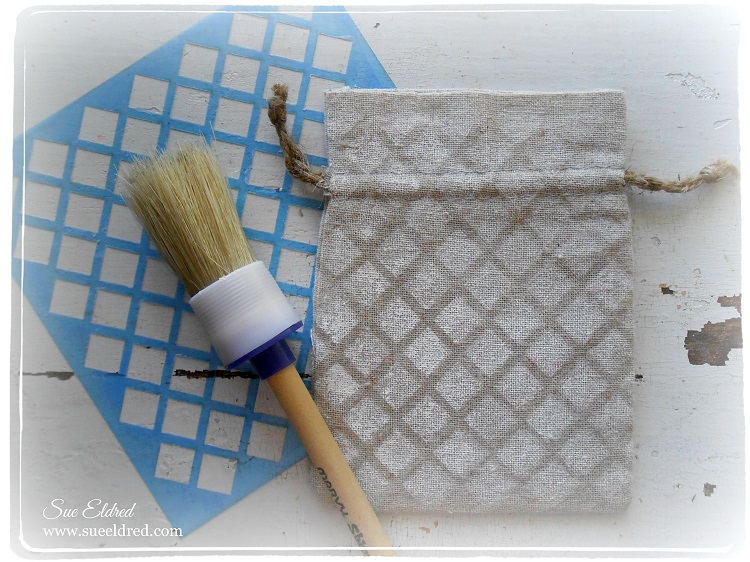
  1. Start with a plain muslin bag.
  2. Lay diamond stencil over the bag and secure in place with removable tape.
  3. Stipple over the stencil with white acrylic paint.
  4. Adhere a 1 1/2″ strip of burlap around center of bag.
  5. Glue a thin piece of white lace around the bottom of the burlap strip.
  6. For the heart:  Paint a small piece of red burlap with several coats of white acrylic paint, creating the nice soft pink color.
  7. Cut burlap with heart die.
  8. Adhere sheer pink rosette ribbon onto pink heart and glue onto front of muslin bag.
  9. Cut and Decorate a small tag.

Burlap Utensil Holder 2

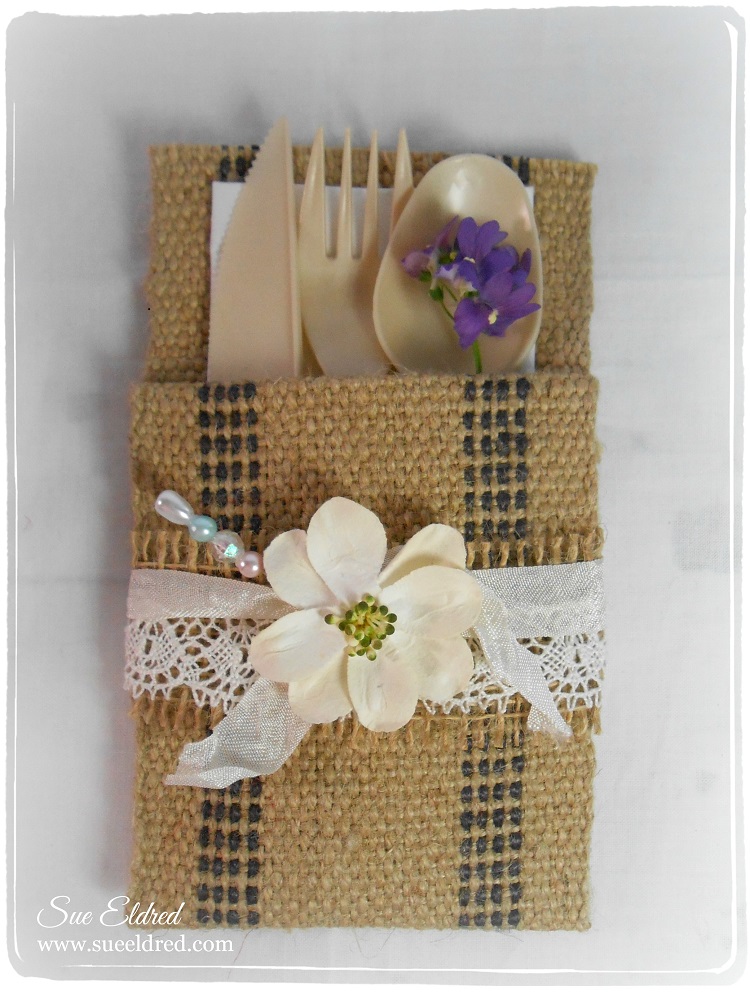
The Burlap Utensil Holder uses the 3 1/2″ navy striped burlap ribbon.

  1. Cut a 12″ strip of burlap ribbon.
  2. Fold over one end of the ribbon approx. 1/2 end and glue using a good Fabri Tac glue.  I used small metal binder clips to secure the ribbon in place while drying.
  3. Create a 4″ pouch by folding and gluing ribbon.  (love those binder clips)Glue a piece of 1 1/2″ burlap ribbon around pouch.
  4. Glue lace over burlap ribbon and tie with a piece of cream crinkle ribbon.
  5. Embellish with a flower and stick pin.
  6. Add a napkin and utensil and your ready to go.

Craft Ideas Magazine

Craft ideas magazine cover

The other day I received this magazine in the mail.

At first, it stumped me.  Why am I getting this magazine?

When I finally got the chance to sit down and look at it I noticed the name had changed.

Craft Ideas was formerly Crafts n’ Things.

Fall Addition!!!  I immediately knew what I was looking for.

Craft ideas Magazine Everyday Moments

Ta Da!!!  Here I am on pages 56 & 57.

My “Everyday Moments” accordion album with all the instructions so you can make one too.

Another thing that makes me happy:   they used the photographs I took for the article.

Make Wedding Place Settings with Smoothfoam

The Bride and Groom Place setting  is a cute way to identify where the bride and groom will sit for dinner!

To make the Bride and Groom Place Settings you’ll need…            (*affiliate link)

4″ Smoothfoam ball
Smoothfoam sheet (any size)
Stick ‘n Carve*
Hot Wire Foam Cutter*
Sandpaper, paint brush
Craft paints – black and white
Mod Podge Gloss Finish*
Stickles Glitter Glue, Diamond*
2 wood dowels
Gold Paint Marker*
“Story of Us” stickers

  1. Draw, trace or print the outlines of a dress and bow tie on to the transfer paper, then stick the paper to a sheet of Smoothfoam.
  2. Cut out the images with the foam cutter, through the transfer paper.
  3. Remove the transfer paper and sand the edges of the foam as needed. Paint the bow tie black and paint the dress white.
  4. Cut the Smoothfoam ball in half then paint one half black and paint the other half white.
  5. After the paint is dry, coat each piece with Mod Podge (gloss finish).
  6. Embellish the surface of the dress and ball with glitter glue for extra sparkle.
  7. Cut each dowel to the appropriate size so the markers are the same height as shown. Paint the dowels with a gold paint pen and insert into the foam, connecting each piece to its base.
  8. Embellish each marker with stickers and bling.

Shop Handmade – The Wedding Store

Disclaimer:  This blog uses ads and affiliate links.  If you choose to make a purchase using one of the links, I receive a small commission (at no additional cost to you) that helps offset the costs of maintaining this blog.  Thanks for your support!

Quick & Easy Washi Tape Vase

Today’s the first Monday of the month time for the Designer Craft Connection Blog Hop.

The Theme this month is Handmade Gift Ideas.  (don’t forget to hop)

Quick & Easy Washi Tape Vase

My project today is a fun, quick & easy project that you can make in minutes.

This would make a great last minute gift.

Washi Tape Vase Close Up  Washi Tape Vase Details

I started with a narrow glass bottle that has a fairly long straight section.

Wrap the bottle with Washi Tape.  Choose two patterns or more.

Having a straight section is important to getting the washi tape on evenly.

You can smooth out any wrinkles in the tape with your thumb nail or a bone folder.

I added a little more detail around the neck of the bottle with some ribbon and a button.

I picked up the ribbon this Spring at The Paper Source in Indianapolis.  (I’ll be hoarding this)

I glued the button onto a Memo Pin* from Tim Holtz and stuck into the ribbon.

Grab a flower from the garden and your ready to go.  It really is that easy.

Just a note in case you’re wondering:

The tape on the vase, just like the flower won’t last for ever.  It’s just pretty.

*Disclosure:  I am a Amazon Affiliate.

Reverse Glass Painting Technique with Decocolor Markers

I learned the Reverse Glass Technique, a long time ago,  from my Mom who loved to paint.

I believe, when did the reverse glass technique, she used Acrylic Paint on her painting.

For mine, I’m using Deco Color Paint Markers* (affiliate link) from Marvy Uchida.

I use these paint markers all the time on a variety of surfaces.

First thing you’ll want to do is to pick out the image.

For me, the simpler the better.

I picked a free graphic from Coloring Hub. (link below)

Stained Glass Clip Art from Coloring Hub

Reverse Glass Paint #1

1.  Lay Clip Art under glass and trace around image with black Decocolor marker.

Reverse Glass Paint #2

2. Use ruler for outside areas to get those lines straight.  Make sure to leave time for the ink to dry before laying ruler on top the previous line.

Here is the design outlined.  I like using the fine point marker better than the extra fine marker.

Reverse Glass Paint #3

3.  Flip the glass over and do your coloring on the reverse side of the glass.  Make sure to color all the way to the edge of the lines.

Reverse Glass Paint #4

4.  Color in the remaining sections.  Make sure to get the colors as close as possible.  Here is the back of the glass with the full design colored in.

Marvy Uchida also makes a DecoColor Paint Marker Remover* which I absolutely love.  It has saved me on more than one occasion.  It works wonderful to correct any mistakes you make.  I recommend you pick one of those up also.  (FYI:  it also removes alcohol ink from non porous surfaces)

Here’s some interesting history on Reversed Glass Painting.  (it’s been around for a long time)

Reverse Glass with Scrapbook Paper

Here’s another possible way to do a background.  (a more updated version)

Color/Paint only a portion of the image and leave the rest unfinished.

Add a piece of scrapbook paper to the back of the glass before framing.

Shop Amazon Scrapbooking Supplies*

Disclaimer:  This blog uses ads and affiliate links.  If you choose to make a purchase using one of the links, I receive a small commission (at no additional cost to you) that helps offset the costs of maintaining this blog.  Thanks for your support!

Cherish Family 1936

I recently ran across this old Family Reunion picture from 1936.

Cherish Family 1936 layout

Because there is over 100 relatives in the picture, I wanted to highlight where my Grandparents are.

Cherish Family 1936 layout tools

I used one of the frames from the “Clear Mixers”.

After removing one side of the protective covering, I painted the edges with Antique Linen Distress

Paint.  I glued a small piece of scrapbook paper under the painted side and trimmed it with an exact-o

knife.  I gently sanded the edges with a sanding block and distressed it slightly with Vintage Photo

Distress Ink before removing the second protective coating.

Cherish Family Layout 1936 close up

My grandfather is the one with the x and my grandmother is sitting to his left holding my Uncle Bill.

I used the Chamberry Collection from Adorn it and a scalloped circle punch and a old border punch

from Marvy Uchida.

This project was created for and sponsored by Clear Scraps.

Learn How to make a Fabulous Card with Fancy Folds in just a few Simple Steps

Fancy Fold Card Want to learn how to make a fabulous looking card in a few simple steps? Fancy Folds Instructions I learned this technique from the book

Fabulous Folds for Card Making*
Design by Lisa Silver

  1. Punch 9 circles.  (mine is a 2″ circle)  I edged each circle with Butterscotch Ink.
  2. Fold each circle into four sections.  (lines on the above picture are to make it easier to view)
  3. Fold in bottom curves to make point at the bottom.  (do this with 8 of the circles)
  4. Flip Circle and fold in sides so folds meet in center.
  5. Arrange petals on remaining circle to make a total of eight petals.

Fancy Fold Card Close Up I added a little gold flower button from Buttons Galore and More. FYI:  If you happen to pick up the book, I’m on pages 148, 160 & 164

(*Disclosure:  I am a Amazon Affiliate.)

Ugly Chair Make-Over

Ugly Chair Before

I picked up this ugly green chair last fall at a garage sale for only one dollar.

The man who sold it to me that morning wanted to hurry up and sell it before his wife came home

from taking the kids to school and changed her mind.

To him, it was an ugly chair.  To me, I saw possibilities.

As luck would have it, the very same week-end, I picked up a wonderful length of red and cream

ticking fabric for 50 cents.  It was perfect, it was meant to be.

But…because I just couldn’t cut the lovely fabric just yet,

I left the project in the garage to marinate over the winter.

Beautiful Chair After

I discovered in the process of recovering the chair that it used to have a red velvet seat.  (yuck!)

It was gross.  I took everything off and added new foam before re-covering the seat.

The chair was glued, reinforced and painted with red paint left over from previous projects.

Last night I put the final coat of red paint on the chair.  (red takes a lot of coats)

I just love it.  Now to find the perfect spot.  Maybe my workshop.

Total cost on the project $4.50.  Not to bad of a bargain.  (Pretty resourceful if I say so myself.)

I can’t decide it I should leave it as is or add some kind of stencil design in the middle.  Thoughts?

Basic Grey’s: Herbs & Honey Home Decor

Herbs & Honey Home Decor

One of the things I look for when I go treasure hunting are picture frames.   Square ones in particular.  I am just drawn to square frames.  Doesn’t matter how ugly the picture is inside.

Herbs & Honey Home Decor before

I gave the gold frame a white wash look with Tim Holtz Distress Paint in Antique Linen. (frame cost .50)

Herbs n Honey Home Deco close up

I made a simple 3″ pinwheel using two different pinks from the “Herbs & Honey” Collection.  The middle of the pinwheel was made using “bottle cap” stickers from the same collection.

What do you look for when you go treasure hunting?  (I think that sounds better than garage sales)