Simple Stories Classic Christmas Cards

I’ll be teaching a new class at The Paper Forest in December.

simple-stories-classic-christmas-cards-2193

Simple Stories Classic Christmas Cards…

You may want to grab your elf hat and shoes for this fast-paced Christmas Card Class.

In this class we will create 8 Christmas cards using the Simple Stories Classic Christmas Collection.

All you need to bring is your double stick tape roller, plenty of 3D foam mounting squares and scissors.

Please join me…

Thursday, December 1st
at The Paper Forest in Washington, IL
5:30-7:30 p.m.
Cost:  $25

Contact The Paper Forest at 309-745-3868 to sign up.
If there is enough interest we may add a daytime class.

Way to Go Cubbies!

stephanie-cubs-layout

Last night, while watching the “nail biting” World Series…

my daughter texted me asking me if I could locate the picture of her in her cubs outfit.

She’s been a Cub’s fan for quite some time.

I’d forgotten that I had made it into a scrapbook page.

So…I thought today was a perfect day to share this Throw Back Thursday page.

WAY TO GO CUBBIES!!!

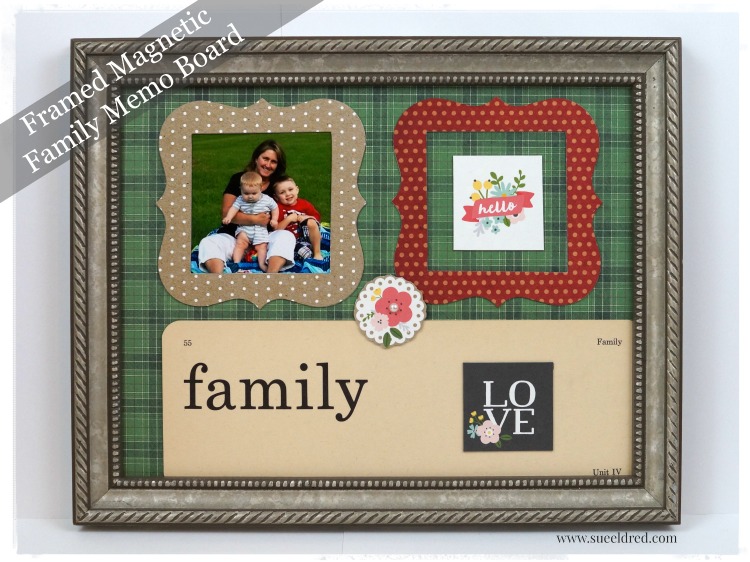
Framed Magnetic Family Memo Board

framed-magnetic-family-memo-board-2001

A decorative alternative to the family refrigerator.

This picture of me with my grandsons is one of my favorite photos.

It’s been hanging around on the fridge for a couple of years now.

I decided to make a Framed Magnetic Memo Board that I can hang on the wall and swap out photo’s

in the magnetic frames when ever I feel like it.

framed-magnetic-family-memo-board-2005

  • I started with an old picture frame with the glass removed.
  • I adhered the Magnetic Craft Sheet from Deflecto using double sided adhesive on the frame backing with the black magnetic side up.
  • Next, I covered the black magnetic sheet with a “thin” piece of plaid scrapbook paper and inserted it back into the frame.  (TIP:  using thin paper is the key to the magnetic sheets sticking together)
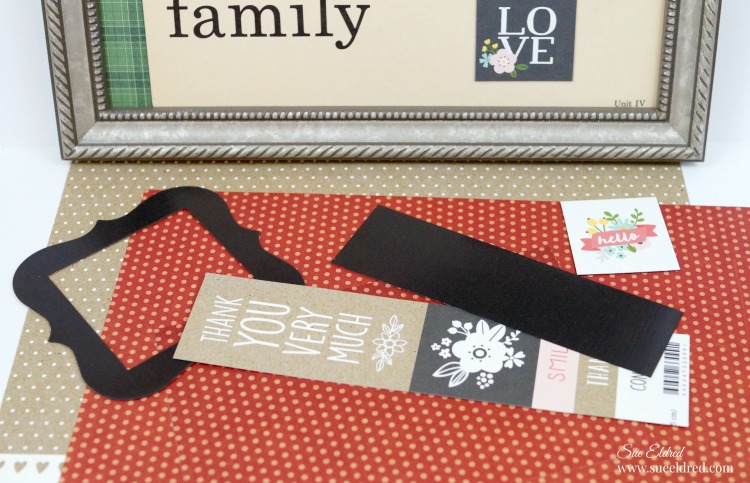
  • To make the frames:  Cover magnetic sheets with scrapbook paper. Cut magnetic sheet with craft knife and mat or use a wood die cut frame to cut out the frames.
  • You can also create small word magnets using scrapbook paper and the magnetic craft sheets.

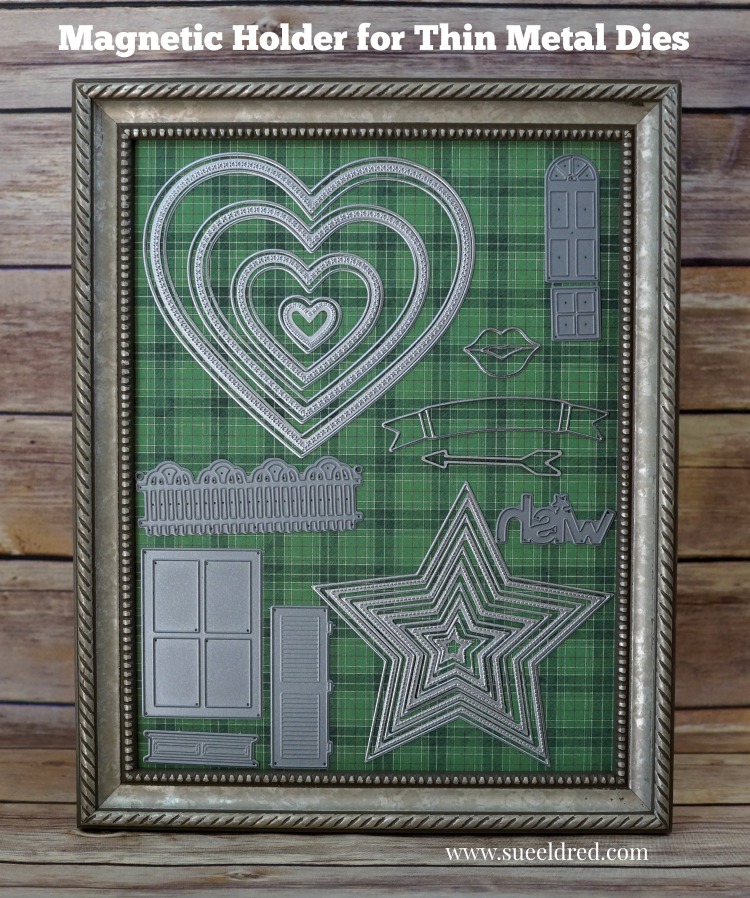
magnetic-holder-for-thin-metal-dies-sues-creative-workshop

Thin metal dies will not work to cut the magnetic sheets, but it would be a great way to store them!

Deflecto Magnetic Craft Sheets, 8″ x 15″, 3-Pack, White (5901)


“This is a sponsored post. As a member of the Deflecto Design Team I have been provided product in exchange for my creative ideas, views and opinions.”

*This post uses Amazon Affiliate links.  I am an Amazon Affiliate.

Boo Door Hanger and Autumn Wreath

autum-wreath-and-boo-door-hanger-sues-creative-workshop-1256

The plan was to make the “Boo Door Hanger” and the “Autumn Wreath”

as two separate projects with two separate blog posts.

But… while I was working on decorating my front porch for Fall,

I tried them together and decided I liked it.

The “Boo Door Hanger” is a separate piece that I can remove after Halloween.

fall-wreath-supplies-sues-creative-workshop

I assembled the wreath using a grapevine wreath, a couple of fall silk floral bouquets, ribbon and my

hot melt glue gun.  After cutting the stems apart from the bouquet, I played around with the

arrangement of the flowers and glued them in place.

A simple bow glued into place finished off the Autumn Wreath.

The entire project took less than a half hour.

sign-tags-stickers-and-paper-1119

The Boo Door Hanger was a little more involved…

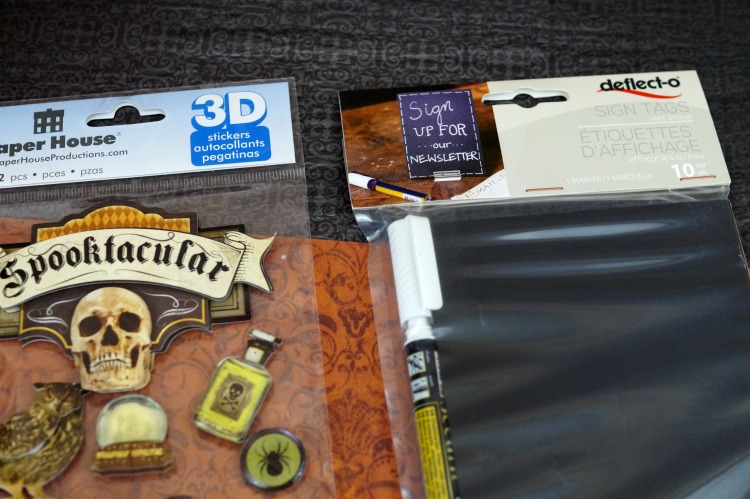
I used Black Sign Tags that come with a White Wet Erase Marker from Deflecto Craft Solutions

and Halloween paper and stickers from Paper House Productions.

die-cut-frames-1124

I applied the Halloween paper onto thin chipboard and cut out three die-cut frames.

I cut the sign tags just slightly bigger than the opening of the frame and adhered it to the back.

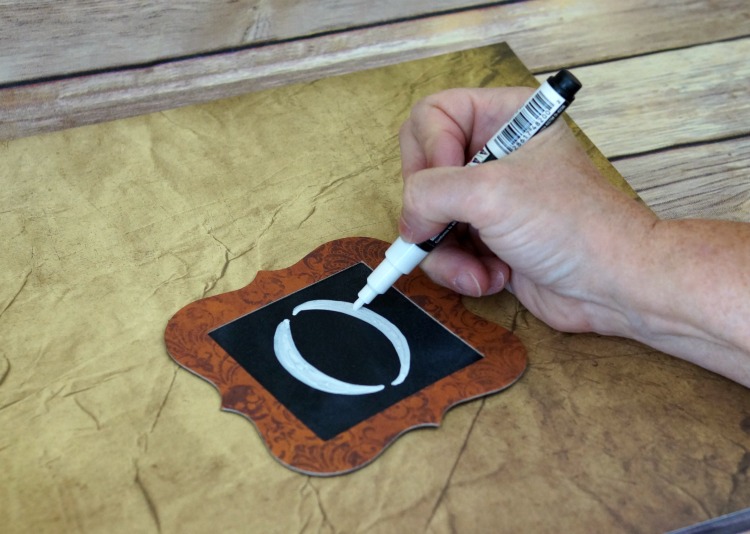
drawing-the-letters-with-the-chalk-marker-1125

I drew in my letters using the white dry erase pen.

Make a mistake?  Just wipe the sign tag with a damp paper towel and start over.

boo-door-hanger-close-up-1127

I punched two holes in the top and bottom of the first two frames and the top only of the last frame.

I added a black eyelet to each hole and connected the frames with small garment pins.

boo-door-hanger-1129

I embellished each frame with Spooktacular 3D Stickers from Paper House Productions.


“This is a sponsored post. As a member of the Paper House Productions and Deflecto Design Team I have been provided product in exchange for my creative ideas, views and opinions.”

There’s no place like Home

poppy-heart-sues-creative-workshop-the-wizard-of-oz

You don’t need to be a huge Wizard of Oz fan…

to fall in love with this new paper collection from Paper House Productions.

But if you are, you’re in luck!

poppy-heart-side-view-suess-creative-workshop-the-wizard-of-oz

This sweet water colored collection from Michelle Coleman is beautifully done.

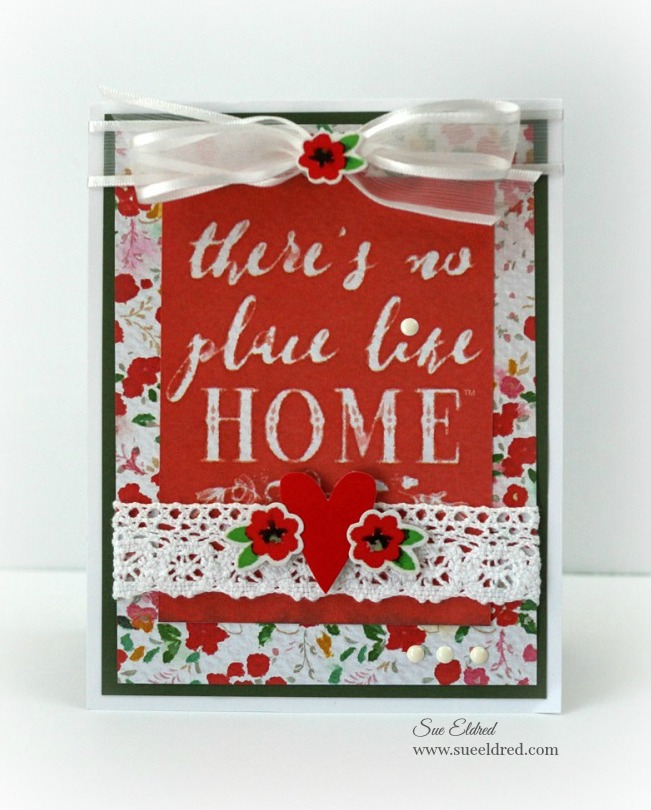
theres-no-place-home-sues-creative-workshop-the-wizard-of-oz

I fell in love with her red poppies.  (Who wouldn’t?)

And as the saying goes…“There’s No Place Like Home”.

theres-no-place-like-home-inside-card-sues-creative-workshop-the-wizard-of-oz

Here’s what I used on my cards:


These projects were created for and sponsored by Paper House Productions.

Autumn Woods Pop-Up card and Fall Collage

Autumn Woods Pop Up Card 096

One of the best things about being on a design team is the opportunity to work with awesome

products.  When I got my last box of goodies from Paper House Productions I instantly fell

in love with the Autumn Woods Collection.

Autumn Woods Pop Up Card 083

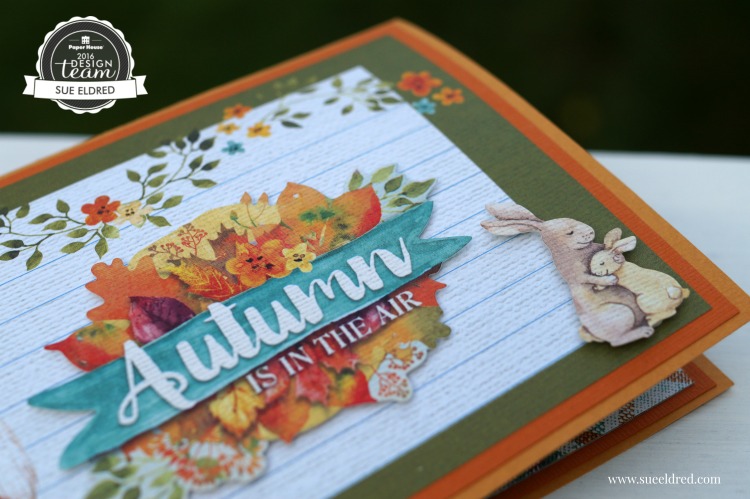
The sweet water colored woodland animals are cute without being to cutesy.

I knew as soon as I saw them that they needed to be made into a pop-up card.

Autumn Woods Pop Up Card 084

Tips…

  • I apply baby powder on the back of my stickers with a small paintbrush to remove the tackiness.  That way I can use my stickers like die-cuts.
  • On the front of the card:  I love adding dimension… so under the “Autumn is in the Air” and the “bunnies” I used 3-D foam mounting squares.
  • Add even more dimension to the inside of your pop up card by adding thin foam mounting squares to the stickers “tree” and  “autumn woods” and strategically placing them on the background.
  • I created a couple of pop-up steps for my forest friends.

Autumn Woods Collage 115

While cleaning up the Autumn Woods scraps laying on my desk, I decided to make a Fall

Collage using a rummage sale frame I picked up last month for next to nothing.

Autumn Woods Pop Up Card 0099

All in all… I would have to say that the Autumn Woods Collection has to be my favorite

Paper House Productions collection so far.  (at least for the time being)

Here’s the list of the Paper House Products I used:

These projects were created for and sponsored by Paper House Productions.

Disclaimer:  This blog uses ads and affiliate links.  If you choose to make a purchase using one of the links, I receive a small commission (at no additional cost to you) that helps offset the costs of maintaining this blog.  Thanks for your support!

Shop Amazon Scrapbooking Supplies*

Old Frame Make-Over from last Friday’s treasure hunt.

When I asked what the price was for the old terra pot, she paused and said “a quarter”.

When I asked her how much for the next item, she said “a quarter”.

It didn’t take long for me to realize that this was going to be fun.

By the time I put my pile on the table she said “a dollar……..ummm fifty?”

I love a good treasure hunt.

Especially when it’s ran by an old lady who just wants to get rid of everything.

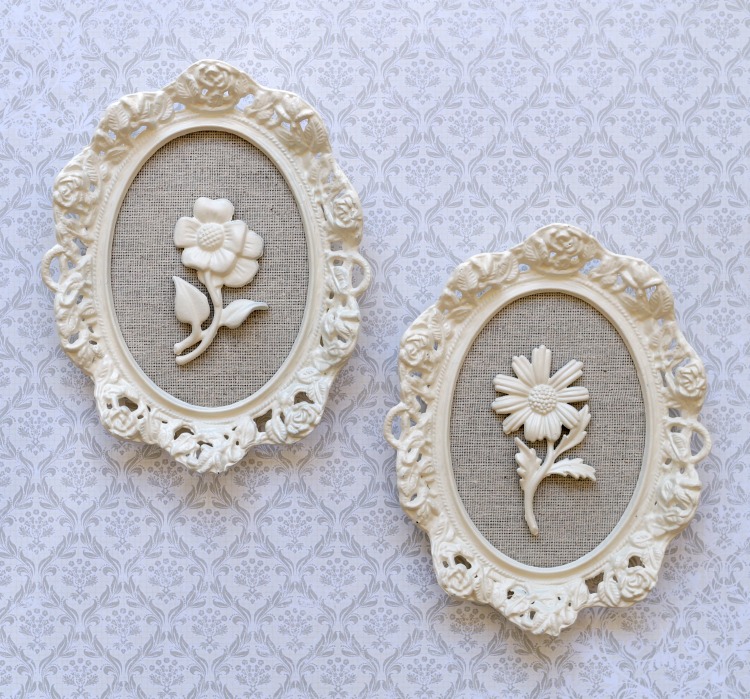
old-metal-frames-23

Honestly, I wasn’t completely sure about these heavy metal frames when I first picked them up.

But…at a quarter how could I go wrong?

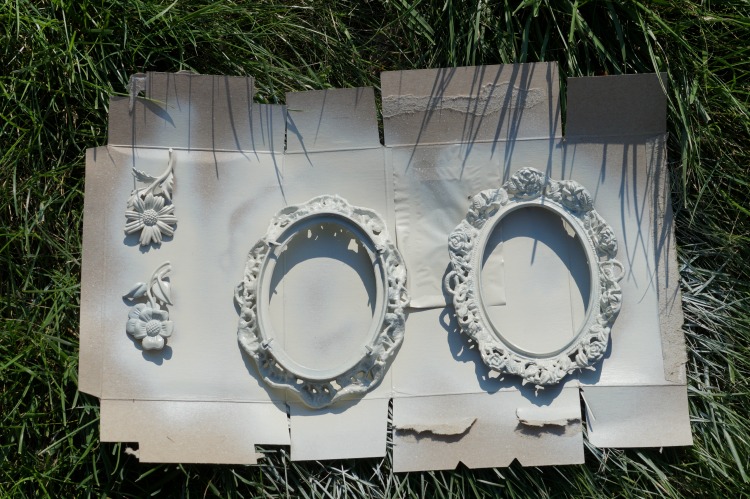
painting-the-metal-frames

Armed with a can of off-white spray paint…

I deconstructed the frames and gave everything a couple coats of paint.

old-metal-frames-make-over-sues-creative-workshop-265

I sprayed the black velvet matting with spray adhesive and applied a piece of a woven tan fabric.

I marked the two holes in the matting where the metal flowers had been previously.

I was able to use the prongs on the back of the metal flowers to line them up exactly where they

had been before.  (so easy)

I trimmed the excess fabric from around the matting and re-inserted everything back into the frame.

old-metal-frame-make-over

A super simple project with a modern up-dated look.


How to make a Halloween Hauntings Treat Bag

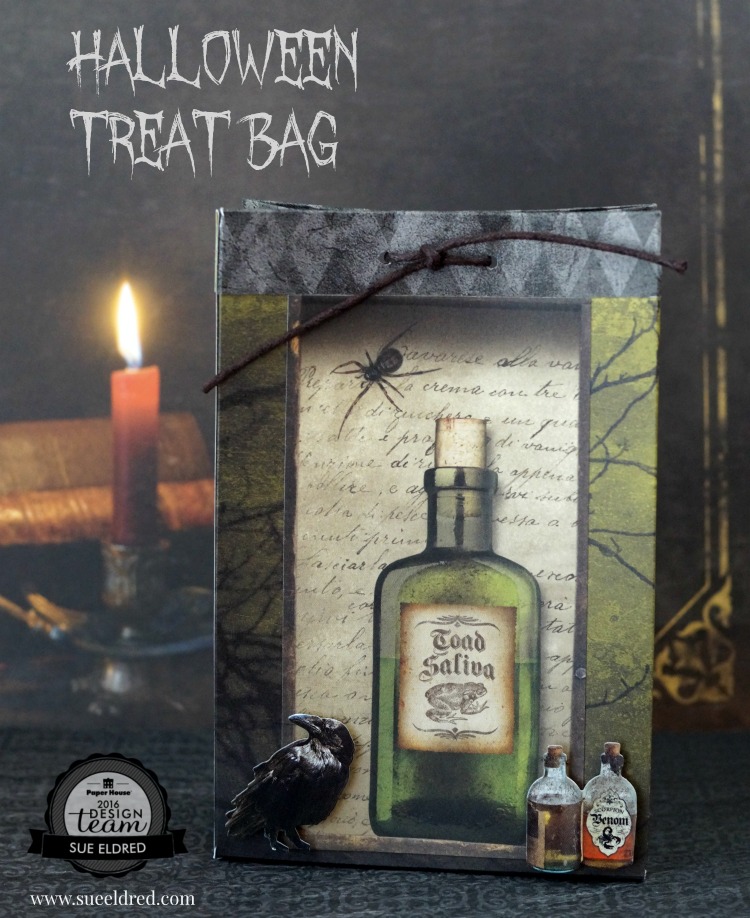
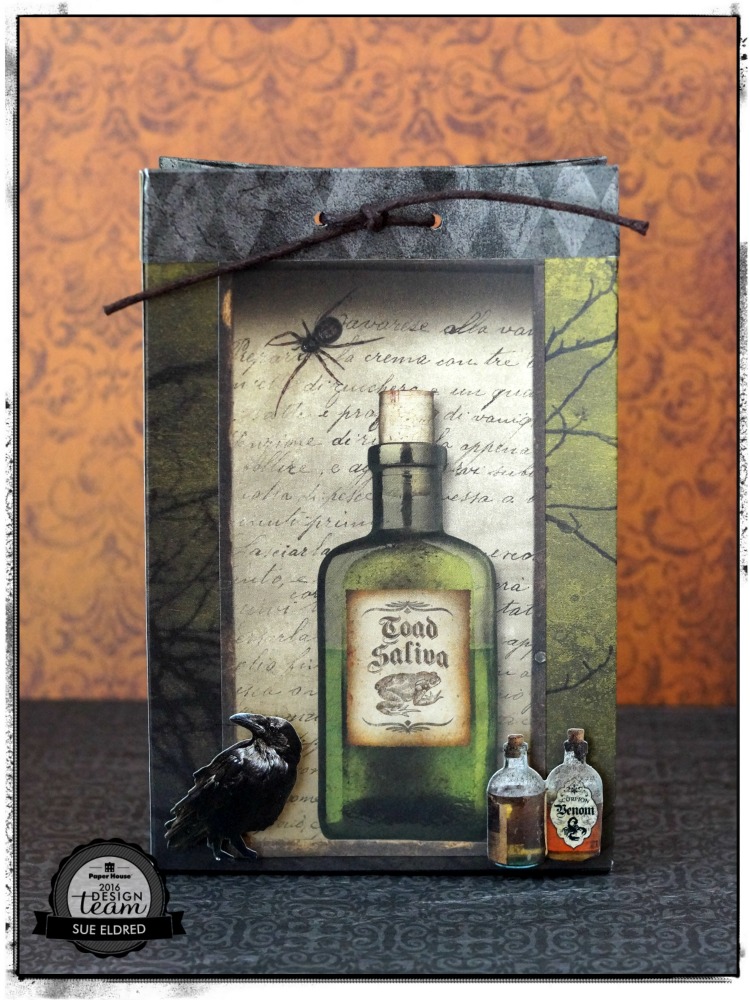
Halloween Treat Bag 185

You can make a Spooky Halloween Treat bag using only one piece of 12″ x 12″ paper.

That is as long as you’re not afraid of a few measurements… it really is pretty easy.

How to make the Halloween Treat Bag

Here’s what you’ll need:

Directions:

  1. Cut All Hallows Moon double sided Halloween paper to 8 1/4″ x 11 3/4″.
  2. Score the long width of the paper at 3/4″, 4 3/4″, 5 1/2″, 6 1/4″, 10 1/4″ and 11″.
  3. Score the top of the paper at 3/4″.
  4. Score the bottom 1 1/2″.
  5. Fold along score lines
  6. Cut away the first 3/4″ corner piece.
  7. Fold over the top 3/4″ and adhere in place.  (top diagram)
  8. Fold along lines to create a 4″ x 6″ box.
  9. Tape Side and bottom of the box.Taping the Bottom Flap 148
  10. Cut “toad saliva” bottle section from the Apothecary scrapbook paper and adhere to the front   of the bag.
  11. Add 3D foam mounting squares to the back of the “raven” and “bottles” stickers and use to embellish the bag.
  12. Punch two holes on the top of the bag.
  13. Fill with goodies (or NOT) and tie with a black cord.

Halloween Treat Bag 191

The Halloween Treat Bag was created for and sponsored by Paper House Productions.


How to Create a Birthday Card for the Football Fanatic in your Life…

Everyone has that one family member that really LOVES football.  (maybe it’s you?)

Here’s a card I created for Craft Ideas magazine’s Fall Issue.  (page 69)

A fun football themed birthday card for young and old.

Football Birthday Card 6376

How to make a Football Birthday Card…

Made with papers and stickers from Paper House Productions sports collections.

Supplies Used:

  • P-2058 MVP Tags 12” Double Sided Scrapbook Paper (Paper House Productions)
  • P-2060 All Star 12” Double Sided Scrapbook Paper (Paper House Productions)
  • P-2056 Footballs 12” Double Sided Scrapbook Paper (Paper House Productions)
  • STCX-1010 Football 12” Cardstock Stickers
  • Brown Cardstock
  • Black Cardstock
  • 3D Foam Mounting Squares
  • Double Sided Tape Runner
  • Paper Cutter
  • Scissors

Directions:

  1. Make a 4 1/4″ x 5 1/2″ top-fold card from brown cardstock.
  2. Cut a 4” strip of the green football sidelines border sticker and adhere to the bottom of the MVP tag.  Cut 3 ¾” x 5” panel  from  “All Star” scrapbook paper and adhere MVP tag off-centered as shown.  Adhere All Star panel onto 4″ x 5 1/4″ black cardstock panel.  Adhere all layers onto card front.
  3. Embellish card with letters and football stickers as shown. For added dimension, adhere “Go Team Go” sticker with 3D foam mounting squares.

Football Birthday Card Inside 6378On the inside of the card:

Cut a 3 ¾” x 5” piece of “Footballs” scrapbook paper. Layer it onto a 4” x 5 ¼” piece of black cardstock and adhere it in the inside of the card. Embellish with stickers.


craft-ideas-fall-2016

Make sure to check out Craft Ideas Magazine for Craft Ideas for Every Occasion, Every Skill Level.


How to create a cute little Party Ant for your BBQ

Party Ant 9648

Sometimes in the midst of all my creative endeavors and the business of everyday life,

when I need a break from all the seriousness.

I like to stop and make something fun and a little bit silly. 

It’s one of my ways of procrastinating.

Honestly, I would never invite real ants to a BBQ, but, this one is dressed up, too cute and

ready for a party.  (a great little conversation starter)

Party Ant Supplies 9537

To make a Party Ant you’ll need a few supplies…               (*Amazon Affiliate Links)


*Disclosure:  This post uses ads and affiliate links.  If you choose to make a purchase using one of the links, I receive a small commission (at no additional cost to you) that helps offset the costs of maintaining this blog.  Thanks for your support!

Painted Balls on Skewers 9544

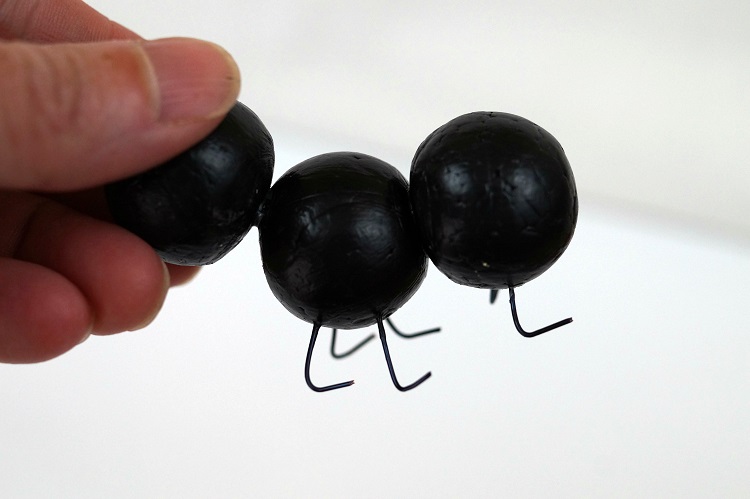
  • Dip the end of the bamboo skewers into craft glue and insert into the balls.
  • Paint balls with black acrylic paint.
  • After the paint has dried, cut the ends of the skewers approx. 3/4″, dip into glue and attach body and head of the ant together.

Ant Feet 9552

  • Cut six 1″ pieces of wire, bend the ends as show, dip in craft glue and insert into body of the ant.
  • Cut two more 1″ pieces of wire and curl the top of the wire with wire tools before inserting them into the head of the ant for the antennas.

Ant Eyes

  • Add two black dots to the center of the adhesive pearls to use as the eyes.
  • Punch a 1″ circle from decorative scrapbook paper, cut a notch from the circle and glue together to form a party hat.  Glue onto the top of the ant.  Top off the hat with a teeny tiny pom pom.
  • Cut a strip of adhesive pearls to use as a necklace.

Party Ant 9637

Mine is fairly small, but, wouldn’t a giant one make a cute centerpiece?  (think real big!)

Join Amazon Kindle Unlimited 30-Day Free Trial