
Capturing the First Day of School Smiles…
As a kid, I always looked forward to going back to school.
New clothes, new supplies, and the new fall lineup on TV.
As a mom, I was a little sad sending them.
It always felt like summer was over as soon as the kids went back to school.
I was never that mom that couldn’t wait for them to go back.
But once we got back into the routine, everything was good again.
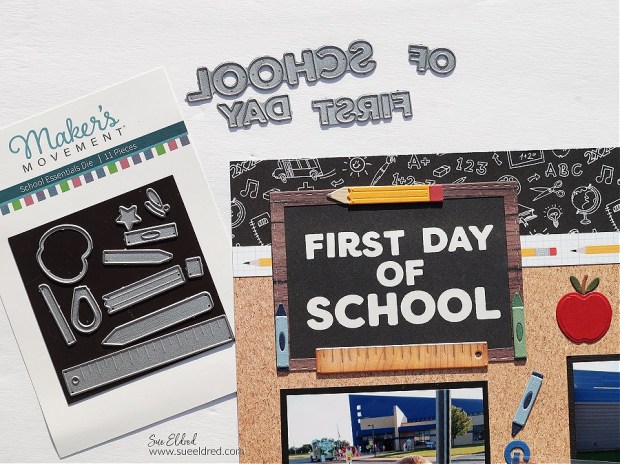
(The layout is of my older two Grandsons First Day of School.)
Die-Cutting Tips…
- For better results with dies that have grooves, use thick or double-layered cardstock.
- I adhered two pieces of cardstock together using the Xyron Create-A-Sticker Mini*.
- I also added a second layer of adhesive to the cardstock before cutting the pieces out using the Mini Maker Die Cutting Machine.
- You will want to run it through and then back again to make sure that all layers have been cut.
- Each little die-cut piece becomes a sticker which makes it easy to put all the parts together.

Disclosure: This is a sponsored post for The Maker’s Movement. I have been provided product and compensation in exchange for my creative ideas. The view and opinions are my own.


Materials Used: (*affiliate links)
- M12463 School Essentials Die Set
- M12531 First Day Die Set
- MOD203 Nested Stitched Rectangles
- Crossover II Die Cutting System*
- Xyron Create a Sticker Mini*
- Xyron Tape Runner*
- Simple Stories School Life Collection: 14910 Journal Elements*
- Photo Play Paper Recess Collection: REC2402 Star Student*
- Bella Blvd Pop Quiz Collection: PQ1884 Borders*
- Cardstock
- TH93245 Tim Holtz® idea-ology Small Talk Stickers


*Disclosure: This blog uses ads and affiliate links. If you choose to make a purchase using one of the links, I receive a small commission (at no additional cost to you) that helps offset the costs of maintaining this blog. Thanks for your support!
