
Add a little warmth and coziness to your home with Quick and Easy DIY Holiday pillows.
Today’s pillow projects have a couple of unique twists to make these projects super easy.

For the “Believe” pillow I started with a .79 dish towel that I picked up at IKEA.

To give my towel a creamy vintage color… I soaked my towel in a tub of hot tea.
I wanted my towel to stay light so I only left it in a minute or two.
Leave towel in longer for a darker brown color.
Rinse the towel in hot water and then throw in the dryer to set.

- Iron the towel to make crisp and stencil the towel using the 12″ Word Xmas Tree stencil from Clear Scraps and dark red acrylic paint.
- Fold the towel in half, stenciled side in, stitched the towel together and fill with a soft stuffing.
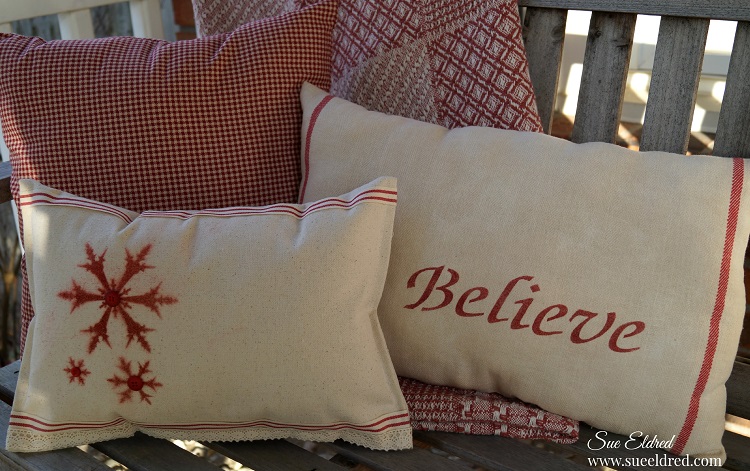
The Snowflake pillow is a No Sew Pillow. (I really cheated with this pillow.)
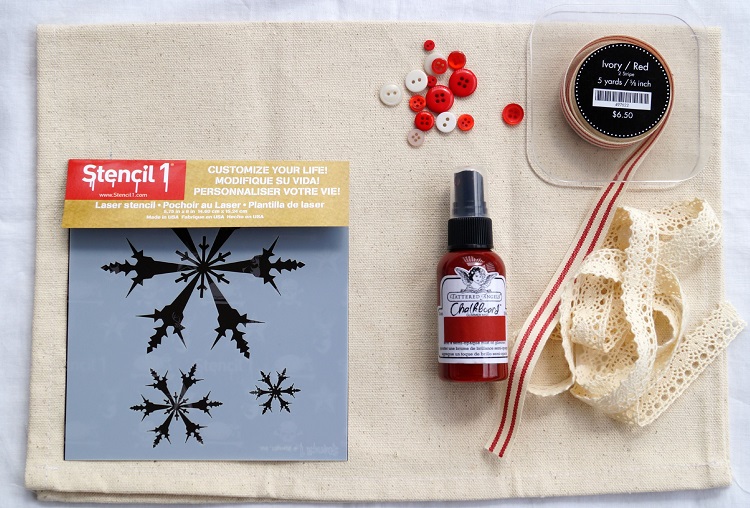
- I used a plain 14″ x 20″ canvas placemat from Canvas Corp Brands which I stenciled with the Snowflake stencil from Stencil 1 using Tattered Angels Chalkboard Mists. Make sure to cover and mask any areas that you wouldn’t want sprayed.
- Glue the ribbon, lace and buttons onto the placemat using Beacon Fabri-Tac Permanent Adhesive, 4-Ounce, tucking ends to backside of the placemat.
- Glue place mat together and fill with a soft stuffing.
- No Sewing Required. (for decorative use only)


