Elegant and Easy Holiday Card

How to Make an Elegant and Easy Monochromatic Holiday Card.

When it comes to making cards for the Holidays, two words come to mind, elegant and easy.  This Merry little card is both.  With a few simple tricks and tips, this card is a snap to make.

Disclosure:  This is a sponsored post  for the Maker’s Movement.  I have been provided product
and compensation in exchange for my creative ideas.  The view and opinions are my own.
Materials Used:                        (*affiliate links)

*Disclosure:  This blog uses affiliate links.  If you choose to make a purchase using one of the links, I receive a small commission (at no additional cost to you) that helps offset the costs of maintaining this blog.  Thanks for your support!
Directions:

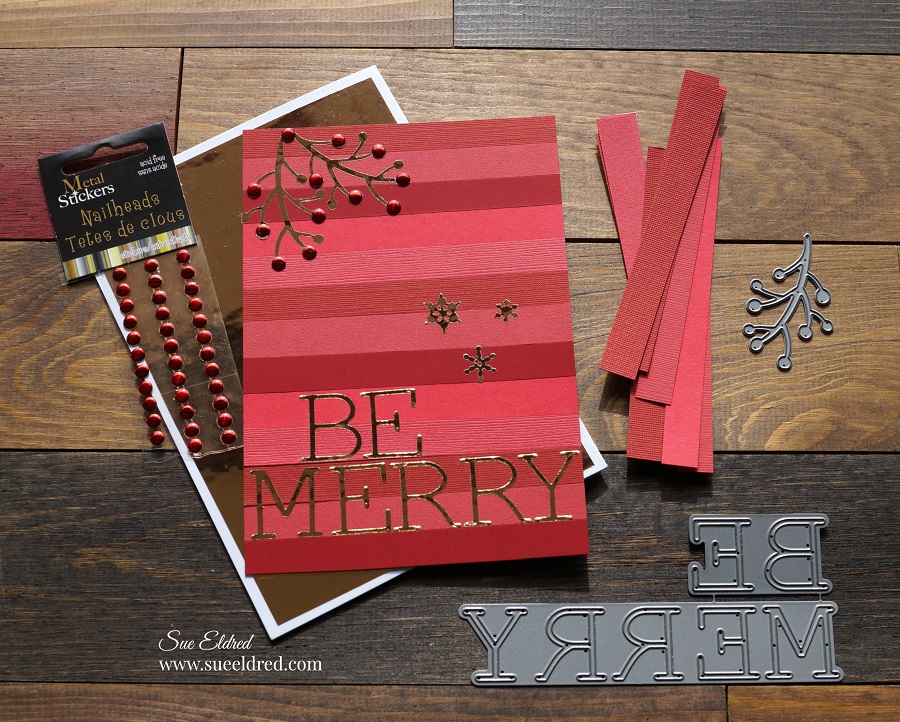
  • Choose several different shades of red cardstock.  (I used four.)  Cut into 2 1/2″ x 4 1/2″ strips.
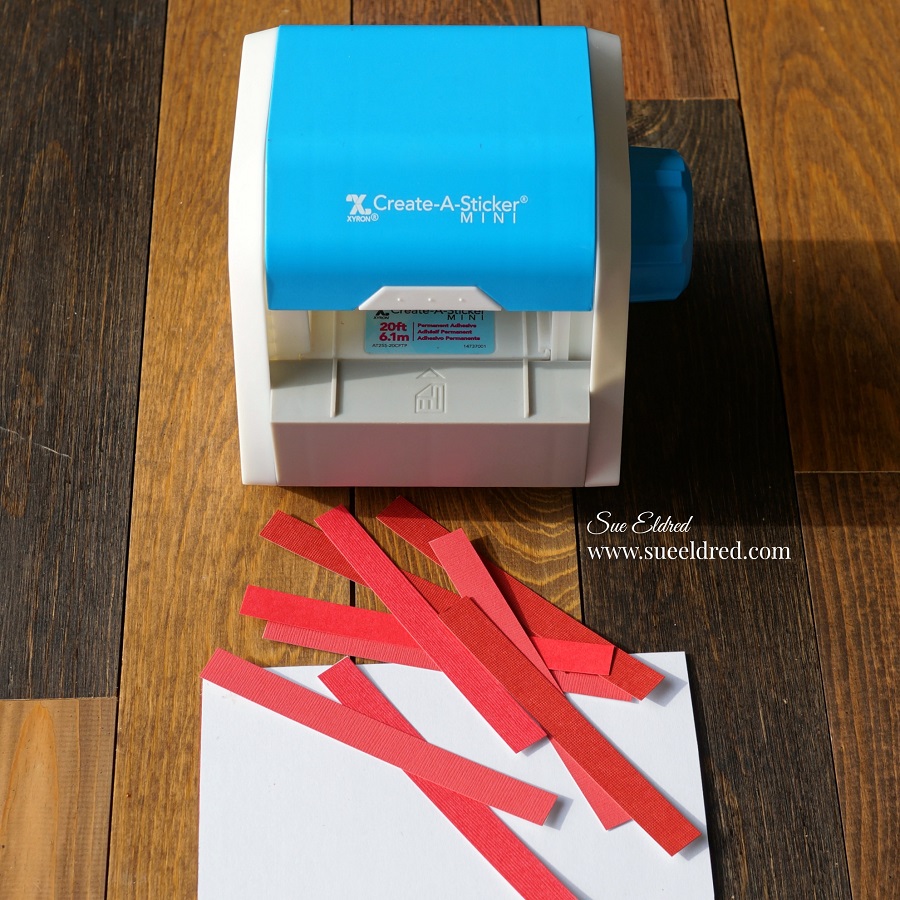
  • To make assembly easy.  I used the Xyron Create a Sticker to add adhesive to the back of the strips of cardstock.
  • Trim the larger strips into 1/2″ x 4 1/2″ smaller strips.
  • Cut a 4 1/2″ x 6 1/2″ piece of red cardstock to use as the base.  Starting at the top, add the strips of red cardstock to the base.
  • Die-cut two branches using the Winter Foliage Die Set and Gold Chrome Vinyl.
  • Die-cut small snowflakes using the gold chrome vinyl and the snowflakes found in the Snow Globe Die Set.
  • Die-cut the words “Be Merry” using gold chrome Vinyl and the Be Merry Die Set.
  • Remove the white protective backing from the vinyl and use as stickers to decorate the front of the card.  I used the edge of the cardstock strip to help me line up the words.
  • Add red metal nailhead sticker embellishments onto the branch.
  • Cut a 4 3/4″ x 6 3/4″ piece of Chrome Adhesive Vinyl and adhere to a white 5″ x 7″ card.
  • Adhere the striped card front to the card base.

Oh Holy Night Christmas Star Decoration

My very most favorite Christmas Song is Oh Holy Night. 

The melody gets me every time.  To me, it’s one of the most beautiful songs.

I love to close my eyes when listening to it.   (And a good tenor can bring me to tears.)

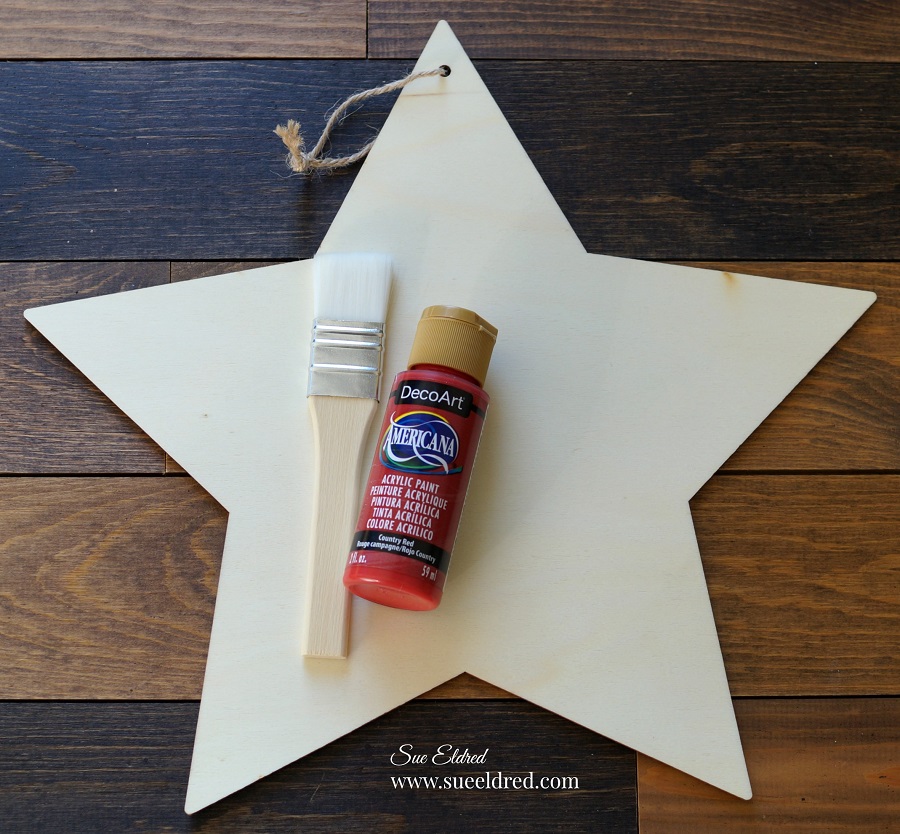
I wanted a new Star to hang near the top of my tree this year, so I decided to make one using

my favorite song and an inexpensive wood star I found at Dollar Tree*.

*Disclosure:  This blog uses affiliate links.  If you choose to make a purchase using one of the links, I receive a small commission (at no additional cost to you) that helps offset the costs of maintaining this blog.  Thanks for your support!

Add some of my favorite Glossy Craft Vinyl from StyleTechCraft, and I have what I need to make the perfect star for me.

Materials Used:        (*affiliate link)

StyletechCraft products brought to you by ATSM Craft

Directions:

  • Paint the wood star using the Country Red Acrylic Paint*.
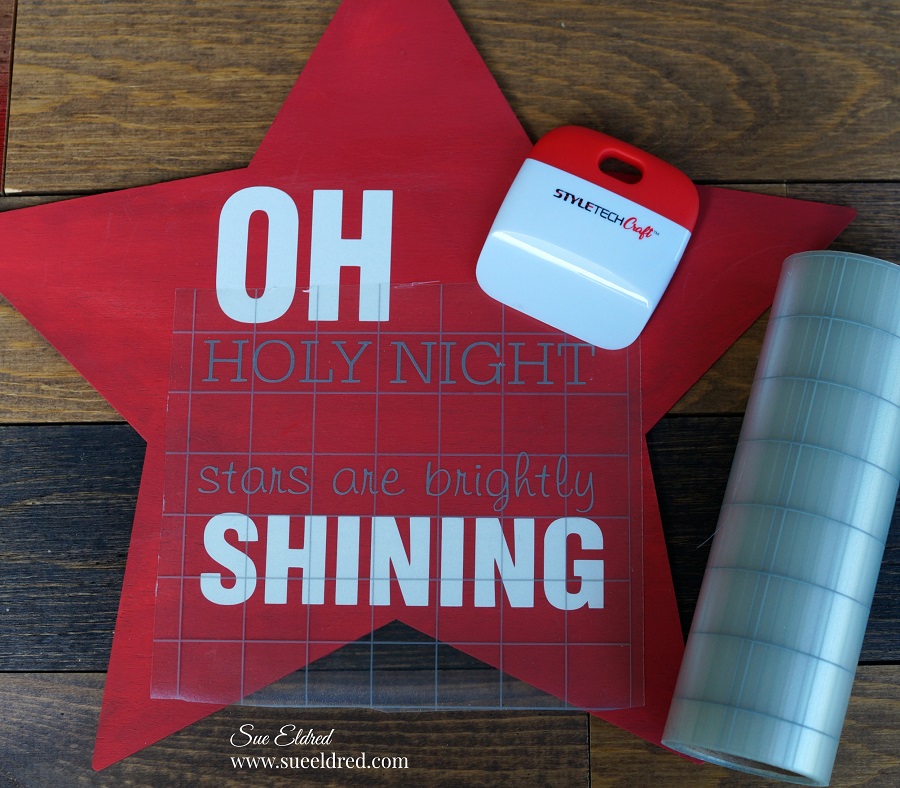
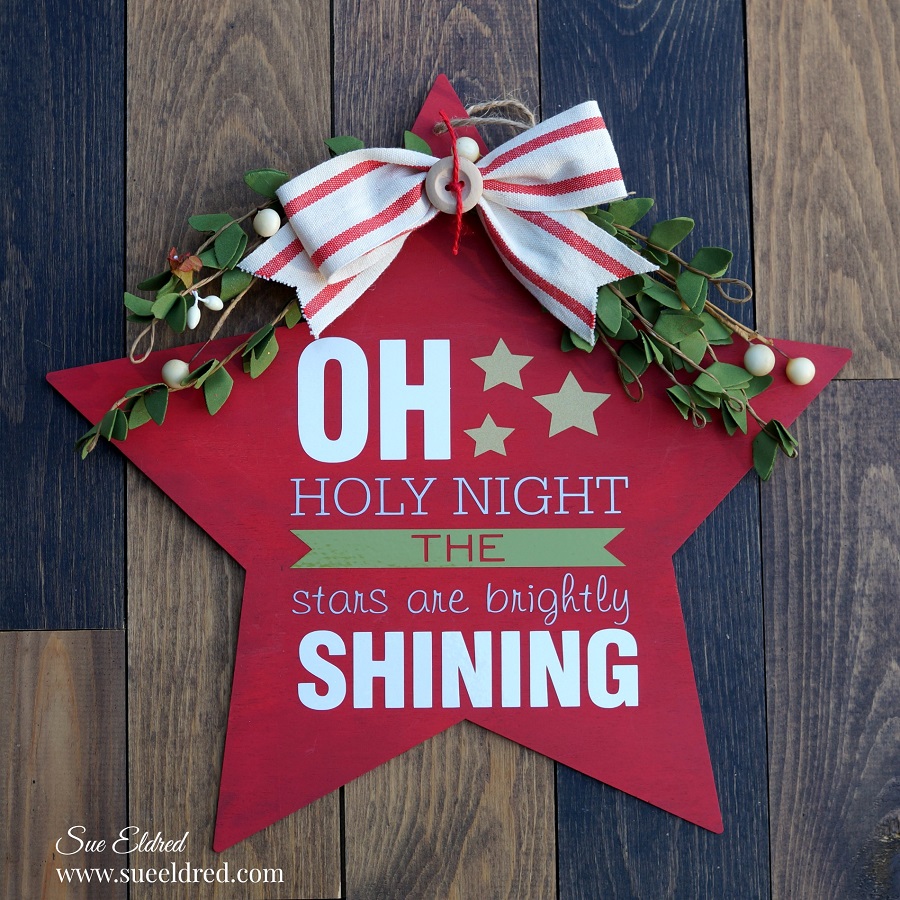
  • Use the Oh Holy Night SVG cut file and the Silhouette Cameo Electronic Die Cutting Machine* to cut the pieces out of vinyl.  (Make sure to keep the spacing the same as in the file.)
  • Use the vinyl pick tool to remove the excess vinyl from inside and around the letters and banner.
  • Cut a piece of Vinyl Transfer Tape* to fit over the vinyl words.  Gently rub over the transfer paper using the squeegee tool.  Lift the transfer tape to remove the vinyl from the white liner.
  • Using the vinyl transfer tape, line up the white vinyl words “Oh, and Shining” onto the star first.  Gently rub over the vinyl transfer tape using the squeegee tool to make sure all the image has transferred.   Remove the transfer tape.
  • Line up the silver words “Holy Night, and brightly shining” and place between the previous words.  Continue with the gold stars and the olive banner.  (It’s hard to see it from the pictures but the gold and silver stands out nicely on top the red star.)

Actually, the star would look fine, just as it is in the above picture.

But, I wanted to add a little ribbon and greenery on the top of my star to fancy it up.

I’m really happy with the way it turned out. This Star will go near the top of my tree and will go

beautifully with my decorations. The Star would look great in the center of a Christmas wreath.

Or, if you used a smaller star, it would make a cute ornament.

“This is a sponsored post.  As a member of the StyleTechCraft Design Team I have been provided product and compensation in exchange for my creative ideas.  The views and opinions are my own.

Gnome for the Holidays

The Holiday Season isn’t even here yet, and Gnomes are popping up in stores everywhere.

That’s a good thing for me because I think they’re adorable.

I especially love the Holiday Gnomes.

Did you know that Gnomes are considered good luck?

The way things have been going this year, I’m going to need a lot more gnomes.

Have you tried making Gnomes yet?

I haven’t made any Gnomes yet myself, but it’s on my Holiday to-do list this year.

I thought this “Gnome for the Holidays” sign would look perfect with the two I already have.

I used StyleTechCraft metallic luster vinyl for a fun shimmery, metallic Holiday Decoration.

Materials Used:

StyletechCraft products brought to you by ATSM Craft

*Disclosure:  This blog uses affiliate links.  If you choose to make a purchase using one of the links, I receive a small commission (at no additional cost to you) that helps offset the costs of maintaining this blog.  Thanks for your support!

Directions:

  • Cut a piece of coordinating holiday scrapbook paper to fit inside of the frame.
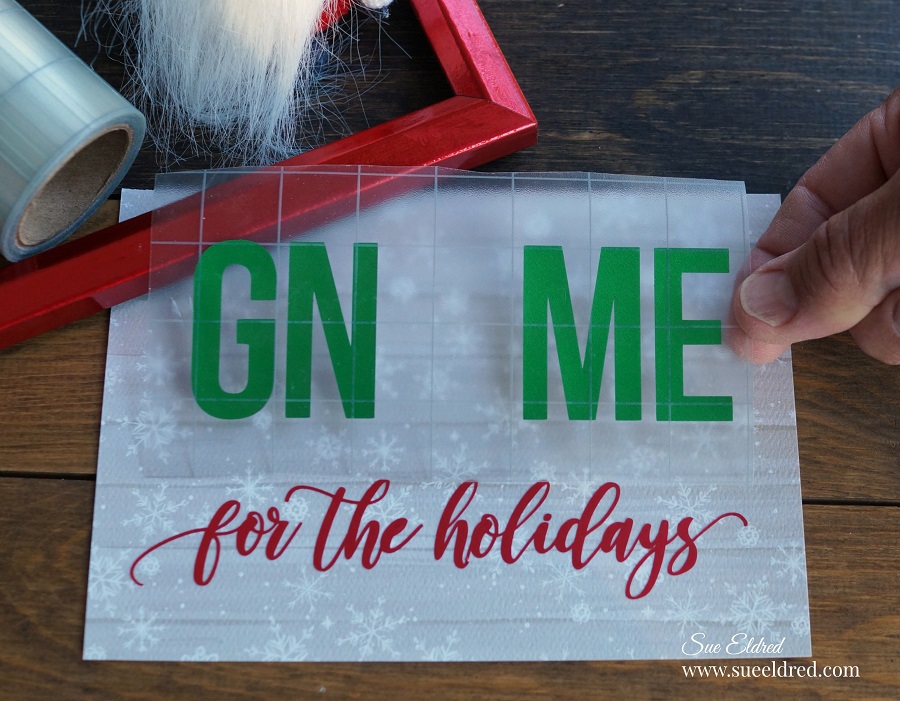
  • Use the “Gnome for the Holidays” SVG cut file and the Silhouette Cameo Electronic Die Cutting Machine* to cut the pieces out of vinyl.
  • Use the vinyl pick tool to remove the excess vinyl from inside and around the letters and shapes.
  • Cut a piece of Vinyl Transfer Tape* to fit over the vinyl words.  Gently rub over the transfer paper using the squeegee tool.  Remove the vinyl from the white liner.
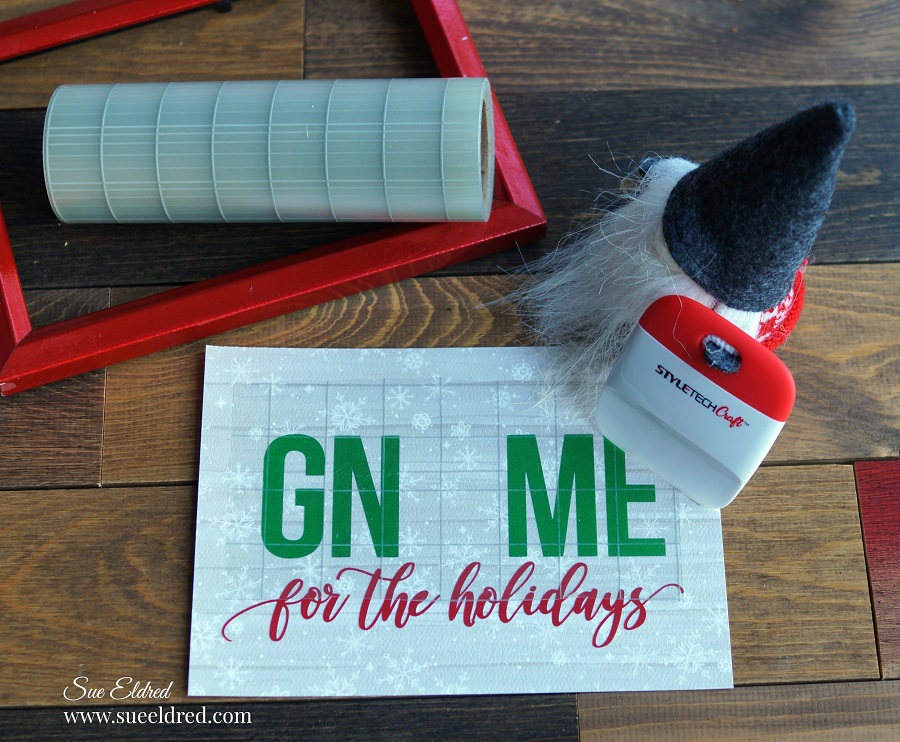
  • Using the transfer tape, line up the vinyl words onto the scrapbook paper.

  • Gently rub over the Vinyl Transfer Tape* to make sure all the image has transferred.   Remove the transfer tape.
  • Continue adding the vinyl layers that make up the Gnome.
  • Add into a fun red metallic frame and enjoy it.

“This is a sponsored post.  As a member of the StyleTechCraft Design Team I have been provided product and compensation in exchange for my creative ideas.  The views and opinions are my own.

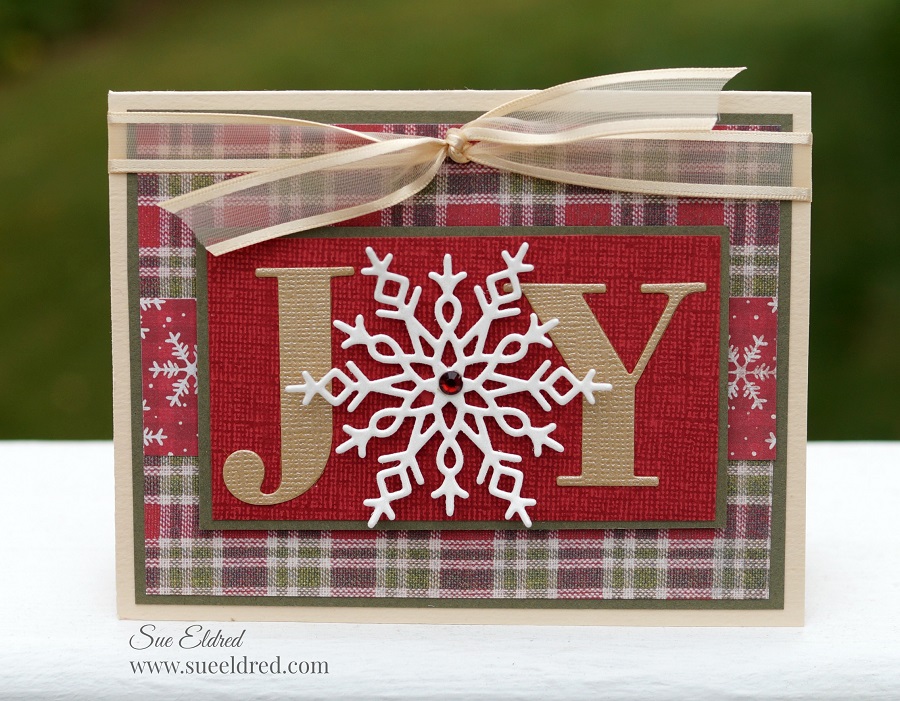
Holiday Joy Christmas Card

A little Holiday Joy Christmas Card to brighten up your day.

If you like making your own Christmas cards and have a lot to make,

this quick and easy card might be a great choice.

I’m thinking, this simple little card is the one I’ll send this year.

Disclosure:  This is a sponsored post  for the Maker’s Movement.  I have been provided product
and compensation in exchange for my creative ideas.  The view and opinions are my own.

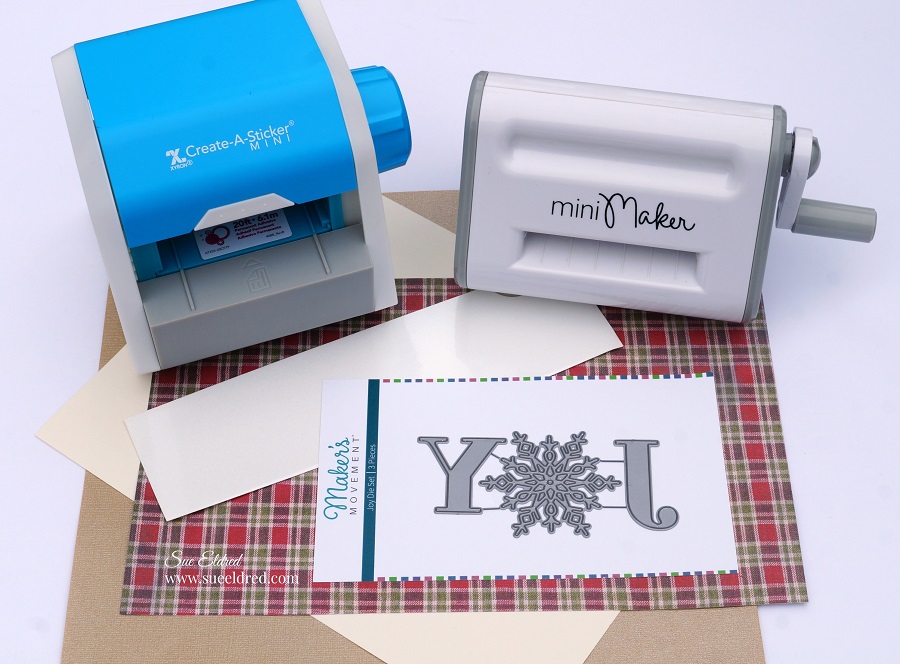
Supplies Used:             (*affiliate links)

*Disclosure:  This blog uses affiliate links.  If you choose to make a purchase using one of the links,  I receive a small commission (at no additional cost to you) that helps offset the costs of maintaining this blog.  Thanks for your support!

Card Details….

  • To make my snowflake stand out more. I took a small piece of white ultra metallic glitter vinyl and adhered it to a piece of cream cardstock before die-cutting the snowflake. You can’t tell by the picture, but the snowflake has a glittery shimmer.
  • I like to use the Xyron Create-A-Sticker*to add adhesive on the back of the gold cardstock before die-cutting the letters.  It makes assembling the card a breeze.
  • The finished card size is 4 1/4″ x 5 1/2″.

A “Pear-fectly” Good Day.

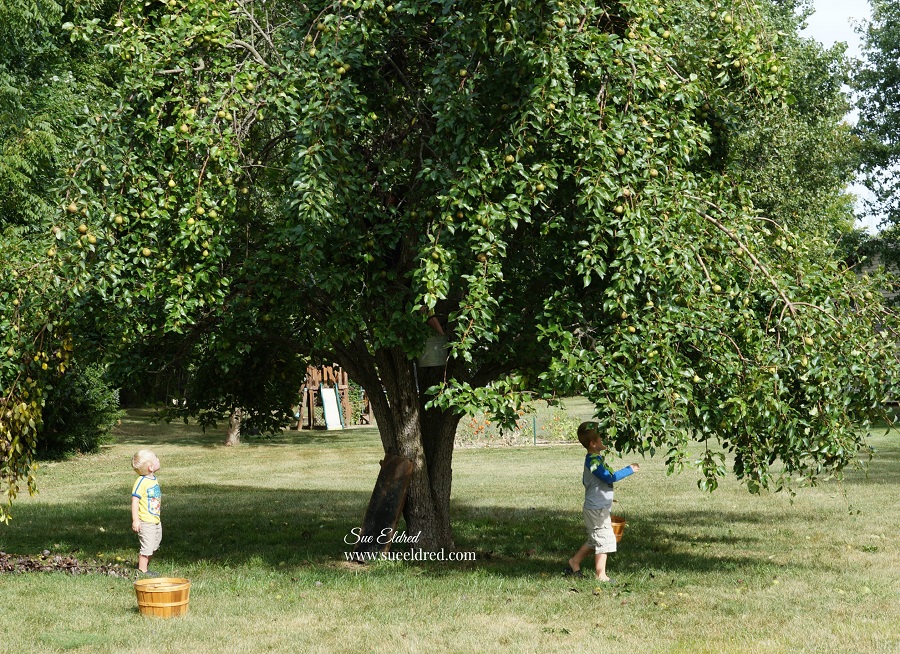
The old pear tree in the side yard has always given us a lot of fruit.

This year it seemed abundantly overloaded.

We usually don’t do anything with the pears.

The kids, on occasion, have used them for batting practice.

Feeling inspired this year, I decided to make pear sauce and pear butter.

So, on a beautifully warm end of Summer day, I enlisted the help of my three grandsons

to pick pears. The boys enthusiastically agreed.  (can you find the third boy?)

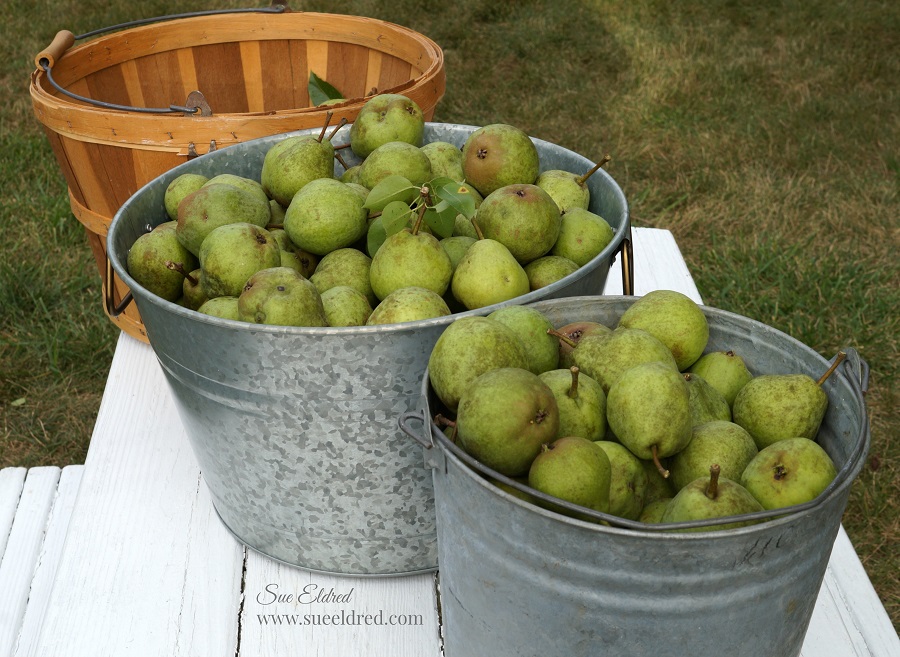
It didn’t take long for them to fill three large buckets full of pears.

It takes approximately 30 pears for one batch.

After making one batch of pear sauce and two batches of pear butter, I remembered why

I don’t make it every year. Peeling pears is a lot of work.

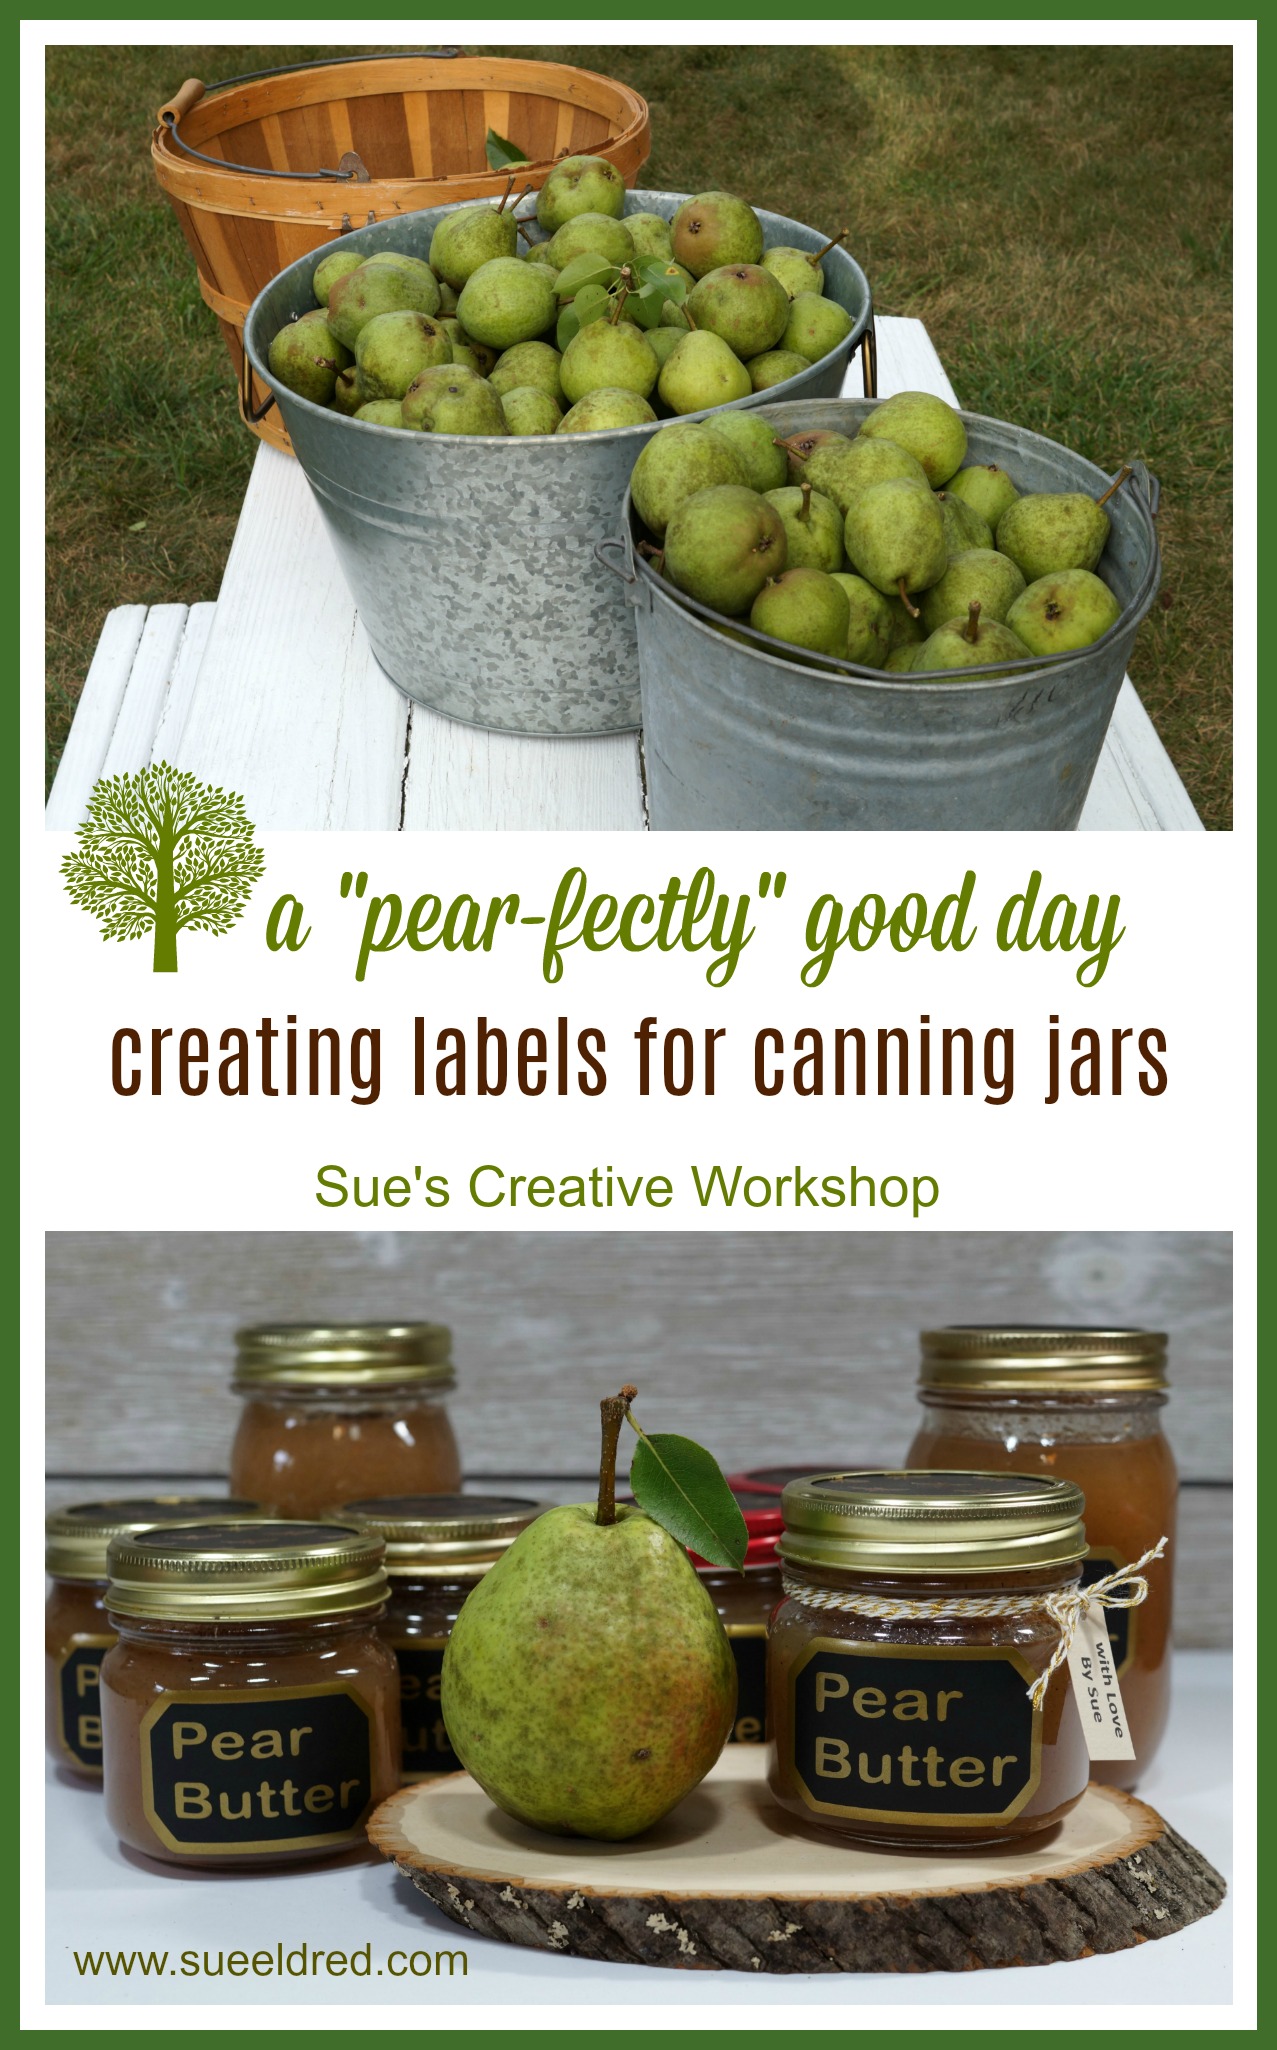
After all the work that goes into canning the fruit, I needed pretty labels to put on the jars.

(I will be giving some away.)

Here’s what I used: (*affiliate link)

StyleTechCraft™ products brought to you by ATSM Craft 

*Disclosure:  This blog uses affiliate links.  If you choose to make a purchase using one of the links, I receive a small commission (at no additional cost to you) that helps offset the costs of maintaining this blog.  Thanks for your support!

Directions:

  • Measure and size the SVG label file so that the labels fit the side of the jar.
  • Cut the labels and the words using the Silhouette Cameo.
  • Use the vinyl pick tool to remove the excess vinyl inside and around the words.
  • Use the transfer tape to layer the words and the labels.
  • Apply the finished label onto the jar.

I used the Uchida Clever Lever Mega Circle Craft Punch* to punch a perfectly sized circle to fit under the canning ring.
Because little details make a difference…

I wrapped gold and white twine around the neck of the jar and attached a small tag.

“This is a sponsored post.  As a member of the StyleTechCraft Design Team I have been provided product and compensation in exchange for my creative ideas.  The views and opinions are my own.

PIN ME ↓

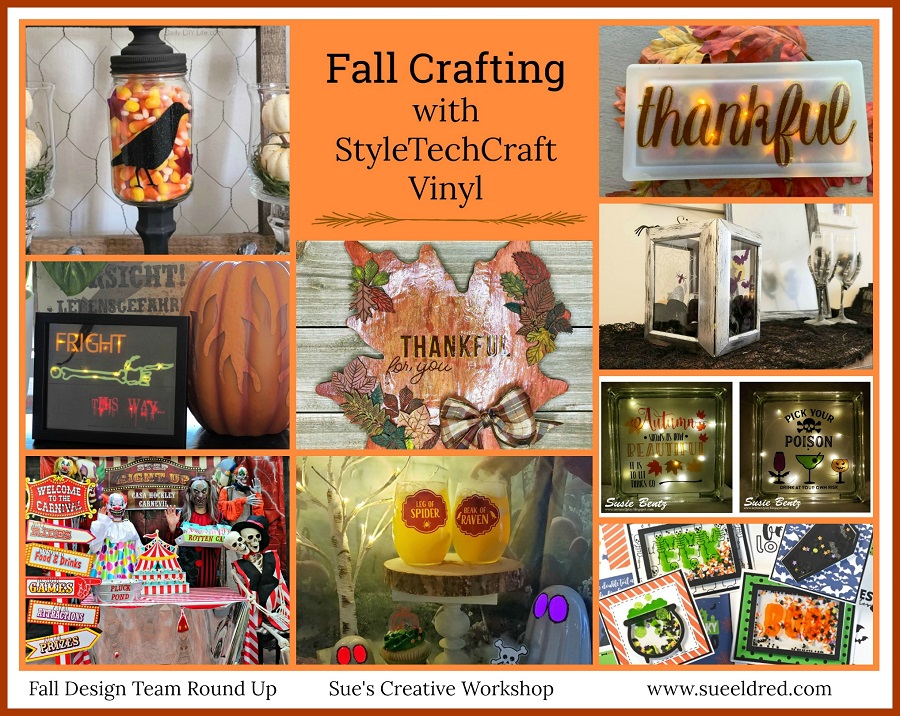
Fall Crafting with StyleTechCraft Vinyl

There are so many creative ways to use StyleTechCraft vinyl.

Every month, I’m blown away at the amazing projects the StyleTechCraft Design Team creates.

But this month, they really hit it out of the park with their ideas and designs.

Here’s a Round-Up of the Fall Design Team Projects:

Make sure to visit their blogs for more information on the projects.

Styletech Craft products brought to you by ATSM Craft 

Dog Treats for the First Day of School

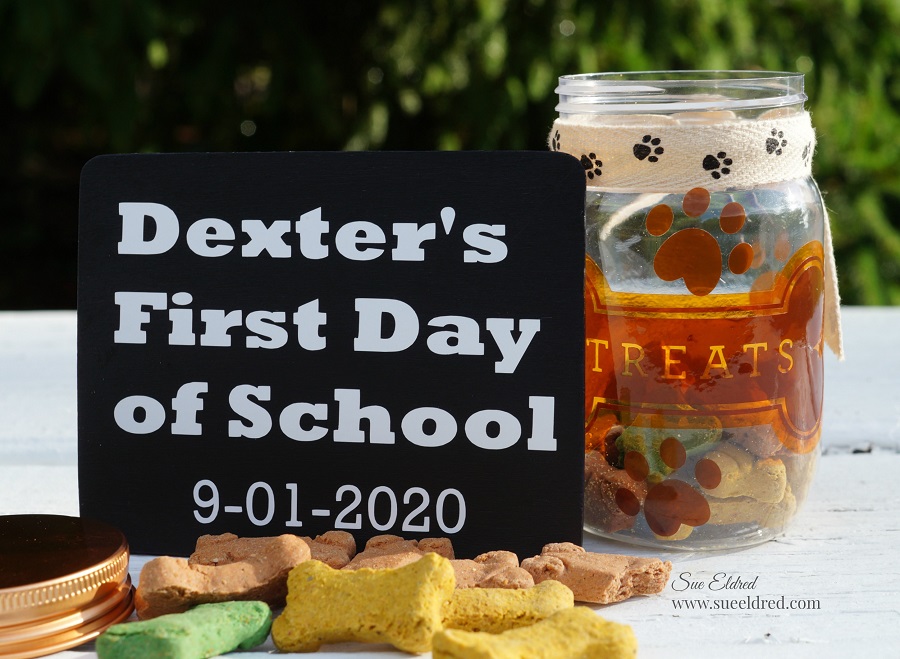
Yesterday was Dexter’s First Day of School.

Dexter is our 9-month Shichon puppy.  He is a sweet, loving, energetic ball of fluff.

We adopted him two days before Valentine’s Day and about a month before everything

went nuts.  He’s not a quarantine puppy, but he’s sure been a bright spot during that time.

I’ve been on more walks and talked to more neighbors because of him.  He loves everyone!

Anyway…

In the list of instructions for the first day of class was to bring dog treats.  (lots of treats)

So, I decided to decorate a little jar for his treats.

I found the little plastic jar at Dollar Tree* and used vinyl to decorate it.

*Disclosure:  This blog uses affiliate links.  If you choose to make a purchase using one of the links, I receive a small commission (at no additional cost to you) that helps offset the costs of maintaining this blog.  Thanks for your support!
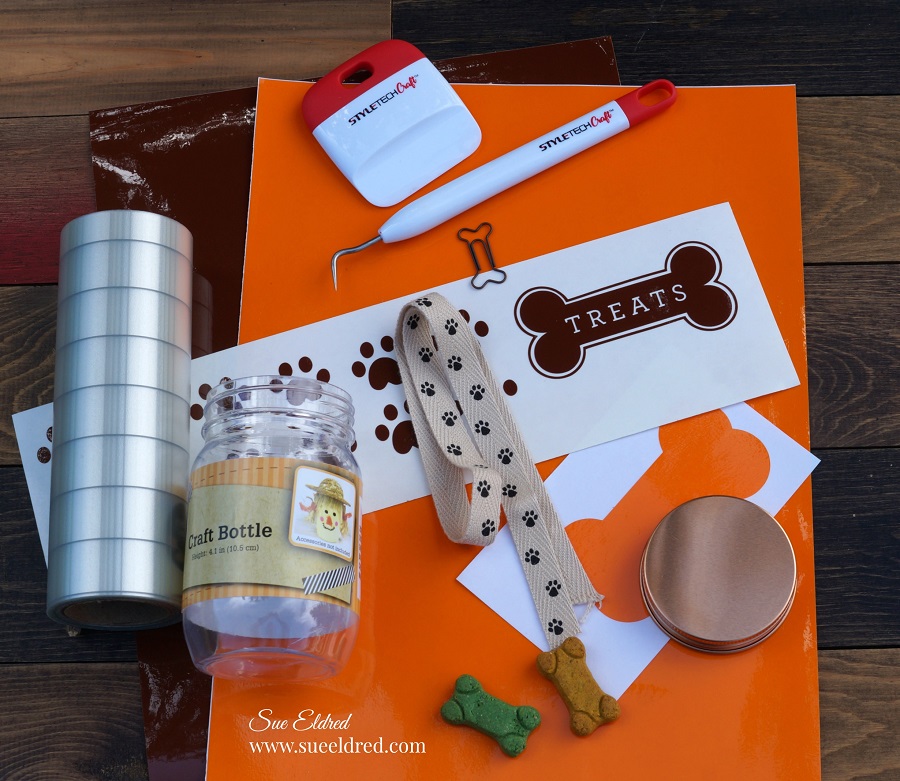
Here’s what I used to make my treat jar:

StyleTechCraft™ products brought to you by ATSM Craft 

Directions:

  • Using a “Dog Bone Treats” SVG file from the Silhouette Store and the Silhouette Cameo Electronic Die-Cutting Machine*, cut out the images using StyletechCraft Transparent Vinyl in Sunflower and Brown.
  • Use the vinyl pick to remove the letters from dog bone, leave the inside pieces of the letters.
  • Cut a piece of Vinyl Transfer Tape* to fit over the vinyl image.  Gently rub over the transfer paper using the squeegee tool.  Remove the vinyl image from the white liner.
  • Overlay the brown bone onto the large orange bone silhouette.

  • Carefully apply the vinyl to the jar.  Give the vinyl a gentle rub using the squeegee to make sure everything has transferred and remove the transfer tape.
  • Add paw prints randomly around the jar using the transfer tape.
  • Tie with a paw print ribbon and fill with dog treats.

FYI…The First Day of School Sign was made by painting a small wood sign with black chalkboard paint and applying words created with StyleTechCraft White Craft Vinyl*.

Dexter is such a smart, sweet little boy. 

He’s our first dog and, he’s been a great addition to our family.  He brings a lot of smiles.

And by the way…he did really great during his first class!

“This is a sponsored post.  As a member of the StyleTechCraft Design Team I have been provided product and compensation in exchange for my creative ideas.  The views and opinions are my own.

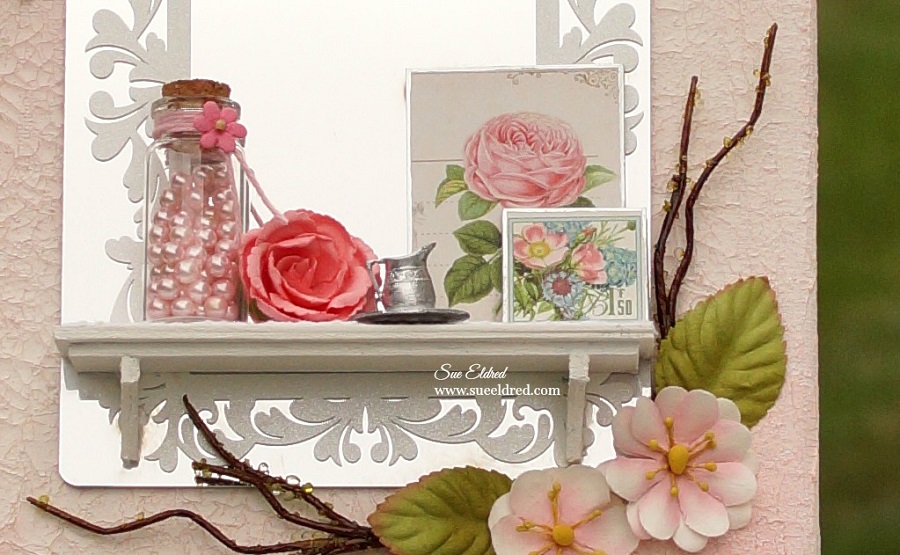
Pretty in Pink Mixed Media Canvas

Pretty and Sweet, Delicate and Petite, a mixed media project made simple.

Every once in awhile, I like to do something I little different from my usual projects.
This mixed media canvas is one of those projects.
It reminds me of a crackling wall found in an old cottage.

How to make a Pretty in Pink Mixed Media Canvas

Materials Used:

*Disclosure:  This blog uses affiliate links.  If you choose to make a purchase using one of the links, I receive a small commission (at no additional cost to you) that helps offset the costs of maintaining this blog.  Thanks for your support!

Directions:

  • Prepare the canvas with a painted coat of Gesso.
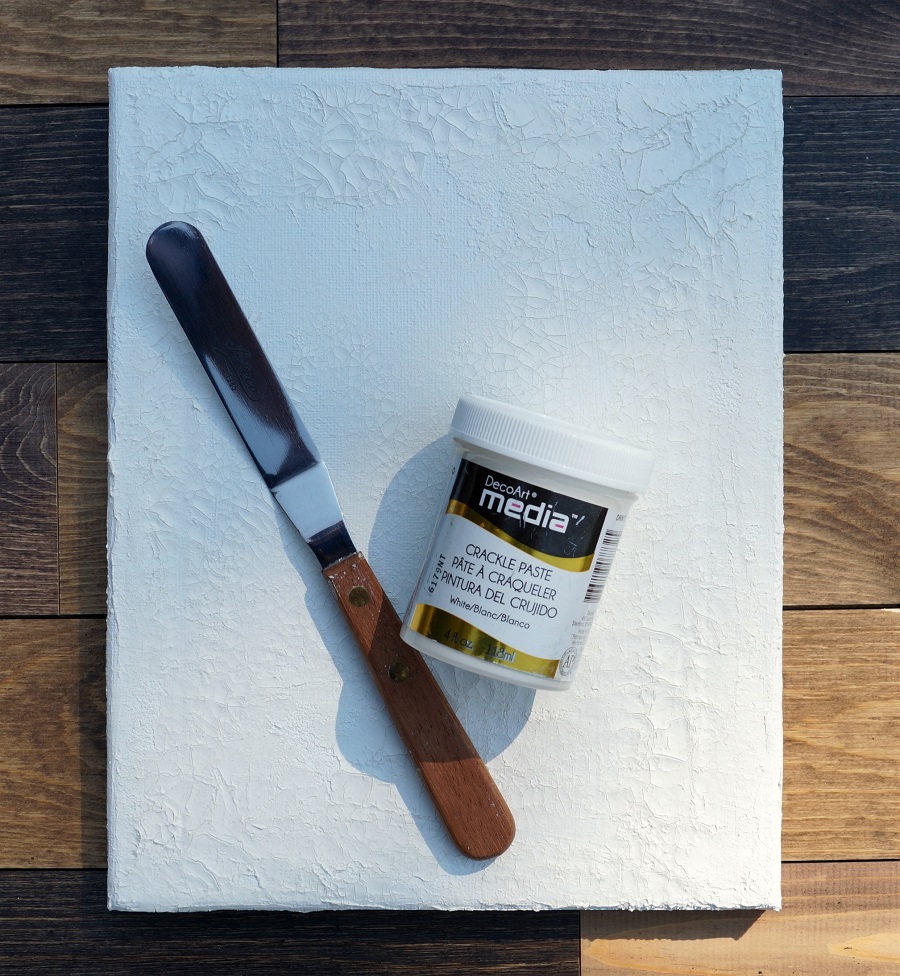
  • Apply Crackle Paste onto the entire canvas using a palette knife.

  • Using a stipple brush*, rub rose-colored ink onto the canvas, giving it a subtle hint of pink.

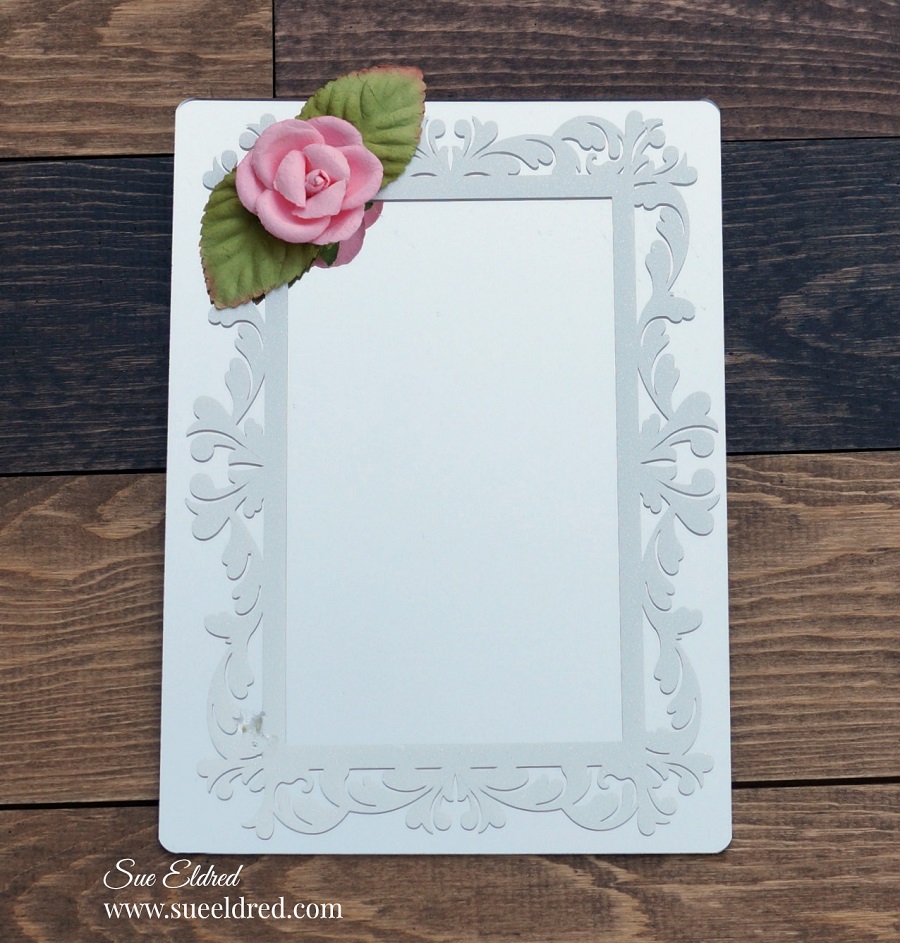
  • Create a delicate scroll frame using white adhesive glitter vinyl, an SVG cut file, and an electronic die cutting machine.
  • Use Transfer paper to align and place the frame onto the mirror.
  • Center and glue mirror onto the canvas with DAP Rapid Fuse All Purpose Adhesive*.

  • The mantle was created by layering, stacking and gluing cut pieces of chipboard with craft glue. (nothing fancy just basic construction)
  • Paint it with white acrylic paint.
  • Glue the mantle onto the mirror using DAP Rapid Fuse All Purpose Adhesive*.

  • For added stability, glue the small floral scrapbook paper pieces onto the chipboard.
  • Decorate the mantle with a small jar filled with pink pearl beads, a miniature pewter pitcher and saucer, and the floral scrapbook pieces.
  • Adhere floral embellishments around the top and bottom corner of the mirror.

For another DIY Mixed Media project, click on the link below.  ↓

         Little Birdie Mixed Media Canvas

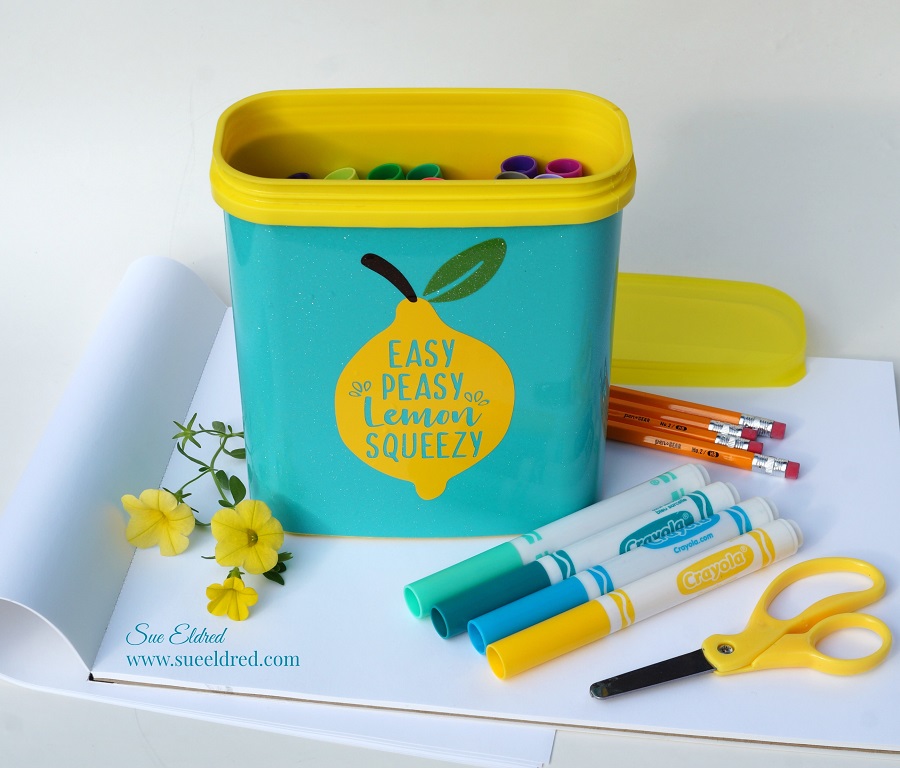
Easy Peasy Upcycled Container

I love a good upcycled, recycled project.

Creating a useful item from something that would be thrown away or put in the recycling bin.

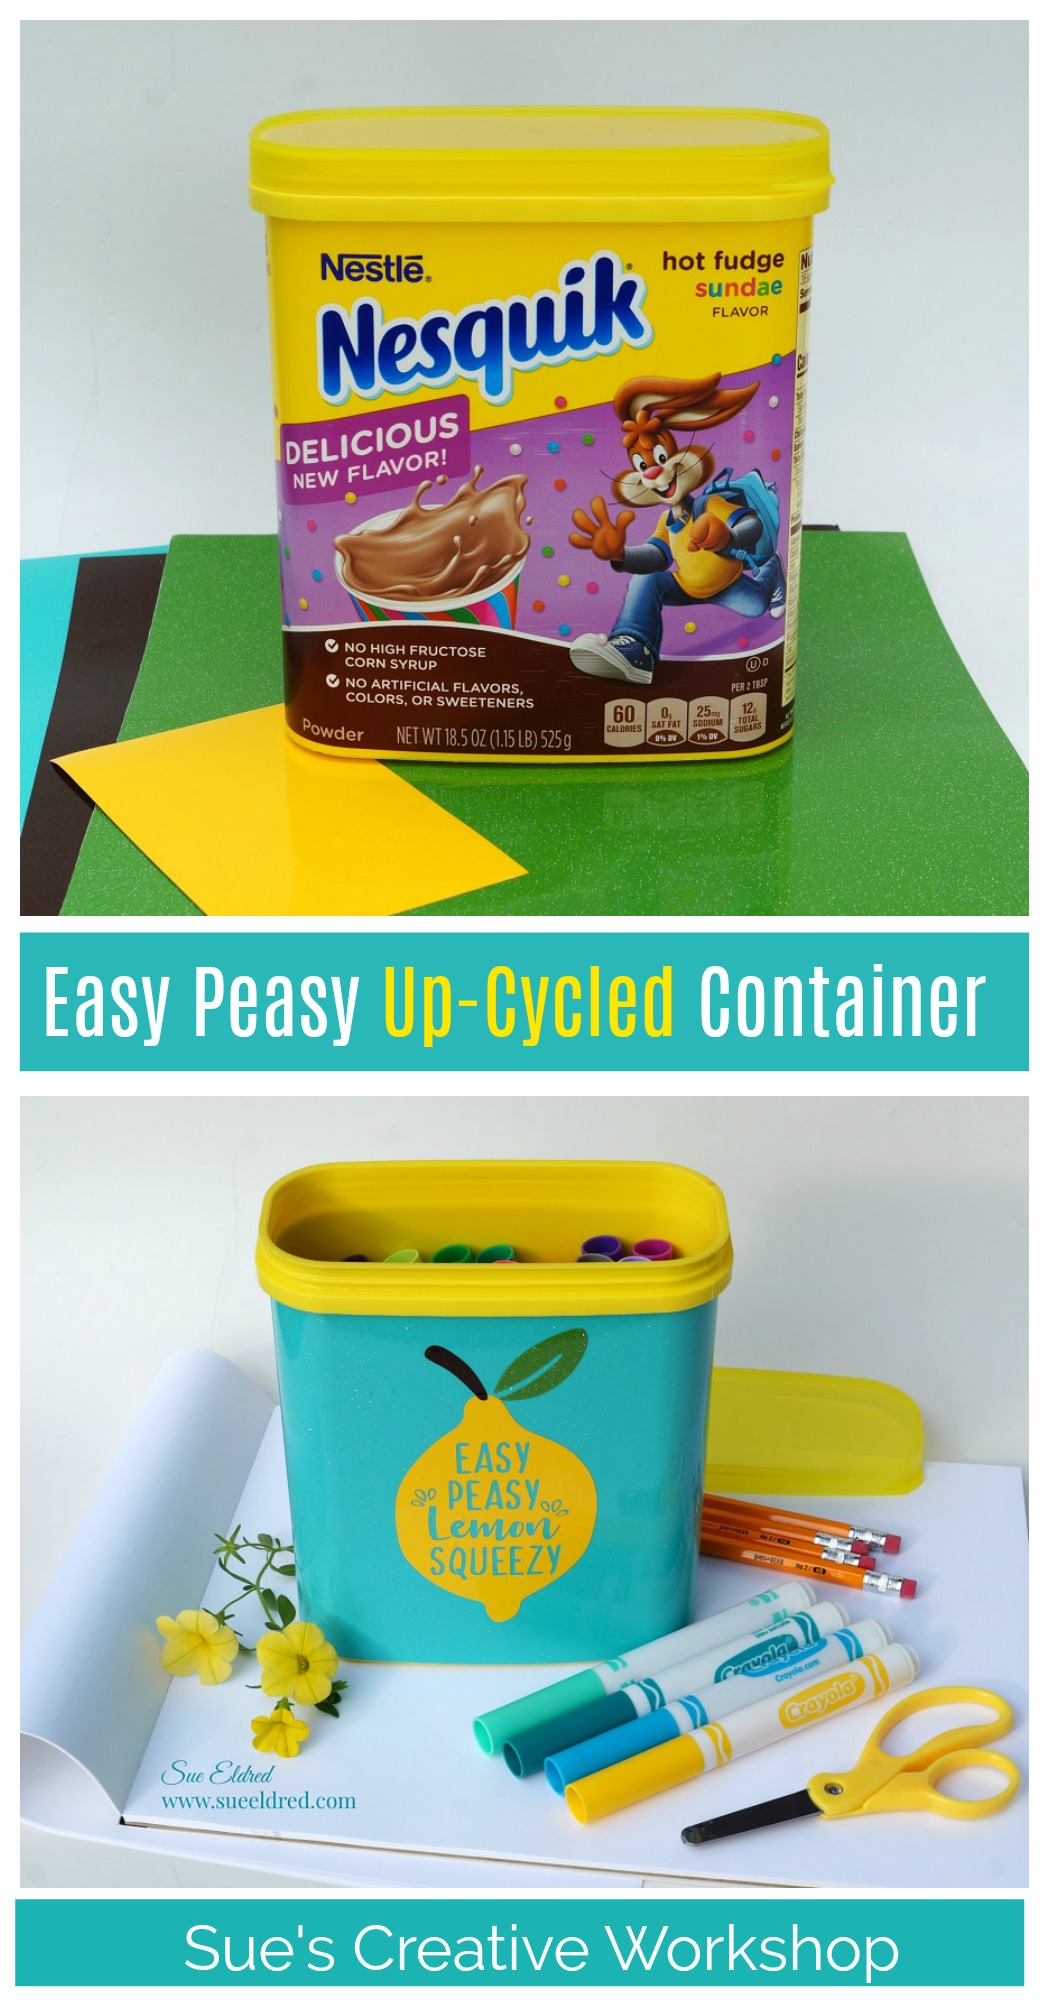
This project was made using an empty Nesquik container.

I have been drinking chocolate milk for as long as I can remember. My dad used to use the Nesquik containers in his garage to store nuts and bolts and lots of other small items. We found several vintage cans out in his garage when we were going through it.

I LOVE making things using craft vinyl and my Silhouette Cameo Electronic Die Cutting Machine*  There are so many things you can make and decorate.

Tip:  If you don’t have access to these products, you can still UPCYCLE/RECYCLE a container like the Nesquik Can using decorative paper, contact paper or stickers to personalize and embellish.  (Below are the directions and materials on how I upcycled my container.)

For my Easy Peasy Lemon Squeezy Up-cycled Container I used:

StyletechCraft products brought to you by ATSM Craft

*Disclosure:  This blog uses affiliate links.  If you choose to make a purchase using one of the links, I receive a small commission (at no additional cost to you) that helps offset the costs of maintaining this blog.  Thanks for your support!

Directions:

  • Measures and cut two pieces of  vinyl to wrap around the container.  (I used one long piece and one shorter piece.)
  • Use the printed graphics on the side of the container to line up your edge.  Slowly wrap the vinyl around the container smoothing as you go to reduce the air bubbles.

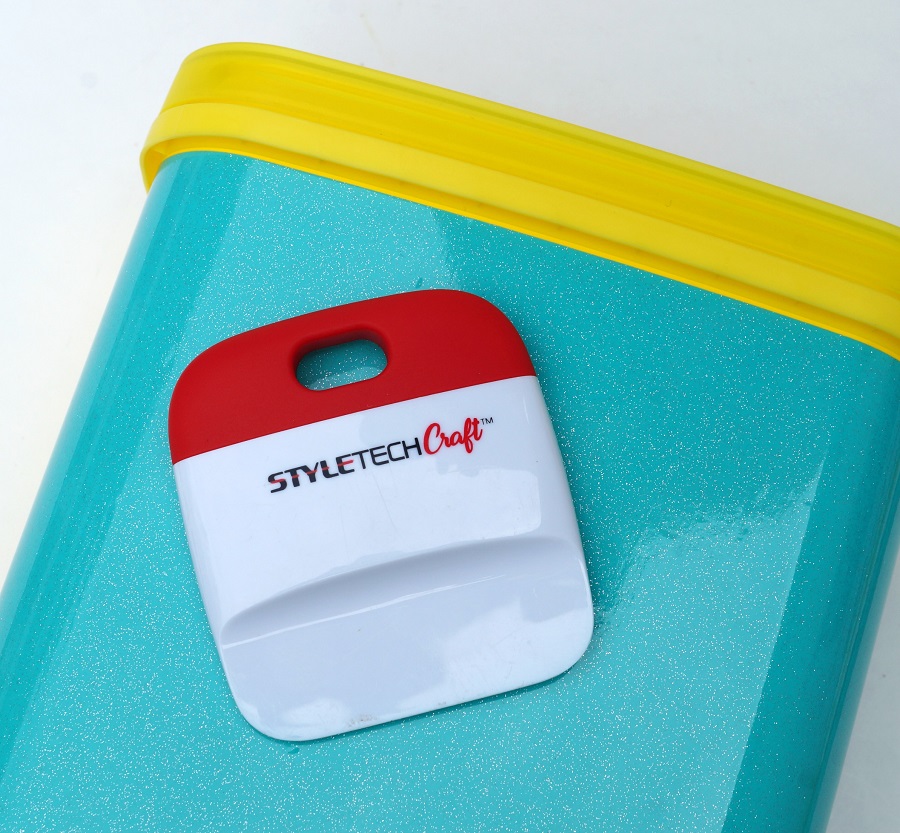
  • Use the squeegee tool to smooth the vinyl.  If you can’t get rid of the air bubble with the squeegee tool you can use a small pin to poke a hole in the vinyl to release the air.

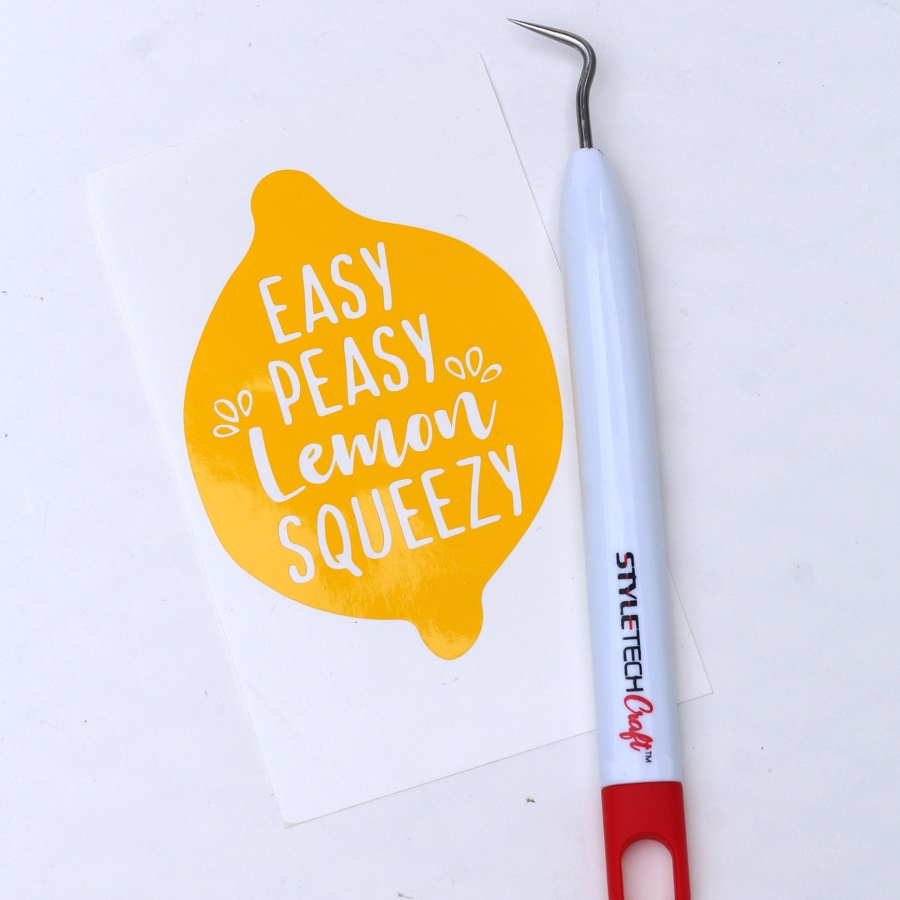
You can find the Easy Peasy Lemon Squeezy SVG file at the Silhouette Design Store.

  • Use the vinyl pick to remove the letters from the vinyl lemon, leave the inside pieces of the letters.

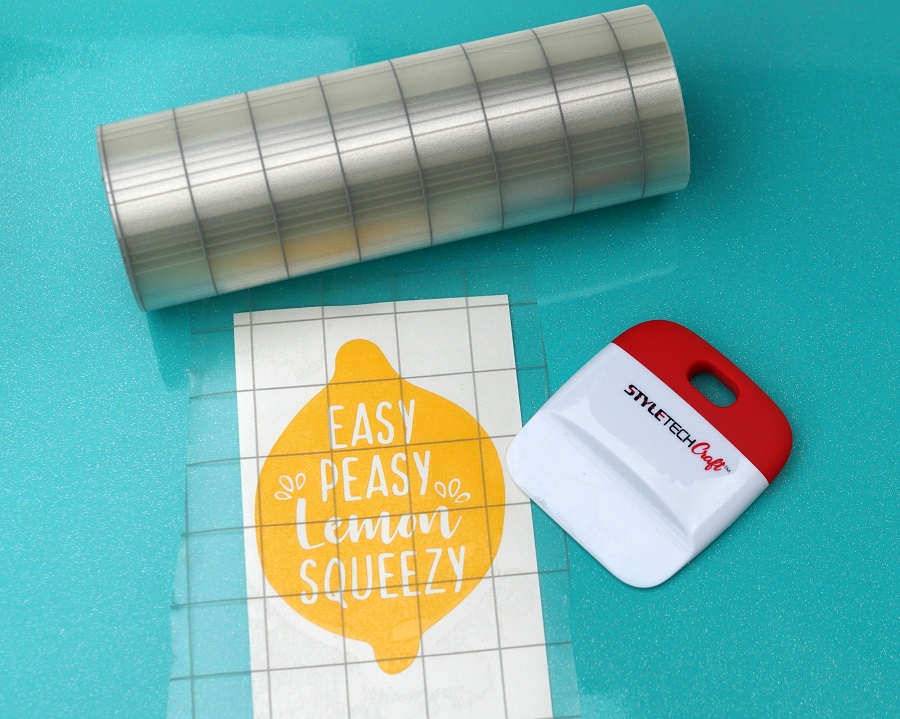
  • Cut a piece of Vinyl Transfer Tape* to fit over the vinyl image.  Gently rub over the transfer paper using the squeegee tool.
  • Remove the vinyl from the white liner, center the image on the front of the can.
  • Gently rub over the Vinyl Transfer Tape* to make sure all the image has transferred.   Remove the transfer tape.
  • Repeat the process with the stem and leaf.

A fun little upcycled project, great for many different uses.  (not just in the garage)

Place several cans side by side for a cute and creative way to store supplies.

“This is a sponsored post.  As a member of the StyleTechCraft Design Team I have been provided product and compensation in exchange for my creative ideas.  The views and opinions are my own.

If you liked this post you might also like Organizing the Kids Craft Cabinet.

Pin ME↓

Save

Just for Fun- DIY Golf Menu Board

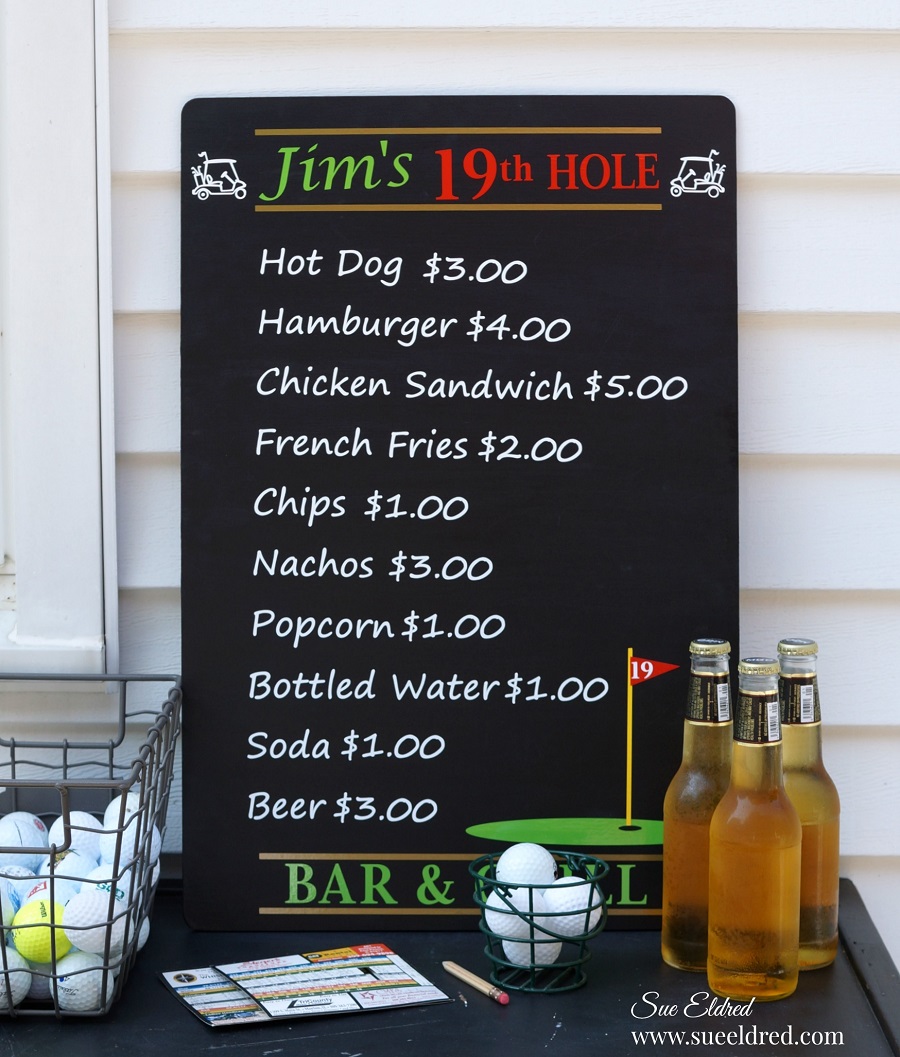
DIY Golf Menu Board…

It started as a joke.

Last month, as my husband was painting the floor of the deck, I opened the window,

stuck my head out and asked if he wanted anything to drink.

He said we should put in a counter at the window so we could take orders.

I wanted a Pool Snack Bar, he really wanted the 19th Hole.

This is our compromise.

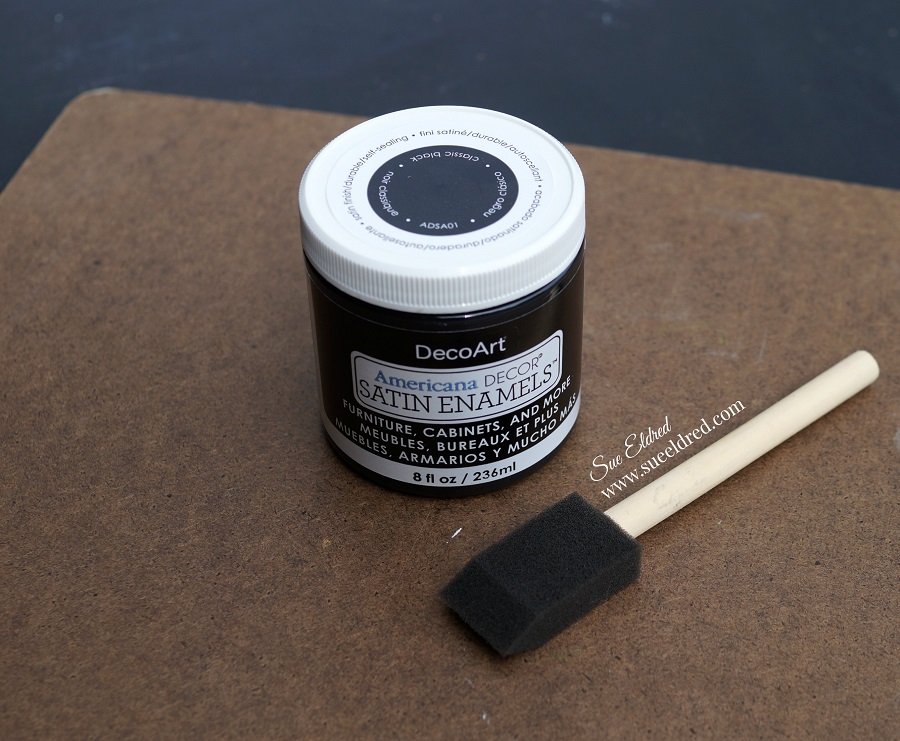
  • I painted a thin hardboard panel with several coats of DecoArt Americana Decor Black Satin Enamel Paint.
  • I gave the painted board a light sanding with steel wool to make it smooth.

Supplies Needed:

Directions:

  • Using an SVG Cut File purchased from the Silhouette Store, size and cut all the pieces using the Cameo Die-Cutting Machine.
  • Use the Vinyl Tools to “weed” out the negative spaces around your image.

StyletechCraft products brought to you by ATSM Craft

*Disclosure:  This blog uses affiliate links.  If you choose to make a purchase using one of the links, I receive a small commission (at no additional cost to you) that helps offset the costs of maintaining this blog.  Thanks for your support!

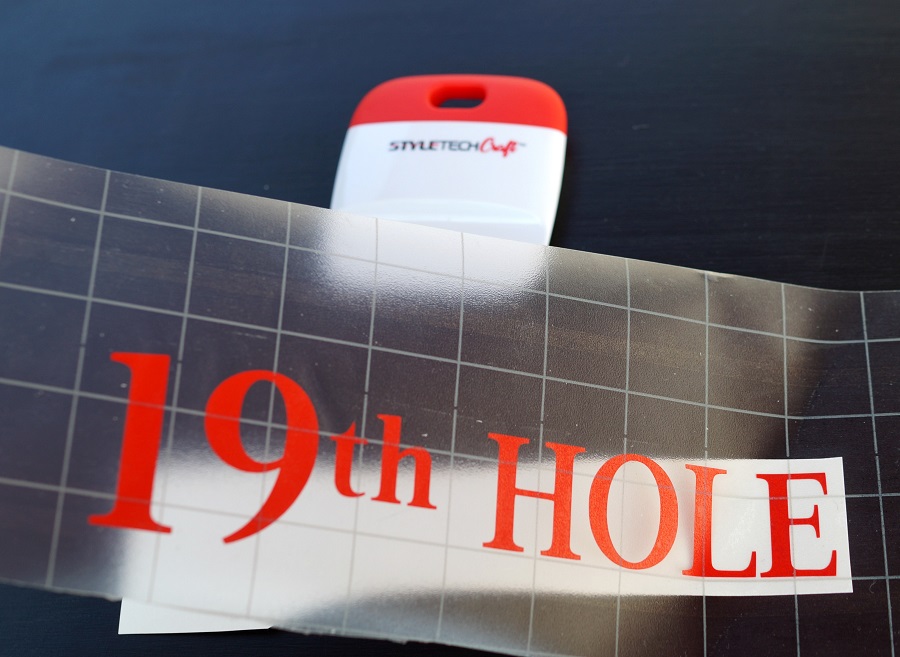
  • Apply transfer tape over the image and give a gentle rub with using vinyl scraper tool to transfer the image to the tape.
  • Gently lift up to remove the image off white backing.

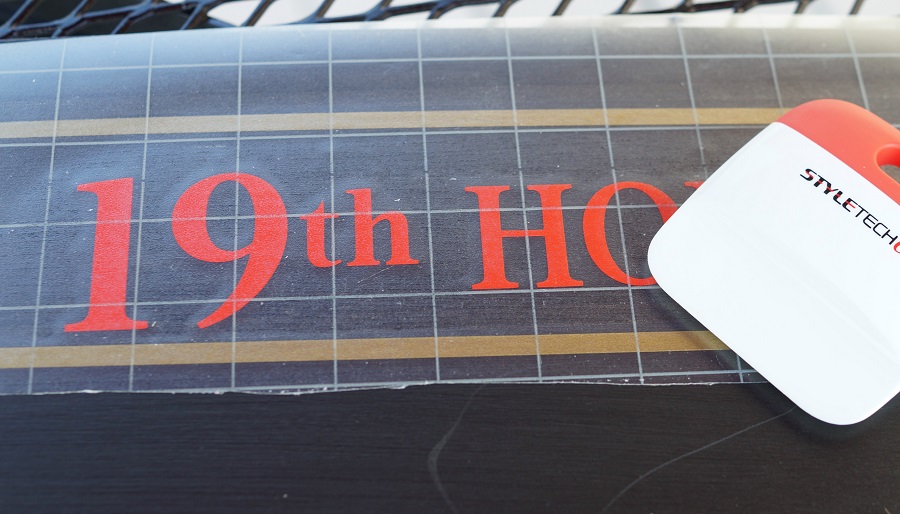
  • Align and place the image onto the board.
  • Give a rub with the vinyl scraper tool to transfer the vinyl onto the board.

My husband loves the board.  (I wonder if I can get him to pay?)

“This is a sponsored post.  As a member of the StyleTechCraft Design Team I have been provided product and compensation in exchange for my creative ideas.  The views and opinions are my own.