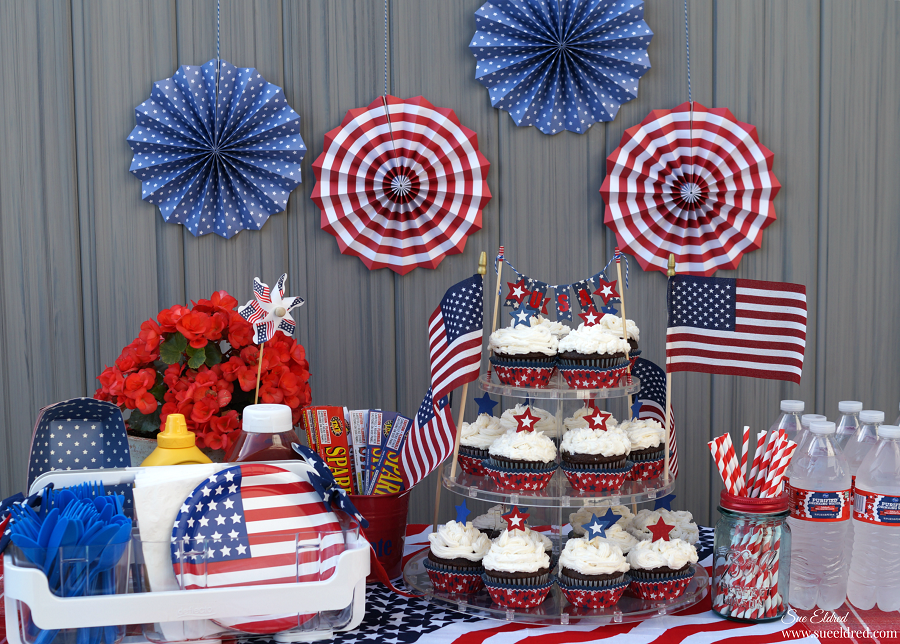
Patriotic Themed Summer Party

Celebrate the Red, White, and Blue!

No matter if your party is big or small.

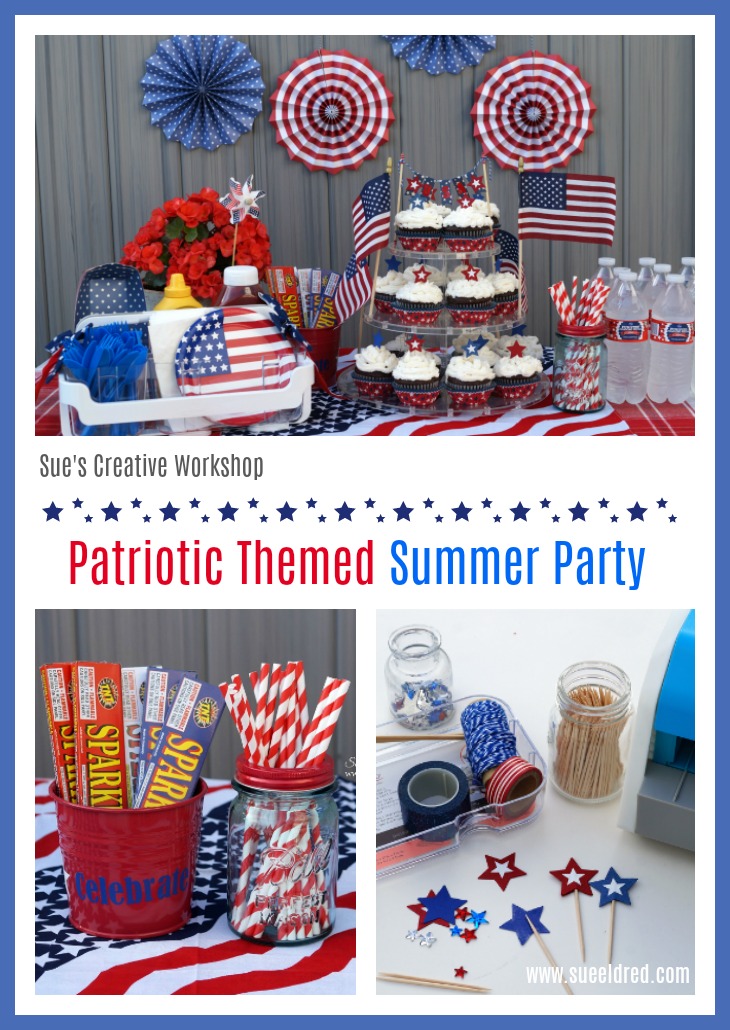
It’s easy to throw together a Red, White, and Blue Patriotic Themed Summer Party.

Gather up some hotdogs, burgers, and brats for the perfect Summer BBQ Get-Together.

Here are a few Ideas to make the Summer Holidays fun and special.
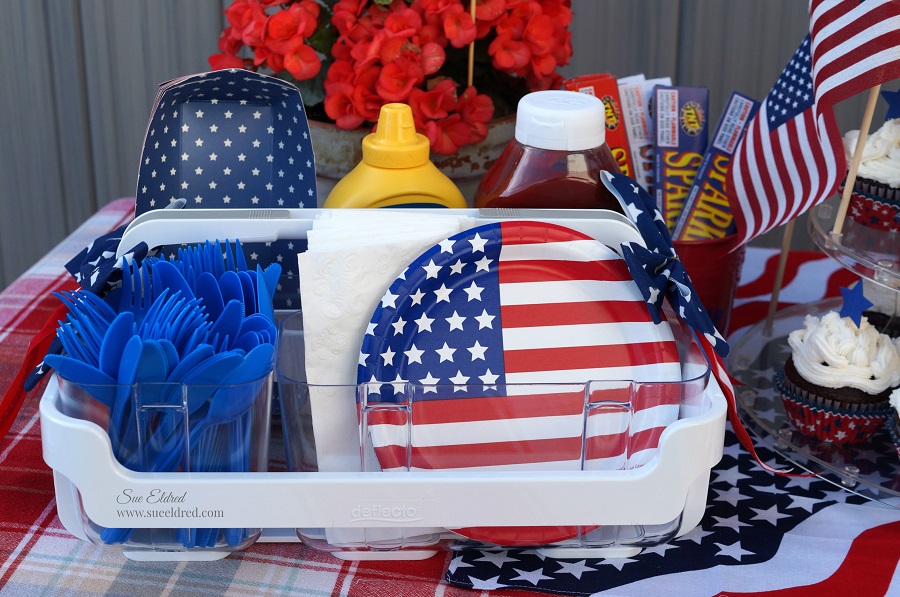
Grab and Go Party Ware.

Bring Deflecto to your next party.

I used a Deflecto Stackable Caddy Organizer* to hold my tableware and condiments

for easy grab and go.

Disclosure:  “This is a sponsored post. As a member of the Deflecto Design Team I have been provided product and compensation in exchange for my creative ideas, views and opinions.”
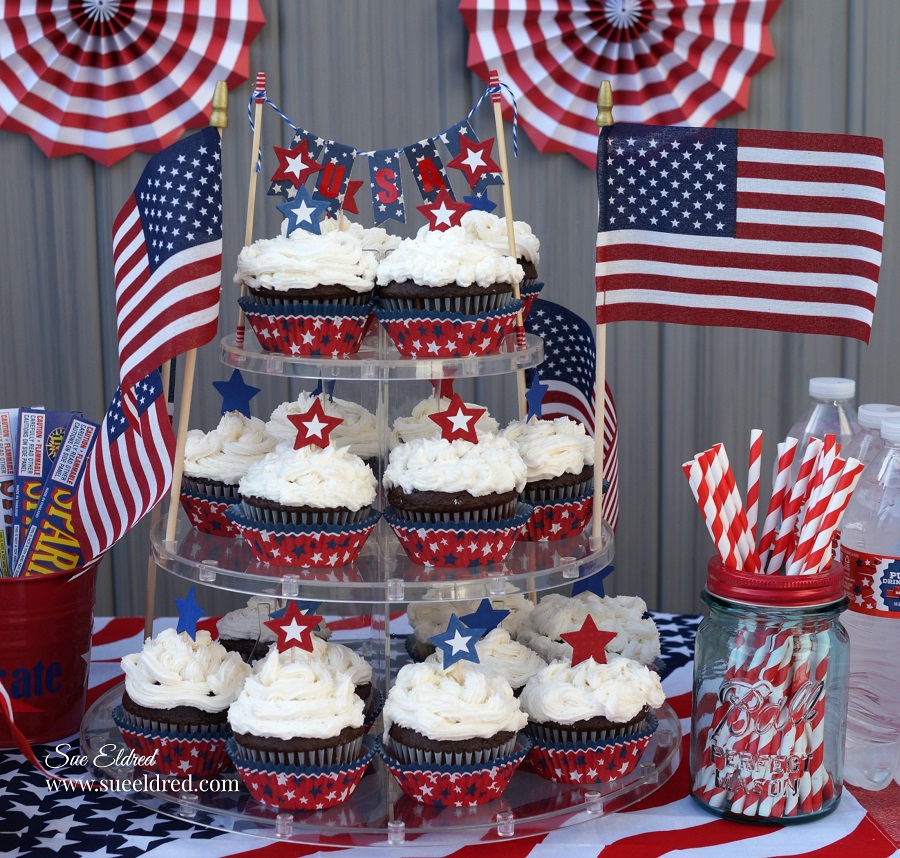
Bold Stripes and Bright Stars

Every party needs a few yummy desserts.

The 3-Tier Dessert Stand* is perfect for displaying cupcakes and other goodies.

It is easy to put together and folds flat for compact storing.

*Disclosure:  This blog uses ads and affiliate links.  If you choose to make a purchase using one of the links, I receive a small commission (at no additional cost to you) that helps offset the costs of maintaining this blog.  Thanks for your support!
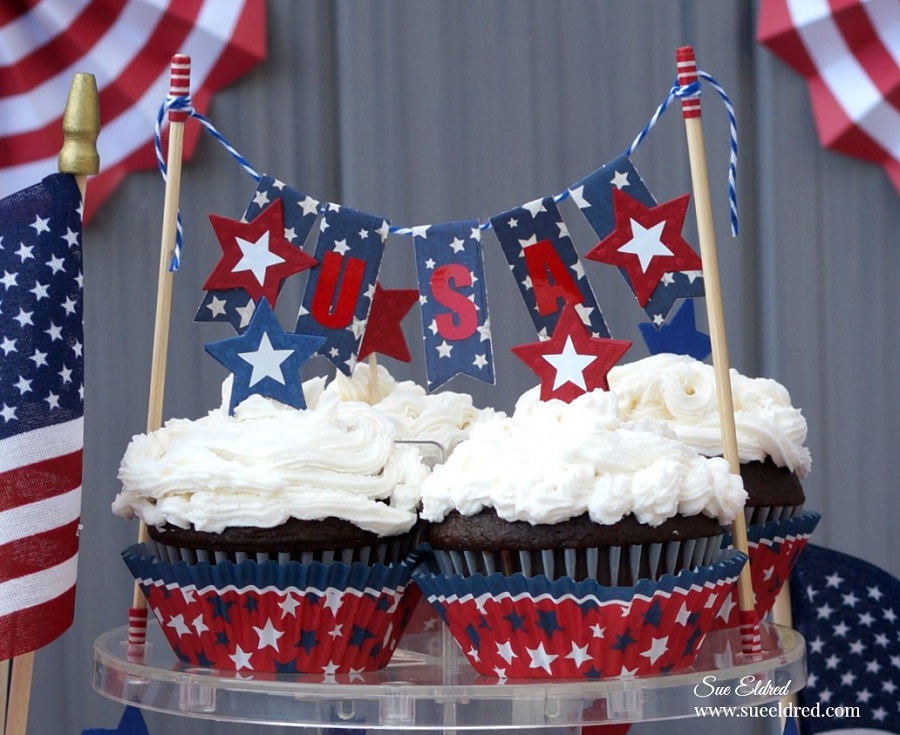
A cute little banner for the top of the stand.
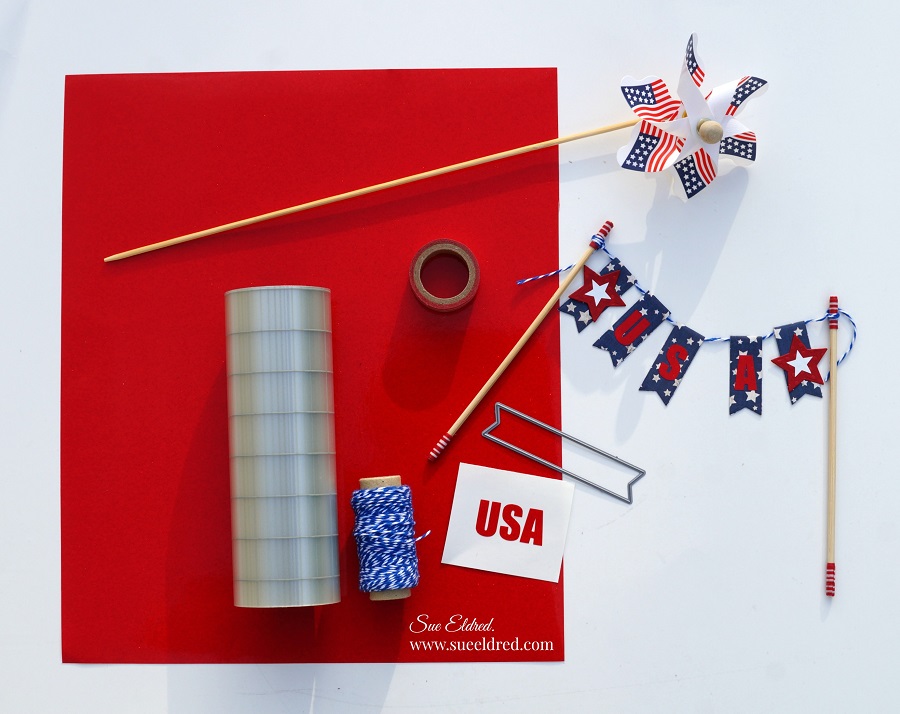
How to make the Banner…

  • Cut two bamboo skewers* 6″ each.  Wrap the ends with decorative washi tape*.  The washi tape helps keep the skewers securely in place when inserting in the stand.
  • Die-cut or hand-cut 5 banners out of decorative scrapbook paper.
  • Tie a piece of blue and white twine on each end of the bamboo skewers.
  • Fold banners and adhere to the twine.
  • Apply letter stickers on the front of the banners.
  • I used StyleTechCraft Red Glitter Vinyl and my silhouette die-cutting machine* to create the words USA to apply to my banners.
  • Stick on each side of the top tier in the holes made to hold cake pops.

StyletechCraft products brought to you by ATSM Craft*
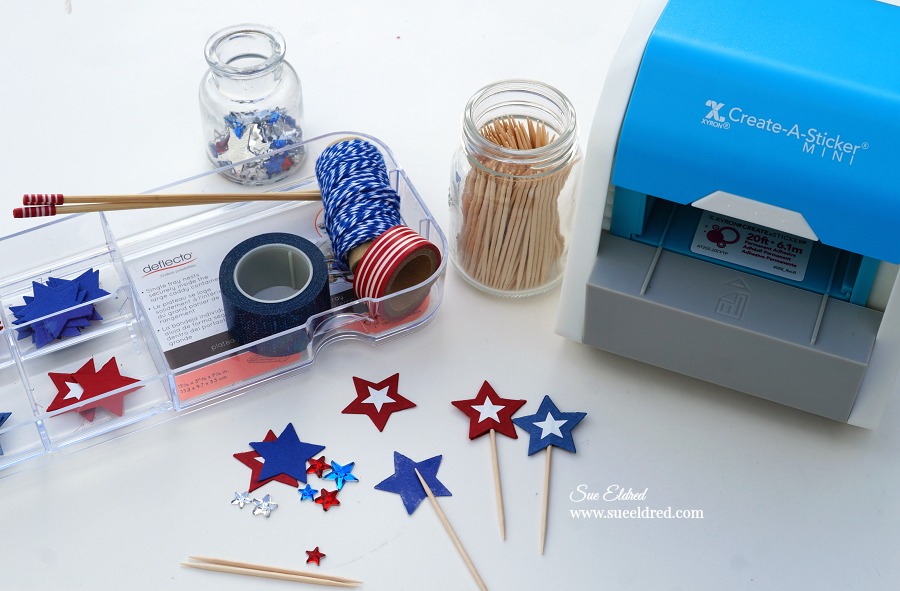
Little details make everything more festive.

Don’t forget to make a few star picks to stick into the cupcakes.

This is a fun project that the kids can help you make.

  • Create the picks by punching or die-cutting several blue and red stars.
  • Add adhesive to the back of the star and place a toothpick in the center.
  • Adhere a second star on the back.
  • For quick and easy work, I used the Xyron Create-A-Sticker* to add adhesive to the stars.
  • Decorative the stars with additional small foil stars.

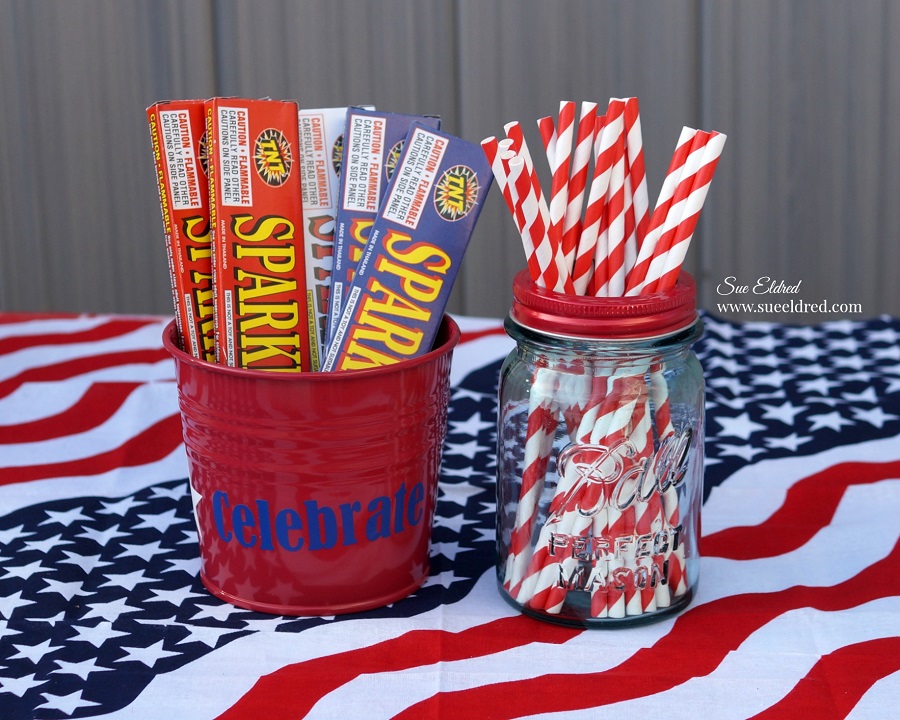
Add a touch of Vintage Americana with Blue Ball mason jars*. 

They are great for storing straws, and they also make great drinking glasses.

And when the sun starts going down, don’t forget the sparklers and glow in the dark novelties.
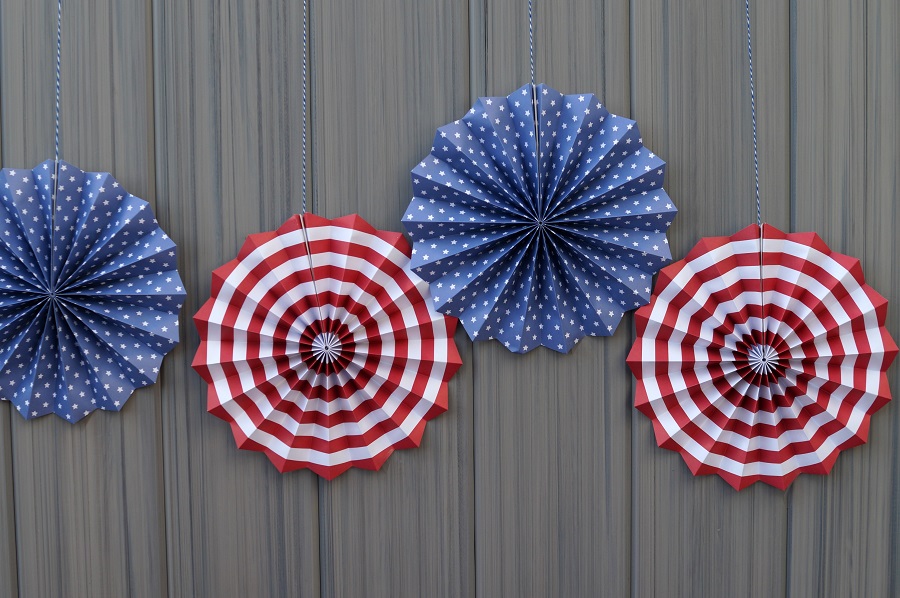
Summer Fun Party Decorations Ideas:  (*affilate links)

←PIN ME

Products Used for your convenience…

Save

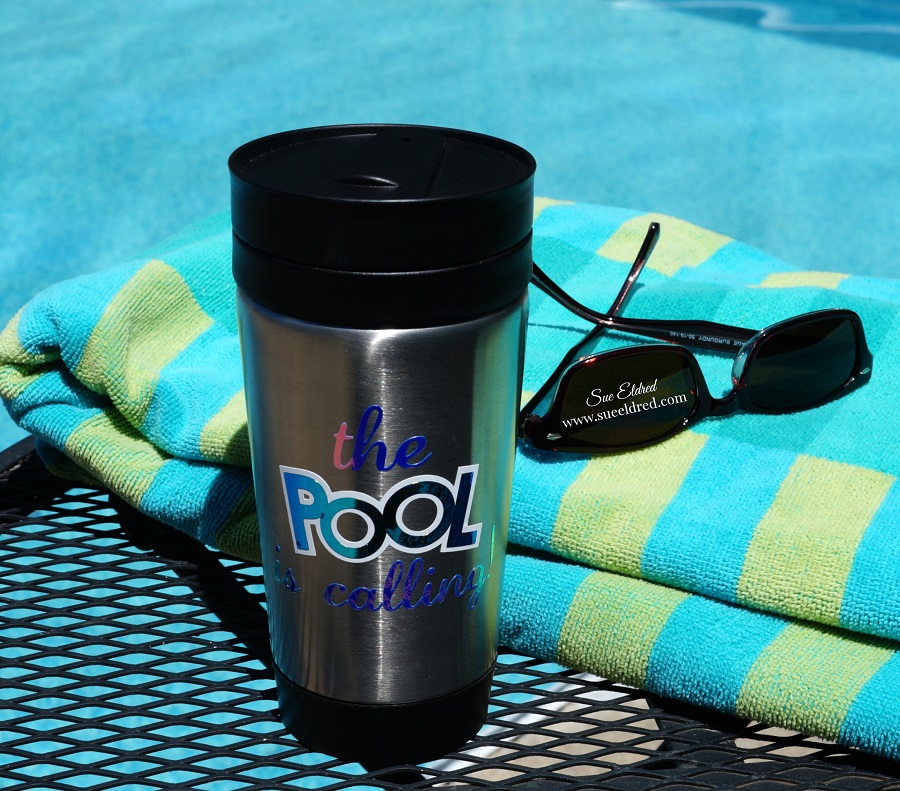
The Pool is Calling Drink Holder

It feels like Summer is here now that the pool is officially open.

A few more bright and sunny days, and I’ll be ready to jump in.

Who am I kidding?  I’m either under the umbrella or on my pool float relaxing.

And since we’re not allowed to have glass items by the pool, (my rule) I made myself

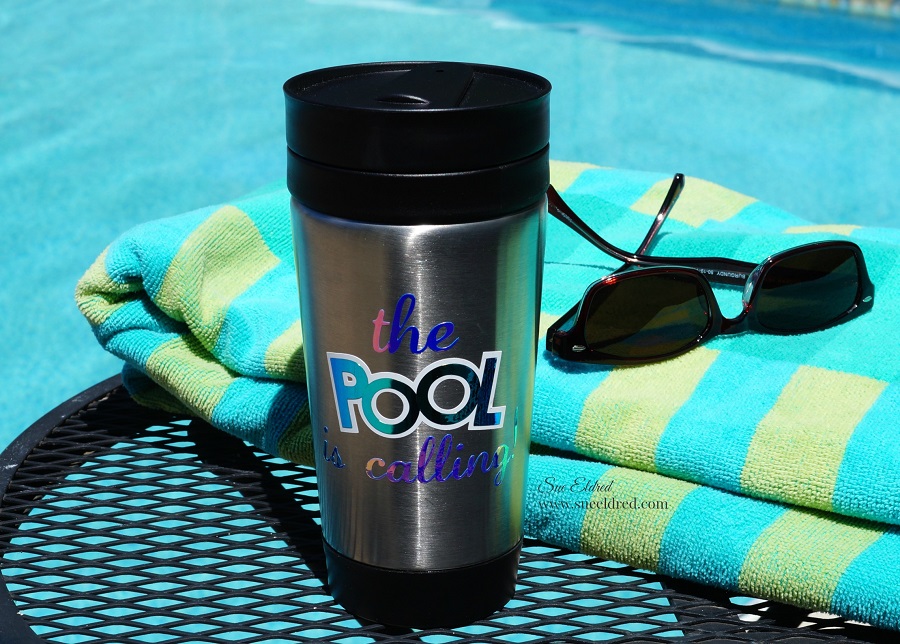
a cute drink container using an expensive stainless steel tumbler found at Dollar Tree*.

*Disclosure:  This blog uses affiliate links.  If you choose to make a purchase using one of the links, I receive a small commission (at no additional cost to you) that helps offset the costs of maintaining this blog.  Thanks for your support!

For my drink holder, I used Iridescent Opal Vinyl* from StyleTechCraft to create the words.

I love the way the Opal Vinyl shimmers and changes with the light.

StyleTechCraft Opal Vinyl* comes in nine different colors for a lot of fun options.

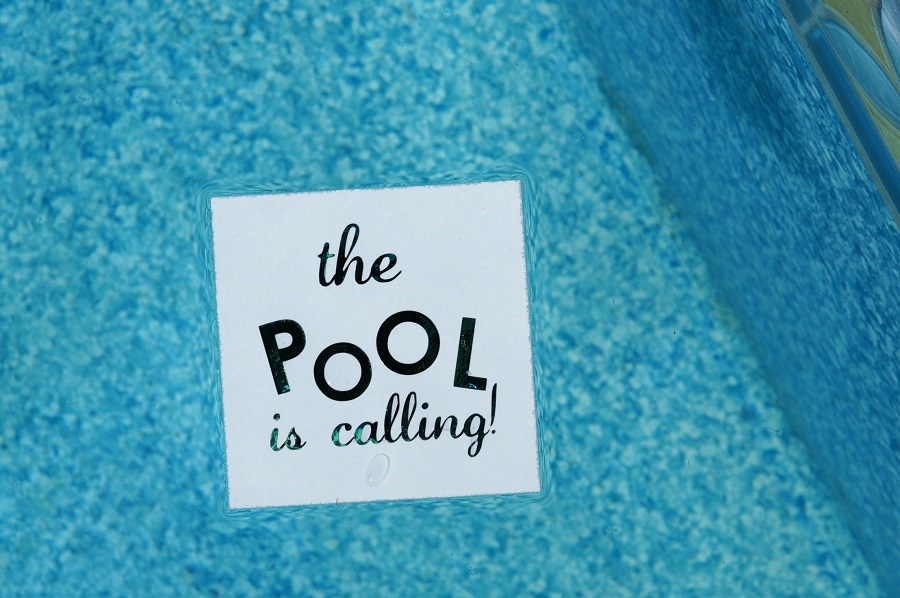
While taking pictures of the products for this post, one of the pieces flew into the pool.

I thought it was ironic, so I took a picture.  (opal vinyl holds up in water)

Here’s what I used to create my drink holder:            (*affiliate links)

StyletechCraft products brought to you by ATSM Craft*

Directions:

  1. Wipe the surface of the tumbler with the alcohol wipe to remove any oils.
  2. Use the Silhouette Electronic Die Cutting Machine to cut the words “the Pool is Calling!” out of Opal and White Craft Vinyl
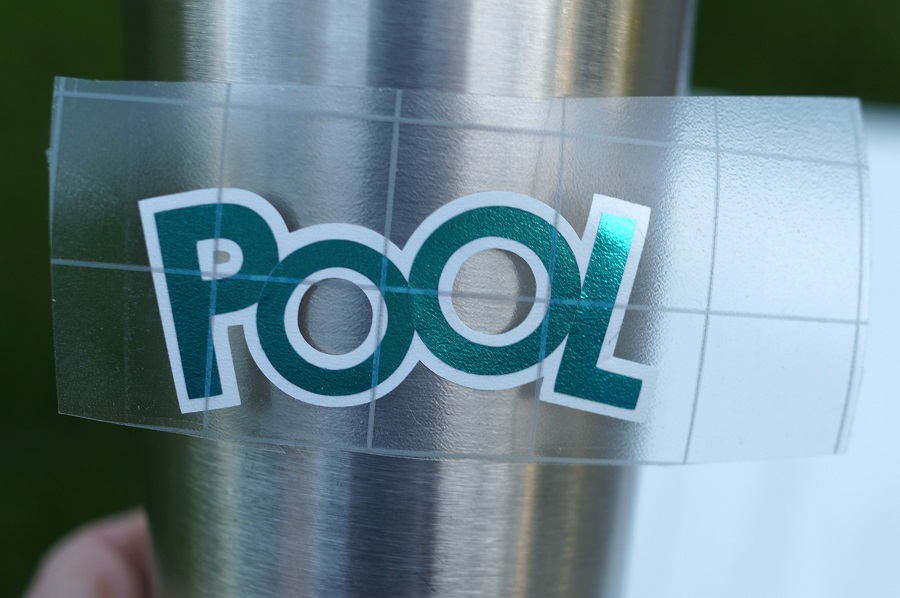
  3. The cut file I used came with an outline for the word “Pool”.  I cut it out of white glossy craft vinyl to make the word “Pool” stand out.
  4. Use a small piece of transfer paper, place onto the individual letters that spell the word “Pool”.  Place letters one by one on the white outline.
  5. Cut a piece of transfer paper slightly larger than the white vinyl outline.
  6. Apply transfer tape over the outline. Give the transfer tape a gentle rub.
  7. Apply the word “Pool” onto the tumbler.
  8. Apply additional words onto the tumbler.
  9. Allow the vinyl to cure on the tumbler for 4 days before using. (Hand wash Only)

“This is a sponsored post.  As a member of the StyleTechCraft Design Team I have been provided product and compensation in exchange for my creative ideas.  The views and opinions are my own.

How to Personalize a Wine Glass with Glitter Vinyl

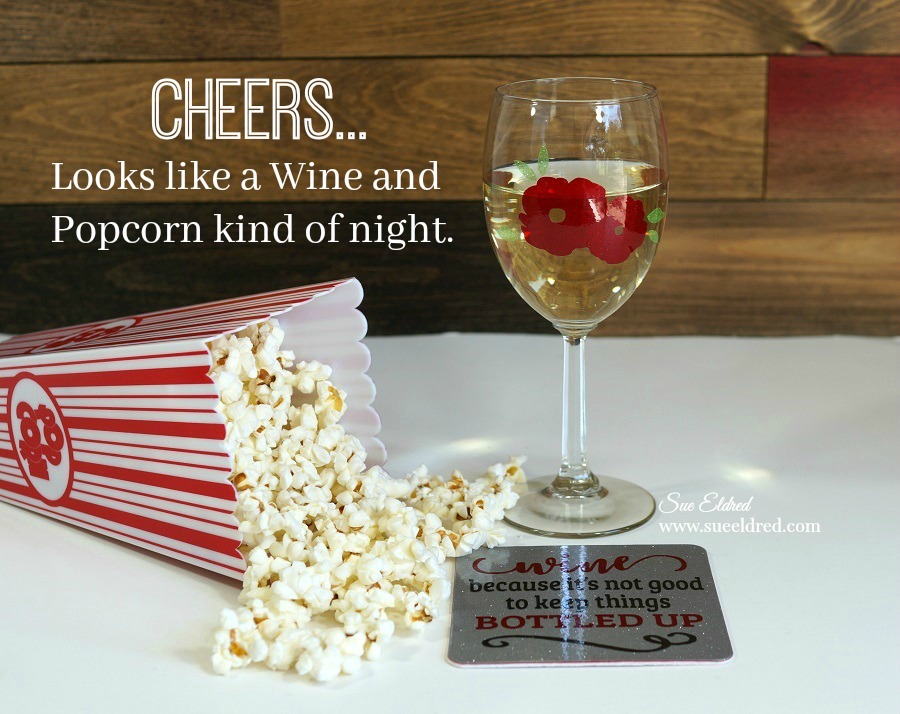
One of my favorite snack combinations is Wine and Popcorn.

It’s great for a casual party or a perfect movie night snack!

For your next party, try personalizing inexpensive Wine Glasses from Dollar Tree*.

Add names to the glasses, and they’ll be no more mixing them up .

*Disclosure:  This blog uses affiliate links.  If you choose to make a purchase using one of the links, I receive a small commission (at no additional cost to you) that helps offset the costs of maintaining this blog.  Thanks for your support!

How to Personalize a Wine Glass with Glitter Vinyl

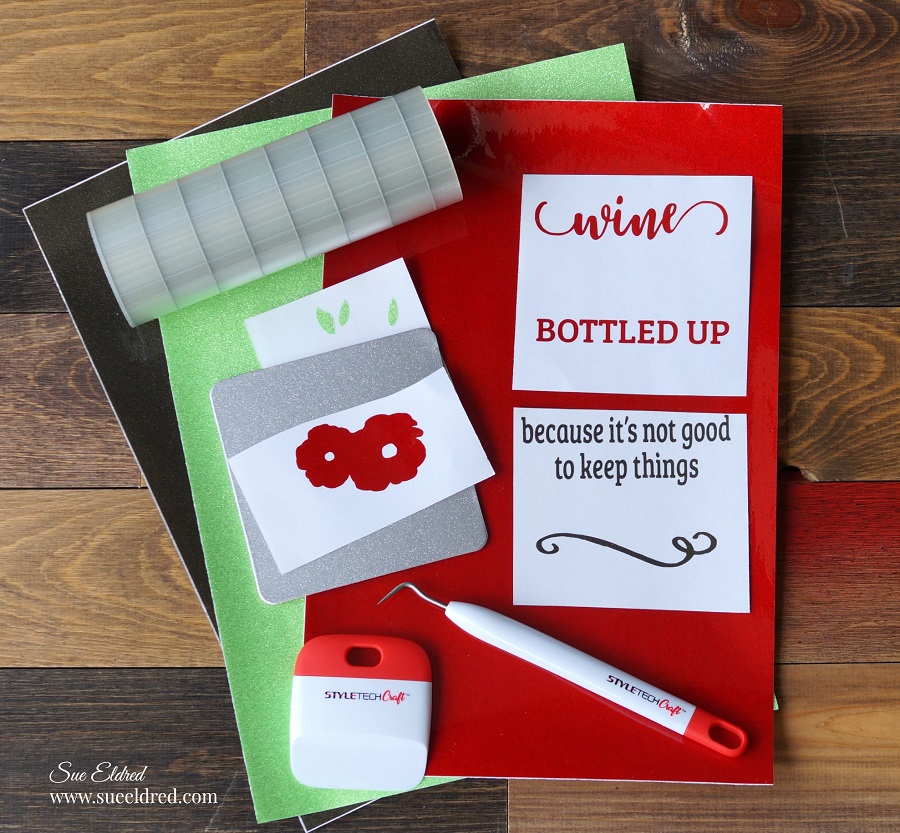
Materials:    (*affiliate link)

The great thing about StyleTechCraft Transparent Glitter Vinyl is that it’s the only film in the world that is colored glitter on both the inside and outside.  

Styletech Craft products brought to you by ATSM Craft

Directions:

  • The flower and leaves image used on the wine glass was purchased online as a “cut file” from the Silhouette Store.
  • Using the Silhouette Cameo Electronic Die Cutting Machine*, I resized the flower and leaves image to fit on the front of the wine glass.  (Mine was approx. 2 1/2″ x 1 3/4″)
  • Lay the vinyl on the cutting mat.  (Because my mat is old and not super sticky, I use a piece of removable tape to hold my vinyl on the mat.)
  •  Set machine on the vinyl setting, cut images out using the Silhouette Cameo Electronic Die Cutting Machine*.  Cut the image out in red and green adhesive glitter vinyl.
  • Use the Weeding Tool, to carefully remove the negative spaces in and around the image.

  • Cut a piece of Vinyl Transfer Tape* a little larger than the flower shape.
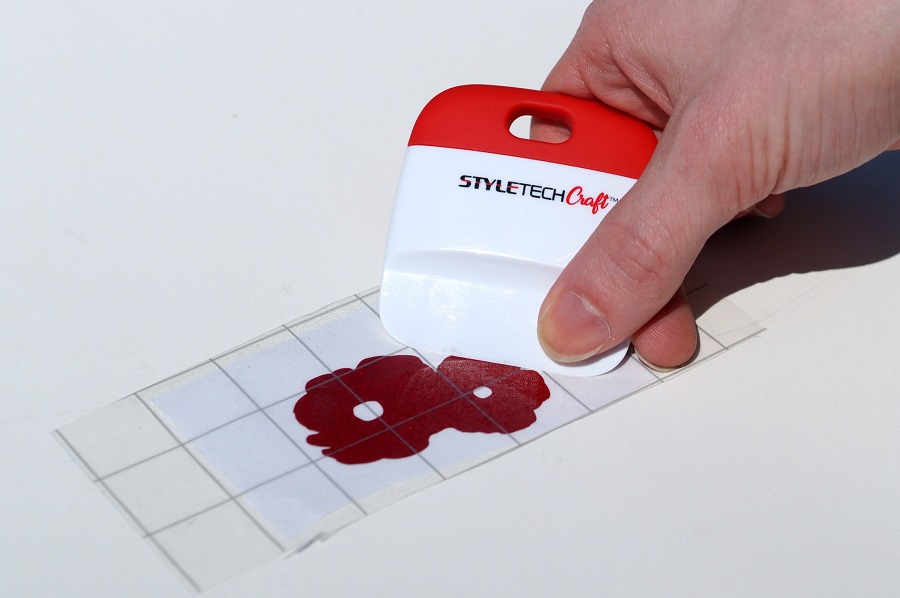
  • Lay the Vinyl Transfer Tape*on top of the flowers. Gently rub over the transfer paper using the vinyl scraper tool to make sure the image has transferred.

  • To help the vinyl stick securely to the glass…Wipe the surface of the wine glass with the alcohol wipe to remove any oils.   
  • Lay transfer paper onto glass. Because the surface is curved, start from the center of the image and rub one side at a time using vinyl scraper tool. The tool allows you to smooth the image and get rid of air bubbles.
  • Remove Vinyl Transfer Tape*.
  • Center leaves over floral design and repeat process.

Allow the vinyl to cure on the glass for 4 days before using. (Hand Wash Only)

And of course, you’re going to need a cute coaster to go with your wine glass.

  • Apply adhesive Silver Glitter Vinyl to the front of a chipboard coaster.  Trim around the edge of the coaster with a craft knife.
  • Create the words using red and black transparent and apply onto the coaster the same as the wine glass.  Enjoy!

Cheers…looks like a Wine and Popcorn kind of night!

“This is a sponsored post.  As a member of the StyleTechCraft Design Team I have been provided product and compensation in exchange for my creative ideas.  The views and opinions are my own.

Save

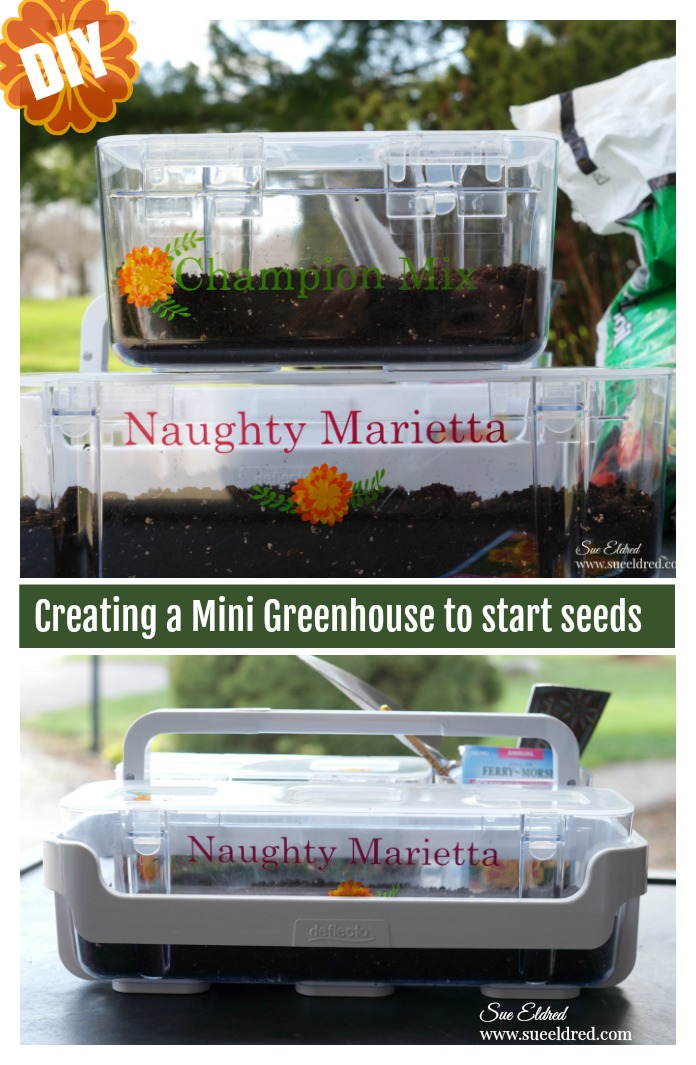
Creating a Mini Greenhouse for Starting Seeds

I was searching online for Mini Greenhouses when I came across an image of a container

for starting seeds that reminded me of the containers found in the

Deflecto Stackable Caddy Organizer*.

That image sparked an idea for creating a moveable mini greenhouse.

“This is a sponsored post.  As a member of the StyleTechCraft Design Team I have been provided product and compensation in exchange for my creative ideas.  The views and opinions are my own. 

Because everything’s a little better when you add vinyl…

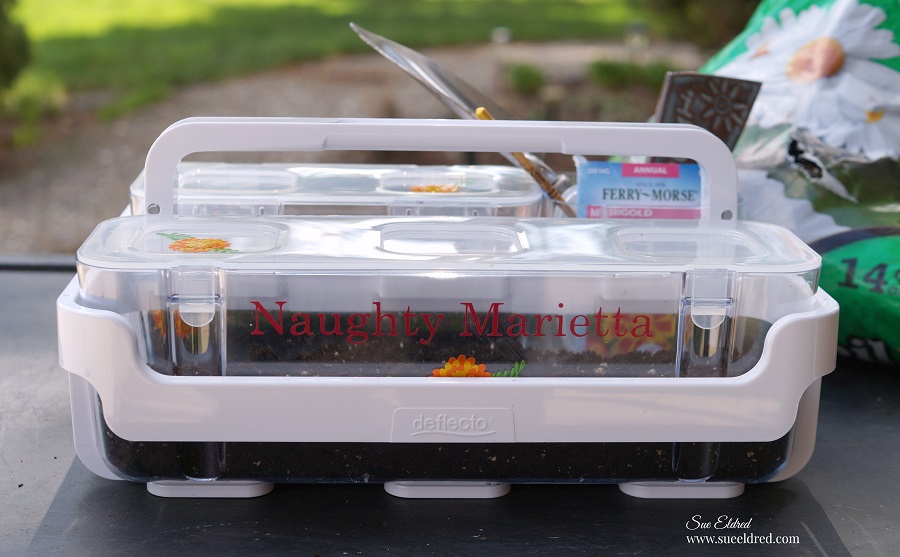
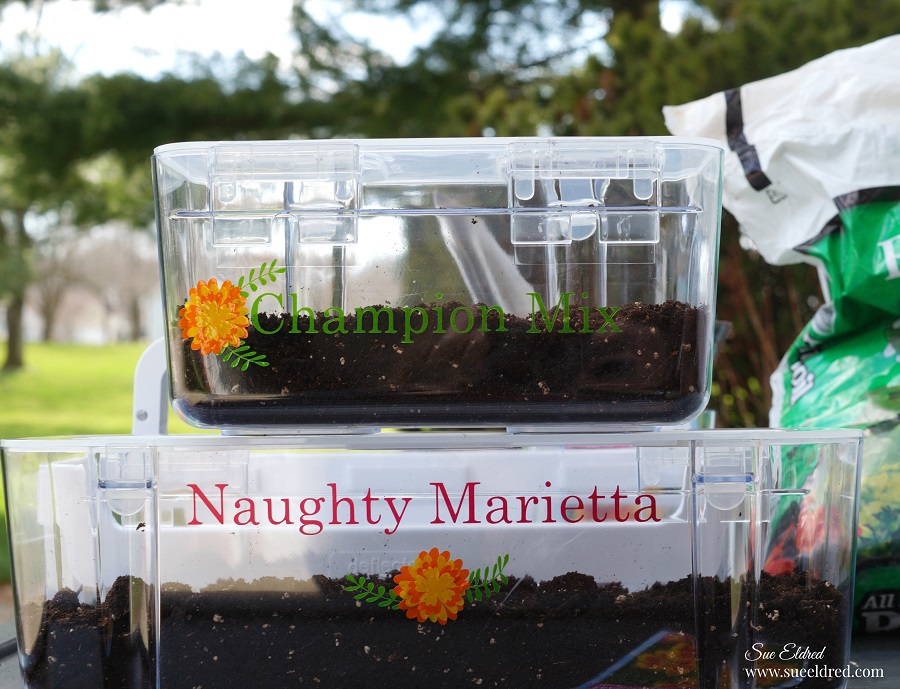
I decided to personalize the containers.

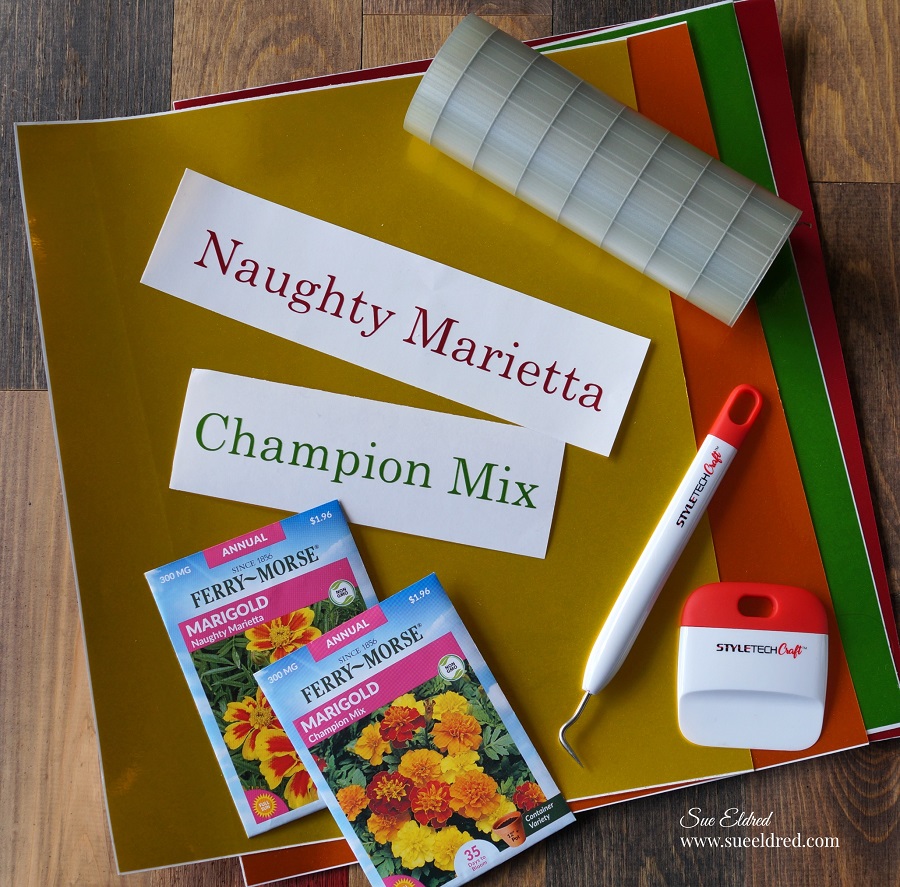
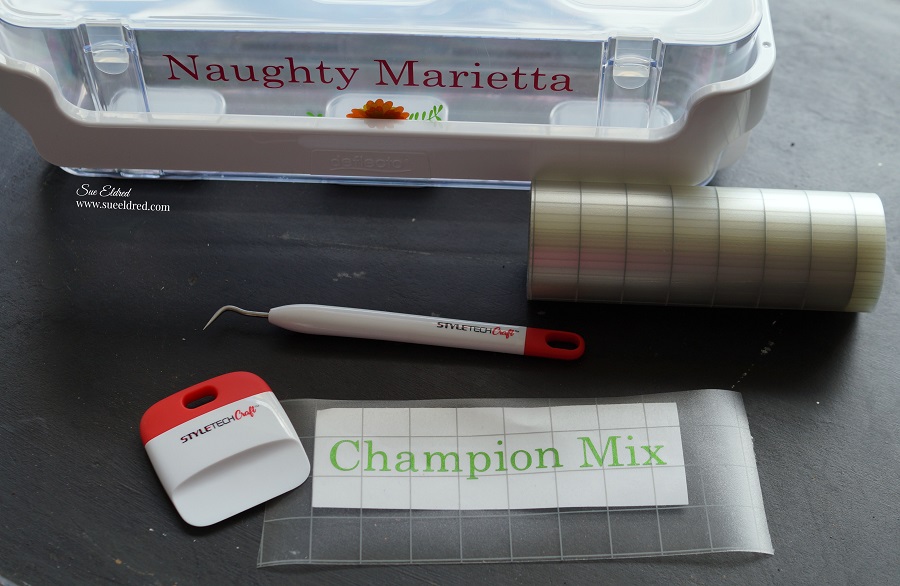
I used a Silhouette Cameo Electronic Die Cutting Machine* to create and cut the flower

names out of Ruby and Apple Green Polished Metal adhesive vinyl from StyleTechCraft.

Using the weeding tool, carefully remove the negative spaces in and around the letters.

This blog uses affiliate links.  If you choose to make a purchase using one of the links, I receive a small commission (at no additional cost to you) that helps offset the costs of maintaining this blog.  Thanks for your support!

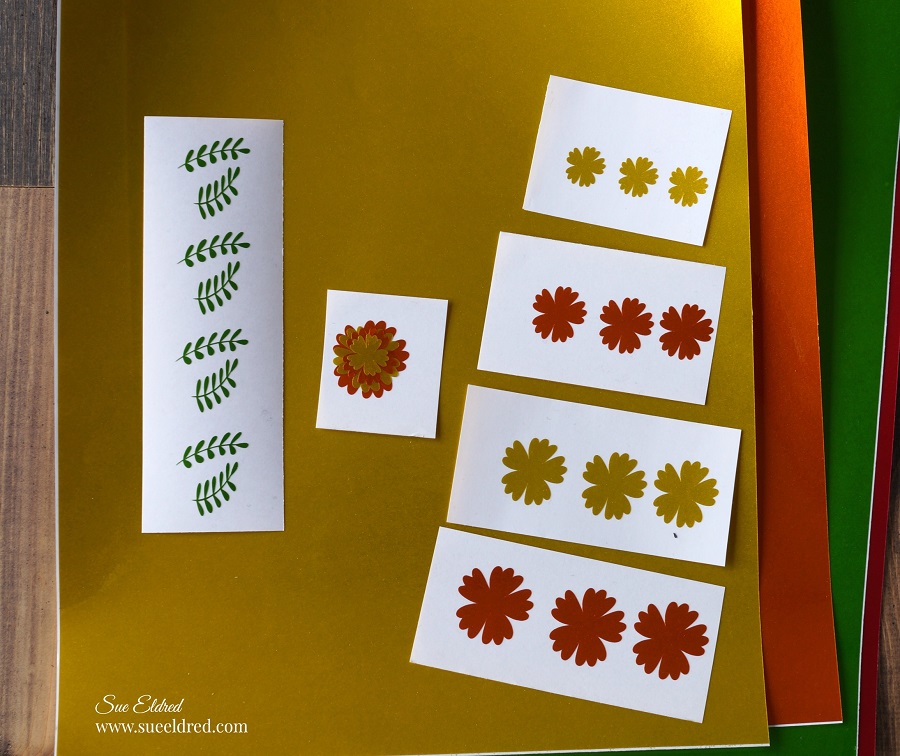
I also cut and weeded 4 graduating sizes of ruffled flowers using Yellow and Orange Polished

Metal Adhesive Vinyl and leaves made from Apple Green Polished Metal Vinyl.

Stager and layer the vinyl flowers to create a marigold-looking flower.

To apply the vinyl:

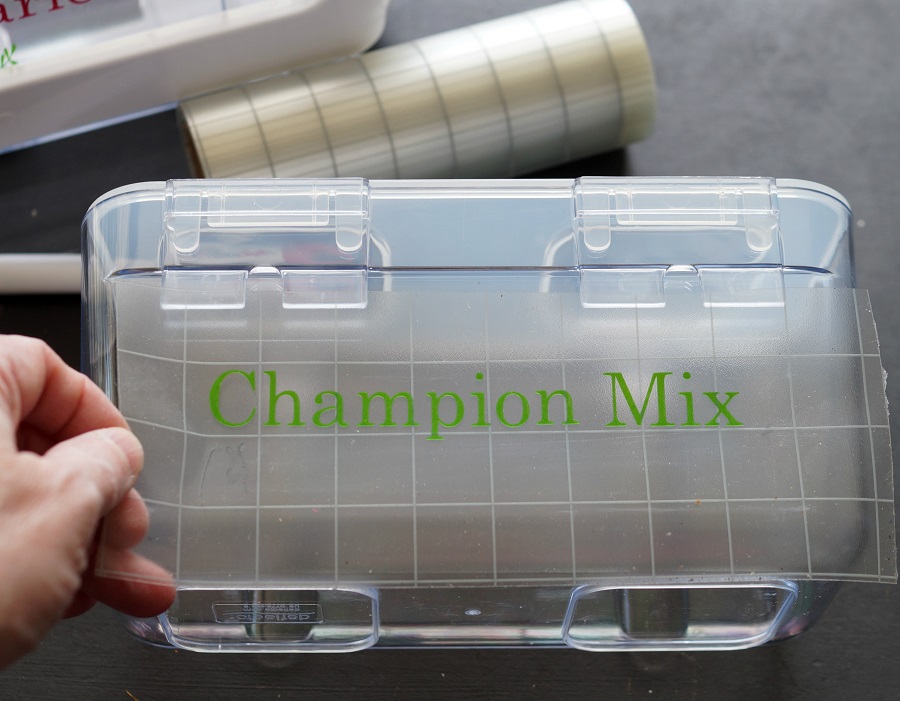
  • Cut a piece of transfer tape a little larger than the words.
  • Lay transfer tape over the words and give a gentle rub using a scraper tool.

  • Use the transfer tape* to apply the words onto the container.
  • Rub over the transfer tape with the scraper tool to help the letters stick.
  • Remove the transfer tape*.

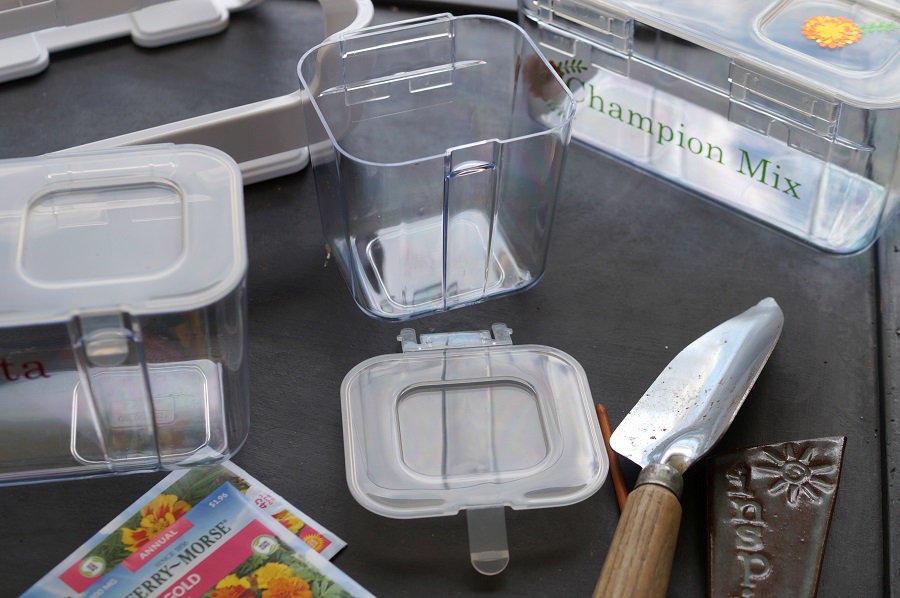
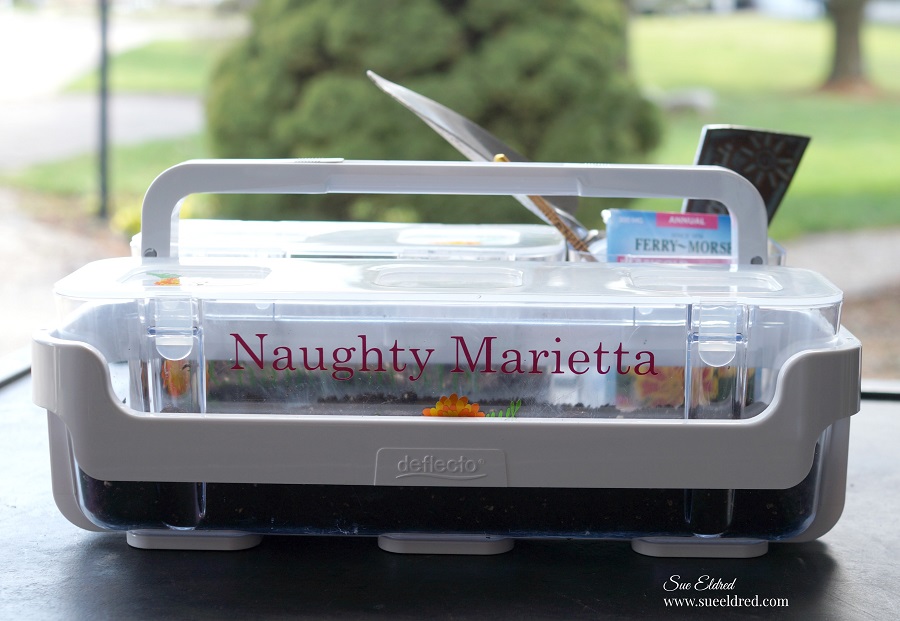
The Deflecto Stackable Caddy Organizer* comes with three clear containers; small, medium,

and large.  I used the two larger containers to plant my seeds.

I took the lid off the smallest container and used it to hold my garden tools and seed packets.

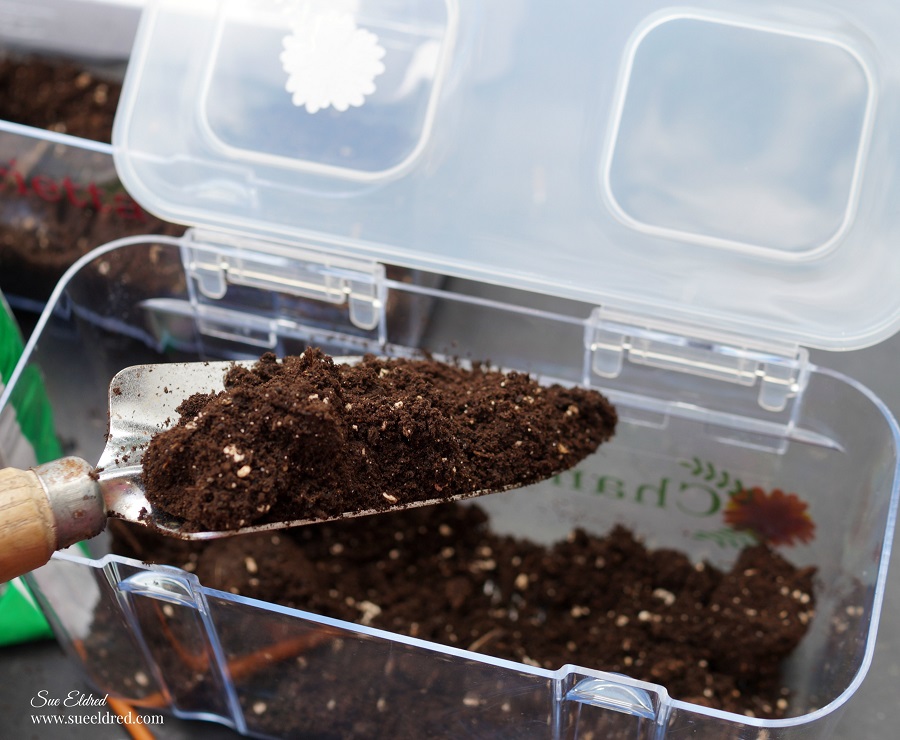
  • Add a layer of potting soil to the bottom of the clear containers and sprinkle the top with seeds.
  • Add a thin layer of soil on top of the seeds and water.

The containers create a humidity dome which is great for keeping seeds moist and protected.

The seeds will start to sprout in a 5-10 days.

Old Weathered Flower Pots-Sue's Creative Workshop www.sueeldred.com

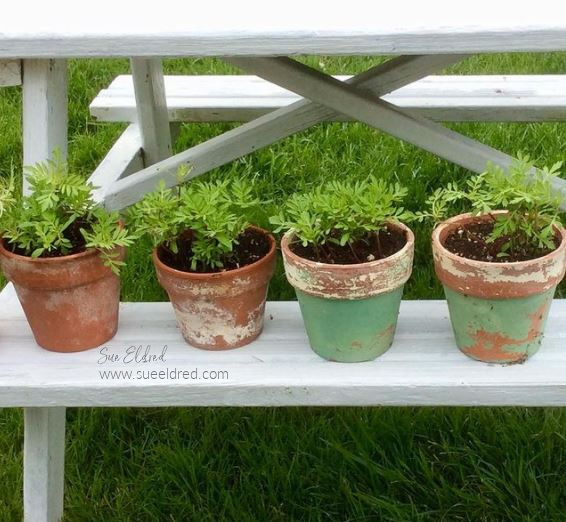
When the seedlings mature, I will transfer them into pots and then into the ground.

My Mini Greenhouse Seed Starter is easy to move around so I can take advantage of the best

sunshine.  A great project to do as a family.

(Watch the video for more information on the Deflecto Stackable Caddy Organizer*.)

Save

For more Family Fun you might also like…

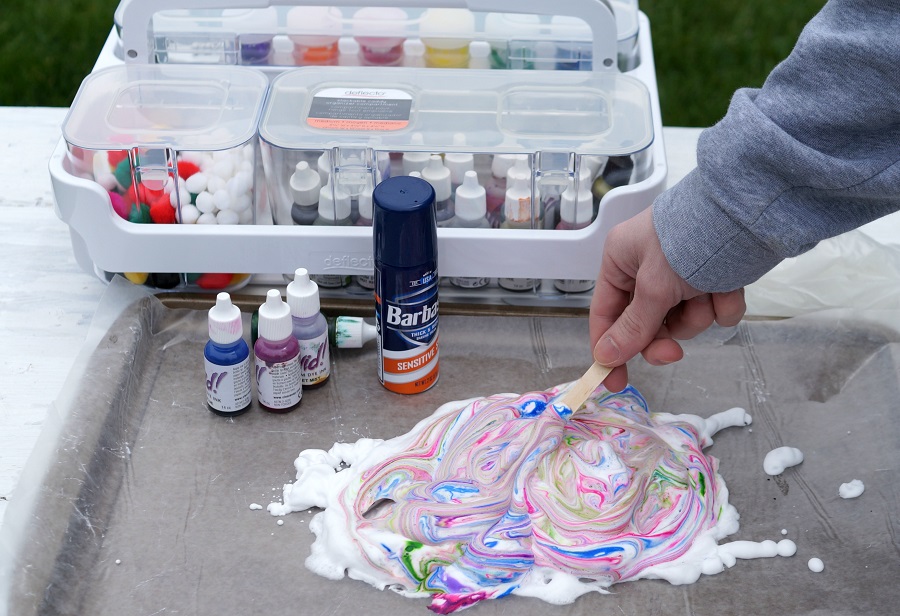
How to Make Shaving Cream Art.

Shaving Cream Art-Sue's Creative Workshop www.sueeldred.com 541

PIN ME↓

DIY-Mini Greenhouse for Starting Seeds-Sue's Creative Workshop www.sueeldred.com

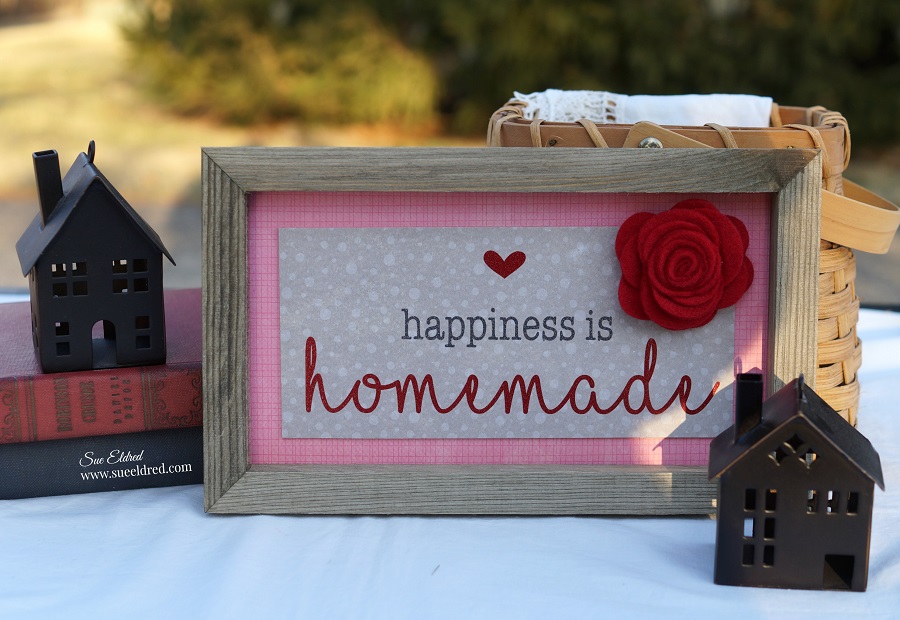
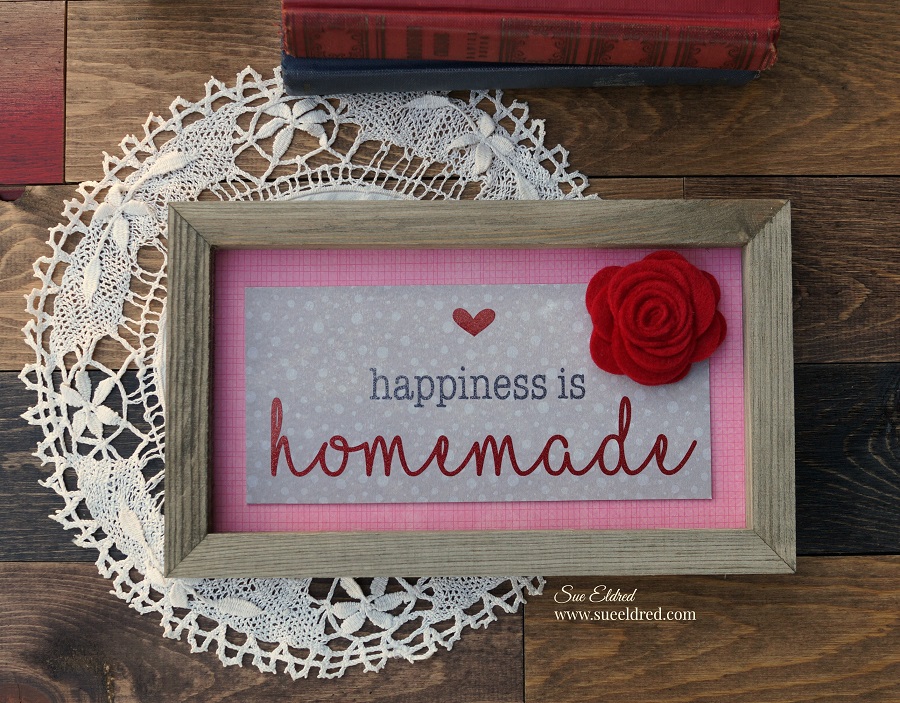
DIY Happiness is Homemade Rustic Frame

How to make a DIY Happiness is Homemade Rustic Frame…

The DIY Happiness is Homemade Frame is a simple home décor vinyl project that we made

in my StyleTechCraft Workshop at Creativation 2020 in Phoenix last month.

DIY Happiness is Homemade Frame Products Used:                  (*affiliate link)

Disclosure:  This blog uses affiliate links.  If you choose to make a purchase using one of the links, I receive a small commission (at no additional cost to you) that helps offset the costs of maintaining this blog.  Thanks for your support!

Directions:

  • Cut an 8″ x 10″ piece of red scrapbook paper and insert inside rustic frame.
  • Cut a piece of 3 1/2″ x 7 1/2″ matboard and a 3 1/2″ x 7 1/2″ piece of gray scrapbook paper.

  • Lay the 3 1/2″ x 7 1/2″ gray scrapbook design side up on the Xyron Creative Station*, crank the handle to run the paper through the machine.  As it moves through the Xyron CreativeStation* it adds adhesive to the backside of the paper.
  • Adhere the gray scrapbook paper onto the 3 1/2″ x 7 1/2″ piece of matboard.

  • Cut a piece of transfer paper a little larger than the “heart and homemade” words.
  • Lay transfer paper over “heart and homemade”. Give a gentle rub using scraper tool.

  • Apply onto the gray chipboard paper. Remove transfer paper.
  • Center the words “happiness is” between “heart and homemade” and repeat the process.
  • Apply adhesive to the back of the chipboard layer using the Xyron tape runner.

  • Adhere the chipboard layer centered in the frame.
  • Add red felt flower to right corner of the frame.

“This is a sponsored post.  As a member of the StyleTechCraft Design Team I have been provided product and compensation in exchange for my creative ideas.  The views and opinions are my own.

Click on Pictures for Links* 


Organizing the Craft Cabinet

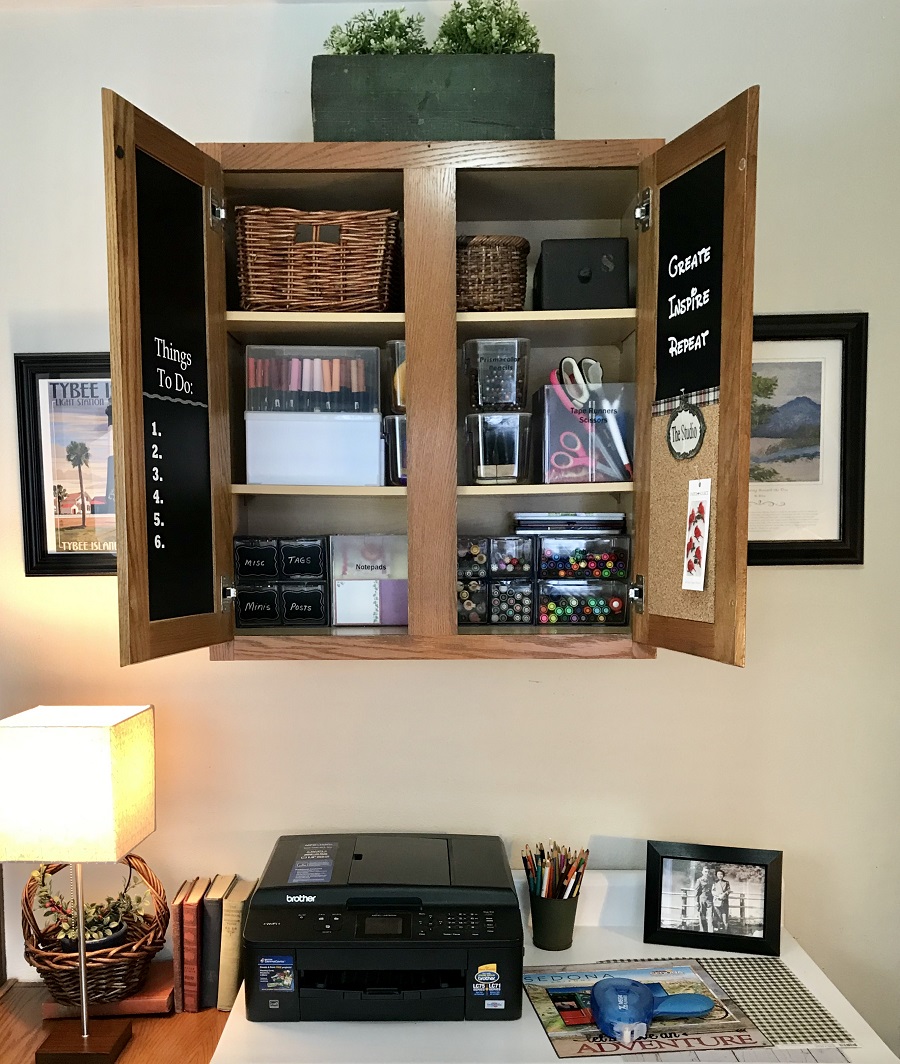
Organizing the Craft Cabinet with Deflecto Storage

I have been slowly working on creating my perfect workspace since last Spring

when I moved my craft room into my son’s old bedroom.

I’ve been taking my time, I want to get it right.

It’s coming along beautifully.  (I hope to share it soon.)

As crafter’s go, I’m a fairly neat and tidy person.

I’m also a fan of closed-door storage.

With closed-door storage, cabinets can easily get ignored and out of control.

I had one of those ignored craft cabinets.

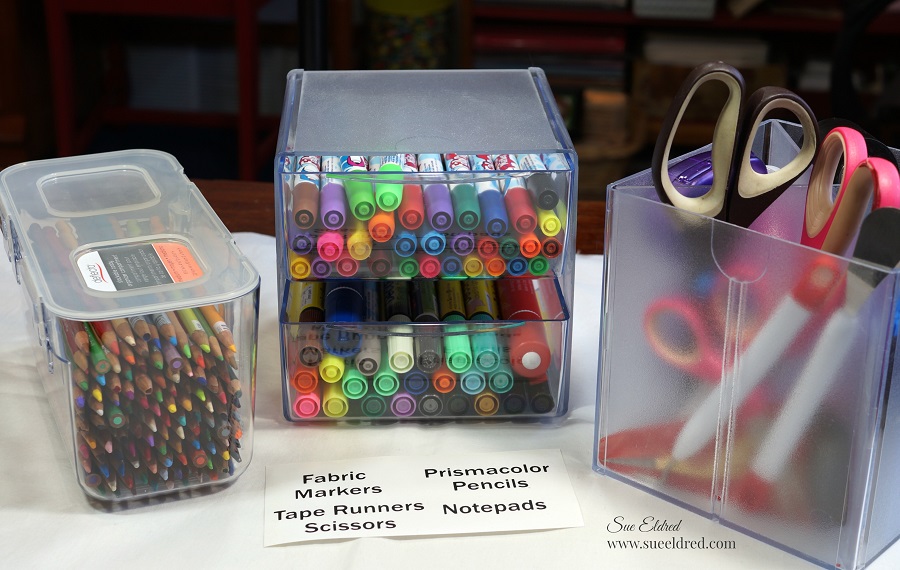
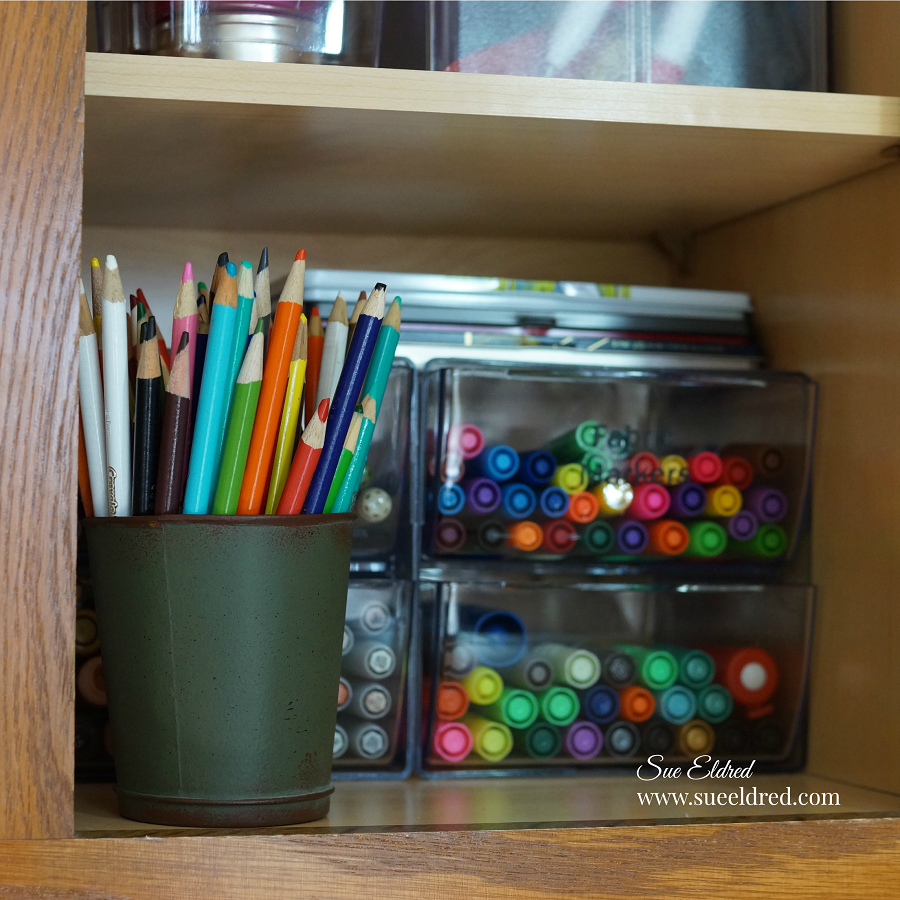
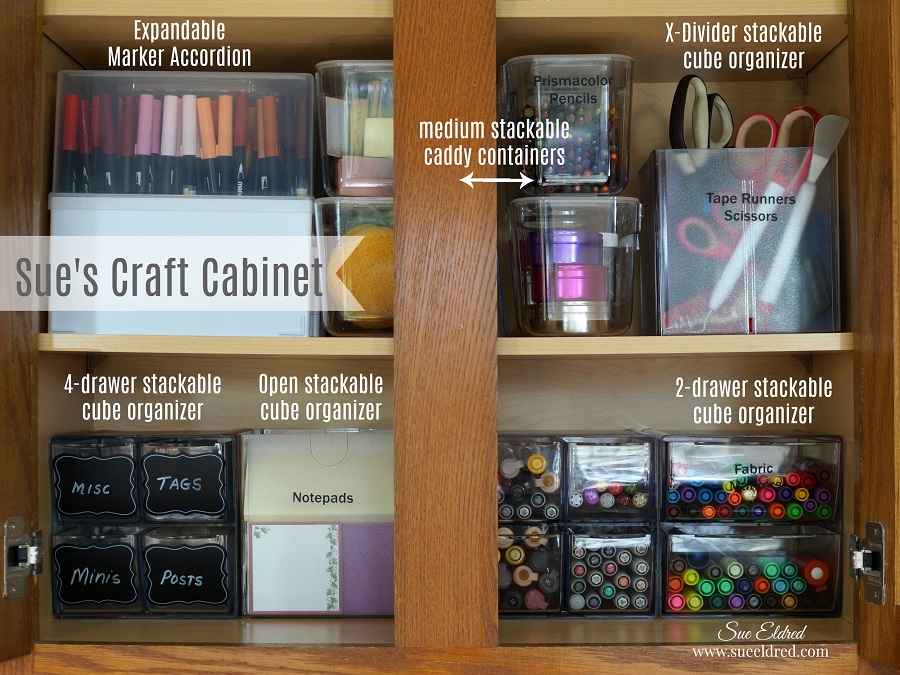
After clearing out the cabinet, I organized items into clear storage containers from Deflecto.

Because I’m such a nice person, I occasionally allow others to use my craft supplies.

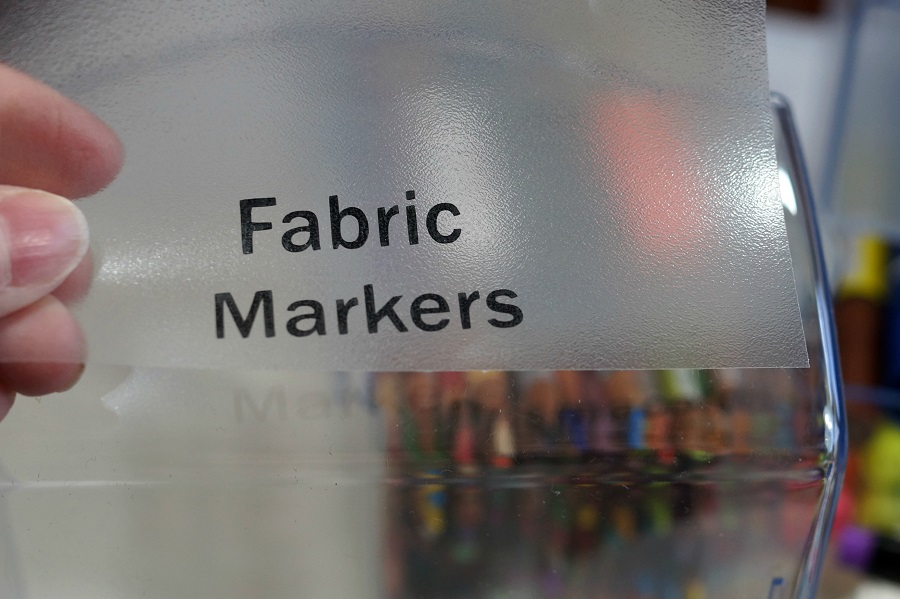
Labeling the bins not only look good, but it’s helpful for those looking for supplies.

I used a  Silhouette Cameo Electronic Die Cutting Machine* to create and cut the words out of

StyleTechCraft black adhesive vinyl*.

I used transfer paper to apply the words onto the clear bins.

*Disclosure:  This blog uses affiliate links.  If you choose to make a purchase using one of the links, I receive a small commission (at no additional cost to you) that helps offset the costs of maintaining this blog.  Thanks for your support!
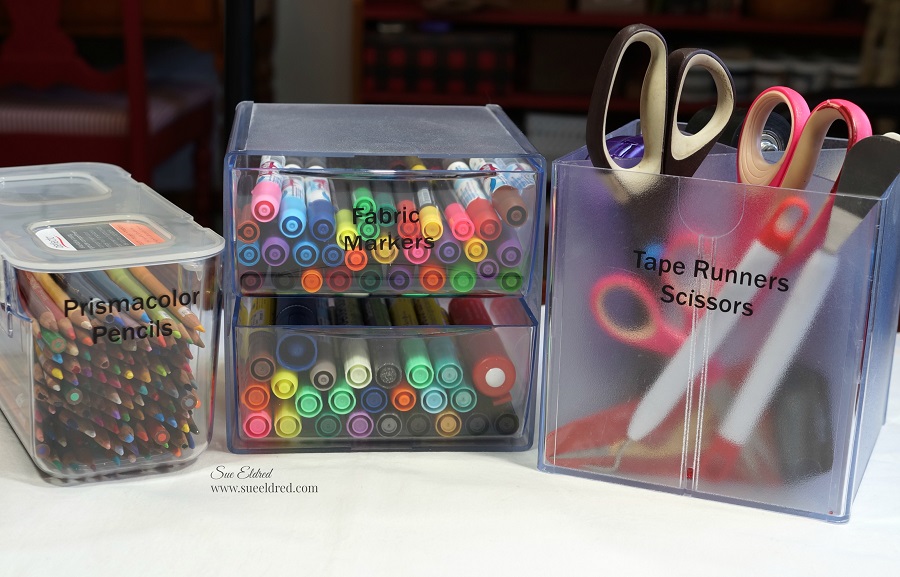
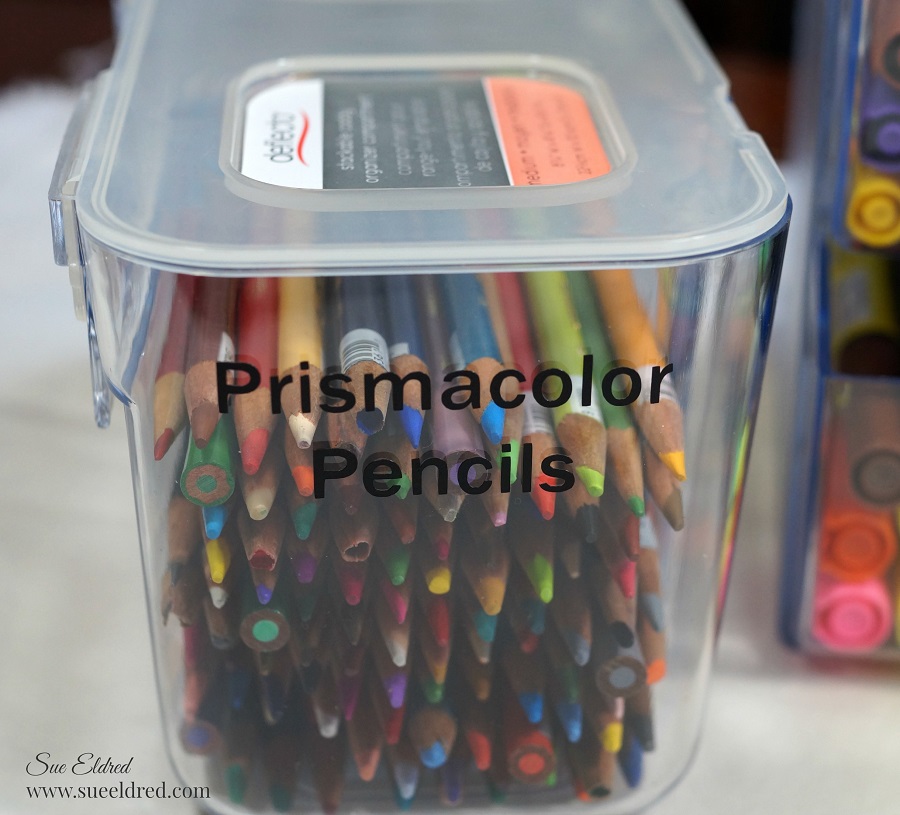
As a self proclaimed organizing nut, I find labeled bins extremely satisfying.

Clear bins make everything easier to find.

The bins are also easy to take with you when you need to work.

They keep your work space clutter-free and your supplies close at hand.

My newly Organized Craft Cabinet.  Everything fits so nice in this space.

Here’s what I used to organize my Craft Cabinet:    (*Amazon Affiliate Links)

Look for Deflecto products on Amazon, Scrapbook.com and at Michaels and Hobby Lobby.

“This is a sponsored post. As a member of the Deflecto Design Team I have been provided product in exchange for my creative ideas, views and opinions.” 

StyleTech Craft 2020 Design Team Call

StyleTechCraft is having a Design Team Call.

They are one of the great company I work with.   (information below)

Do you love working with vinyl?

We are looking for Designers and Bloggers to work with our extensive line of adhesive vinyl.

All our adhesive vinyl works well with all cutting machines and can be cut into just about any design you can imagine. Great for Home Décor, Seasonal Crafting, and Paper Crafting Projects.

We have all the popular colors; Ultra Metallic, Glitter, Chromes, Metalized, Etches and much more.  We have more sparkle, bling and glitter vinyl than all our competitors.

Here’s what we’re looking for…
• Creative Designers who have a blog and are active on Social Media.
• Designers who can commit to a one-year term beginning March 1st.
• Designers will be expected to create one project each month including photos and basic instructions and post to your blog and social media by the 5th of each month.
• US Designers Only

Here’s what you’ll get…
You will be provided a generous welcome package of current products and will continue to receive new products during your term. You will receive monetary compensation for your projects each quarter and will be eligible for additional monthly endorsements.

To Apply…
Email Markhlee@mac.com with your Name, Address, Website, and any other pertinent crafty information about yourself along with 2 to 3 pictures or projects you’ve made using vinyl.

Deadline to Apply is January 31, 2020.

*Disclosure:  This blog uses affiliate links.  If you choose to make a purchase using one of the links, I receive a small commission (at no additional cost to you) that helps offset the costs of maintaining this blog.  Thanks for your support!

Don’t throw away those Christmas Photo Cards!

What do you do with all those Christmas Photo Cards you’ve just received? 

Before you put all your Christmas Crafting Supplies away…

I have one last project for you to make.

The Beloved Christmas Photo Card.

I love annual Christmas photo cards and how it  shows how your family changes from

one year to the next.  I have a hard time throwing them away after the season is over.

What do you do with them besides putting them in a box?

This year, I finally decided to make an album to put them in.

The album had to be simple so that I can easily add the next years’ photo cards and easy

enough that I would actually do it.

This is how I made it…

  • I started with two 5-1/2″ x 8-1/2″ pieces of white matboard and two 12″ x 12″ pieces of Christmas Scrapbook paper.
  • I used my Xyron Creative Station* to add adhesive to the back of the scrapbook paper before adhering it to the matboard.  I added the second piece of scrapbook paper to the other side of the matboard.
  • I used my  Silhouette Cameo Electronic Die Cutting Machine* to create the words and cut them from Glittered Self Adhesive Vinyl from StyleTechCraft.
  • I added a small Christmas chipboard sticker on the front of the album to add dimension.
  • Punch a hole in the top of the matboard covers with a Crop-A-Dile Punch*.
  • Align the Photo Cards with the top cover and use a pencil to draw a mark on the card so you’ll know where to punch the hole.
  • Using a large book ring, I added my cards to my album with the most recent photo cards on top.

For your convenience here’s these are the products I used:    


*Disclosure:  This blog uses affiliate links.  If you choose to make a purchase using one of the links, I receive a small commission (at no additional cost to you) that helps offset the costs of maintaining this blog.  Thanks for your support!
“This is a sponsored post.  As a member of the StyleTechCraft Design Team I have been provided product in exchange for my creative ideas.  The views and opinions are my own.

Red Buffalo Plaid Hot Chocolate Bar

Fun and Easy Red Buffalo Plaid Party Ideas

The theme for this year’s Sue’s Holiday Workshop was “Mad for Plaid”.

To add to the fun of the event, I created a Red Buffalo Plaid Hot Chocolate Bar.

The Hot Chocolate Bar was simple to put together and was a big hit.

The most important part of the Hot Chocolate bar is the Hot Chocolate.

I went back and forth trying to decide on how I wanted to present the Hot Chocolate.

There are so many recipes online for delicious hot chocolate.

Because this was a “creative event”, I went with a little more creative approach.  (and simple)

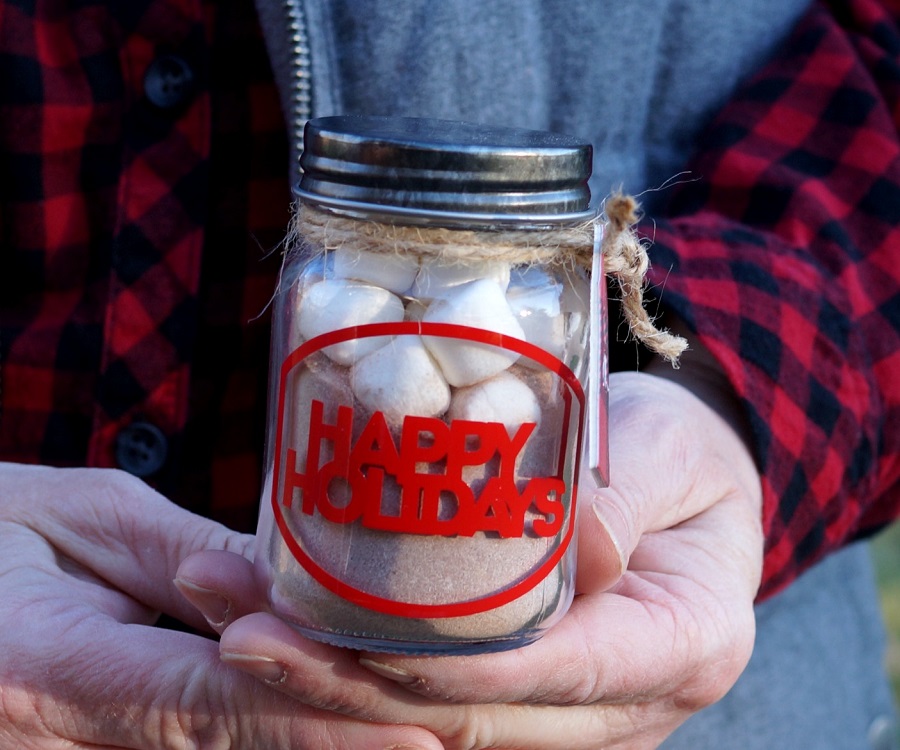
For my Hot Chocolate Jars…

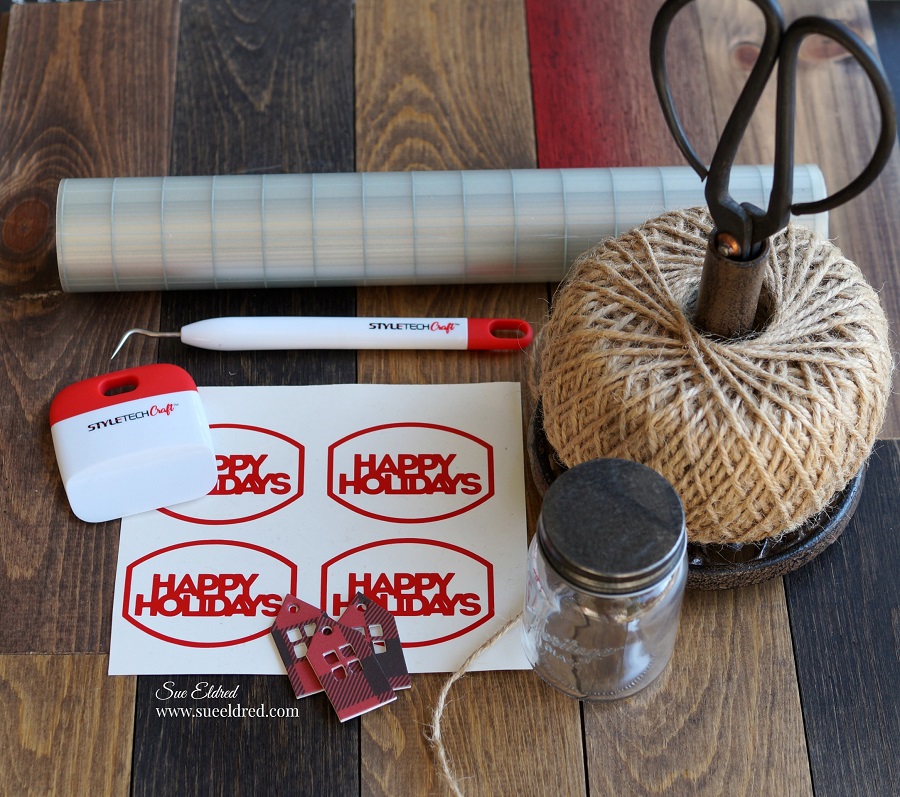
I found little tiny mason jars at Michaels Craft Store.  I created labels for the jars using a

Silhouette Cameo Electronic Die Cutting Machine* and Red Glossy Craft Vinyl from

StyleTechCraft.  I applied my labels onto the jars using Vinyl Transfer Tape* .

I tied a small plaid chipboard house made from Eileen Hull’s House Ornament Die*

with twine around the neck of the jar.

*Disclosure:  This blog uses affiliate links.  If you choose to make a purchase using one of the links, I receive a small commission (at no additional cost to you) that helps offset the costs of maintaining this blog.  Thanks for your support! 

The jars were filled with enough Hot Chocolate mix for one individual serving.  

They make a great party favor, and the guest gets to take home a cute little jar.

I put all the jars on the bottom of a plain black two-tiered metal stand.

I applied Red Buffalo Plaid Washi Tape* around the rim.

This little detail helped make it stand out and added to the theme.

On the top of the metal stand I added spoons, mini chocolate chips, candy canes.

I also left a place for a can of whipped cream (not yet added to this picture).

For the Table…

I used a black tablecloth for the base of my table and cut a red buffalo plaid runner from

plaid flannel.  (Sew Simple…I didn’t even sew the edges.)

It’s a really quick and inexpensive way to create the look

Air Pots filled with Hot Water made making the Hot Chocolate easy and mess-free.

For a vintage feel, I used large mason jars filled with extra hot chocolate mix,

extra marshmallows, and caramels.

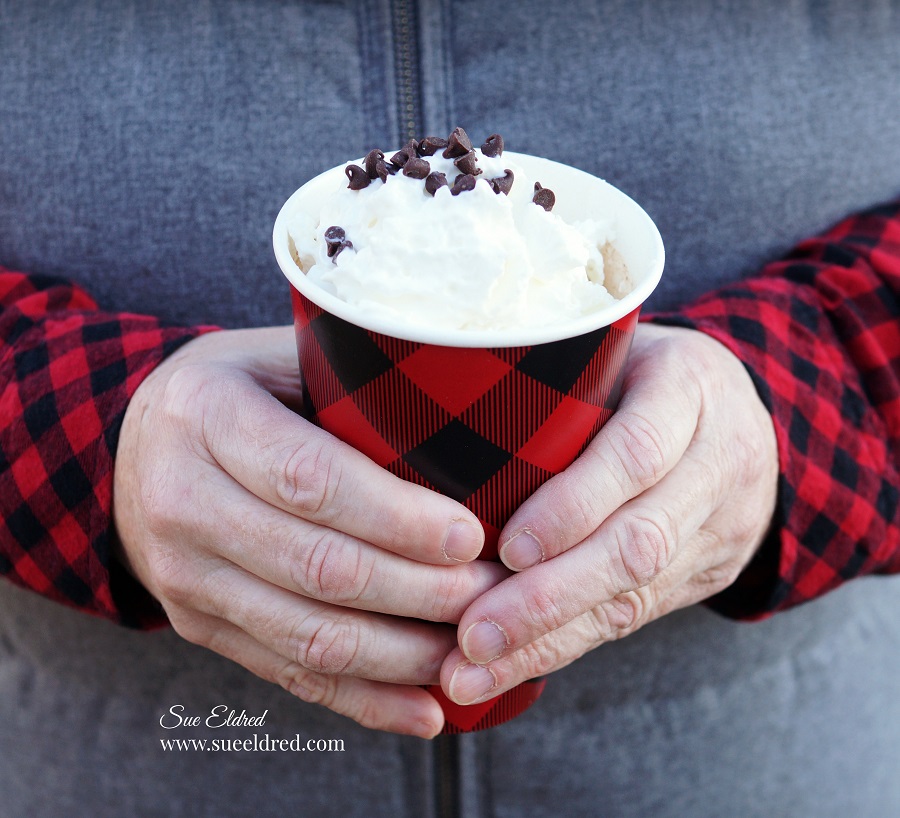
I picked up the Buffalo Plaid Insulated Coffee Cups* and Red Buffalo Plaid Party Supplies* online.

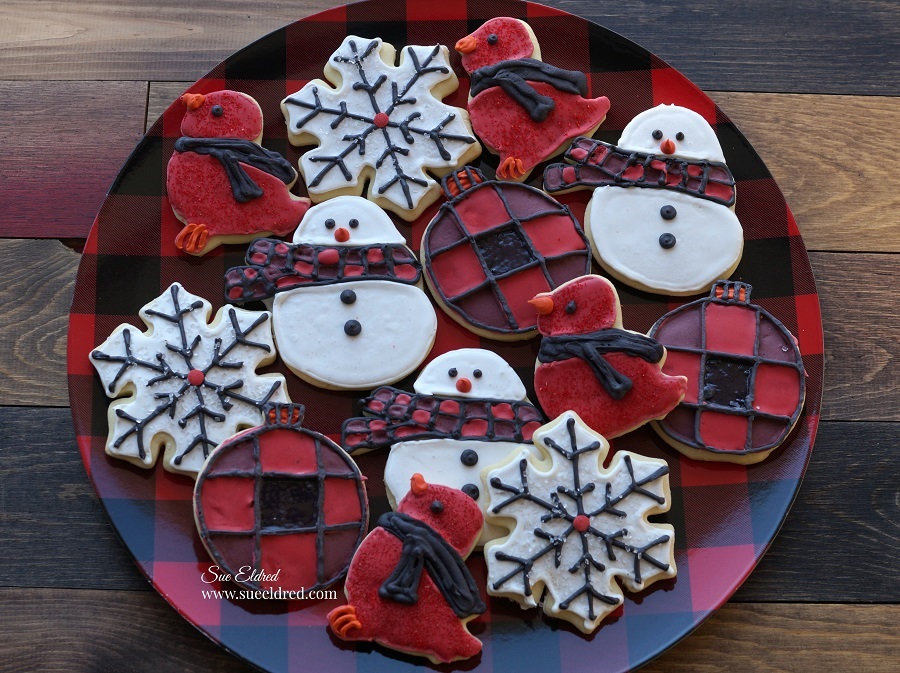
A Hot Chocolate Bar would not be complete without frosted sugar cookies.

My sweet daughter in law baked these sugar cookies from my favorite sugar cookie recipe.

You can see the sugar cookie recipe here.

(The little red bird was made using an Easter Chick cookie cutter.)

I made the Holiday Hot Chocolate Sign by painting a wood bracket sign with black chalkboard

paint.  I used a Silhouette Cut SVG file from the Silhouette Store and my Silhouette Cameo

Electronic Die Cutting Machine* and resized the image to fit my sign.

I used red and white glossy craft vinyl from StyleTechCraft.

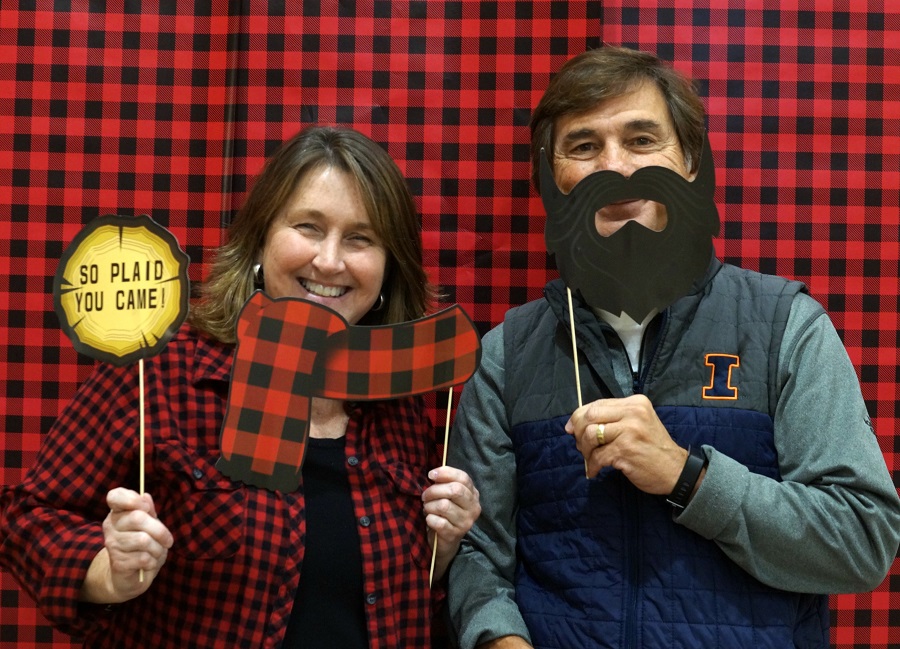
To complete the fun, I had fun Red Buffalo Plaid Themed Photo Props*.

I used Red and Black Buffalo Plaid wrapping paper on the background wall.

A fun way to break the ice and get the party started.

Red Buffalo Plaid Party Supplies Available on Amazon.

Always in my heart ❤️

A Christmas Ornament with Special Meaning.

The holidays are especially hard for people who have lost loved ones.

The year I lost my Dad, right before Christmas, I found it really hard to celebrate.

I found myself just going through the motions.

This year, I decided to make a special ornament to place on my tree to remind me

that my loved ones will always be in my heart.

At Christmas Time and Every Day.

To make my ornament…

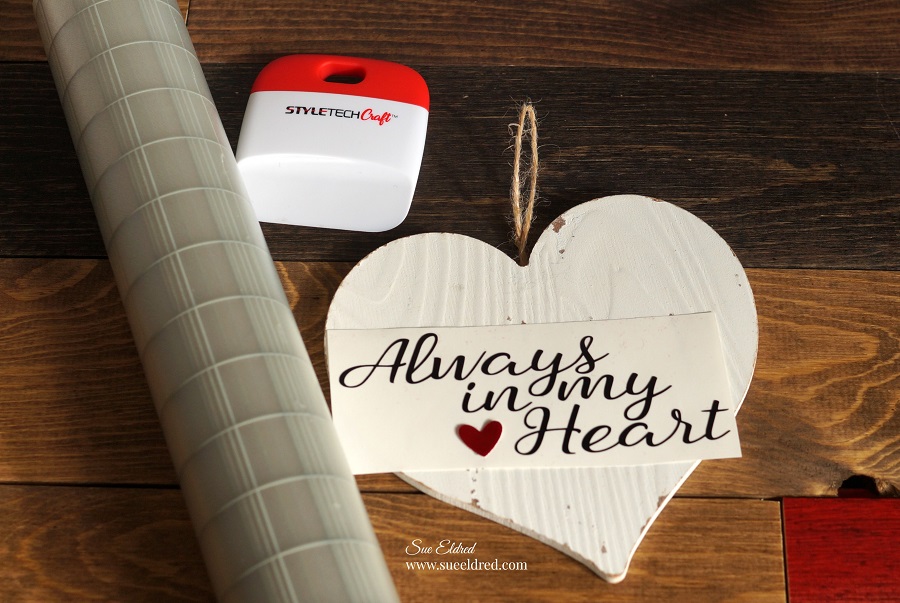
I used a simple whitewashed wood ornament that I picked up at Michael’s.

I cut the words “Always in my Heart” using my Silhouette Cameo Electronic Die Cutting Machine* out of matte black self adhesive vinyl from Styletech Craft.

*Disclosure:  This blog uses affiliate links.  If you choose to make a purchase using one of the links, I receive a small commission (at no additional cost to you) that helps offset the costs of maintaining this blog.  Thanks for your support!

Directions:

  • Using an electronic die cutting machine, I cut the words.
  • Using a weeding tool carefully remove the negative spaces in and around the letters.
  • Place a piece of Vinyl Transfer Tape* over the letters.  Rub over the letters using a vinyl scraper tool to help the vinyl cling
  • Apply words onto the whitewashed wood heart.

A simple little ornament and a whole lot of love.

You can now find the full line of StyletechCraft online at ATSM.


“This is a sponsored post.  As a member of the StyleTechCraft Design Team I have been provided product and compensation in exchange for my creative ideas.  The views and opinions are my own.