Translucent Vinyl Suncatcher

When I received the Translucent Vinyl from Tape Technologies,

I knew it would be perfect for making a Suncatcher.

The translucent vinyl comes in several great colors to choose from.

To make my Suncatcher I used a framed glass sample I rescued from the garbage.

You could also use a small frame and glue the glass into the frame.

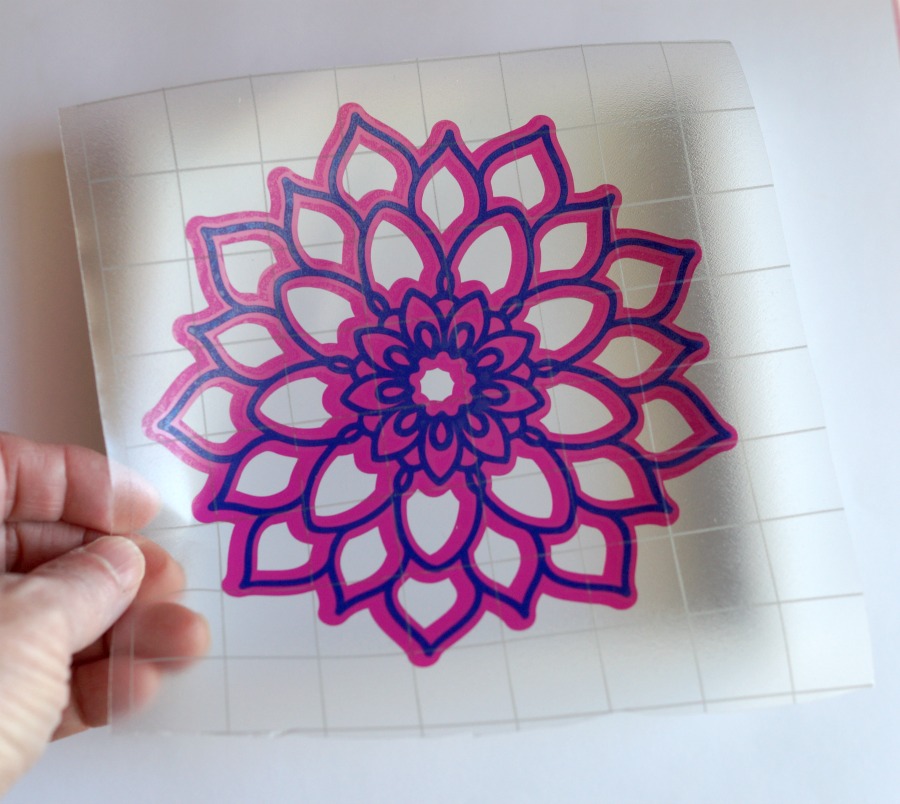
To create my shapes I used my Silhouette Cameo*and Jillibean Soup’s Floral Mandala cut file.

*Disclosure:  This blog uses ads and affiliate links.  If you choose to make a purchase using one of the links, I receive a small commission (at no additional cost to you) that helps offset the costs of maintaining this blog.  Thanks for your support!

I used the Vinyl Transfer Tape* to overlay the blue onto the pink.

I then transferred both images onto the glass to create the Suncatcher.

To create a little more sparkle I added adhesive rhinestones onto the glass.

Shop Your Fav Brands at Scrapbook.com

“This is a sponsored post. As a member of the Tape Technologies Design Team I have been provided product in exchange for my creative ideas, views and opinions.”

Ask for Self Adhesive Glitter Vinyl Sheets- by Styletech from Tape Technologies* at your local Scrapbook Store.

DIY Bloom Planters

“bloom where you are planted”

A little Inspiration for my Summer Flowers…

I’m not sure if it’s a subliminal message or a direct request.  (to my plants that is)

BLOOM!

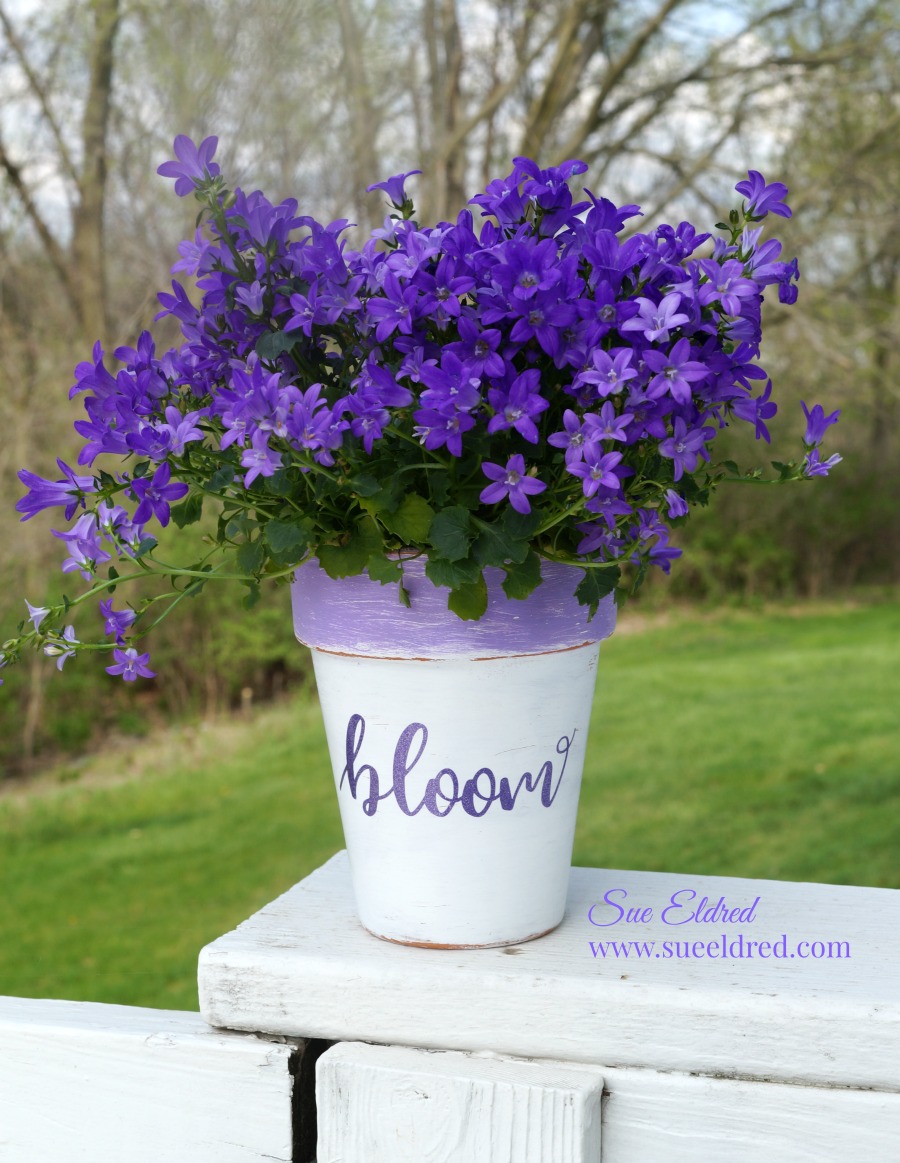
I picked up these beautiful purple flowers over the week-end and decided to spruce up a couple

of plain pots into something special.

FYI…the name of the plant with Campanula, a partial shade loving perennial.

How to make a DIY Bloom planter…              (*affiliate link)

  1.  Paint terra cotta pot with 2 coats of white paint.
  2. Brush a thin layer of purple paint along top band.  (no need to be perfect)
  3. Lightly sand pot for a distressed look.
  4. Using a cut file and the Silhouette Cameo*, cut the saying out of the purple glitter vinyl.
  5. Apply the saying onto the pot using transfer paper.  Smooth into place and remove transfer paper.

Shop Your Fav Brands at Scrapbook.com

*Disclosure:  This blog uses ads and affiliate links.  If you choose to make a purchase using one of the links, I receive a small commission (at no additional cost to you) that helps offset the costs of maintaining this blog.  Thanks for your support!

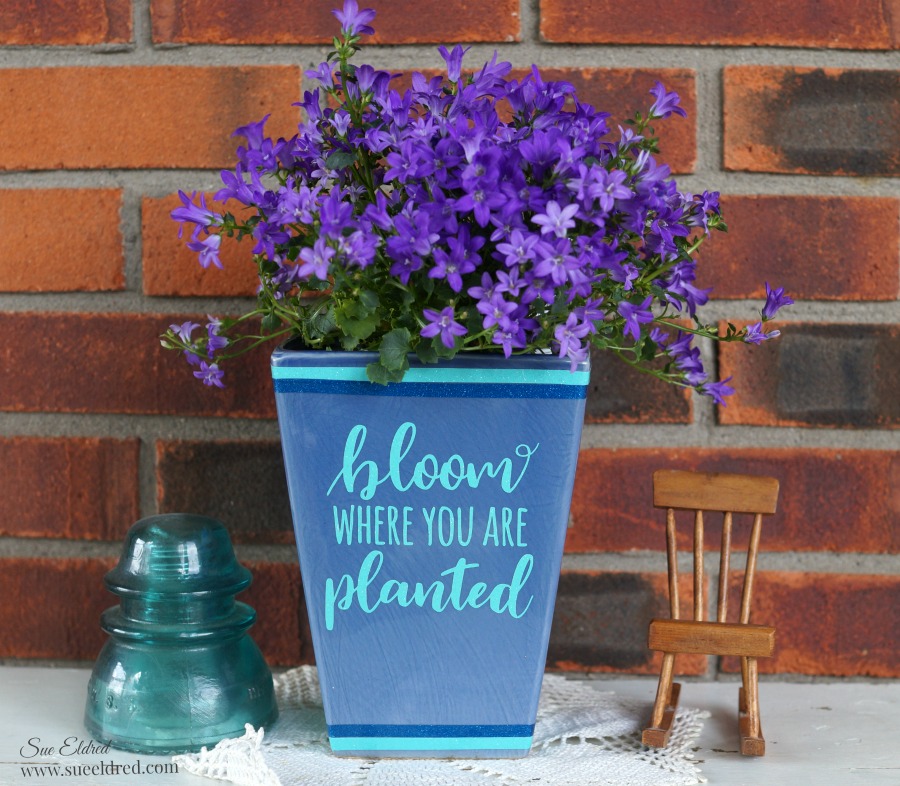
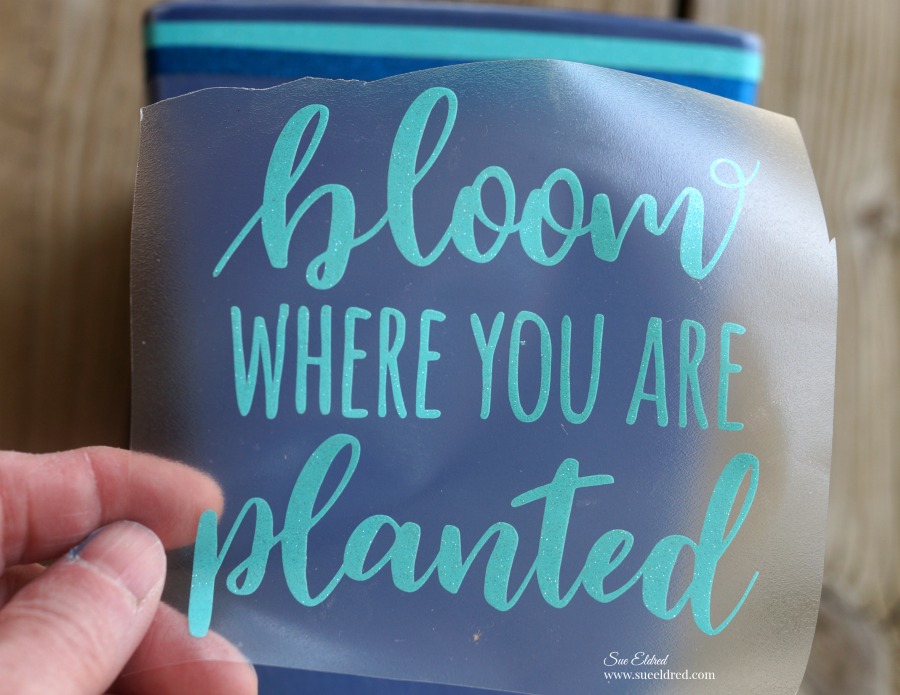
The blue ceramic planter was plain and simple until I added stripes using the glitter vinyl,

and applied the light blue glittered vinyl words using a Vinyl Transfer Tape*.

Perfect decorative accent for my summer front porch.  (or a great gift idea)


Don’t Miss a Thing…Make Sure to Follow me


Ask for Self Adhesive Glitter Vinyl Sheets- by Styletech from Tape Technologies* at your local Scrapbook Store.

“This is a sponsored post.  As a member of the StyleTechCraft Design Team I have been provided product and compensation in exchange for my creative ideas.  The views and opinions are my own.


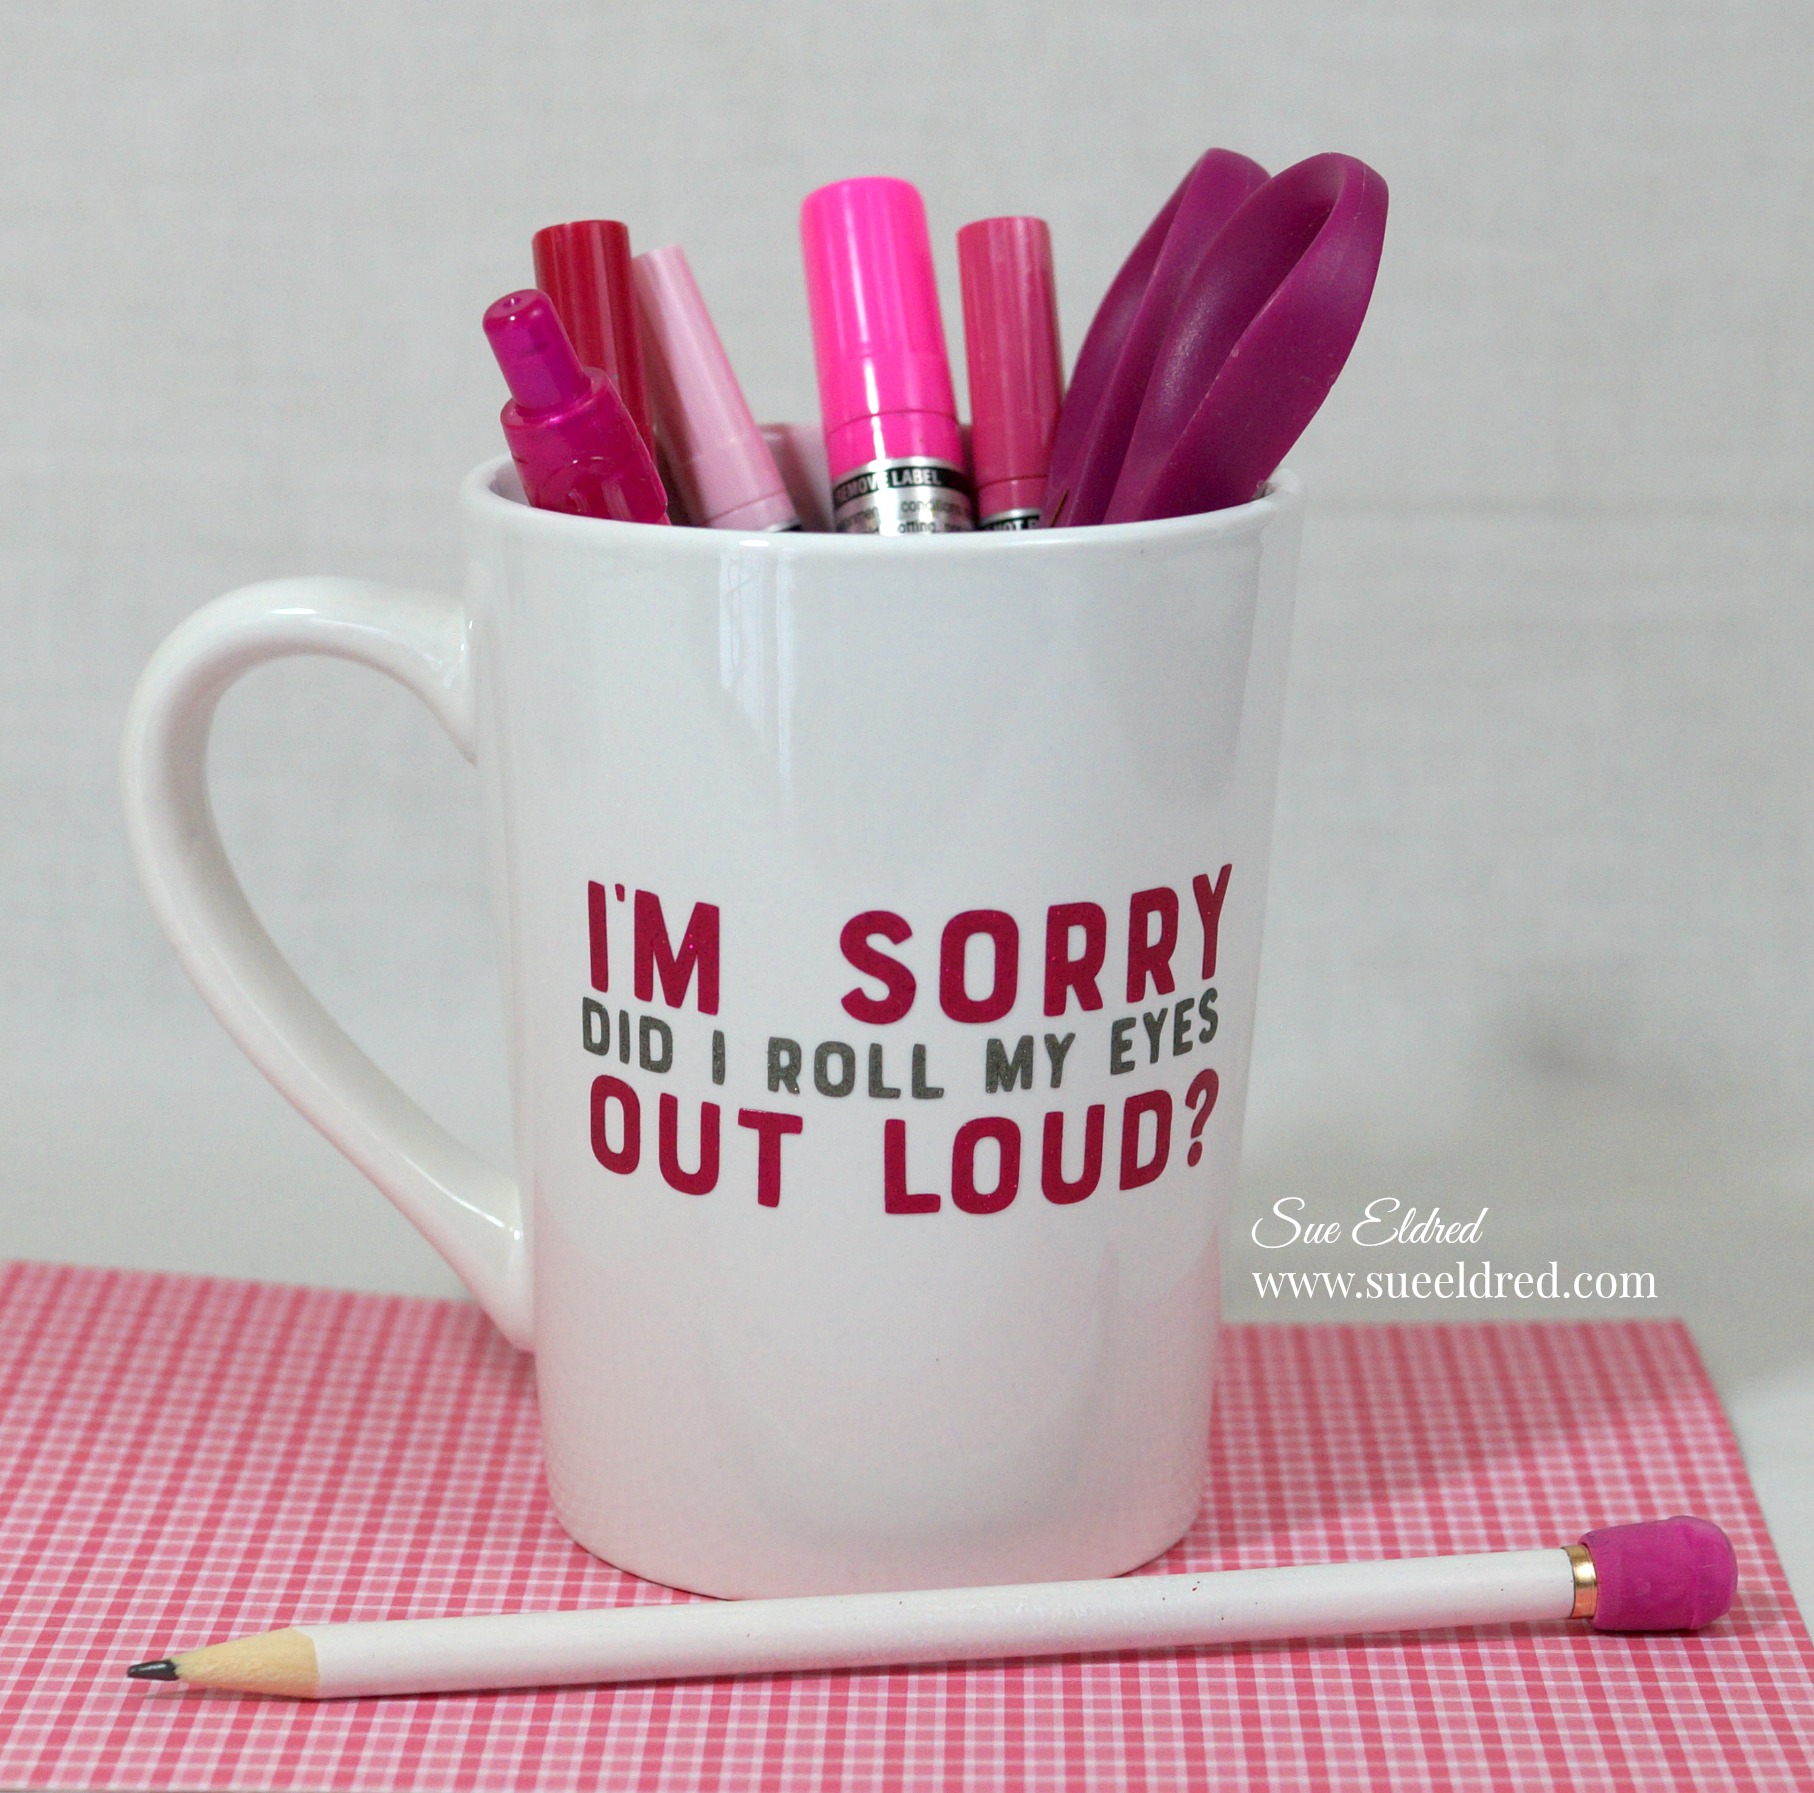
A Cup of Attitude

After I finished personalizing my new cup, I proudly ran downstairs to show it to my husband.

“I don’t get it”  was his response.

“It’s a cup of Attitude”, I replied.  (I still don’t think he got it.)

I’m generally a very sweet and nice person.  

But sometimes…if you could only hear the snarky comments rolling around in my head,

you just might think otherwise.  I keep it to myself most of the time.  (or at least I try)

The struggle is real.

To personalize my cup…                              (*affiliate links)

  •  I used my Silhouette Cameo* to cut out a cute saying from Jillibean Soup out of translucent

Self Adhesive Glitter Vinyl Sheets- by Styletech from Tape Technologies*

  • I picked up the plain white cup at Dollar Tree* for only $1.00.  (*affiliate link)

Dollar Tree is the perfect place to find inexpensive glassware to personalize with vinyl.

Directions:

  • Clean the cup with warm soapy water to remove any grease or residue.
  • Apply the hot pink glittered  vinyl words onto the cup using a Vinyl Transfer Tape*.
  • Next, add the gray glittered vinyl words.
  • The Vinyl Transfer Tape*  makes it easy to line up the words.
  • Wait 4 days for the adhesive to fully cure before using the cup.
  • It is recommended to hand wash only.  (I have put mine in the dishwasher, just saying.)

If you need to keep your attitude a little more subdued…

the cup also makes a great pen holder.

Shop Your Fav Brands at Scrapbook.com

“This is a sponsored post. As a member of the Tape Technologies Design Team I have been provided product in exchange for my creative ideas, views and opinions.”

*Disclosure:  This blog uses ads and affiliate links.  If you choose to make a purchase using one of the links, I receive a small commission (at no additional cost to you) that helps offset the costs of maintaining this blog.  Thanks for your support!

Shop Amazon Scrapbooking Supplies*

“Dyeing” for Spring

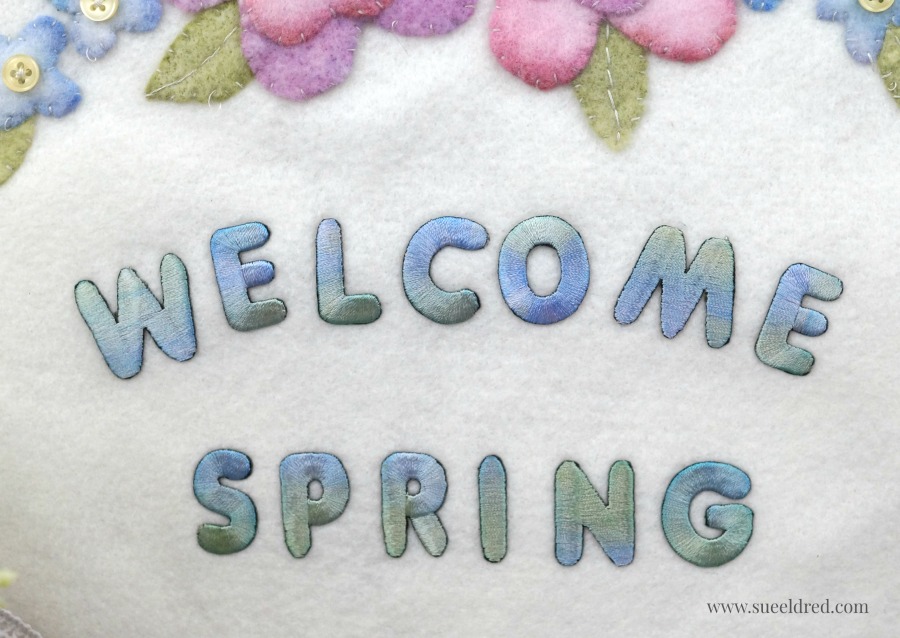
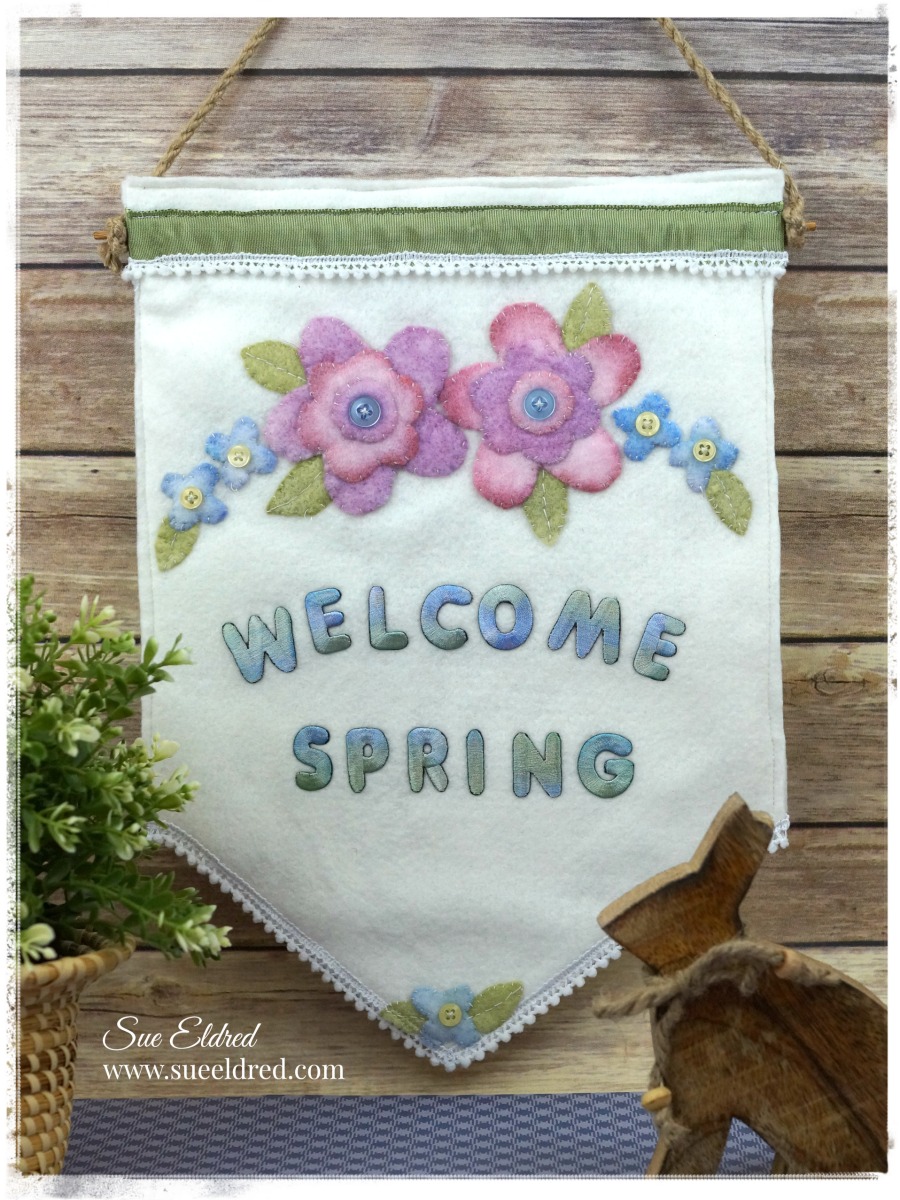
Welcome Spring with all your beautiful flowers, warmer days and everything renewed.

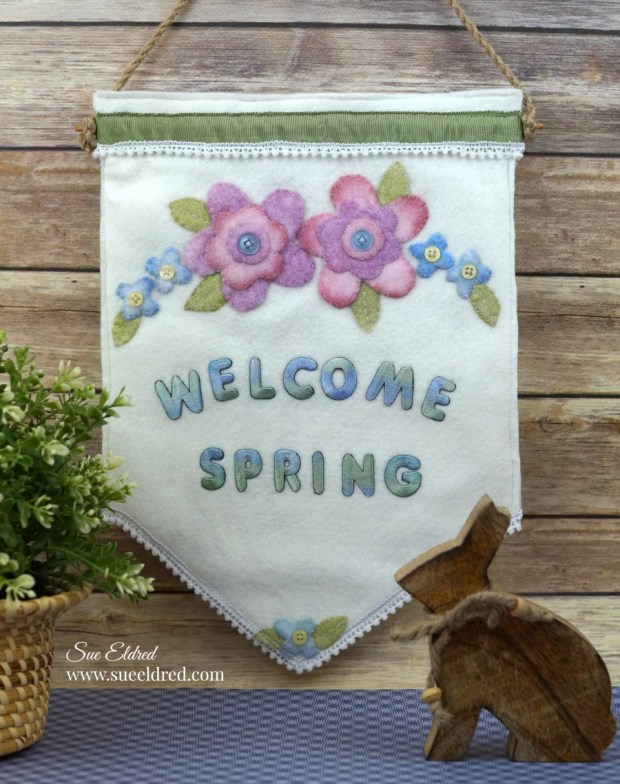
My Welcome Spring Banner turned into a real labor of love.

I began this project with the idea of using fun pink and purple hand cut felt flowers.

After I cut all the flowers and leaves, I decided to dye the embroidered letters.

The letters turned out so soft and delicate, I needed something softer for the flowers.

So…more flowers and more dyeing!  (make sure to read all the instructions below.)

I could of kept things simple and glued all the flowers in place, but noooo…

instead at the last minute I committed myself to stitching the entire thing.

Let me tell you…I’m not a stitcher!    (But, I am pretty satisfied by the way they turned out.)
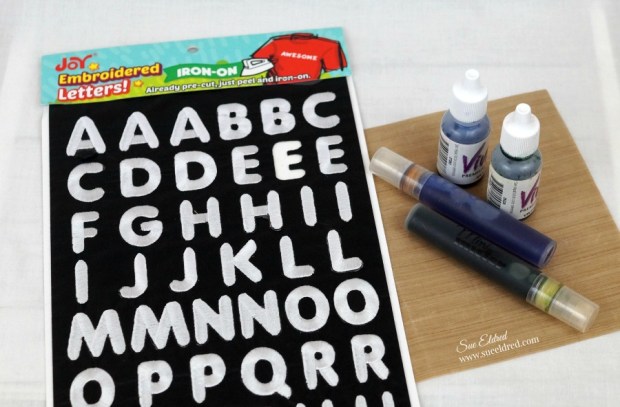
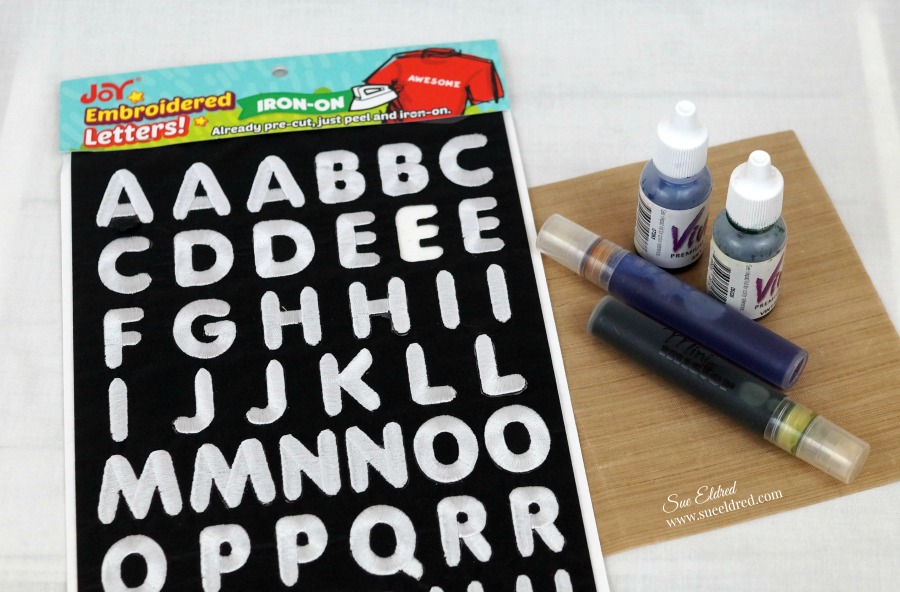
To make the Welcome Spring Banner you’ll need:

  1. Add several drops of dye ink to each misting bottle.
  2. Remove letters from backing sheet and place on a Non Stick Craft Mat* or (wax paper).
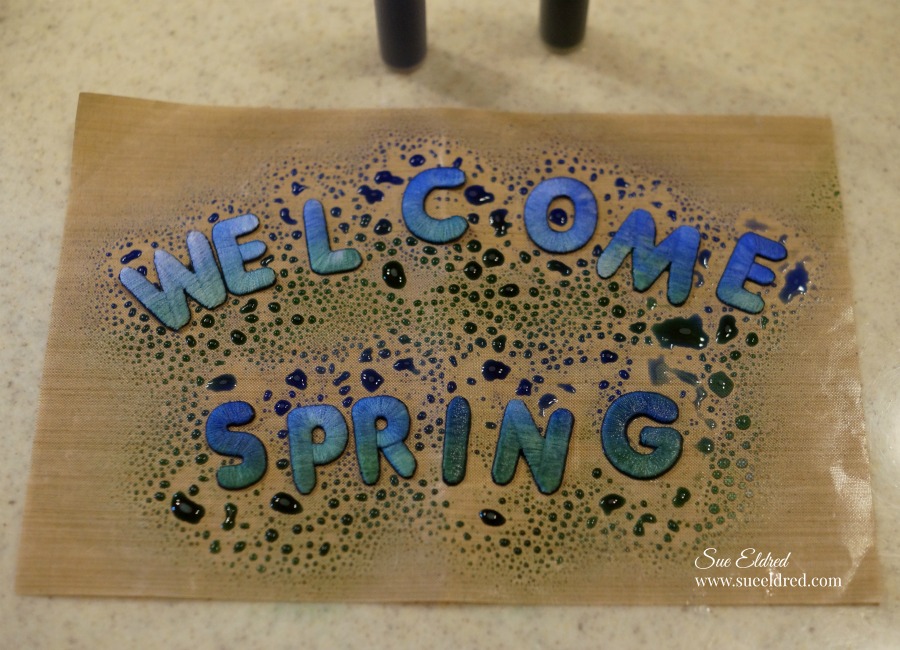
  3. Spritz the letters with both blue and green ink for a variegated look.  Allow the ink to soak into the letters then dab away excess ink and water with a paper towel.  Let dry.
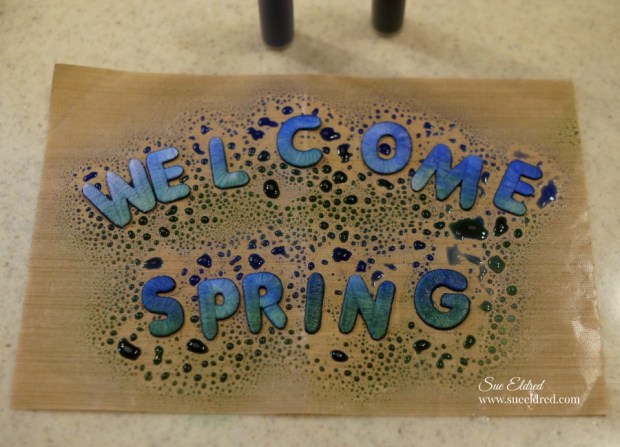
Look at how beautiful the letters dried.  ↓

4.  Create simple, hand drawn flowers (small, medium and large), circle and leaf patterns onto plain white paper.  Cut then trace around the patterns onto white felt.  Cut out.

5.  Spray the leaves green, set aside then spray the flowers and circles one color at a time.  Allow them to dry overnight.

6.  Layer the circle, small flower and large flower on top of each other then stitch in place.  Use a small amount of glue to hold the pieces in place while you stitch.

I love how the ink pooled at the edges of the pink flowers!

7.  To create the banner shape, fold a 10″ x 14″ piece of white felt in half lengthways.  Cut diagonally across the bottom from the center fold to a point about 3″ up from the bottom corner on the outer edges.  Stitch the flowers to the banner using a button at the center of each one.  Tuck leaves underneath the outer edges of the flowers then stitch in place.

8.  Set iron to cotton setting, approx. 350°, or follow garment care label.  Position letters with shiny side down on felt, then iron the letters in place as shown.  Cover letters with a fine cloth.  With firm pressure, iron cloth over the letters for 30 seconds.  Turn banner over and iron the back of the letters for 30 seconds.

9.  Use a sewing machine to stitch the banner to backing material, then stitch trim in place across the top and around the bottom edge if desired.
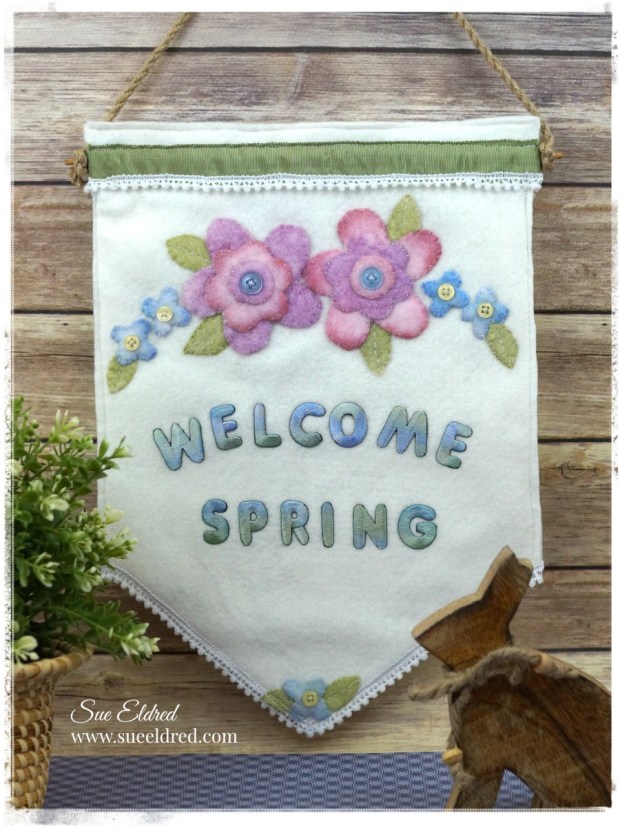
 If you need to finish your banner in less time, glue the flowers, leaves and trim in place, then use a fusible interfacing to adhere the felt banner to a backing.

Look for Joy® iron-on embroidered alphabet letter sheets at your local craft store.

My “Welcome Spring” banner was created for and sponsored by Joy SA.

Shop Your Fav Brands at Scrapbook.com

*Disclaimer:  This post uses ads and affiliate links.  If you choose to make a purchase using one of the links, I receive a small commission (at no additional cost to you) that helps offset the costs of maintaining this blog.  Thanks for your support!

Try Amazon Prime 30-Day Free Trial

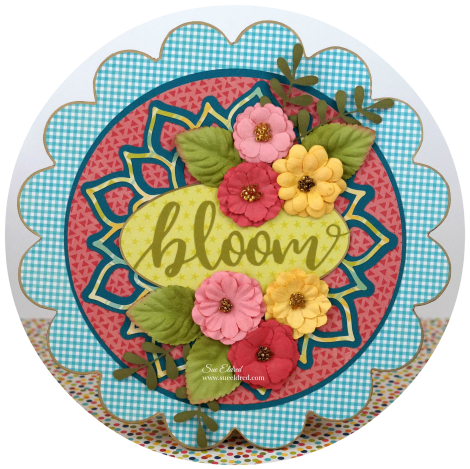
DIY Bloom Floral Plaque

Bloom into Spring with this DIY Bloom Floral Plaque.

I admit it…I’m an adhesive snob.

There’s nothing worse than spending hours on a project and then it  comes undone

from using the wrong adhesives.

I tell people all the time “not all adhesives are created equal”.

That’s one reason why I was so excited to be on the Xyron 2018 Design Team.

Xyron has Good Adhesive!

The DIY Bloom Floral Plaque is the first of many projects to come using Xyron.

DIY Bloom Floral Plaque Products Used:    (*Affiliate Links)

*Disclosure:  This blog post uses affiliate links.  If you choose to make a purchase using one of the links, I receive a small commission (at no additional cost to you) that helps offset the costs of maintaining this blog.  Thanks for your support!

How to make a DIY Bloom Floral Plaque…

  • Lay a piece of a 8 1/2″ x 8 1/2″ piece of decorative scrapbook paper (design side up) on the Xyron Creative Station, 9″* crank the handle to run the paper through the machine.  As it moves through the Xyron Creative Station it adds adhesive to the back side of the paper.
  • Easy to use and it doesn’t need any electricity.

       You get complete coverage, no gluing, no wrinkling, no bubbles!

  • Lay Wood Flower Shaped Plaque onto the adhesive side of the paper.
  • Carefully cut around the wood shape with a craft knife and craft cutting mat.

  • Gently sand away rough-cut edges on the paper using an extra fine sanding block.

  • I used my electronic die cutting machine and cut files to create pieces for my background.  The Xyron Creative Station* is great for adding adhesive to the back of intricate pieces.

  • After the layers are adhered together, I use the XYRON Adhesive Eraser* to remove any extra adhesive from the edges of my pieces.  Remember to use a gentle touch.

The XYRON Adhesive Eraser* is one of my favorites must have tools.  I keep it on my desk at all times.

I think every paper crafter should carry one in their supply box.

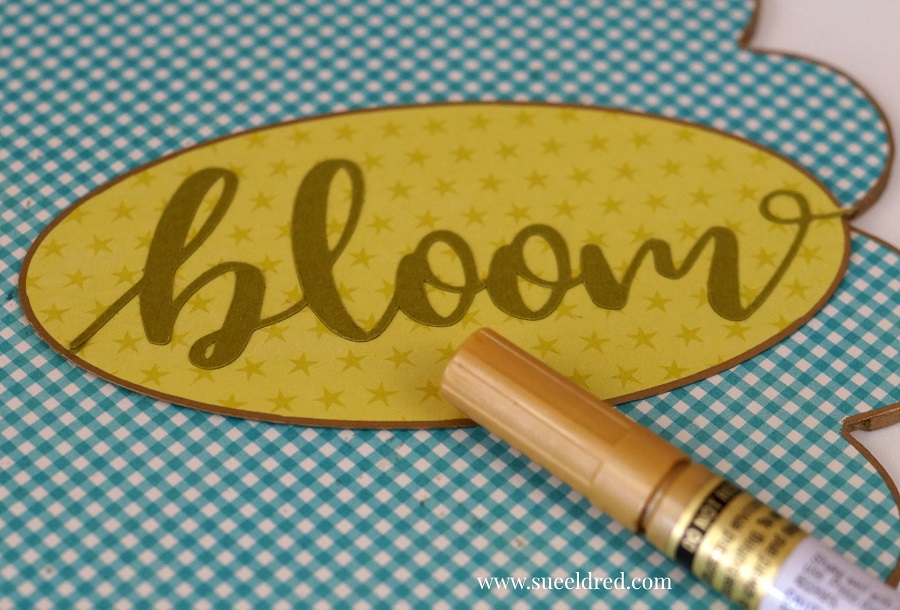
  • For added detail…use a gold paint pen to edge around the outside of the Wood Flower Shaped Plaque and the decorative scrapbook paper oval.

  • My Xyron Creative Station* makes quick work of assembling all the pieces of my DIY Bloom Floral Plaque.
  • Finish embellishing the plaque with a few paper flowers glued into place with craft glue.

 “This is a sponsored post. As a member of the Xyron Design Team I have been provided product and compensation in exchange for my creative ideas.  The views and opinions are my own.”

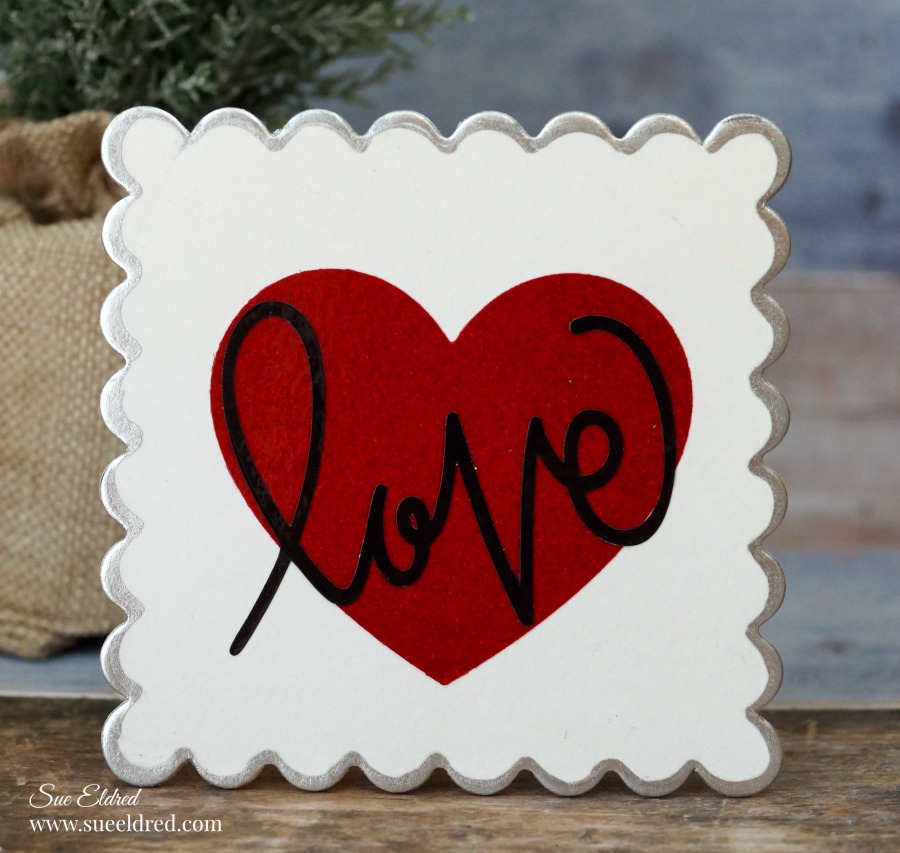
How to make a Love Coaster with Easel

A Quick and Easy, DIY, Valentine’s Decoration or Gift.

The “Love Coaster with Easel” is one of the projects that I made at the StyleTechCraft

booth while at Creativation last week.  

Everyone loved how easy it is to make an easel using a clothespin.

Materials Used:              (*affiliate link)

*Disclosure:  This blog uses ads and affiliate links.  If you choose to make a purchase using one of the links, I receive a small commission (at no additional cost to you) that helps offset the costs of maintaining this blog.  Thanks for your support!

To make the Love Coaster…                               

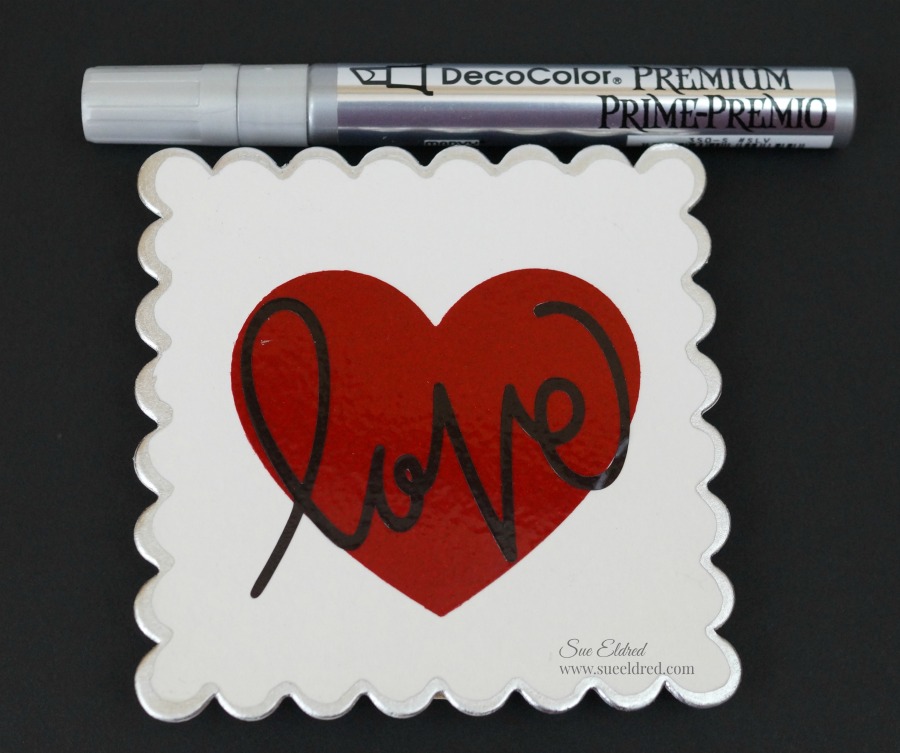
  • You can use Plain White Square Coasters* or…I made my scalloped coaster using a steel rule die and white chipboard.
  • Cut a heart out of Translucent Red Glittered Vinyl from Tape Technologies using a thin metal die.  Apply the glitter heart to the coaster using a transfer paper made for vinyl.
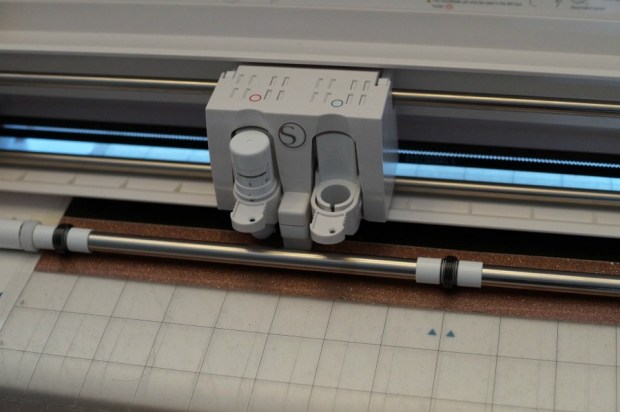
  • Using my Silhouette Cameo Electronic Die Cutting Machine*, I cut the word “love” out of Black Glittered Translucent Vinyl and applied it directly over my heart using transfer paper.
  • I edged the sides of my coaster in silver, using a Silver Leaf Paint Pen*.

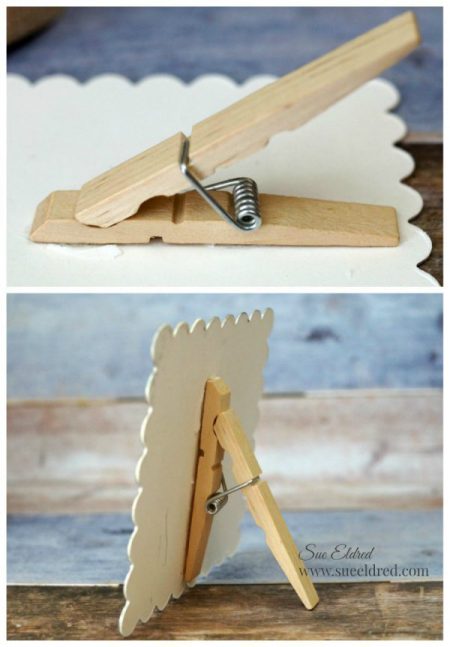
How to make an easel using a clothespin.

To make the Easel…

  • Glue a Wooden Clothespin* on the back of the coaster with Rapid Fuse Adhesive*.
  • Pull the clothespin open just enough so that the round metal spring comes slightly out of its groove.  (Some clothespins work better than others so you might need a little luck.)
  • To keep the clothespin from snapping shut…glue the top ends of the clothespin together.

Love Coaster-Sue's Creative Workshop-www.sueeldred.com 1576

A couple of guys at the show made theirs into Valentine’s cards.

I told them all they had to do was add a sweet note inside and, they were set.

Maybe I should have told them including flowers and chocolates is also a good idea.

“This is a sponsored post.  As a member of the StyleTechCraft Design Team I have been provided product and compensation in exchange for my creative ideas.  The views and opinions are my own.

You can now find the full line of StyletechCraft products online at ATSM.

Give the Gift of Amazon Prime*

DIY…Mad for Plaid Baby Bib

Life gets messy sometimes…with this cute little washable flannel bib, it’s ok.

It’s no secret that I love plaid, especially red plaid.

And…since I had red flannel left over from a pillow project,  I decided to make my sweet

grandson a cute little bib.  It never hurts to have a extra bib or two for those times when

he needs to get messy.

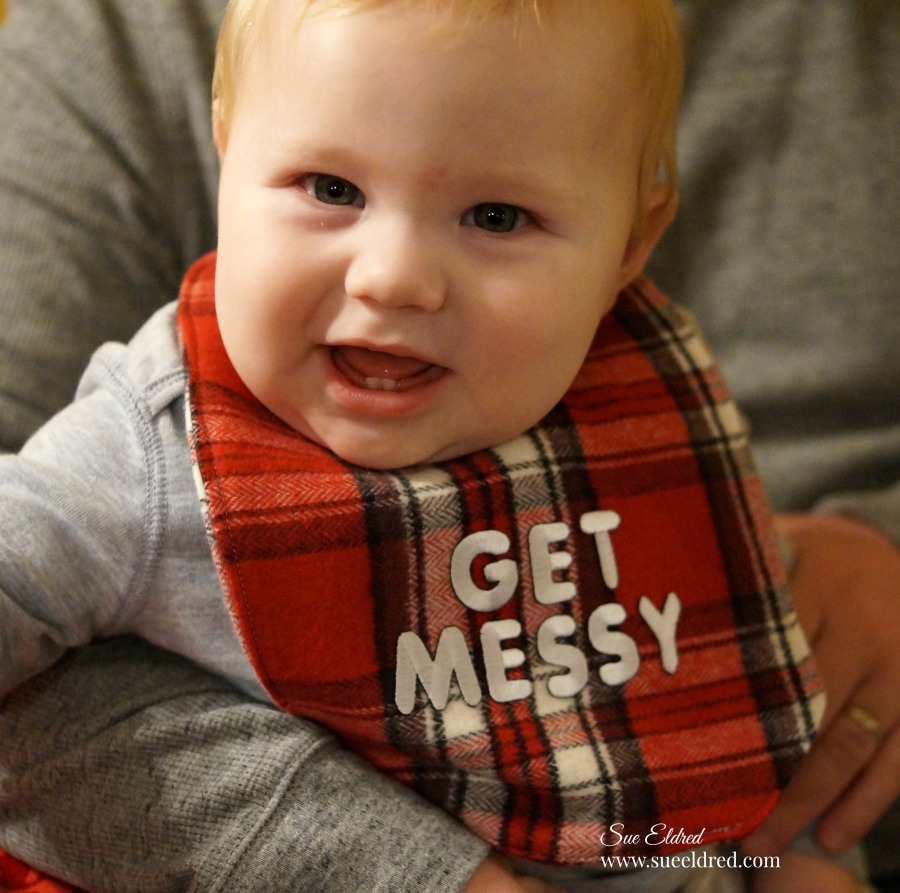
This is how I made my “Get Messy” flannel bib…

  • I made a pattern for my flannel bib by folding an old bib in half and laying it “fold to fold” on a folded piece of cardstock.
  • I wanted the new bib to be a little bigger than the original bib, so, I sketched it with pencil marks to extend the pattern.
  • Cut out the pattern and trace two bibs onto the flannel using a black permanent marker.  Cut out bibs from the flannel.
  • Sew bibs together leaving space on one end to turn bib inside out.  Iron bib to make it lay flat.
  • Sew a top seam around bib and to close the open end.
  • Personalize the bib using Iron-on Embroidered letters from Joy SA.
  • Attach Velcro on each end to close bib.

My “Get Messy” bib was created for and sponsored by Joy SA.

Sew Cute Baby Bibs

*Disclaimer:  This post uses ads and affiliate links.  If you choose to make a purchase using one of the links, I receive a small commission (at no additional cost to you) that helps offset the costs of maintaining this blog.  Thanks for your support!

Try Amazon Prime 30-Day Free Trial
Happy New Year 2018

Happy New Year 1249

By the time we get through all the Christmas Festivities and Parties….

I’m ready to stay in and eat pizza by the time New Year’s Eve comes along.

Relaxing and low key is the answer.

We may even toast the New Year, that is if he’s still awake.

Happy New Years-Sue's Creative Workshop-www.sueeldred.com 1198

Even though we’re not having a big party, Party Hats are always fun.

I must have been really good this year…

because Santa brought me a new Silhouette CAMEO 3 Wireless Cutting Machine*

I used my new present to whip up some simple party hats

Happy New Years-Sue's Creative Workshop-www.sueeldred.com 1203

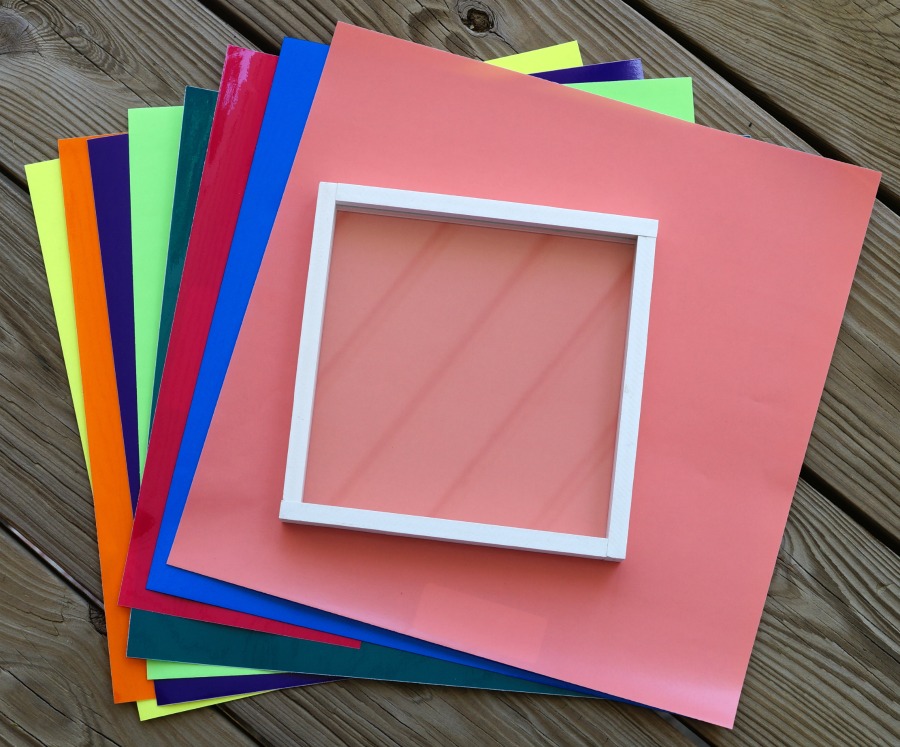
I used two strips of Ultra FX Glitter Vinyl from Styletech and laid them side by side.

I made sure my fonts lined up so that I could cut both colors at the same time.

Happy New Years-Sue's Creative Workshop-www.sueeldred.com 1208

  • I also cut a large mat shape from black cardstock and a slightly smaller mat shape using silver metallic vinyl.
  • I used the transfer paper to remove all the letters at once and laid them onto my shiny mat to create my hat.
  • I cut the bottom section of the mat shape and added a small strip of vinyl for extra decoration.  I created a band for my hat from two strips of cardstock and stuck the “happy new year” mat on the front.  (pretty simple)

Happy New Years Hat-Sue's Creative Workshop-www.sueeldred.com 1241

Now it’s a party.  (well sort of)

Shop Amazon Scrapbooking Supplies*

*Disclaimer:  This post is sponsored by Tape Technologies and uses ads and affiliate links.  If you choose to make a purchase using one of the links, I receive a small commission (at no additional cost to you) that helps offset the costs of maintaining this blog.  Thanks for your support!

Top Ten Blog Posts of 2017

As 2017 winds to an end…

It’s fun to look back through the year and pick which posts were your favorite (and mine too).

As a special treat, this year, I’m joining along in with a group of 40 awesome

Creative Bloggers in a Blog Hop sharing their top 10 favorite posts.

Prepare yourself for Creative Goodness Overload.


Shop Your Fav Brands at Scrapbook.com

If you’ve come from Tifany DeGough  your next stop would be  Melissa Elsner.

As promised here is the full list of the Top Ten Blog Hop…. (enjoy!)

Shop Amazon Scrapbooking Supplies*

*Disclaimer:  This post uses ads and affiliate links.  If you choose to make a purchase using one of the links, I receive a small commission (at no additional cost to you) that helps offset the costs of maintaining this blog.  Thanks for your support!

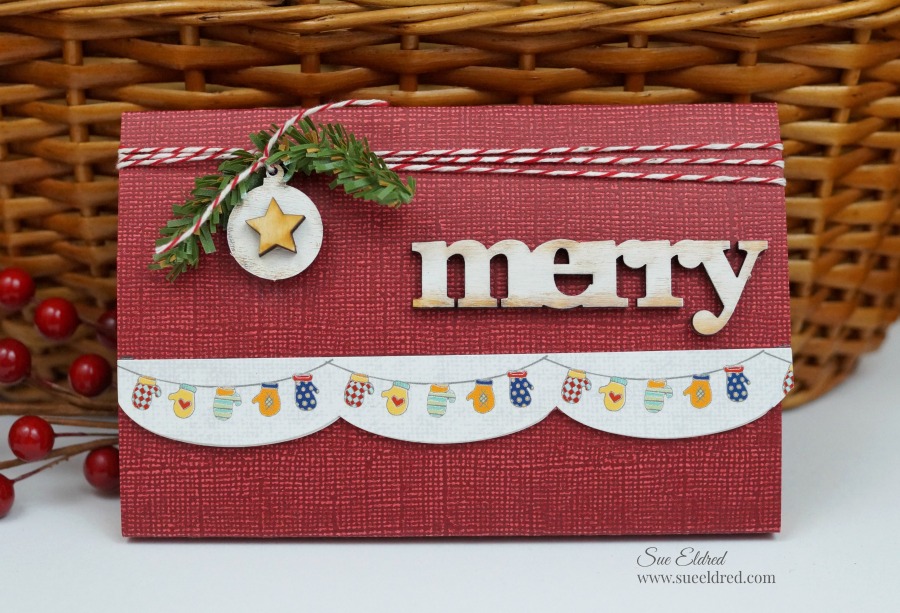
Merry Little Sticky Note Holder

Need a inexpensive gift idea to give a teacher or co-worker?

The Merry Little Sticky Note Holder is a quick and easy project that you can make

in just minutes.

How to make a Merry Little Sticky Note Holder

Supplies Needed:                 (*affiliate link)

*Disclaimer:  This post uses ads and affiliate links.  If you choose to make a purchase using one of the links, I receive a small commission (at no additional cost to you) that helps offset the costs of maintaining this blog.  Thanks for your support!

Directions:

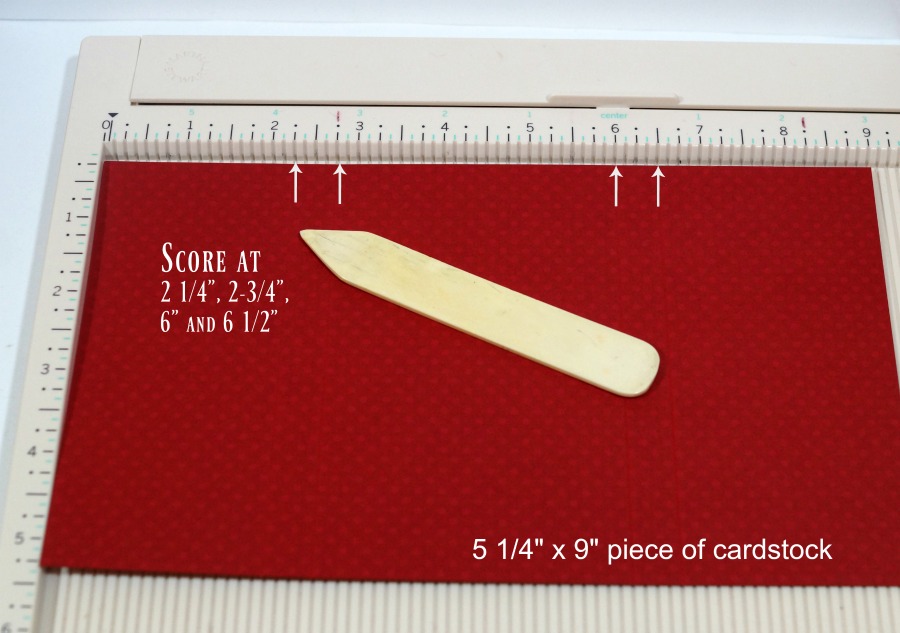
  1. Score a 5 ¼” x 9” piece of cardstock at the 2 ¼”, 2 ¾”, 6” and 6 ½” mark.
  2. Fold along scored lines.
  3. Make a ½” guide line on end of the scored cardstock for applying sticker border. Apply a small border on the guide line. Add a second border to the back of the first.
  4. Paint “merry” and “small ornament” from wood cut outs with white acrylic paint.
  5. Wrap red and white twine around top flap and tie ornament and greenery. Glue merry onto front flap.

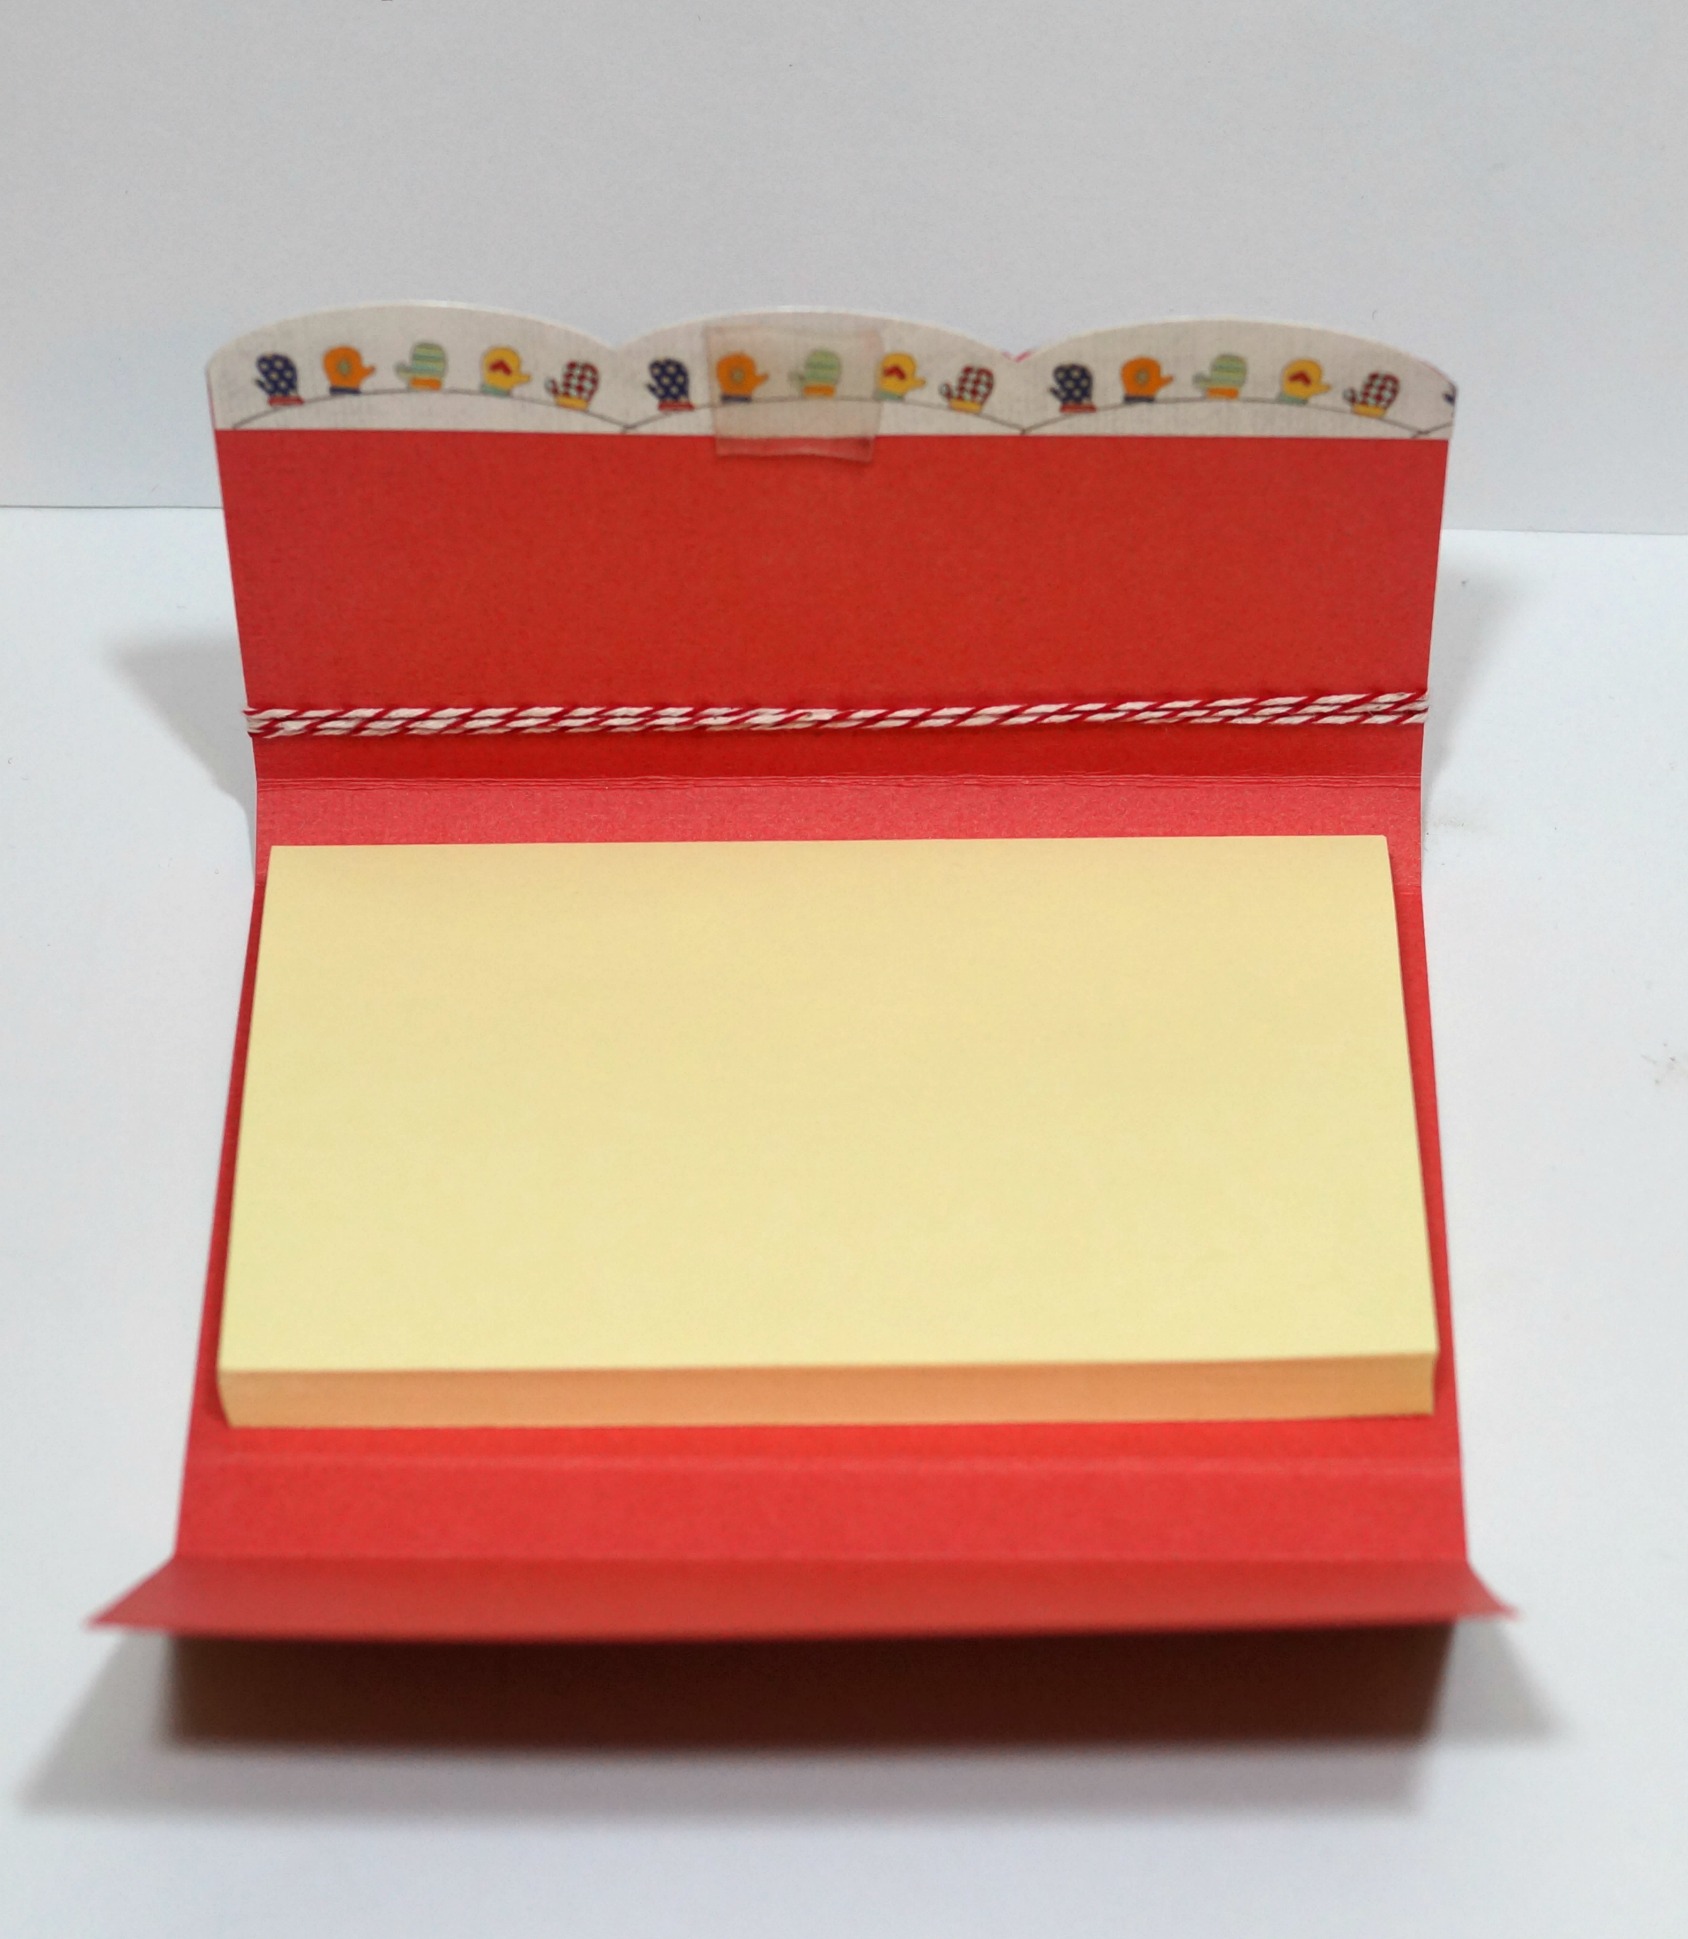
  6. Add restickable mini tab to the inside of the flap and add sticky notes.

You can purchase the Warm My Heart Sticker Sheet and Christmas Wood Shapes from Adornit.com.

Shop Amazon Scrapbooking Supplies*