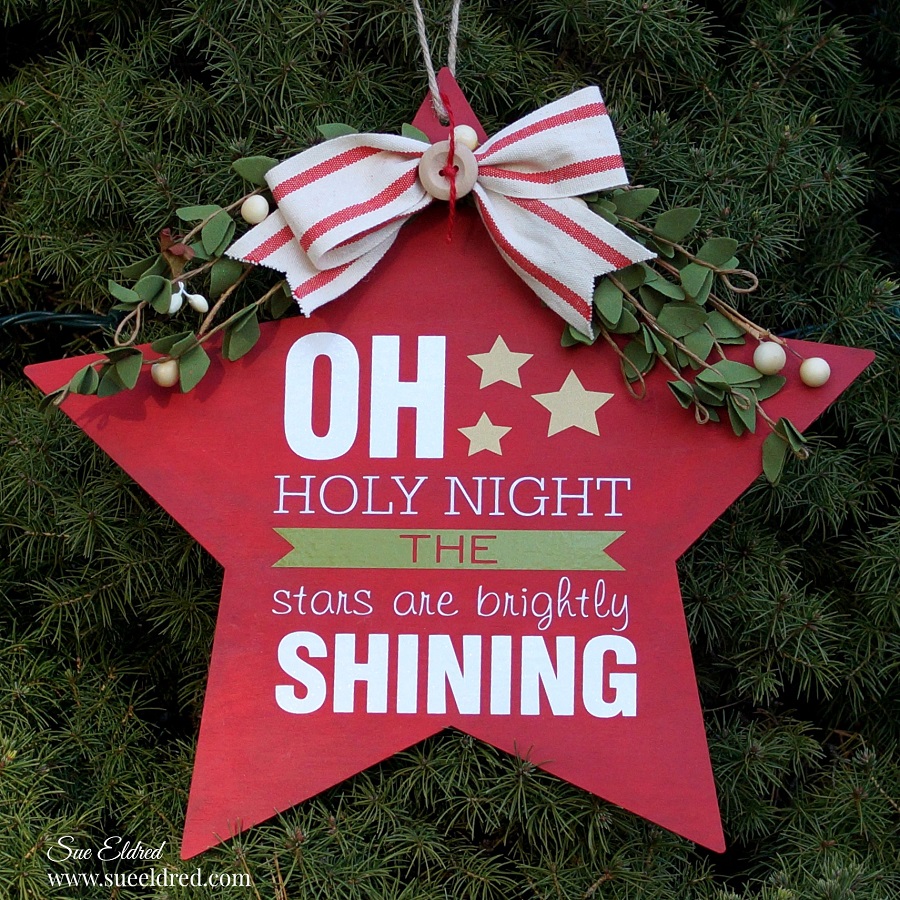
My very most favorite Christmas Song is Oh Holy Night.
The melody gets me every time. To me, it’s one of the most beautiful songs.
I love to close my eyes when listening to it. (And a good tenor can bring me to tears.)
I wanted a new Star to hang near the top of my tree this year, so I decided to make one using
my favorite song and an inexpensive wood star I found at Dollar Tree*.

*Disclosure: This blog uses affiliate links. If you choose to make a purchase using one of the links, I receive a small commission (at no additional cost to you) that helps offset the costs of maintaining this blog. Thanks for your support!

Add some of my favorite Glossy Craft Vinyl from StyleTechCraft, and I have what I need to make the perfect star for me.
Materials Used: (*affiliate link)
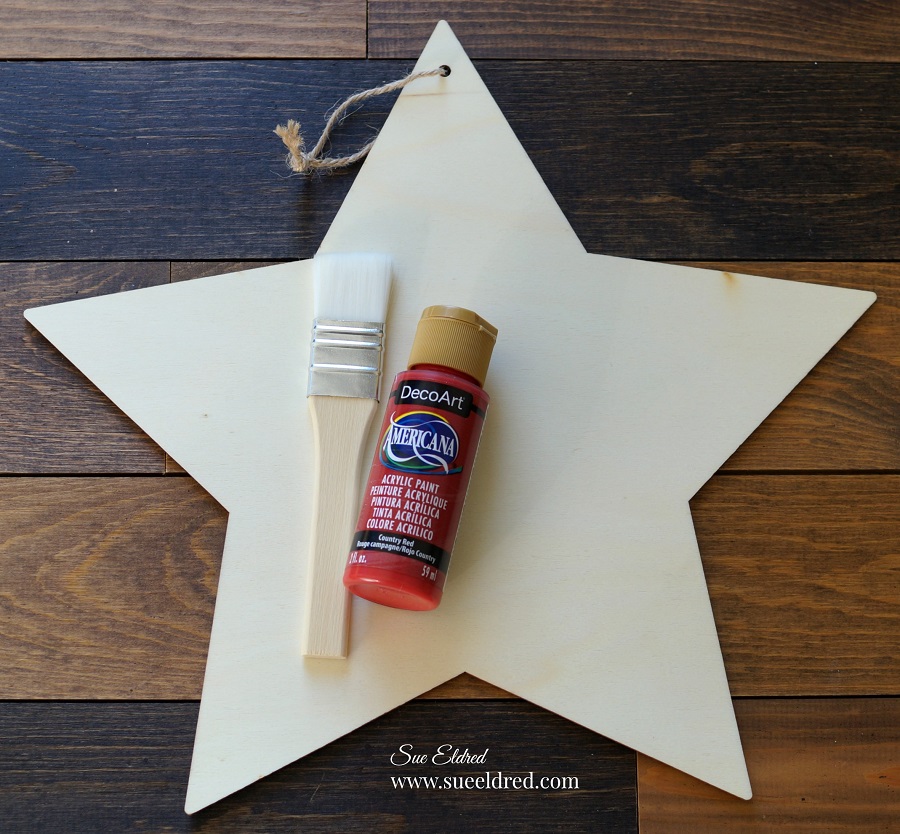
- 12″ Wood Star from Dollar Tree*
- DecoArt Americana Acrylic Paint, Country Red*
- StyleTechCraft Glossy Craft Vinyl: White*, Silver*, Gold*, and Olive*
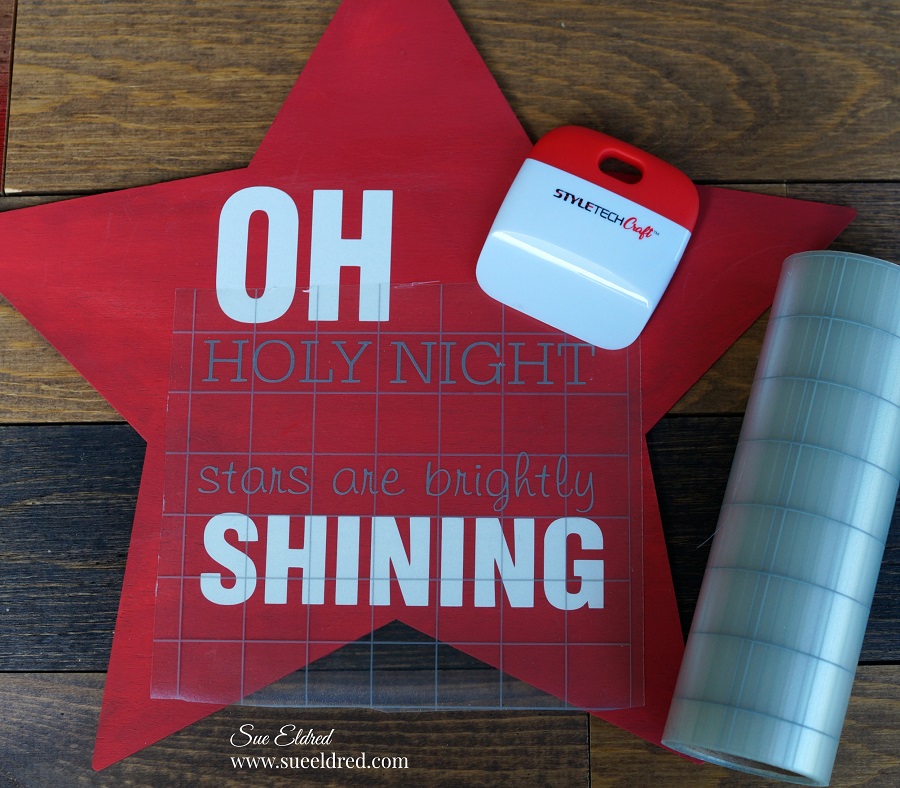
- StyleTechCraft Vinyl Tool Kit*
- StyletechCraft Grid Transfer Tape, Clear*
- Silhouette Cameo Electronic Die Cutting Machine*
- Oh Holy Night SVG file from the Silhouette Store
- Ribbon
- Greenery
- Hot Glue Gun

StyletechCraft products brought to you by ATSM Craft
Directions:
- Paint the wood star using the Country Red Acrylic Paint*.
- Use the Oh Holy Night SVG cut file and the Silhouette Cameo Electronic Die Cutting Machine*
to cut the pieces out of vinyl. (Make sure to keep the spacing the same as in the file.)
- Use the vinyl pick tool to remove the excess vinyl from inside and around the letters and banner.
- Cut a piece of Vinyl Transfer Tape* to fit over the vinyl words. Gently rub over the transfer paper using the squeegee tool. Lift the transfer tape to remove the vinyl from the white liner.
- Using the vinyl transfer tape, line up the white vinyl words “Oh, and Shining” onto the star first. Gently rub over the vinyl transfer tape using the squeegee tool to make sure all the image has transferred. Remove the transfer tape.
- Line up the silver words “Holy Night, and brightly shining” and place between the previous words. Continue with the gold stars and the olive banner. (It’s hard to see it from the pictures but the gold and silver stands out nicely on top the red star.)

Actually, the star would look fine, just as it is in the above picture.
But, I wanted to add a little ribbon and greenery on the top of my star to fancy it up.
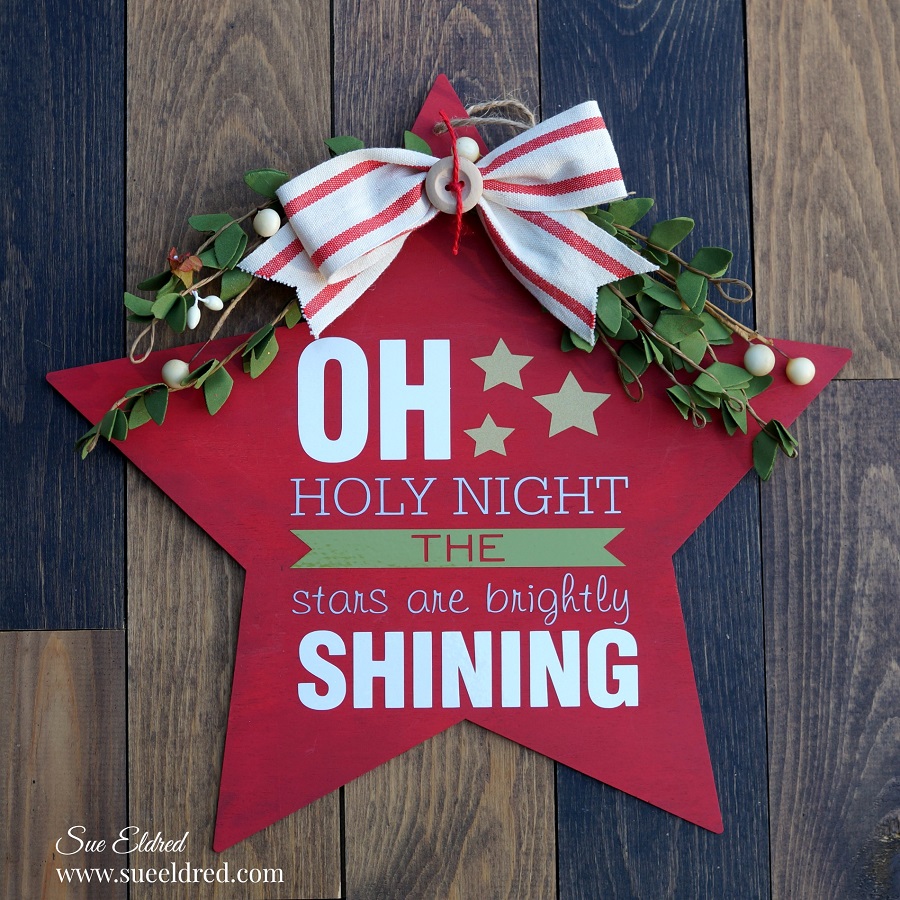
I’m really happy with the way it turned out. This Star will go near the top of my tree and will go
beautifully with my decorations. The Star would look great in the center of a Christmas wreath.
Or, if you used a smaller star, it would make a cute ornament.
![]()
“This is a sponsored post. As a member of the StyleTechCraft Design Team I have been provided product and compensation in exchange for my creative ideas. The views and opinions are my own.