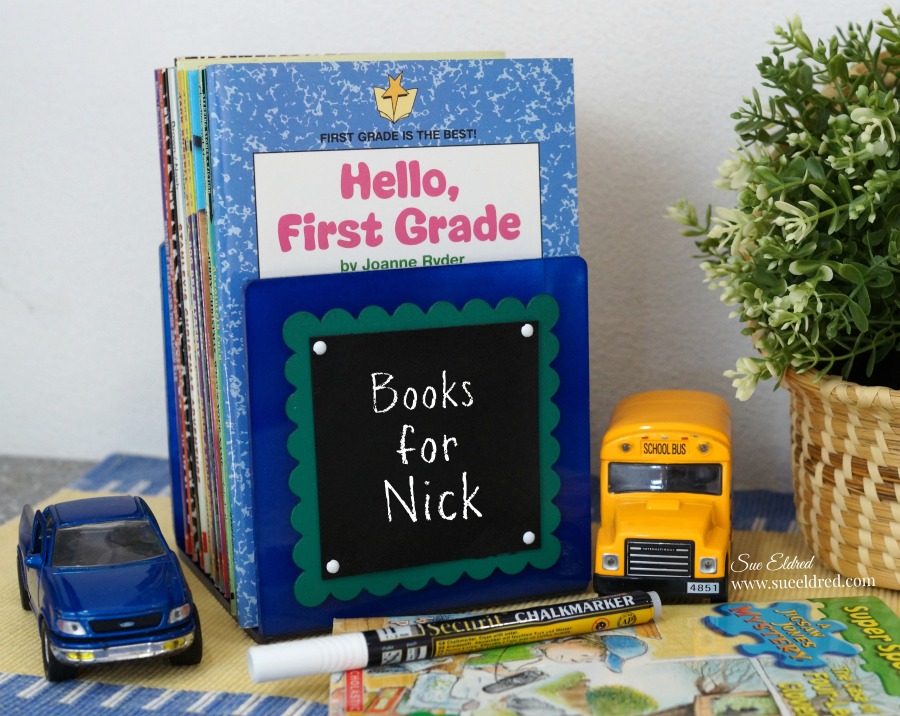
My grandson Nick learned to read this year in Kindergarten.
This new ability has renewed his love of books.
Not just any old book will do, it has to be a chapter book.
To keep Nick from rummaging through all the bookshelves…
I created a small book stand for him to use with all the age appropriate books
I’ve saved through the years. (He hasn’t seen it yet, I think he’s going to like it.)
To create Nick’s bookstand…
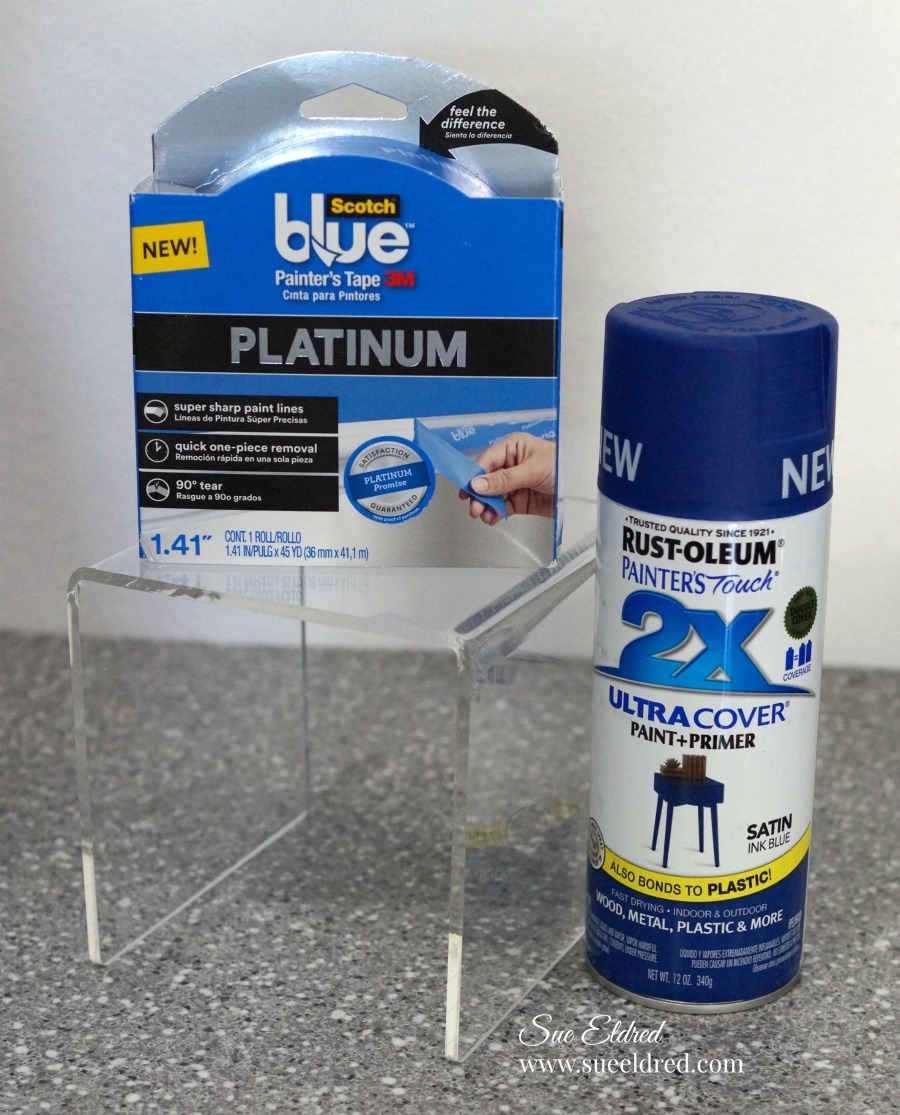
I used a Square Display Riser* (affiliate link) from a set of 3 acrylic risers I received from
Deflecto as part of my monthly Design Team box.

I covered the outside of the Square Display Riser* with ScotchBlue Platinum Painter’s Tape*
.

I sprayed the inside of the Square Display Riser*
with Rust-Oleum Painter’s Touch Multi Purpose Spray Paint*.
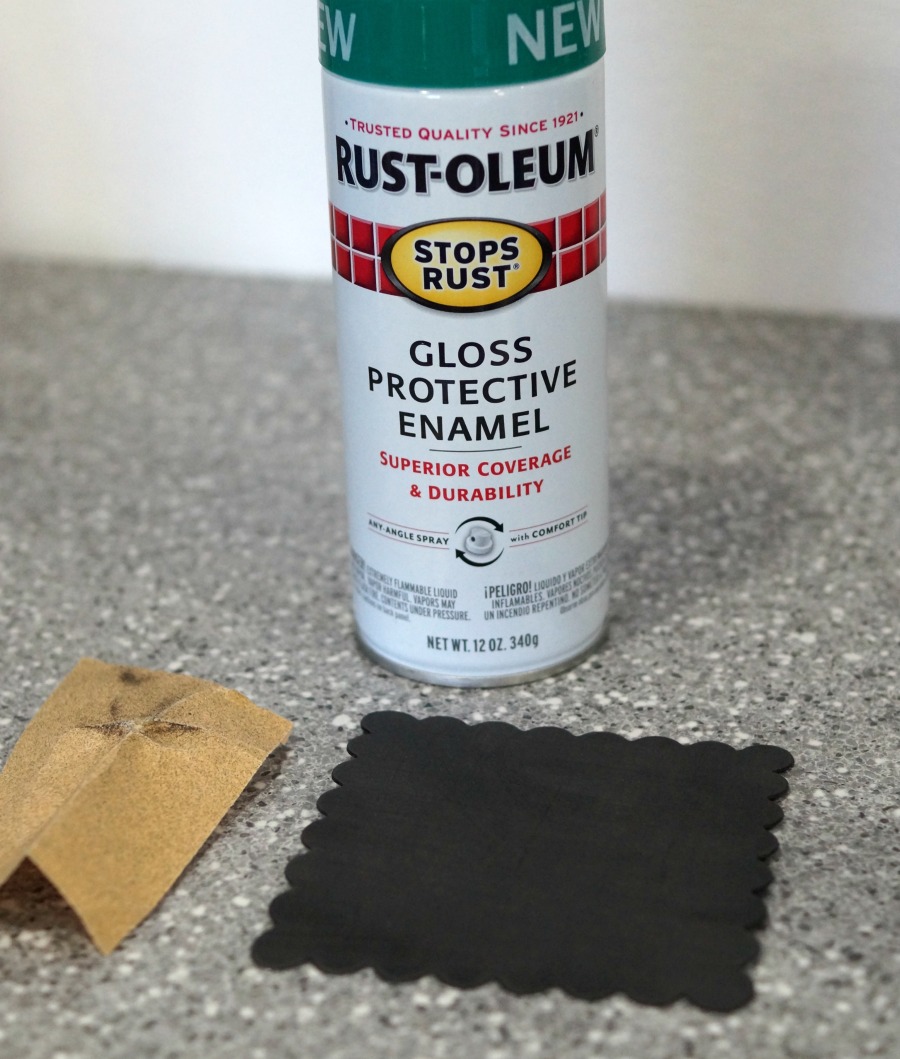
I die-cut a scalloped square from black chalkboard vinyl (Sign Tags w/Wet Erase Marker)
and roughed it up with extra fine sandpaper for better paint adhesion.
I then painted the vinyl square with green spray paint.

For the Mini Chalkboard…
- I cut a smaller piece of the black chalkboard vinyl and punched holes on each of the four corners to add decorative brads before gluing with Beacon’s Quick Grip Glue*
onto the painted scalloped square.
- I glued the completed scalloped square onto the Square Display Riser*
.
- The mini chalkboard is a great place to write encouraging reminders.
![]()
“This is a sponsored post. As a member of the Deflecto Design Team I have been provided product in exchange for my creative ideas, views and opinions.”
For more summer fun… click on ad below.

Disclaimer: This blog uses ads and affiliate links. If you choose to make a purchase using one of the links, I receive a small commission (at no additional cost to you) that helps offset the costs of maintaining this blog. Thanks for your support!