Sea Glass Milk Bottle Vase

How to create a Sea Glass Vase…

I love the light and airy look of sea glass.

Inspired by a recent trip to the ocean… I decided to try my hand at making a Sea Glass Vase.

I used these cute Milk Bottles* from LeisureArts*  and Krylon Sea Glass Spray Paint, Aqua*.

The Sea Glass Paint is available in several colors like Sea Glass Ruby*.  (I’m thinking Christmas!)

I contemplated the best way to paint my bottle.  Because I wanted to also paint the bottom of

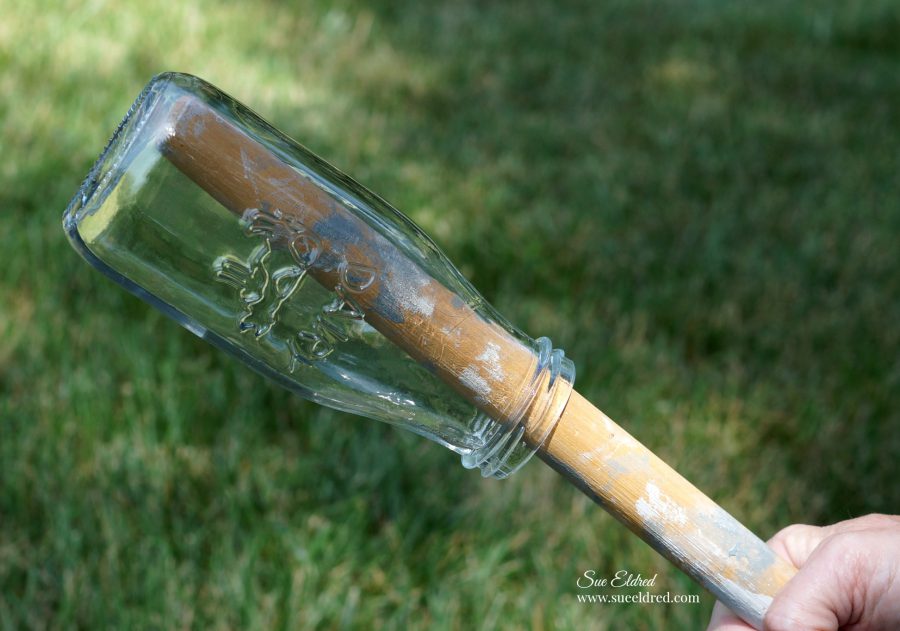
the Milk Bottle*,  I came up with the idea of inserting a paint roller handle into the bottle.

While the idea was good in theory, it was hard to rotate the jar evenly when spraying.

(see first at tempt picture below↓)

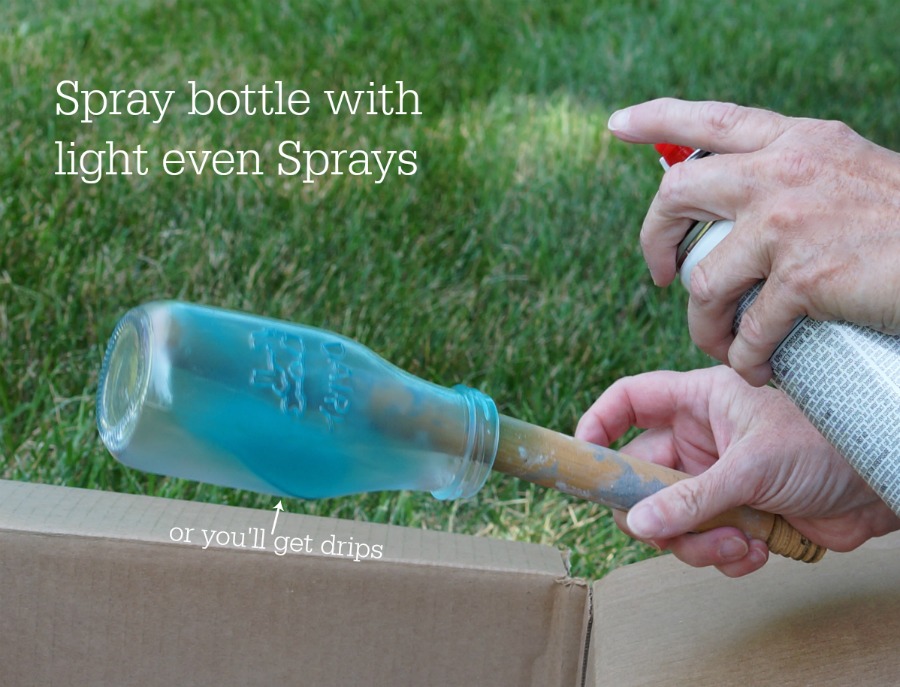
After the first attempt…  I got a little smarter and wrapped the handle in paper, making a

snugger fit.  (that worked great)  I was able to rotate the bottle using the handle as I sprayed

the bottle with short thin coats of paint to avoid drips.

The more coats applied the less translucent the finish will be.

Once painted, I was able to use the handle to aid in drying.

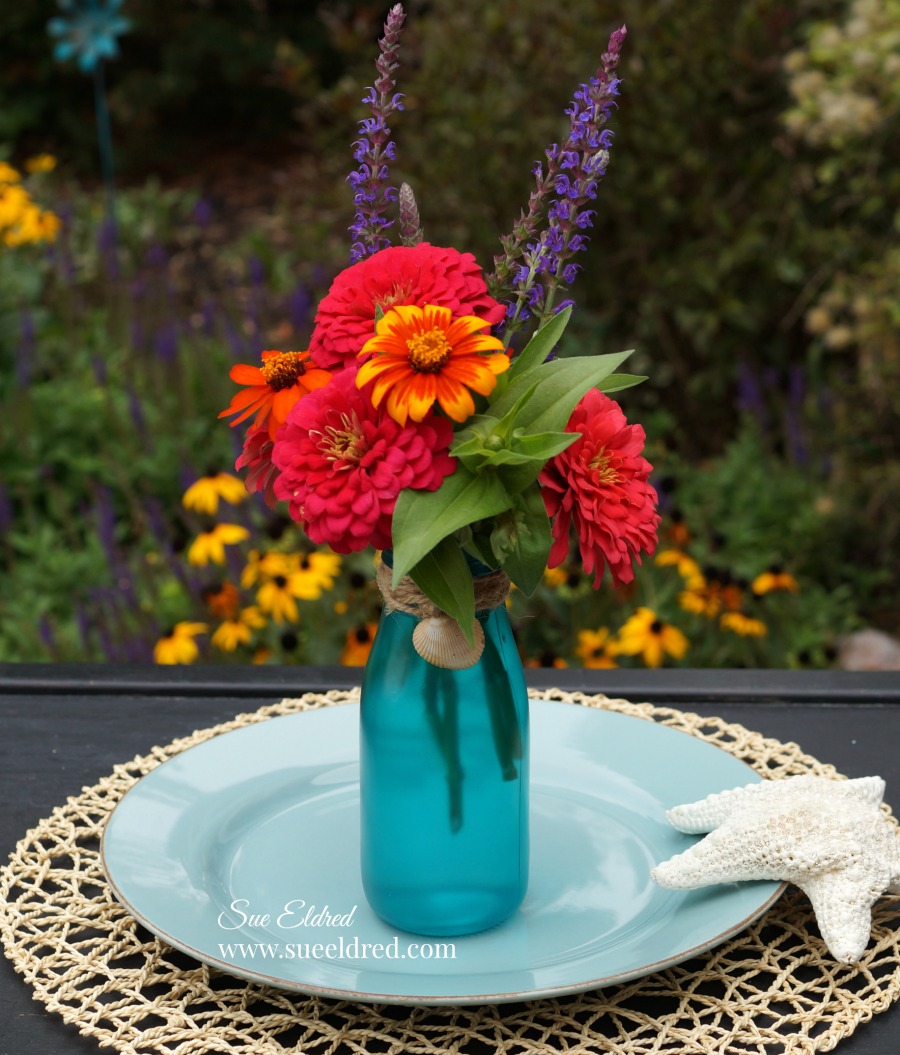
To go with the Beachy Sea Glass look, I wrapped twine around the neck of the Milk Bottle*

and added a small seashell I picked up on the beach.     (FYI…vase should be hand washed only)

A perfect addition to the dinner table.

Shop Your Fav Brands at Scrapbook.com

Disclaimer:  This blog uses ads and affiliate links.  If you choose to make a purchase using one of the links, I receive a small commission (at no additional cost to you) that helps offset the costs of maintaining this blog.  Thanks for your support!

Shop Amazon Scrapbooking Supplies*

Saturday Morning Memo Board

Making Saturdays Special..

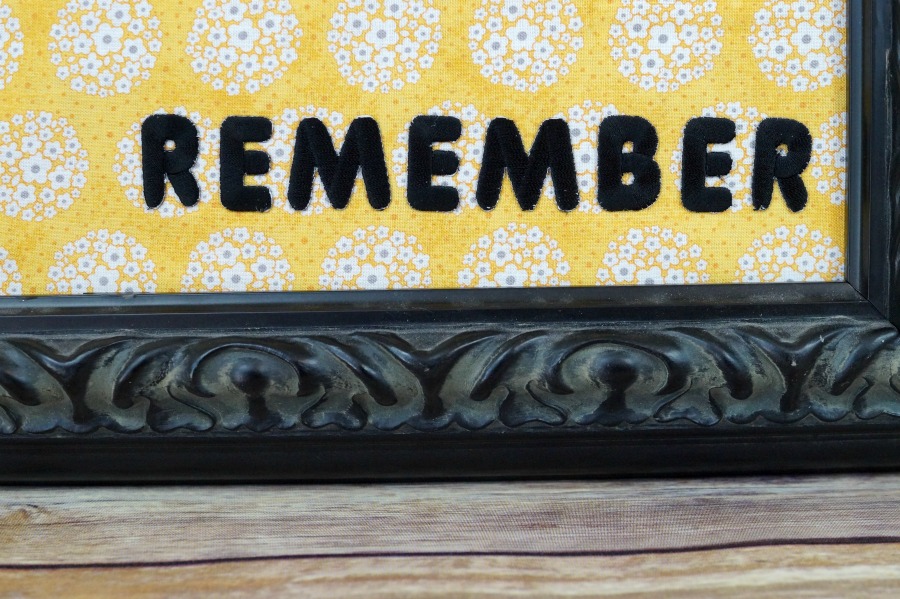
Make family time more special with this cute memo board.

Now that the kids are starting to head back to school, weekends are more important than ever.

It’s nice just being together.

Whether I post a reminder about a fun event or a special note to say “I love you,”

this memo board helps me remember that Saturdays should be a little more laid back –

just the way I like it.

To make the Memo board I used…                     (*amazon affiliate link)

Directions:

  1.  Measure and cut the cork tiles to fit inside the frame.
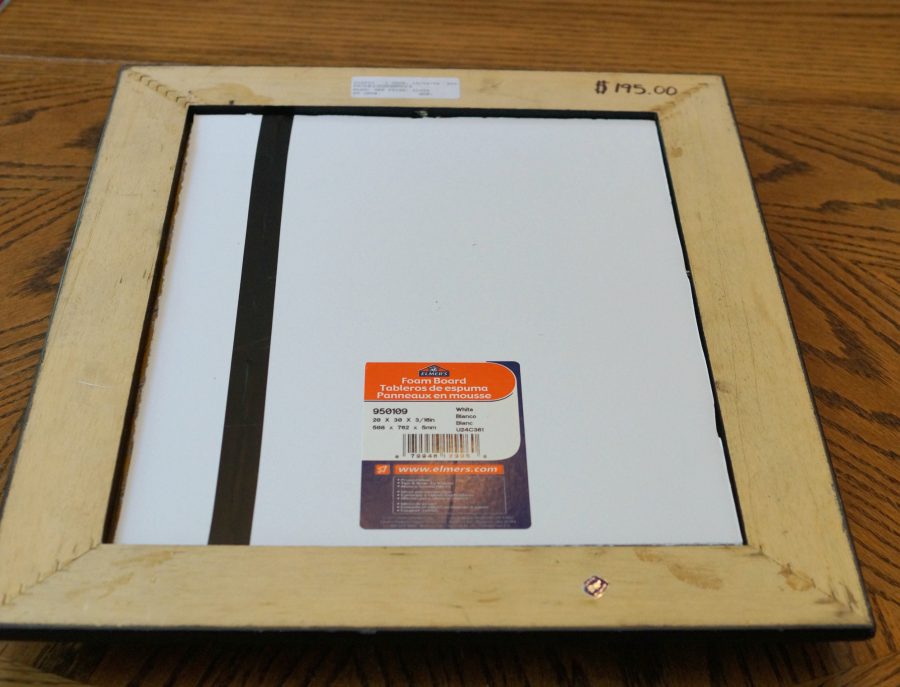
  2. Because my frame was deep, I cut a piece of foam board the same size.  I glued the cork tiles to the foam board using liquid glue.

3.  Lay fabric over cork to determine letter placement.  Gently slide cork from underneath fabric and iron letters.

4. Spray the cork with adhesive and smooth the fabric over it.

5. Tap in a few tack nails inside the back of the frame to hold everything in place.

This project was created for and sponsored by Joy, SA.

Shop Amazon Scrapbooking Supplies*

Disclaimer:  This blog uses ads and affiliate links.  If you choose to make a purchase using one of the links, I receive a small commission (at no additional cost to you) that helps offset the costs of maintaining this blog.  Thanks for your support!


How to Create Quick and Easy Bows

This one’s for my “Bow Challenged” friends…  (you know who you are)

Learn How to Create Quick and Easy Bows using the DecoFun Bowmaker.

Tying beautiful bows doesn’t have to be a challenge anymore…

Thanks to the DecoFun Bowmaker I received to participate in this month’s

Designer Crafts Connection Blog Hop I can now make big beautiful bows

For my project…I decided to give my plain wreath a seasonal update with a new bow.

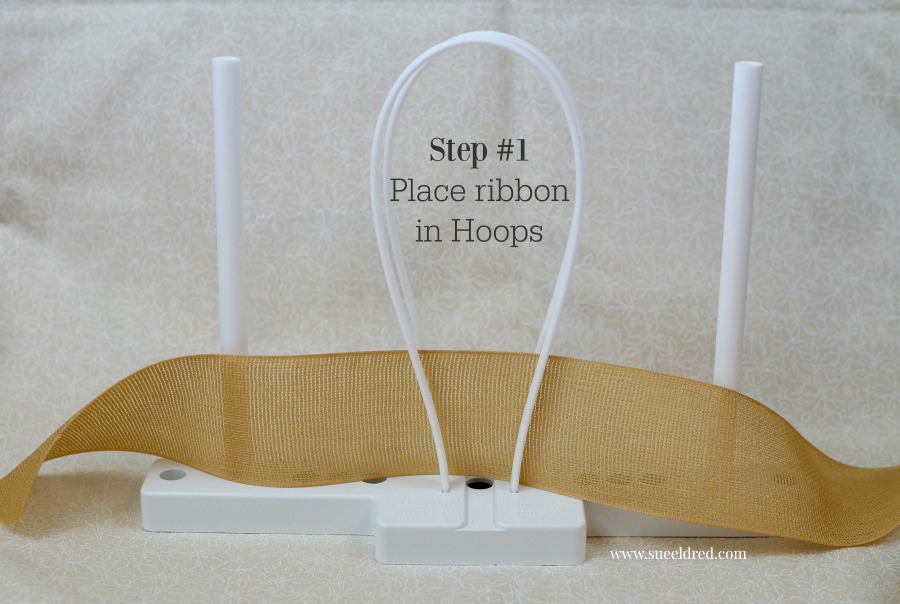
Step#1  Place Ribbon in Hoops

Step #2  Bring Ribbon Around Rods

I used approx. 3 yards of ribbon, so keep on wrapping.

Step #3 Pinch Ribbon Center & Tie with Wire

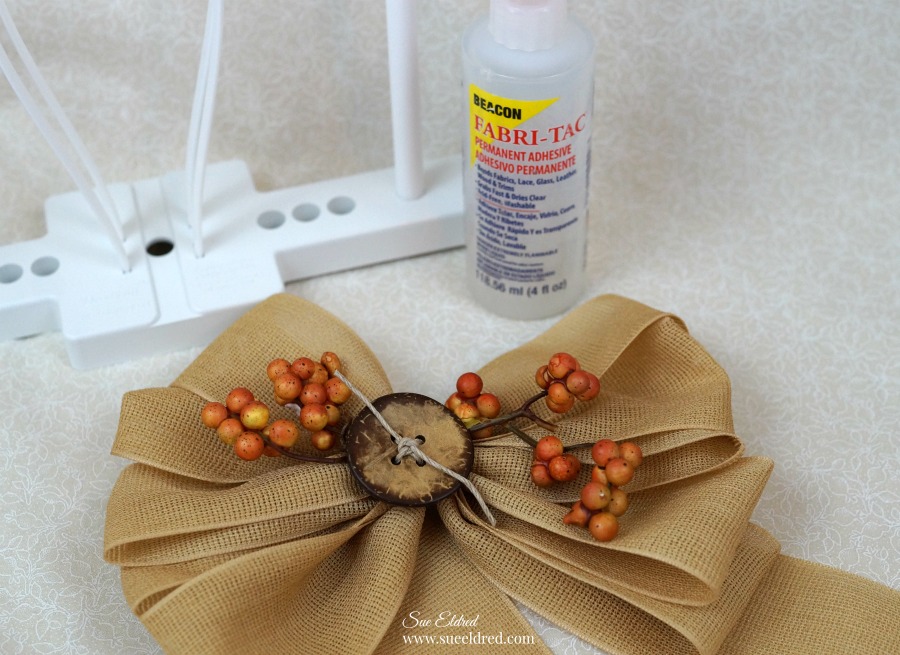
For Seasonal Fun…add berries under wire

Glue a Big Wood Button to the center of the bow with Fabri-Tac Permanent Adhesive*.

A Quick and Easy way to add a Big Beautiful Bow to a simple wreath.

The Bowmaker is adjustable and great for weddings, parties, birthdays, holidays and more.

For more DecoFun Bowmaker projects click here.

*Disclaimer:  This post uses ads and affiliate links.  If you choose to make a purchase using one of the links, I receive a small commission (at no additional cost to you) that helps offset the costs of maintaining this blog.  Thanks for your support!

Try Amazon Prime 30-Day Free Trial

Vintage School Desk Make-Over

I was looking for a project when I went into the Goodwill that day.

I saw the old desk sitting there in back.   I looked it over and left.

It wasn’t until later that night when I envisioned the completed project in my head.

I ran back over the next morning.

The desk was in pretty rough shape from years of use and abuse.

The three holes in the front of the desk intrigued me…

Was it a combination of several kids over the years or one very bored individual.

How long did it take?

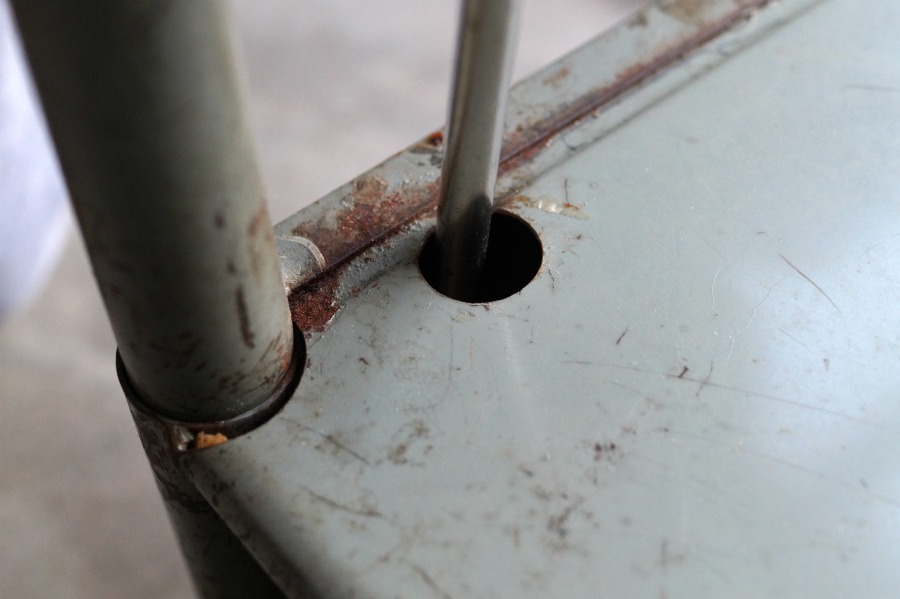
The top was screwed onto the base with 4 screws.  I contemplated how I was

going to fit my hand in the opening to unscrew it.  (I’m including this picture

just in case I’m not the only one. )  Under the desk, were four holes for inserting

an extra long screwdriver into the hole to unscrew the top.  Duh!

I picked up some additional supplies at my local home store.                                   (*affiliate link)

I sanded off the majority of the rust with a Palm Sander*.  (hand sanding would work as well)
Spray the base of the metal  desk with Forged Hammered Antique Pewter Spray Paint*.

This was the first time I’d used a textured spray paint.  I really like the finish.

To keep the project simple, instead of cutting and gluing boards together…

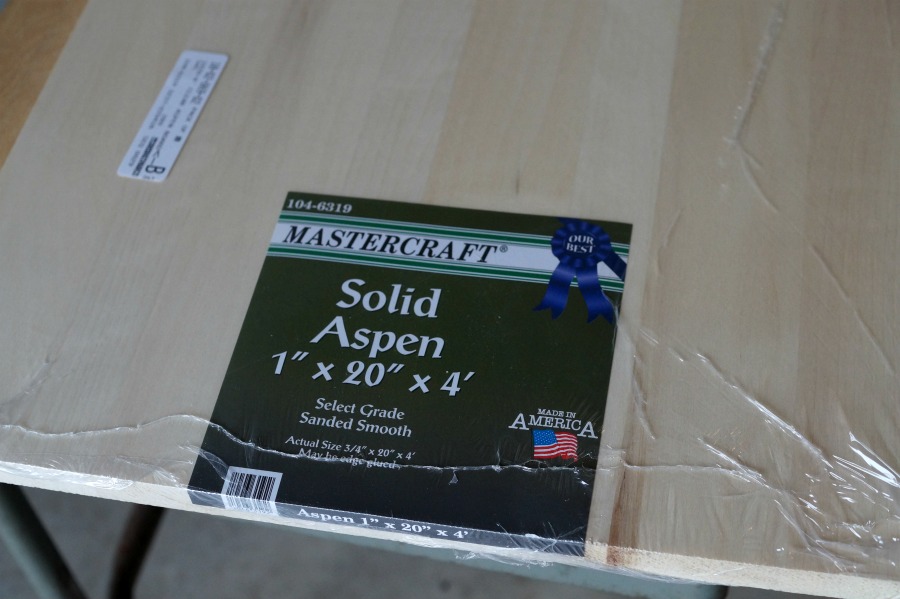
I picked up a large piece of Solid Aspen that was ready to go and just the right length.

I enlisted the help of my brother to help me cut the board.

For those of you that don’t have a circular saw, a regular hand saw could be used instead.

We cut the top 18″ x 24″ and the bottom shelf 15″ x 24″.

If you don’t have any of those fancy corner templates, use the edge of the spray paint can

as a template to mark the rounded corners.

A power sander was used to round the edges of the board.

You could also use a coping saw to cut off the corner and sand smooth with a sanding block.

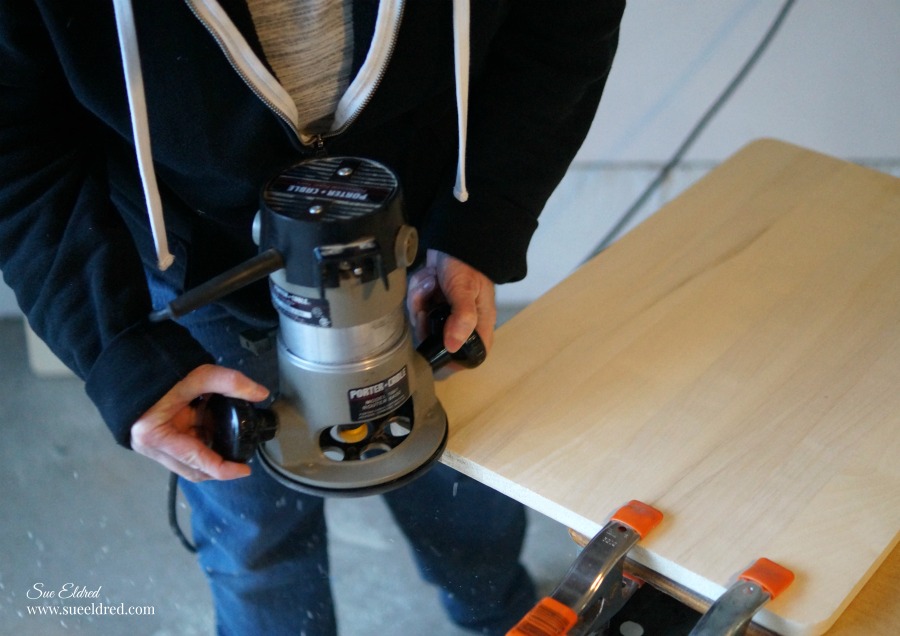
For a smooth finished edge…  I used a router.

Prepare the wood for staining by lightly sanding the surface.  Sand in the direction of the grain.

Remove all the sanding dust with a clean damp rag.    (read all the directions on the can)

Apply stain on the wood with brush or clean lint free rag.   Allow the stain to  penetrate

the wood for 3-5 minutes before wiping excess stain off.   Allow time for the wood to dry.

Apply a coat of polyurethane over the surface of the wood.

After the polyurethane dries, smooth the surface with a fine steel wool.

Wipe surface and apply a second coat of polyurethane.

After all the pieces were dry…

I screwed the top back onto the base and added the shelf to the bottom bar. 

I added a couple of flat rectangle baskets in the desk opening for storage.

I love the vintage industrial feel of this piece.

No longer a desk.  It makes a great side piece.

*Disclaimer:  This post uses ads and affiliate links.  If you choose to make a purchase using one of the links, I receive a small commission (at no additional cost to you) that helps offset the costs of maintaining this blog.  Thanks for your support!

Try Amazon Prime 30-Day Free Trial

Save

How to Create an Easy Pickled Finish with Vintage Effect Wash

How to create an Easy Pickled Finish with Vintage Effect Wash from Deco Arts.

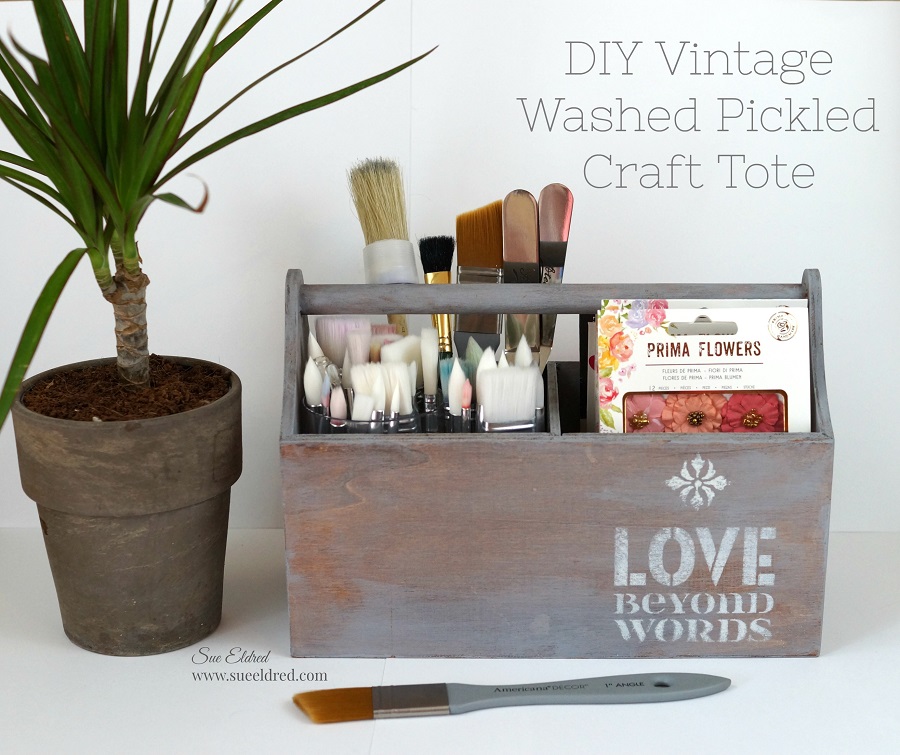
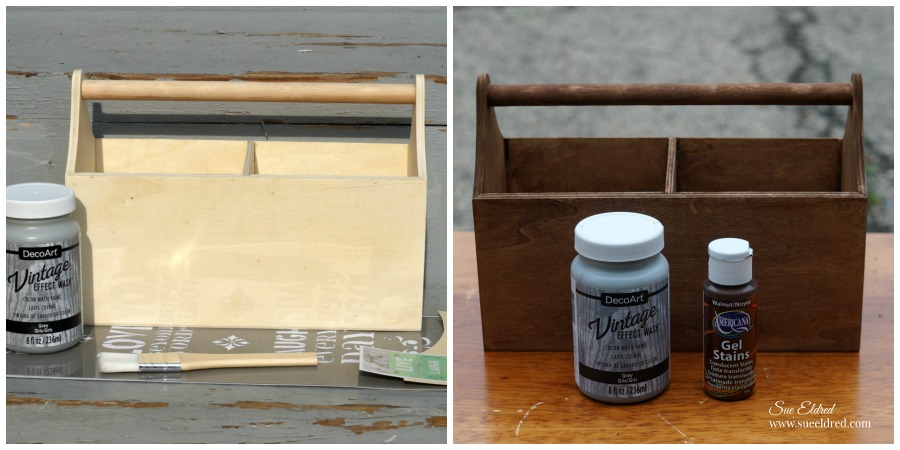
I had this unfinished wood tote that I wanted to use the new Vintage Effect Wash on.

My first thought was to just give the tote a cool white wash using the paint.

But after further thought and a little experimentation, I decided to warm up the look by

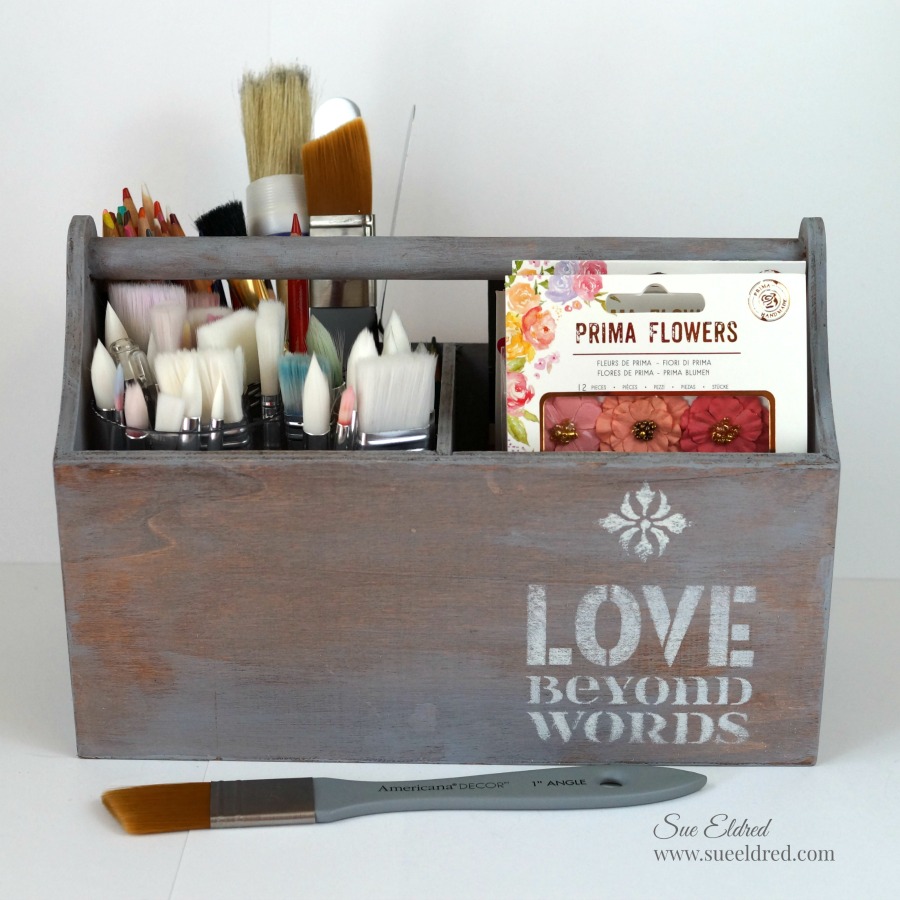
staining it with a Walnut Gel Stain first.  I love the way it turned out.

This would make a great garden tool holder, picnic caddy, or my favorite…a Craft Tote.

DIY Pickled Crate

Supplies Used:                (*affiliate link)

 Directions:

  1. Lightly sand the wood crate if necessary.
  2. Paint or brush crate with DecoArt Americana Walnut Gel Stains Paint*.
  3. Rub off excess stain with soft clean rag.  Allow stain to dry.
  4. Apply Decoart Vintage Effect Wash Grey* onto crate with brush allowing the stain to show through.   Wipe with clean soft rag if necessary.  (It’s that easy!)
  5. If desired, add stenciling onto the crate.
  6. Apply a sealer to protect the finish.

The Love Beyond Words Pickled Crate was sponsored by DecoArts.

Try Amazon Prime 30-Day Free Trial

Disclaimer:  This blog uses ads and affiliate links.  If you choose to make a purchase using one of the links, I receive a small commission (at no additional cost to you) that helps offset the costs of maintaining this blog.  Thanks for your support!

Painting Basics

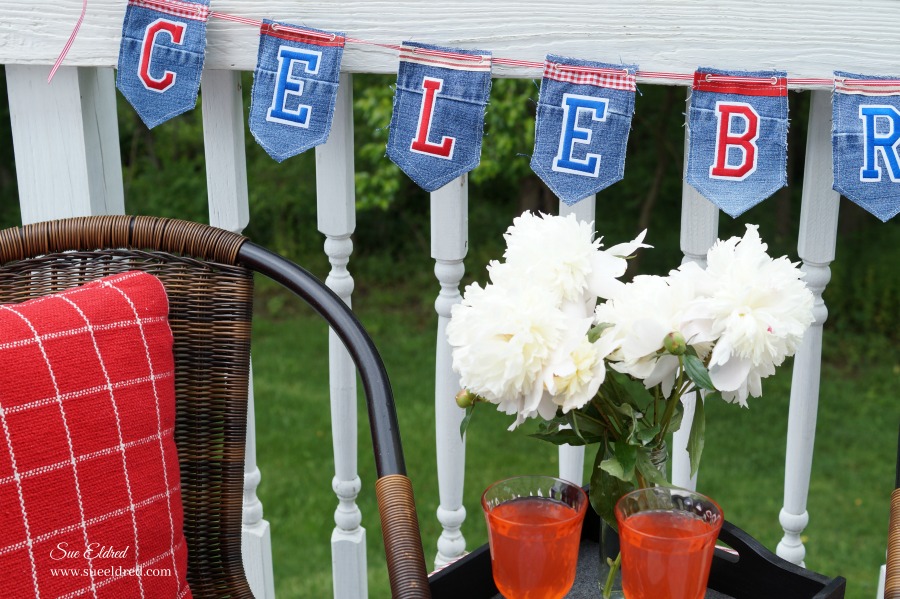
“Celebrate” with a Banner made from old blue jeans

Create a banner using Joy Embroidered Iron On Letters and old blue jeans.

When inspiration hits in the middle of the night, it usually ends of being one of my favorite

kind of projects.  (This one  was fun.)  

Got any old worn blue jeans ready to be thrown out?

I started with my old blue jeans and 3″ Iron-on Embroidered Varsity Letters from Joy

in red and blue.

I created a 3 1/2″ x 5 1/2″ banner pattern using grid paper and traced it onto the jeans.

To add a little interest…I incorporated the seams from the sides of the jeans to use for the

front of the banner.  For the word “C-E-L-E-B-R-A-T-E”  I cut 9 banners for the front with

seams and 9 plain ones to use to line the back of the banner.

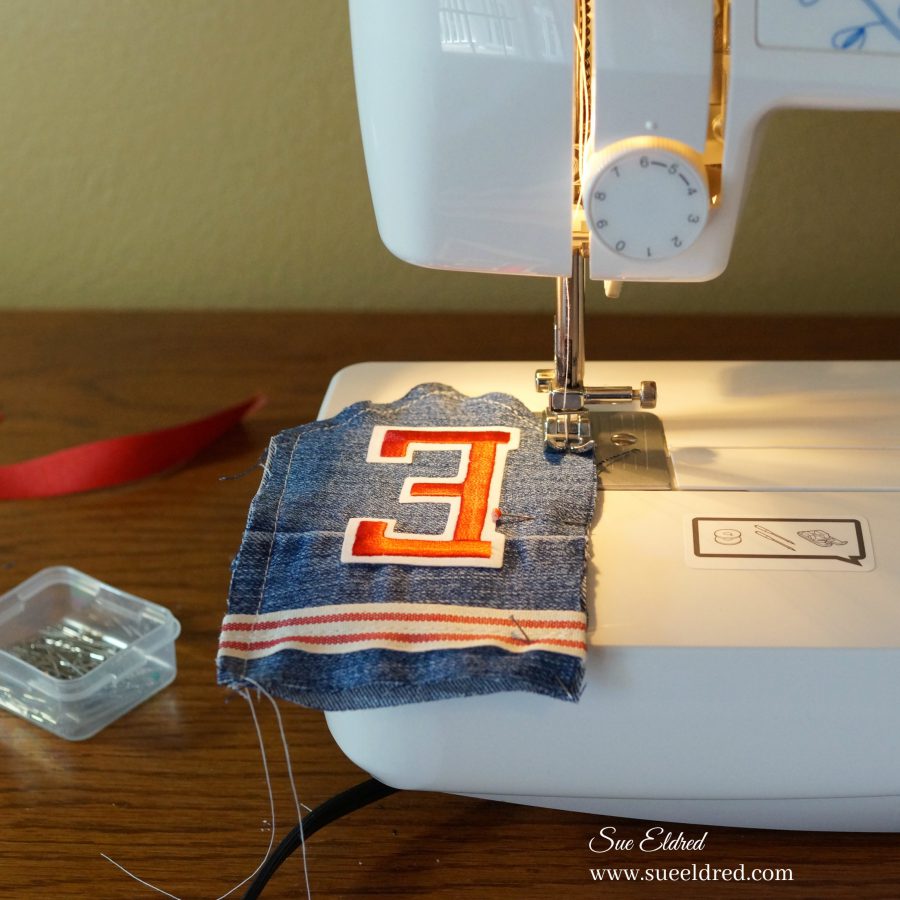
The Iron-on Embroidered Varsity letters are sticky backed so I went ahead and placed

them onto the front of my banners before sewing.

Next came my jar of red ribbon scraps.  (I love red so much, I have a jar just for “red”)

I sewed the ribbon scraps onto the tops of each banner.

I then sandwiched the front with a plain back and simply sewed around each banner with

my sewing machine.  After the third banner, I finally got smart and started using straight pins.

As you can tell, I was going for a casual simple look.  (that’s my story and I’m sticking to it)

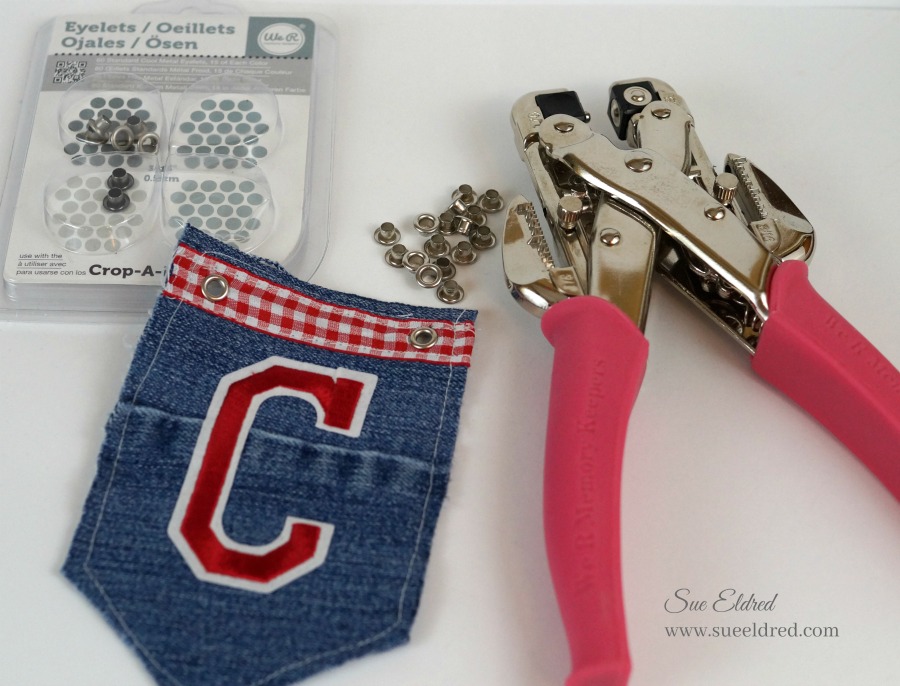
After I was finished sewing all my banners, I used my We R Memory Keepers Crop-A-Dile*

to punch two holes.  (I used the 3/16″ sized hole.)

I used We R Memory Keepers Eyelets Cool Metal* (affiliate link) for my eyelets.

Did you know that the  Crop-A-Dile* easily goes through both layers of jeans.

Join Amazon Kindle Unlimited 30-Day Free Trial

Disclaimer:  This blog uses ads and affiliate links.  If you choose to make a purchase using one of the links, I receive a small commission (at no additional cost to you) that helps offset the costs of maintaining this blog.  Thanks for your support!


The “Celebrate” banner was created for and sponsored by Joy.

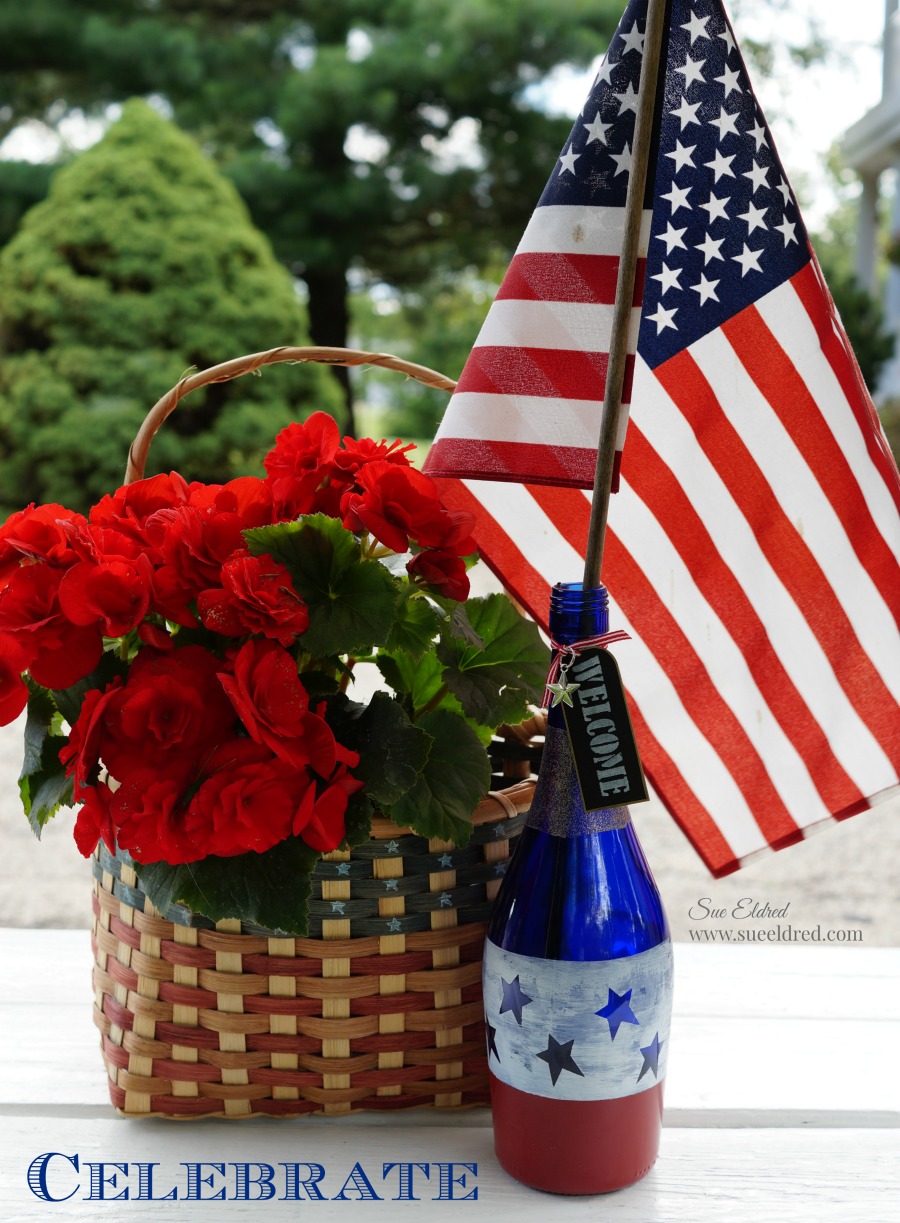
How to make a Patriotic Red, White and Blue Etched Wine Bottle

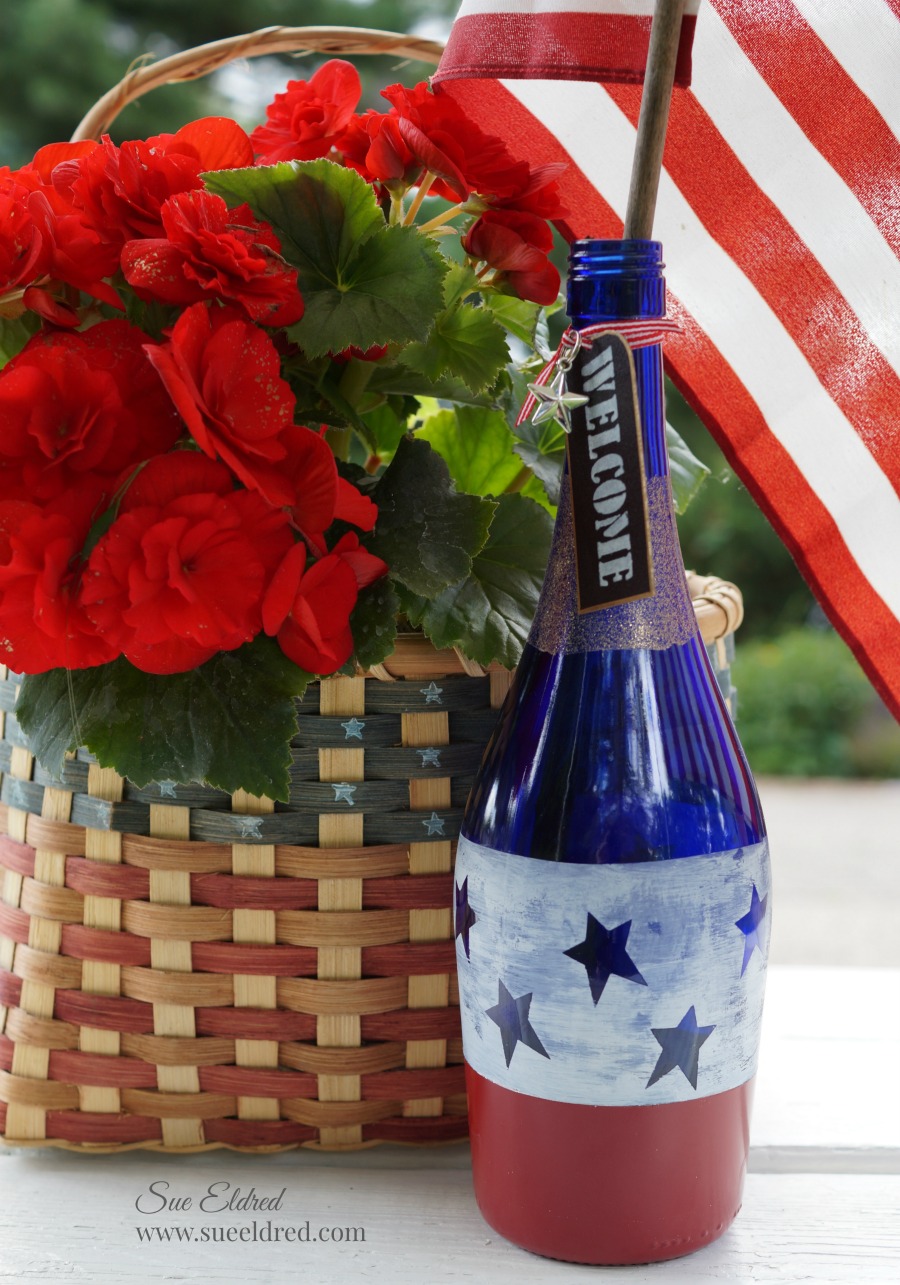
Celebrate the holidays with a Red, White and Blue Etched Wine Bottle.

I’m getting ready for a Americana Crafternoon this week-end with a fun group of ladies

and thought I’d make up a few decorations.  As luck would have it, I just happened to

have an empty blue wine bottle.   I thought to myself, that would make a perfect vase.

I added red flowers to a 50 cent Garage Sale-Flag Basket and now I have a festive display.

Shop Dollar Tree for Red White & Blue Party Supplies*                      (*affiliate link)

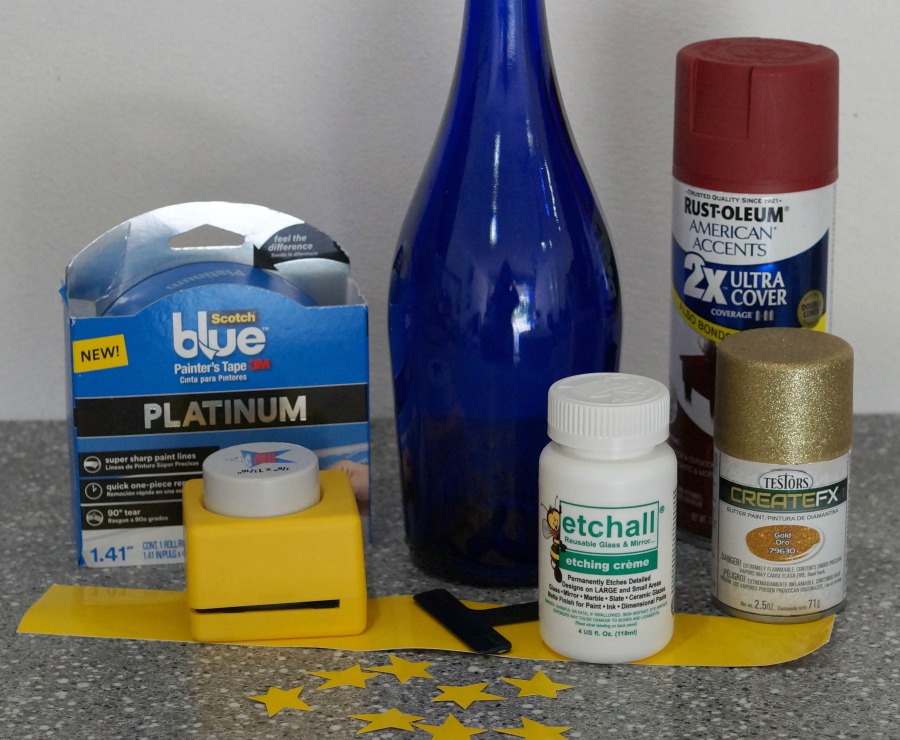
To make the Red, White and Blue Etched Wine Bottle I used…             (*amazon affiliate links)

Directions:

  1.  Clean and remove the label off a blue glass wine bottle with warm soapy water.  (Dry)


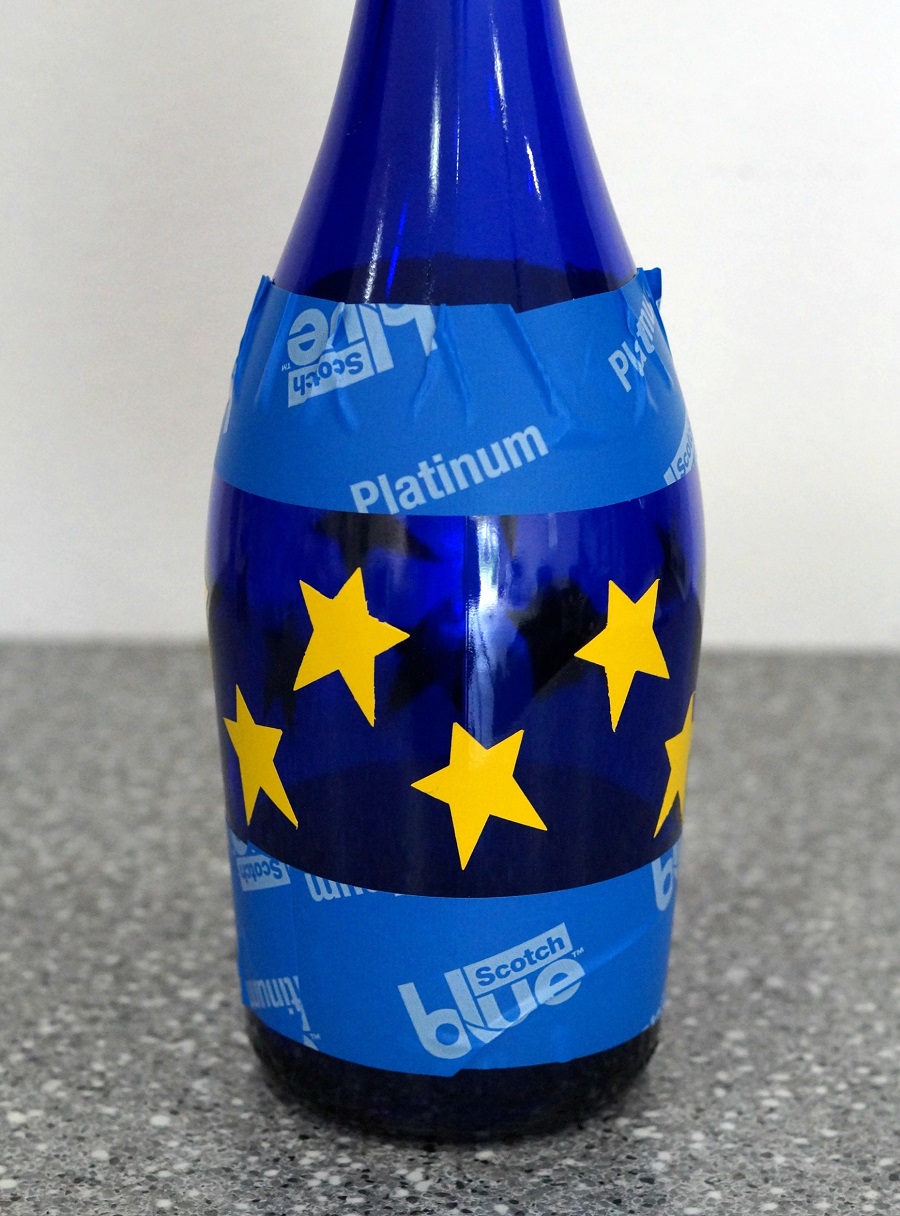
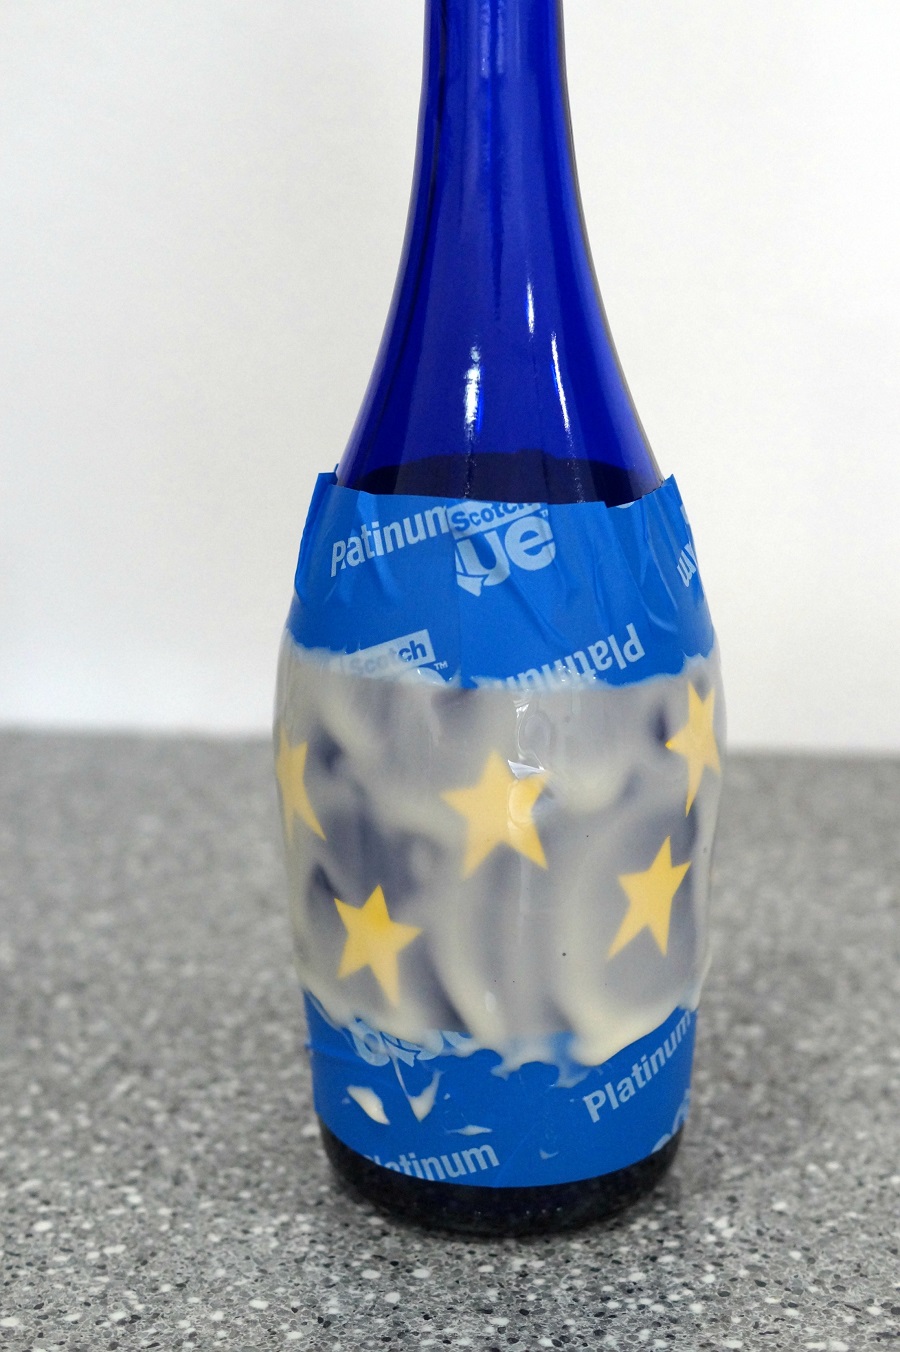
2.  Mask off a 2 ½ to 3 inch section on the center of the wine bottle with blue painter’s tape.  Burnish the edges of the tape with your fingertip, the tape should lay flat against the bottle.

3.  Punch stars out of the etchall etchmask* Remove backing from the stars and stick randomly on the bottle.  Burnish the stars with your fingertips onto the bottle.

4.  Apply a heavy coat of etchall Etching Crème*   onto the bottle using the squeegee.

5.  Let crème sit for 15 minutes.  (You will need to keep an eye on the bottle to make sure etching crème doesn’t run past the blue painter’s tape.)  Scrape excess etching crème from the bottle and return the extra etching crème back into the bottle. It’s reusable.

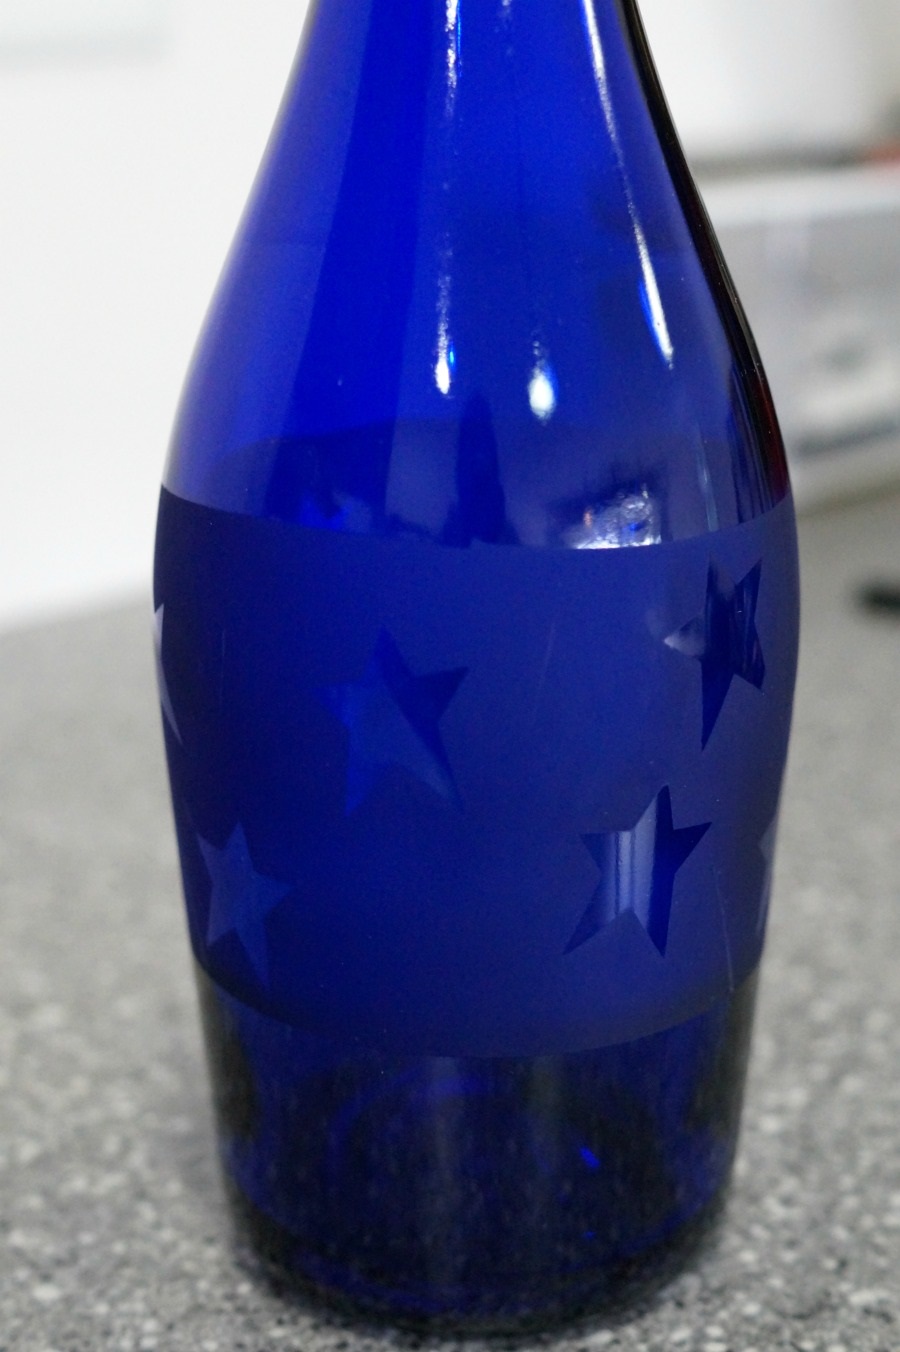
6.  Rinse bottle with warm water to clean.  Remember to keep crème away from porcelain or ceramic tiles.  Remove tape and stars and dry.  The bottle will have a nice subtle etching.

7.  While I liked the subtle look… I decided I wanted something a little bit brighter for my patriotic bottle.   I dried brushed white acrylic paint over the etched surface.  Wipe off excess paint with a damp cloth for a white washed look.  The paint only sticks to the etched surface.  (How cool it that.)  It really makes the stars pop.

8.  Re-mask the bottle with the blue painter’s tape, this time covering the etched surface.  Paint the bottom of the bottle with the colonial red spray paint.

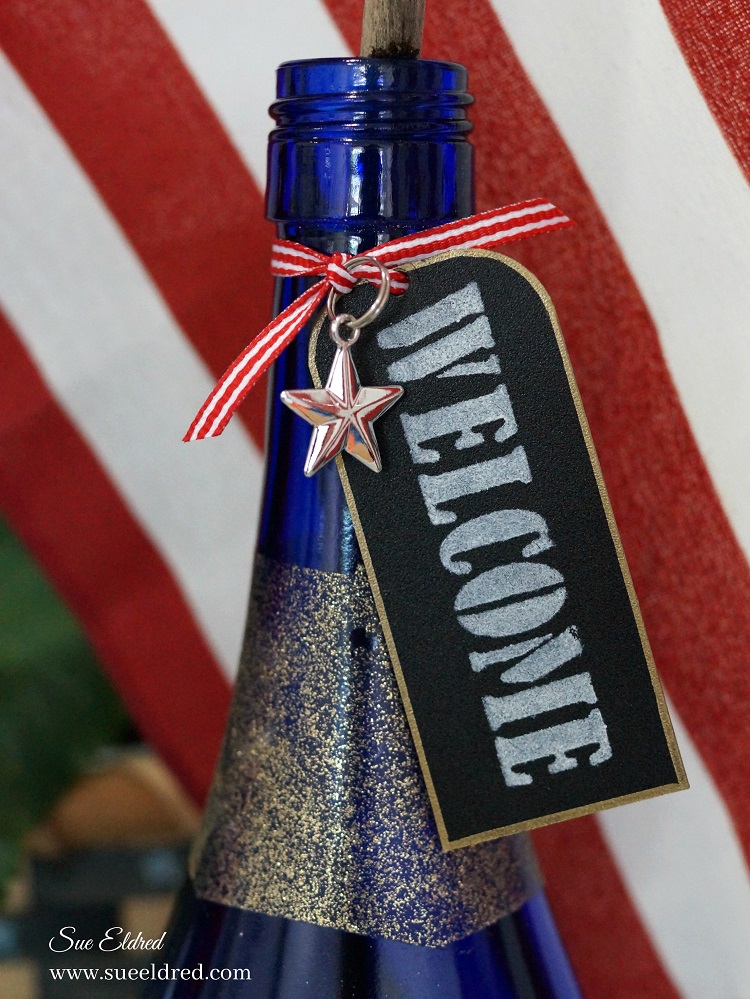
10.  Mask a small section on the top of the bottle and spray with gold spray paint.

11.  Cut a small black vinyl rectangle and round two of the corners with the corner punch.

12.  Stencil the word “welcome” from the family words stencil onto the black vinyl using a stencil brush and the multi-surface acrylic paint.

13.  Use the gold paint pen to add a thin border around the black vinyl tag.  Punch a small hole on the top of the tag and tie onto the neck of the bottle with ribbon.

Enjoy the party with friends.  (maybe even empty another blue wine bottle)


Don’t Miss a Thing…Make Sure to Follow me.

Shop Your Fav Brands at Scrapbook.com

Disclaimer:  This blog uses ads and affiliate links.  If you choose to make a purchase using one of the links, I receive a small commission (at no additional cost to you) that helps offset the costs of maintaining this blog.  Thanks for your support!

Jazz Up your Flip Flops with Patent Leather Paint

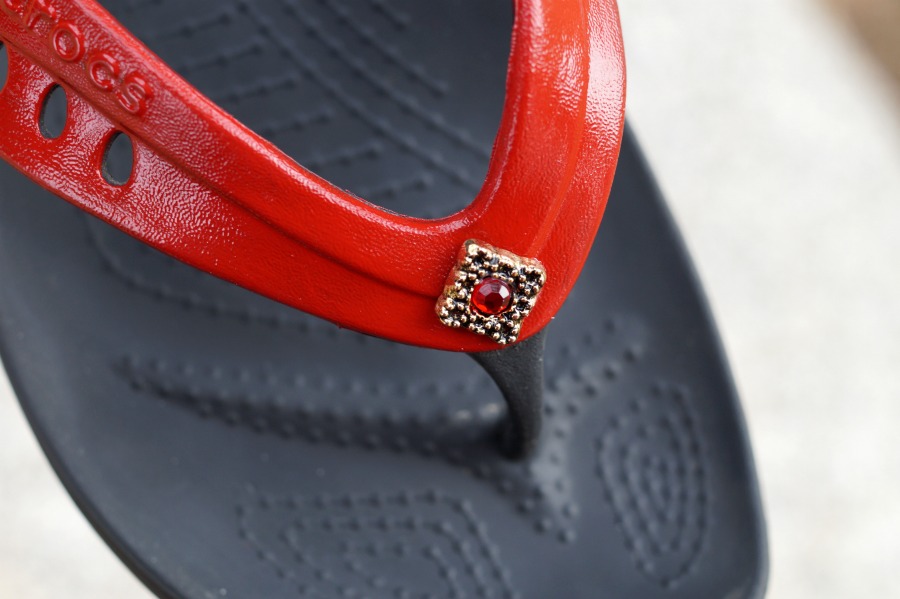
Old or New…Jazz Up your flip flops with Patent Leather Paint from Deco Arts.

While attending the Creativation show in Phoenix earlier this year, I received a bottle

of “new” Garnet patent leather paint to play with.  You could say, I was smitten.

This paint was so fun and easy to work with.

 A quick and easy way to jazz up old or new flip flops.  (also pumps and purses)

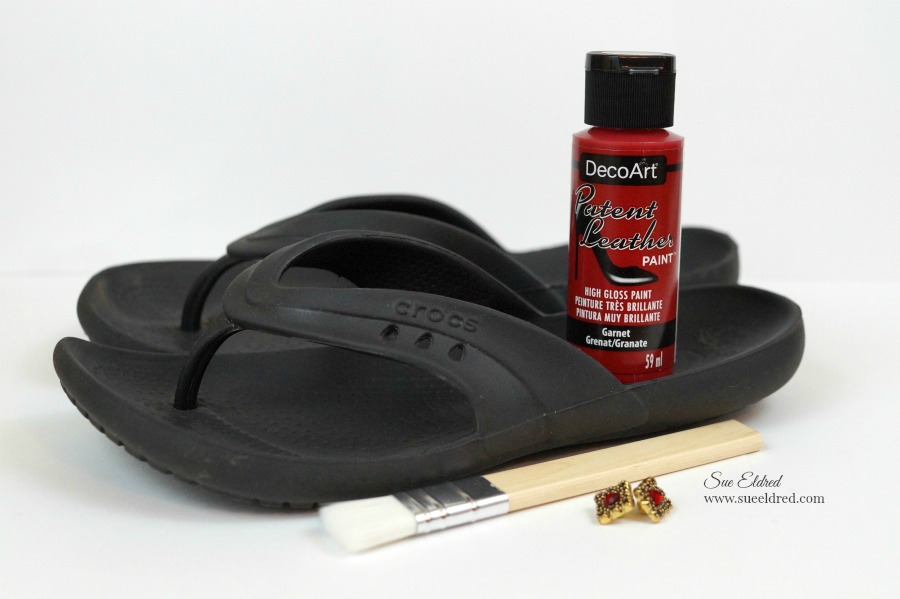
To jazz up your flip flops you’ll need…              (*amazon affiliate link)

Directions:

  1. If using old flip flops… Make sure to wipe flip flops well with damp towel to remove any dirt or dust.
  2. Apply patent leather paint evenly with a soft-bristled brush.  The paint will have a slight tacky feel as it is drying.
  3. Apply 2-3 coats of paint to get the desired coverage.  Allow paint to dry between coats.
  4. Cut the shank off the back of the button with Wire Cutter*.
  5. Adhere the button onto the front of the flip flops using Quick Grip Adhesive*.
  6. Allow paint to cure 24-48 hours before using.

Next… Get a pedicure and ENJOY!

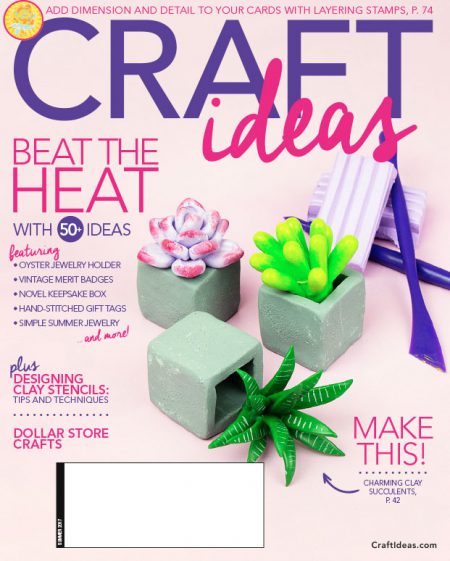
The Jazzed Up Flip Flops were created for Craft Ideas Magazine’s Summer 2017 issue.

Shop Your Fav Brands at Scrapbook.com

Shop Amazon Scrapbooking Supplies*

Disclaimer:  This blog uses ads and affiliate links.  If you choose to make a purchase using one of the links, I receive a small commission (at no additional cost to you) that helps offset the costs of maintaining this blog.  Thanks for your support!

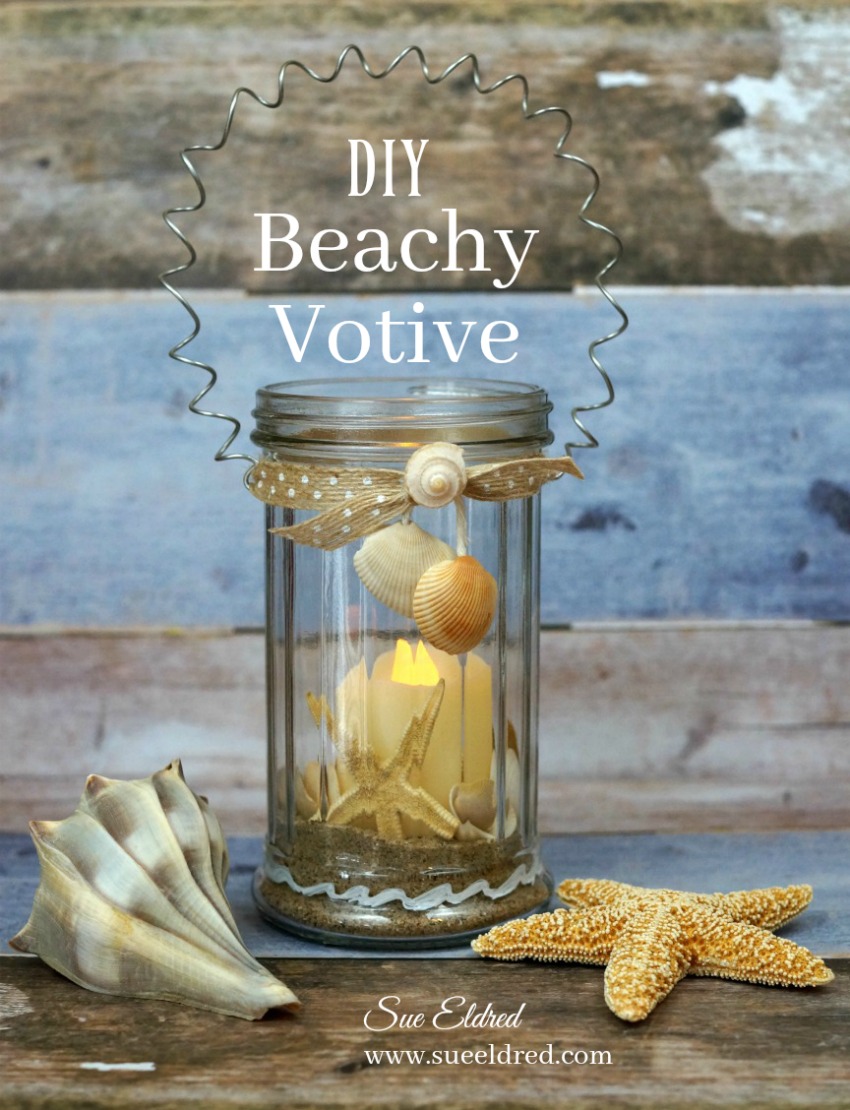
Create a Beach Votive with a few Dollar Store Treasures.

Create a Beachy Votive with a few Dollar Store treasures.

A cheap and easy beachy decoration.

A great way to display those small shells collected on vacation.

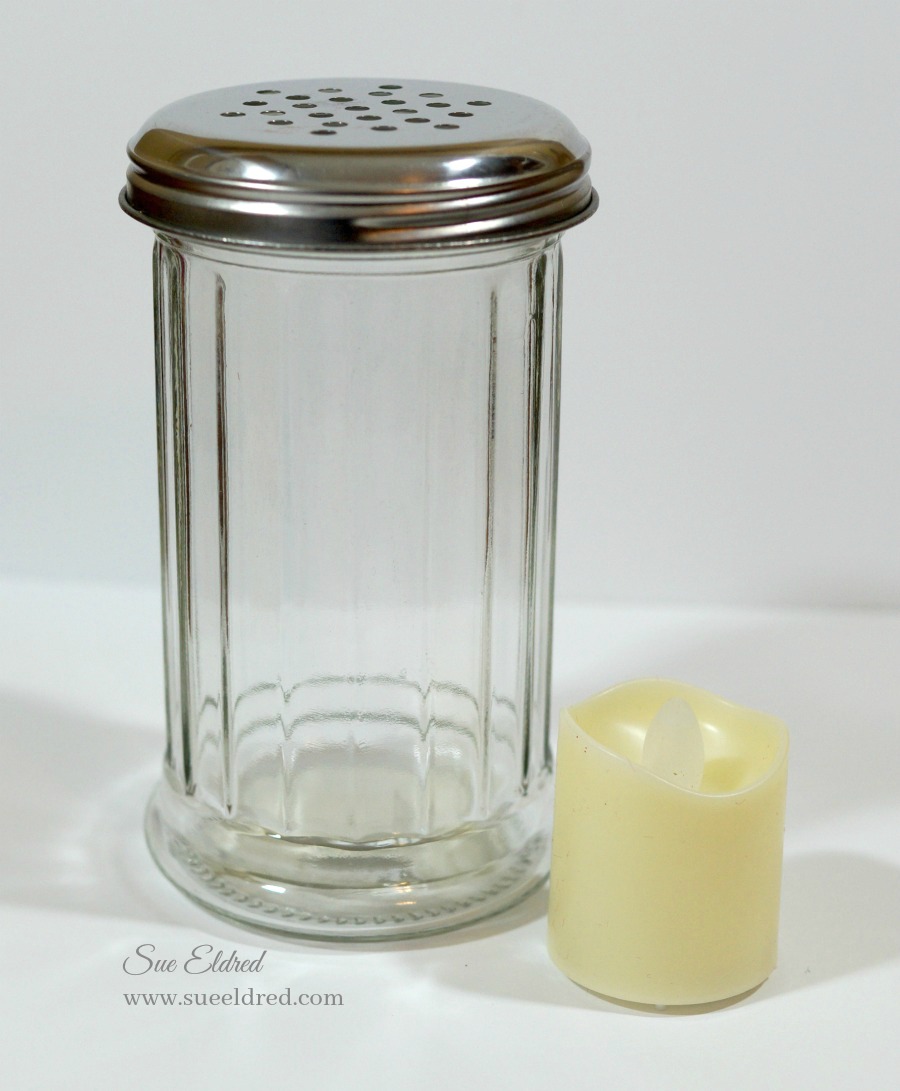
I purchased the Parmesan Cheese Shaker* and a Flameless Candle Votive*

To make the Beachy Votive here’s what I used:                             (*affiliate link)
Disclaimer:  This blog uses ads and affiliate links.  If you choose to make a purchase using one of the links, I receive a small commission (at no additional cost to you) that helps offset the costs of maintaining this blog.  Thanks for your support!

Directions:

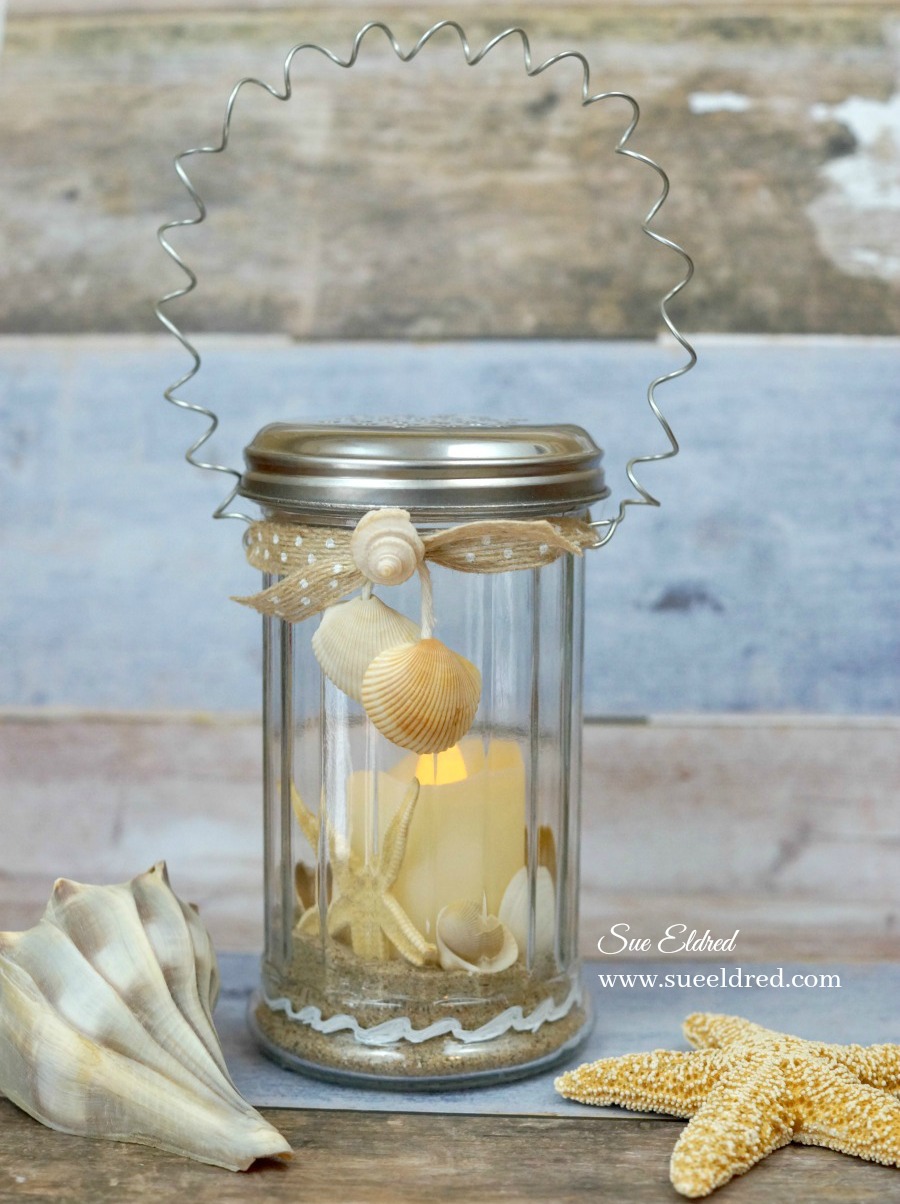
  • Wrap wire around a pencil for a spiral handle.

  • Using the needle nose pliers, make a small loop on each end of the wire.

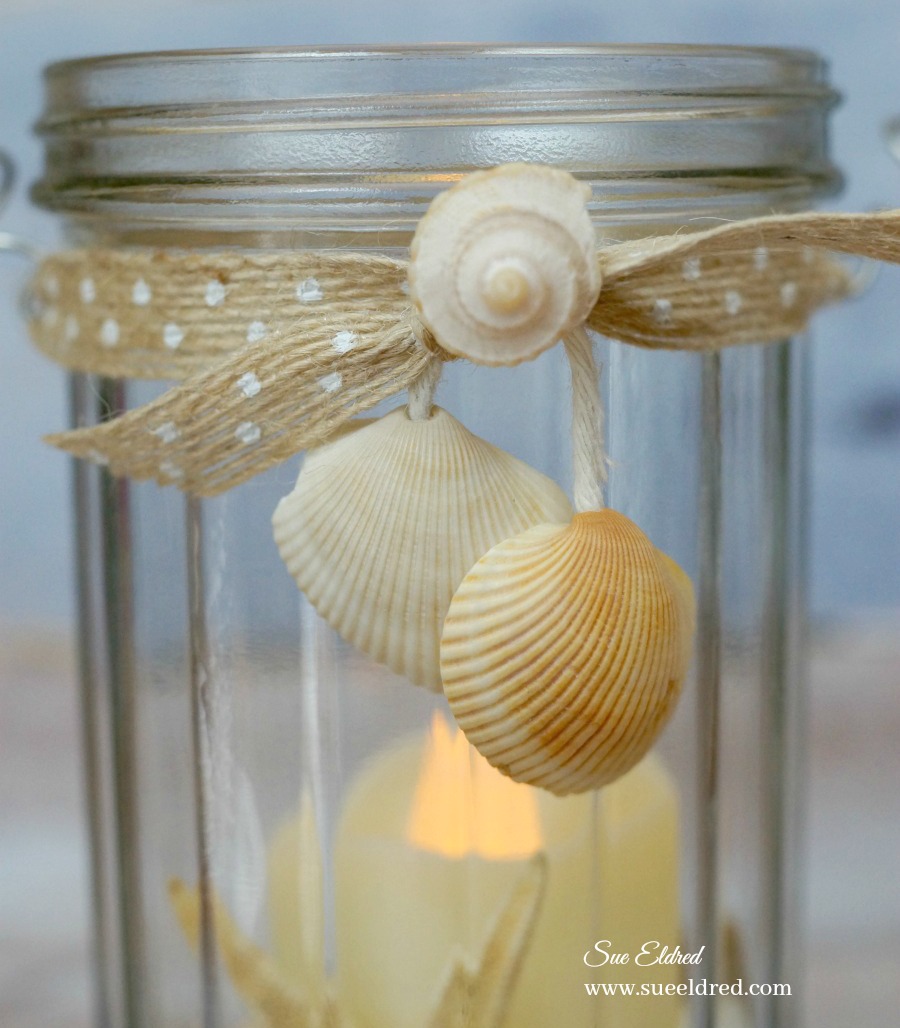
  • Find two small shells with natural holes on the end.  Tie them together with a small piece of string.

  • Thread burlap ribbon through both looped ends of the wire and tie around the top of the parmesan shaker.  Add shells on string as you knot the ribbon.
  • Glue top of broken shell onto the knot of the burlap ribbon with Beacon Fabri-Tac Permanent Adhesive*.
  • Add approx. 1″ of sand into the parmesan shaker.  Add small votive and shells.

The Beachy Votive looks good with or without the lid.

How to make a 4th of July Centerpiece with Fireworks, Flags, Banners and Pinwheels

What do you think about when you hear the words “4th of July”?

For me it’s… White picket fences, fireworks and the good old red white and blue. 

Or a 4th of July Celebration Centerpiece with Fireworks, Flags, Banners and Pinwheels all

rolled into one.   I created this 4th of July centerpiece a couple years ago, since it’s one

of my favorite projects, I thought I’d share it again.   Enjoy!

How to make a 4th of July Centerpiece…

Products Used:                 (*affiliate link)

Directions:

  1.  Paint the round disc with Navy Blue paint.

2.  Cut two 1” x 12” strips of the red striped paper and one 1” x 2” piece. Adhere to the side of the disc with double stick tape roller.

3.  Die-cut 7 fence sections.

4.  Paint 15 round toothpicks white. (set four aside to use later.)

5.  Cut 11 toothpicks in half. Glue one toothpick half on each end and middle of the fence with the pointed end facing down.

6.  Insert fence sections onto the top edge of the disc.

7.  Paint the 4” cube red.

8.  Cut five 3 ¾” x 3 ¾” pieces of Navy & Ivory dot paper. Adhere to the sides and top of the cube. Glue cube to center of the disc.

9. Paint two bamboo skewers white. Cut skewers to 5”.

10.  Glue small blue beads to top of each skewer.

11.  Create small ½” flags from scraps of paper and cardstock. Adhere onto a 12” piece of blue and white twine.  Tie ends of the twine to top of the skewers to make a flag banner. Insert into disc.

12.  To create Bottle Rockets:  Paint two bamboo skewers red.  Cut two pieces of red striped paper 1 3/4” x two. Wrap around pencil to curve paper. Remove pencil and roll tightly to form a small tube. Wrap a 1/2” strip of navy dot paper around tube.  Glue a small piece of twine inside of tube to create the bottle rocket wick. Glue tube onto red bamboo skewer and insert into disc. Create second bottle rocket for other side of the disc.

13.  Punch two 3” Navy and Ivory Dots scalloped circles.

14.  Cut two strips of red card-stock: 1 1/4”” x 12” and 2 1/4” x 6 1/2” . Adhere the two strips together to form one long 2 1/4” x 18” strip of red card-stock.

15.  Using scoring board and scoring tool. Score card-stock every 1/4” down the entire length. Fold strip accordion fold. Glue ends together with a strong adhesive to form a cylinder.

16.  On a flat surface, gather the bottom of the cylinder tight while spreading and pushing down on the top to create the Rosette.

17.  With a strong adhesive, attach one of the scalloped circles to the center of the Rosette. Hold into place until the adhesive starts to hold.

18.  Turn the Rosette over and attach the second scalloped circle onto the other side of the rosette.

19.  Create a second smaller rosette using a 1” x 12” strip of red striped paper. Score strip every 1/4”.  (repeat steps 16 and 17)

20.  Glue blue button into center of the rosette to hold in place. Glue onto center of the scalloped circle. Add star sticker to center of button.

21.  Paint a bamboo skewer with Navy paint. Cut into a 5” piece. Insert into back of finished Rosette.

22.  Insert finished Rosette into top of the 4″ cube.

23.  Create small pinwheels by adhering two pieces of 1” x 1” paper together.  On each corner, cut diagonally two-thirds of way to square’s center, dividing each corner into two points. Bring every other point to center so that the points overlap. Glue into place.

24.  Glue small red button to center of each pinwheel.  Glue onto white painted toothpick and insert into base.

25.  Create and print computer generated “CELEBRATE” and “4th of July” onto white card-stock.  Cut and layer to size and adhere onto picks and skewers and insert onto centerpiece.

This project was created for and sponsored by Smoothfoam and Canvas Corp Brands.

For more summer fun…click on Slimer ad below

Slimer

Disclaimer:  This blog uses ads and affiliate links.  If you choose to make a purchase using one of the links, I receive a small commission (at no additional cost to you) that helps offset the costs of maintaining this blog.  Thanks for your support!

Join Amazon Kindle Unlimited 30-Day Free Trial