4th of July Centerpiece

4th of July Centerpiece 2

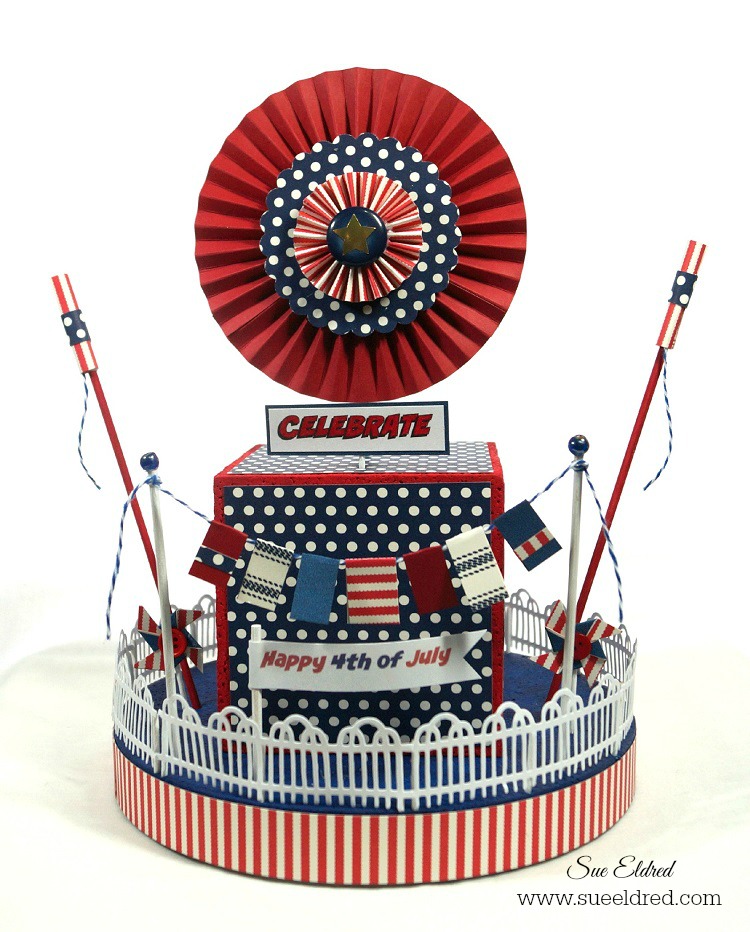
White picket fences, the good old red white and blue. 

A 4th of July Celebration with Fireworks, Flags, Banners and Pinwheels all rolled into one

fun Party Centerpiece.

Products Used:                 (*affiliate link)

  1. Paint the disc with Navy Blue paint.
  2. Cut two 1” x 12” strips of the red striped paper and one 1” x 2” piece. Adhere to the side of the disc with double stick tape roller.
  3. Cut 7 fence sections.
  4. Paint 15 round toothpicks white. (set four aside to use later.)Fence 3836
  5. Cut 11 toothpicks in half. Glue one toothpick half on each end and middle of the fence with the pointed end facing down.

  6. Insert fence sections onto the top edge of the disc.

  7. Paint the 4” cube red.

  8. Cut five 3 ¾” x 3 ¾” pieces of Navy & Ivory dot paper. Adhere to the sides and top of the cube. Glue cube to center of the disc.

Base 3839

9. Paint two bamboo skewers white. Cut skewers to 5”.

10.  Glue small blue beads to top of each skewer.

11.  Create small ½” flags from scraps of paper and cardstock. Adhere onto a 12” piece of blue and white twine.  Tie ends of the twine to top of the skewers to make a flag banner. Insert into disc.

Flags 3845

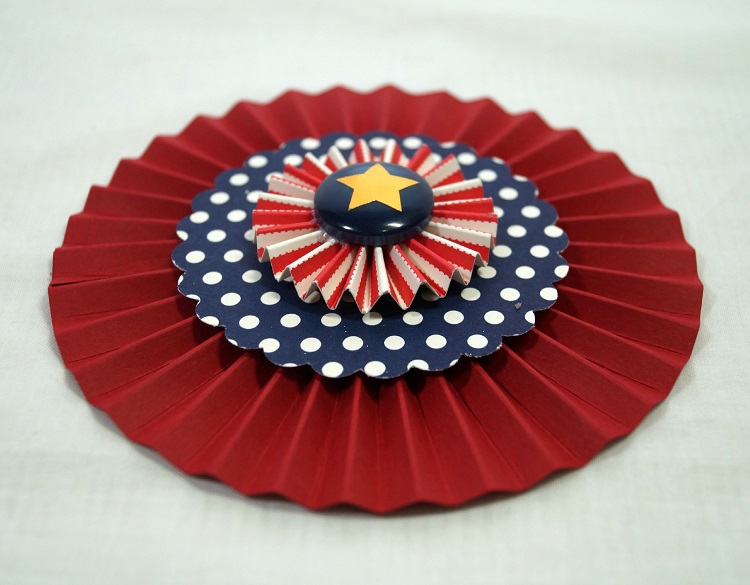
12.  To create Bottle Rockets:  Paint two bamboo skewers red.  Cut two pieces of red striped paper 1 3/4” x two. Wrap around pencil to curve paper. Remove pencil and roll tightly to form a small tube. Wrap a 1/2” strip of navy dot paper around tube.  Glue a small piece of twine inside of tube to create the bottle rocket wick. Glue tube onto red bamboo skewer and insert into disc. Create second bottle rocket for other side of the disc.

Rosette 3847

13.  Punch two 3” Navy and Ivory Dots scalloped circles.

14.  Cut two strips of red card-stock: 1 1/4”” x 12” and 2 1/4” x 6 1/2” . Adhere the two strips together to form one long 2 1/4” x 18” strip of red card-stock.

15.  Using scoring board and scoring tool. Score card-stock every 1/4” down the entire length. Fold strip accordion fold. Glue ends together with a strong adhesive to form a cylinder.

16.  On a flat surface, gather the bottom of the cylinder tight while spreading and pushing down on the top to create the Rosette.

17.  With a strong adhesive, attach one of the scalloped circles to the center of the Rosette. Hold into place until the adhesive starts to hold.

18.  Turn the Rosette over and attach the second scalloped circle onto the other side of the rosette.

19.  Create a second smaller rosette using a 1” x 12” strip of red striped paper. Score strip ever 1/4”.

20.  Glue blue button into center of the rosette to hold in place. Glue onto center of the scalloped circle. Add star sticker to center of button.

21.  Paint a bamboo skewer with Navy paint. Cut into a 5” piece. Insert into back of finished Rosette.

Rosette 3849

22.  Insert finished Rosette into top of the 4″ cube.

Pinwheels 3857

23.  Create small pinwheels by adhering two pieces of 1” x 1” paper together.  On each corner, cut diagonally two-thirds of way to square’s center, dividing each corner into two points. Bring every other point to center so that the points overlap. Glue into place.

24.  Glue small red button to center of each pinwheel.  Glue onto white painted toothpick and insert into base.

25.  Create and print computer generated “CELEBRATE” and “4th of July” onto white card-stock.  Cut and layer to size and adhere onto picks and skewers and insert onto centerpiece.

This project was created for Smoothfoam and sponsored by Smoothfoam and Canvas Corp Brands.

For summer fun… click on ad below.

Slimer

Disclaimer:  This blog uses ads and affiliate links.  If you choose to make a purchase using one of the links, I receive a small commission (at no additional cost to you) that helps offset the costs of maintaining this blog.  Thanks for your support!
Join Amazon Kindle Unlimited 30-Day Free Trial

Happy Little Camper


Happy GlampingI always tell people, my idea of roughing it is a bad hotel room. But who knows, if I had a happy little camper like this, I might try my luck with camping.

Supplies:

6″ Smoothfoam Disc
2″ Smoothfoam Ball
Window & Door Die by Impression Obsession
Diecutting machine
Scrapbook paper
Acrylic paints – Antique White, White, Light Blue, Black
Paintbrush, Q-tip
Silver metallic paint marker
Ribbon & twine
Craft glue
Assorted brads
Corsage pins
Craft knife or Hotwire Foam Cutter

1.  To create the body of the camper, cut 2″ off the edge of the Smoothfoam disc.  Paint the top antique white and the bottom light blue.  Add white polka dots on top of the blue with a small Q-tip.

2.  Cut two slices out of the middle of the Smoothfoam ball for the wheels and paint them black.

3.  Cut a small block from the leftover Smoothfoam to prop up the camper’s front end and color it with the silver paint pen.

4.  Glue all the pieces together as shown.

5.  Die-cut two windows from white paper and glue them onto patterned paper, then trim to create the window background. Cut a 1″ x 2″ piece of red cardstock to use as the door.
Glue one windows to the camper and the other to the door, then glue the door to the camper.

6.  Make a banner with ribbon and twine.  Tie twine ends around corsage pins and stick into top of the camper.

Happy Glamper 2

How to make a Farm House Kitchen Recipe Book

How to make Farm House Kitchen Recipe Book

The Farm House Kitchen Recipe Book

was made using papers and embellishments from Canvas Corp Brands Farm House Kitchen line.

This recipe book is a fairly easy but  still detailed, I’ve included lots of photos and instructions

so you can make one for yourself.  If you have any questions on the project please leave them in

the comments and I will answer them as soon as I can.  Enjoy!

Designed by Sue Eldred for Canvas Corp Brands.

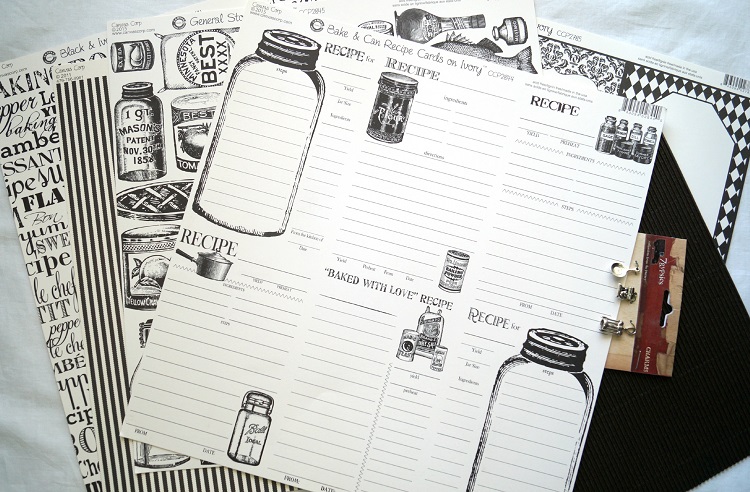
Recipe Book Papers 04159

Canvas Corp Brands Products:

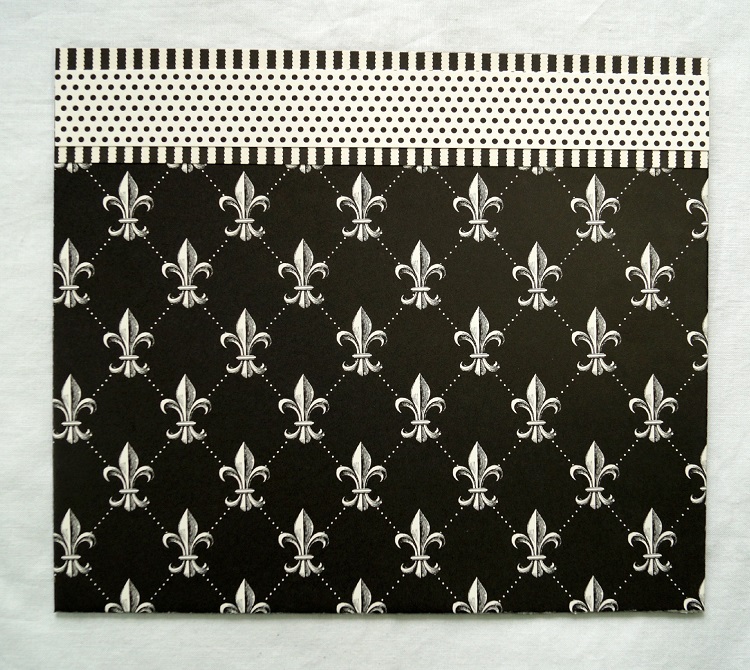
  • CCP2868 Black & Ivory Fleur De Lis Reverse
  • CCP2609 Black & Ivory Ribbon Stripe
  • CCP2745 Black & Ivory Pin Dot
  • CCP2785 Little Black Pages on Ivory
  • CCP2631 Black & Ivory Bon Appetit (2 sheets)
  • CCP2845 General Store On Ivory
  • CCP2829 Black & Ivory Zig Zag
  • CCP2844 Bake & Can Recipe Cards (3 sheets)
  • CCP2817 Journal Lines on Ivory
  • Black Corrugated Paper
  • 12717 Charms Kitchen
  • Cream Cord
  • Silver Jump Rings

Additional Products Used:

  • Chipboard
  • Black Cardstock
  • Dbl. Stick Tape Runner
  • Bind It All & Coil
  • Black Foam Mounting Squares
  • 1/16” hole punch

Finished Book: 7 1/2” x 8 3/4”

Inside Pages: 7 1/4” x 8 3/4”

Cover w mitred corners 4170

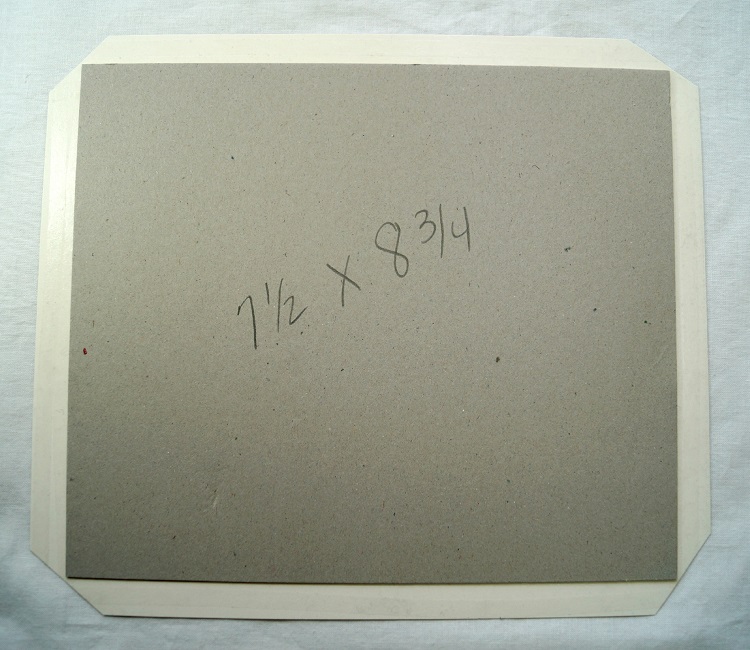
  1. Cut two pieces of chipboard 7 1/2” x 8 3/4”.
  2. Cut one piece of Fleur De Lis paper 8 1/2” x 9 3/4” for the front cover and one piece of Black and Ivory Zig Zag 8 1/2” x 9 3/4” for the back cover.
  3. Generously apply adhesive to the back of the scrapbook paper, make sure to go to the edge of the paper. Lay and center the cut chipboard onto the back of the paper.
  4. To make mitered edges: Cut at a diagonal a triangle off each edge of the four corners of the scrapbook paper. Leave approx. 1/8” space between chipboard when cutting. (tip-save triangles to cover edges if corners don’t meet.

inside cover 4177

5. Fold over and adhere each edge to the reverse side of the chipboard. Repeat with the second piece of chipboard and scrapbook paper. Rub with bone folder for better adhesion.

inside cover 04181

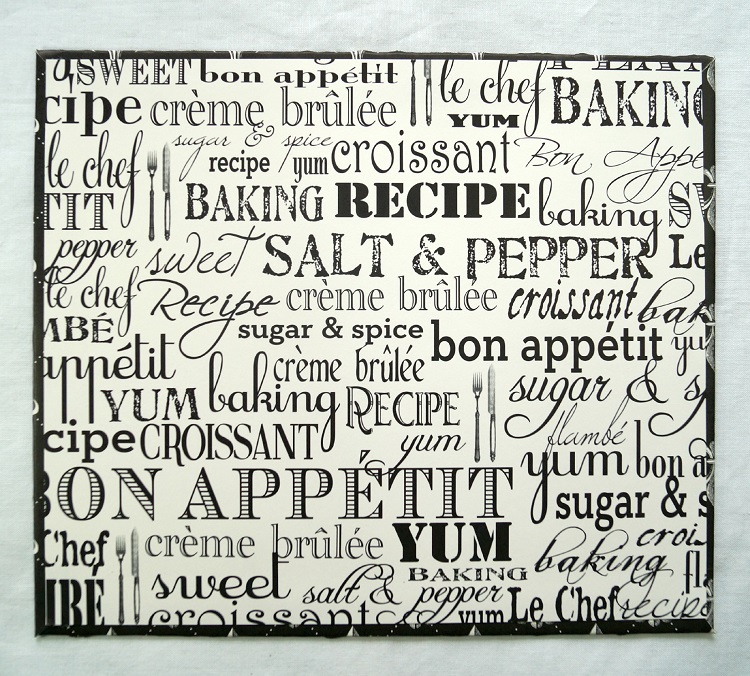
6.  Cut two pieces of Black & Ivory Bon Appetit paper 7 1/4” x 8 1/2” and adhere to the inside of the album.

Cover 04183

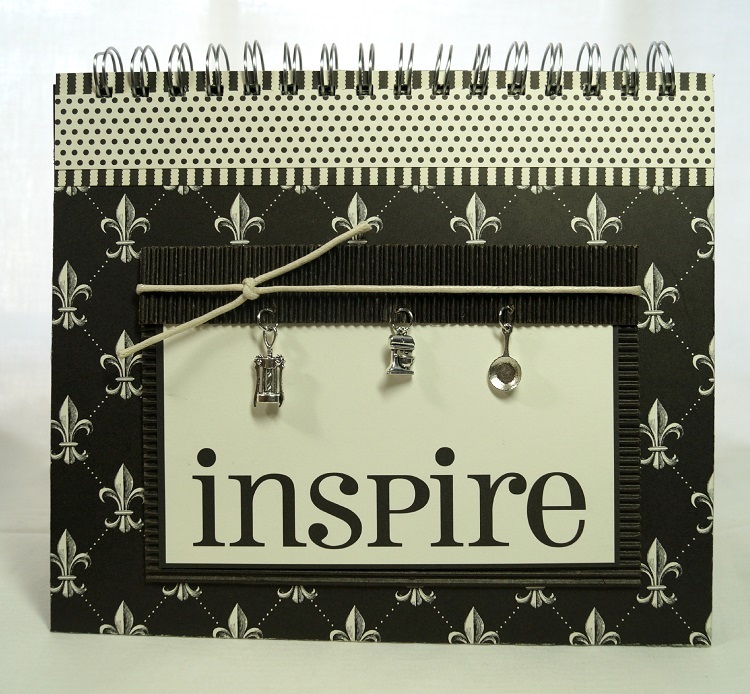
7.  Decorate the front cover with a 1 1/2” strip of Black and Ivory Ribbon Stripe paper and a 1” strip of Black and Ivory Pin Stripe paper.

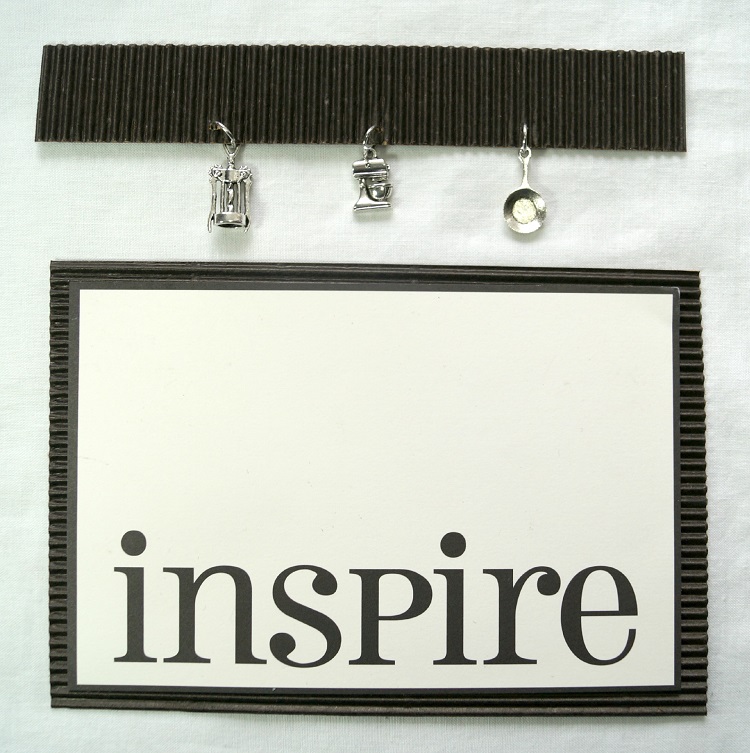
Inspire Pieces 4186

8.  Cut two pieces of black corrugated paper, 4 1/2” x 6 1/2” and 1” x 6 1/2”.

9.  Cut and the 4” x 6” section with the word “inspire” from the Little Black Pages on Ivory paper and adhere to the 4 1/2” x 6 1/2” piece of black corrugated paper.

10.  Punch three small holes on the 1” strip of black corrugated paper and hang kitchen charms with silver jump rings.

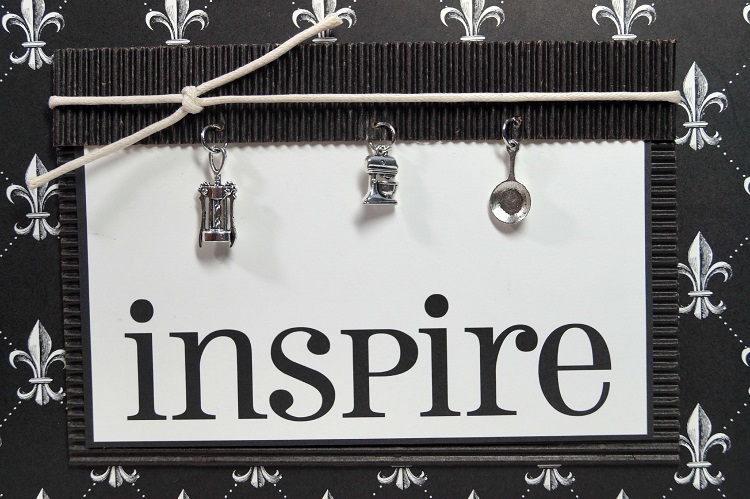
inspire close up 04192

11.  Glue on top of “inspire” paper.

12.  Tie White Cord around layers and adhere to the front of the album.

inside album 04197

13.  For the Inside Pages: Cut several pieces of black cardstock 7 1/4” x 8 3/4”.

14.  Cut and add recipe cards from the Bake and Can Recipe Cards paper to your book.

Cut Outs 4163

15.  Decorate your pages with additional strips of paper and cut outs from the General Store on Ivory paper.

Farm House Recipe Book 4189

16.  Bind the Farm House Recipe Book with the Bind It all Machine and coils.

Disclaimer:  This project was created for and sponsored by Canvas Corp Brands.

Smiley Face Graduation Pencil Topper

What every Graduate needs.  A Smiley Face Graduation Pencil Topper. 

And because this little guy’s feeling really special, he needed a bow tie.

To make the Smiley Face Pencil Topper you’ll need:

  • 2″ Smoothfoam Ball
  • Sanding Block or Fine Sandpaper
  • Craft Knife
  • Yellow and Black Acrylic Paint
  • Pencil
  • Black Cardstock or Black Chipboard
  • Red Twine
  • Black Brad
  • Black Gingham Ribbon
  • Craft Glue
  1. Lightly sand ridge from the smoothfoam ball.
  2. To make the top of the ball flat, cut a small portion from the top of the ball with a craft knife.
  3. Paint the ball with yellow paint.
  4. Paint the top portion of ball with black paint and paint on face.
  5. Bore a hole into the bottom of the ball big enough to fit the pencil.
  6. Using the red twine, make a small tassel.
  7. Cut a 2″ square piece of black chipboard.
  8. Punch a small hole in center of the chipboard.  Insert ends of the tassel and black brad.
  9. Glue Mortarboard onto top of the Smiley Face.  Insert onto pencil
  10. Make a small bow tie from black gingham ribbon and glue onto the front of the pencil.

This project was created for and sponsored by Smoothfoam.

The Cooker Guy

Another fun kid friendly project with one of my favorite helpers.  The Cooker Guy!

Kids love helping in the kitchen and this guy’s no exception.  Whenever he catches me

working on something in the kitchen, a scooting chair is soon to follow.

The Cooker Guy

I’ve been told several times, “Grandma you need a kid apron for me.”

So… I decided we should make a special one just for him.

Misting the Apron

I purchased a small apron from Canvas Corp Brands.

They call it a Toddler Apron, but it’s plenty big enough for this 4 year old.

Stenciled and sprayed

We misted and sprayed the apron with various colors of Glimmer Mists from Tattered Angels.

We also used a couple of stencils to create designs on the apron.

Personally, I think it looks more like a Art Apron than a Chef Apron.

But really?  Who’s to say?  He’s happy and that’s all that matters.

Custom Letters

To make this apron special I used these really nice iron-on embroidered letters I received from

I used the Funky Style Hobo Font in white.

I like getting the letters in white so that I can customize them any color I want.

Make sure to check out their Creating with Joy Blog.  www.creatingwithjoy.blogspot.com

I asked Nick what he wanted his apron to say and he choose the words “Cooker Guy.”

Cooker Guy Collage

Here’s my happy “Cooker Guy”, doing what does best.  Helping out.

“This is a sponsored post.  As a member of the Joy® Design Team I have been provided product and compensation in exchange for my creative ideas.  The views and opinions are my own.

Shop Your Fav Brands at Scrapbook.com

*Disclosure:  This blog uses ads and affiliate links.  If you choose to make a purchase using one of the links, I receive a small commission (at no additional cost to you) that helps offset the costs of maintaining this blog.  Thanks for your support!

DIY Graduation Frame with Tassel

DIY Graduation Frame 5398

Some years I don’t have any Graduations to celebrate. 

This year there are three.  One from High School, Two from Junior High.  (not mine!)

I decided to make a Graduation Frame to use as one of the gifts.

After the ceremony the Graduate can take out the greeting and add a picture.

DIY Graduation Frame Collage

For my frame I used:                                                                                    (*affiliate link)
  1. To make the tassel:  Wrap the red twine around a piece of chipboard several times.  The size of the chipboard determines the length of the tassel.
  2. Cut a piece of twine to gather and tie tightly around the twine at the top of the wrapped chipboard.
  3. Cut open the bottom loops from the chipboard.
  4. Wrap thin gold wire around the top of the tassel to imitate the look of a gold band.
  5. Trim the bottom of the tassel to even the length.
  6. Create computer generated greeting and insert inside the frame.
  7. Ink white chipboard numbers gray using the ink applicator.  Stick on front of the frame.
  8. Make a small garland from small 1/2″ strips of paper adhered to a piece of red twine.
  9. Adhere the tassel to the back of the frame with a small piece of tape.  That way the Graduate can reposition the tassel if needed after adding photo.

FYI:  When my oldest graduated from High school his younger sister also graduated from Junior High.  Four years later when it was time for her to graduate High School he was graduating from College.

SO….for all you young people thinking of starting a family. 

Don’t space your kids 4 years apart.  (The magic number is three.)  Just saying!

“This is a sponsored post. As a member of the Deflecto Design Team I have been provided product in exchange for my creative ideas, views and opinions.”

Shop Your Fav Brands at Scrapbook.com

*Disclosure:  This post uses ads and affiliate links.  If you choose to make a purchase using one of the links, I receive a small commission (at no additional cost to you) that helps offset the costs of maintaining this blog.  Thanks for your support!

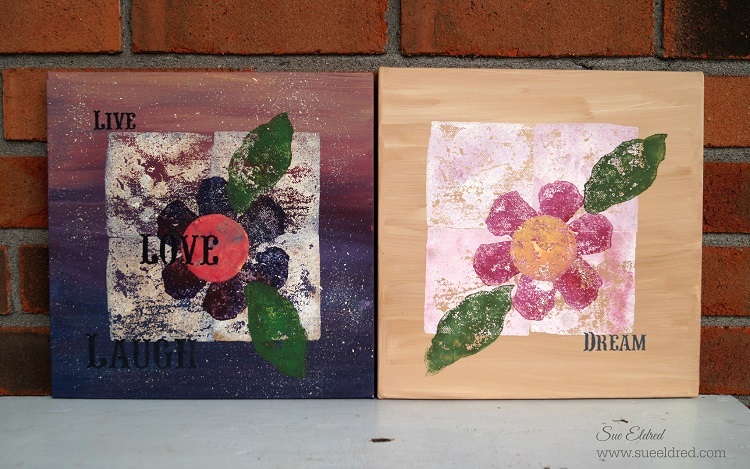
Block Stamping on Canvas with Smoothfoam

Both Canvas' 4913

I had this great idea to make stamps using Smoothfoam so that I could do sidewalk stamping with my

Grandsons.  After one messy (but fun) try, I decided it really wasn’t going to work the way I wanted.

So… I decided to use the stamps on a canvas instead.

(See Wednesday’s post:  The Good, the Bad and the Messy)

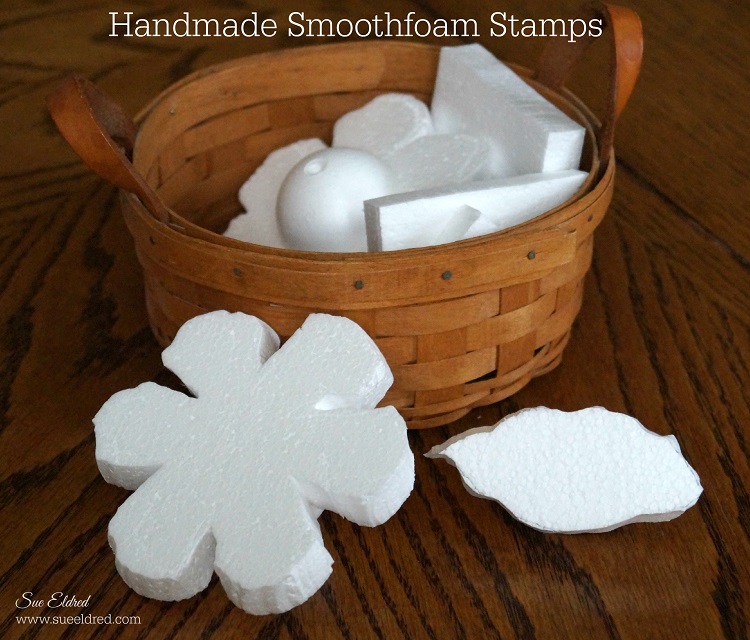
Handmade Smoothfoam Stamps 4837

I created the stamps using a Hotwire Foam Cutter.  You could also use a craft knife.

Because the original plan was to use them with the kids, I glued handles on the back.

I made flower shapes, leaves, squares and triangles.

Block Stamping Collage

Supplies Used:

  1. Prime canvas with acrylic paint.
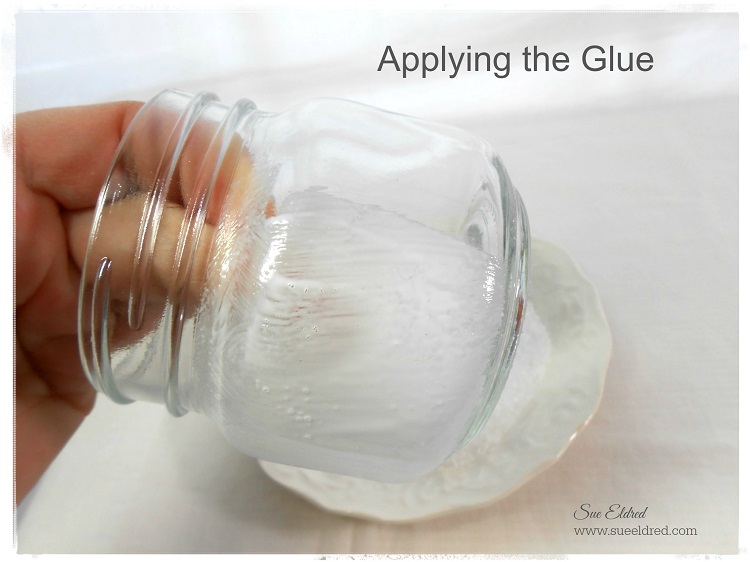
  2. Sponge acrylic paint on the back of the Smoothfoam pre-cut square, stamp onto the canvas.  You may need to press the back of the canvas with your remaining hand to get crisper image.  Repeat three more times to create square background.
  3. Stamp flower and leaves.  Using a small Smoothfoam ball cut in half, stamp center of flower.
  4. Stencil words on Canvas.

Block Stamping on Canvas with Smoothfoam

Disclaimer:  This project was created for and sponsored by Smoothfoam.

How to Make a Garden Butterfly Sign

Welcome to My Garden Butterfly Sign 4758

How to make a Garden Butterfly Sign.

A fun technique using Black Sign Tags from Deflecto Craft Solutions.

According you my you tube account it’s been 4 years since I made my first video.

I guess it was finally time for my second one.  (let me know what you think)

“This is a sponsored post. As a member of the Deflecto Design Team I have been provided product in exchange for my creative ideas, views and opinions.”

Simply Beautiful Handmade Flower

Learn how to make a Simply Beautiful Handmade Flower in a few easy steps.

To make the flower you’ll need:      (*affiliate link)
Disclosure:  This blog uses affiliate links.  If you choose to make a purchase using one of the links, I receive a small commission (at no additional cost to you) that helps offset the costs of maintaining this blog.  Thanks for your support!

Directions:

  1. Punch 3 daisies from each one of the punches for a total of 12 punch outs.
  2. Using the end of a pencil or skewer, round each of the petals up.
  3. Turn the punched shaped over and press down into the center.
  4. Glue two of the largest flowers together slightly off centered.  Add the third flower.
  5. Continue adding and gluing the next size flower and glue on top.  Repeat with the third size.
  6. Pinch the smallest flowers up tight and stagger and glue onto the center of the flower.
  7. Spray the finished flower with Glimmer Mist until you get the desired shade of color.
  8. Once the flower is dry add a small adhesive pearl in the center of the flower.
  9. Create card using Captivating Squares shapes and layers misted with Glimmer Mist

*FTC Disclosure… “This is a sponsored post.  I have been provided product in exchange for my creative ideas.  The views and opinions are my own.”

Glittered Bunny Egg

Are you ready for Spring?

Warm Weather, Pretty Flowers and Sweet Little Bunnies and Easter Eggs.

My project today is a Sweet Glittery Little Bunny made from a Smoothfoam Egg.

Bunny Parts and Supplies 3178 Glittered Bunny Egg 3224

To Make the Glittered you’ll need:        (*affiliate links)

  1. Cut two bunny ears from the smoothfoam sheet
  2. Lightly sand Smoothfoam egg and bunny ears.
  3. Glue ears onto Smoothfoam egg.
  4. Paint with cream paint.  Paint inside of the bunny ears pink.
  5. Cover the entire bunny with a thin coat of mod podge and sprinkle with glitter.
  6. Insert micro brads for the eyes and heart brad for the nose.
  7. Draw small mouth with fine black marker.

This project was created for and sponsored by Smoothfoam.

Shop Your Fav Brands at Scrapbook.com

*Disclosure:  This blog uses ads and affiliate links.  If you choose to make a purchase using one of the links, I receive a small commission (at no additional cost to you) that helps offset the costs of maintaining this blog.  Thanks for your support!