Eileen Hull’s New Vintage Truck Die

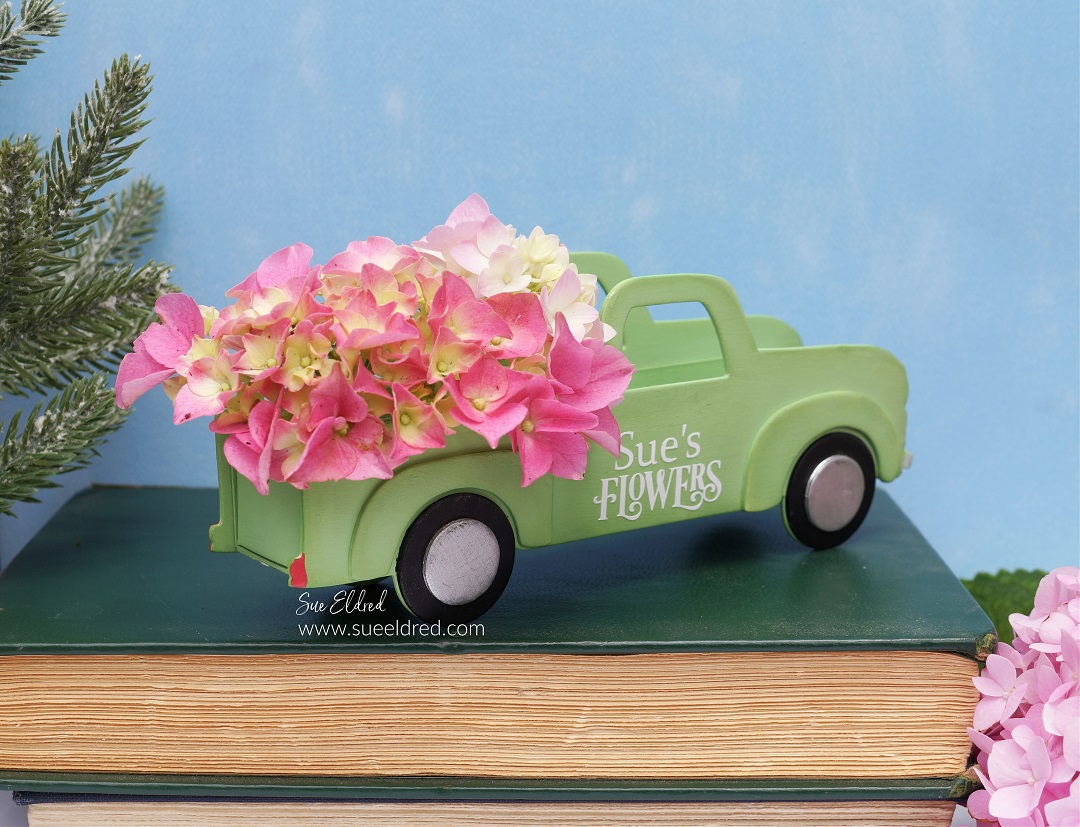
Vintage Flower Truck

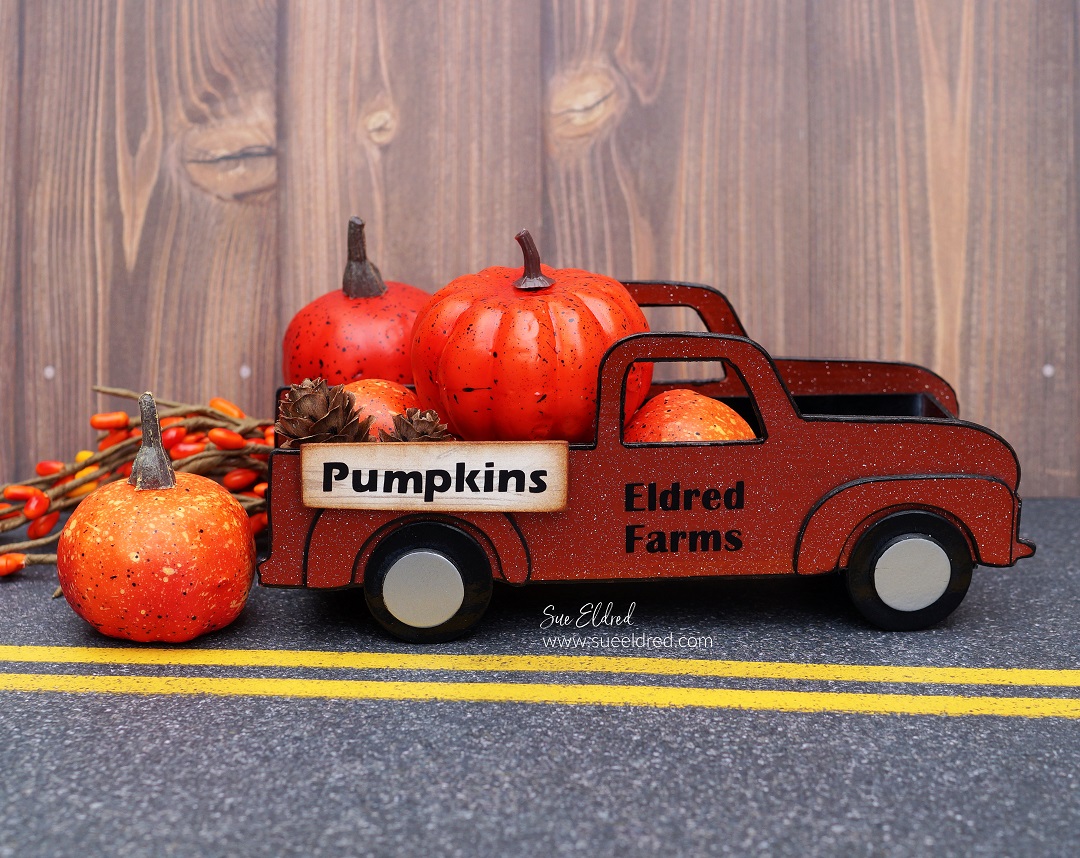
I’m excited to share with you Eileen Hull’s New Vintage Truck Die*

that is part of the New Chapter 3 Release Dies from Sizzix.

It is one of the cutest dies for so many different Holidays.

Can you imagine it as an old rusty pickup filled with miniature pumpkins? 

And of course, think of all the cute things you can do for Christmas.

Vintage Flower Truck-Sue's Creative Workshop www.sueeldred.com 491

Here’s What I used:    (*affiliate link)

Tips:

*Disclosure:  This blog uses ads and affiliate links.  If you choose to make a purchase using one of the links, I receive a small commission (at no additional cost to you) that helps offset the costs of maintaining this blog.  Thanks for your support!

Cardinal on Wreath Ornament

Another project made using the New Chapter 3 Dies is this Simple Holiday Ornament

using the New Ornament Box Die*  and the Wreath and Snowflake Thinlets Die Set*.

There’s a limited supply of these dies currently, so make sure to get yours today.

Eileen Hull/ Sizzix Chapter 3 Dies

Eileen’s Teams have joined together to give you even more ideas on these creative New Dies.

LET’S GET GOING ON OUR RELEASE PARTY BLOG HOP…

Click on the next link below to continue on your way. Comment on each designer’s blog post to be eligible to win a prize!  (see Eileen’s Blog for details)

Eileen Hull Designs
Julia Aston
Madeline Arendt
Jennie Atkinson
Sue Eldred
Maggi Harding
Lisa Hoel
Elizabeth Robinson
Tonya Trantham
Pam Bray
Jenny Marples

Using Stazon Ink on Acrylic

Using Stazon Ink on Acrylic

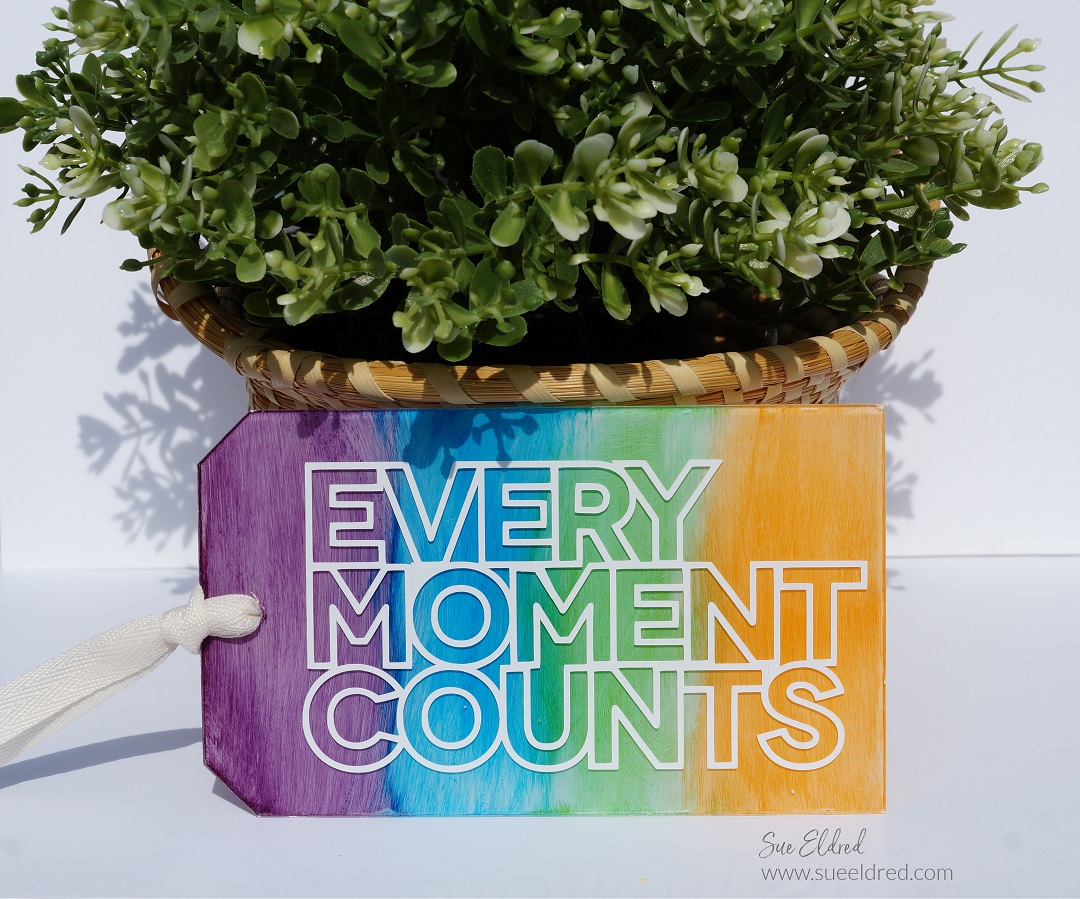
How to Create a Multi-colored Acrylic Tag using StazOn Ink.

I tried this technique last year and have been wanting to recreate another project

so that I could share the process with you all.  (I’m not sure what took me so long.)

And with so many different acrylic sizes and shapes available, the ideas are endless.

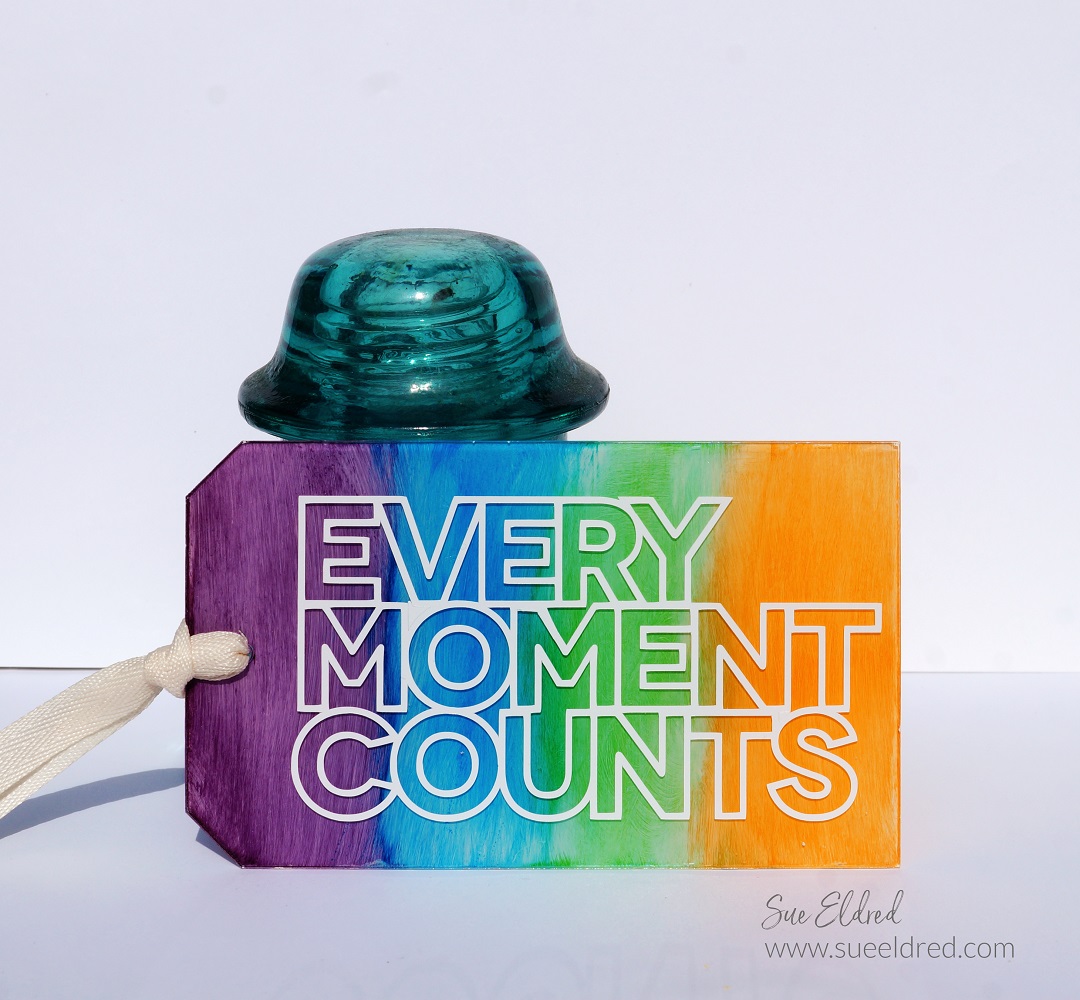
Every Moment Counts Acrylic Tag

StazOn Ink is a permanent ink that is archival-quality.

It dries very quickly and can be used on porous (cardstock) and non-porous (glossy paper, vinyl, glass, acrylic) surfaces.

Using Stazon Ink on Acrylic

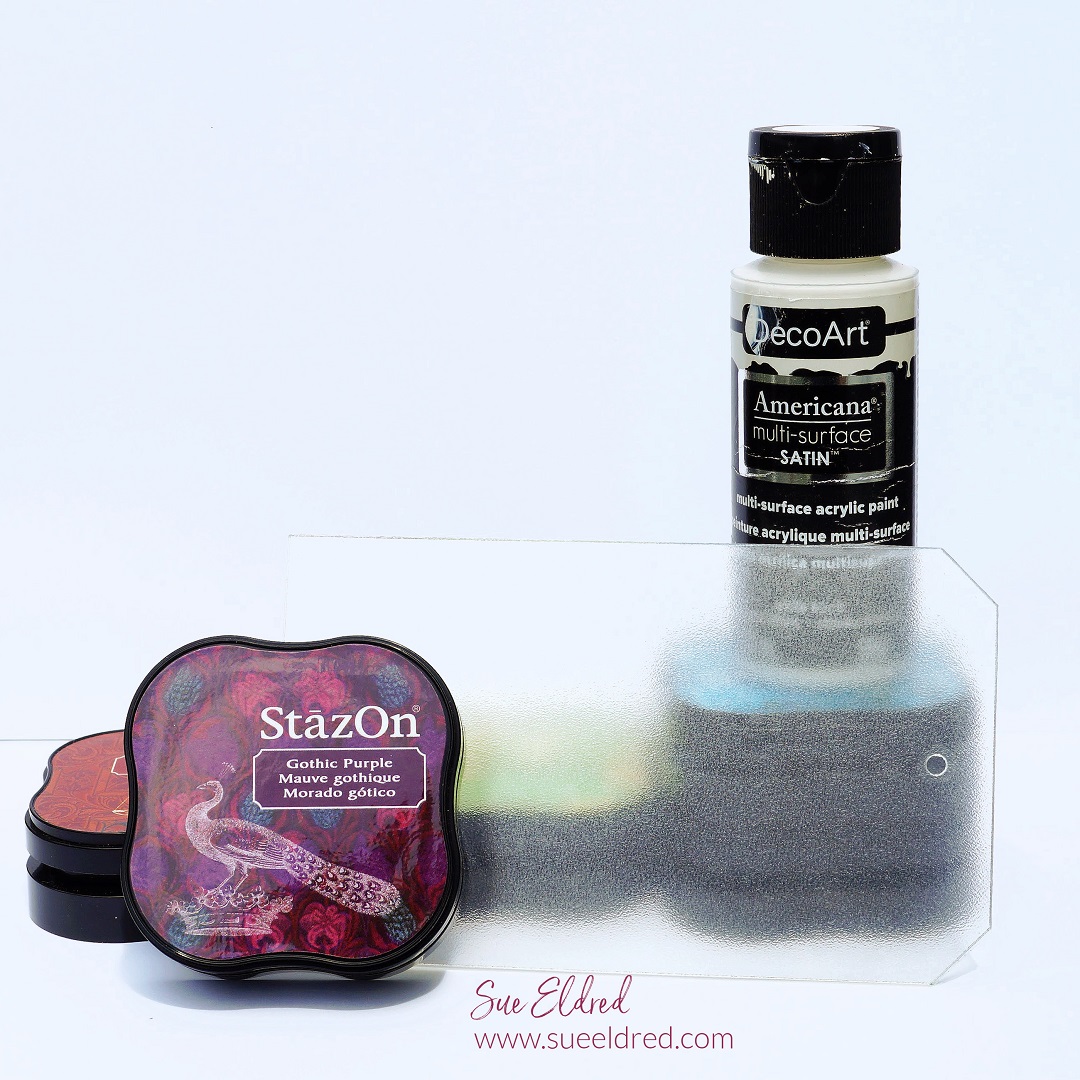
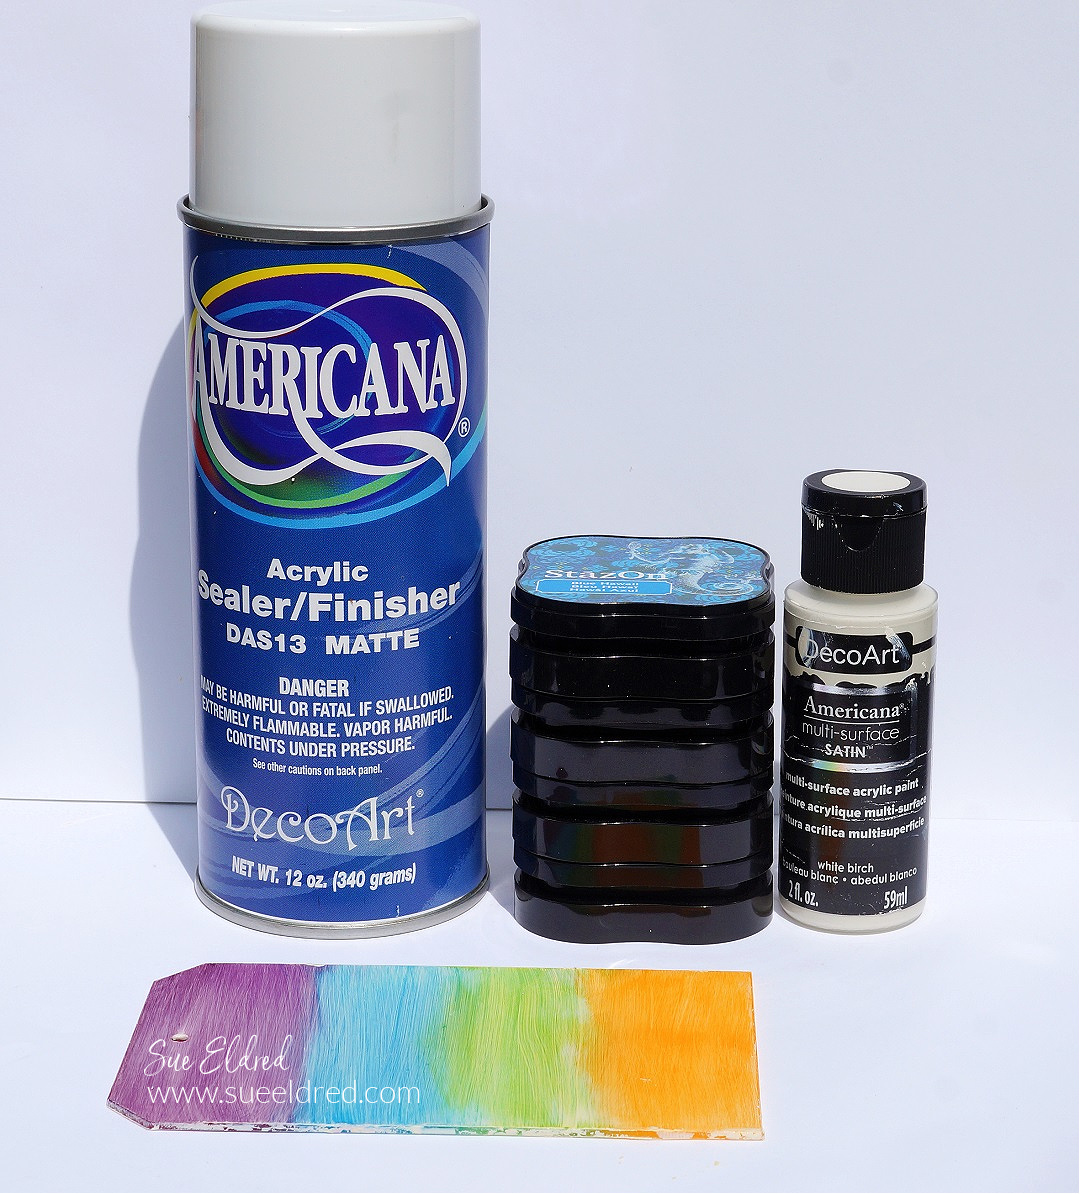
Materials Used:     (*affiliate links)

*Disclosure:  This blog uses ads and affiliate links.  If you choose to make a purchase using one of the links, I receive a small commission (at no additional cost to you) that helps offset the costs of maintaining this blog.  Thanks for your support!

How to use Stazon Ink on Acrylic

Directions:

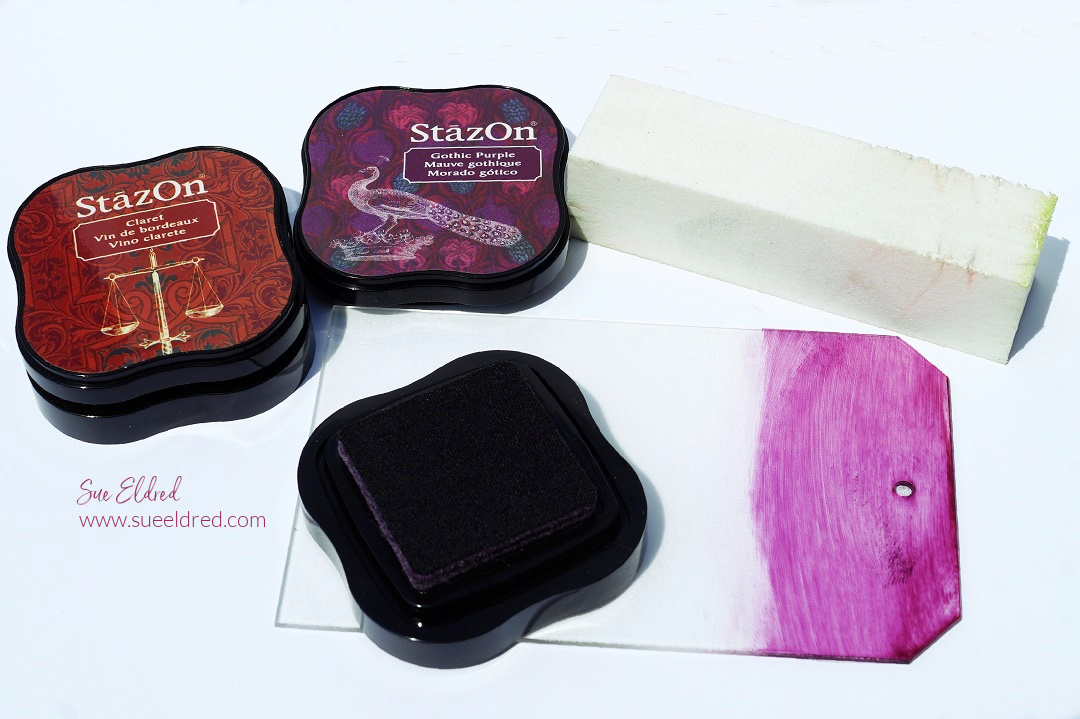
  • Most acrylic pieces usually come with a thin protective covering on both sides of the acrylic.  Remove protective covering off only one of the sides.  You will be working on one side at a time so only remove the protective cover off one side.  If your acrylic doesn’t have a protective covering you’ll need to make sure to protect the other side.
  • Give the acrylic piece a quick once over with a sanding block.  This helps ensure that everything adheres.
  • Rub the StazOn ink pad directly onto the acrylic to add the first color.

How to use Stazon Ink on Acrylic

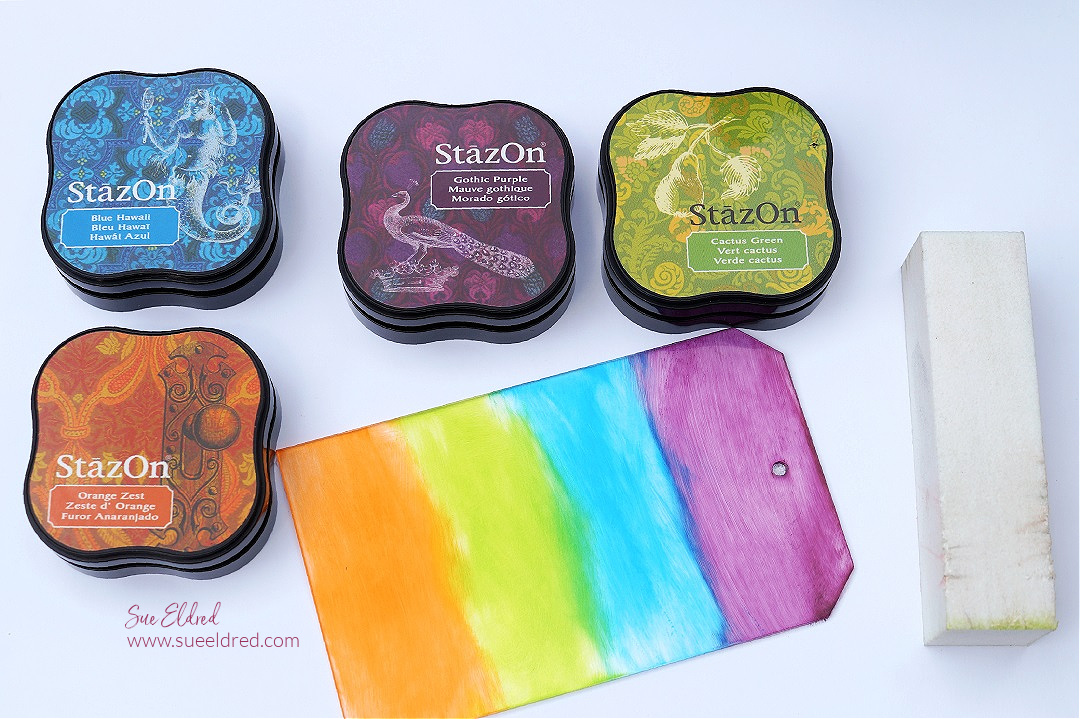
  • Continue adding additional colors to the tag.  
  • You can experiment with different swipes and swirls to find the pattern you like.

Using Stazon Ink on Acrylic

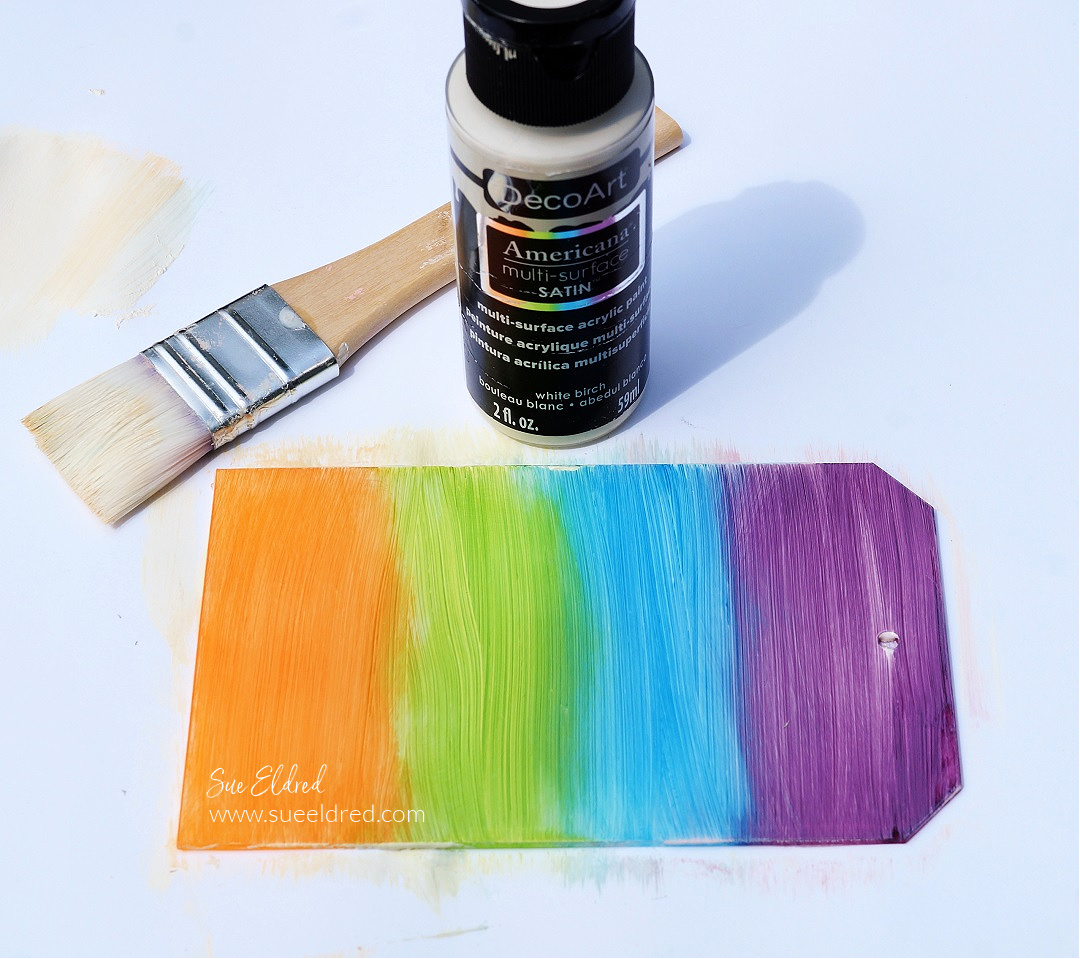
  • Paint one or two coats of light multi-surface acrylic paint over the ink.  The multi-surface paint is perfect for surfaces like acrylic.  The paint makes the colors of the ink pop and not as translucent.

Using Stazon Ink on Acrylic

  • For added protection and a scratch-resistant tag, I sprayed the tag with a matte acrylic sealer. (the color won’t be coming off my tag)
  • After everything has fully dried, turn the tag over and remove the second piece of protective covering from the acrylic.

Using Stazon Ink on Acrylic

For the other side of the tag.  

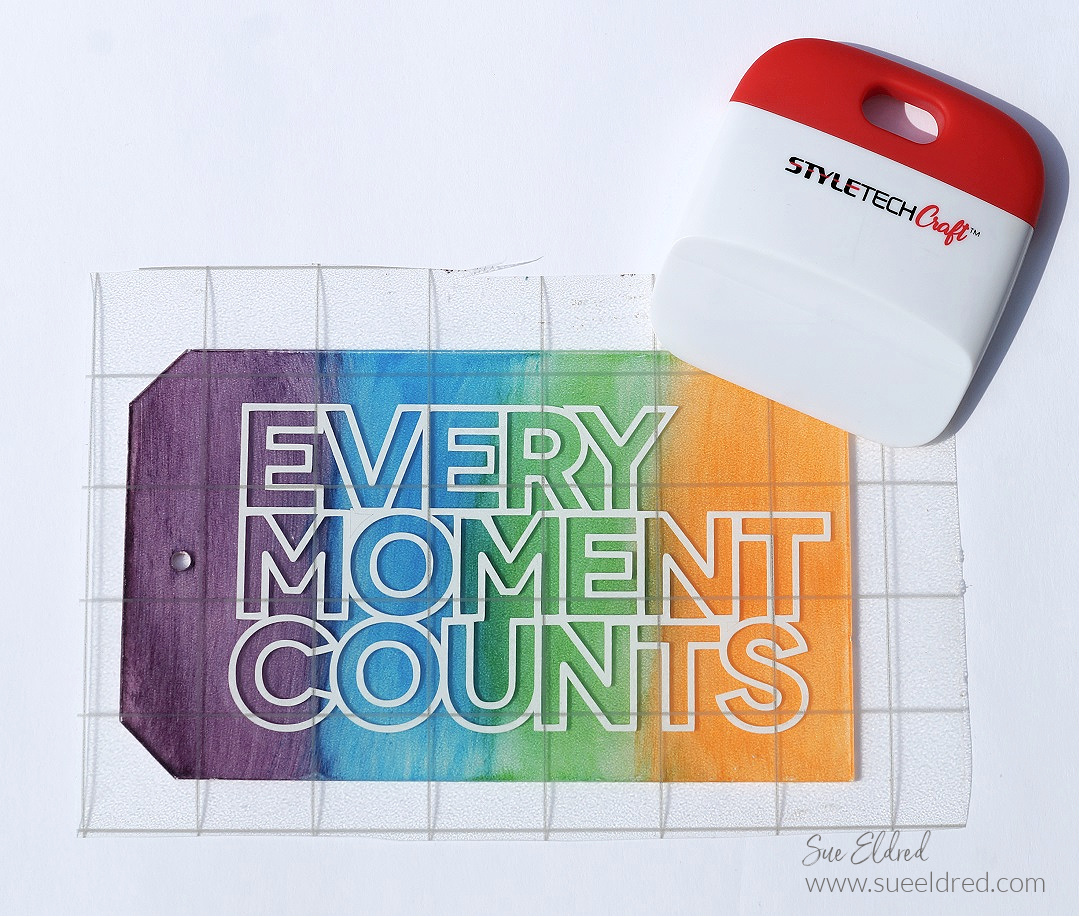
  • I created a saying using an SVG file from the Silhouette Store and cut it out of white glossy adhesive craft vinyl using my Silhouette Electronic Die-Cutting Machine*.
  • I used the vinyl tools to remove the excess vinyl in and around the letters.
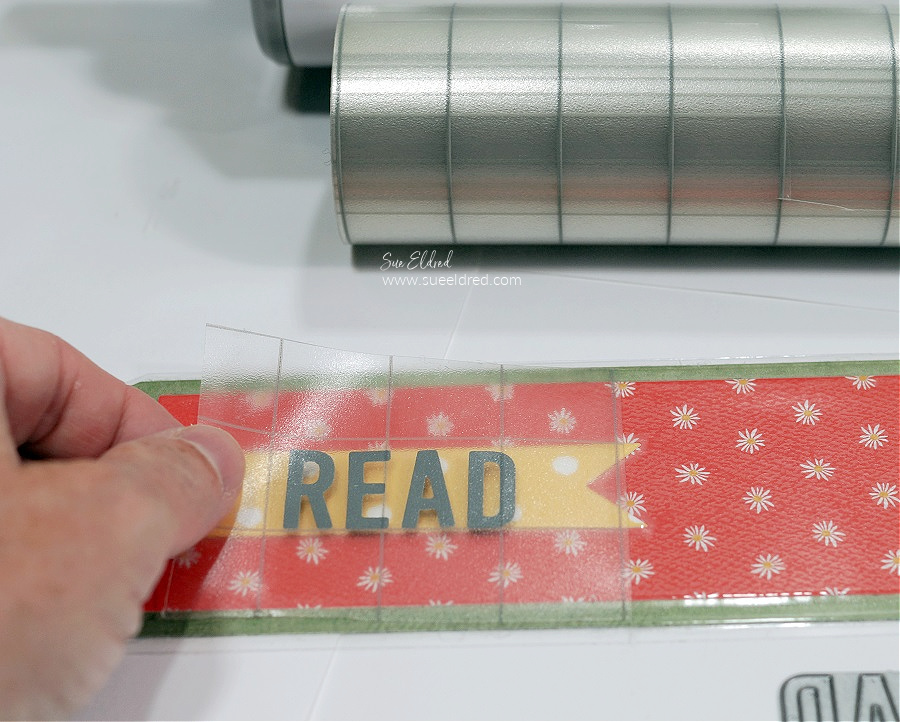
  • Cut a piece of Clear Transfer Tape* slightly larger than the word.
  • Using the vinyl scraper tool, gently rub over the letters to make sure they have transferred.
  • Lift the word off the white backer paper.

Apply Craft Vinyl to Acrylic Tag

  • Center and position the words over your acrylic tag and gently rub over the transfer paper with the vinyl scraper tool.
  • Carefully remove transfer paper from the acrylic tag.
  • Add ribbon or twine through the hole of the tag.

Makes a great inspirational bag tag.

Every Moment Counts Acrylic Tag

Interested in the Products Used on the Every Moment Counts Tag?

Click on Images below for Amazon Ordering.

Amazon Audible Promo    Amazon Audible Free Trial*

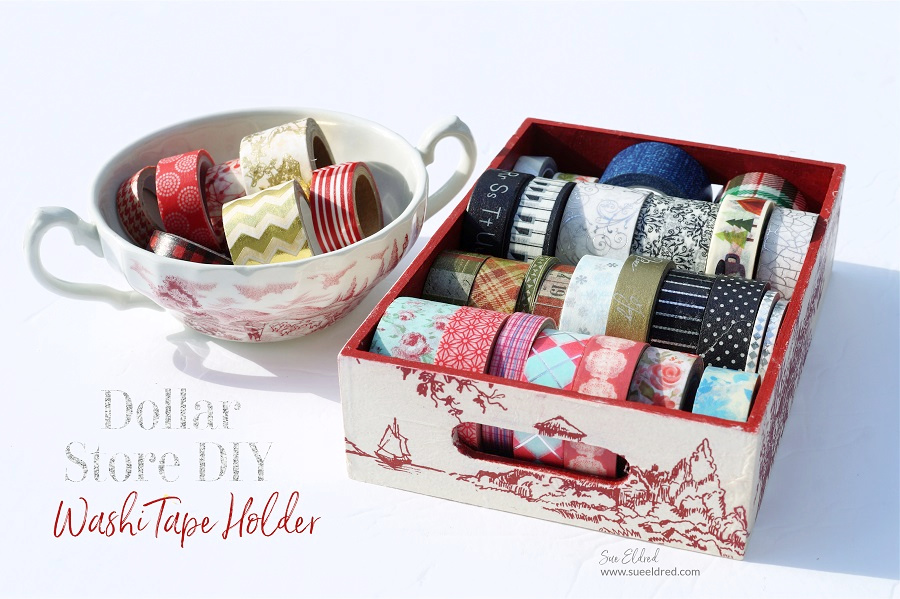
Dollar Store DIY-Washi Tape Holder

Dollar Store DIY-How to make a Washi Tape Holder

A Dollar Store DIY

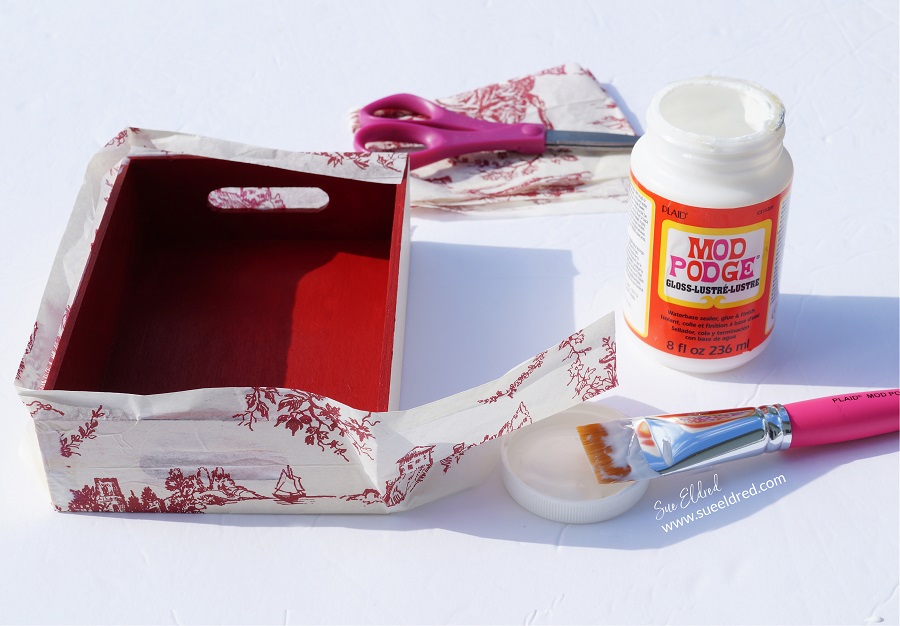
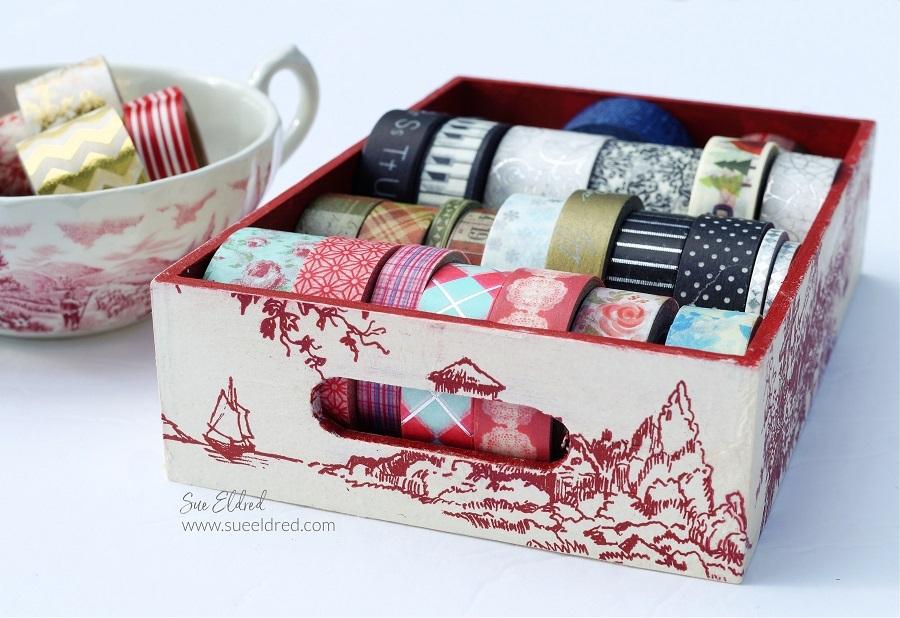
Turn an inexpensive Dollar Tree wood tray* into a cute little washi tape holder.

Just add Mod Podge and Decorative Tissue Paper for a quick and easy project.  

I found this cute little wood tray the other day at Dollar Tree and I thought it was

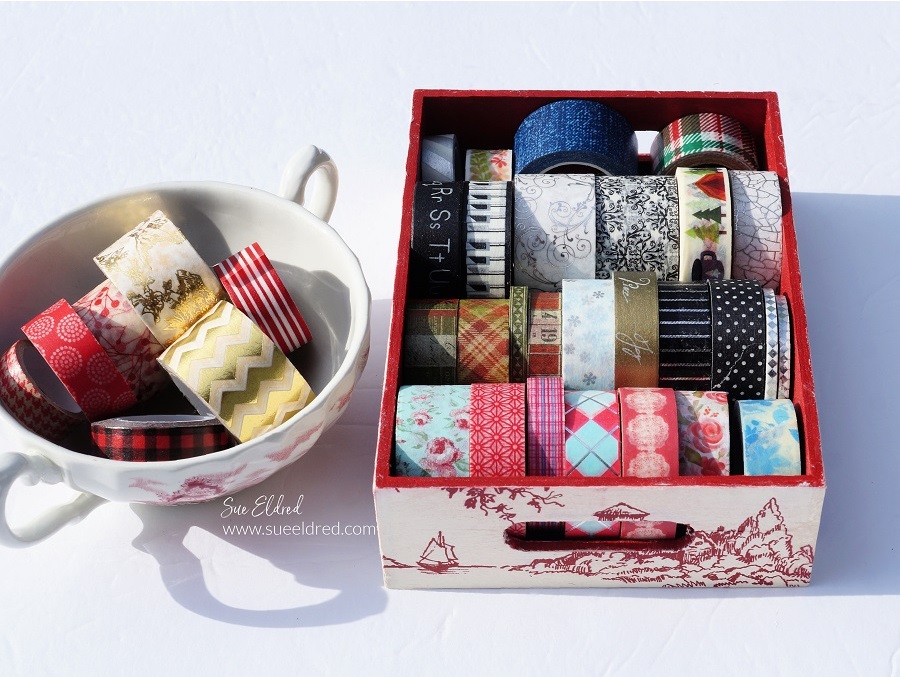
the perfect size to hold a small collection of Washi Tape. 

(I’m so happy that Dollar Tree is bringing in more craft supplies.)

Mod Podged Washi Tape Holder

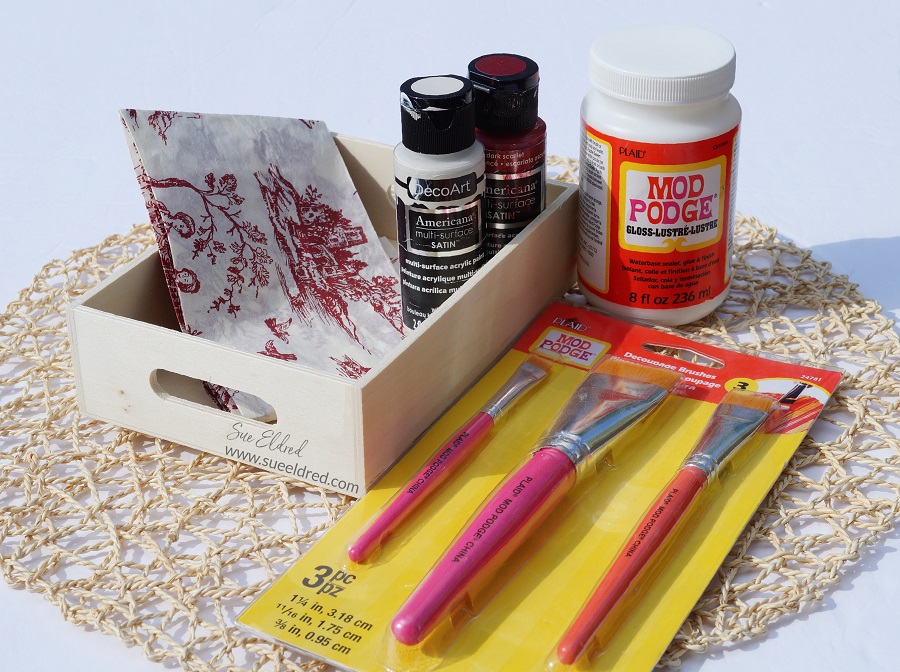
Materials Used:

Mod Podge on a Wood Tray

Directions:

  • Lightly sand the surface of the tray with the sanding block to smooth.
  • Paint the outside with white birch paint and the inside with dark scarlet.
  • Cut the tissue paper into 3″ strips.  Working one side at a time, apply Mod Podge* to the side of the tray.  Apply and gently smooth tissue paper.  Apply tissue paper to all four sides.  Allow Mod Podge* to dry.
  • Use a Sanding Block* on the edges of the tray to gently remove the extra tissue paper.
  • Use a Small Emory Board* to gently remove the extra tissue paper from the small opening.
  • Apply one or two coats of mod podge over the tissue paper to seal.

Dollar Store Crafting

With so many unique patterns of tissue paper available you should be able to easily

find the perfect pattern to decoupage your little tray.

Mod Podged Washi Tape Holder

The wood tray measures approximately 5″ x 7″ and can hold several rolls of Washi Tape.  

No Sew Bunny Gnome

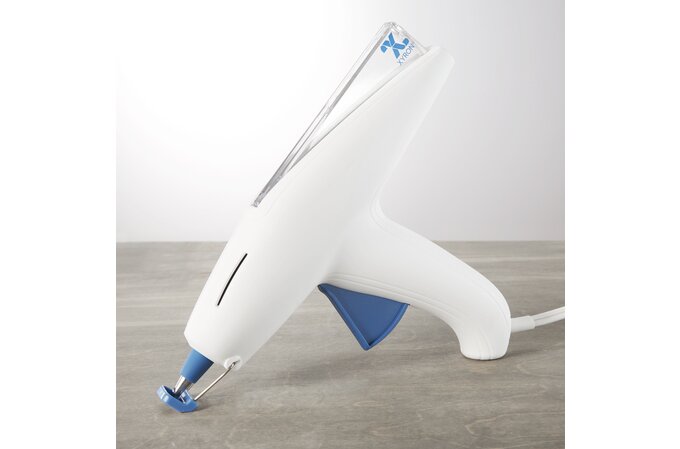
No-Sew Bunny Gnome made using the New Xyron Glue Gun.

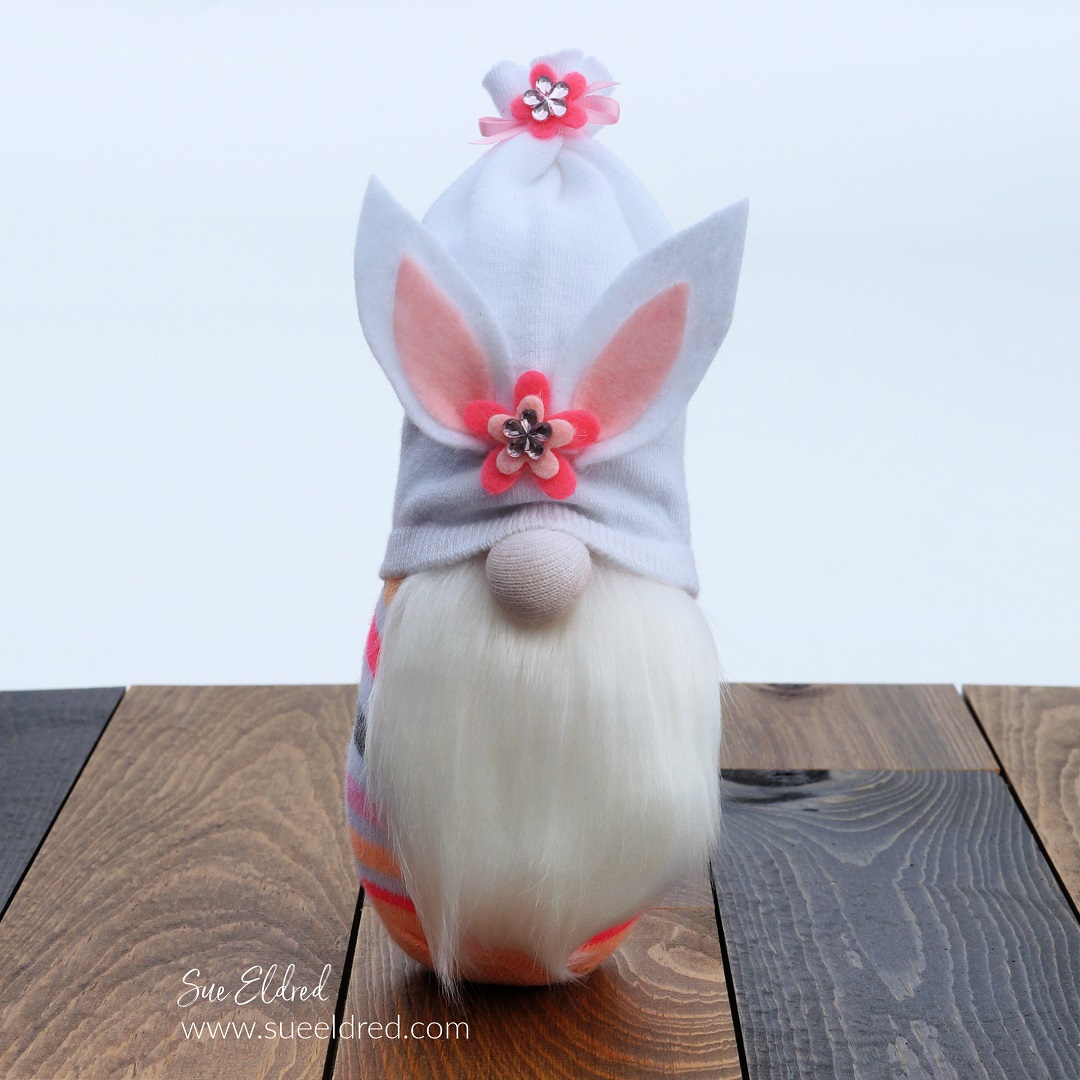
This Bunny Gnome was made using a couple of inexpensive girl socks from Dollar Tree.

The instructions for the Bunny Gnome are very similar to how I made the Valentine Gnome.

I filled the bottom of the sock with 1/3 cup of rice and filled the rest with poly-fil.

The top of the sock was tied tight with a piece of string and I added a small dab of glue from

my New Xyron Glue Gun to secure it.  I added a faux fur beard, a sock hat with a little

poly-fil added for shape and cute little felt ears.

No-Sew Valentine Gnome.   (click on picture for tutorial)

The Gnome is ready for Spring with his cute little felt ears and felt flowers.

*Disclosure:  This blog post uses affiliate links.  If you choose to make a purchase using one of the links, I receive a small commission (at no additional cost to you) that helps offset the costs of maintaining this blog.  Thanks for your support!

Xyron Mini Multi-Stick Glue Gun

Enabler Alert…

Xyron has come out with three New glue guns.  This one pictured above is what I used to create the No-Sew Bunny Gnome.  One of my favorite features is that you can add up to three glue sticks so that you don’t have to keep reloading while you work.  How cool is that?

 Disclosure:  “This is a sponsored post.  I have been provided product and compensation in exchange for my creative ideas.  The views and opinions are my own.”

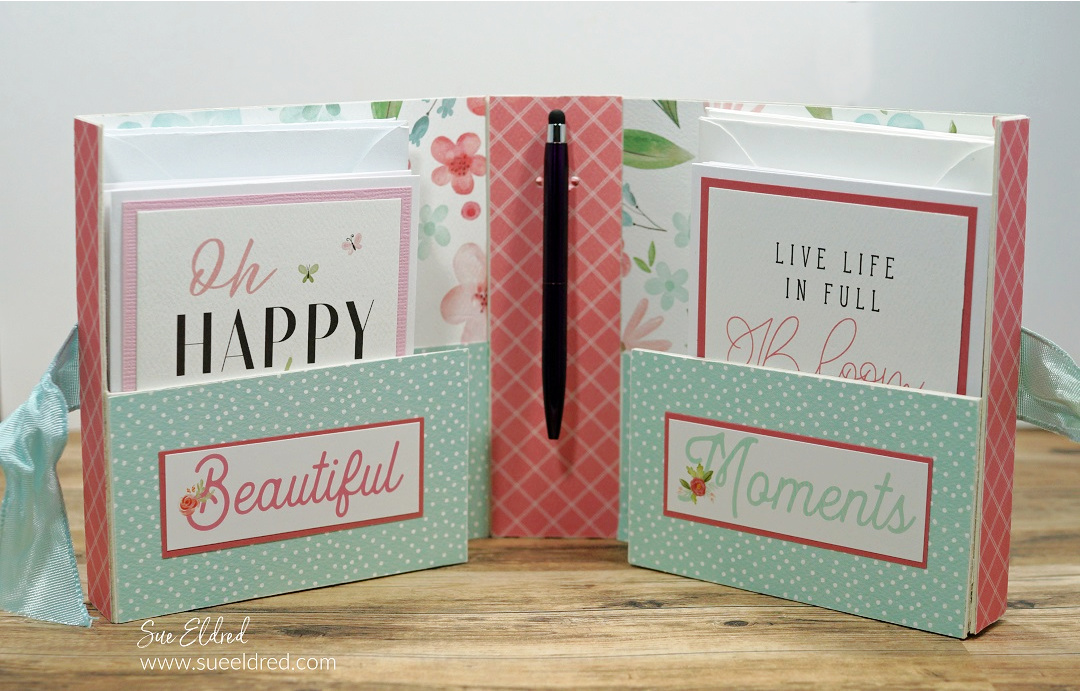
Flower Garden Notecard Folio

Flower Garden Notecard Folio-Sue's Creative Workshop www.sueeldred.com 3854

How to Create a Flower Garden Notecard Folio

To Celebrate Spring and all things Flowers, I decided to make a Notecard Folio using paper from

Carta Bella’s Flower Garden Collection and Eileen Hull’s New Folio Journal Die from Sizzix*.  

      NEW Folio Journal at Sizzix

Materials Used:         (*Affiliate Links)

*Disclosure:  This blog uses affiliate links.  If you choose to make a purchase using one of the links, I receive a small commission (at no additional cost to you) that helps offset the costs of maintaining this blog.  Thanks for your support!

Flower Garden Notecard Folio-Sue's Creative Workshop www.sueeldred.com 3858

Album Details:

  • The album pieces are die-cut using Sizzix White Matboard Sheets*, which is the perfect size for cutting long pieces.  (You will need to cut the album pieces twice.)
  • There is a smaller rectangle die-cut piece that comes with the die. (cut two)  You will use the piece to create a pocket with the outer flap.  
  • Align and adhere both ends of the spine together using Tear It! Double-Sided Crafter’s Tape*.
  • Cover the front and inside of the album with decorative scrapbook paper.  (see album making tip below)
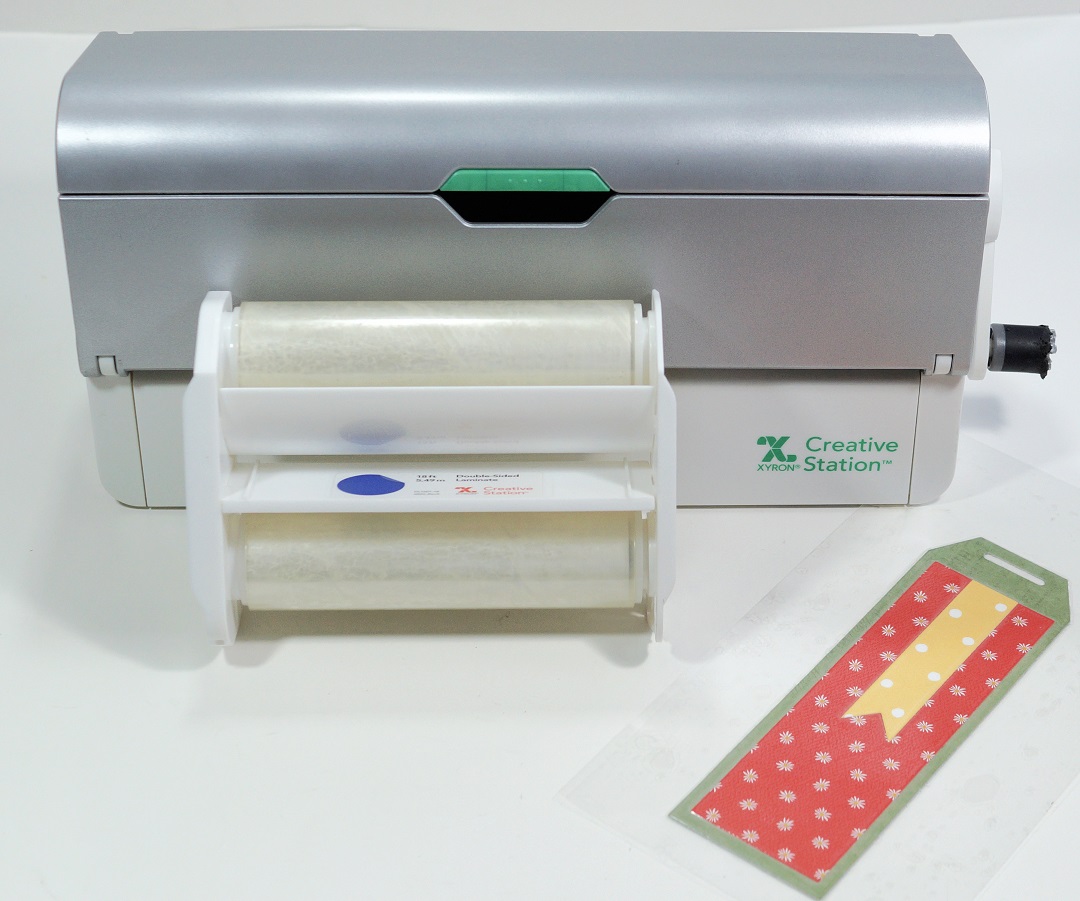
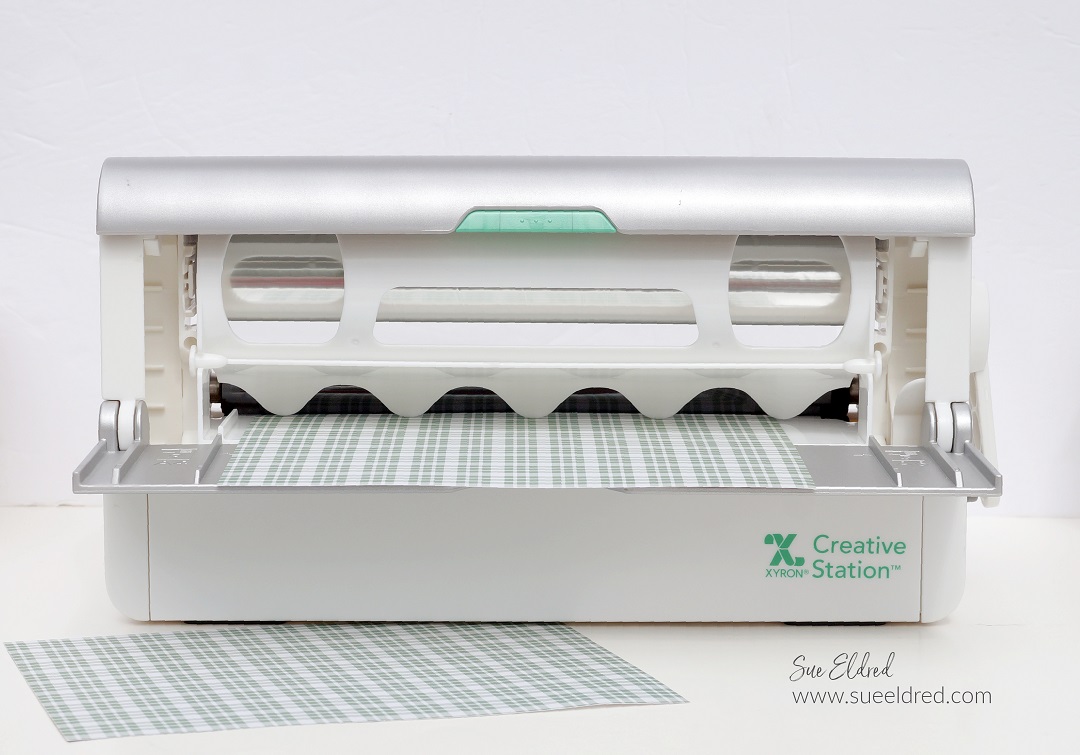
  • Album Making Tip:  I use my Xyron Creative Station* to add adhesive to my paper before sticking it onto the matboard.  It adds a complete adhesive layer without puckering or wrinkles.
  • Using a craft knife and cutting mat, I cut both ends of the flaps down to create 2 1/2″ pockets.  Adhere the “pocket pieces” (the small scored pieces that come with the die) to finish the bottom of the pockets.
  • I used Carta Bella Farmhouse Market Collections Stickers* to embellish the pocket fronts.

Flower Garden Notecard Folio-Sue's Creative Workshop www.sueeldred.com 3782

  • Create simple 3 1/2″ x 4 1/2″  layered cards using the Carta Bella Flower Garden:  3″ x 4″ Journaling Cards*.
  • After using one of the Journaling Cards for my front and back cover and another section for my green spine, I was able to create 8 small notecards to fill my notecard folio.  

Flower Garden Notecard Folio-Sue's Creative Workshop www.sueeldred.com 3898

  • The ribbon was added around the album before adding the front and back cover.
  • I created a small chipboard tag for the spine and punched the holes using a Crop-A-Dile Power Punch*.  
  • On the inside center binding, I hung a pen on the loop of ribbon that was added for the tag.

Flower Garden Notecard Folio-Sue's Creative Workshop www.sueeldred.com 3816

Wouldn’t this make a nice Birthday or Mother’s gift for someone special?

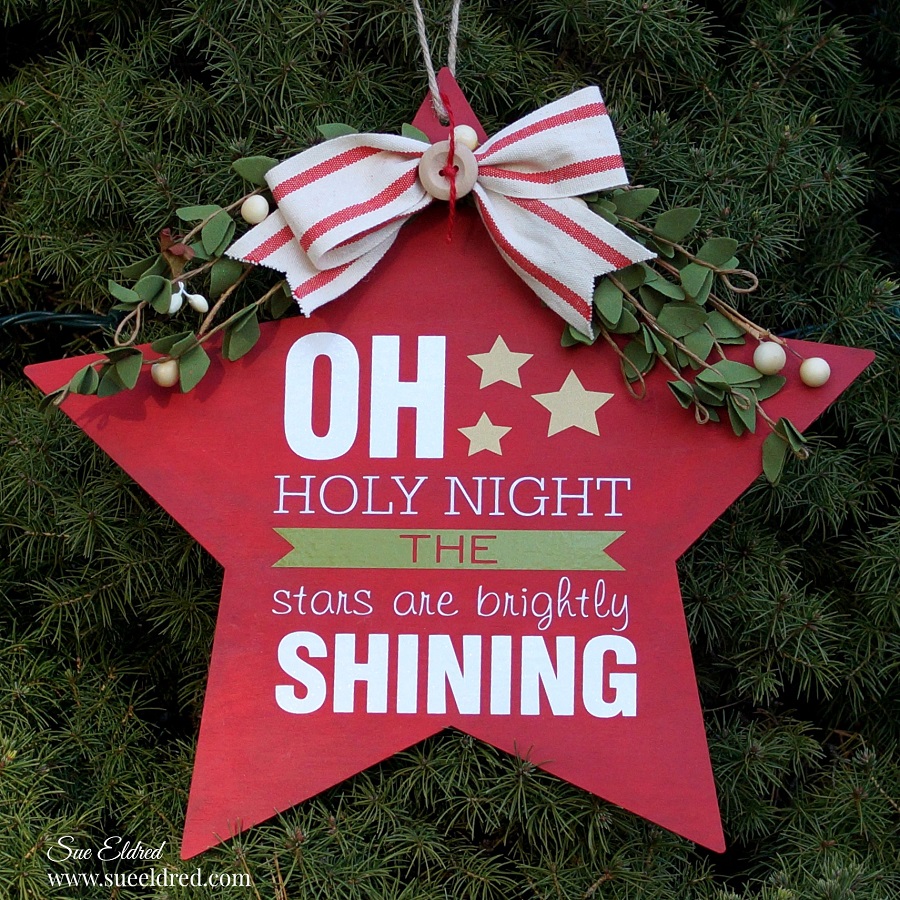
Oh Holy Night Christmas Star Decoration

My very most favorite Christmas Song is Oh Holy Night. 

The melody gets me every time.  To me, it’s one of the most beautiful songs.

I love to close my eyes when listening to it.   (And a good tenor can bring me to tears.)

I wanted a new Star to hang near the top of my tree this year, so I decided to make one using

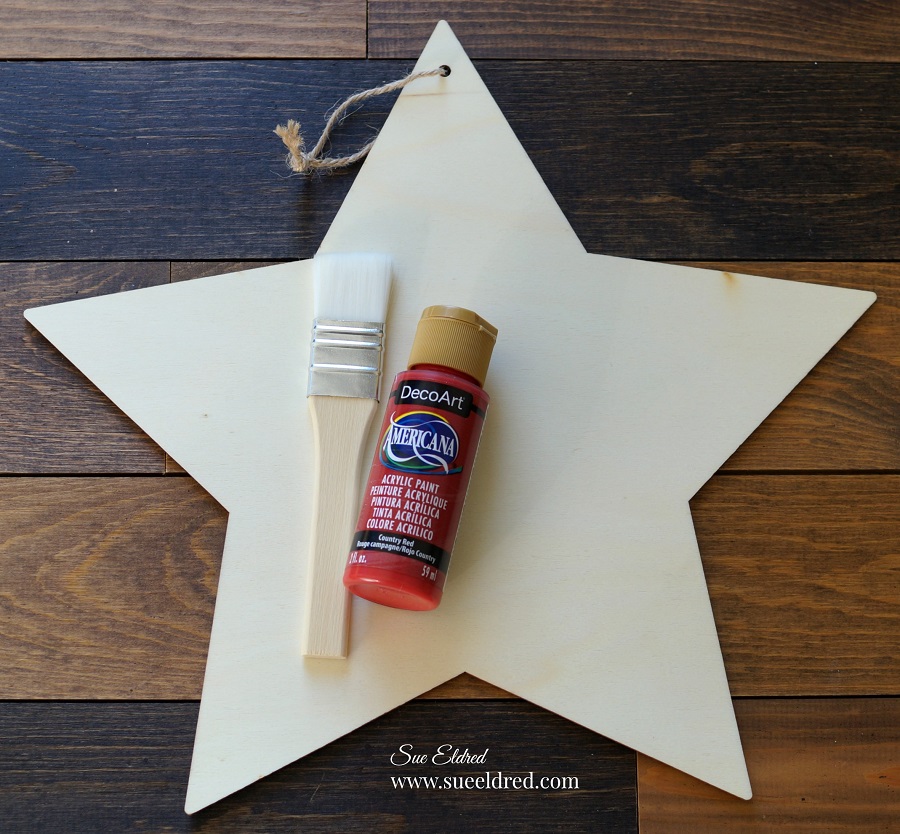
my favorite song and an inexpensive wood star I found at Dollar Tree*.

*Disclosure:  This blog uses affiliate links.  If you choose to make a purchase using one of the links, I receive a small commission (at no additional cost to you) that helps offset the costs of maintaining this blog.  Thanks for your support!

Add some of my favorite Glossy Craft Vinyl from StyleTechCraft, and I have what I need to make the perfect star for me.

Materials Used:        (*affiliate link)

StyletechCraft products brought to you by ATSM Craft

Directions:

  • Paint the wood star using the Country Red Acrylic Paint*.
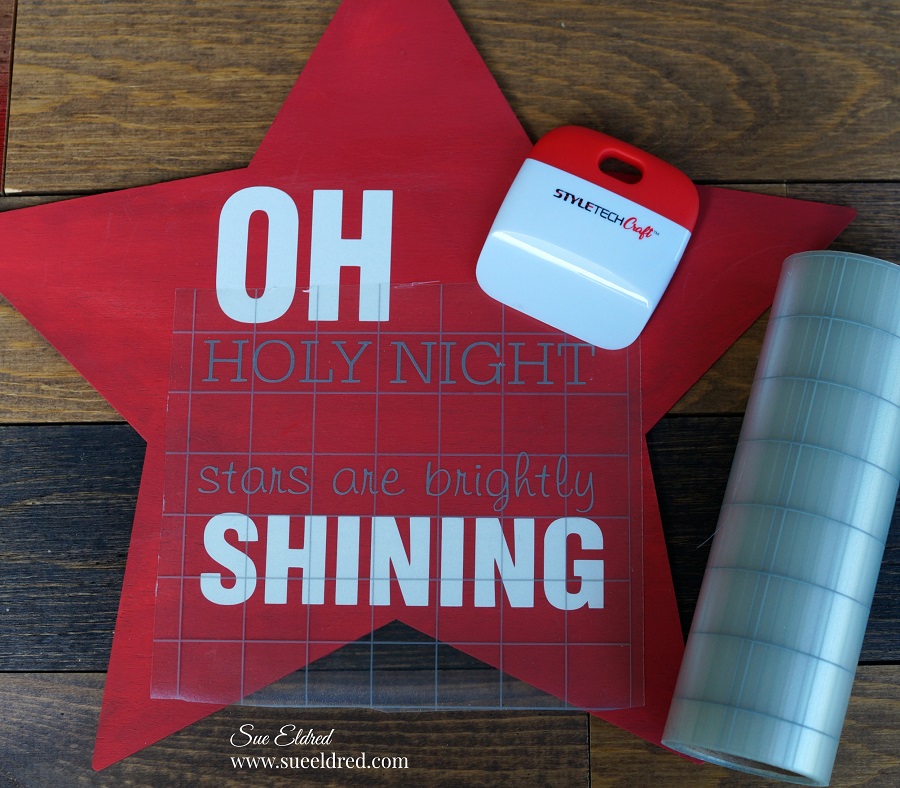
  • Use the Oh Holy Night SVG cut file and the Silhouette Cameo Electronic Die Cutting Machine* to cut the pieces out of vinyl.  (Make sure to keep the spacing the same as in the file.)
  • Use the vinyl pick tool to remove the excess vinyl from inside and around the letters and banner.
  • Cut a piece of Vinyl Transfer Tape* to fit over the vinyl words.  Gently rub over the transfer paper using the squeegee tool.  Lift the transfer tape to remove the vinyl from the white liner.
  • Using the vinyl transfer tape, line up the white vinyl words “Oh, and Shining” onto the star first.  Gently rub over the vinyl transfer tape using the squeegee tool to make sure all the image has transferred.   Remove the transfer tape.
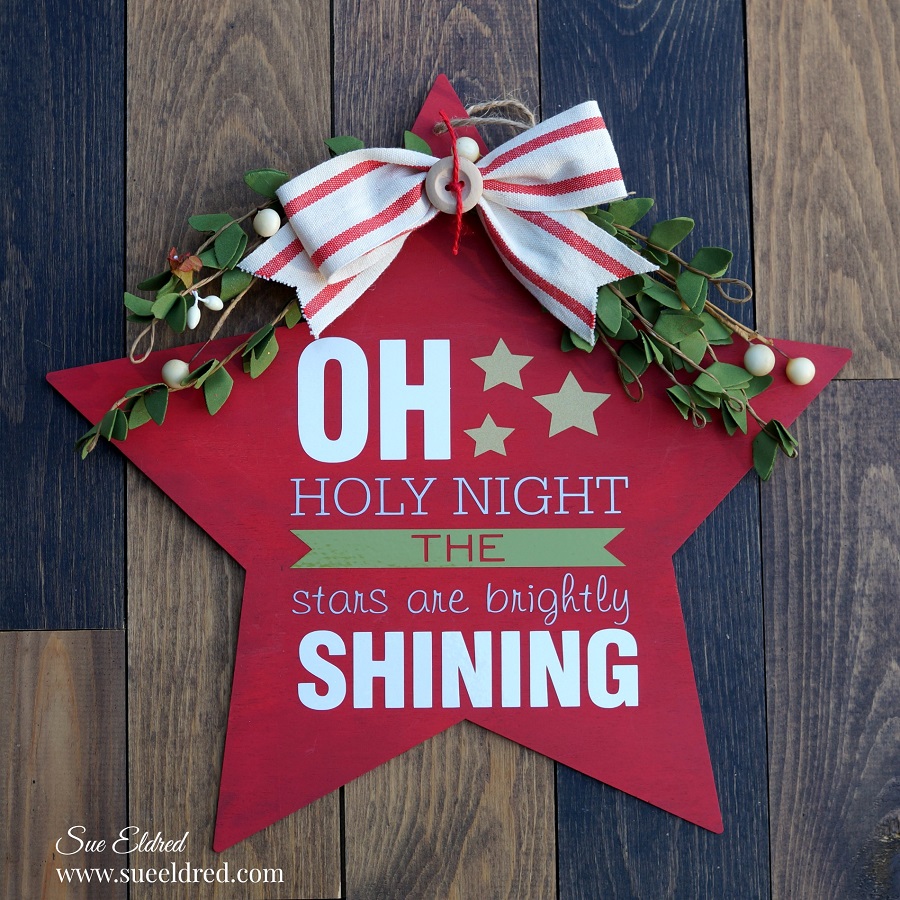
  • Line up the silver words “Holy Night, and brightly shining” and place between the previous words.  Continue with the gold stars and the olive banner.  (It’s hard to see it from the pictures but the gold and silver stands out nicely on top the red star.)

Actually, the star would look fine, just as it is in the above picture.

But, I wanted to add a little ribbon and greenery on the top of my star to fancy it up.

I’m really happy with the way it turned out. This Star will go near the top of my tree and will go

beautifully with my decorations. The Star would look great in the center of a Christmas wreath.

Or, if you used a smaller star, it would make a cute ornament.

“This is a sponsored post.  As a member of the StyleTechCraft Design Team I have been provided product and compensation in exchange for my creative ideas.  The views and opinions are my own.

Red Posies Felt Christmas Ornaments

Fairfield World’s 80th Birthday Celebration

If you are a crafter, chances are you’ve used Poly-fil a time or two. (or much, much more)

Would you believe they’ve been around for 80 years?

My grandma used poly-fil for years, and so have I.

So when given the opportunity, I  jumped at the chance to help them celebrate.

And talk about celebrating, they even sent us a box of goodies to inspire us.

How cool is that? (my favorite was the cheese popcorn)

Disclosure:  This is a sponsored post.  I have been provided product in exchange for my creative ideas.  The views and opinions are my own.

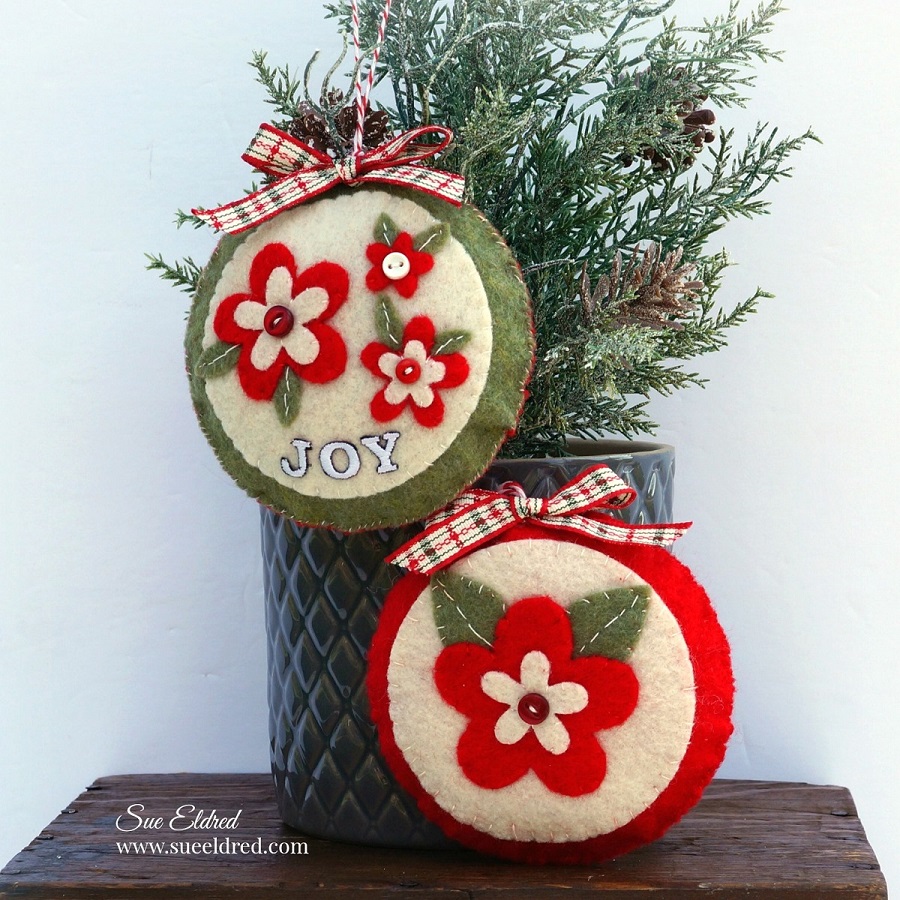
With Christmas coming soon, I decided to make a couple of Red Posies Felt Ornaments.

I enjoy stitching from time to time, but because I’m not an expert by any means,

I’m going to call them “Simple Homespun Charm”.

Materials Used:              (*affiliate links)

*Disclosure:  This blog uses affiliate links.  If you choose to make a purchase using one of the links, I receive a small commission (at no additional cost to you) that helps offset the costs of maintaining this blog.  Thanks for your support!

Directions:

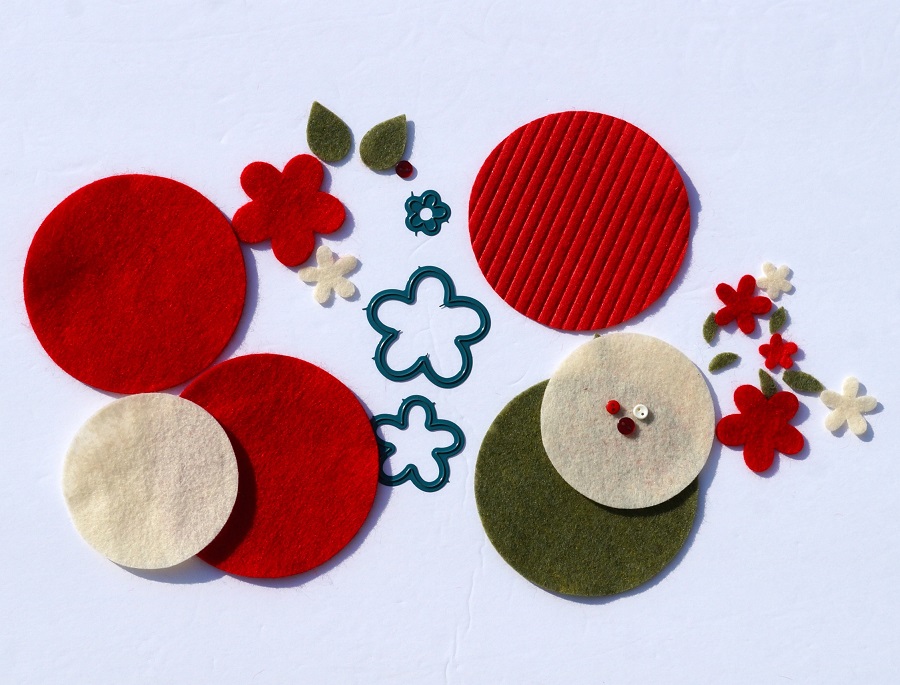
  • Die-cut the flowers, leaves, and circles out of felt.
  • Arrange the die-cut pieces on the felt.

  • Add a small dab of fabri-tac adhesive* under the top felt piece to hold it in place while you do your stitching.
  • I like to start with the top layer first and work my way down so that I’m not going through as many layers of felt at one time.

  • Hand sew simple stitches in white and red thread around the pieces.

  • Use small, close stitches to close the ornament 3/4 of the way closed.
  • Add a small amount of poly-fil into the center of the ornament and finish sewing it closed.

  • Use a large hole needle to add twine to the top of the ornament for hanging.
  • Adhere a small bow onto the top of the ornament with fabri-tac adhesive*.
  • To add a small word, like the word joy, iron the letters onto the felt circle before stitching.

For more 80th Birthday Celebration check out Fairfield World on Instagram.

DIY Dollar Store Plaid Pumpkins

DIY Dollar Store Plaid Pumpkin

A Quick and Easy way to turn a Dollar Store wood cut out into a Plaid Pumpkin.

I found this cute inexpensive wood pumpkin* at Dollar Tree* and thought it would

make a cute little plaid pumpkin to add to my Fall decorations. 

It was super simple to make.

Materials Used:            (*affiliate links)

Shop Tombow

*Disclosure:  This blog uses affiliate links.  If you choose to make a purchase using one of the links, I receive a small commission (at no additional cost to you) that helps offset the costs of maintaining this blog.  Thanks for your support!

DIY Dollar Store Plaid Pumpkin

Directions:

DIY Dollar Store Plaid Pumpkin

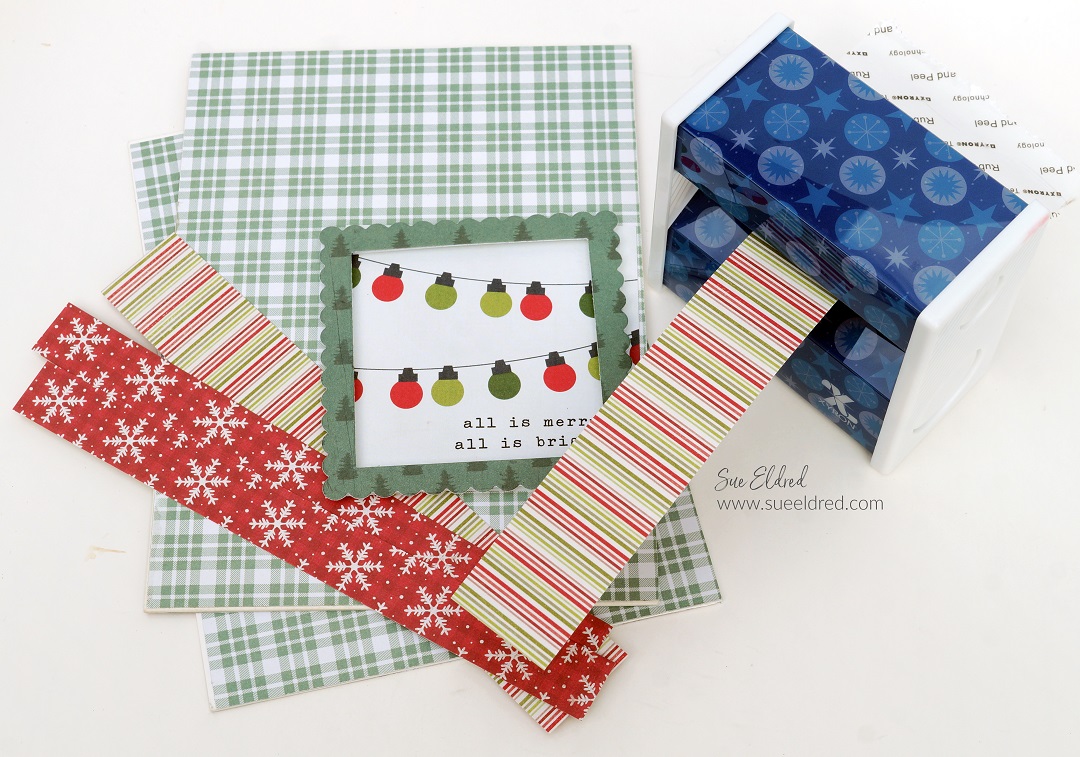
  • Insert the paper design side up into the Xyron Creative Station*.   Crank the handle to run the paper through the machine.  The Xyron Creative Station* adds complete adhesive covering to the back of the paper.  (You could also use a glue stick or liquid glue adhesive.)  

xyron logo 2

Everything you need to bring out creativity. Shop Xyron products!  (free shipping, no minimums)

DIY Dollar Store Plaid Pumpkin

  • Adhere the black and orange buffalo plaid paper* onto the front of the pumpkin.
  • Cut the excess paper from the inside and outside of the pumpkin using a craft knife and cutting mat.
  • Use a sanding block or extra-fine sandpaper to smooth the edges of the cut paper.
  • Use a black or dark gray marker to add color to the edges of the paper to cover the white core. 

DIY Dollar Store Plaid Pumpkin

Add to your Seasonal Décor and Enjoy!

Dollar Tree Tip…I have come to the conclusion when it comes to “Dollar Tree Holiday Product” that you need to buy them as soon as you see them.  (you never know if it’ll be there the next time)  

How to make a Buffalo Plaid Wood Slice Pumpkin

Buffalo Plaid Wood Slice Pumpkin

Buffalo Plaid Wood Slice Pumpkin…

Nothing says warm and cozy Fall Décor like Buffalo Plaid and Pumpkins.

Add them together for a cute Fall Home Décor project.

Shop $1 Fall Decor at Dollar Tree!

Buffalo Plaid Wood Slice Pumpkin-Sue's Creative Workshop www.sueeldred.com 5376

I love using wood slices in projects.

If you’re lucky, and you have lots of trees, chances are you may have a log or two that you

could cut off a slice. If not, with the popularity of wood slices* you can easily find them online,
or in the craft department of your favorite store.
Buffalo Plaid Wood Slice Pumpkin

Featured Storage:  Deflecto Stackable Caddy Organizer*

If you follow me much at all, you know I love my Deflecto Stackable Caddy Organizer*.

I can easily customize the Caddy by removing the lids, and adding a

Deflecto Interlocking Marker Organizer* for paintbrushes and glue sticks.

Once I fill my Caddy with supplies, I can easily take it outside to work on a lovely day.

Disclosure:  “This is a sponsored post. As a member of the Deflecto Design Team I have been provided product and compensation in exchange for my creative ideas, views and opinions.”

Buffalo Plaid Wood Slice Pumpkin-Sue's Creative Workshop www.sueeldred.com 5590

Materials used to make the Buffalo Plaid Pumpkin:

*Disclosure:  This blog uses ads and affiliate links.  If you choose to make a purchase using one of the links, I receive a small commission (at no additional cost to you) that helps offset the costs of maintaining this blog.  Thanks for your support!

Buffalo Plaid Wood Slice Pumpkin

  • To get the color I wanted for the base of my pumpkin. I mixed Orange Twist and Jack-O-Lantern acrylic paint.
  • Paint just to the inside edge of the pumpkin slice. Leave the outer bark showing.

How to make a Buffalo Plaid Wood Slice Pumpkin

  • Add strips of painter’s tape onto the pumpkin to make stripes.  Rub your finger over the tape to make sure that the tape is securely on the pumpkin and has no gaps.
  • Paint inside the stripes with a thin coat of white birch acrylic paint.  Be careful not to apply the paint too thick.   Only one thin coat of paint is needed.
  • Remove painter’s tape.
  • Allow paint to fully dry before continuing to the next step.

How to make a Buffalo Plaid Wood Slice Pumpkin

  • Rotate the frame 180° and apply the tape in the opposite direction. Make sure the tape is securely down.
  • Paint additional stripes with a light coat of dolphin (light gray) acrylic paint.

How to make a Buffalo Plaid Wood Slice Pumpkin

  • Remove the painter’s tape. Allow the paint to dry.
  • Lightly sand the wood slice. Sanding brings out the wood-grain and helps to hide any little imperfections.
  • Wipe with a clean cloth.

How to make a Buffalo Plaid Wood Slice Pumpkin

  • Cut a small 2″ piece from a tree branch to use for the stem.
  • I also used a “home” wood word picked up at the craft store for my pumpkin.
  • Hot glue the stem onto the top of the pumpkin.  Hot glue the word “Home” on the front of the pumpkin.

How to make a Buffalo Plaid Wood Slice Pumpkin

  • To give my Pumpkin a little extra support while sitting on my mantel, I hot glued a small wood piece (cut from an old scrabble tray) to the back of the pumpkin.  Because the wood slice is not perfectly round, you may have to offset it a bit.
  • Tie raffia around the stem and hot glue a small button bow with faux fall berries onto the pumpkin.  You can find instructions on how to make a button bow here.

Loved the Wood Slice Pumpkin?
Click here for the Wood Slice Snowmen tutorial.

DIY Wood Slice Snowmen


Don’t Miss a Thing…Make Sure to Follow me

Save

Save

Simple Vintage Garden Tag Album

How to make a Simple Vintage Garden Tag Album.

In keeping with the pretty in pink theme, I created

a sweet little tag album made with the Simple Vintage Garden District Collection

from Simple Stories and several tags dies from The Maker’s Movement.

(To say I love this collection would be an understatement.)

*FTC Disclosure… “This is a sponsored post for The Maker’s Movement.  I have been provided product and compensation in exchange for my creative ideas.  The views and opinions are my own.”

Here’s what I used:                        (*affiliate link)


*Disclosure:  This blog uses ads and affiliate links.  If you choose to make a purchase using one of the links, I receive a small commission (at no additional cost to you) that helps offset the costs of maintaining this blog.  Thanks for your support!

Directions:

  • Cut two large tags out of thin chipboard using the Crossover II Die Cut Machine for the front and back cover of the tag album.
  • You may need to run it through the roller twice before picking it up the tag to make sure it cut all the way through.
  • Cut additional tags using decorative scrapbook paper for the inside pages.

The Crossover II Fabric & Paper Cutting System* has adjustable rollers and pressure settings.  It adjusts for multiple layers and allows you to be able to cut a variety of thicknesses.  It can cut fabric, faux leather, craft foam, chipboard, felt and, several other materials.

  • You will need to use four tags for the front and back of the tag album cover.
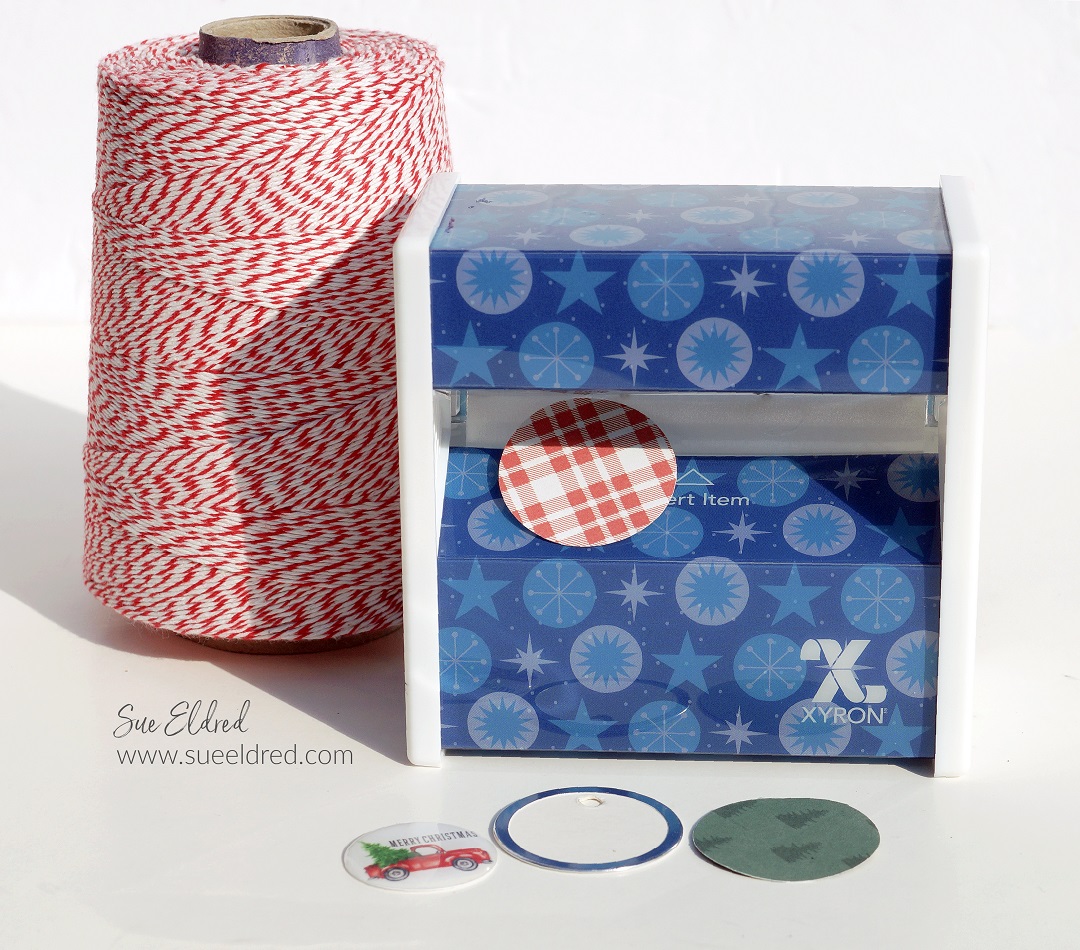
  • Place the tag design side up on the Xyron Creative Station* crank the handle to run the tag through the machine.  As it moves through the Xyron Creative Station it adds adhesive to the back of the tag.
  • Remove tag from the protective liners and adhere to the front and back of each chipboard tag.

(FYI…I used the 5″ Permanent Adhesive Refill Cartridge* in the Xyron Creative Station.)

I used a lot of dimensions to create the front cover.

  • Cut a small banner from thin chipboard, cover it with decorative scrapbook paper the same way as the front and back covers.
  • Cover the small metal rimmed tag with circles cut from scrapbook paper.
  • Use twine to tie around the banner and a small teapot charm to hang from the book ring.
  • Create a “bloom” word sticker using the Xyron Creative Station and a small piece of off white scrapbook paper.  Use the bloom word die from the “In Full Bloom” stamp and die set and cut it using the adhesive paper.

  • Decorate and embellish the inside pages using pieces from the ephemera set, and banners.

  • This page was created using the Library Pocket Die Set and the Nested Square Tags Die Set.

Fill your tag album full of fun memories and use it as a sweet gift for someone special.

Save