How to make a Buffalo Plaid Wood Slice Pumpkin

Buffalo Plaid Wood Slice Pumpkin

Buffalo Plaid Wood Slice Pumpkin…

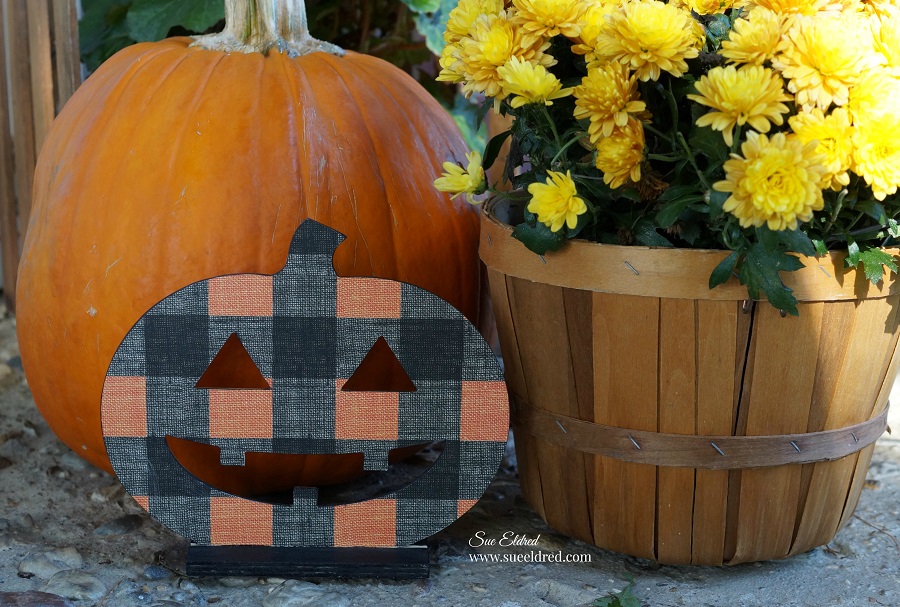
Nothing says warm and cozy Fall Décor like Buffalo Plaid and Pumpkins.

Add them together for a cute Fall Home Décor project.

Shop $1 Fall Decor at Dollar Tree!

Buffalo Plaid Wood Slice Pumpkin-Sue's Creative Workshop www.sueeldred.com 5376

I love using wood slices in projects.

If you’re lucky, and you have lots of trees, chances are you may have a log or two that you

could cut off a slice. If not, with the popularity of wood slices* you can easily find them online,

or in the craft department of your favorite store.

Buffalo Plaid Wood Slice Pumpkin

Featured Storage:  Deflecto Stackable Caddy Organizer*

If you follow me much at all, you know I love my Deflecto Stackable Caddy Organizer*.

I can easily customize the Caddy by removing the lids, and adding a

Deflecto Interlocking Marker Organizer* for paintbrushes and glue sticks.

Once I fill my Caddy with supplies, I can easily take it outside to work on a lovely day.

Disclosure:  “This is a sponsored post. As a member of the Deflecto Design Team I have been provided product and compensation in exchange for my creative ideas, views and opinions.”

Buffalo Plaid Wood Slice Pumpkin-Sue's Creative Workshop www.sueeldred.com 5590

Materials used to make the Buffalo Plaid Pumpkin:

*Disclosure:  This blog uses ads and affiliate links.  If you choose to make a purchase using one of the links, I receive a small commission (at no additional cost to you) that helps offset the costs of maintaining this blog.  Thanks for your support!

Buffalo Plaid Wood Slice Pumpkin

  • To get the color I wanted for the base of my pumpkin. I mixed Orange Twist and Jack-O-Lantern acrylic paint.
  • Paint just to the inside edge of the pumpkin slice. Leave the outer bark showing.

How to make a Buffalo Plaid Wood Slice Pumpkin

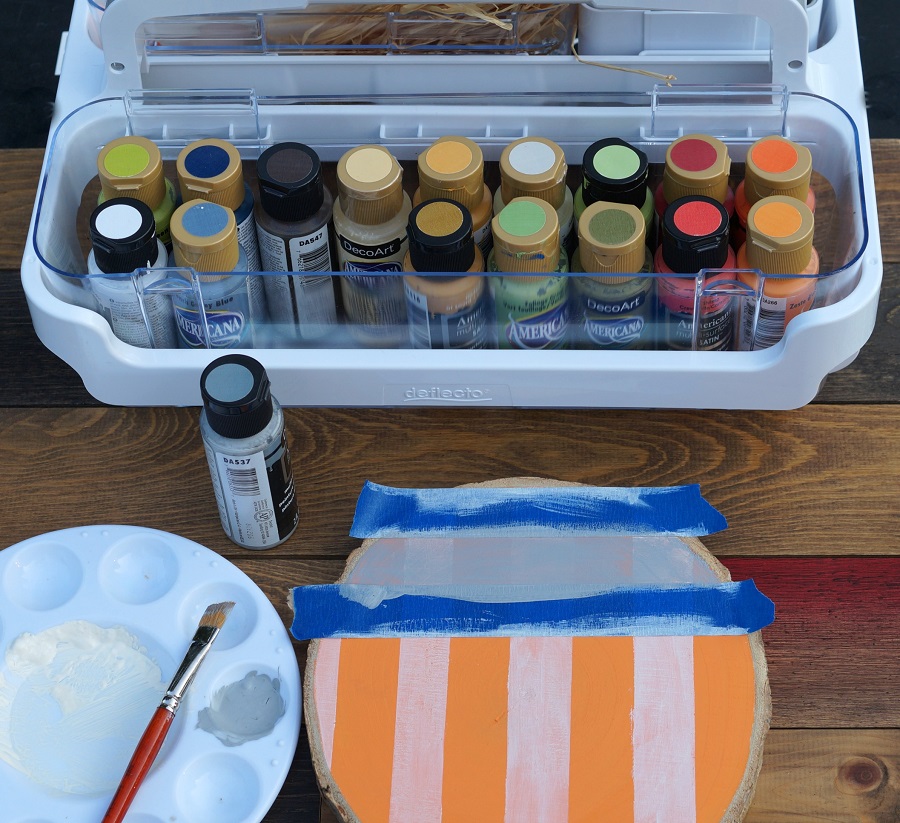
  • Add strips of painter’s tape onto the pumpkin to make stripes.  Rub your finger over the tape to make sure that the tape is securely on the pumpkin and has no gaps.
  • Paint inside the stripes with a thin coat of white birch acrylic paint.  Be careful not to apply the paint too thick.   Only one thin coat of paint is needed.
  • Remove painter’s tape.
  • Allow paint to fully dry before continuing to the next step.

How to make a Buffalo Plaid Wood Slice Pumpkin

  • Rotate the frame 180° and apply the tape in the opposite direction. Make sure the tape is securely down.
  • Paint additional stripes with a light coat of dolphin (light gray) acrylic paint.

How to make a Buffalo Plaid Wood Slice Pumpkin

  • Remove the painter’s tape. Allow the paint to dry.
  • Lightly sand the wood slice. Sanding brings out the wood-grain and helps to hide any little imperfections.
  • Wipe with a clean cloth.

How to make a Buffalo Plaid Wood Slice Pumpkin

  • Cut a small 2″ piece from a tree branch to use for the stem.
  • I also used a “home” wood word picked up at the craft store for my pumpkin.
  • Hot glue the stem onto the top of the pumpkin.  Hot glue the word “Home” on the front of the pumpkin.

How to make a Buffalo Plaid Wood Slice Pumpkin

  • To give my Pumpkin a little extra support while sitting on my mantel, I hot glued a small wood piece (cut from an old scrabble tray) to the back of the pumpkin.  Because the wood slice is not perfectly round, you may have to offset it a bit.
  • Tie raffia around the stem and hot glue a small button bow with faux fall berries onto the pumpkin.  You can find instructions on how to make a button bow here.

Loved the Wood Slice Pumpkin?
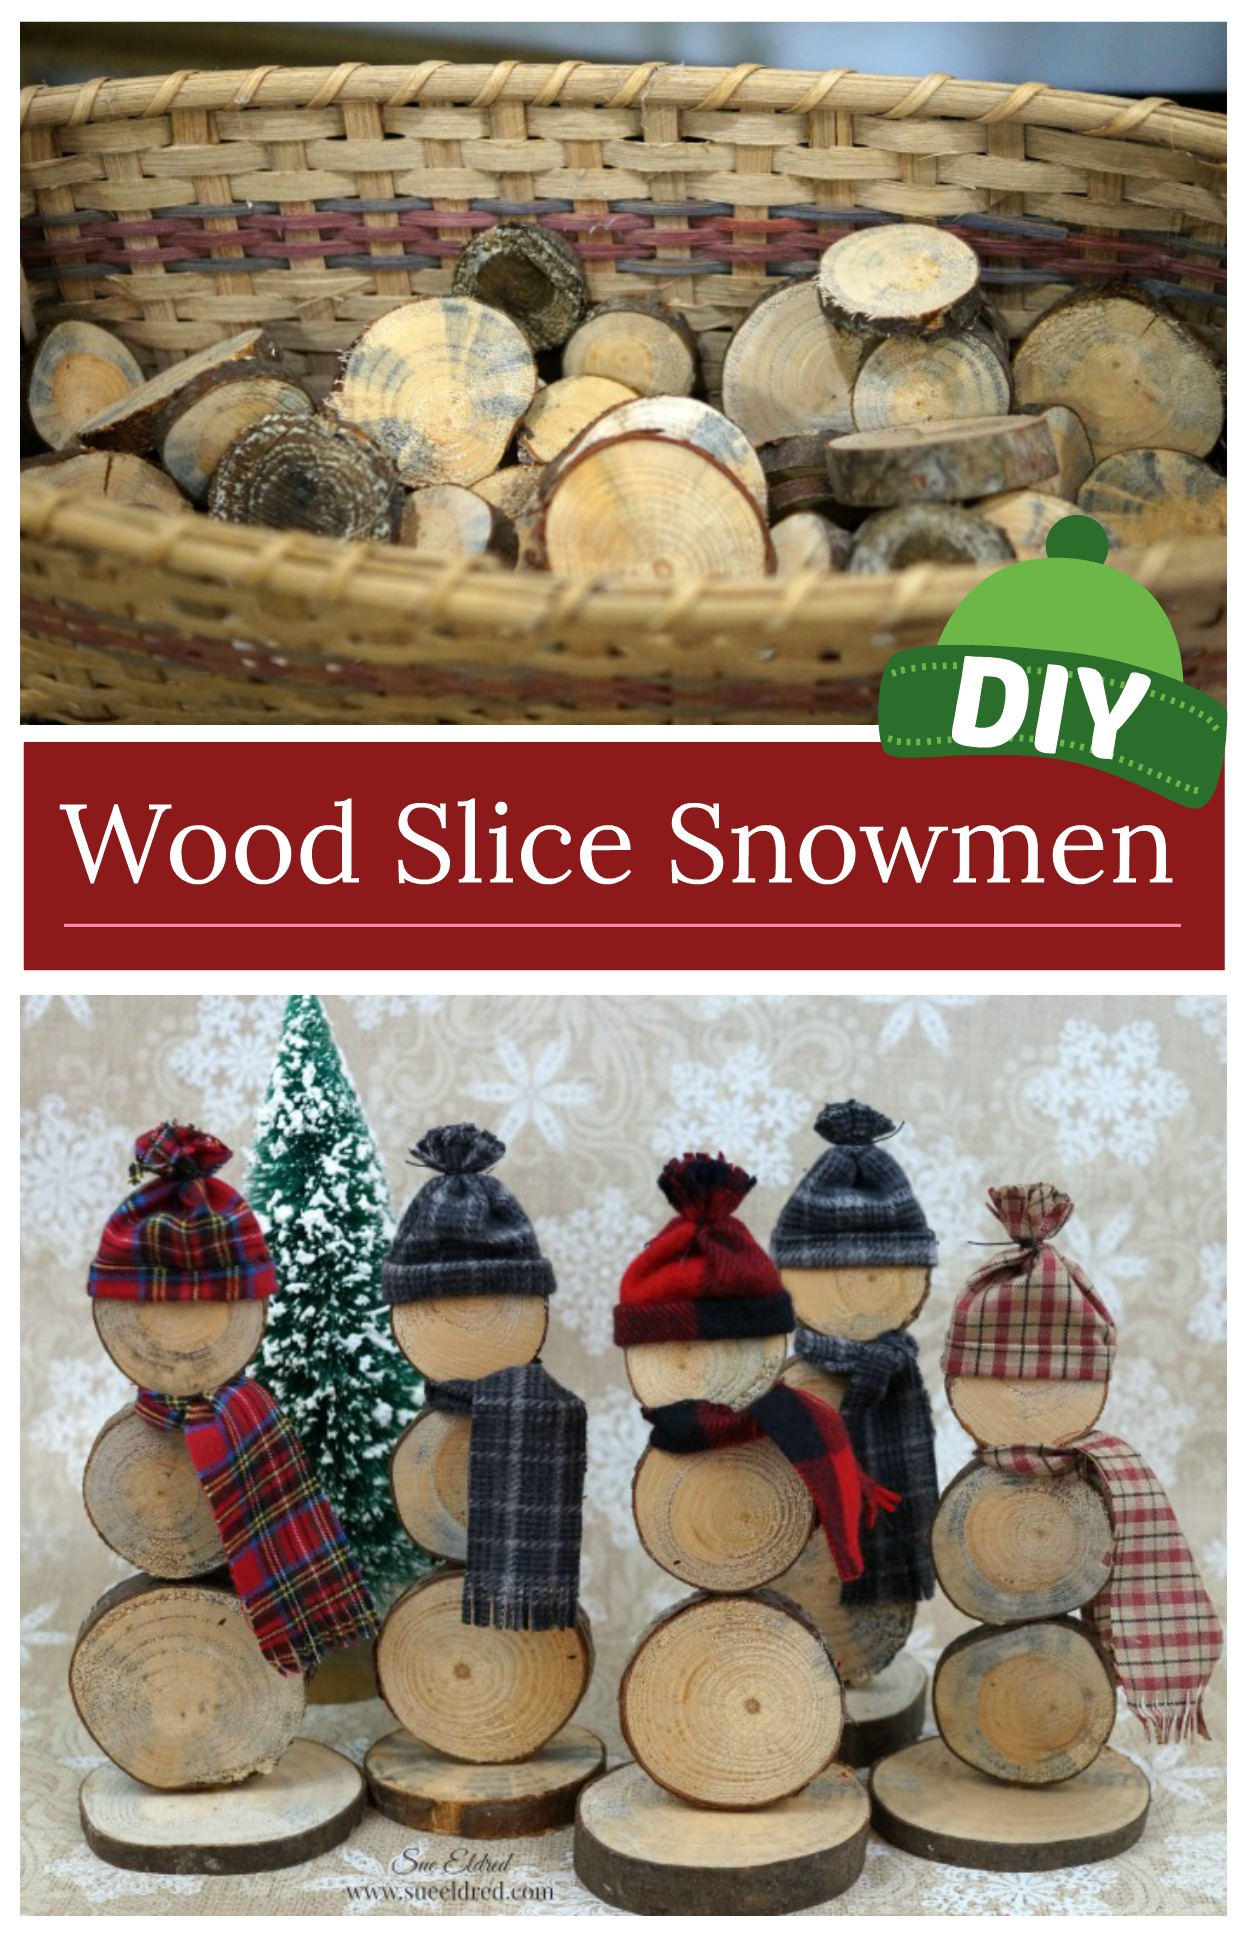
Click here for the Wood Slice Snowmen tutorial.

DIY Wood Slice Snowmen


Don’t Miss a Thing…Make Sure to Follow me

Save

Save

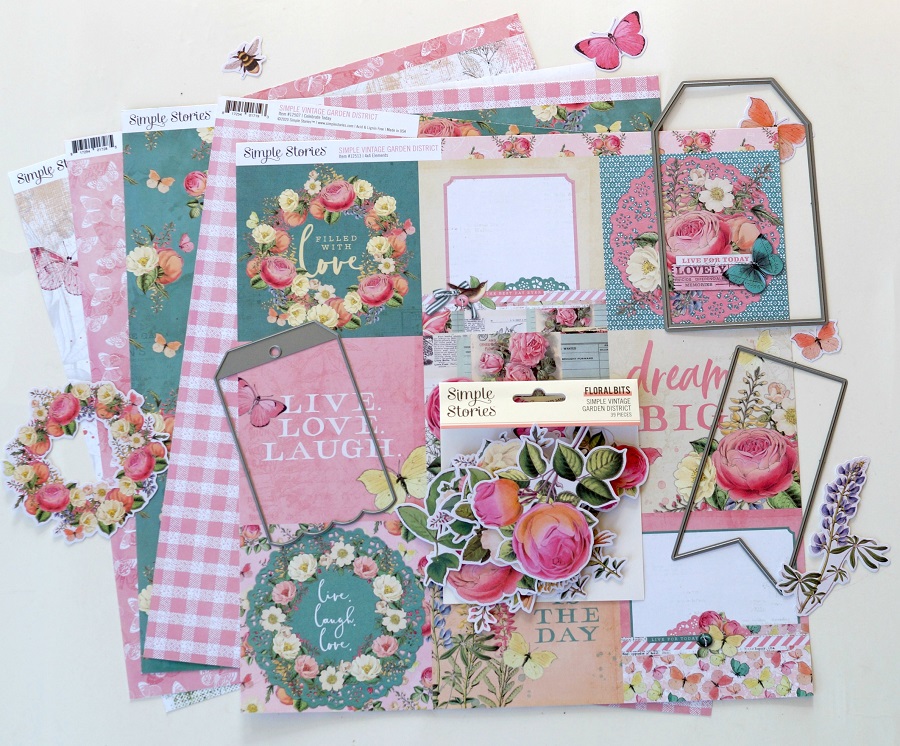
Simple Vintage Garden Tag Album

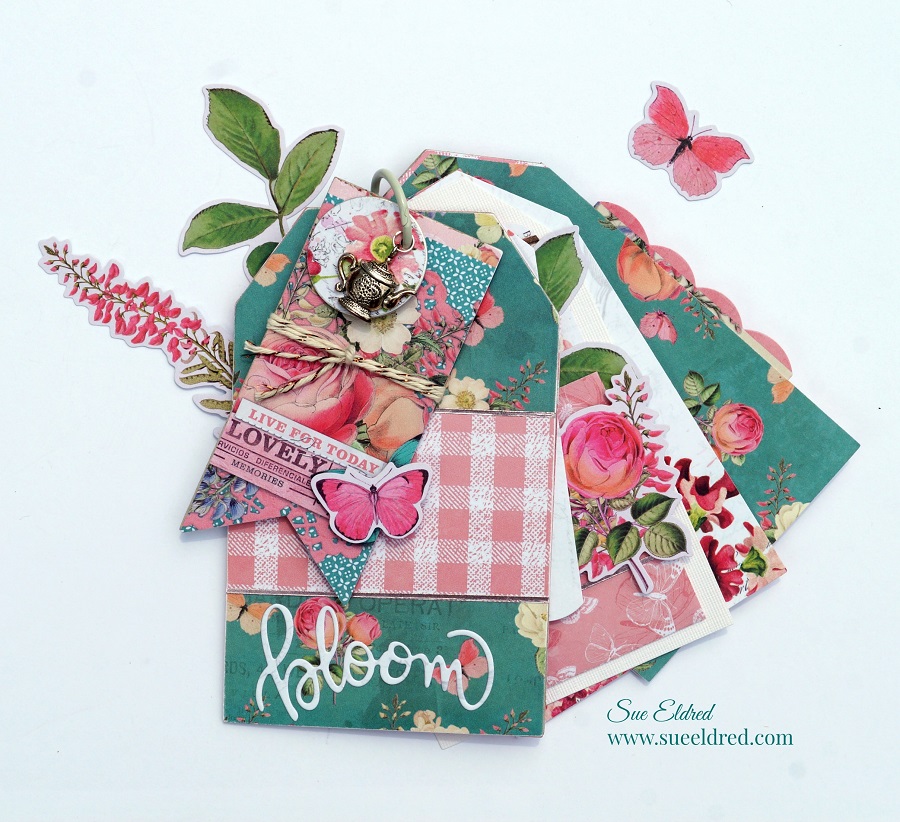
How to make a Simple Vintage Garden Tag Album.

In keeping with the pretty in pink theme, I created

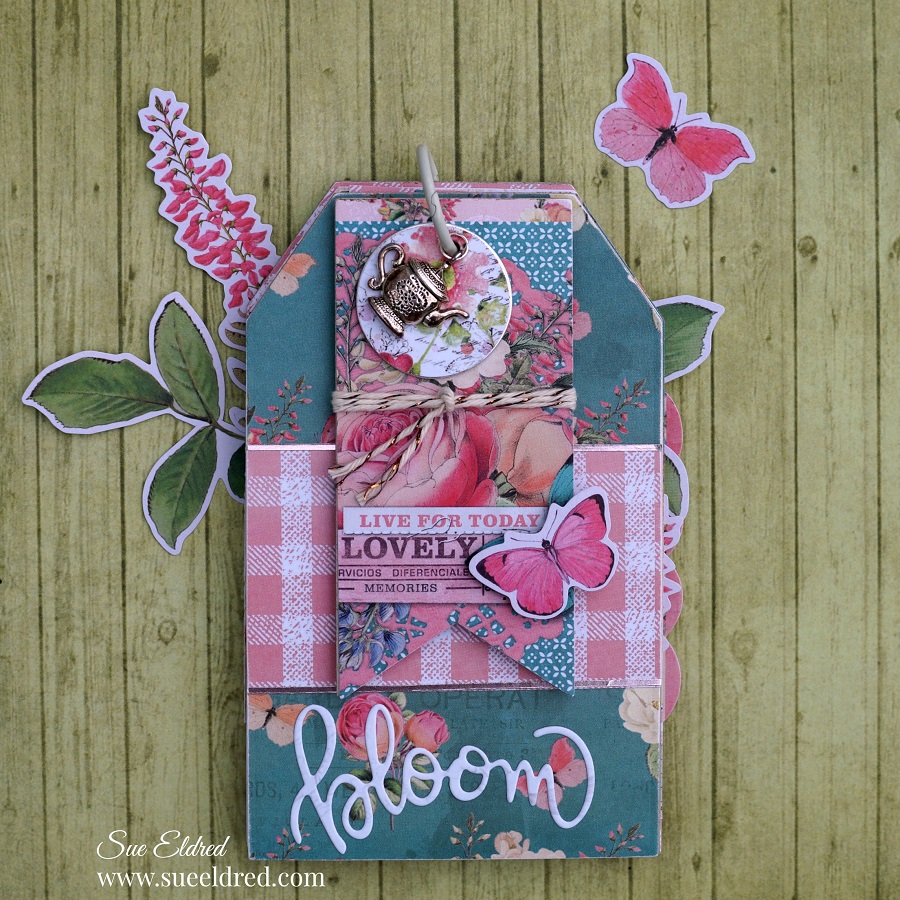
a sweet little tag album made with the Simple Vintage Garden District Collection

from Simple Stories and several tags dies from The Maker’s Movement.

(To say I love this collection would be an understatement.)

*FTC Disclosure… “This is a sponsored post for The Maker’s Movement.  I have been provided product and compensation in exchange for my creative ideas.  The views and opinions are my own.”

Here’s what I used:                        (*affiliate link)


*Disclosure:  This blog uses ads and affiliate links.  If you choose to make a purchase using one of the links, I receive a small commission (at no additional cost to you) that helps offset the costs of maintaining this blog.  Thanks for your support!

Directions:

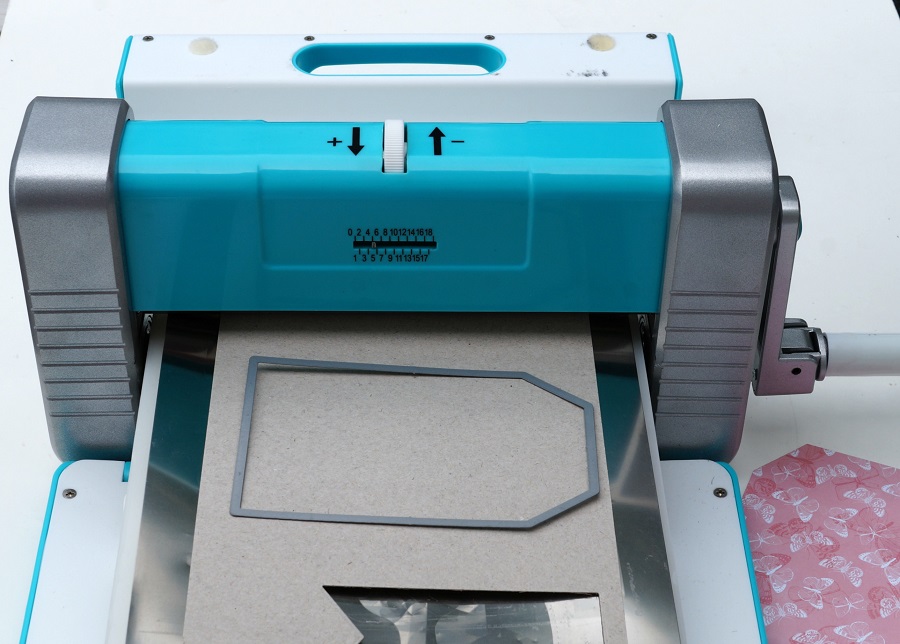
  • Cut two large tags out of thin chipboard using the Crossover II Die Cut Machine for the front and back cover of the tag album.
  • You may need to run it through the roller twice before picking it up the tag to make sure it cut all the way through.
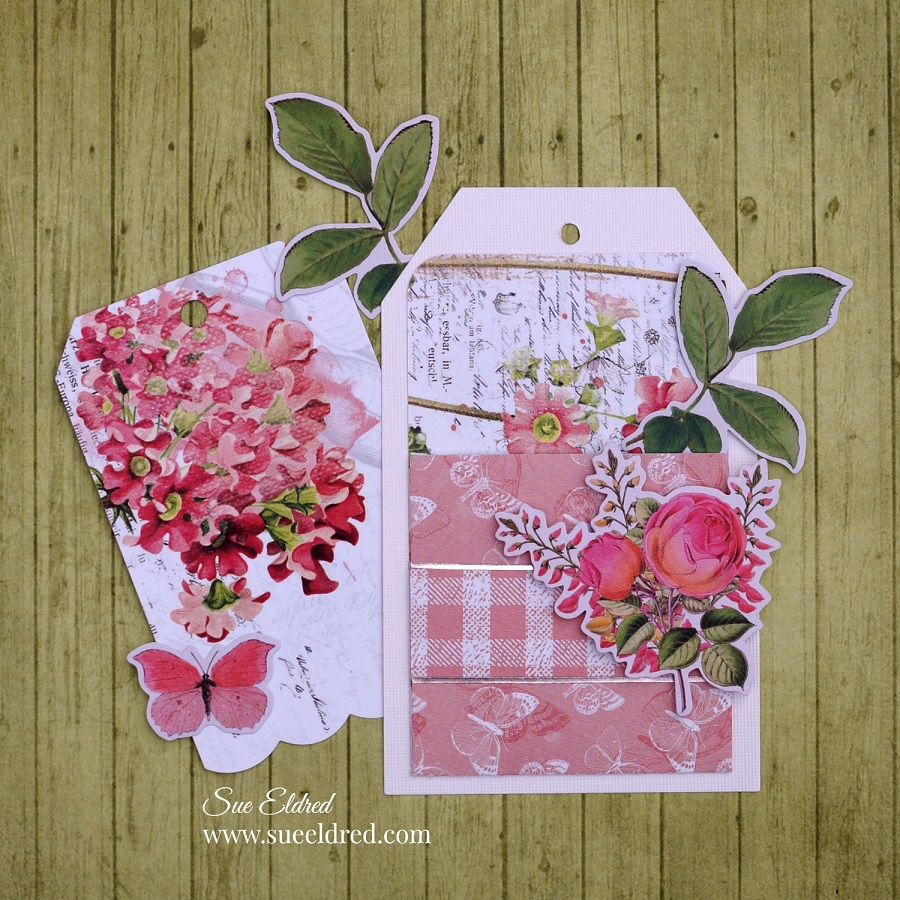
  • Cut additional tags using decorative scrapbook paper for the inside pages.

The Crossover II Fabric & Paper Cutting System* has adjustable rollers and pressure settings.  It adjusts for multiple layers and allows you to be able to cut a variety of thicknesses.  It can cut fabric, faux leather, craft foam, chipboard, felt and, several other materials.
  • You will need to use four tags for the front and back of the tag album cover.
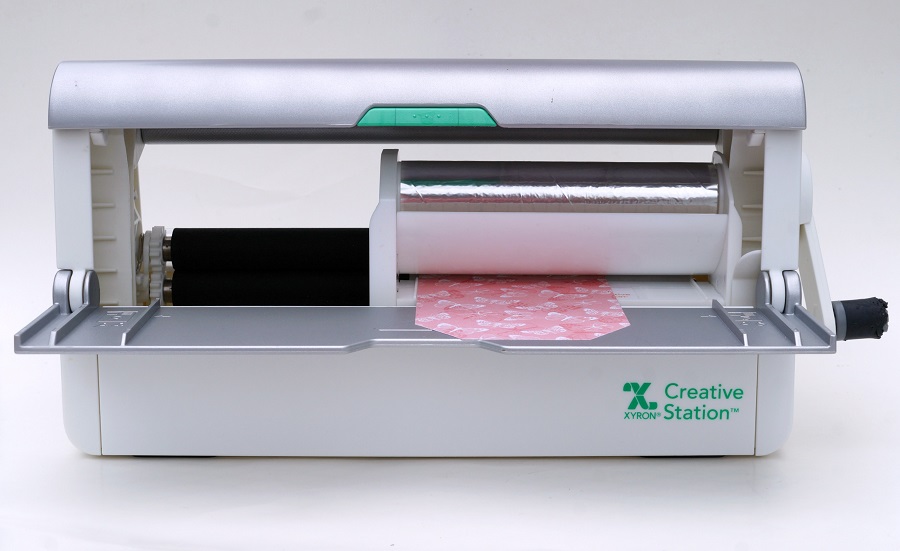
  • Place the tag design side up on the Xyron Creative Station* crank the handle to run the tag through the machine.  As it moves through the Xyron Creative Station it adds adhesive to the back of the tag.
  • Remove tag from the protective liners and adhere to the front and back of each chipboard tag.

(FYI…I used the 5″ Permanent Adhesive Refill Cartridge* in the Xyron Creative Station.)

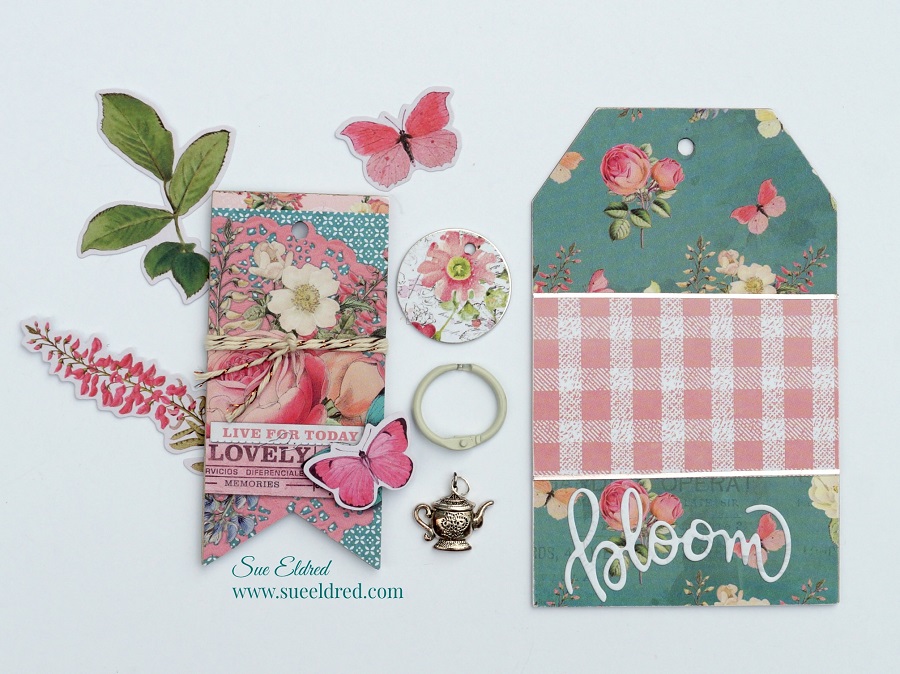
I used a lot of dimensions to create the front cover.

  • Cut a small banner from thin chipboard, cover it with decorative scrapbook paper the same way as the front and back covers.
  • Cover the small metal rimmed tag with circles cut from scrapbook paper.
  • Use twine to tie around the banner and a small teapot charm to hang from the book ring.
  • Create a “bloom” word sticker using the Xyron Creative Station and a small piece of off white scrapbook paper.  Use the bloom word die from the “In Full Bloom” stamp and die set and cut it using the adhesive paper.

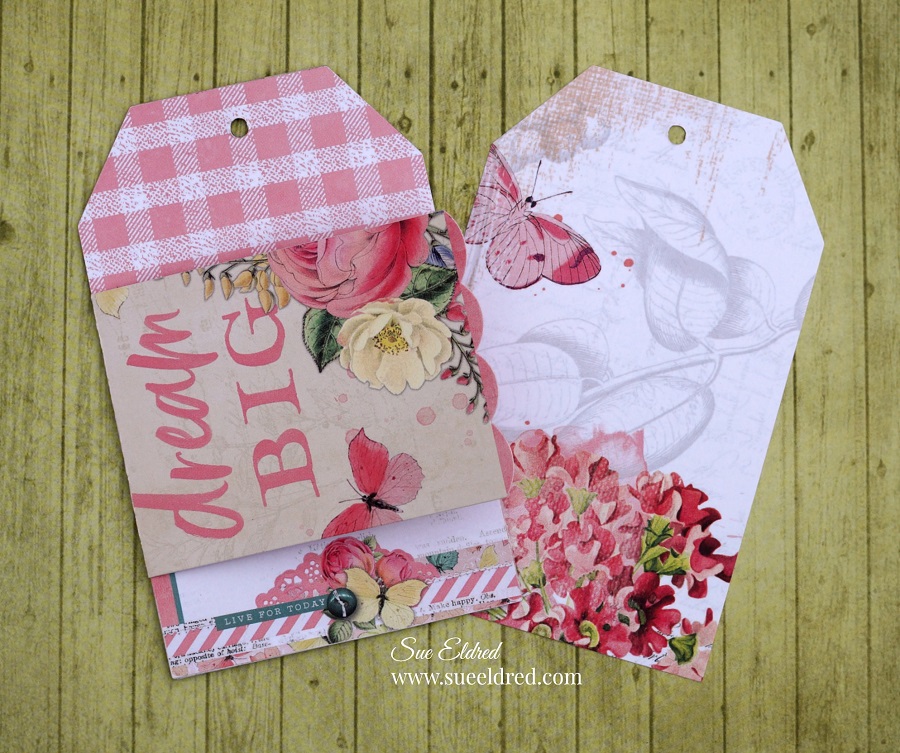
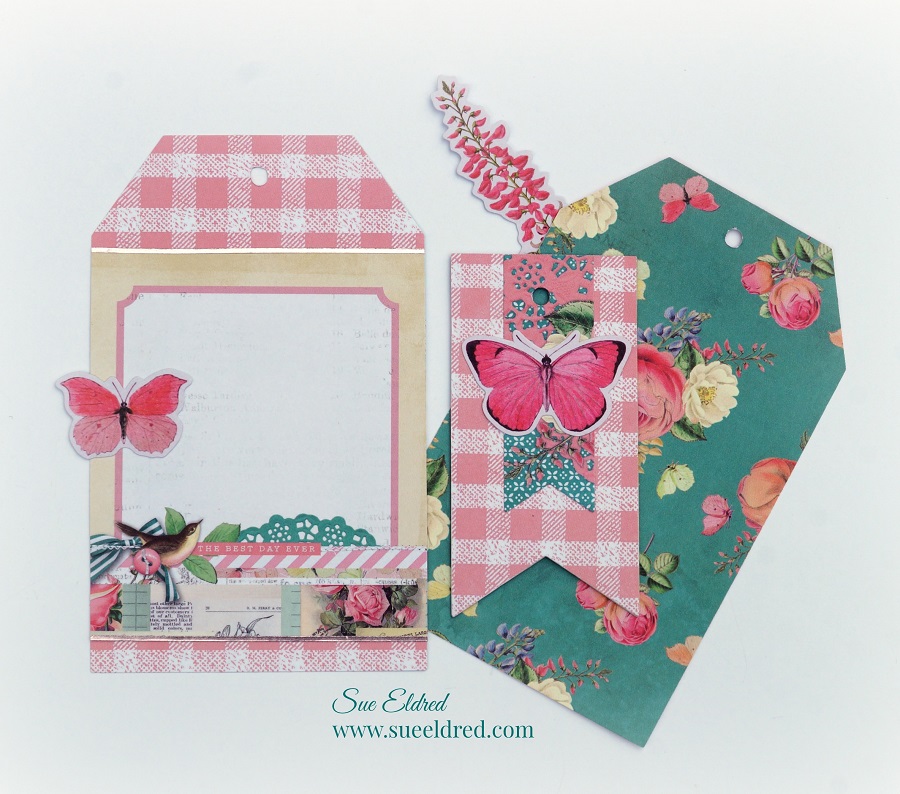
  • Decorate and embellish the inside pages using pieces from the ephemera set, and banners.

  • This page was created using the Library Pocket Die Set and the Nested Square Tags Die Set.

Fill your tag album full of fun memories and use it as a sweet gift for someone special.

Save

Pretty in Pink Mixed Media Canvas

Pretty and Sweet, Delicate and Petite, a mixed media project made simple.

Every once in awhile, I like to do something I little different from my usual projects.
This mixed media canvas is one of those projects.
It reminds me of a crackling wall found in an old cottage.

How to make a Pretty in Pink Mixed Media Canvas

Materials Used:

*Disclosure:  This blog uses affiliate links.  If you choose to make a purchase using one of the links, I receive a small commission (at no additional cost to you) that helps offset the costs of maintaining this blog.  Thanks for your support!

Directions:

  • Prepare the canvas with a painted coat of Gesso.
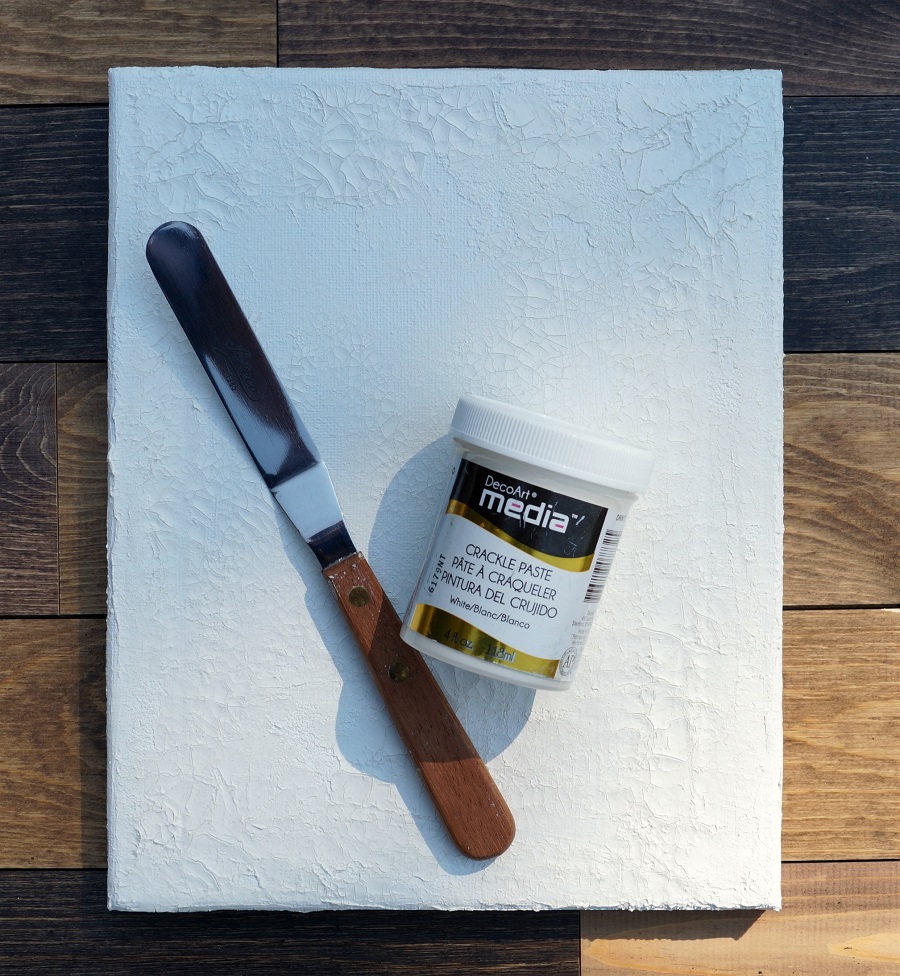
  • Apply Crackle Paste onto the entire canvas using a palette knife.

  • Using a stipple brush*, rub rose-colored ink onto the canvas, giving it a subtle hint of pink.

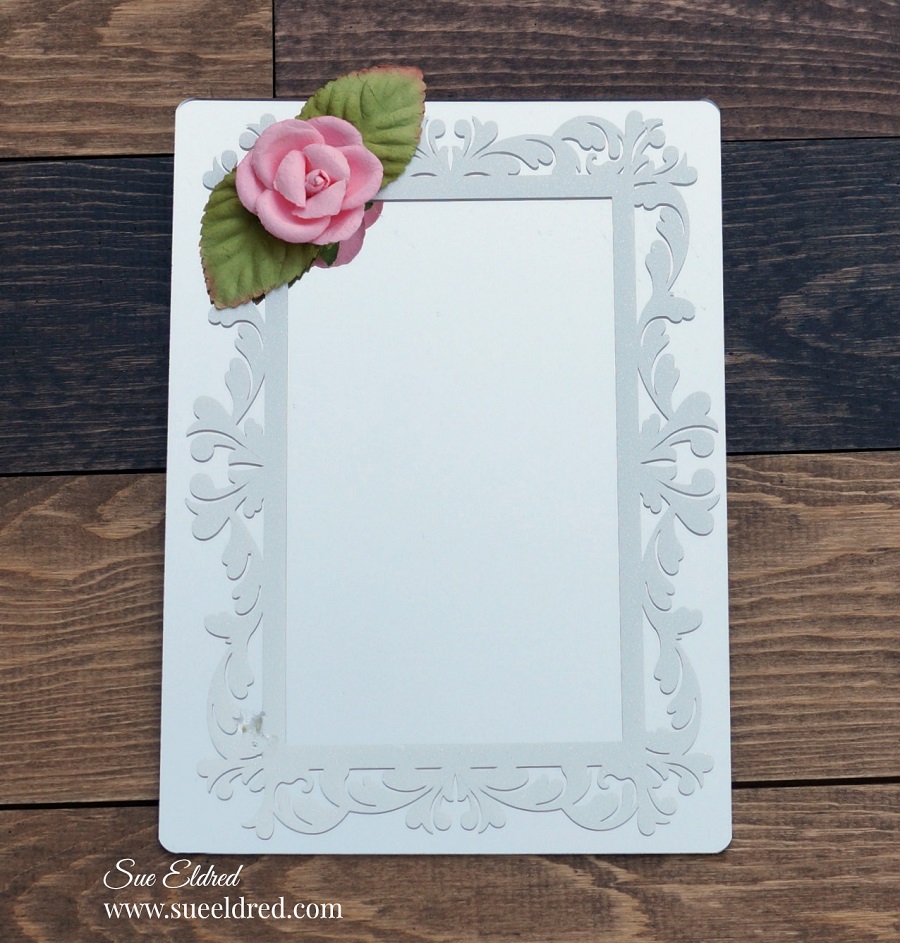
  • Create a delicate scroll frame using white adhesive glitter vinyl, an SVG cut file, and an electronic die cutting machine.
  • Use Transfer paper to align and place the frame onto the mirror.
  • Center and glue mirror onto the canvas with DAP Rapid Fuse All Purpose Adhesive*.

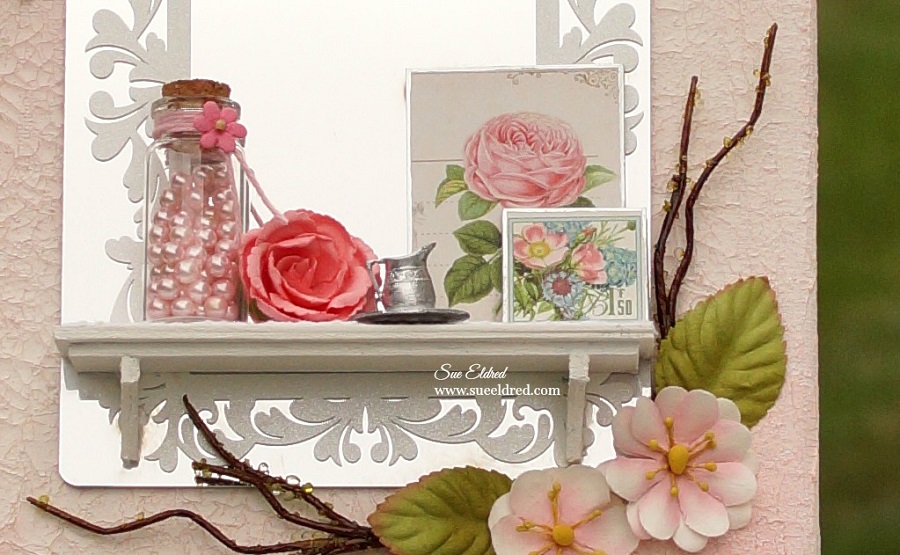
  • The mantle was created by layering, stacking and gluing cut pieces of chipboard with craft glue. (nothing fancy just basic construction)
  • Paint it with white acrylic paint.
  • Glue the mantle onto the mirror using DAP Rapid Fuse All Purpose Adhesive*.

  • For added stability, glue the small floral scrapbook paper pieces onto the chipboard.
  • Decorate the mantle with a small jar filled with pink pearl beads, a miniature pewter pitcher and saucer, and the floral scrapbook pieces.
  • Adhere floral embellishments around the top and bottom corner of the mirror.

For another DIY Mixed Media project, click on the link below.  ↓

         Little Birdie Mixed Media Canvas

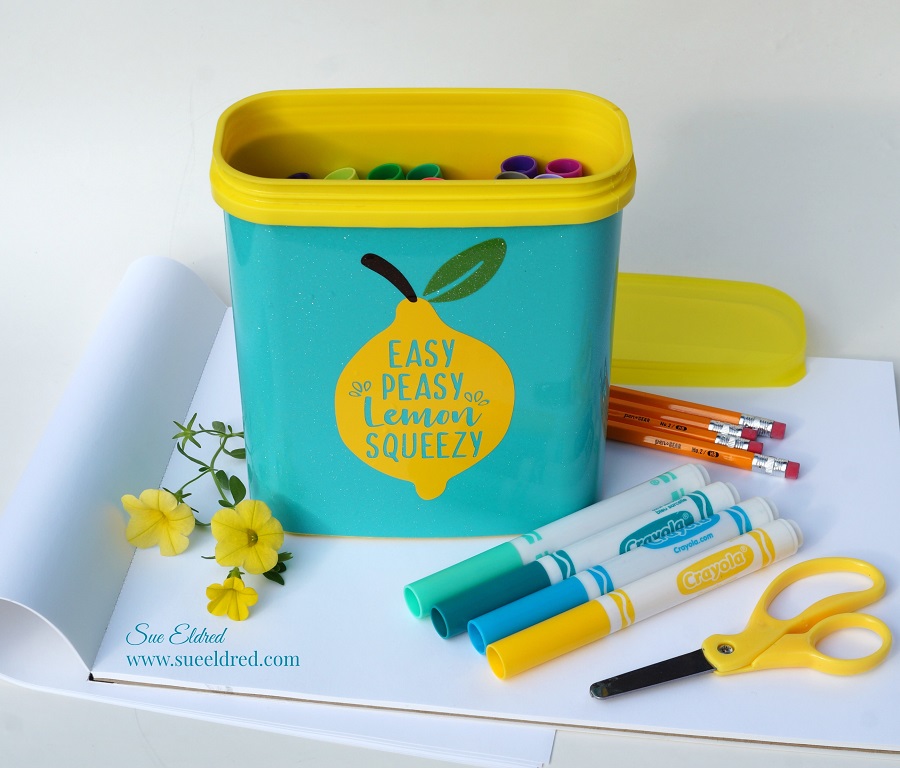
Easy Peasy Upcycled Container

I love a good upcycled, recycled project.

Creating a useful item from something that would be thrown away or put in the recycling bin.

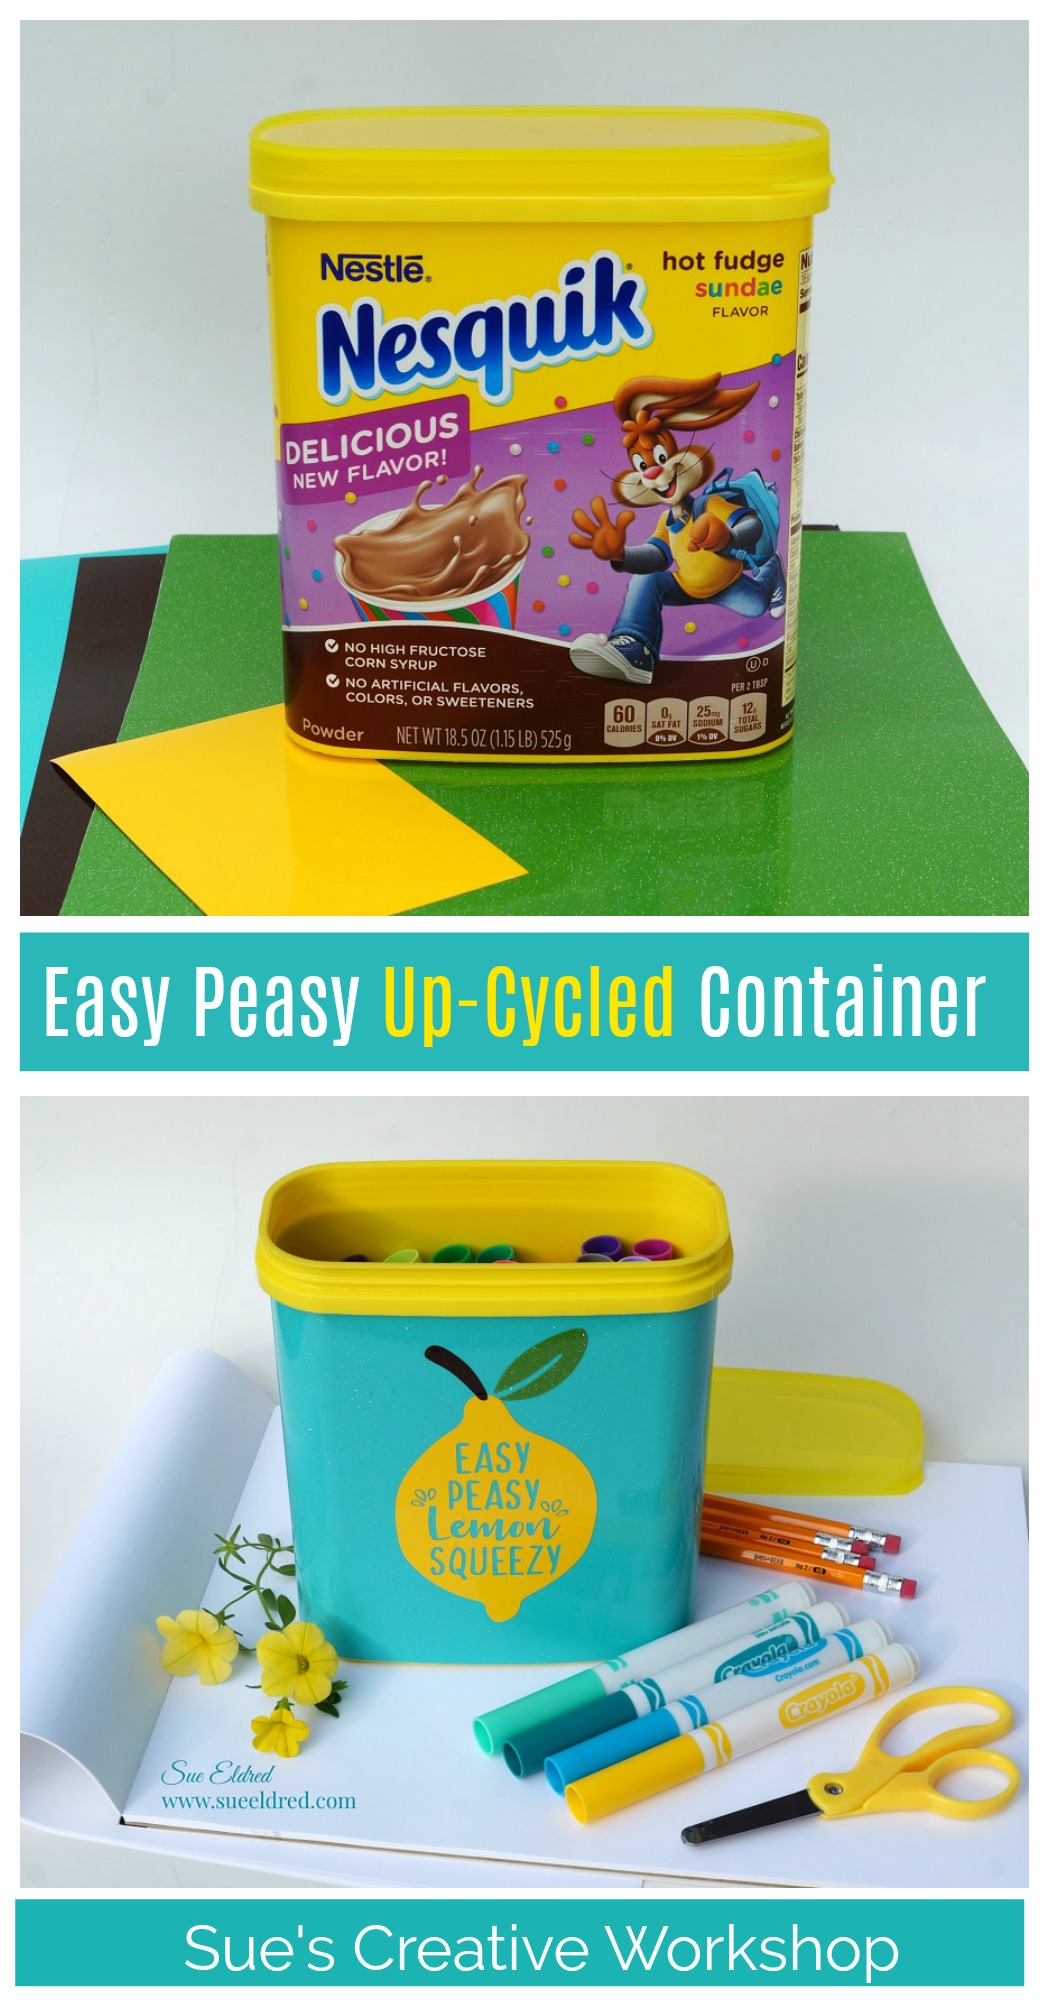
This project was made using an empty Nesquik container.

I have been drinking chocolate milk for as long as I can remember. My dad used to use the Nesquik containers in his garage to store nuts and bolts and lots of other small items. We found several vintage cans out in his garage when we were going through it.

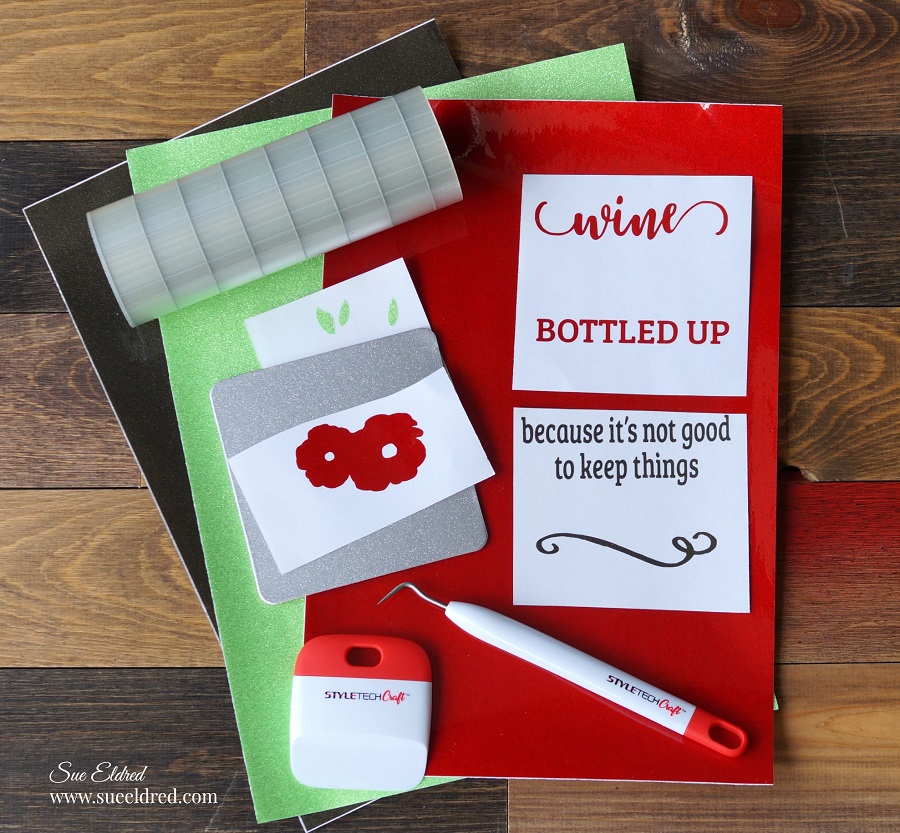
I LOVE making things using craft vinyl and my Silhouette Cameo Electronic Die Cutting Machine*  There are so many things you can make and decorate.

Tip:  If you don’t have access to these products, you can still UPCYCLE/RECYCLE a container like the Nesquik Can using decorative paper, contact paper or stickers to personalize and embellish.  (Below are the directions and materials on how I upcycled my container.)

For my Easy Peasy Lemon Squeezy Up-cycled Container I used:

StyletechCraft products brought to you by ATSM Craft

*Disclosure:  This blog uses affiliate links.  If you choose to make a purchase using one of the links, I receive a small commission (at no additional cost to you) that helps offset the costs of maintaining this blog.  Thanks for your support!

Directions:

  • Measures and cut two pieces of  vinyl to wrap around the container.  (I used one long piece and one shorter piece.)
  • Use the printed graphics on the side of the container to line up your edge.  Slowly wrap the vinyl around the container smoothing as you go to reduce the air bubbles.

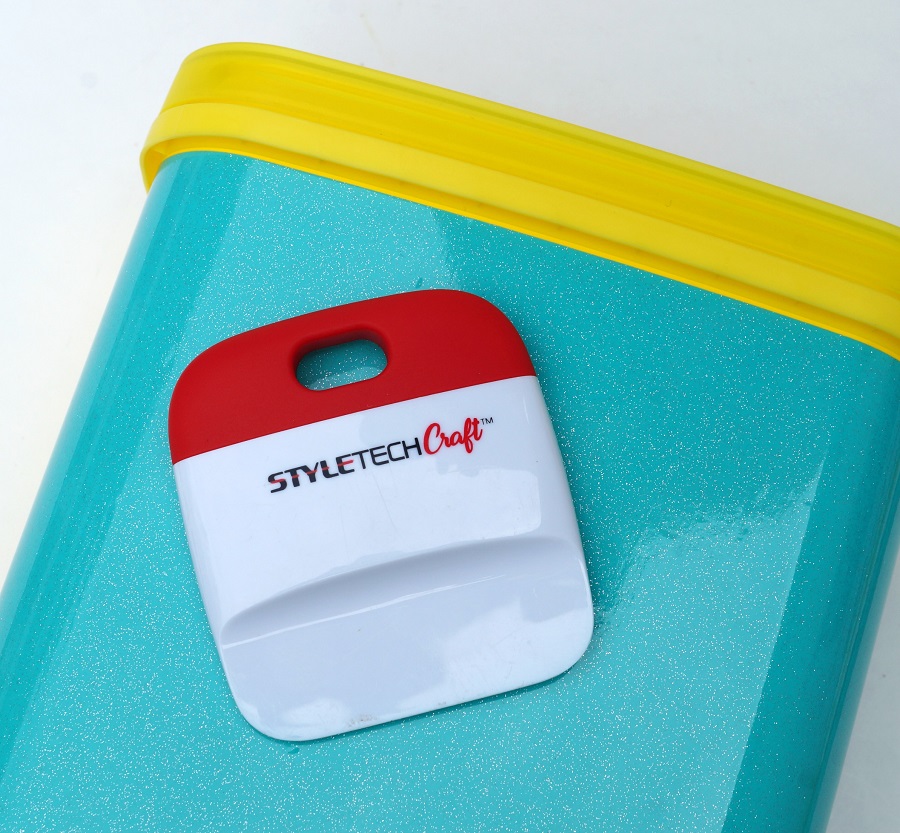
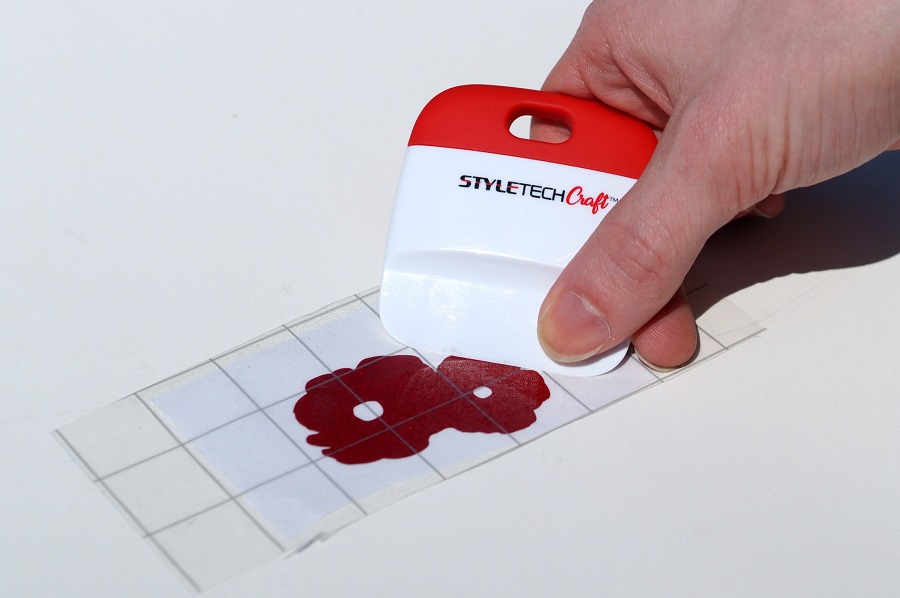
  • Use the squeegee tool to smooth the vinyl.  If you can’t get rid of the air bubble with the squeegee tool you can use a small pin to poke a hole in the vinyl to release the air.

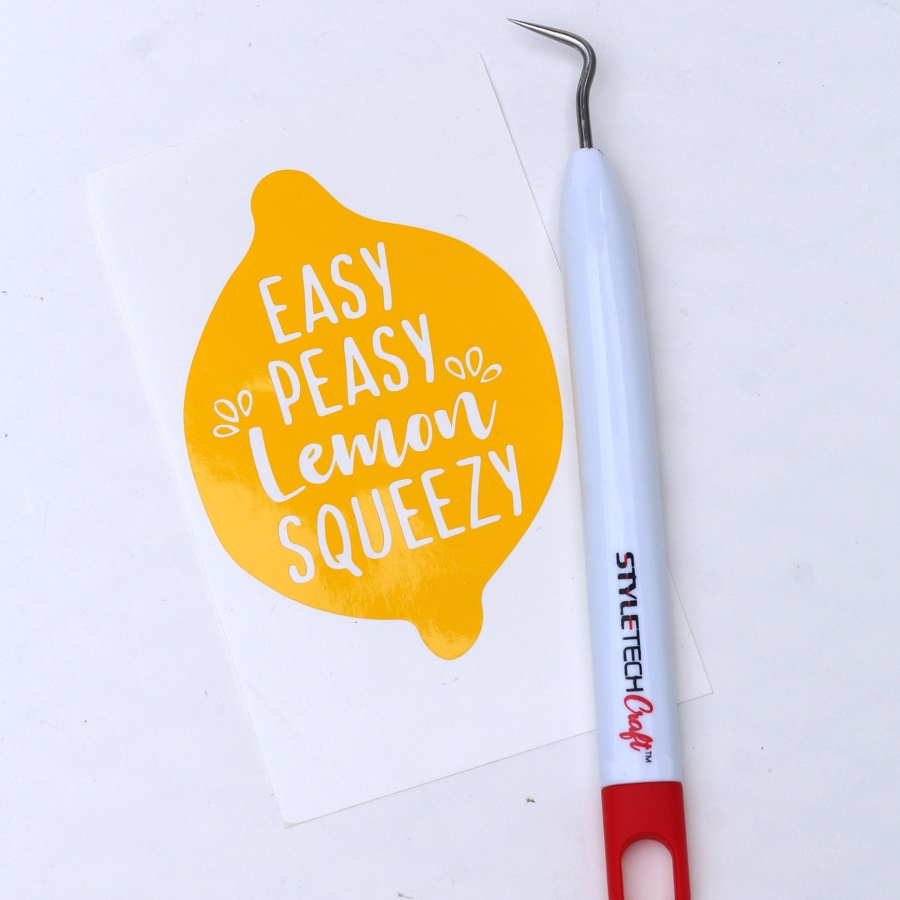
You can find the Easy Peasy Lemon Squeezy SVG file at the Silhouette Design Store.

  • Use the vinyl pick to remove the letters from the vinyl lemon, leave the inside pieces of the letters.

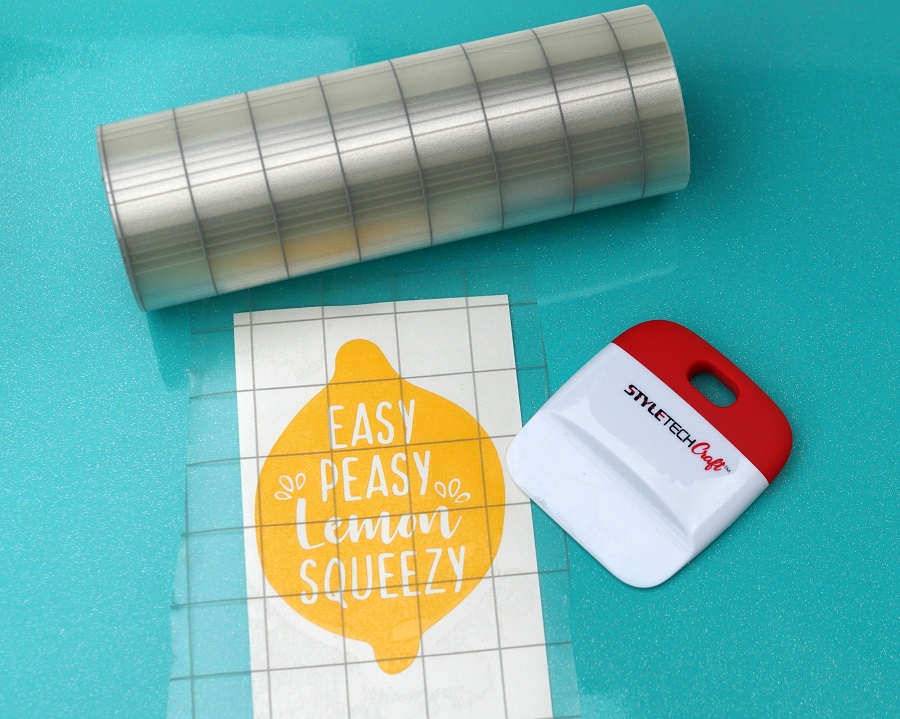
  • Cut a piece of Vinyl Transfer Tape* to fit over the vinyl image.  Gently rub over the transfer paper using the squeegee tool.
  • Remove the vinyl from the white liner, center the image on the front of the can.
  • Gently rub over the Vinyl Transfer Tape* to make sure all the image has transferred.   Remove the transfer tape.
  • Repeat the process with the stem and leaf.

A fun little upcycled project, great for many different uses.  (not just in the garage)

Place several cans side by side for a cute and creative way to store supplies.

“This is a sponsored post.  As a member of the StyleTechCraft Design Team I have been provided product and compensation in exchange for my creative ideas.  The views and opinions are my own.

If you liked this post you might also like Organizing the Kids Craft Cabinet.

Pin ME↓

Save

Christmas in July with Eileen Hull’s Dies

Christmas in July with Eileen Hulls New Release Snowman and Mitten Dies.

I wanted to share with you a couple of fun Wintery projects using the NEW dies that are

now available from Eileen Hull and Sizzix*.

The Gingham Mitten Gift Box uses the #664510 Mitten Box Die by Eileen Hull

It cuts out all the pieces you need to make a super cute gift box that you can fill with treats.

A few tips…

  • Adhere the gingham paper to Sizzix, Little Sizzles White Mat Board* using your favorite adhesive before cutting out the mitten die.  I like to use the Xyron Creative Station* to adhere the paper to the mat board so I get complete adhesive covering.
  • Paint the inside and sides of the box with red acrylic paint.
  • Glue lace onto the front of the gingham mitten before assembling the box.  I like to use a super-fast grab adhesive like DAP Rapid Fuse Adhesive*to glue my pieces together.

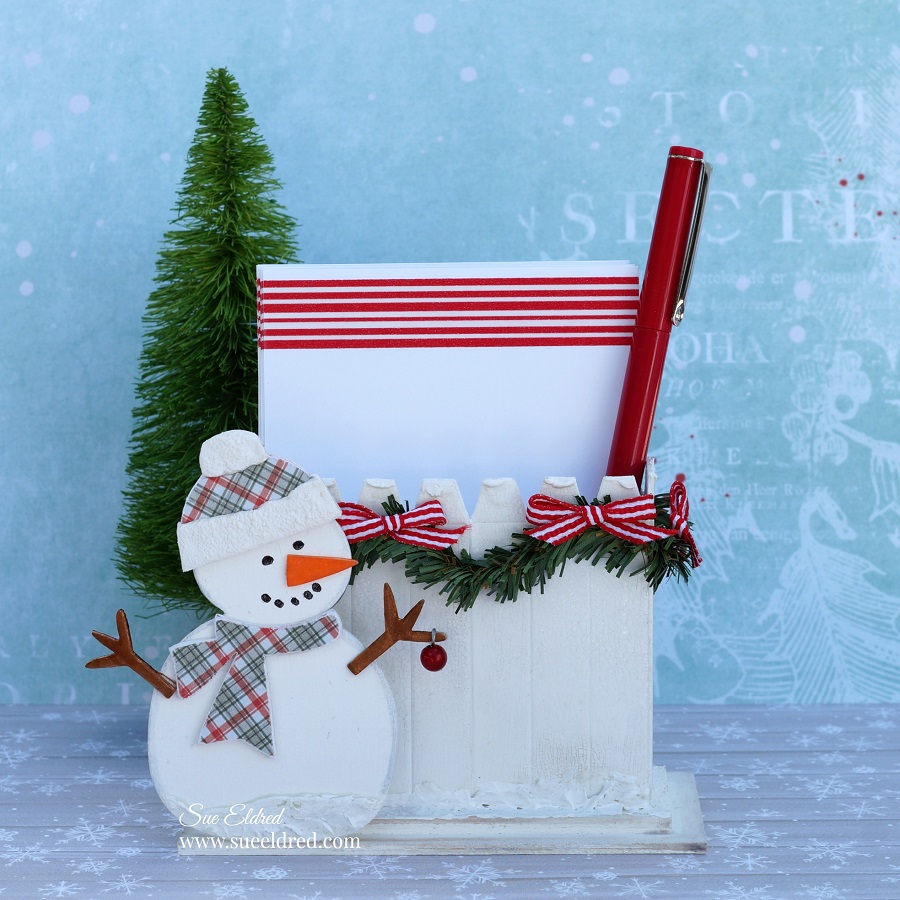
The second project is a Snowman Note Card Holder.

I used the #664511 Snowman Box Die by Eileen Hull and adapted it a bit. 

  • When I saw the scored piece that is supposed to be used to create the box, I saw a fence.  So, of course, I had to make a Snowman decorating a fence.
  • I glued two of the box parts together to make the fence.  I created a platform out of extra pieces of Little Sizzles Mat Board* for a place for the fence to stand.

The Snowman Box Die cuts all the pieces to makes these two adorable Snowman Boxes. 

Extra Snowman Supplies                 (*affiliate links)

*Disclosure:  This blog uses ads and affiliate links.  If you choose to make a purchase using one of the links, I receive a small commission (at no additional cost to you) that helps offset the costs of maintaining this blog.  Thanks for your support!

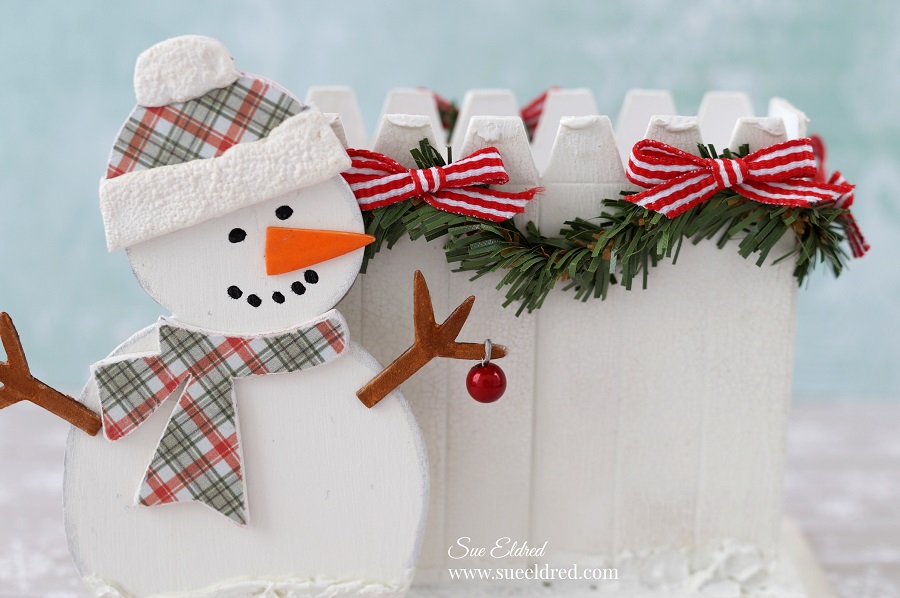
There’s a lot of dimension that was added to my Snowman.

  • I painted the fence and snowman with white acrylic paint.  After the paint had dried, I gave them both a coat of One Step Crackle Paint*.  The thicker the paint the larger the crackles.  (My crackles are more subtle.)
  • I used White Liquid Applique* on the rim and top of the snowman’s hat.  I let the liquid applique dry before heating it with a Heat Tool* to raise it.  If you let it dry before heating, the liquid applique raises evenly not bumpy.
  • I used DecoArt Dimensional Effects*on the tops of the fence and around the base.  I also used it on the bottom of my Snowman.

Check out the creative ways the Inspiration and Education Teams have used the Mitten and Snowman dies! We hope that you will be inspired too and share how you use the dies in the Eileen Hull Fan Club.

For a full list of designers visit Eileen’s Blog Here.

But wait- there’s more- the Release Party continues!  You won’t want to miss the Facebook Live at Eileen Hull Designs at 12:00 noon Eastern time on Wednesday, July 1! Join the chat- and a random commenter will win the Snowman die.

Please hop with us through all of the projects and leave comments on the different designers’ blogs. A lucky commenter will win the Mitten Box die…

Thanks everyone!

Save

Spring Watercolor Bouquet Card

Spring Watercolor Bouquet

I love the soft look of a handmade water-colored card.

This card was made using the Hello Spring Stamp and Die Set from the Maker’s Movement.

Just for you…I’ve created simple step by step instructions on how to make the card.

How to make a Spring Watercolor Bouquet Card

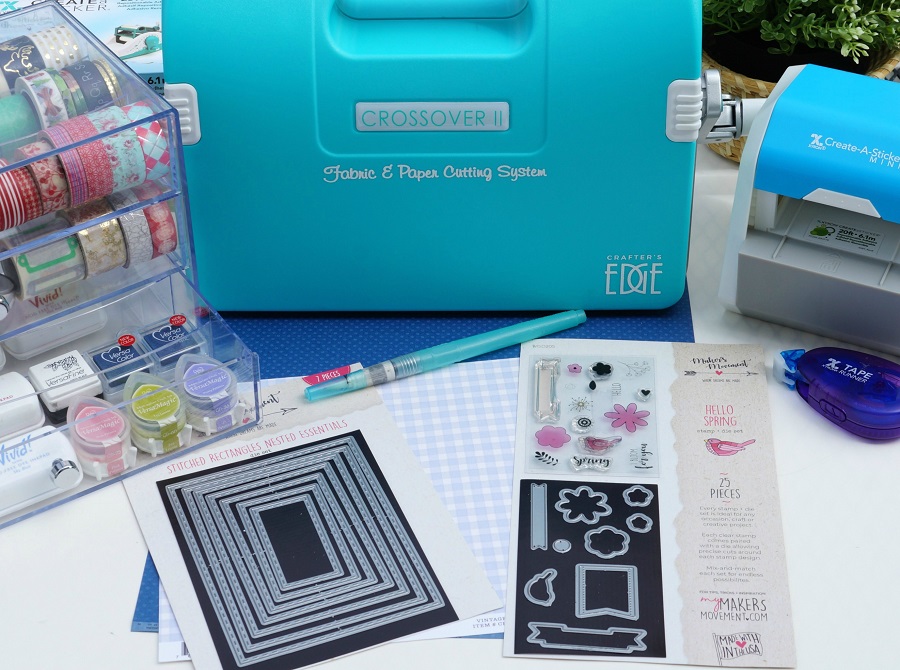
Materials Used:                (*affiliate link)

*Disclosure:  This blog uses ads and affiliate links.  If you choose to make a purchase using one of the links, I receive a small commission (at no additional cost to you) that helps offset the costs of maintaining this blog.  Thanks for your support!

  • In the Hello Spring Stamp and Die Set, there are several stamps that have a coordinating die that matches the stamp.
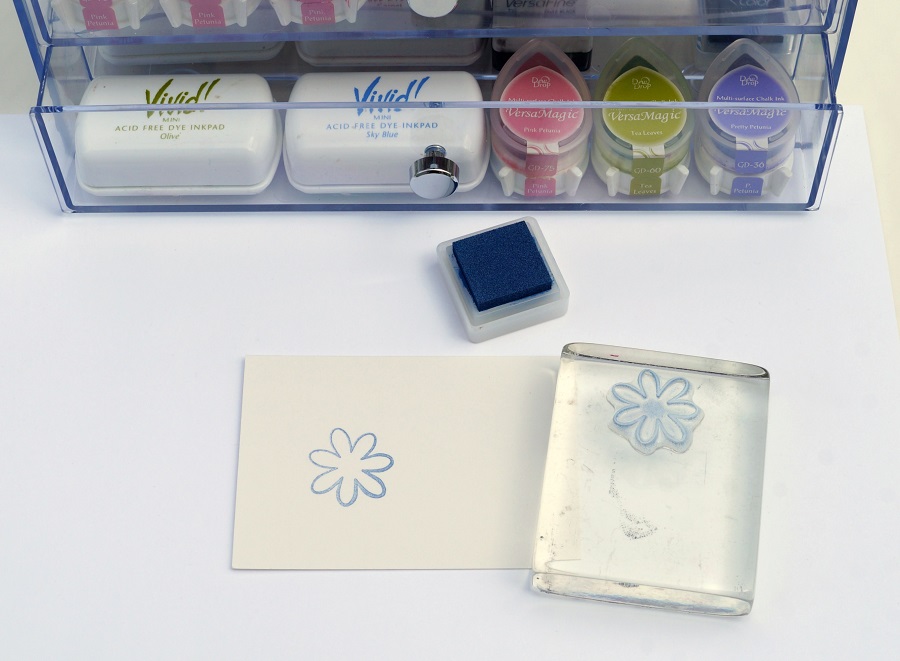
  • Stamp a flower using blue ink onto a piece of watercolor paper.

  • Place the mask onto the stamped flower image and stamp a second flower image slightly overlapping the first flower.

  • By using the mask, you create the look of one flower behind the other.

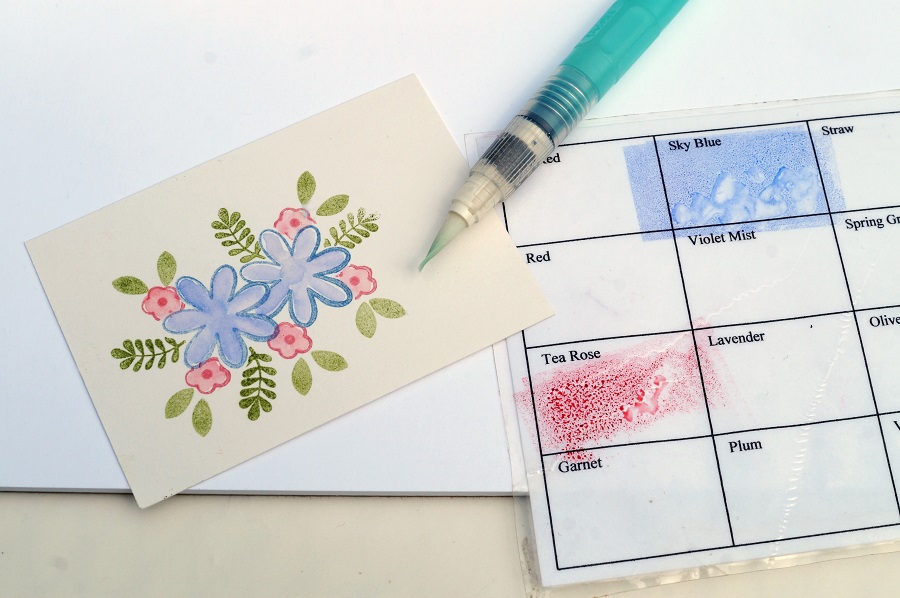
  • Place masks on both of the stamped flower image.  Start adding the background images by stamping small pink flowers, ferns, and leaves.

  • Remove masks and watercolor the stamped flowers using a water-brush*.
  • I like to use dye ink to watercolor.  I apply the ink to a simple grid that I printed onto copy paper and laminated.   Dip the wet tip of the water-brush* into the ink and paint your images.  (You can also use a small paintbrush and water.)

  • After the painted images have dried, stamp the center of the flowers using small stamps from the Hello Spring Stamp and Die Set.

  • Cut frames using the Nested Stitched Rectangles Dies.
  • Adhere water-colored image, frames, and layers onto a 4 ½” x 5 ½” blue dot card.
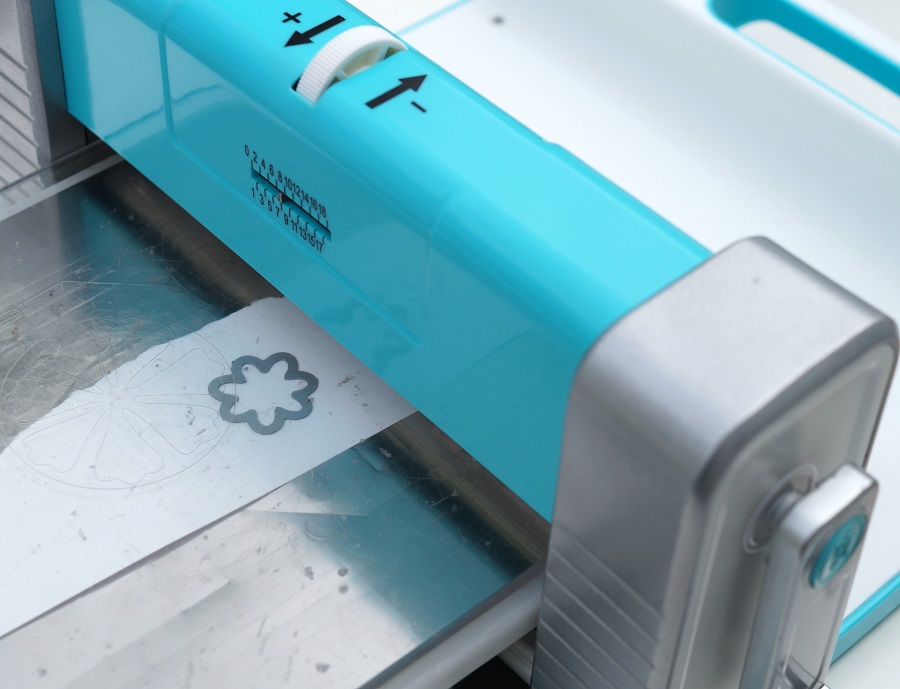
  • Stamp another flower with blue ink onto watercolor paper.  Watercolor the flower as before.  Cut the flower out using the coordinating die and the Crossover II Fabric & Paper Cutting System*.
  • Mount onto the lower right corner of the card using a thin foam mounting square.
  • Stamp “Hello” onto a small white banner cut from the small banner die found in the Hello Spring set.  Trim banner to size and adhere under the raised flower.
  • Add a simple sheer ribbon to the top of the card to finish.

*FTC Disclosure… “This is a sponsored post for The Maker’s Movement.  I have been provided product and compensation in exchange for my creative ideas.  The views and opinions are my own.”

Save

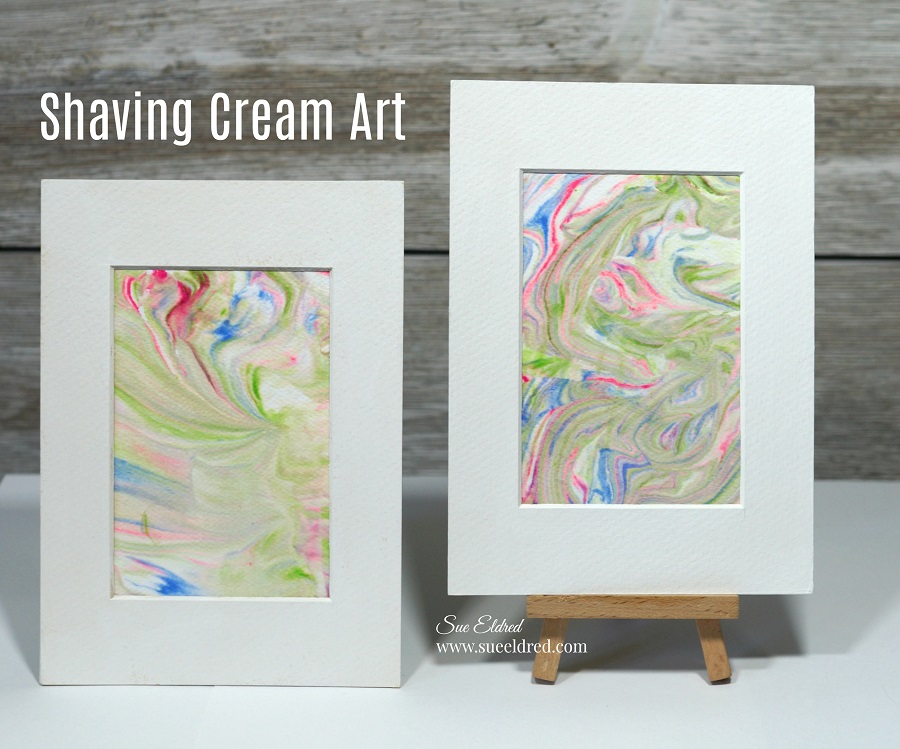
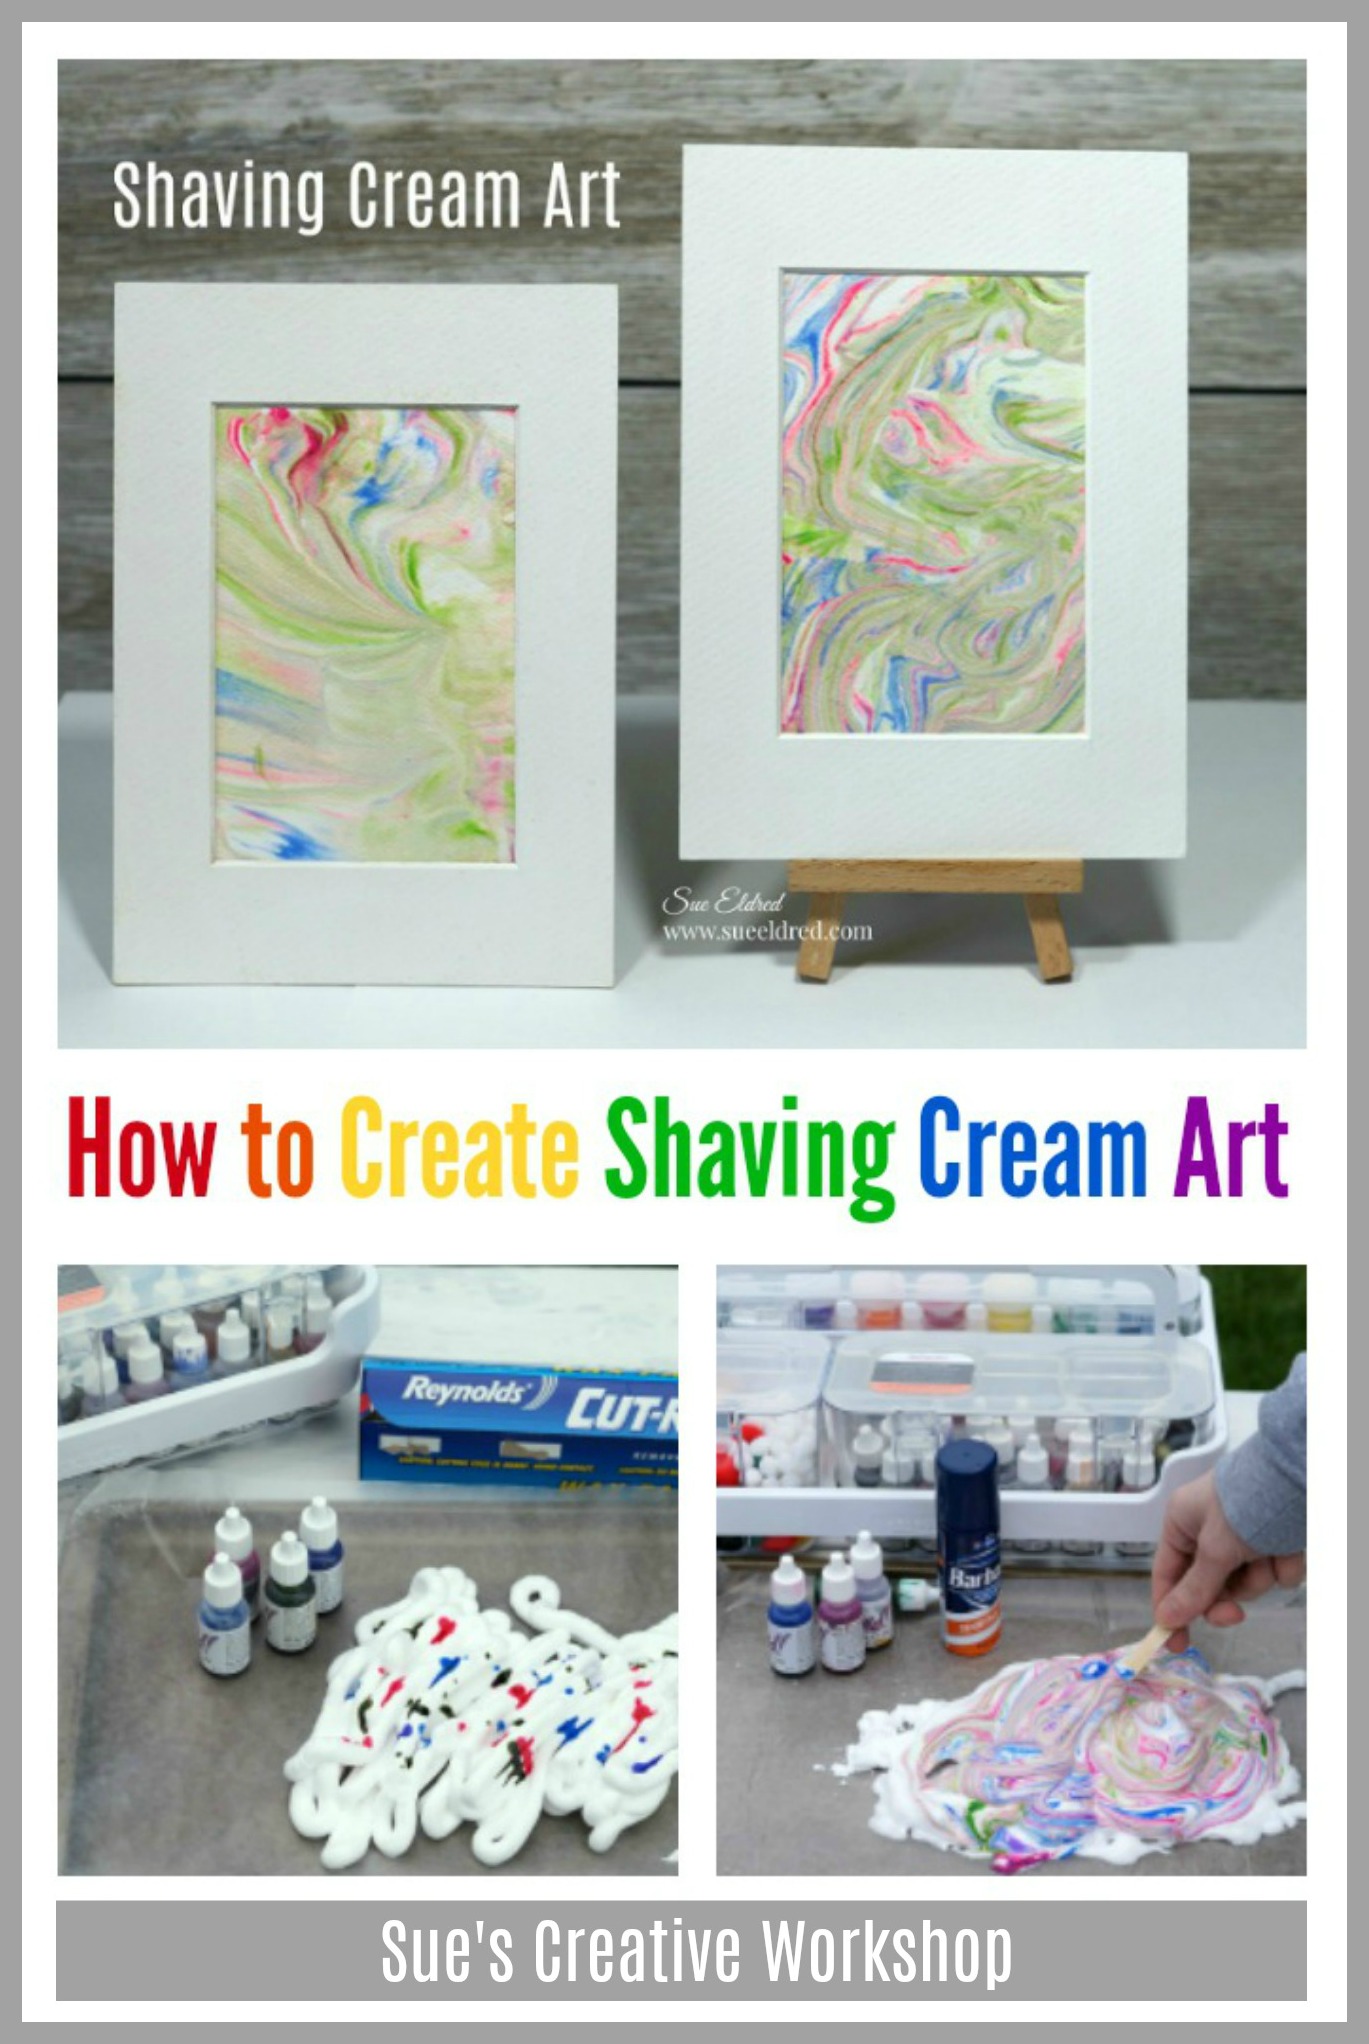
Shaving Cream Art

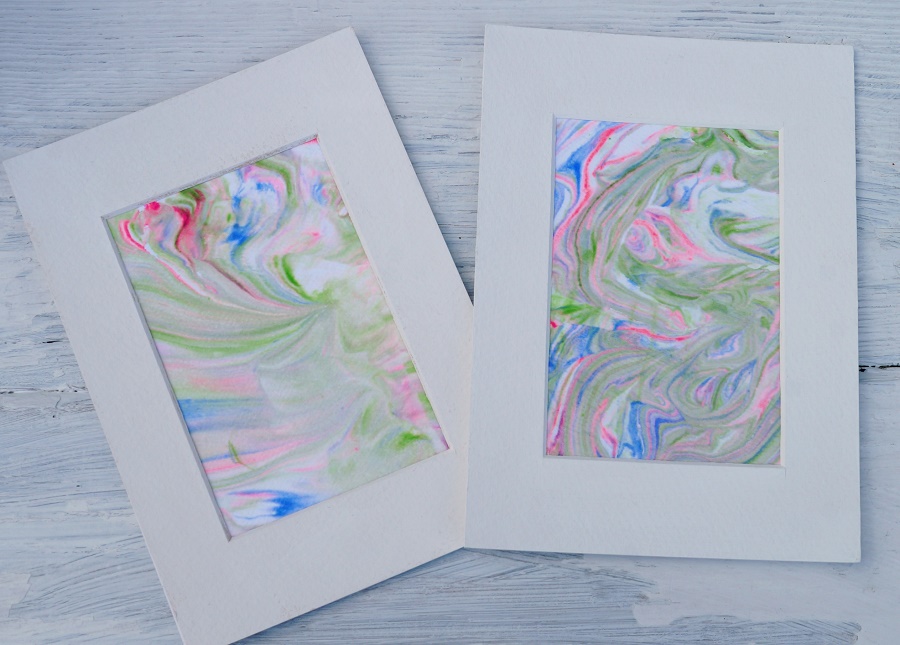
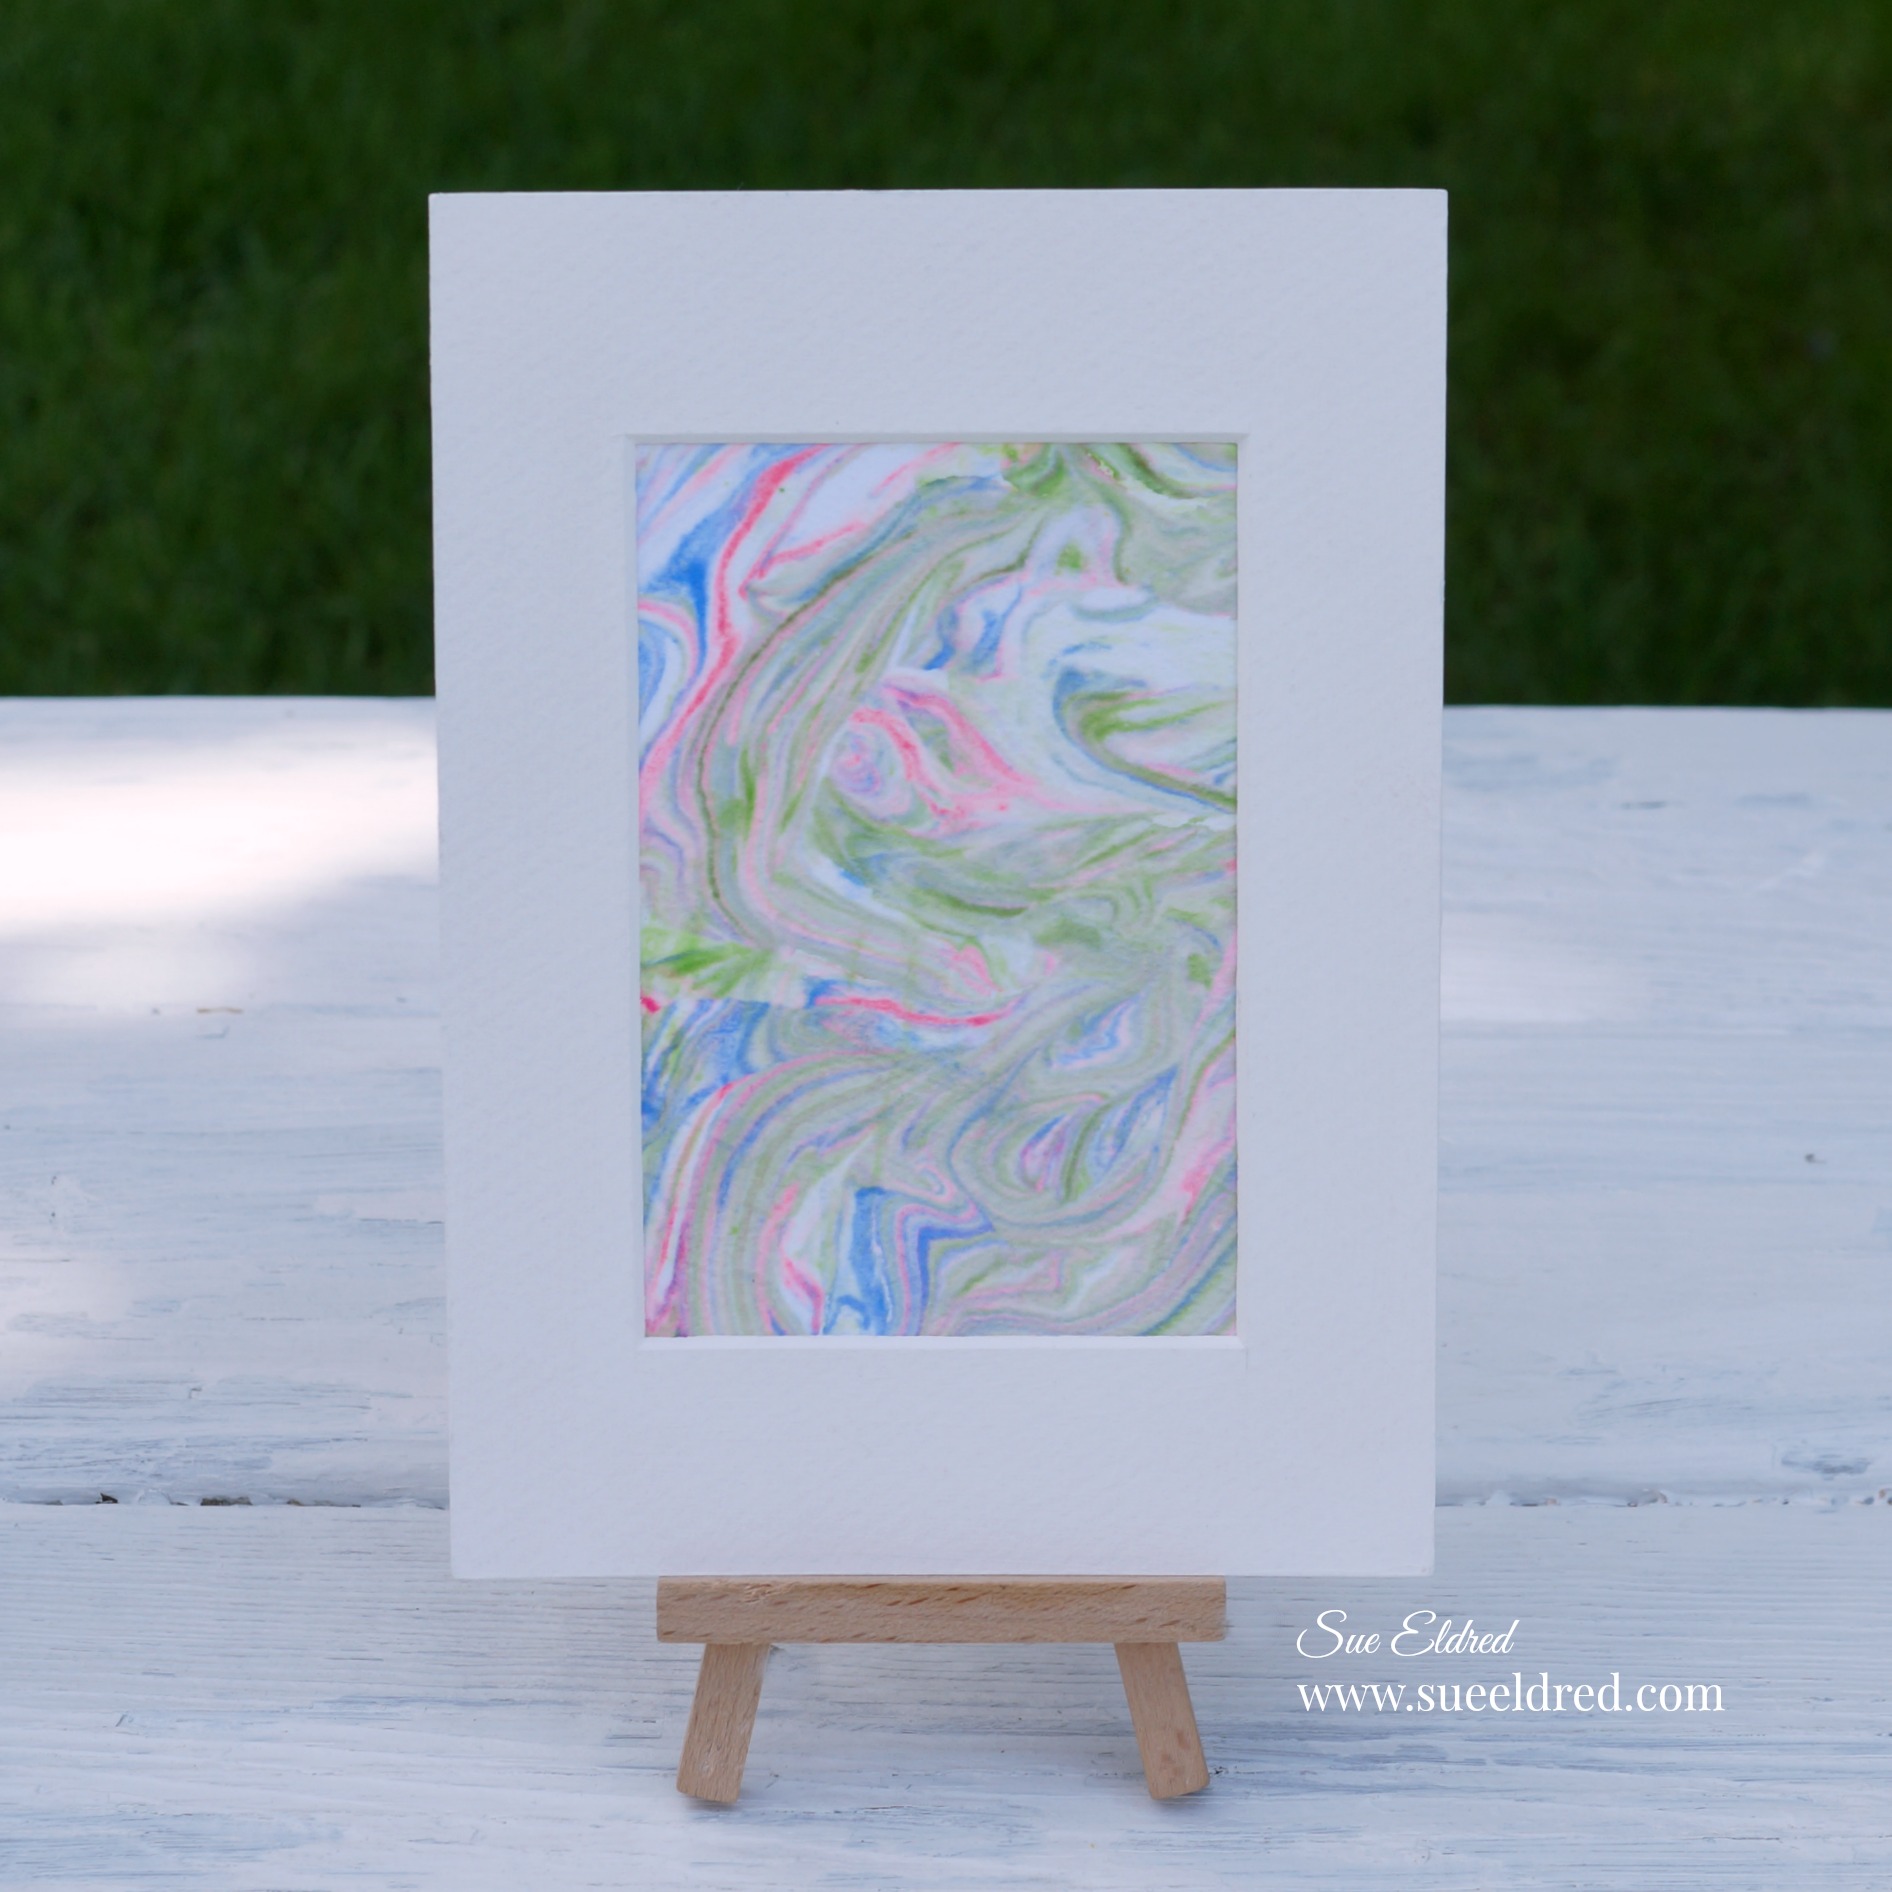
Create Unique One of a Kind Art with Shaving Cream.

Shaving Cream Art is a fun project that the whole family can participate in.

How to Create Shaving Cream Art

Materials Needed:

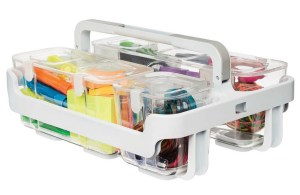
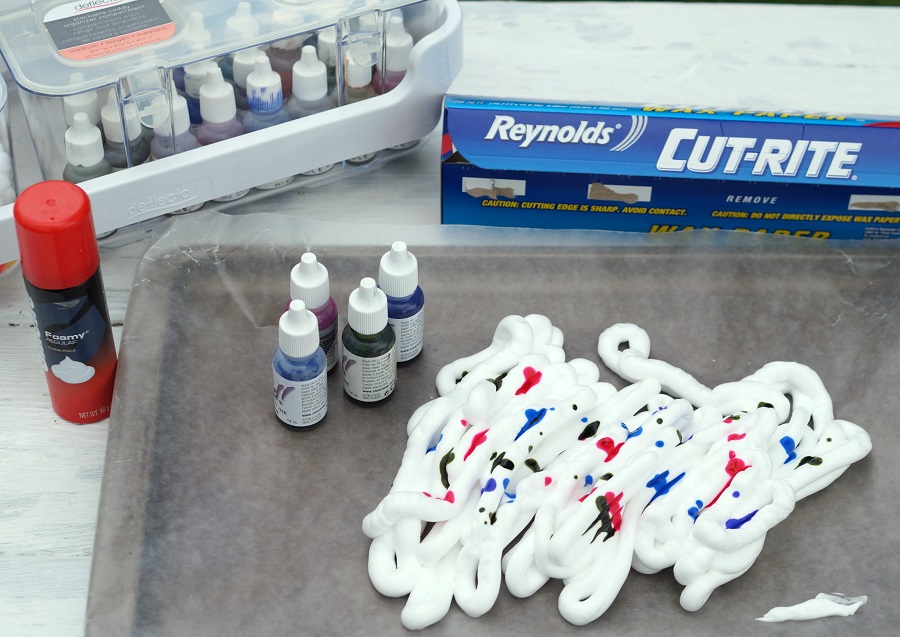
I use the Deflecto Stackable Caddy Organizer* to hold my ink refills and other crafty supplies.
*Disclosure:  This blog uses ads and affiliate links.  If you choose to make a purchase using one of the links, I receive a small commission (at no additional cost to you) that helps offset the costs of maintaining this blog.  Thanks for your support!

Shaving Cream Art can get a little messy so a little prep work is necessary.

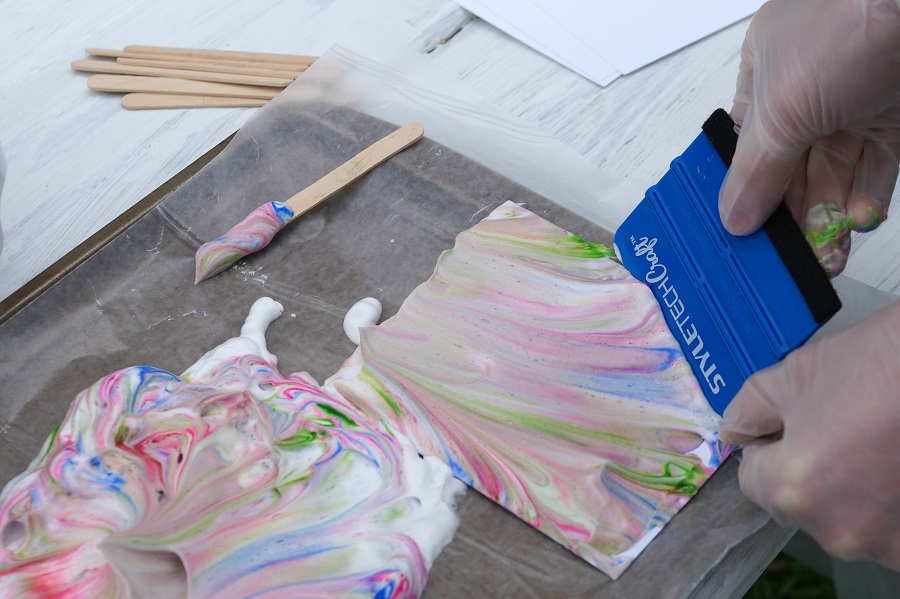
  • For easy clean up…Place a piece of wax paper* over a large baking sheet.
  • Add shaving cream onto wax paper.
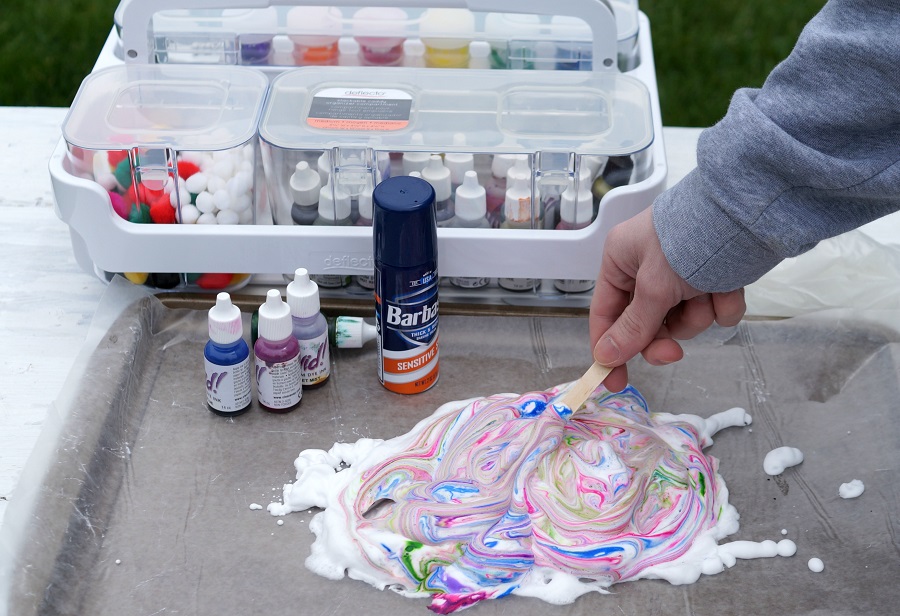
  • Add several drops of ink onto the shaving cream.

  • Use a craft stick* to swirl the ink into the shaving cream.
  • Do not over stir or the shaving cream will become muddy.

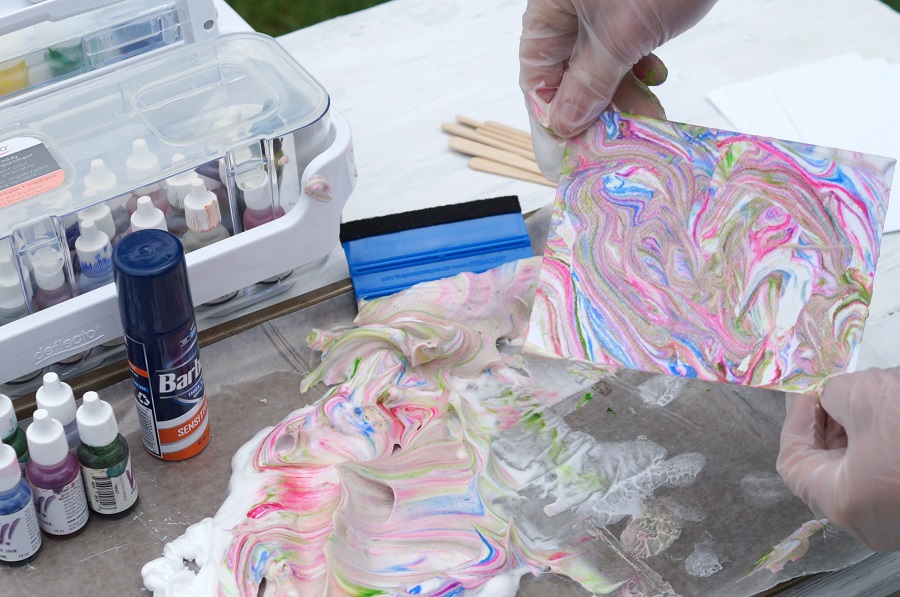
  • Place card-stock directly onto the shaving cream and lightly Smoosh.

  • Carefully lift the card-stock from the shaving cream.

  • Use the scraper tool* to scrape the excess shaving cream from the card-stock.

  • Without re-stirring the shaving cream, you can repeat the process several more times.
  • The first one will be the most vibrant and will get subtly lighter each time.

Each one will be different and will lighten as they dry.

You can use this process to create even larger pieces of art. 

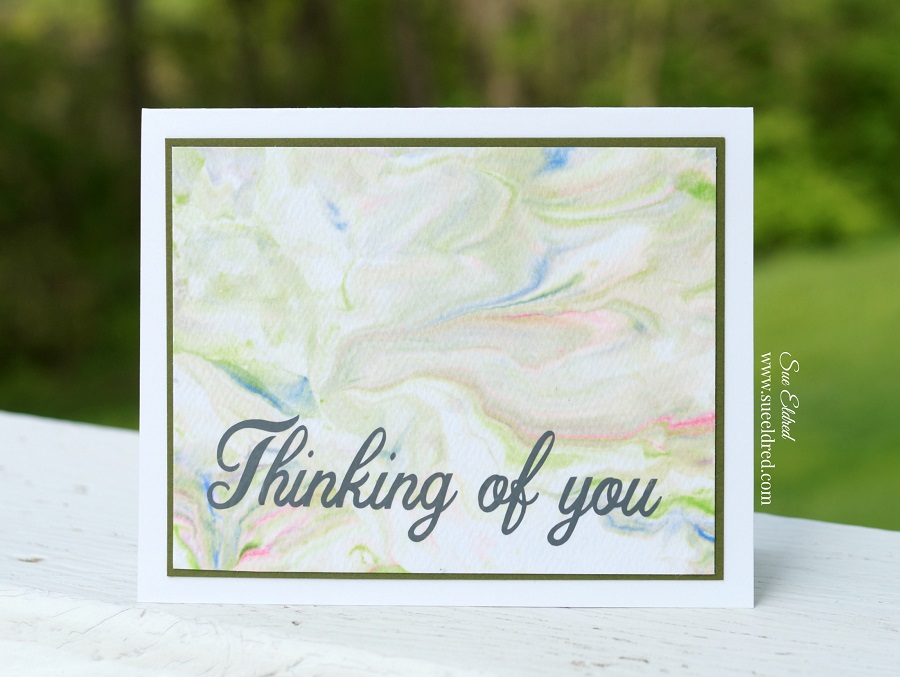
Shaving Cream Art also makes a great background for card-makers.

Disclosure:  “This is a sponsored post. As a member of the Deflecto Design Team I have been provided product and compensation in exchange for my creative ideas, views and opinions.”


Don’t Miss a Thing…Make Sure to Follow me

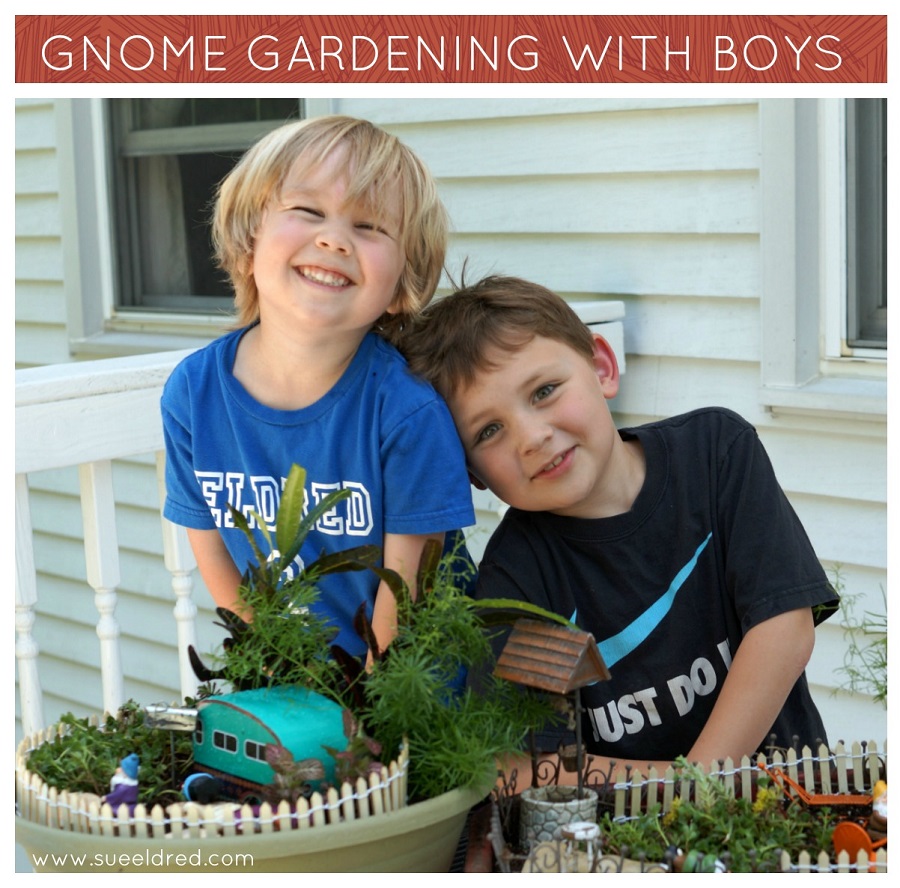
If you liked the Shaving Cream Post you might like Gnome Gardening with Boys.

Save

Save

Save

PIN ME↓

How to Personalize a Wine Glass with Glitter Vinyl

One of my favorite snack combinations is Wine and Popcorn.

It’s great for a casual party or a perfect movie night snack!

For your next party, try personalizing inexpensive Wine Glasses from Dollar Tree*.

Add names to the glasses, and they’ll be no more mixing them up .

*Disclosure:  This blog uses affiliate links.  If you choose to make a purchase using one of the links, I receive a small commission (at no additional cost to you) that helps offset the costs of maintaining this blog.  Thanks for your support!

How to Personalize a Wine Glass with Glitter Vinyl

Materials:    (*affiliate link)

The great thing about StyleTechCraft Transparent Glitter Vinyl is that it’s the only film in the world that is colored glitter on both the inside and outside.  

Styletech Craft products brought to you by ATSM Craft

Directions:

  • The flower and leaves image used on the wine glass was purchased online as a “cut file” from the Silhouette Store.
  • Using the Silhouette Cameo Electronic Die Cutting Machine*, I resized the flower and leaves image to fit on the front of the wine glass.  (Mine was approx. 2 1/2″ x 1 3/4″)
  • Lay the vinyl on the cutting mat.  (Because my mat is old and not super sticky, I use a piece of removable tape to hold my vinyl on the mat.)
  •  Set machine on the vinyl setting, cut images out using the Silhouette Cameo Electronic Die Cutting Machine*.  Cut the image out in red and green adhesive glitter vinyl.
  • Use the Weeding Tool, to carefully remove the negative spaces in and around the image.

  • Cut a piece of Vinyl Transfer Tape* a little larger than the flower shape.
  • Lay the Vinyl Transfer Tape*on top of the flowers. Gently rub over the transfer paper using the vinyl scraper tool to make sure the image has transferred.

  • To help the vinyl stick securely to the glass…Wipe the surface of the wine glass with the alcohol wipe to remove any oils.   
  • Lay transfer paper onto glass. Because the surface is curved, start from the center of the image and rub one side at a time using vinyl scraper tool. The tool allows you to smooth the image and get rid of air bubbles.
  • Remove Vinyl Transfer Tape*.
  • Center leaves over floral design and repeat process.

Allow the vinyl to cure on the glass for 4 days before using. (Hand Wash Only)

And of course, you’re going to need a cute coaster to go with your wine glass.

  • Apply adhesive Silver Glitter Vinyl to the front of a chipboard coaster.  Trim around the edge of the coaster with a craft knife.
  • Create the words using red and black transparent and apply onto the coaster the same as the wine glass.  Enjoy!

Cheers…looks like a Wine and Popcorn kind of night!

“This is a sponsored post.  As a member of the StyleTechCraft Design Team I have been provided product and compensation in exchange for my creative ideas.  The views and opinions are my own.

Save

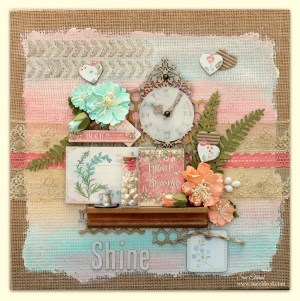
Little Birdie Crafts Mixed Media Canvas

Mixed Media Made Simple

In the past, I was intimidated at the thought of doing a Mixed Media project.

I was intrigued but intimidated.

After a few attempts, I found that Mixed media doesn’t have to be intimidating

if you break it down into a few simple steps.

What is Mixed Media?

Mixed Media is a visual art that uses more than one medium or material.  Two common examples of mixed media art are assemblages and collages.  Different materials include cloth, paper, paint, wood, and found objects.

Here’s the 4 basic steps I use:

  1. prep canvas
  2. create background
  3. add dimension
  4. composition

When it comes to Mixed Media, I am still a novice.  The steps I use are mere suggestions.

This month, I got the opportunity to work with Little Birdie Crafts in a Blog Hop with fellow designers of the Designer Craft Connection.  Little Birdie Crafts has a great selection of handmade flowers, chipboard pieces, stencils, paper and so much more.  Right now they have a great sale going on, make sure to check out the Little Birdie Crafts online store.

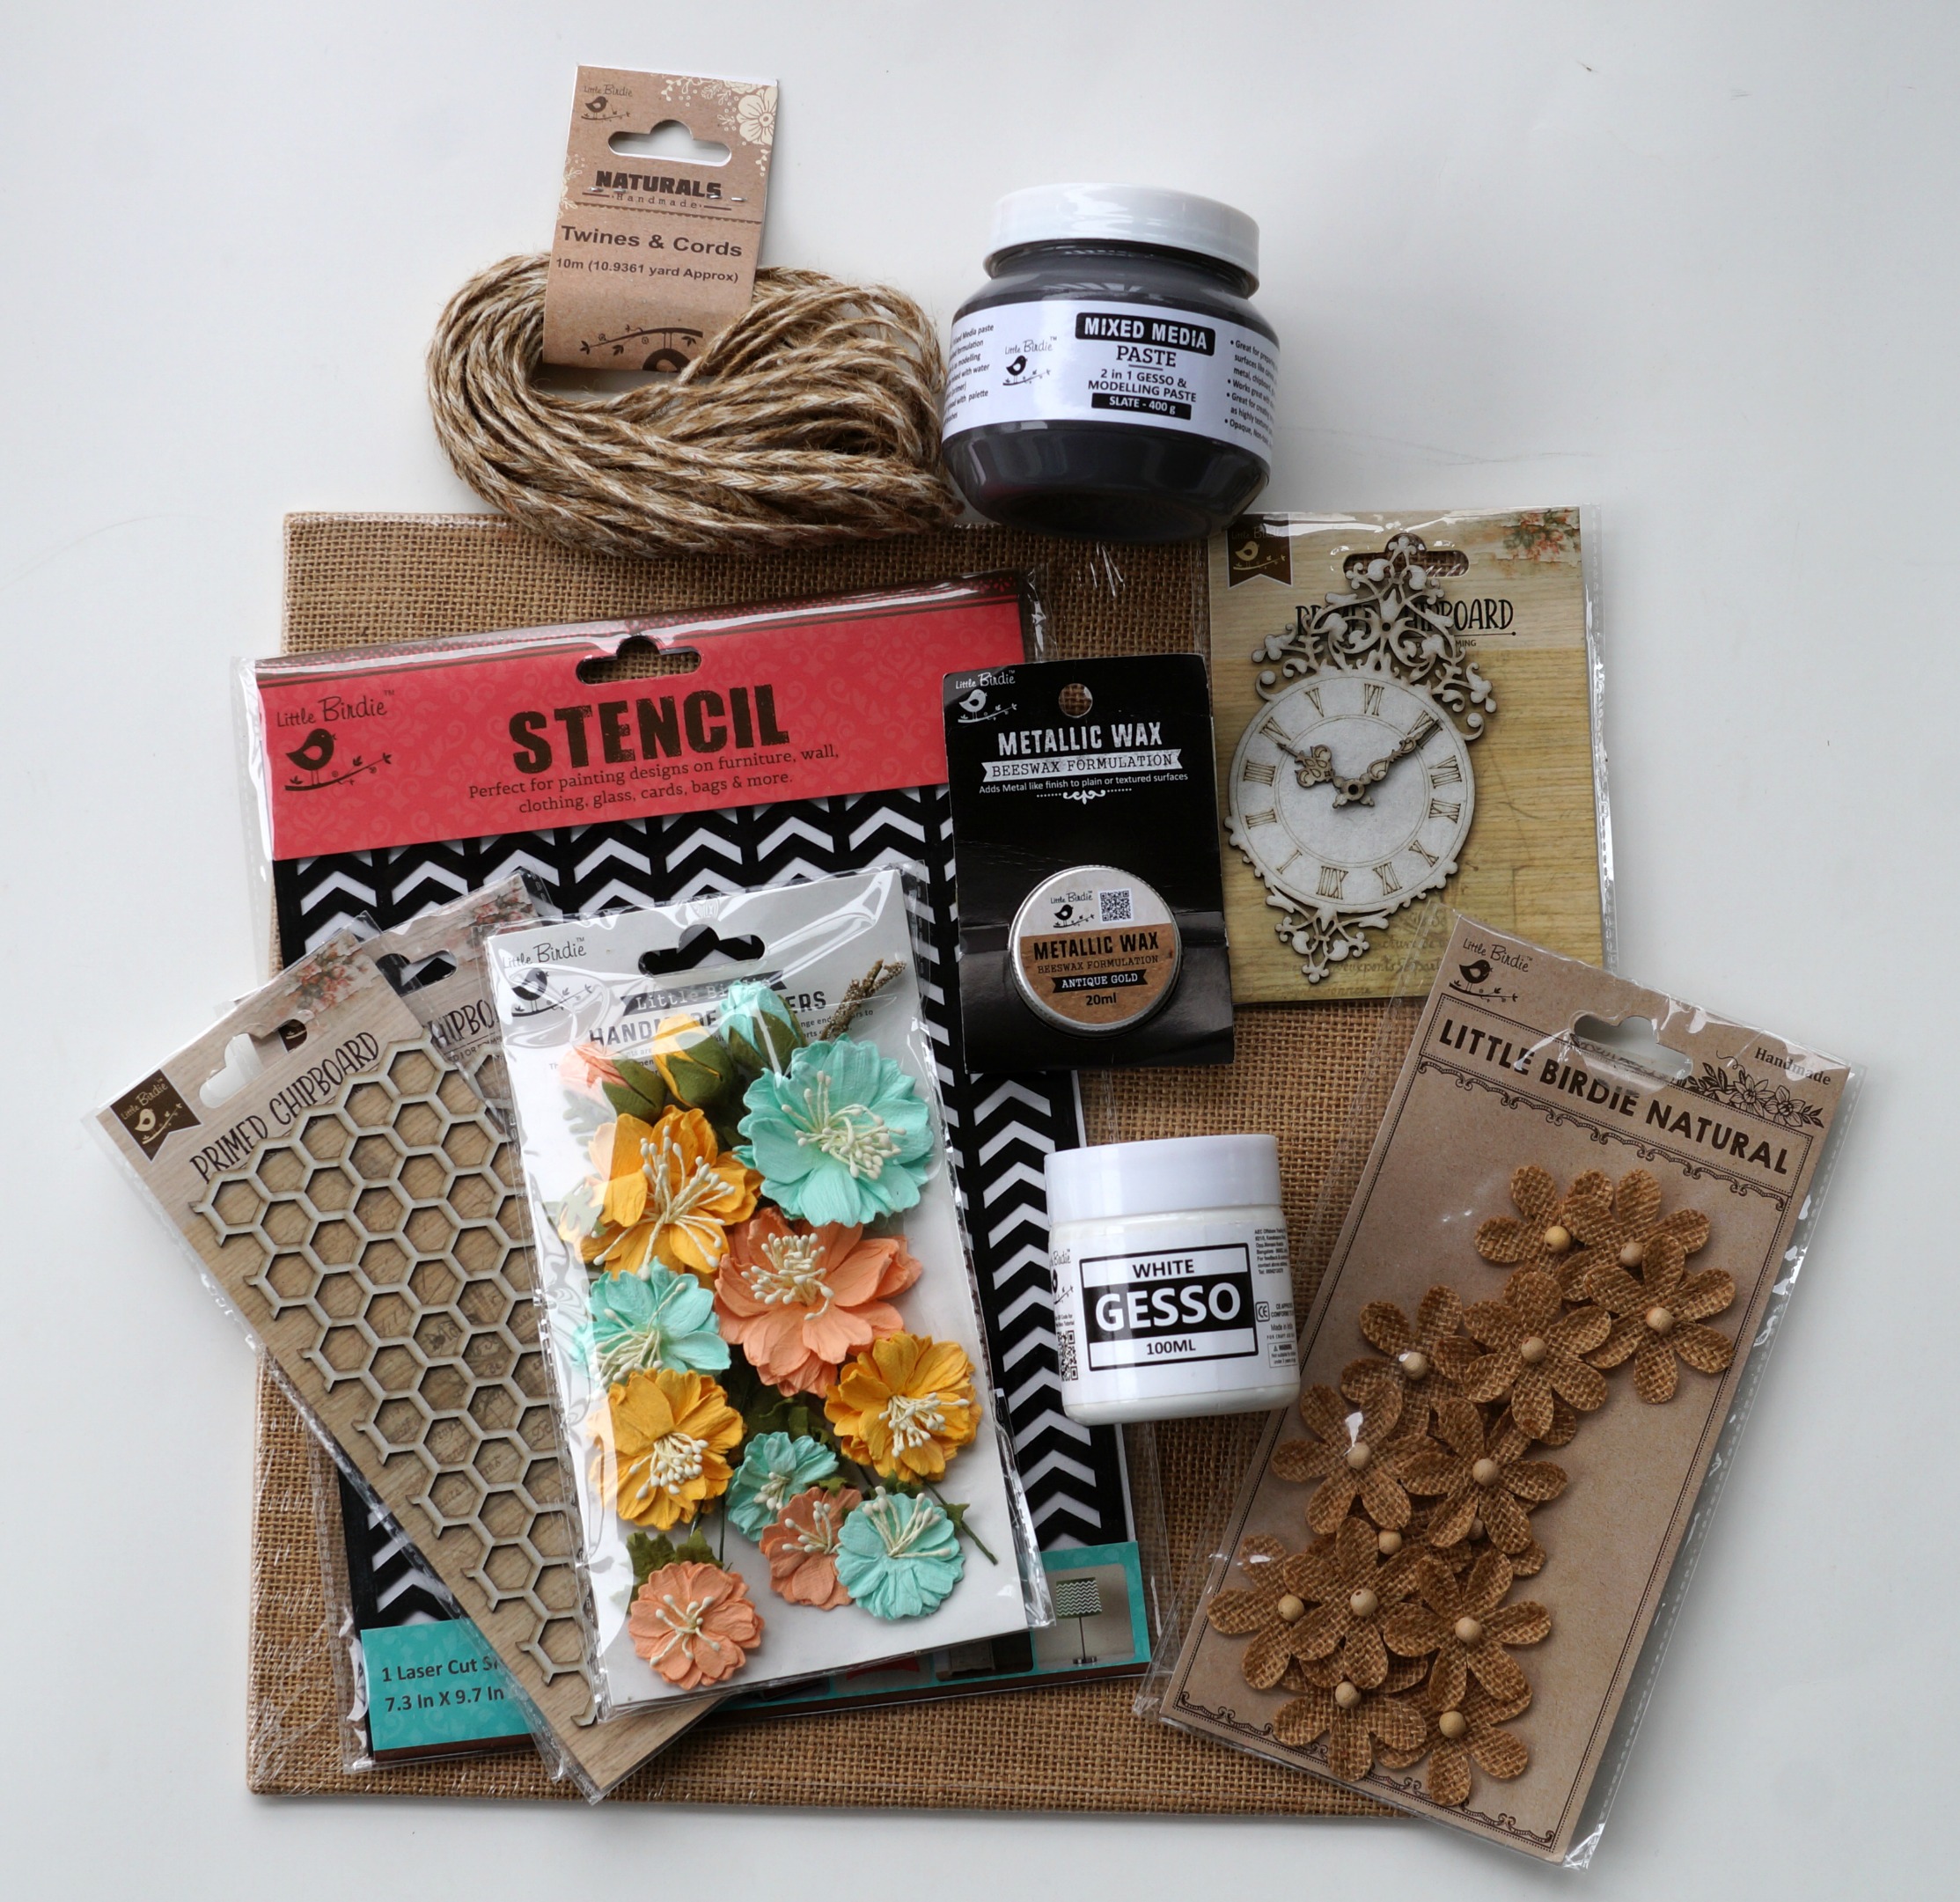
These are the Little Birdie Crafts products used:

  • 12 x 12 Burlap Art Board  (CR73782)
  • White Gesso (CR75625)
  • Antique Gold Metallic Wax (CR79830)
  • Mixed Media Paste-Slate (CR79374)
  • Natalie Pastel Flowers (CR70092)
  • Chipboard Ornate Clock (CR26249)
  • 2-Chipboard Honey Comb (CR56011)
  • Chevron Stencil (CR64149)
  • Jute Braided Twine  (CR82268)

Additional Products Used:                       (*affiliate link)

*Disclosure:  This is a sponsored post.  I have been provided product in exchange for my creative ideas.  The views and opinions are my own.  This blog uses ads and affiliate links.  If you choose to make a purchase using one of the links, I receive a small commission (at no additional cost to you) that helps offset the costs of maintaining this blog.  Thanks for your support!

Step One 1

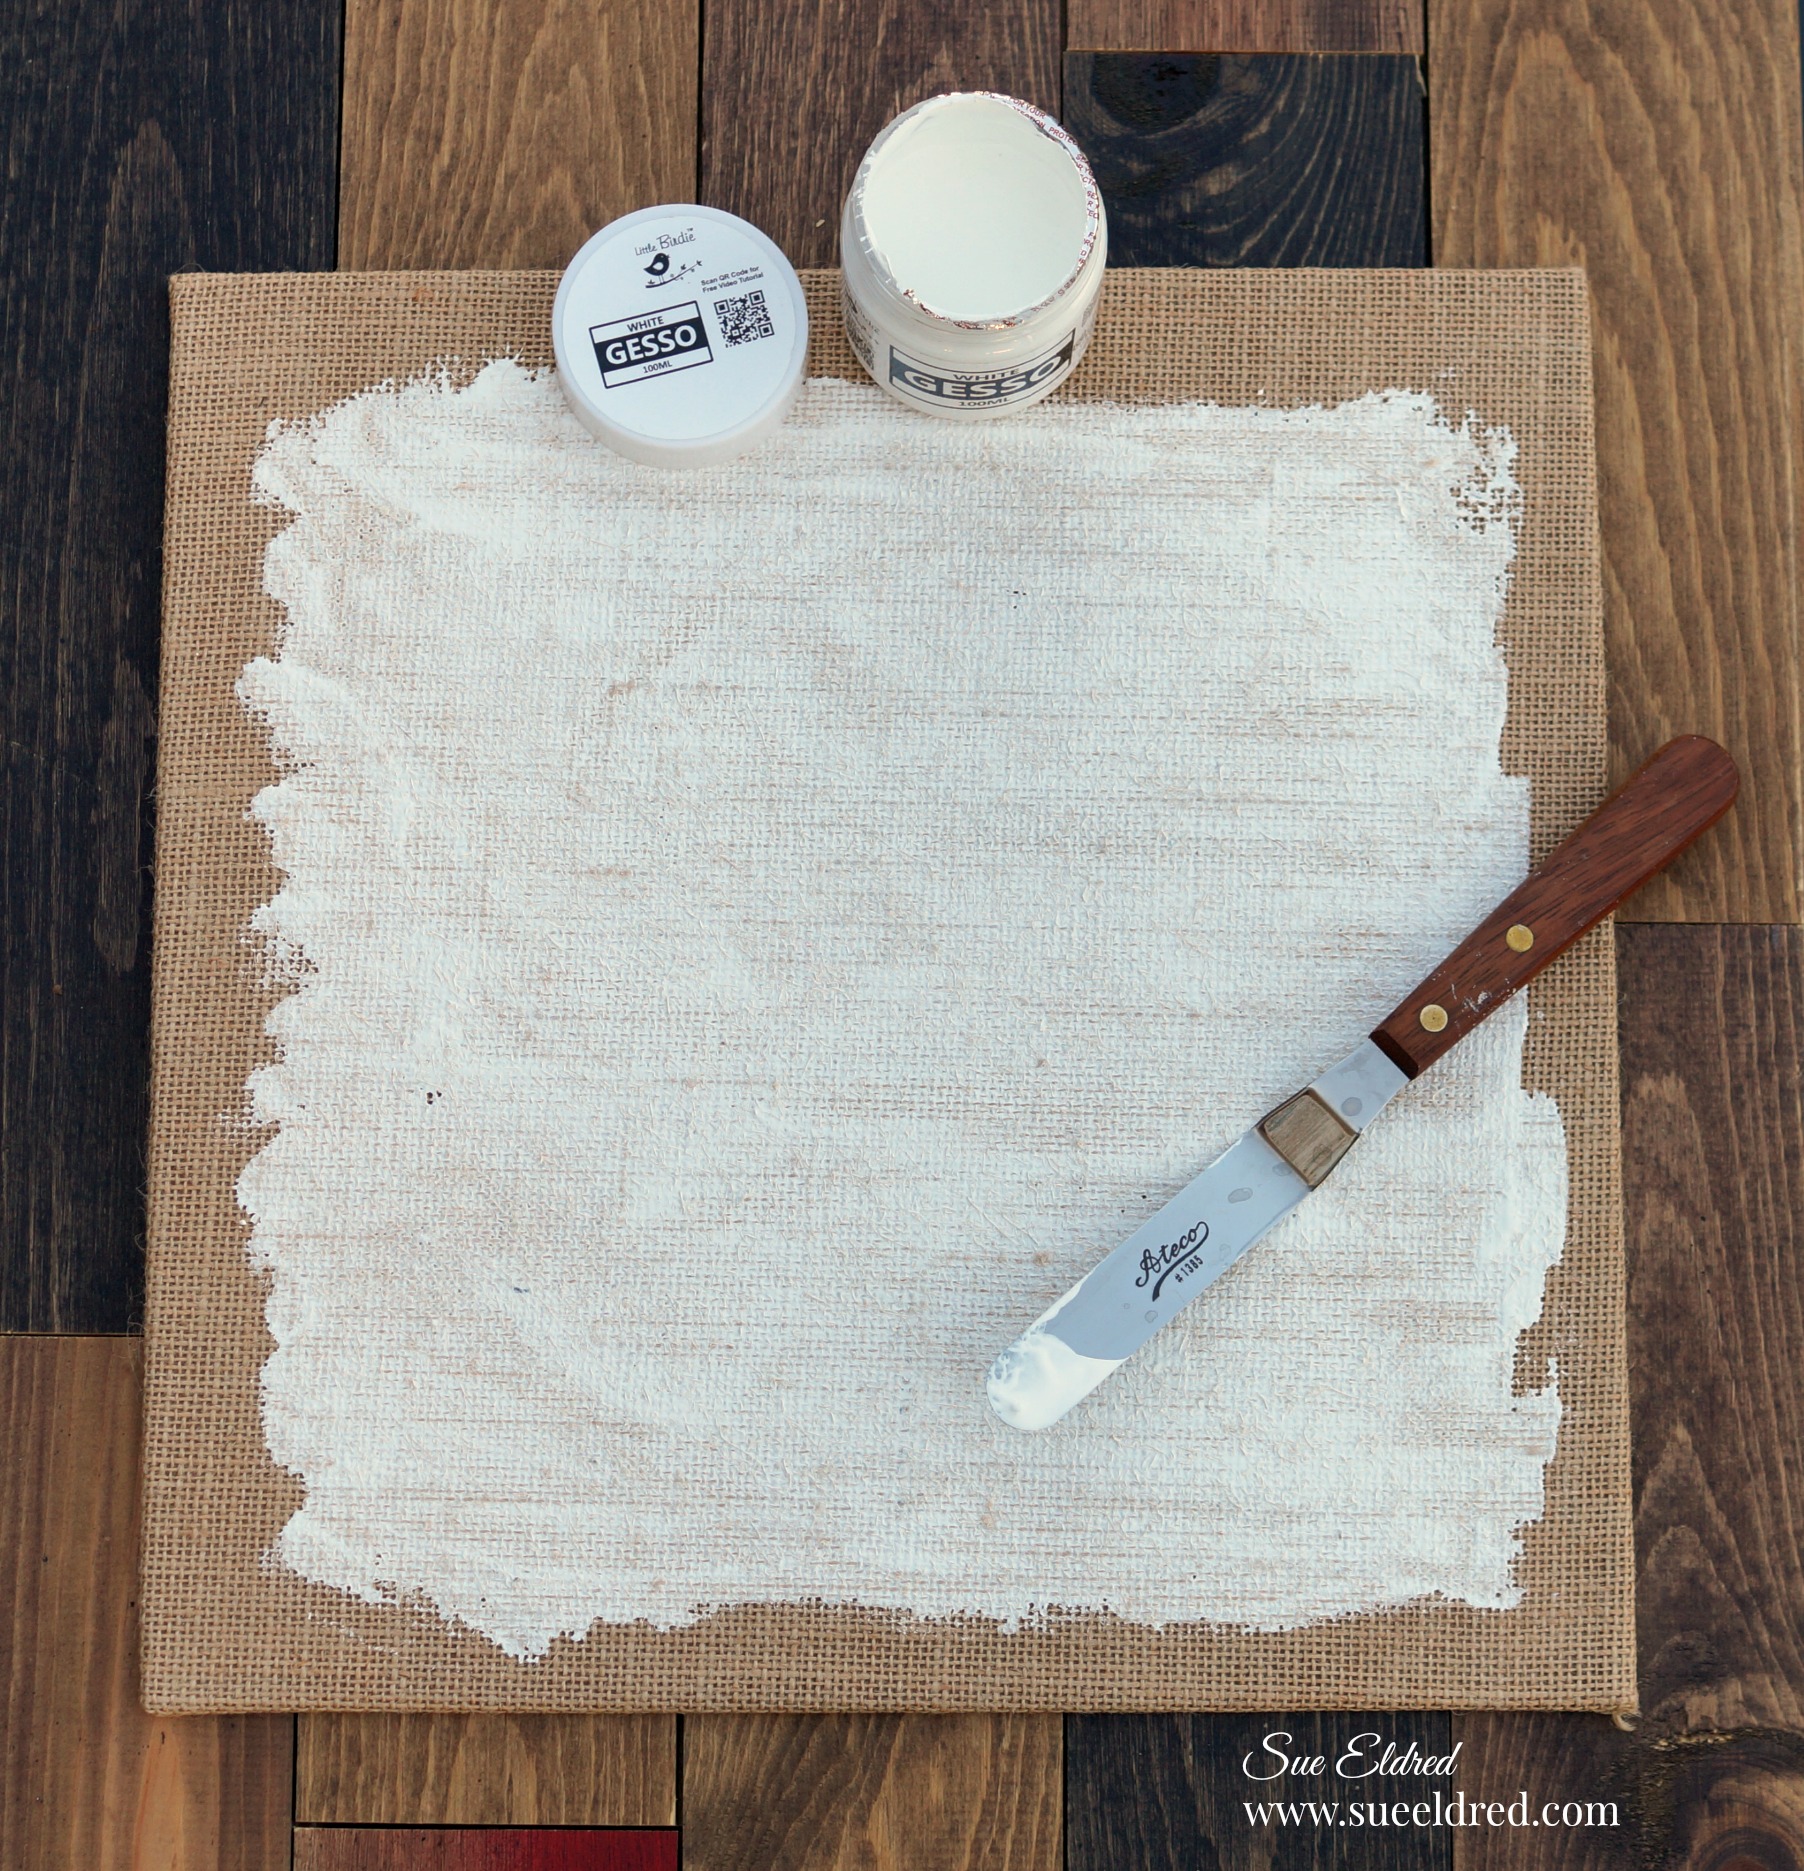
  • Prep burlap canvas with gesso using a palette knife or paintbrush to prepare the surface for paint.

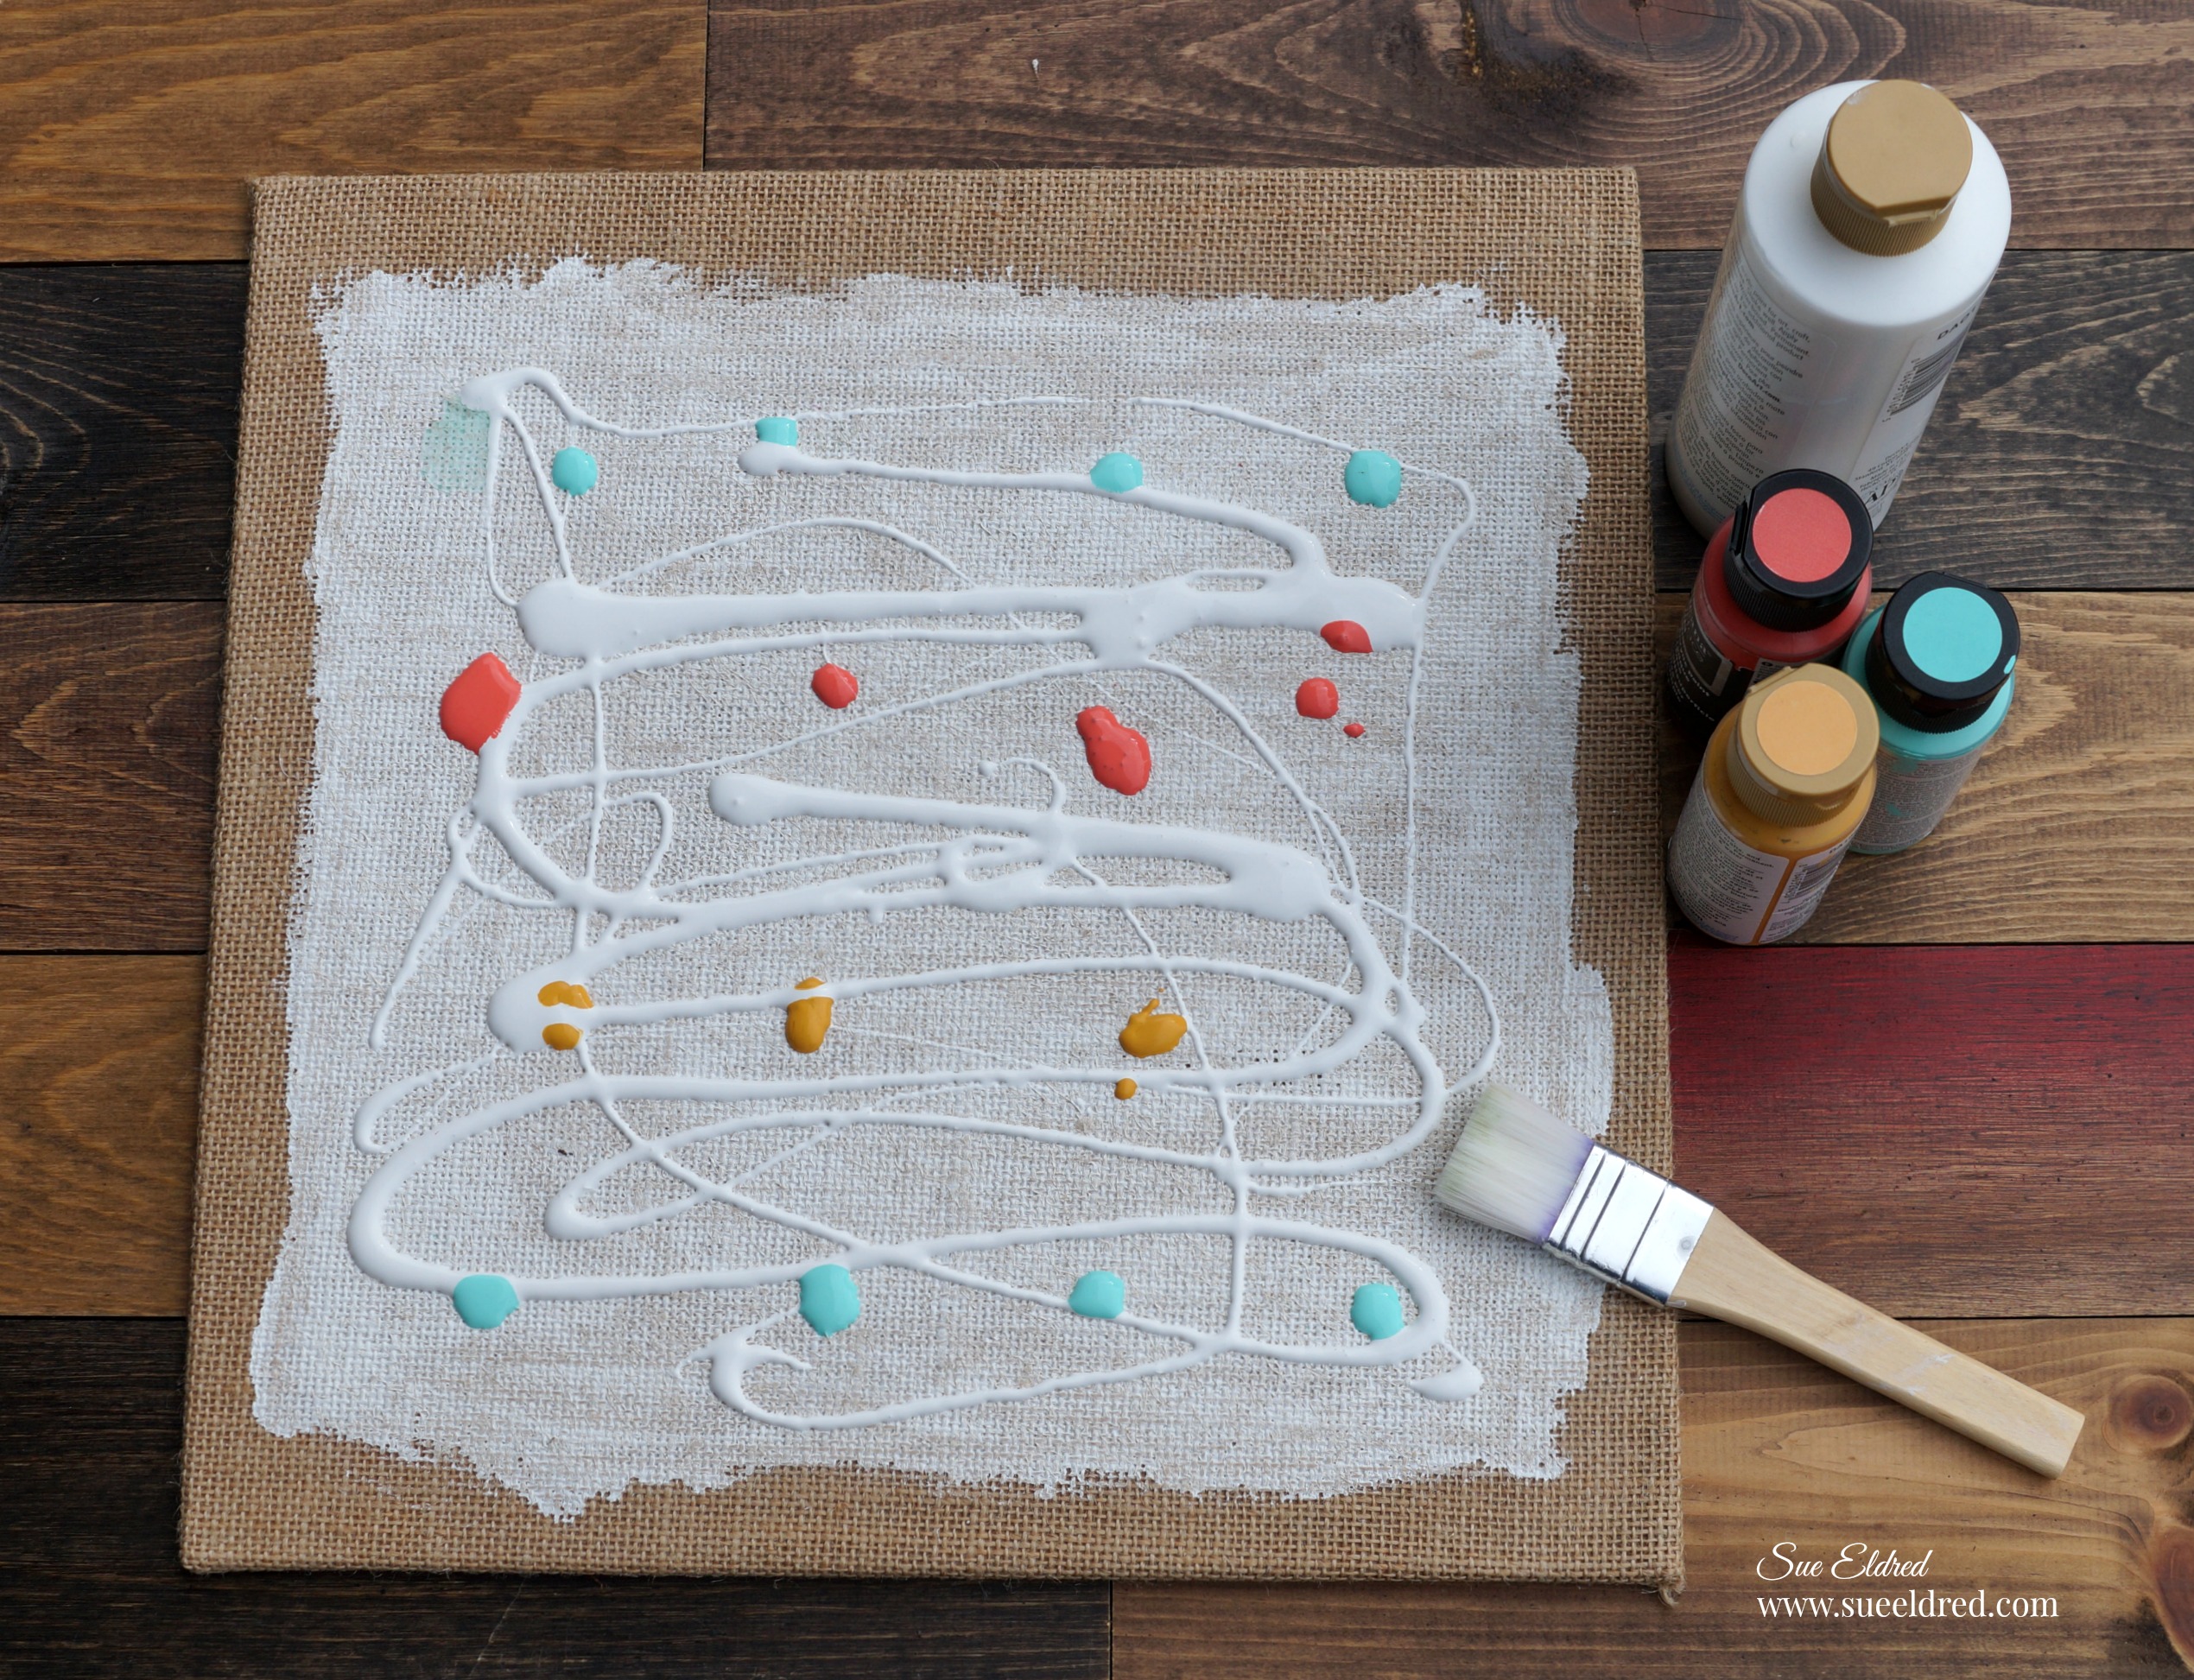
  • Add white acrylic paint over the surface of the canvas, and drips of coral, marigold and aqua paint.

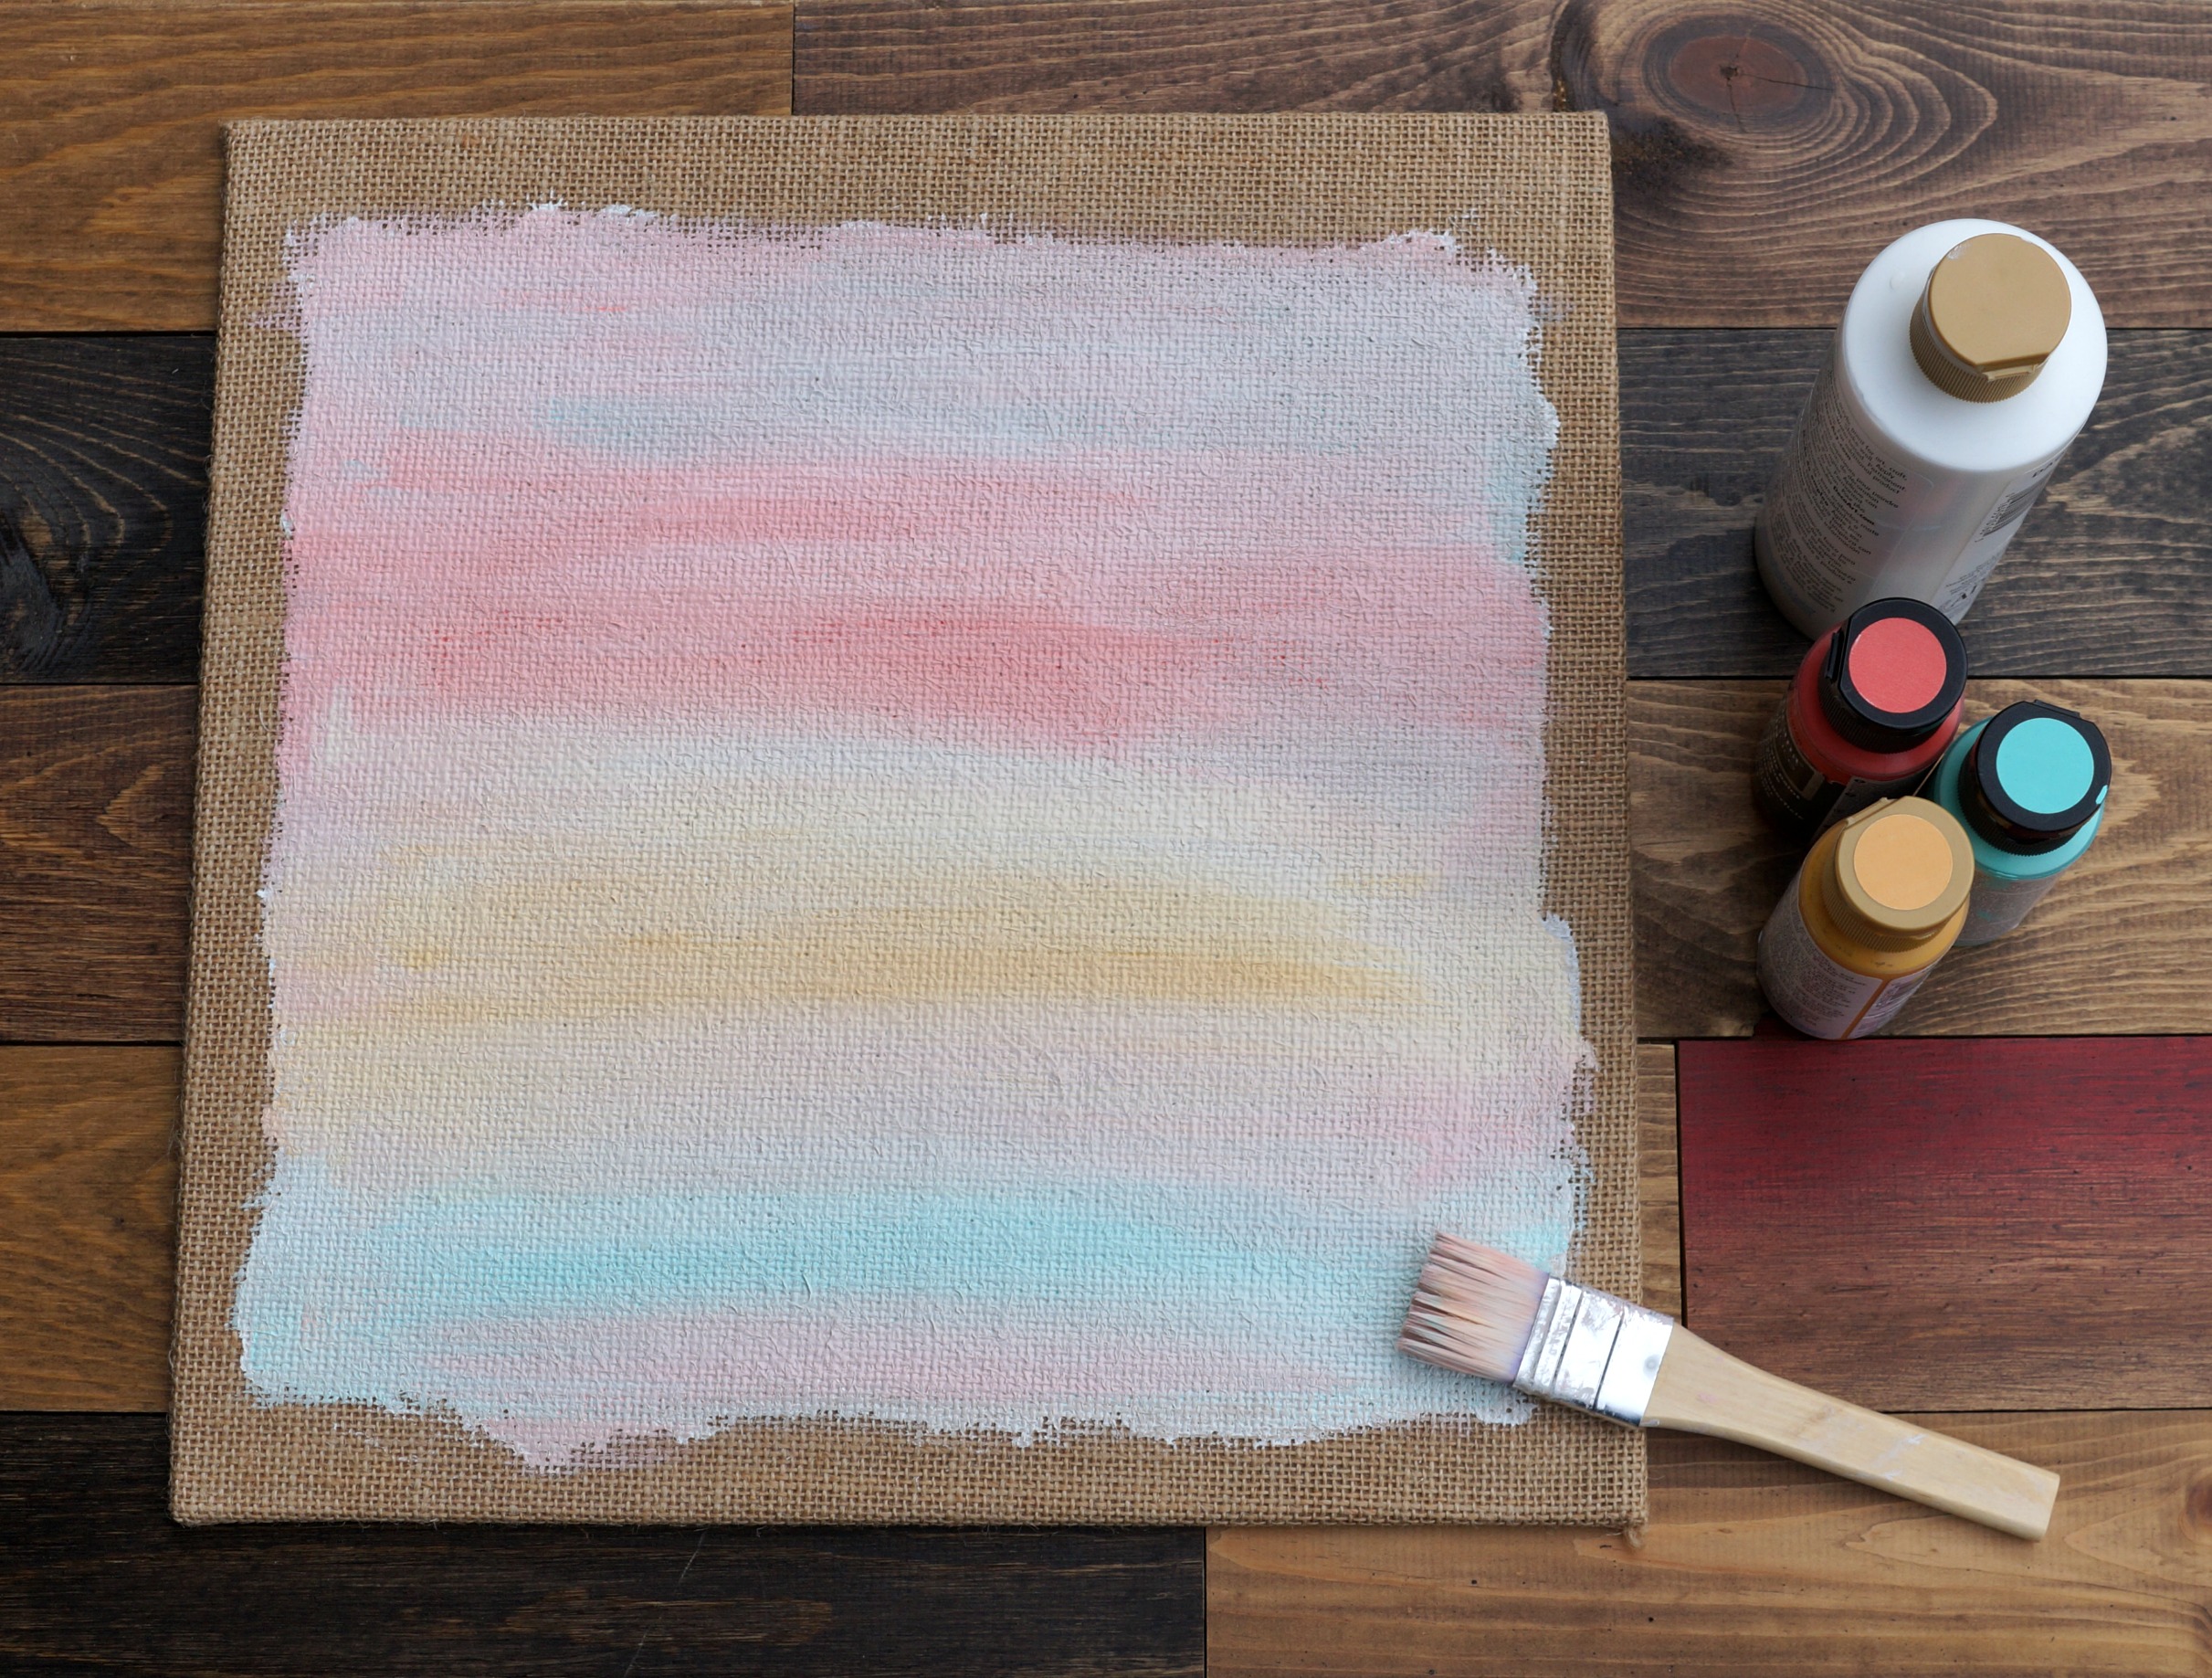
  • Blend horizontally across the canvas using a paintbrush to create a soft background.

Starting the process of building the background.

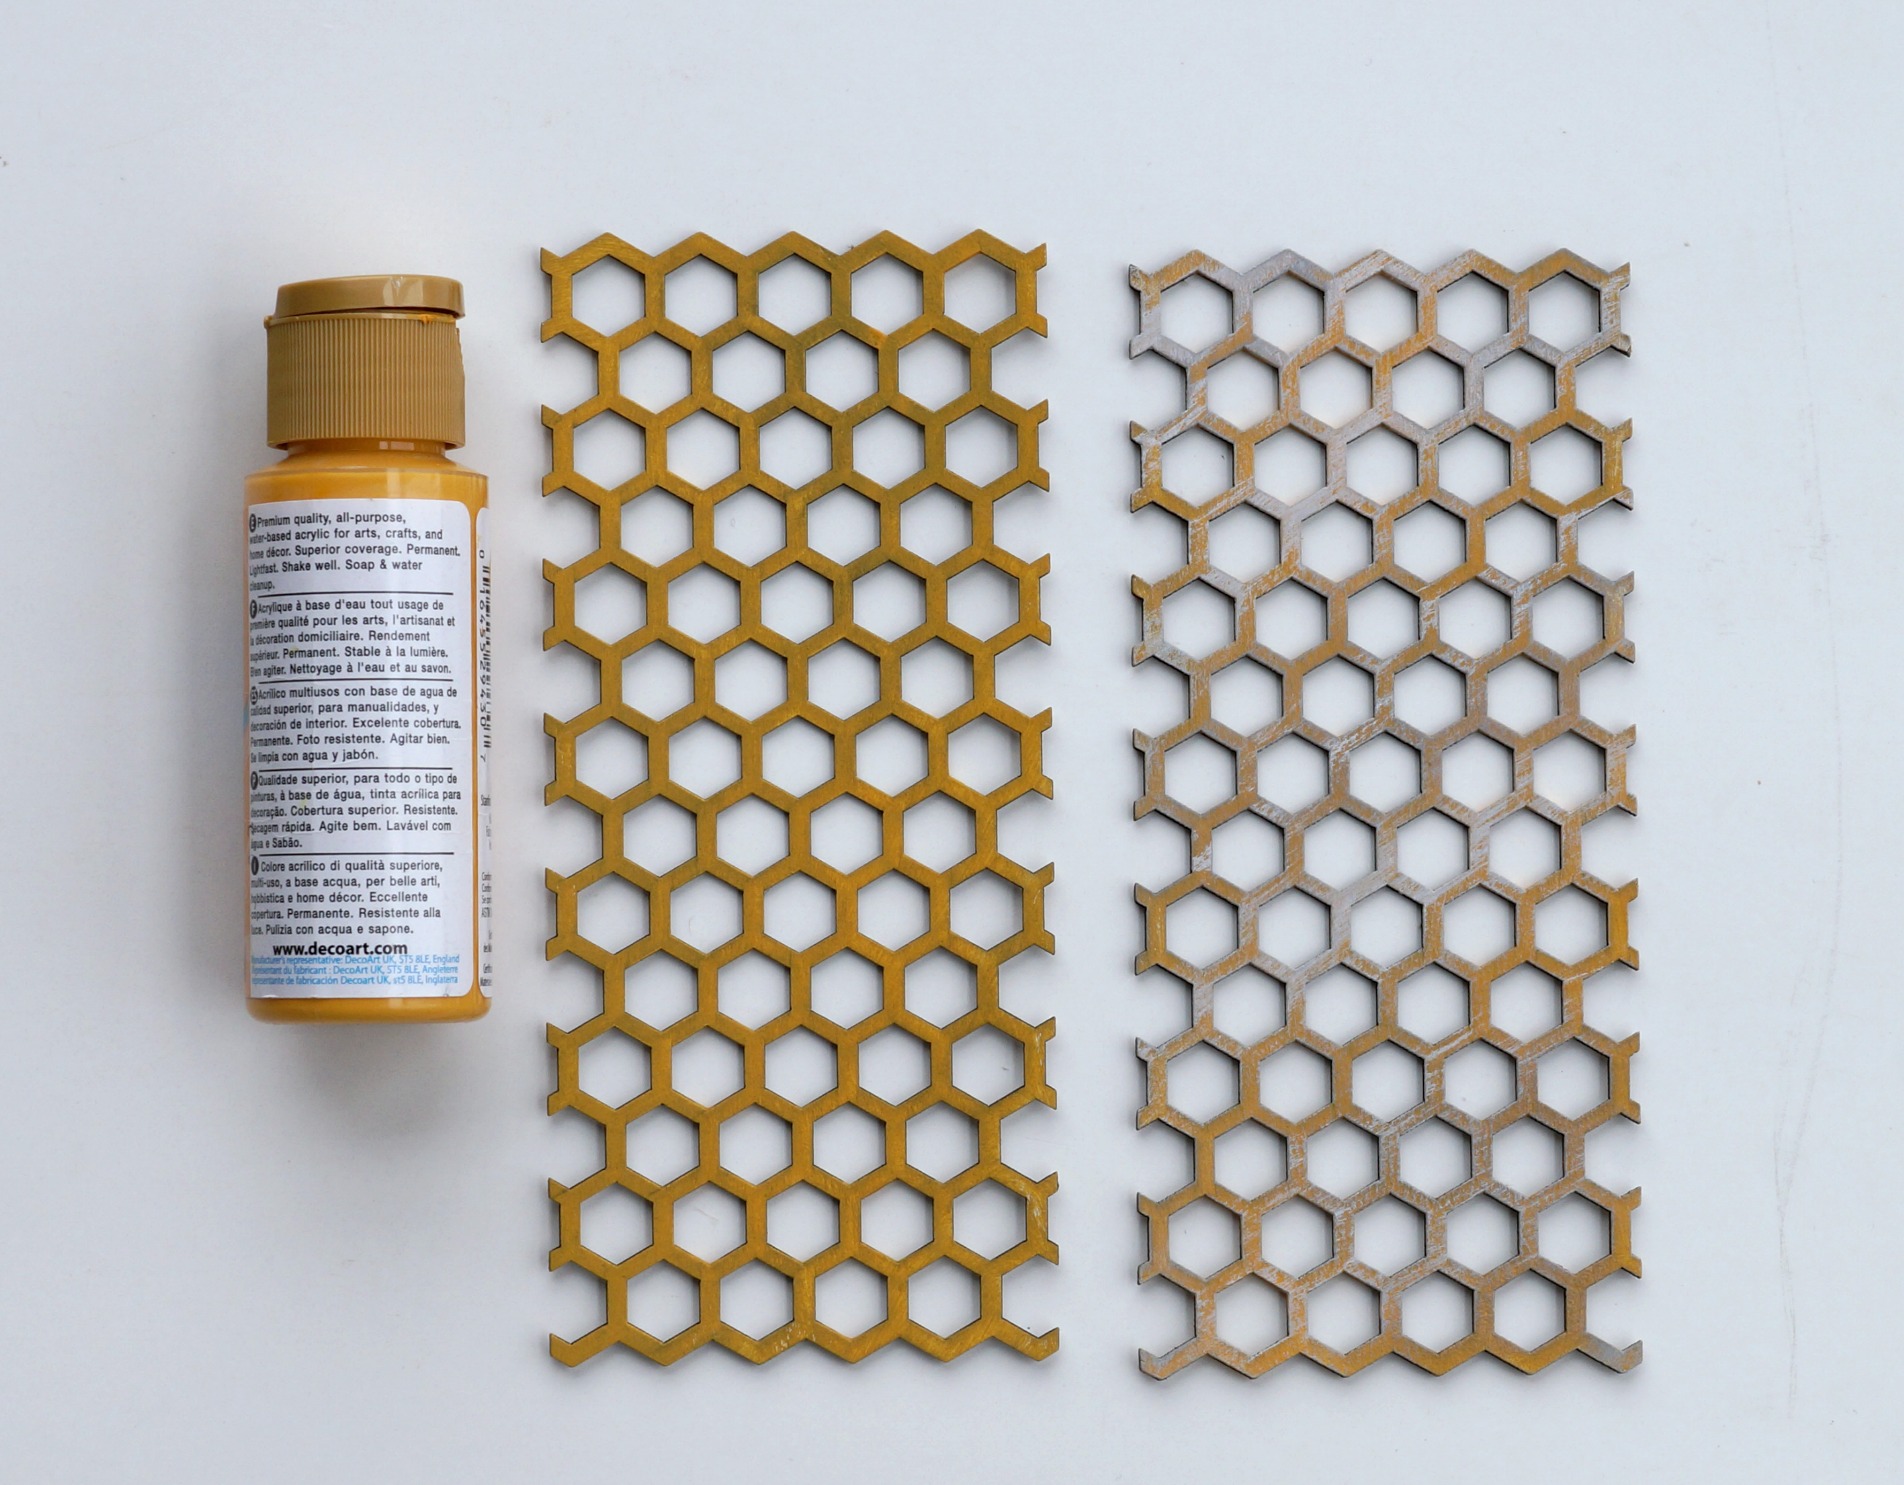
  • Paint chipboard honeycomb with marigold paint and dry brush with white acrylic paint.

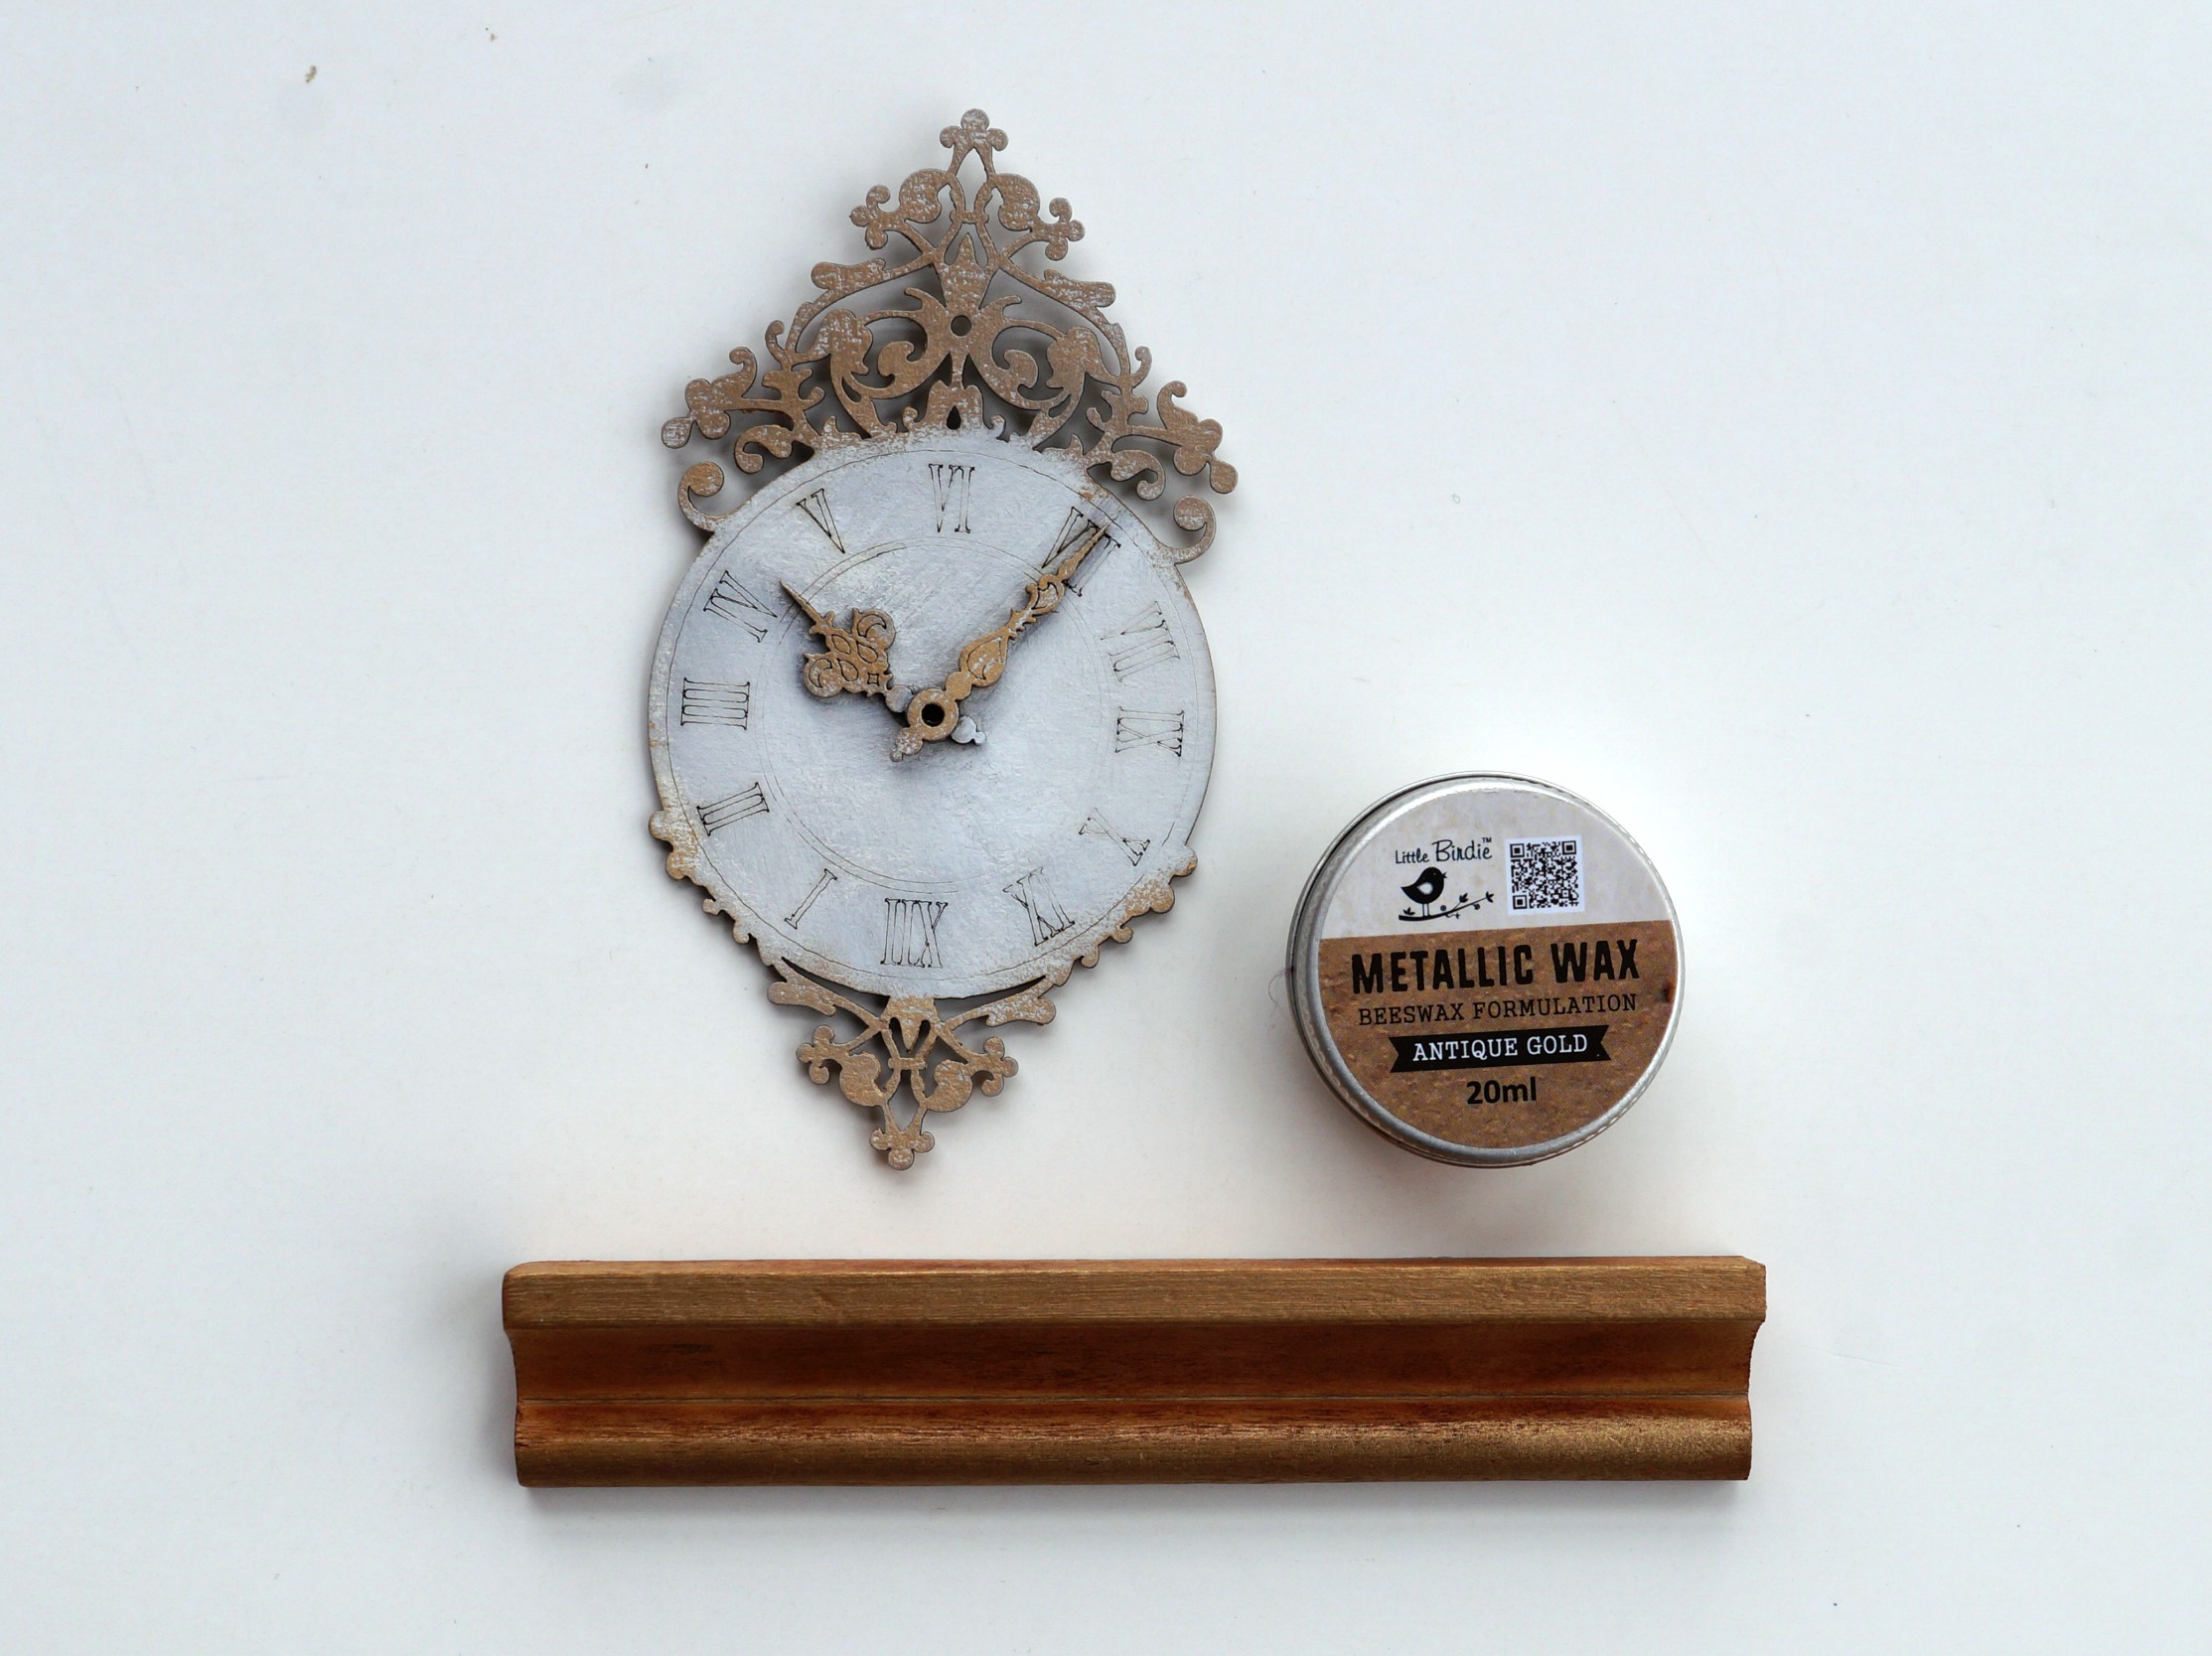
  • Lightly paint chipboard clock with white acrylic paint.  Rub antique gold metallic wax to accent the ornate edges and hands of the clock.
  • The shelf is a scrabble tile holder that was stained using Vintage Photo Ink.  It’s hard to see in this picture but the edge of the shelf is accented in the antique gold metallic wax.

Texture and dimension adds interest to the canvas.

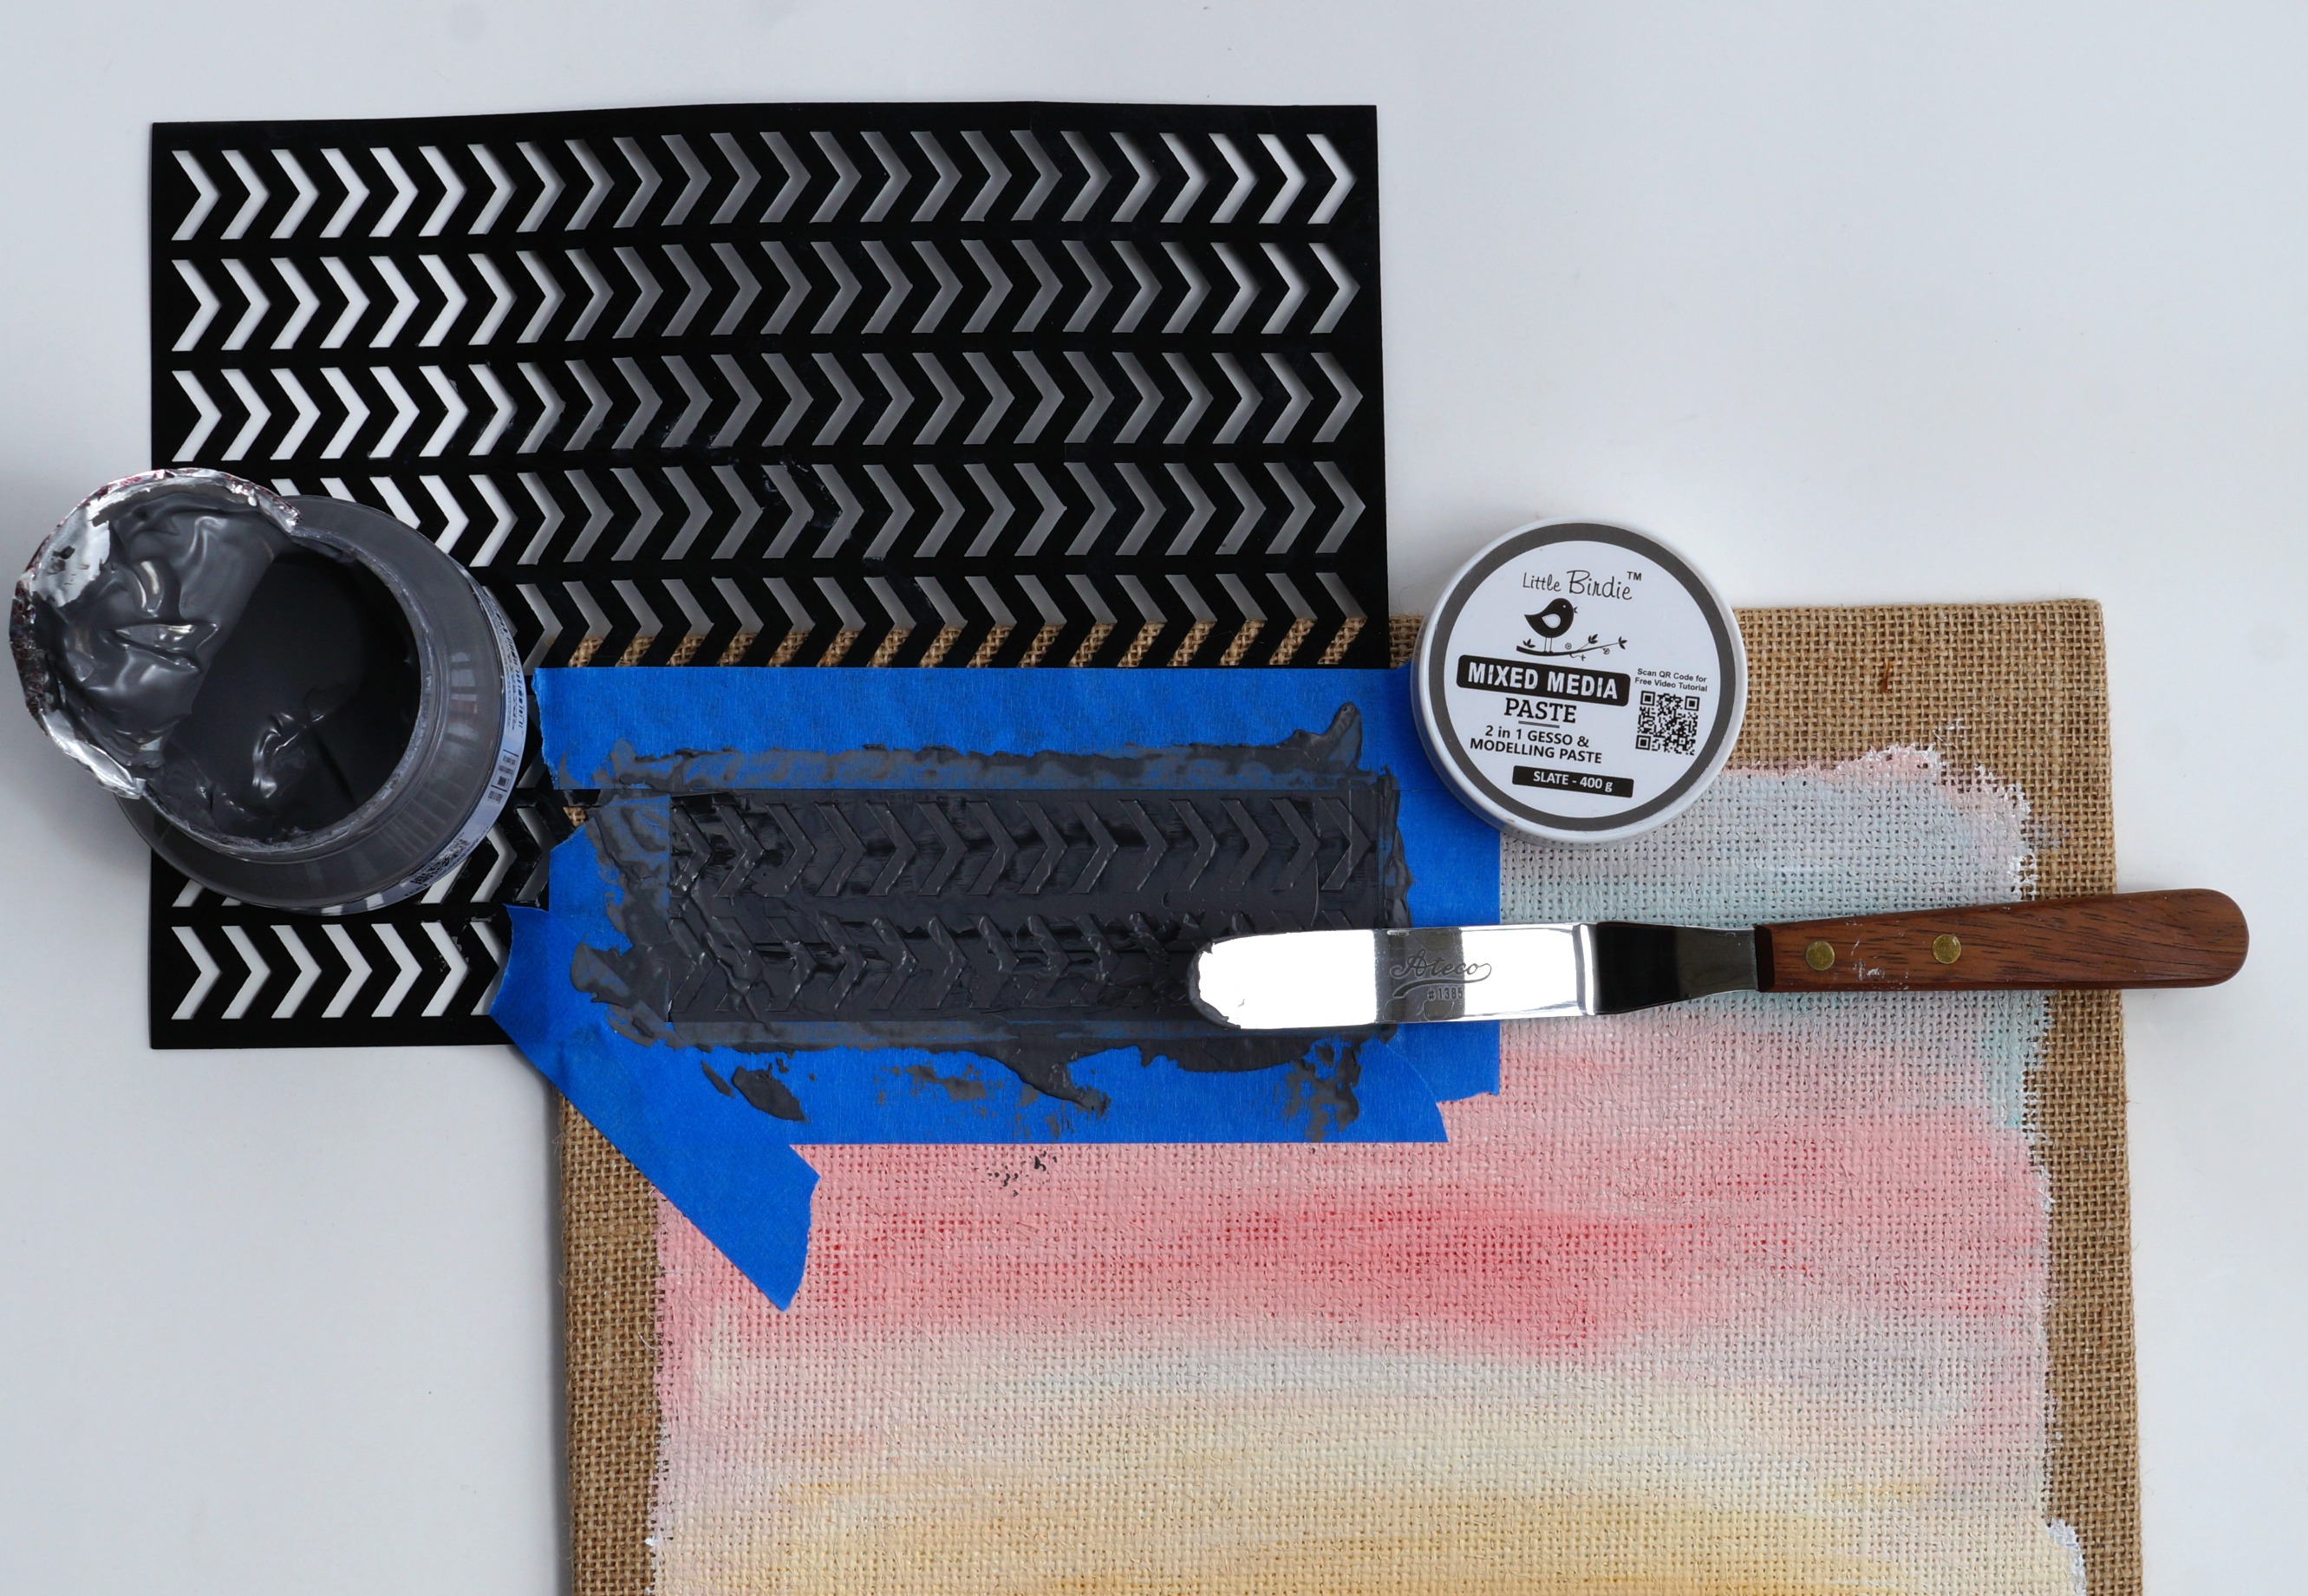
  • Tape stencil to board using removable painter’s tape to mask the area that you want to add the mixed media paste.  Apply paste in a thin layer onto the board using a palette knife.

Step 2 Building the Background

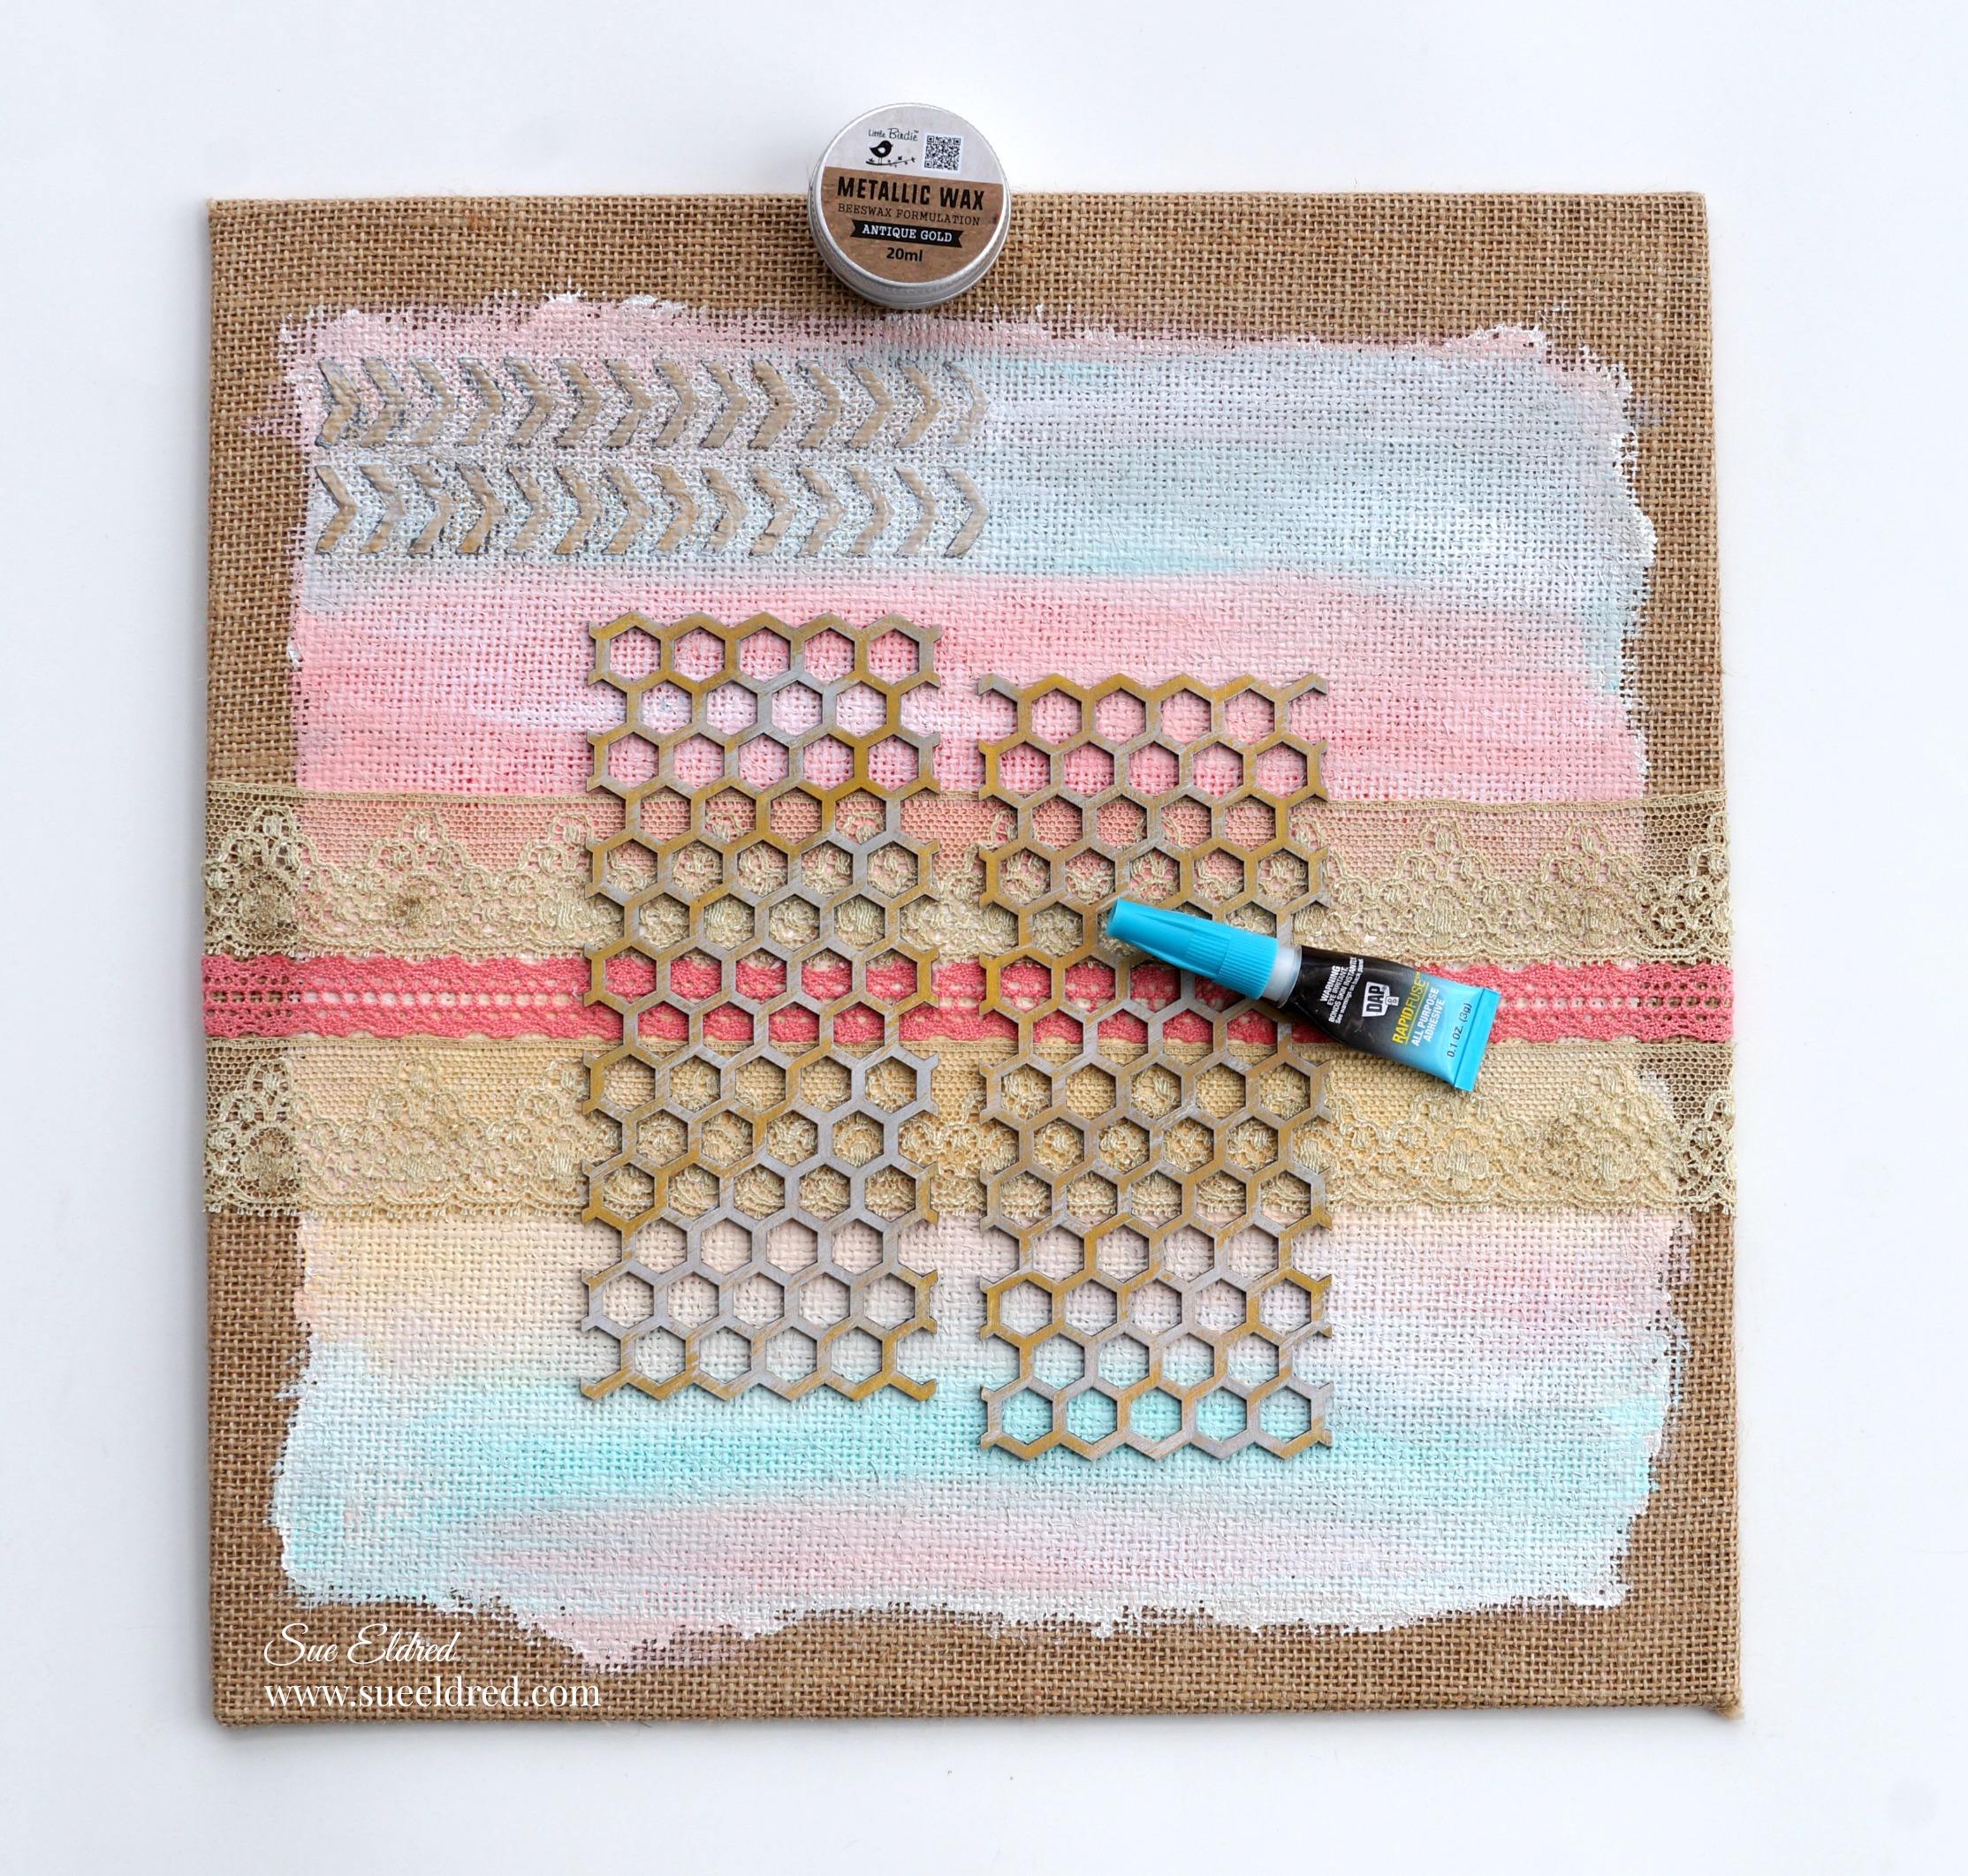
  • Once the texture paste has dried.  Go over the paste with a thin layer of white acrylic paint to lighten it.  Apply antique gold metallic wax to accent the texture.
  • Glue vintage lace onto the canvas using mod podge.  Apply a thin layer of mod podge directly to the area on the canvas where I will be adding the lace.
  • Stagger the painted chipboard honeycomb onto the board to create interest and glue in place.

Step 3 and 4  Dimension and Composition

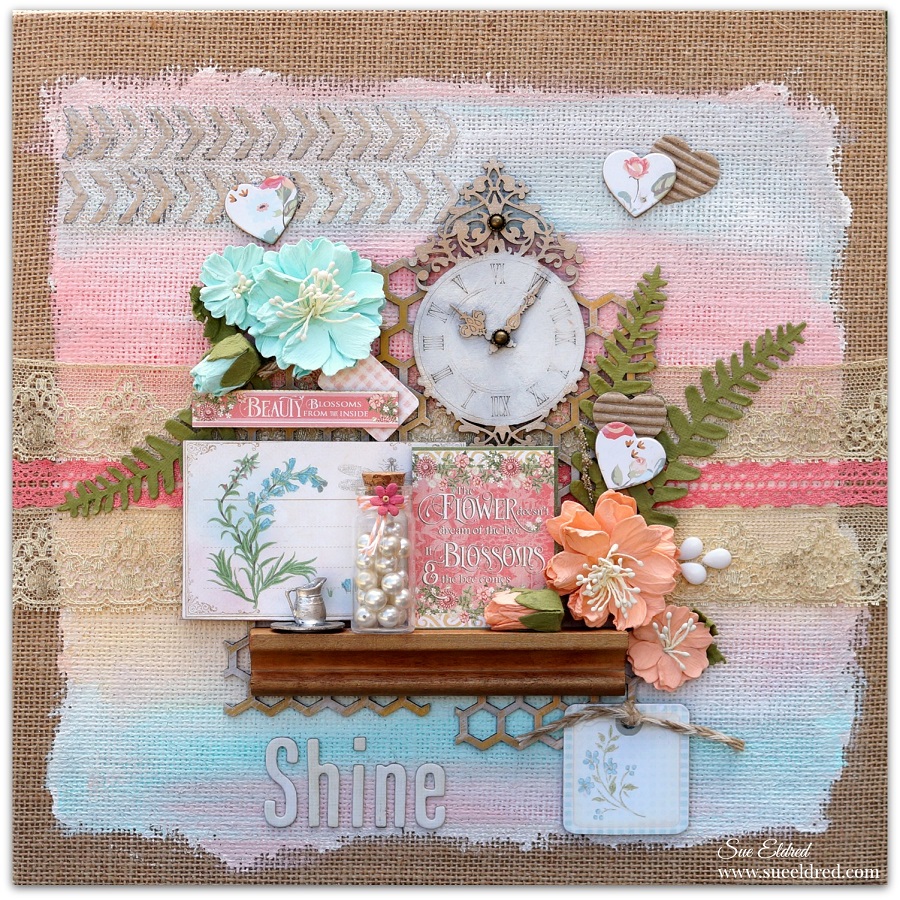
  • Create focus.  The place where you want the eye to land.
  • I like to use an item to anchor my canvas.  An anchor can be a photo or in this case the shelf.
  • To create stability and dimension…I add chipboard to the back of all my paper pieces.
  • Arrange and Rearrange your pieces on the canvas until you are satisfied.
  • Glue pieces on canvas using a strong glue.  (I always find that I add and edit as I glue.)

For the full list of Designers participating in the Little Birdie Crafts Blog Hop click here.

Save

Save

Save

Lucky Number 3

Lucky Number 3

When you’re as cute as this kid…

When you’re the third brother, the third grandkid, the third grandson and…

it’s  your birthday and you’re turning three.  (it’s a really big deal)

You’re “Lucky Number 3”.

I decided to make him a special shirt for his birthday.

Making a special shirt for a special occasion is really easy when you have iron-on

embroidered letters from Joy.

Directions:

  1.  Set iron to cotton setting, approx. 350°, or follow garment care label.
  2. Remove letters from sheet.  Position letters with shiny side down onto the t-shirt.
  3. Cover letters with a fine cloth.  With firm pressure, iron cloth over the letters for 30 seconds.
  4. Turn t-shirt inside out and iron the back of the letters for 30 seconds.
  5. Allow to cool for 1 minute before handling.
  6. Turn shirt inside out when washing.

“This is a sponsored post.  As a member of the Joy® Design Team I have been provided product and compensation in exchange for my creative ideas.  The views and opinions are my own.

*Disclosure:  This blog uses affiliate links.  If you choose to make a purchase using one of the links, I receive a small commission (at no additional cost to you) that helps offset the costs of maintaining this blog.  Thanks for your support!