Etching for Fall

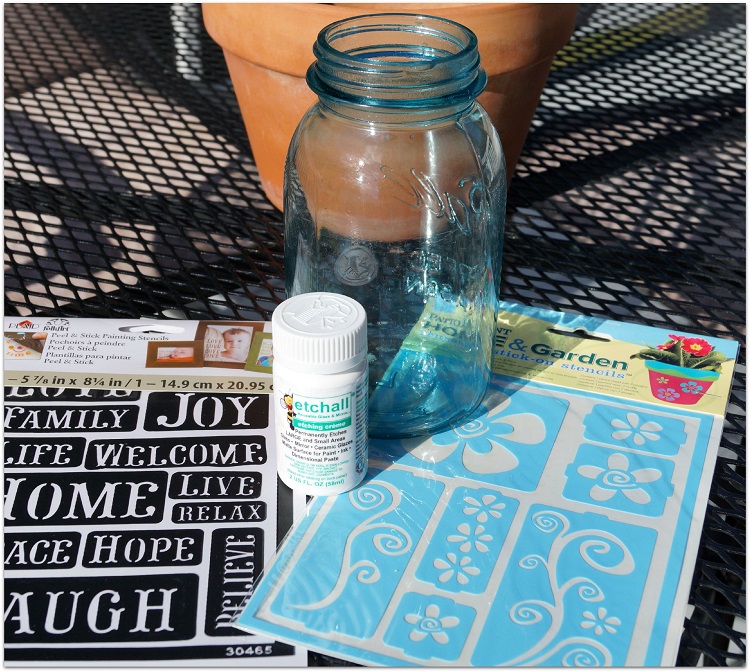
I picked up this very old bottle at a yard sale…

The story with this bottle is that the guy bought a collection of old medicine bottles from the

early 1900’s that came from the old Bartonville State Mental Hospital.

If your not from around here, rumor is, the old State Hospital is haunted.

I believe the show “Ghost Hunters” did an episode there.

So… that and the fact that it was only $2.00 had me intrigued.

The old bottle was in rough shape.

When I tried removing the cork, it pretty much disintegrated on the spot.

tape bottle and etchall creme 9950 Etched Bottle 9970

To breath new life into the old bottle… 

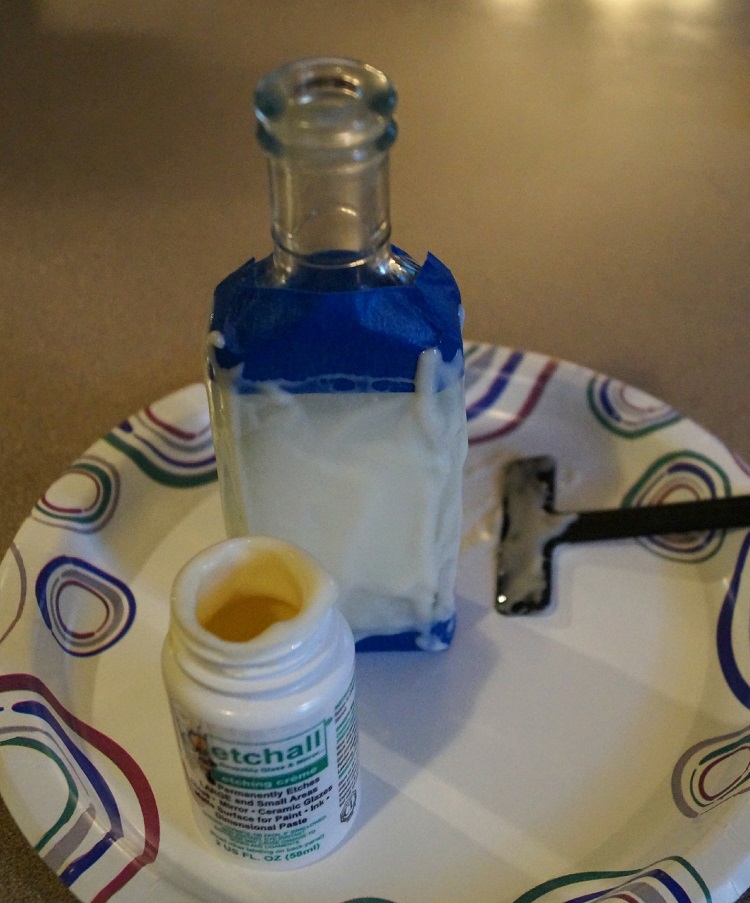
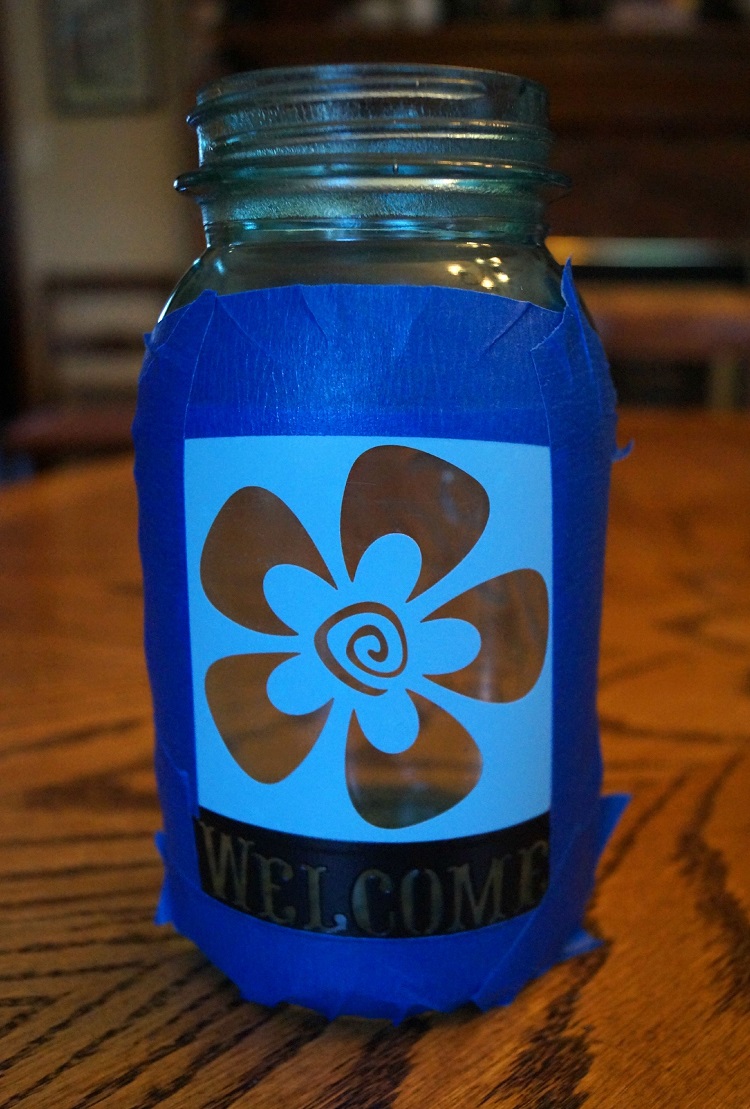
I masked the top and the bottom of the bottle with removable painters tape and added

a thick coat of etchall Etching Creme*.  (*affiliate link)

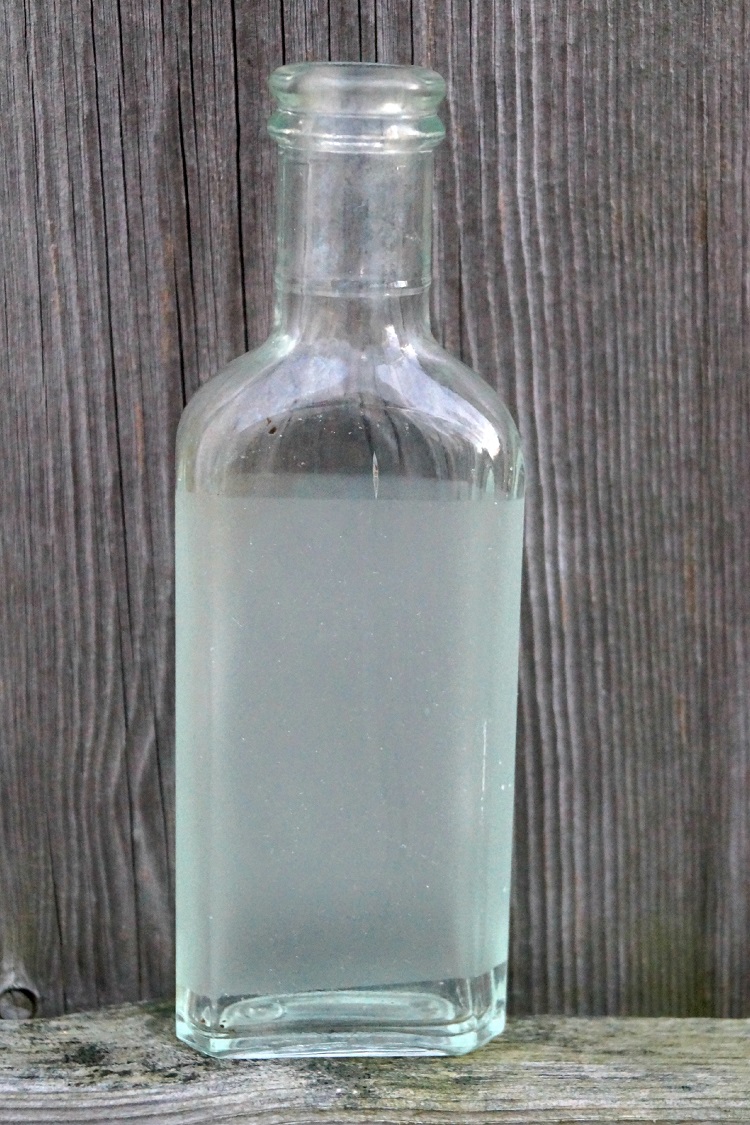
After waiting 15 minutes, I removed the excess etching crème and put the excess back

in the container.  I rinsed the bottle with warm water and let dry.

(make sure to read the instructions on the bottle of etching crème.)

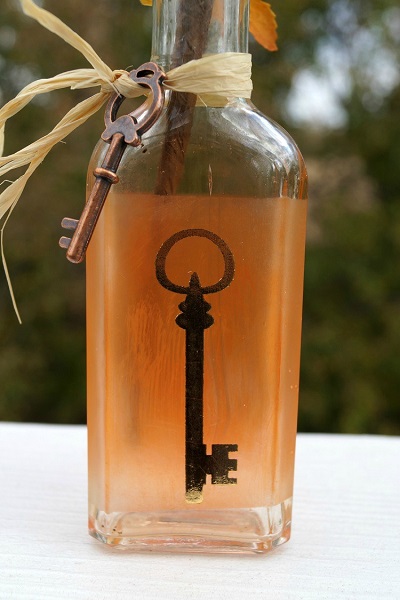
To give the bottle a little Fall color…

I used a StazOn Ink Pad, Orange Zest* and rubbed the ink over the bottle.

The ink only adheres to the etched area.

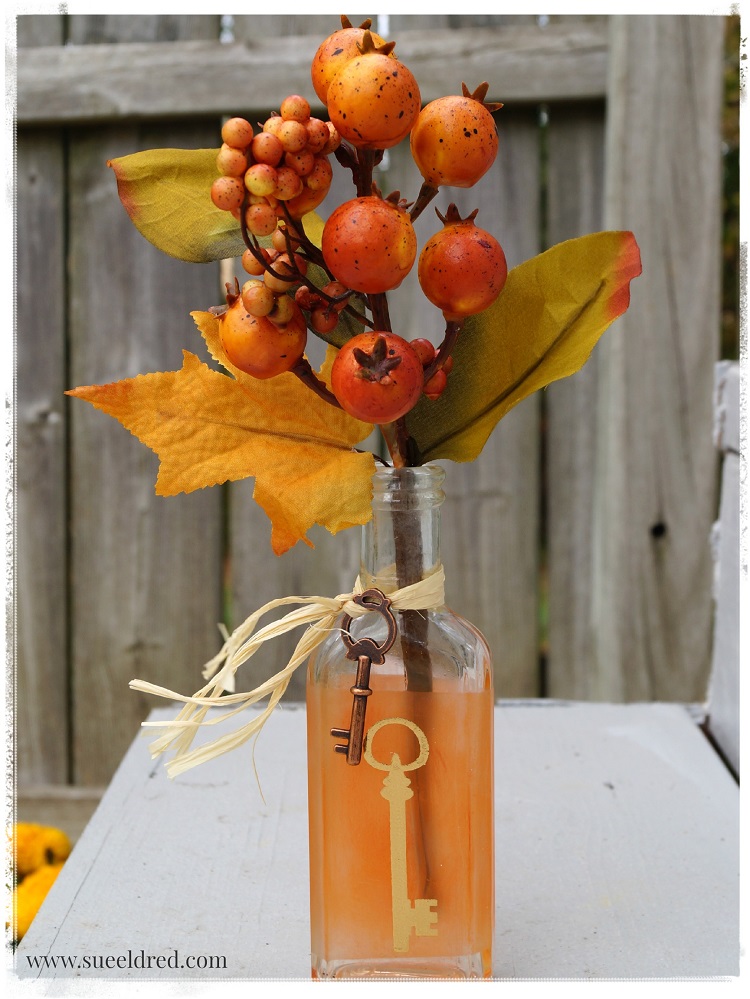
To finish the look, I added a rub-on decoration to the front of the bottle with

a little raffia and key around the neck.

A new look for a very old bottle.

This project was created for and sponsored by Etchall®.

Disclaimer:  This blog uses ads and affiliate links.  If you choose to make a purchase using one of the links, I receive a small commission (at no additional cost to you) that helps offset the costs of maintaining this blog.  Thanks for your support!

Join Amazon Kindle Unlimited 30-Day Free Trial

Creating a Garden Stepping Stone

Creating a Garden Stepping Stone 08274

Every one in my family thinks of me when they see Red Toile dishes.

It’s my thing.  (one can never have too many right?)

So… when my daughter saw a set of Red Toile dishes on clearance for $25 at her local thrift store

she immediately called me to see if I wanted them.   (um, yes!)

While packing the car for their visit home, my son in law picked up the box to rearrange the car

and the bottom fell out.  Most of the dishes survived.  Five of the large plates did not.

Broken China 08190

Deciding to turn lemons into Lemonade…

I kept the broken plates to make a few garden stones.

Nick and I making Garden Stones 2

I enlisted the help of my little buddy.  He was eager to lend a hand.  (with gloves of course)

Laying out the pieces in the pan 8187

Creating a Garden Stepping Stone:

  • Cover the sides and bottom of an old cake pan with Petroleum Jelly for easy removal.
  • Arrange the pieces of the broke china pattern side down in the bottom of the pan.  Make sure to use the flattest pieces.
  • Add glass stones in between the pieces for added color and interest.

Smoothing out the cement 8199

  • Mix a quick setting cement according to the directions on the package.
  • Fill pan with cement approx. an 1″ thick.
  • Shake pan a little to fill in the gaps and smooth.
  • Allow a couple hours for the stones to set.
  • Remove stepping stones from the pans and clean excess cement from the top of the stones with a stiff wire brush and water.
  • Allow a few days for the cement to cure before sitting outside in your garden.

close up of stone 8267

*Disclaimer:  This blog uses ads and affiliate links.  If you choose to make a purchase using one of the links, I receive a small commission (at no additional cost to you) that helps offset the costs of maintaining this blog.  Thanks for your support.

my flowers 8329

Any content on this website is created for inspiration purposed only.  Creating with my suggested methods, products used, and tools is under your own risk.


Try Amazon Prime 30-Day Free Trial

Shoot for your Goals

Shoot for your Goals 9260

This is one of my favorite Soccer pictures of Nicholas taken by his daddy last Spring.

Today was a big day for Nicholas…

First Day of Pre-School

First Day in a new Dance Class and…

First Soccer Game of the Fall Season.

He’s one pretty busy boy.


I made my Soccer Frame for my Deflecto Design Team Project using:


Deflecto Beveled Frame, Metal Knobs, 5 x 7 Inches (799593CR)*

game on

Kaisercraft’s Game On Collection P1496 First Place

*Disclosure:  I am a Amazon Affiliate.


“This is a sponsored post. As a member of the Deflecto Design Team I have been provided product in exchange for my creative ideas, views and opinions.”

The Very Hungry Caterpillar

The Very Hungry Caterpillar 8205

Have you read the story of the little caterpillar that ate and ate and ate?

And then turned into a beautiful butterfly?  (spoiler alert)

the hungry caterpillar

My project was based off the book The Very Hungry Caterpillarby Eric Carle.

the very hungry caterpillar 08216

Here’s what you’ll need to make the Caterpillar:

  • Six- 2″ Smoothfoam Balls
  • Sanding Block or Very Fine Sanding Paper
  • Deco Art Americana Acrylic Paint:  Olive Green, Sea Aqua, Watermelon Slice, Marigold, Brown
  • Paint Brushes
  • Bamboo Skewers
  • White Craft Glue
  • Craft Knife
  • Mod Podge

Directions:

  1. Lightly Sand the ridge around the middle of the Smoothfoam ball.
  2. To help the caterpillar sit and not roll.  Cut a slightly flat side in two of the balls.  Use them as your first and last green balls.
  3. Paint five balls with Olive Green and Sea Aqua acrylic paint.  For added dimension, stipple or sponge the opposite color on the balls.
  4. Paint the last ball with the Watermelon Slice acrylic paint.  Add a cute little face.
  5. Cut a bamboo skewer into 1″ pieces.  Connect the balls together using the skewers and white craft glue.
  6. Cut the tip off of two skewers and paint brown.  Insert into the top of the caterpillar’s head.
  7. Paint a coat of mod podge to seal the paint and give a shiny finish.

Disclaimer:  This project was created for and sponsored by Smoothfoam.

How to Etch a Mason Jar…

I love the look of daisies in old blue canning jars.  It just says summertime.

It’s simple, beautiful and it makes me happy.

I recently got the opportunity to work with a new product, etching crème from Etchall®.

While looking around for something to etch, I noticed the daisies sitting on the table.

Hmmm…Wouldn’t that look great with a etched flower and a greeting?

It’s a super simple project.  (just how I like it)

Here’s what you’ll need:                                   (*affiliate link)

Shop Your Fav Brands at Scrapbook.com

Directions:

  1. Clean jar to remove all dirt, fingerprints and oil.  Dry with a coffee filter, paper towel, or lint-free cloth.
  2. Apply Stencils to jar.  Burnish the edges of the stencil.  You’ll want to make sure no edges are coming up.
  3. Mask around the stencil with removable painters tape for extra surface protection.
  4. Apply a heavy coat of etchall® etching crème to the masked area of the stencil.
  5. Leave etching crème on design for 15 minutes.  After etching time has elapsed, use the squeegee to return the crème back into the original container for later re-use.
  6. Rinse etched surface with hot water to remove any remaining crème. Remember to keep crème away from porcelain sinks or ceramic tiles.

Mason Jar with Stencils 8839Mason Jar with Stencils and Masks 08841Mason Jar with Etching Creme 8842

             Step #2                                        Step #3                                      Step #4

The etched flower looks subtle against the water in the blue jar.   

“This is a sponsored post.  As a member of the Etchall Design Team I have been provided product and compensation in exchange for my creative ideas.  The views and opinions are my own.”

Join Amazon Kindle Unlimited 30-Day Free Trial

Disclosure:  This blog uses ads and affiliate links.  If you choose to make a purchase using one of the links, I receive a small commission (at no additional cost to you) that helps offset the costs of maintaining this blog.  Thanks for your support!


Don’t Miss a Thing…Make Sure to Follow me.

Colorful Chalkboard Frame for Kids and grownups

Funky Pallet Frame 8798

A simple paint and stencil project, fun for kids or grown ups.

I decided to finish painting this colorful Rustic Pallet Frame* that I started working on

yesterday evening.  As the name suggests, the frame is rustic and somewhat rough.

Because I was planning on stenciling on it…  I sanded the front of the frame to make it smoother.

I wasn’t worried about making it completely smooth.

The Colorful Chalkboard Frame would be a great project to make with the kiddos.

Funky Pallet Frame painted 8792

Directions to make the Colorful Chalkboard Frame:

  1. Sand the front of the frame.
  2. Paint the frame with white acrylic paint.
  3. Paint the top of each pallet section with different acrylic colors.  Sort of a modified rainbow.
  4. Because the stencil had four unique patterns, I decided each color needed its own pattern.
  5. Mask off each section of the wood before stenciling.
  6. Stencil using a stipple brush and white acrylic paint.
  7. Allow to dry completely
  8. To mute to colors:  Lightly sand the frame with a sanding block.  (optional)
  9. For an added sheen:  Apply clear crème wax to front of frame, allow to sit for one hour and buff.
  10. I added a small chalkboard to the inside of the frame.

Funky Pallet Frame Supplies

Supplies Used:                                          (*affiliate link)

*Thanks to Walnut Hollow and DecoArt for providing the materials used on this frame.

For more Summer fun with the kids…click on SIime Ad below.

Slimer

Disclaimer:  This blog uses ads and affiliate links.  If you choose to make a purchase using one of the links, I receive a small commission (at no additional cost to you) that helps offset the costs of maintaining this blog.  Thanks for your support!

Join Amazon Kindle Unlimited 30-Day Free Trial

Getting Creative with Resin

Getting Creative with Resin 8181

I’ve always wanted to use resin in a project but have always felt somewhat intimidated.

Thanks to an opportunity with Environmental Technology Inc., the makers of

jewelry resin and much more, I finally got my chance.


EnviroTex Jewelry Resin

And… after watching this video.  I felt confident to start.

I couldn’t believe how easy it was and how happy I was with the results.

The hardest part was deciding what to make and what to fill.

Halloween before the resin 2880 Creative before the resin 2883

For my Projects:

  • I started with some over-sized bottle caps from Maya Road which I spray painted black.
  • I used a circle punch to make a background from scrapbook paper.
  • I used dimensional stickers, metal pieces, regular stickers and glued everything in place using  white craft glue.
  • I measured and mixed the resin according to the instructions and filled the bottle caps.
  • Then it was time to wait for the resin to cure.

waiting for the resin to cure

The original plan was to add a hanger on the back, and use them as a decoration.

But… I had a better idea and decided to add a magnet to the back instead.

I really, really like them.

Resin Work in Progress 2908

Now that I’ve seen how easy it is, I’ve got a few more things in the works.

Shop Amazon Scrapbooking Supplies*

*Disclaimer:  This post uses ads and affiliate links.  If you choose to make a purchase using one of the links, I receive a small commission (at no additional cost to you) that helps offset the costs of maintaining this blog.  Thanks for your support!

Creating a Decorative Display Board for all my Little Pretties

Smoothfoam Display Board 07114

My project started as a Memo Board and… 

While I was looking for some push pins I stumbled across a collection of little pretties.

Tucked away in a cabinet along with a lot of other embellishments were these little

metal frames.  Something that I’d been hoarding since my K & Company days.

I added those frames along with some other little pretties onto my board.  (Love!)

Memo Board Products

To make my Memo/Display Board I used:            (*amazon affiliate link)

Directions:

  1. Paint wood frame with cream acrylic paint.
  2. Cut the Smoothfoam sheet a 1/4″ larger than the center opening of the frame.
  3. Apply spray adhesive to the front of the Smoothfoam and lay onto the fabric.
  4. Wrap and glue the fabric around the back of the Smoothfoam.
  5. Glue the frame onto the front of the covered Smoothfoam.
  6. Decorate the top and bottom of the frame with dimensional flowers.

*My little pretties are stuck into the display board with decorative garment pins.

A really fast and easy project.

This project was created for and sponsored by Smoothfoam.

Shop Amazon Scrapbooking Supplies*

Disclaimer:  This blog uses ads and affiliate links.  If you choose to make a purchase using one of the links, I receive a small commission (at no additional cost to you) that helps offset the costs of maintaining this blog.  Thanks for your support!

DIY Wedding Projects Day #4: Wedding Album

Wedding Album 2

Preserve your memories from weddings, anniversaries, and more, in this beautiful burlap covered scrapbook or photo album. Embellish the cover with ribbon, gems, twine and more for a personalized look you will love.

Supplies Needed:

  • 1 yd. Gazette 2” Ribbon: Raw Silk
  • ½ yd. Antique White Double Faced Satin 7/8”
  • ½ yd. Lucy Ivory Lace
  • 2 Gems from Design Chain Tracy-Silver
  • Twine
  • Chic Silver Leaves
  • Pre-Made 5” x 7” Burlap Covered Scrapbook Album
  • 3” Chipboard Heart
  • Beacon Fabri-Tac Permanent Adhesive*  (affiliate link)
  • Needle and Thread

Wedding Album Directions:

  1. Cut approx. 16-18” of Gazette Raw Silk Ribbon. Using the needle and thread with a long tail, make a simple running stitch down one side of the ribbon.
  2. Gather ribbon together with thread and tie in the center to form the ribbon rosette.
  3. Create a second ribbon rosette using 12” of 7/8” Antique White Double-Faced Satin Ribbon.
  4. Glue Antique White rosette onto the center of the Raw Silk rosette.
  5. Cut a gem from the Design Chain Tracy-Silver and glue to the center of the rosette flower.
  6. Wrap 12” piece of Gazette Raw Silk Ribbon with the ends meeting centered on the front of the album. Glue ends to the album.
  7. Wrap a 12” piece of Lucy Ivory Lace around album, again meeting centered on the front of the album. Glue ends to album.
  8. Glue Ribbon flower onto front of the album cover the ends of the lace and ribbon.
  9. Bend slightly the ends of the Chic Silver Leaves and glue onto the album with the ends underneath the flower.
  10. Wrap twine around the chipboard a couple of times and tie with a bow.
  11. Glue a small gem cut from the Design Chain Tracy-Silver onto the center of the twine bow.
  12. Glue chipboard heart onto the front of the album.

Shop Handmade – The Wedding Store

Disclaimer:  This blog uses ads and affiliate links.  If you choose to make a purchase using one of the links, I receive a small commission (at no additional cost to you) that helps offset the costs of maintaining this blog.  Thanks for your support!