
DIY Felt Holiday Stocking
If you love the warm and cozy feeling of Homespun Holidays and love making your gifts,
this simple felt stocking project is for you.
It makes a sweet stocking to hang on the mantel for Santa to add little gifts.
Or add in some greenery and use it as a Holiday decoration.
![]()
Disclosure: This is a sponsored post for Gwen Studios. I have been provided product in exchange for my creative ideas. The views and opinions are my own.
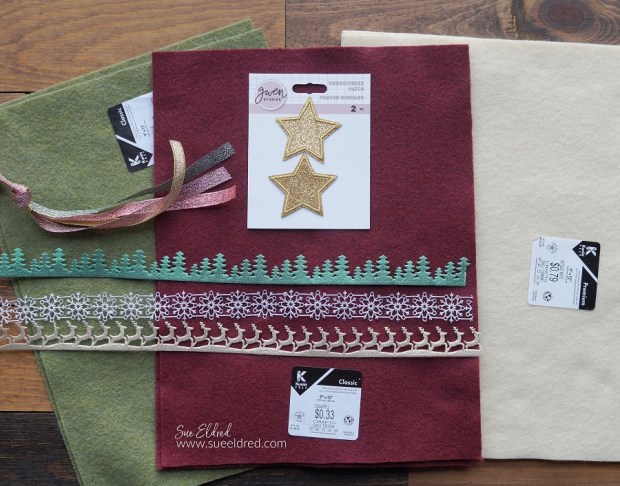
Materials Used: (*affiliate link)
- Gwen Studios Snowflake Die-Cut Ribbon*
- Gwen Studios 3/8″ Metallic Holiday Ribbon*
- Gwen Studios Gold Star Embroidered Iron-On Patch*
- Kunin Classic Felt Cream*
- Kunin Classic Felt Cranapple*
- Kunin Classic Felt Olive*
- Stocking Pattern
- Silhouette Cameo Electronic Cutting Machine*
- Scissors*
- Needle and Thread
- Iron*
*Disclosure: This blog uses ads and affiliate links. If you choose to make a purchase using one of the links, I receive a small commission (at no additional cost to you) that helps offset the costs of maintaining this blog. Thanks for your support!

Directions:
- Draw or create a stocking pattern onto cardstock. I used an SVG cut file from the Silhouette Store and a Silhouette Cameo Electronic Cutting Machine*. I sized the stocking pattern to fit on a 9″ x 12″ piece of felt and cut the stocking pattern using cardstock.
- Trace the pattern pieces onto the felt and cut them out.
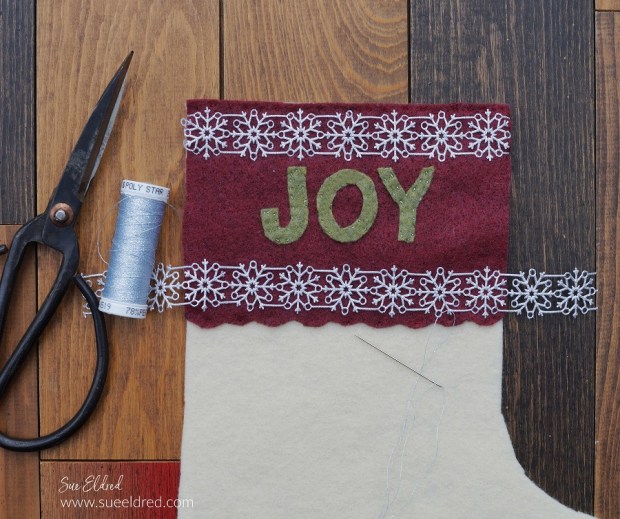
- Cut the word “JOY” out of felt. Hand stitch the felt pieces onto the stocking.
- Tack the Snowflake Die-Cut Ribbon onto the front of the stocking using silver thread.
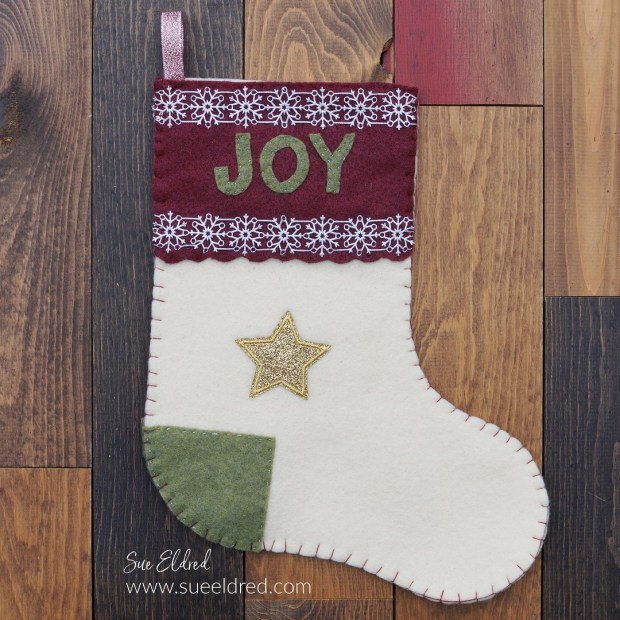
- Iron the star patch onto the front of the stocking using the directions found on the back of the package.
- Align the front and back of the felt stocking together. Using a “blanket stitch” stitch around the edge of the felt stocking.
- Stitch a small piece of metallic ribbon as a loop on the corner of the felt stocking for hanging.


YOUR STOCKING IS BEAUTIFUL