
Welcome your guests this Winter Season with a Snowflake Door Hanger
that you can leave up until Spring.

The White Snowflake Welcome Door Hanger measures 10″ and is happy hanging as a
Holiday Welcome on your front door or just hanging out on the wall.
Add it to the center of a wreath for even more pizazz.

Materials Used: (*affiliate link)
- StyleTechCraft White Ultra Metallic Vinyl*
- StyleTechCraft Vinyl Transfer Tape*
- StyleTechCraft Vinyl Tool Kit*
- Welcome Snowflake SVG File from The Silhouette Store
- Silhouette Cameo Electronic Die Cutting Machine*
- 10” Unfinished Wood Circle*
- DecoArt Black Tie Multi Media Paint*
- DecoArt Country Red Acrylic Paint*
- Sanding Block*
- Removable Painters Tape*
- Xyron Multi-Stick Glue Gun*
- Grey with Red Buffalo Plaid Ribbon, Greenery, Jingle Bell, Twine (Hobby Lobby)

*Disclosure: This blog uses ads and affiliate links. If you choose to make a purchase using one of the links, I receive a small commission (at no additional cost to you) that helps offset the costs of maintaining this blog. Thanks for your support!

Directions:
- Cut the Welcome Snowflake out of StyleTechCraft White Ultra Metallic Vinyl* using the Welcome Snowflake SVG file and a Silhouette Cameo Electronic Die Cutting Machine*.
- Remove the excess vinyl from in and around the snowflake and cut letters.
- Paint the 10” Unfinished Wood Circle* with one or two coats of black acrylic paint.
- Lightly sand over the painted area with a Sanding Block* to smooth the grain.
- Drill a small hole in the top of the wood circle for hanging.
- Trim the paper around the vinyl snowflake and lay it onto the wood circle to determine the placement of the red stripe. Line the tip of the snowflake with the top hole.
- Place a pencil mark on each side of the first double line. Draw a line between the two pencil marks. Measure two inches down from the first pencil marks and draw a second line.
- Place Removable Painters Tape* above and below the pencil lines.
- Paint the area within the two-inch strip with red acrylic paint.
- Lightly sand over the red paint to smooth.

- Cut a 10” x 10” piece of gridded vinyl transfer paper*. Remove the backing from the transfer paper and place it over the vinyl snowflake welcome. Rub over the transfer paper* with a vinyl scraper tool to make sure that the vinyl has transferred. (You can use a bone folder or credit card to rub over it if necessary.) Remove transfer paper.
- Add the piece of natural twine through the top hole for hanging.

- To make the bow, you’ll need approximately 24” of ribbon.
- Fold the ribbon in thirds.
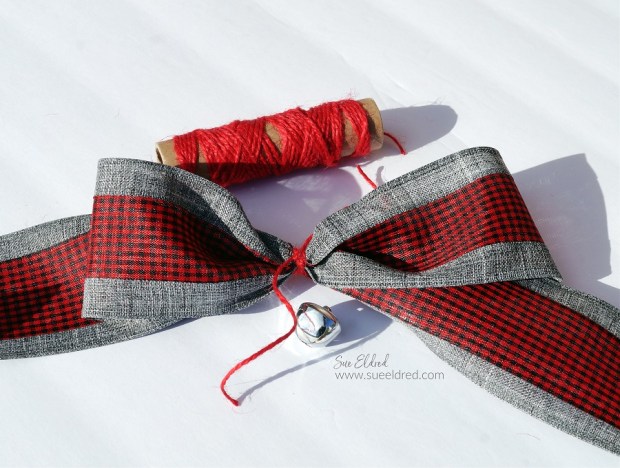
- Gather and wrap red twine around the center of the ribbon a couple of times and tie tightly. Add jingle bell to the twine and tie again.
- Using a hot glue gun, glue the bow to the top of the wood sign, glue greenery under the bow.

The Red Snowflake Welcome is another example of what you can make.
I used a walnut stain on the wood base and a dark red metallic snowflake for a completely different look.
![]()
“This is a sponsored post. As a member of the StyleTechCraft Design Team I have been provided product and compensation in exchange for my creative ideas. The views and opinions are my own.
