Creating a Decorative Display Board for all my Little Pretties

Smoothfoam Display Board 07114

My project started as a Memo Board and… 

While I was looking for some push pins I stumbled across a collection of little pretties.

Tucked away in a cabinet along with a lot of other embellishments were these little

metal frames.  Something that I’d been hoarding since my K & Company days.

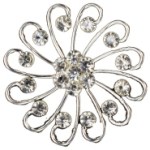
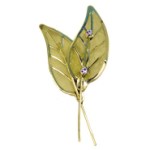
I added those frames along with some other little pretties onto my board.  (Love!)

Memo Board Products

To make my Memo/Display Board I used:            (*amazon affiliate link)

Directions:

  1. Paint wood frame with cream acrylic paint.
  2. Cut the Smoothfoam sheet a 1/4″ larger than the center opening of the frame.
  3. Apply spray adhesive to the front of the Smoothfoam and lay onto the fabric.
  4. Wrap and glue the fabric around the back of the Smoothfoam.
  5. Glue the frame onto the front of the covered Smoothfoam.
  6. Decorate the top and bottom of the frame with dimensional flowers.

*My little pretties are stuck into the display board with decorative garment pins.

A really fast and easy project.

This project was created for and sponsored by Smoothfoam.

Shop Amazon Scrapbooking Supplies*

Disclaimer:  This blog uses ads and affiliate links.  If you choose to make a purchase using one of the links, I receive a small commission (at no additional cost to you) that helps offset the costs of maintaining this blog.  Thanks for your support!

DIY: Mini Crate Make-Over

Red Crate 5878

DIY Mini Crate Make Over…

Because sometimes a girl changes her mind.

crate 4158

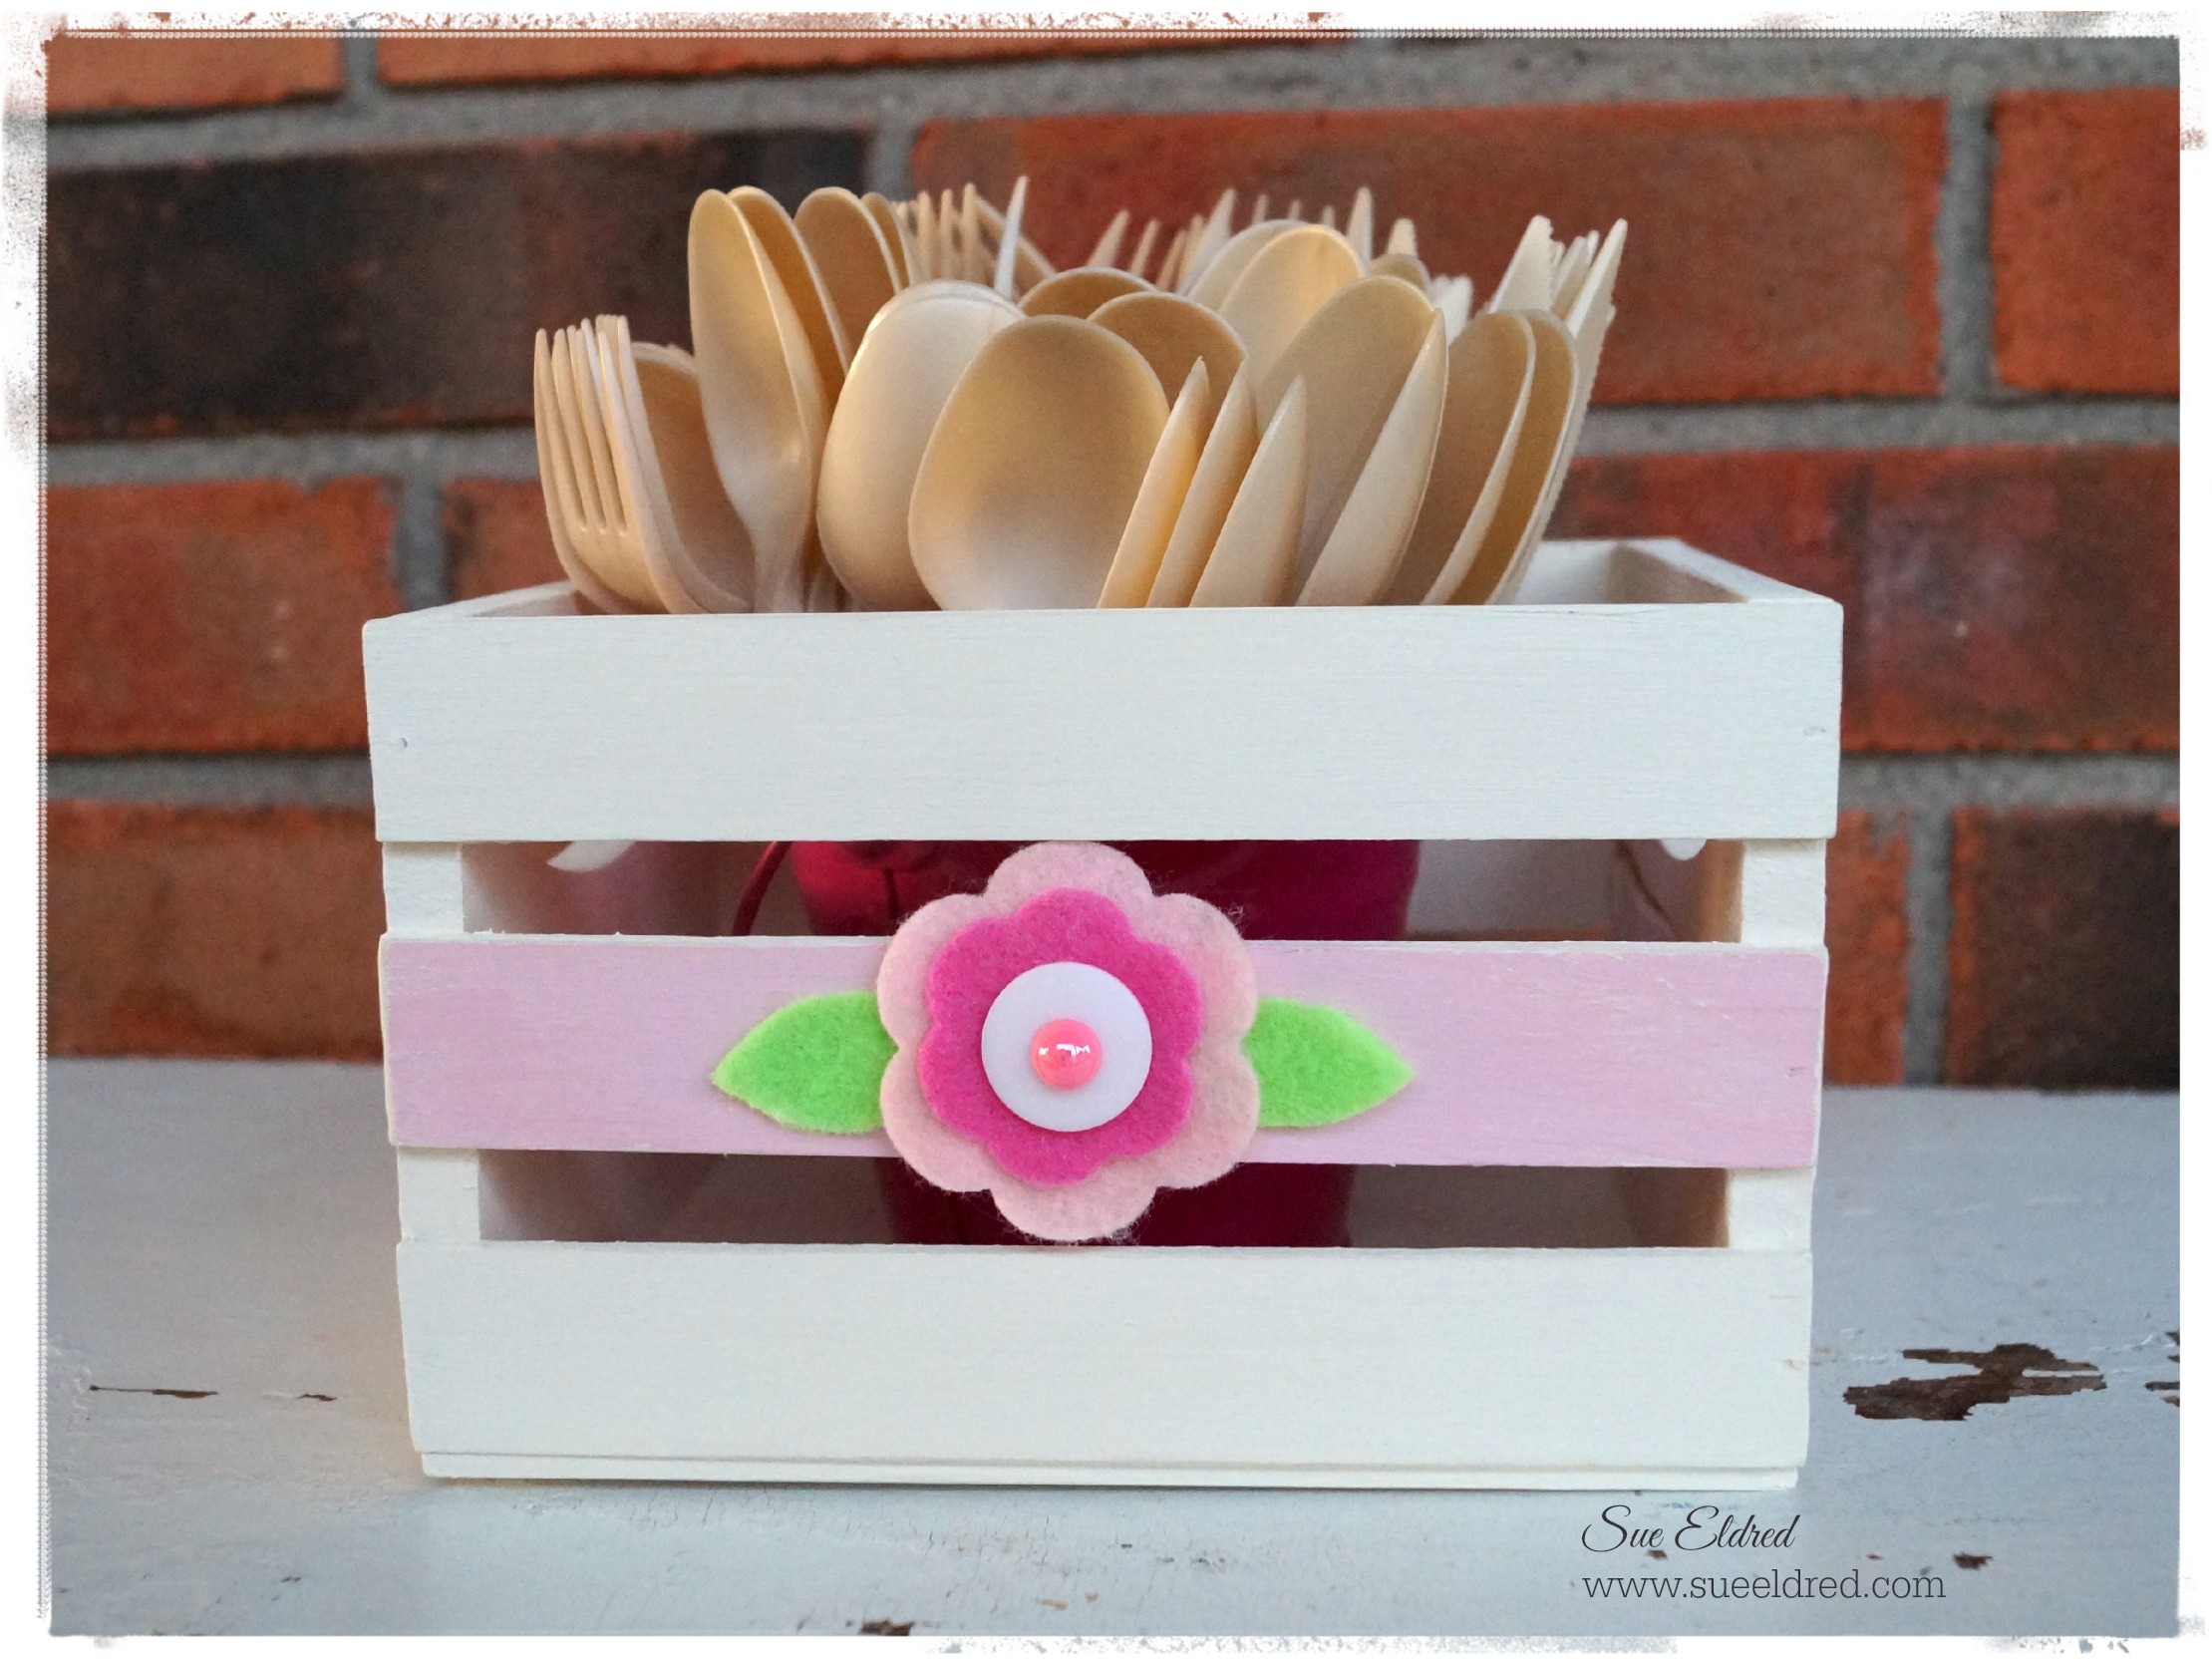
It all started with this…  My Sweet Earth Day Tea Party Crate. (←original post)

A cute cream and pink crate with a pretty pink flower.

It was perfect for what I wanted at the time.

But… always resourceful, I decided to reuse the mini crate* (*affiliate link) in my work space.

Because my work space has a vintage vibe… a mini make over was in order.

Paint with Red Chalk Paint 5173

I took off the flower embellishment and gave the mini crate* a light sanding.

Then I painted the crate with FOLKART Home Decor Chalk, Imperial*.

Being an impatient crafter, I was tempted to start my next color right away.  Make sure to wait.

Allow a couple of hours for the piece to dry before adding the next color.  (trust me)

Paint a thin coat of black paint 5182

Next, I gave the crate a light coating with Black Home Décor paint.

Use a small paint brush to get into those corners.

With a soft, damp, clean cloth, wipe off the black paint to give it an aged distressed look.

I used Tattered Angels Décor in Ebony*.

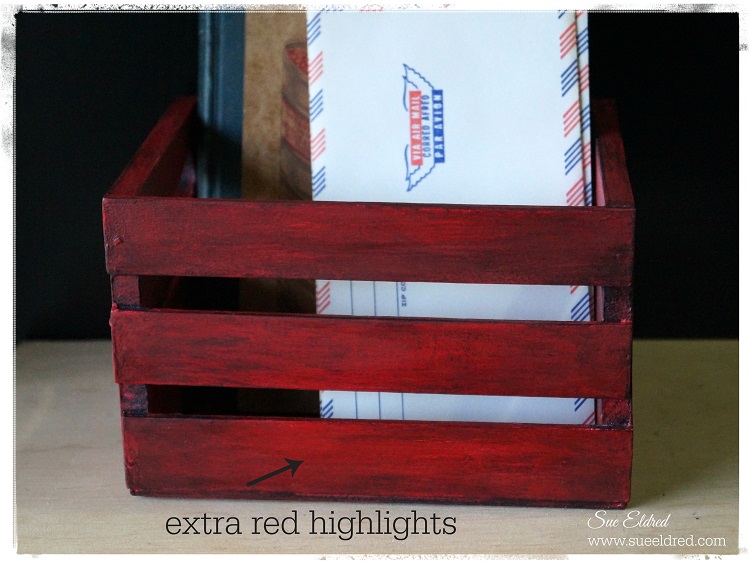
extra red highlights5200

If you start to think it looks to dark, just add highlights with the red paint directly over the

ebony paint.  If you like a matte finish, you can stop right here.

I wanted a little more sheen, so I applied FOLKART Plaid Clear Home Decor Wax*.

With the wax, you apply a thin coat, wait one hour and buff with a clean soft cloth.

I’ve always loved furniture with that aged red finish and wanted to give it a try.

Now that I’ve started with something small, (which is always a good idea)

I’ve got my eye on a couple more pieces I’d like to refinish.

FYI:  If you’d like a mini crate like mine you can get it at online at Amazon* or Walnut Hollow.

This project was sponsored by Walnut Hollow, Canvas Corp and Plaid. 

Join Amazon Kindle Unlimited 30-Day Free Trial

Disclaimer:  This blog uses ads and affiliate links.  If you choose to make a purchase using one of the links, I receive a small commission (at no additional cost to you) that helps offset the costs of maintaining this blog.  Thanks for your support!
Quick & Easy Washi Tape Make-Over

Quick & Easy Washi Tape Make Over 7015

Quick and Easy, Keep It Simple.  Sounds like a great DIY plan. 

With a little creativity you can transform plain into something fun and personal.

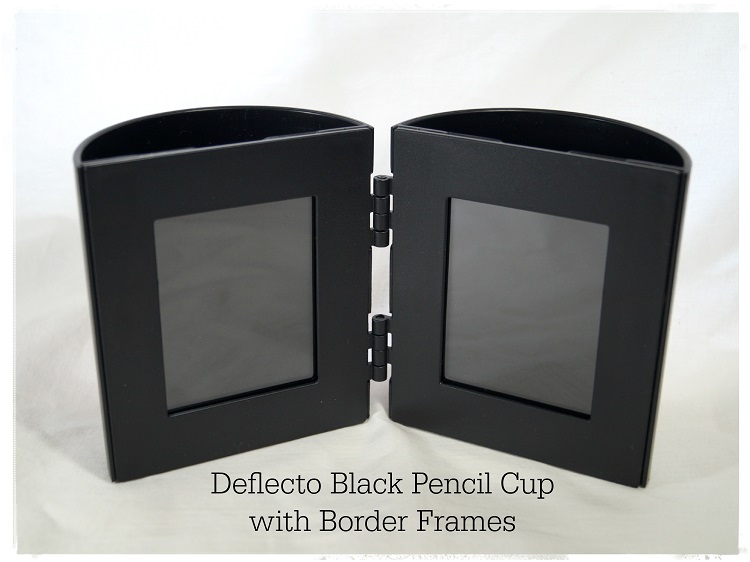
Deflecto Black Pencil Cup 6944

I started with a plain pencil cup from Deflecto.

With a little Washi Tape wrapped around the top and bottom of the cup, a couple of stickers and

accessories…  I now have a cute pencil cup to set on my desk.

I added a couple of my favorite pictures of my special guys from last year.  (boy have they grown)

Quick & Easy Washi Tape Make Over 7014

Need a couple “brownie points” for the upcoming back to school?

This would make a great teacher gift.

Just add the Teacher’s Name, Grade or “Welcome Back to School” along with a apple sticker or two.

Great for Dorm Rooms too.

“This is a sponsored post. As a member of the Deflecto Design Team I have been provided product in exchange for my creative ideas, views and opinions.”

 Featured on Hometalk.com

DIY No Sew Pillows to Dye for…

A Pillow to Dye For

Recently, I participated with a group of Designers in a Manufacturer Challenge sponsored by

Fairfield World the makers of Pillow Forms, Batting, Poly-fil®… and a whole lot more.

After a little good natured trash talking between the designers, the challenge was dubbed the

“Pillow Fight” and with that it was game on.

Not being much of a seamstress I knew I had to take it in another direction.

Hopefully, what I lack in sewing skills I’m making up for in quantity and possibly inspiration

for other non-sowers like me.

If you happened to see my post, “Tie-Dying with Nick” then you’ll know I’m on a little bit

of a tie-dying kick.  (why stop now?   oh… and make sure to check out the bonus project at the end.)

Nick's Tie Dye Pillow 6430Warren's Pillow

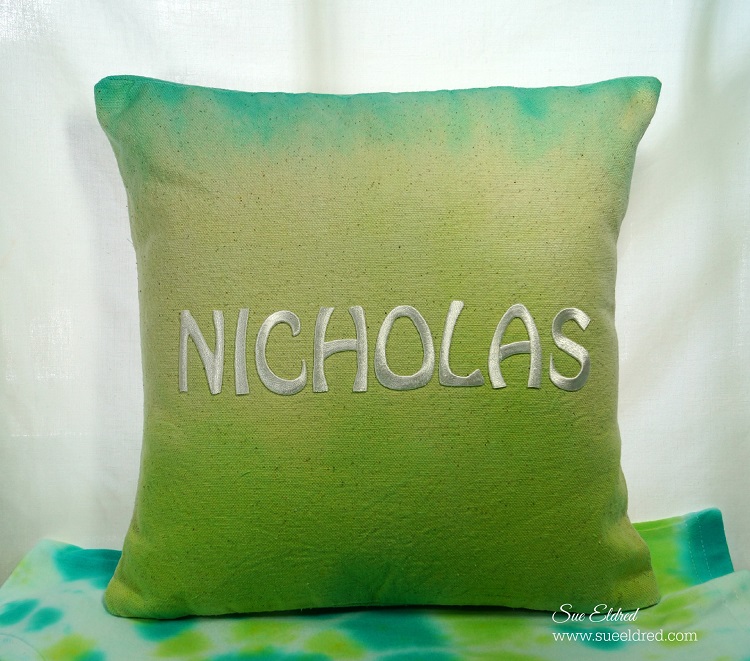
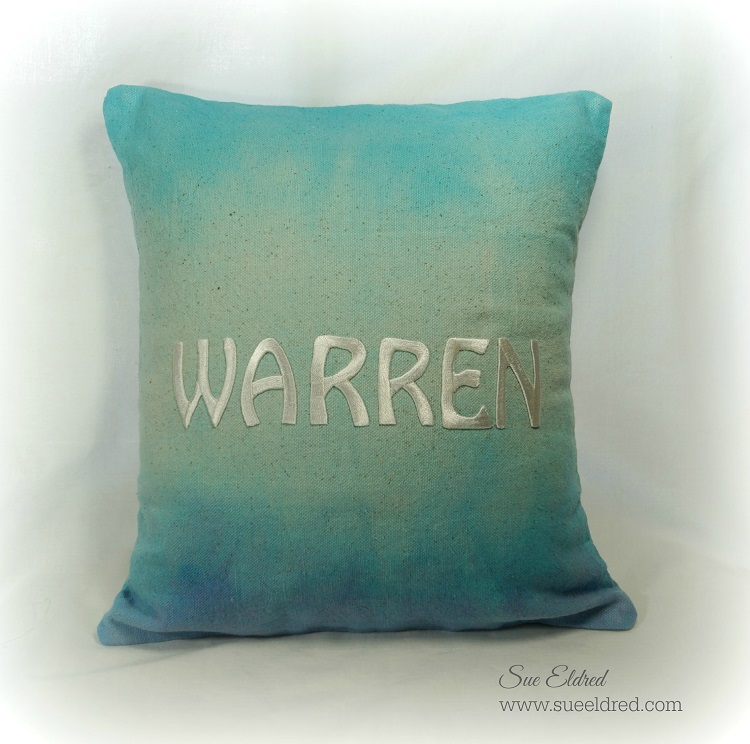
Here are a couple of pillows I made for my grandsons using a one-step tie-dye kit

and the Ombre Technique.  (see instructions below)

It was such a fun and easy project that I let my grandson in on the fun.

Thanks to canvas pillow squares and pillow forms there is no sewing involved.

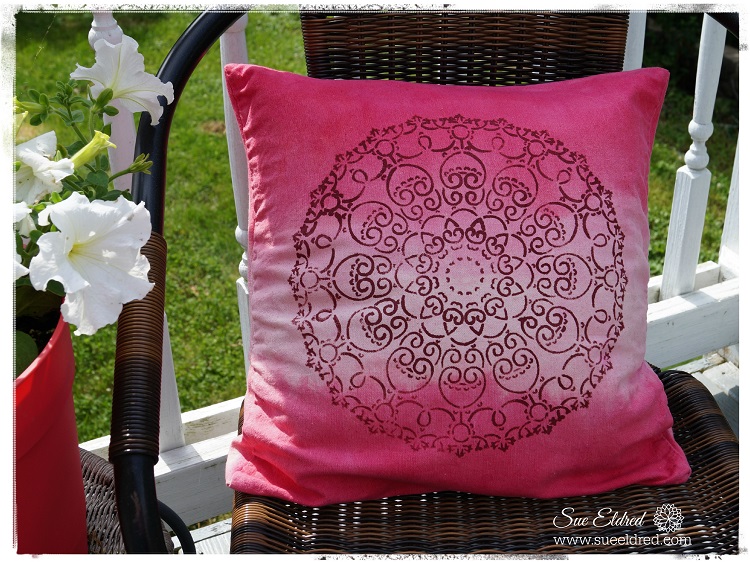
(The red pillow above also uses the ombre Technique only with one color of dye.)

Iron-On embroidered letters allowed me to easily personalize the pillows for the boys.

Nick and the Ombre Technique

For my No Sew Pillows I used:                                                                  (*amazon affiliate links)

These are the instructions included with the Tulip dye kit.

  1. Apply dye.
  2. Dip brush into dye and apply.
  3. Dip brush into water and apply.
  4. Cover dyed fabric with plastic wrap to keep damp.
  5. Let set for 6-8 hours or longer for intense colors.
  6. Rinse well with water until excess dye is removed.
  7. Fill washer to “large load” setting with hottest water suitable for fabric and a small amount of laundry soap.  Wash and dry separately.  Wash separately for the first few washes.

Directions for Stenciling:

The pattern on the Red Pillow was made using the 12″ Doily Stencil*.

  1. Lay protective paper layer inside the canvas pillow square before stenciling.
  2. Center and tape stencil onto pillow with removable painter’s tape so that the stencil won’t move.
  3. Stenciling is a “dry” brush technique. Using a stencil brush, dip just the tip of your brush into the paint. Tap off excess paint before applying to prevent the paint from seeping under the edges of the stencil.
  4. Apply paint with stencil brush in a straight up and down motion called stippling.
  5. Stuff pillow with pillow form or Poly-fil®.

And for an added bonus… Tie Dyed Socks!!!  (Someone stop me)

Tie Dyed Socks

This project was sponsored by Fairfield World, Canvas Corp Brand, Tulip Brand and DecoArt.

*Disclaimer:  This post uses ads and affiliate links.  If you choose to make a purchase using one of the links, I receive a small commission (at no additional cost to you) that helps offset the costs of maintaining this blog.  Thanks for your support!

Join Amazon Kindle Unlimited 30-Day Free Trial*

DIY Wedding Projects Day #3: Wedding Votive

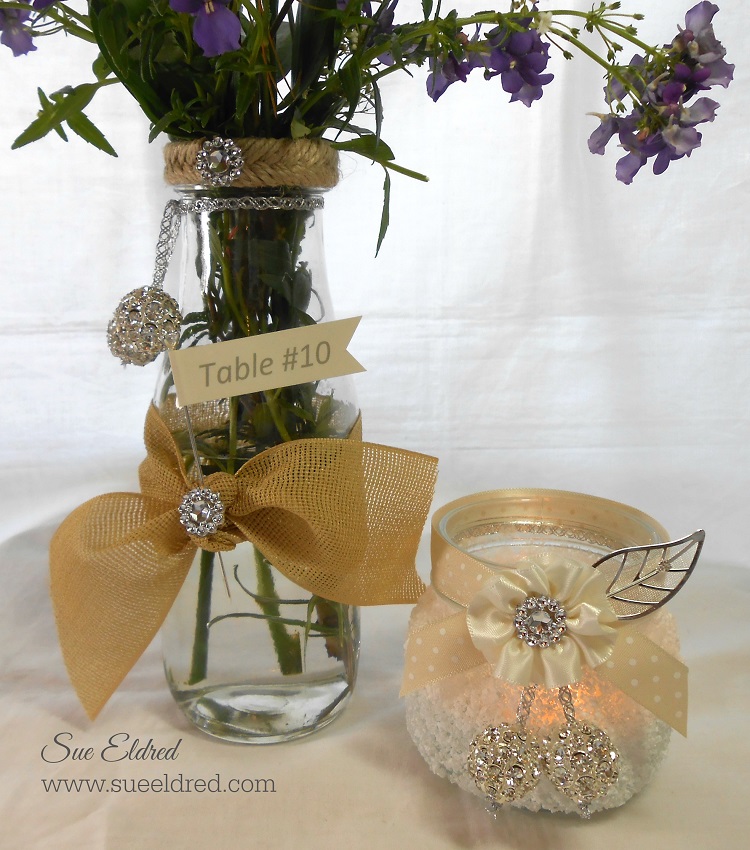
DIY Wedding Votive

Make a statement with Soft and Elegant candle lights on each table. 

This frosted votive will make quite the impact and will fit with several types of wedding décor.

It’s super quick and easy to make.

Tip…Pair with the DIY Vase Table Maker from Day #1

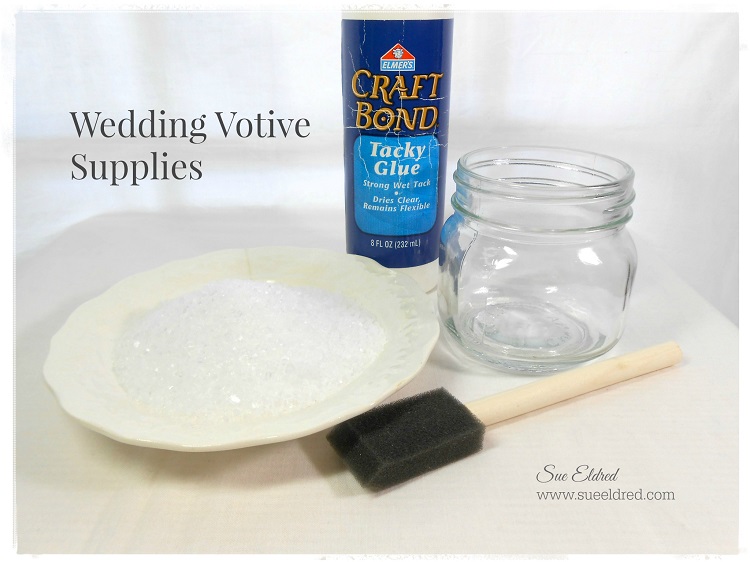
DIY Wedding Votive Supplies Needed:                                       (*Affiliate Link)

Time Needed for Completion: 1 hour plus drying time

Shop Your Fav Brands at Scrapbook.com

*Disclosure:  “This is a sponsored post.  I have been provided product in exchange for my creative ideas.  The views and opinions are my own.”  This blog uses ads and affiliate links.  If you choose to make a purchase using one of the links, I receive a small commission (at no additional cost to you) that helps offset the costs of maintaining this blog.  Thanks for your support!

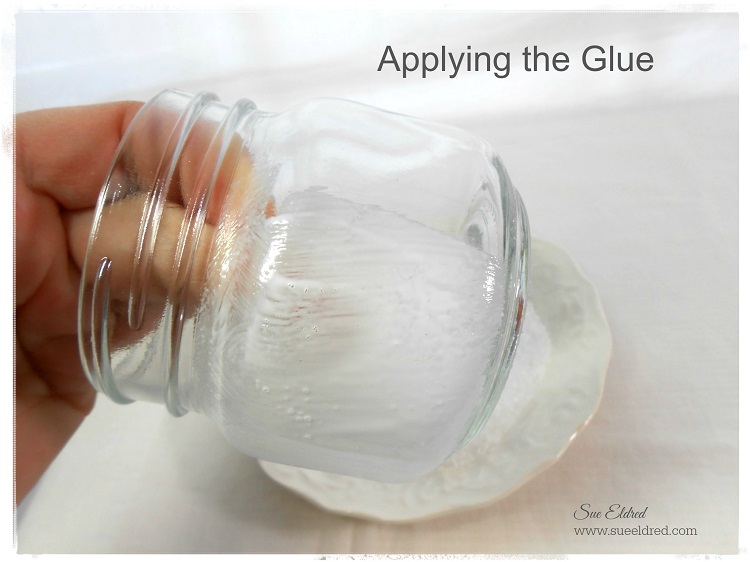
wedding votive applying glue

  • Generously apply Tacky Glue around the side of the jar. Do not put glue on the top neck or bottom of jar.

Wedding Votive Applying Epson Salt

  •   Cover jar with Epson Salt. Allow to dry.

Directions for decorating the votive:

  1. Thread two Blingella Beads onto a length of Quasar ribbon. Tie ribbon around neck of the jar with a knot. Trim and knot ends of Quasar ribbon to hold the beads in place. A little bit of glue on the ends of each knot will add extra security to the beads.
  2. Tie Pierre Ivory Ribbon around the neck of the jar with a knot. Trim ends.
  3. Cut approx. 12” of Antique White Satin ribbon.
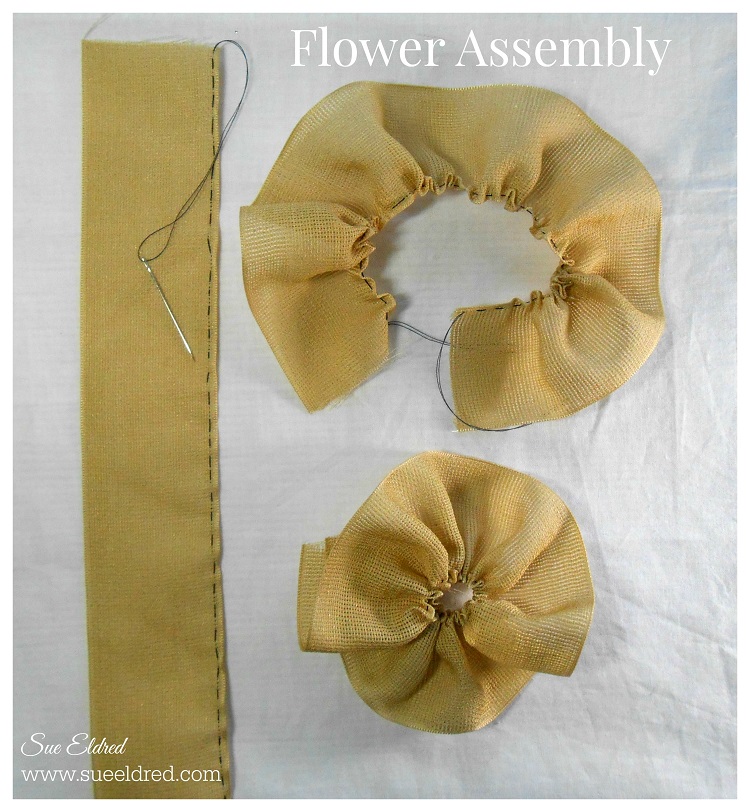
  4. With the needle and thread with long tail, make a simple running stitch down one side of the ribbon.  (*see basic flower assembly picture)
  5. Gather ribbon together with thread and tie in the center to form the ribbon rosette.
  6. Glue gem to center of ribbon flower and glue finished flower onto the knot of the Pierre Ribbon.
  7. Glue gleaming leaf behind flower.
  8. Add Tea Light Candle.

Basic Flower Assembly from Wedding Frame (Day #2)

Make sure to check all the 5 days of the DIY Wedding Projects.

Shop Handmade – The Wedding Store

This project was sponsored by Offray Ribbon.

DIY Wedding Projects Day 2: Love Frame

Offray Wedding Frame 2056

 Make a special frame for a wedding day gift or another special event.

This DIY frame has a soft, shabby chic feel that is perfect for a spring or summer wedding.

Supplies Needed

Wedding Love Frame Directions:

  1. Paint the Plain Wooden Frame with Antique White acrylic paint. Once the frame is dry, lightly sand the edges of the frame to give a distressed look.
  2. Spray paint chipboard letters with Cream Spray paint.
  3. Adhere chipboard letters to the frame with Fabri Tac Glue.
  4. Cut approx. 18” of Gazette Raw Silk Ribbon. With the needle and thread with long tail, make a simple running stitch down one side of the ribbon. Ribbon Flower Assembly 2123
  5. Gather ribbon together with thread and tie in the center to form the ribbon rosette.
  6. Create a second ribbon rosette using 12” of 7/8” Antique White Double Faced Satin Ribbon.
  7. Glue Antique White rosette onto the center of the Raw Silk rosette.
  8. Glue Dazzle Radiance Pin onto the center of both flowers.
  9. Wrap 25” piece of Gazette Raw Silk Ribbon around the frame, meeting the two ends near the top of the frame. Glue ends to the frame.
  10. Glue Flower onto ribbon cover the two ends of the wrapped ribbon.
  11. Adhere Design Chain Tracy-Silver down center of the ribbon and underneath the flower.  Glue Gleaming Leaves Dazzle onto frame.

Click on the pictures below for links of Offray Products Used:

gazette_rawsilkdfs_antiquewhiteradiance

gleaming_leaves_24karatdesignchain_tracy

Shop Handmade – The Wedding Store

Disclaimer:  This blog uses ads and affiliate links.  If you choose to make a purchase using one of the links, I receive a small commission (at no additional cost to you) that helps offset the costs of maintaining this blog.  Thanks for your support!
DIY Wedding Projects Day #1: Vase Table Marker

Offray Wedding Vase 2

Make your own table markers for your wedding day or another special event.

This DIY table marker features a pretty butterfly theme that is perfect for a

Spring or Summer wedding.

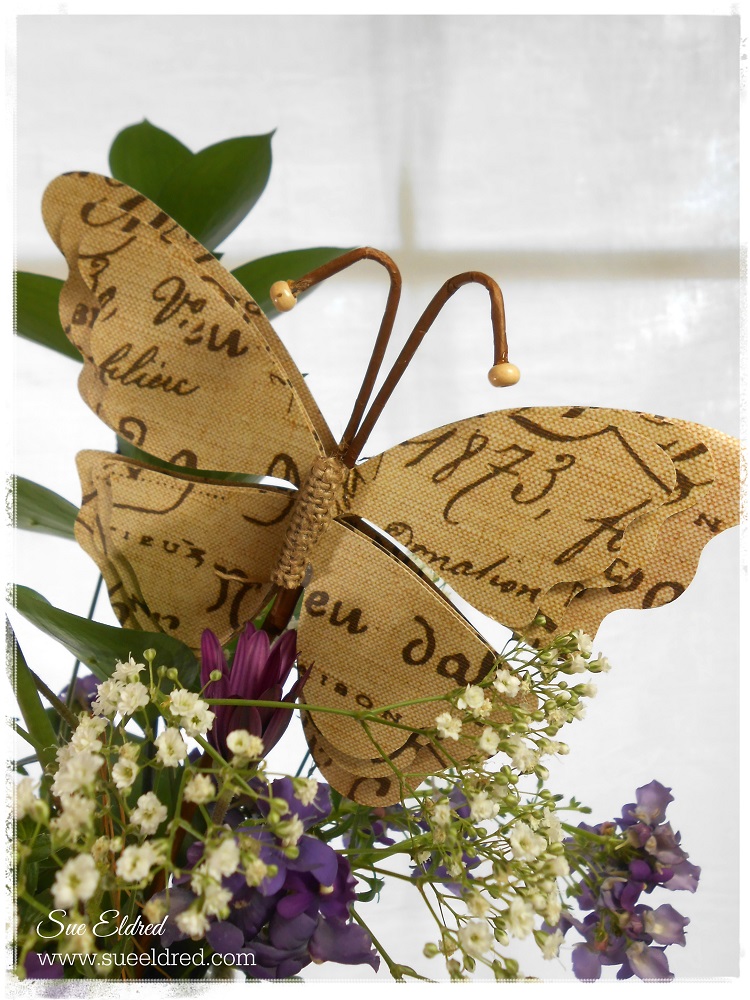
Butterfly 2255  Wedding Table Marker Vase

Supplies Needed:

Wedding Vase Instructions:

  1. Measure the distance around the top of your jar. Cut and remove the wire from the Natural Jute Cord.
  2. Apply a little bit of glue on each end of the Jute Cord to prevent fraying.
  3. Glue cord around top of the jar. Glue on gem to cover seam.
  4. Thread two Blingella Beads onto a length of Quasar ribbon. Tie ribbon around neck of the jar with a knot. Trim and knot ends of Quasar ribbon to hold the beads in place. A little bit of glue on the ends of each knot will add extra security.
  5. Tie Gazette Ribbon around the center of the vase with a knot. Add a small amount of glue underneath the knot to hold the ribbon in place.
  6. Glue small gem onto knot.
  7. Print a computer generated table number or greeting onto cream card-stock.
  8. Trim and cut card stock. Cut the end with a “v” to create the banner. Leave enough card-stock on the left side of the banner so that it can be folded around the Deco Ice stick pin.
  9. Attach banner around the Deco Ice stick pin and insert into the Gazette Ribbon knot.
  10. Fill vase with flowers and add the Fabrique Butterfly.

Shop Handmade – The Wedding Store

Disclaimer:  This blog uses ads and affiliate links.  If you choose to make a purchase using one of the links, I receive a small commission (at no additional cost to you) that helps offset the costs of maintaining this blog.  Thanks for your support!

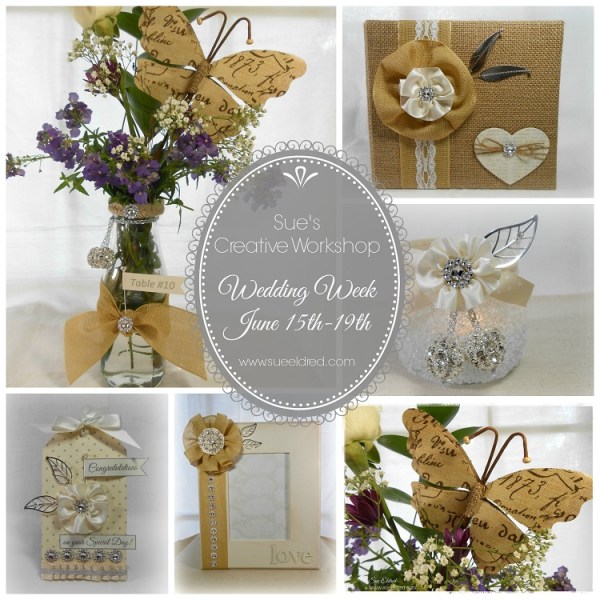
Sue’s Creative Workshop’s Wedding Week

Wedding Picture Collage

June Brides, Weddings, Love is in the Air…

Time for some DIY Wedding Projects.

Last fall, I was given the opportunity to create five Wedding projects for Offray Ribbon.

I had so much fun working on this project with them.

They allowed me to choose anything I wanted to work with.

So many beautiful ribbons and embellishments.

Last week, I received permission that I could share them with you on my blog.

So… for the next five days, I will feature a DIY Wedding project complete with instructions

and pictures.

Enjoy and Share!

Shop Handmade – The Wedding Store

Disclaimer:  This blog uses ads and affiliate links.  If you choose to make a purchase using one of the links, I receive a small commission (at no additional cost to you) that helps offset the costs of maintaining this blog.  Thanks for your support!

Sue’s Fussy Cutting for Beginners

Deflecto Hot off the Press Frame 5497

What is Fussy Cutting you ask?

Fussy Cutting is a quilting term meaning: the selective cutting of a fabric based on a particular element or design.  To cut pieces of fabric so that a particular part of the printed design is centered or featured.

Scrapbookers and Paper Crafters have adopted the term using it to select and cut around specific images on a printed paper.

When I fussy cut, I look for larger, whole images that are easy to cut out.  You’ll need to have a good, sharp pair of scissors with a fine tip so you’ll be able to cut smaller detailed images.  For layering, my favorite thing to use is thin 3D foam mounting squares from Scrapbook Adhesive by 3L.

HOP Paper Pack

Above is a picture I created using Hot Off the Press Artful Watercolor collection.  The paper pack comes with two sheets of each design.

Below is the framed picture broken down into sections.

Deflecto HOTP Frame numbered

  1. I used a second sheet of the scrapbook paper (with the large white flower) and cut along the design to create a pocket.  The pocket was inked with brown ink to make it stand out more.
  2. I added my daughter’s picture right at the top of the pocket.  I cut post cards from a another sheet from the collection and inserted into the pocket covering the bottom of the picture.  The picture and postcards are secured into place with my double adhesive tape.
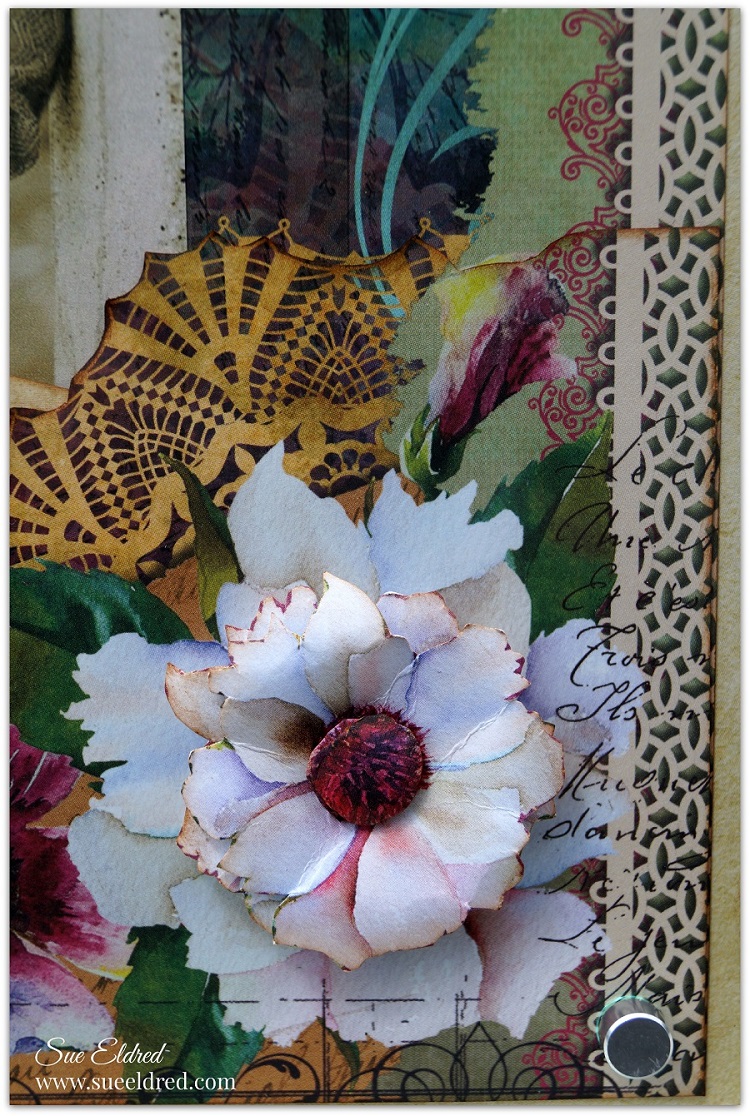
  3. I cut out two white flowers from the floral scrapbook sheet from the collection.  Cut close around the image.  I gave the flowers shape by rubbing the back of the flower with a large ball stylus tool on a soft foam or rubber surface.  Adhere the flowers together with a thin foaming mounting square.
  4. Cut the center only from two additional flower images.  Round the centers (step #3).  Adhere to the center of the white flower using a small thin foam mounting squares.
  5. Place finished picture into the floating beveled frame.  Mount layered flower on top the large white flower that is under the glass.

Deflecto Hot off the Press Frame 5486         Maya Angelou Frame 5641

Close up of the flower.                      Maya Angelou Quote in a 4 x 6 clear acrylic frame.

“This is a sponsored post. As a member of the Deflecto Design Team I have been provided product in exchange for my creative ideas, views and opinions.”

DIY Graduation Frame with Tassel

DIY Graduation Frame 5398

Some years I don’t have any Graduations to celebrate. 

This year there are three.  One from High School, Two from Junior High.  (not mine!)

I decided to make a Graduation Frame to use as one of the gifts.

After the ceremony the Graduate can take out the greeting and add a picture.

DIY Graduation Frame Collage

For my frame I used:                                                                                    (*affiliate link)

  1. To make the tassel:  Wrap the red twine around a piece of chipboard several times.  The size of the chipboard determines the length of the tassel.
  2. Cut a piece of twine to gather and tie tightly around the twine at the top of the wrapped chipboard.
  3. Cut open the bottom loops from the chipboard.
  4. Wrap thin gold wire around the top of the tassel to imitate the look of a gold band.
  5. Trim the bottom of the tassel to even the length.
  6. Create computer generated greeting and insert inside the frame.
  7. Ink white chipboard numbers gray using the ink applicator.  Stick on front of the frame.
  8. Make a small garland from small 1/2″ strips of paper adhered to a piece of red twine.
  9. Adhere the tassel to the back of the frame with a small piece of tape.  That way the Graduate can reposition the tassel if needed after adding photo.

FYI:  When my oldest graduated from High school his younger sister also graduated from Junior High.  Four years later when it was time for her to graduate High School he was graduating from College.

SO….for all you young people thinking of starting a family. 

Don’t space your kids 4 years apart.  (The magic number is three.)  Just saying!

“This is a sponsored post. As a member of the Deflecto Design Team I have been provided product in exchange for my creative ideas, views and opinions.”

Shop Your Fav Brands at Scrapbook.com

*Disclosure:  This post uses ads and affiliate links.  If you choose to make a purchase using one of the links, I receive a small commission (at no additional cost to you) that helps offset the costs of maintaining this blog.  Thanks for your support!