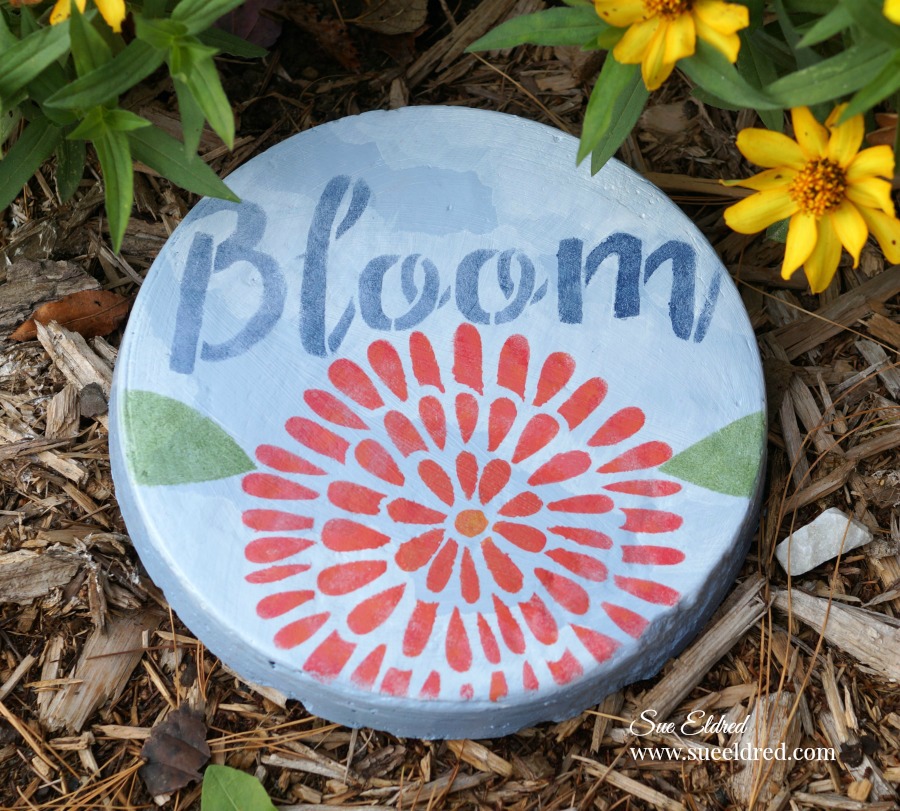
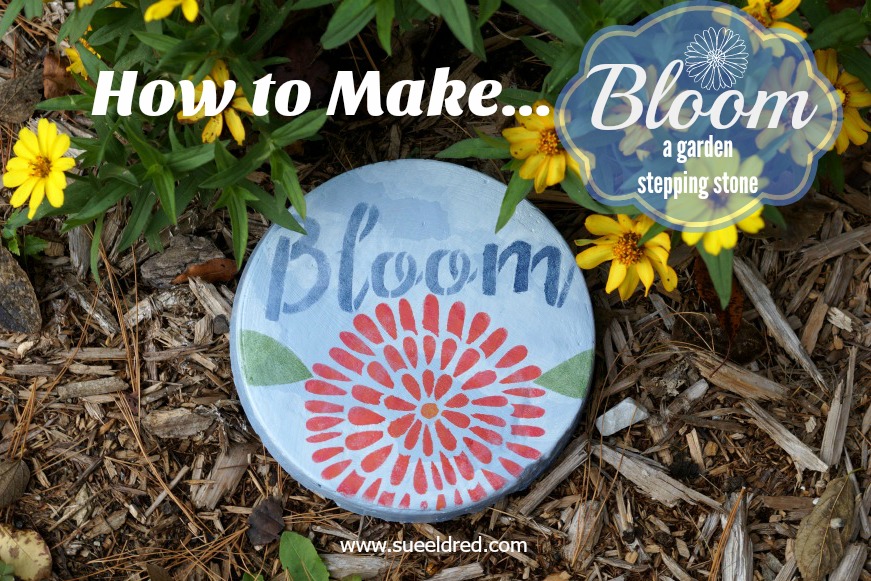
Create a little fun and whimsy in your Garden with a Bloom Garden Stepping Stone.
(The links and instructions to make the Garden stone are included down below.)

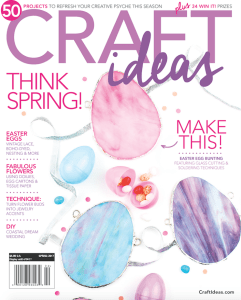
I just got the Garden Issue of Craft Ideas Magazine and I’m so excited that I can finally share
with you my “Bloom Garden Stone”. (you can find it on page #24)
Make sure to check out the entire Garden issue of Craft Ideas,
the issue is full of great garden themed ideas and inspiration.
Materials and Supplies: (*affiliate links)
- 8” Cake Pan
- Petroleum Jelly
- Rapid Set Concrete Mix
- DecoArt DS17-9 Americana Multi-Purpose Sealer*
- DecoArt Americana® Multi Surface Acrylic Paint: Night Sky, Cotton Ball, Woodland Green
- DecoArt Americana® Acrylic Paint: Watermelon Slice, Marigold
- Decoart Decor Stencil 8×8 Garden Bloom*
- DecoArt Americana DuraClear Varnishes*
- Paintbrush
- Stencil Brush*
- White Cardstock
Directions:
- Cover the sides and bottom of an old cake pan with Petroleum Jelly for easy removal.
- Mix Rapid Set Concrete Mix according to manufacturer’s instructions. Fill pan with cement approx. 1″ thick. Shake pan a little to fill in the gaps and smooth. Allow a couple hours for cement to set before removing from the pan. Let the cement stone dry for a day or two before painting.

3. To create a better surface for painting and stenciling, paint cement stone first with DecoArt DS17-9 Americana Multi-Purpose Sealer*

4. Mix together Night Sky and Cotton Ball acrylic paint and basecoat entire stone.

5. Tear a piece of white cardstock with an irregular edge as shown to create a mask stencil for cloud background.
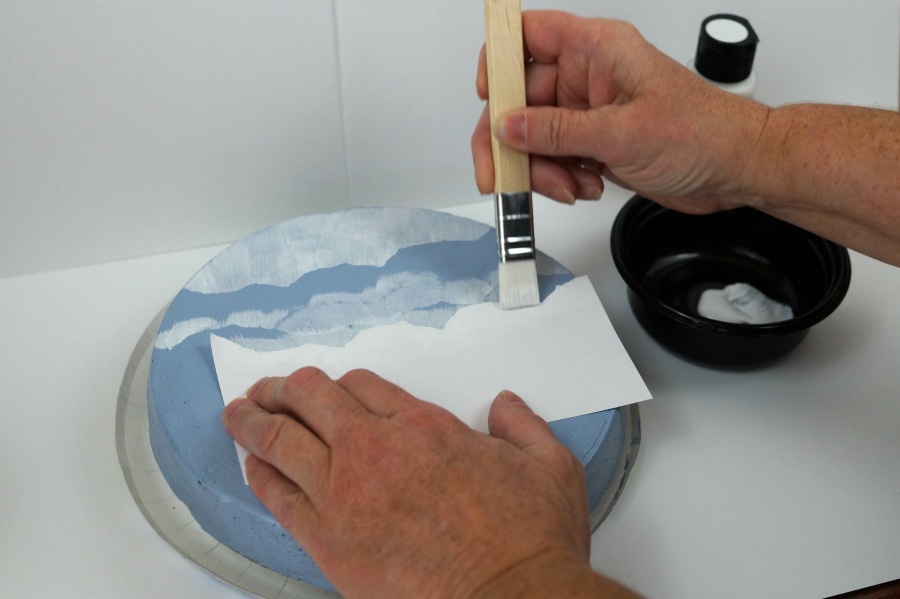
6. Place cloud mask stencil onto stone and paint with an upward motion. Move mask stencil around stone to paint additional clouds and let dry.
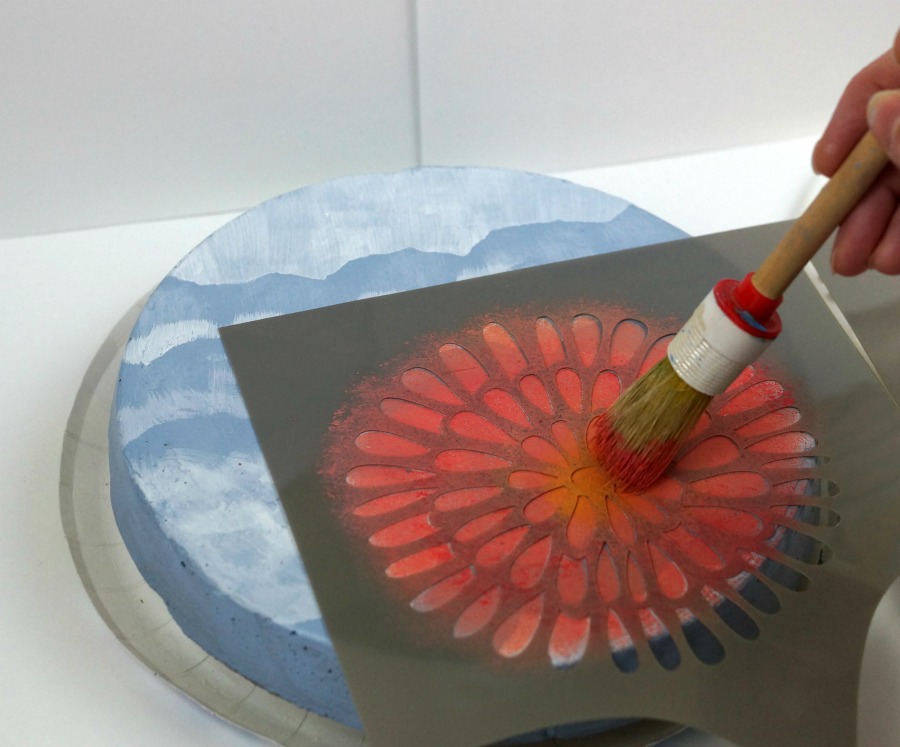
7. Stencil bloom flower using a mixture of Watermelon Slice and Marigold and stencil “bloom” with Night Sky as shown. Paint leaves Woodland Green and let dry.

8. Apply DecoArt Americana DuraClear Varnishes* using paintbrush over stone to help protect the stone from the outdoor elements.

You also might like this stepping stone project I created with my grandson Nick.
The Bloom Garden Stone was created for and sponsored by Craft Ideas Magazine. Craft Ideas for Every Occasion, Every Skill Level.

Join Amazon Kindle Unlimited 30-Day Free Trial
*Disclaimer: This blog uses ads and affiliate links. If you choose to make a purchase using one of the links, I receive a small commission (at no additional cost to you) that helps offset the costs of maintaining this blog. Thanks for your support!