Spread the Love this year with handmade Valentines.
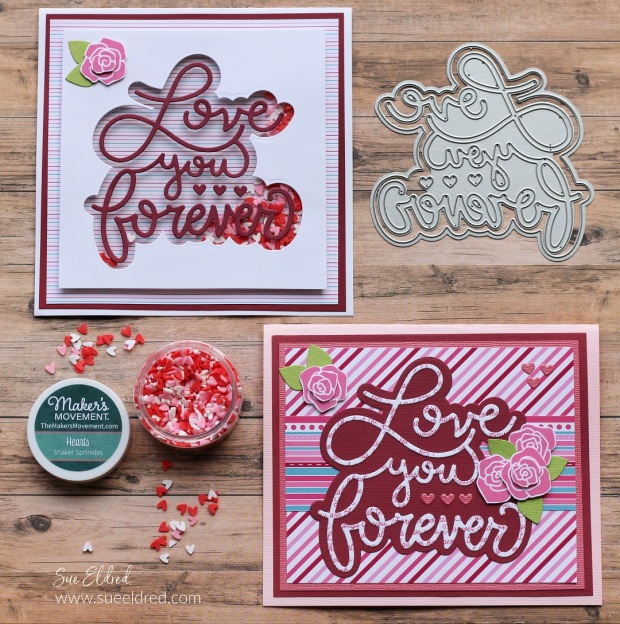
The Love You Forever Valentine’s Day cards were created two different ways
using the “Love You Forever” Die Set from the Maker’s Movement.

Disclosure: This is a sponsored post for The Maker’s Movement. I have been provided product and compensation in exchange for my creative ideas. The view and opinions are my own.
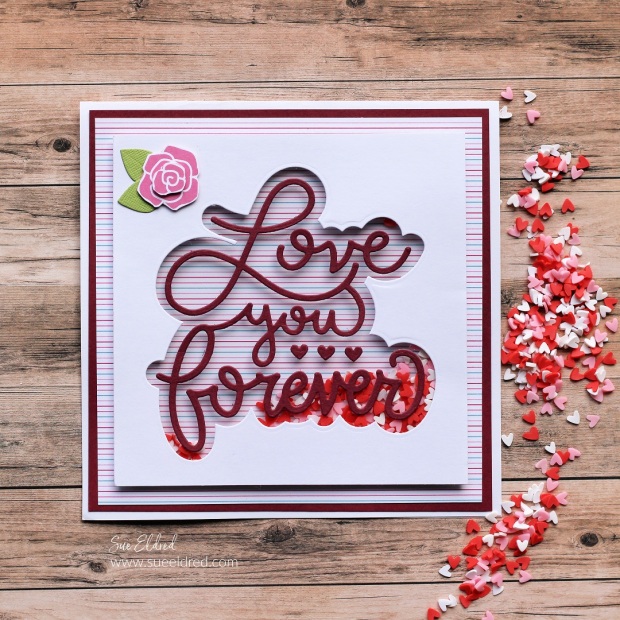
The first card is a clean and simple shaker card,
and the other is more of a traditionally decorated Valentine’s Card.

Materials Used: (affiliate links)
- M12875 Love You Forever Die Set
- M12913 Always & Forever 6″ x 6″ Paper Pad
- M12166 You’re My Jam (for the leaves)
- Crossover II Die-Cutting System*
- MMT212 Clear Acetate Sheet
- Sweetheart Shaker Sprinkles
- MMT211 Double Sided Adhesive Foam
- Xyron Creative Station*
- Xyron Tape Runner*
- Scrapbook Adhesives by 3L Thin 3D Foam Squares*
- Cardstock: White, Cranberry, Light Green
*Disclosure: This blog uses ads and affiliate links. If you choose to make a purchase using one of the links, I receive a small commission (at no additional cost to you) that helps offset the costs of maintaining this blog. Thanks for your support!

Directions:
- This card measures 6″ x 6″.
- Cut a 5″ x 5″ piece of white cardstock.
- The die set comes with two different dies, the outline, and the words. Place the “outline die” onto the white cardstock and die-cut using a die-cut machine.
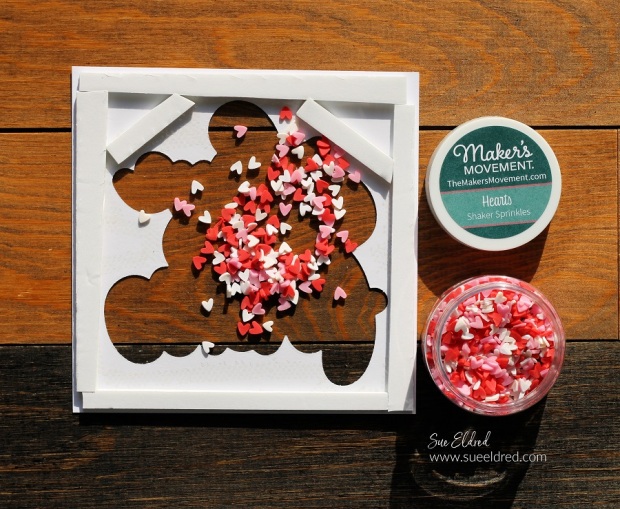
- Turn the cardstock over and adhere a piece of clear acetate onto the cardstock.
- Cut the double-sided adhesive foam into thin strips and place it around the edges of the cardstock.
- One of my favorite tips for die-cutting small pieces is to run the paper through the Xyron Creative Station* to add a layer of adhesive to the back before I die-cut. The paper pieces become stickers which make adhering them to cards very easy.
- Die-cut the words “Love you forever” using cranberry paper ran through the Xyron Creative Station*.
- Adhere the words onto the front of the acetate.
- For the card base, cut a 5 1/2″ x 5 1/2″ piece of striped paper (found in the Always & Forever Paper Pad) and adhere it onto a 5 3/4″ x 5 3/4″ cranberry cardstock layer.
- Adhere layers onto a 6″ x 6″ card.
- Place shaker sprinkles onto the middle of the card base.
- Remove the paper backing from the foam strips and place the white acetate layer centered on the card base.


- To create the dimensional rose on the front of the card, “fussy cut” a large and small rose from the rose background paper found in the paper pad.
- Place a small thin foam square under both roses and adhere the smaller rose to the top of the larger rose. Adhere to the front of the card.

Shaker Cards are both fun to make and fun to receive.
And I think this one is my new favorite.
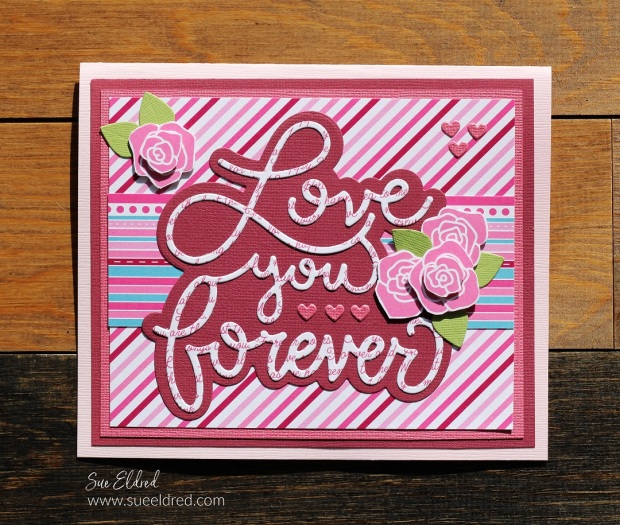
A completely different look using the same Valentine die set and paper pad.
- I used the Xyron Creative Station* to add adhesive to the back of the “Valentine Sayings” paper, from the “Forever & Always” paper pad, before die-cutting the words.
- This card has a lot of different layers and several dimensional flowers that help make this card special.

