
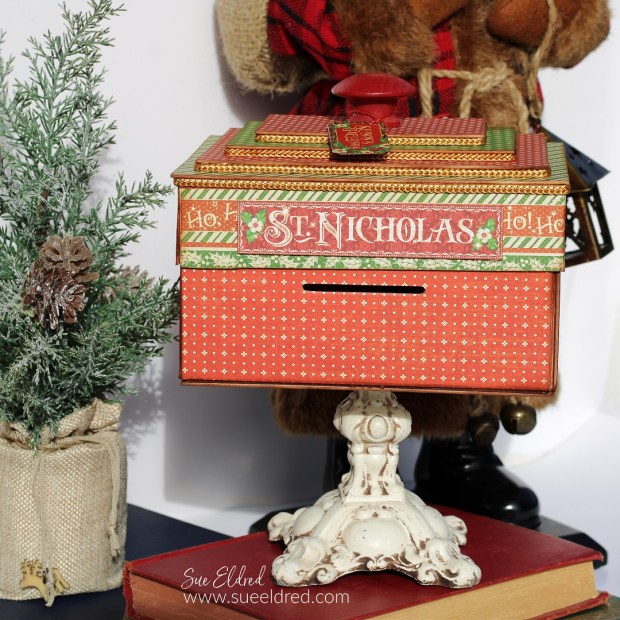
Create a Holiday Mailbox for letters to Santa using the Sizzix Slotted Treat Box Die by Eileen Hull*.
A fun project to make for Christmas!
To say I have a lot of Holiday Scrapbook paper would be a understatement!
Paper crafters have a tendency to “save” their special scrapbook paper
for just the right project.
We also have a tendency to hoard said special paper.

Sometimes its fun to use what you have on hand.
I dug deep into my hoarded Graphic 45 Christmas Scrapbook paper
to make the Santa Letter Box.

One of my favorite tips…
- Before I die-cut the mat board, I like to use the Xyron Creative Station* to add adhesive to the back of the paper. It gives the paper a complete layer of adhesive with no bubbles. It really is easy to use.
*Disclosure: This blog uses ads and affiliate links. If you choose to make a purchase using one of the links, I receive a small commission (at no additional cost to you) that helps offset the costs of maintaining this blog. Thanks for your support!

When making the Santa Letter Box…
- I adapted the box by adding 1″ strips of matboard* around the existing box lid. The extra strips allowed the box to have a lip that fits over the edge of the box.

- I added three additional layers of graduated sized matboard to the lid for dimension using foam tape.
- I glued thrifted gold cording around each layer to cover the Foam Tape*.
- A wood knob painted red completes the lid.

For the base of the letter box, I used an old metal lamp base.
(At least, that’s what I think it is.)
We found it in my Dad’s garage while cleaning it out a few years ago.
It’s fun to use old things in unusual ways.
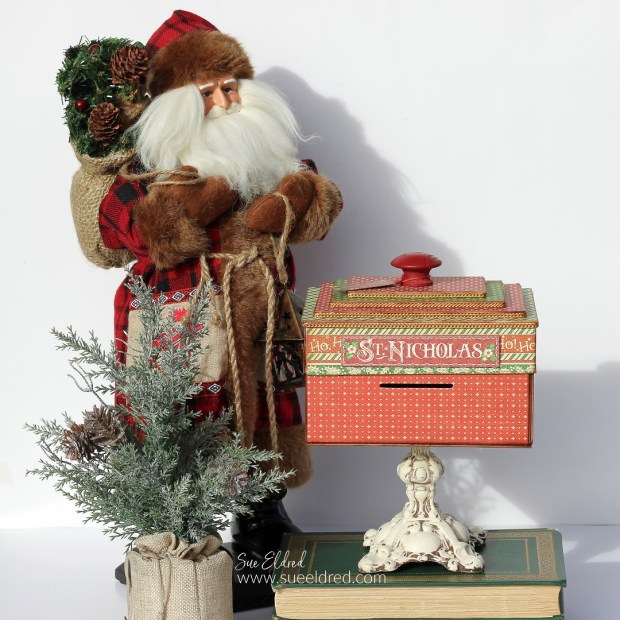
The Santa Letter Box adds a little Christmas Magic to your Holiday Decorating.


Materials Used: (*affiliate links)
- Sizzix Slotted Treat Box Die by Eileen Hull*
- Big Shot Plus Manual Die-Cutting Machine*
- Sizzix White Matboard*
- Holiday Scrapbook Paper
- Xyron Creative Station*
- Tim Holtz Distress Ink, Vintage Photo*
- Ink Applicator*
- Black Foam Tape*
- Gold Cord
- Tombow Mono Aqua Liquid Glue*
- Wood Knob
- Vintage Base from an old lamp

![]()
Disclosure: This is a sponsored post. As a member of the Eileen Hull Educator Team, I have been provided product in exchange for my creative ideas. The view and opinions are my own.

Totally love this project! Great tip about adding the 1″ strips around the outside…and the graduated pieces on the top are perfect!
I love this idea Sue!
Thanks Lisa!