Preserving Summer Memories

Summer Layout 9108

I’m holding on to Summer as long as I can.

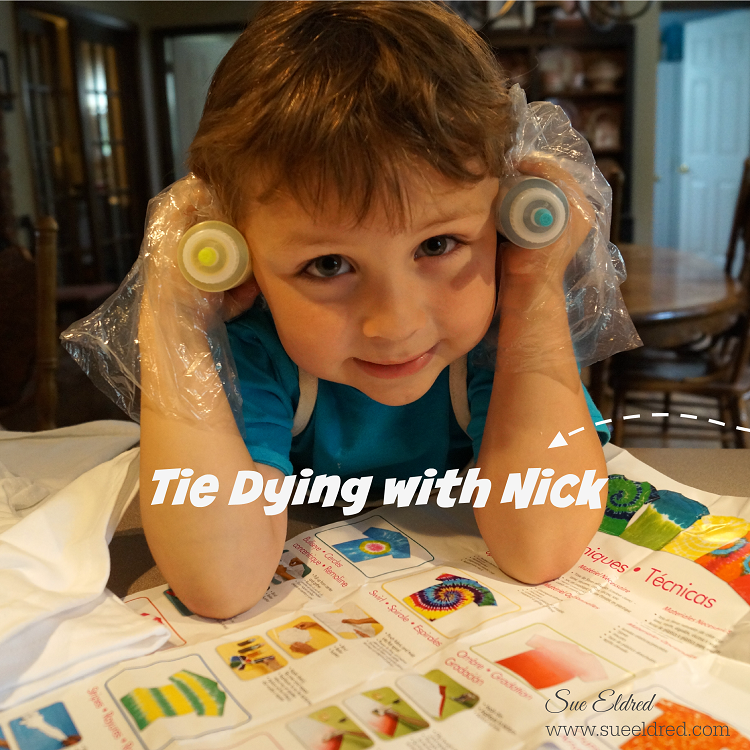
This summer Nicholas learned how to swim the entire length of the pool without the aid

of a floatie and he learned how to float on his back.

Warren learned how to jump off the side of the pool.

Pretty impressive when you consider they’re only 4 and 1 1/2.

Nicholas loves the water, we call him a polar bear because it doesn’t matter how

cold the water is.

Yesterday… we had our last pool party of the season.  Thanks to a little 95º heat wave.

I’m going to miss summer.

My Summer Layout uses:

  • Simple Stories Collections: Summer Vibes and Freedom
  • Bo Bunny’s Boardwalk

Join Amazon Kindle Unlimited 30-Day Free Trial

Disclaimer:  This blog uses ads and affiliate links.  If you choose to make a purchase using one of the links, I receive a small commission (at no additional cost to you) that helps offset the costs of maintaining this blog.  Thanks for your support!

Colorful Chalkboard Frame for Kids and grownups

Funky Pallet Frame 8798

A simple paint and stencil project, fun for kids or grown ups.

I decided to finish painting this colorful Rustic Pallet Frame* that I started working on

yesterday evening.  As the name suggests, the frame is rustic and somewhat rough.

Because I was planning on stenciling on it…  I sanded the front of the frame to make it smoother.

I wasn’t worried about making it completely smooth.

The Colorful Chalkboard Frame would be a great project to make with the kiddos.

Funky Pallet Frame painted 8792

Directions to make the Colorful Chalkboard Frame:

  1. Sand the front of the frame.
  2. Paint the frame with white acrylic paint.
  3. Paint the top of each pallet section with different acrylic colors.  Sort of a modified rainbow.
  4. Because the stencil had four unique patterns, I decided each color needed its own pattern.
  5. Mask off each section of the wood before stenciling.
  6. Stencil using a stipple brush and white acrylic paint.
  7. Allow to dry completely
  8. To mute to colors:  Lightly sand the frame with a sanding block.  (optional)
  9. For an added sheen:  Apply clear crème wax to front of frame, allow to sit for one hour and buff.
  10. I added a small chalkboard to the inside of the frame.

Funky Pallet Frame Supplies

Supplies Used:                                          (*affiliate link)

*Thanks to Walnut Hollow and DecoArt for providing the materials used on this frame.

For more Summer fun with the kids…click on SIime Ad below.

Slimer

Disclaimer:  This blog uses ads and affiliate links.  If you choose to make a purchase using one of the links, I receive a small commission (at no additional cost to you) that helps offset the costs of maintaining this blog.  Thanks for your support!

Join Amazon Kindle Unlimited 30-Day Free Trial

Creating a Decorative Display Board for all my Little Pretties

Smoothfoam Display Board 07114

My project started as a Memo Board and… 

While I was looking for some push pins I stumbled across a collection of little pretties.

Tucked away in a cabinet along with a lot of other embellishments were these little

metal frames.  Something that I’d been hoarding since my K & Company days.

I added those frames along with some other little pretties onto my board.  (Love!)

Memo Board Products

To make my Memo/Display Board I used:            (*amazon affiliate link)

Directions:

  1. Paint wood frame with cream acrylic paint.
  2. Cut the Smoothfoam sheet a 1/4″ larger than the center opening of the frame.
  3. Apply spray adhesive to the front of the Smoothfoam and lay onto the fabric.
  4. Wrap and glue the fabric around the back of the Smoothfoam.
  5. Glue the frame onto the front of the covered Smoothfoam.
  6. Decorate the top and bottom of the frame with dimensional flowers.

*My little pretties are stuck into the display board with decorative garment pins.

A really fast and easy project.

This project was created for and sponsored by Smoothfoam.

Shop Amazon Scrapbooking Supplies*

Disclaimer:  This blog uses ads and affiliate links.  If you choose to make a purchase using one of the links, I receive a small commission (at no additional cost to you) that helps offset the costs of maintaining this blog.  Thanks for your support!

Kindness Matters

Kindness Matters.  All Day.  Every Day. 

This card was made using Art Play Paintables and Blender Basics.

I water colored the image using a waterbrush and a variety of inks from markers and inkpads.

Happy Friday Everyone!

Shop Your Fav Brands at Scrapbook.com

*Disclosure:  This blog uses ads and affiliate links.  If you choose to make a purchase using one of the links, I receive a small commission (at no additional cost to you) that helps offset the costs of maintaining this blog.  Thanks for your support!

Tie-Dying With Nick

Tie Dying with Nick

CUTE KID ALERT:  I love working on crafts with Nicholas and his Mommy.

Last Sunday, we decided to Tie Dye t-shirts.

It all started because of a Tulip One-Step Mini Tie-Dye Kit-Neon* (affiliate link) I received

free last February after a CHA Fave Crafts Designer Event from Tulip and I Love to Create.

I had been meaning to use it, but, hadn’t gotten around to it yet.

Using the squeeze bottles made it so much easier and less messy than the old way of tie-dying.

We had so much fun with this project that Bonnie (Nick’s Mommy) went out and bought a

larger kit the next day.  This past Sunday, when everyone came over for Father’s Day,

we tie-dyed Red White and Blue t-shirts and socks with the kids.

Just saying “a little addicting”.

Choosing the design

The kit came with a large full color sheet of designs, techniques and instructions.

For the boys shirts we did the “swirl” technique.

Nicholas and Warren Fronts and Backs

For Bonnie’s shirts we did the “crumple” and “ombre” techniques.  (no pictures, darn)

Nicholas and Warren 2

It doesn’t get much cuter than this!

I used this picture in a frame for their Daddy’s Father’s Day gift.

Many Faces of Nick Collage

This post would not be complete without including the “Many Faces of Nick“.

Disclaimer:  This blog uses ads and affiliate links.  If you choose to make a purchase using one of the links, I receive a small commission (at no additional cost to you) that helps offset the costs of maintaining this blog.  Thanks for your support!

Join Amazon Kindle Unlimited 30-Day Free Trial

DIY Wedding Projects Day #3: Wedding Votive

DIY Wedding Votive

Make a statement with Soft and Elegant candle lights on each table. 

This frosted votive will make quite the impact and will fit with several types of wedding décor.

It’s super quick and easy to make.

Tip…Pair with the DIY Vase Table Maker from Day #1

DIY Wedding Votive Supplies Needed:                                       (*Affiliate Link)

Time Needed for Completion: 1 hour plus drying time

Shop Your Fav Brands at Scrapbook.com

*Disclosure:  “This is a sponsored post.  I have been provided product in exchange for my creative ideas.  The views and opinions are my own.”  This blog uses ads and affiliate links.  If you choose to make a purchase using one of the links, I receive a small commission (at no additional cost to you) that helps offset the costs of maintaining this blog.  Thanks for your support!

wedding votive applying glue

  • Generously apply Tacky Glue around the side of the jar. Do not put glue on the top neck or bottom of jar.

Wedding Votive Applying Epson Salt

  •   Cover jar with Epson Salt. Allow to dry.

Directions for decorating the votive:

  1. Thread two Blingella Beads onto a length of Quasar ribbon. Tie ribbon around neck of the jar with a knot. Trim and knot ends of Quasar ribbon to hold the beads in place. A little bit of glue on the ends of each knot will add extra security to the beads.
  2. Tie Pierre Ivory Ribbon around the neck of the jar with a knot. Trim ends.
  3. Cut approx. 12” of Antique White Satin ribbon.
  4. With the needle and thread with long tail, make a simple running stitch down one side of the ribbon.  (*see basic flower assembly picture)
  5. Gather ribbon together with thread and tie in the center to form the ribbon rosette.
  6. Glue gem to center of ribbon flower and glue finished flower onto the knot of the Pierre Ribbon.
  7. Glue gleaming leaf behind flower.
  8. Add Tea Light Candle.

Basic Flower Assembly from Wedding Frame (Day #2)

Make sure to check all the 5 days of the DIY Wedding Projects.

Shop Handmade – The Wedding Store

This project was sponsored by Offray Ribbon.

Crazy Quilt Card

Crazy Quilt Card 2

I am fascinated by quilts.  Old ones, new ones, it doesn’t matter…

I love all the colors and patterns.

I once thought I might enjoy making a quilt.

But… I knew I’d never have the patience to finish the job.  (So I quit before I even started.)

Crafter's Ink 87508-Canyon

I recently received some new stamps and inkpads from Ann Butler Designs and

Clearsnap to use for a Blog Hop with a few other designers.

The stamps I received are quilt themed stamps and the Crafter’s ink is perfect for fabric, wood and

more.  Being a paper crafter… my first thought was a quilt card.  (Now that’s a quilt I can make.)

Crazy quilt card Collage

Quilt Card Supplies Used:

  • ColorBox® Background Basics by Ann Butler  Basket 1 and Picnic 1
  • ColorBox Crafter’s® by Ann Butler Canyon, Ocean Breeze, Desert Sand, Evergreen, Deep Woods
  • Blender Basics Paper Pack from Adorn It

Here’s how I made the card:

  1. Cut 1″ squares from the pre-stamped colored paper.  Make extra so that some of them can be cut in 1/2 diagonally.  I stamped the “basket” stamp several times on a 5 1/2″ x 5 1/2″ piece of paper to create my background piece.
  2. I made a 5″ x 5″ scored grid to glue my 1″ squares on.  You don’t necessarily need to make a grid; you could actually glue it right onto the background piece.  I found it easier to arrange and re-arrange my squares on the grid before gluing.   It also helped me keep the squares straight when gluing.
  3. Once pattern is glued down, create secondary pattern by adding cut 1/2″ squares.
  4. Adhere quilt card onto 5 1/2″ stamped square and additional layers.  Finished card is 6″ x 6″.

Shop Amazon Scrapbooking Supplies*

Disclaimer:  This blog uses ads and affiliate links.  If you choose to make a purchase using one of the links, I receive a small commission (at no additional cost to you) that helps offset the costs of maintaining this blog.  Thanks for your support!

DIY Graduation Frame with Tassel

DIY Graduation Frame 5398

Some years I don’t have any Graduations to celebrate. 

This year there are three.  One from High School, Two from Junior High.  (not mine!)

I decided to make a Graduation Frame to use as one of the gifts.

After the ceremony the Graduate can take out the greeting and add a picture.

DIY Graduation Frame Collage

For my frame I used:                                                                                    (*affiliate link)

  1. To make the tassel:  Wrap the red twine around a piece of chipboard several times.  The size of the chipboard determines the length of the tassel.
  2. Cut a piece of twine to gather and tie tightly around the twine at the top of the wrapped chipboard.
  3. Cut open the bottom loops from the chipboard.
  4. Wrap thin gold wire around the top of the tassel to imitate the look of a gold band.
  5. Trim the bottom of the tassel to even the length.
  6. Create computer generated greeting and insert inside the frame.
  7. Ink white chipboard numbers gray using the ink applicator.  Stick on front of the frame.
  8. Make a small garland from small 1/2″ strips of paper adhered to a piece of red twine.
  9. Adhere the tassel to the back of the frame with a small piece of tape.  That way the Graduate can reposition the tassel if needed after adding photo.

FYI:  When my oldest graduated from High school his younger sister also graduated from Junior High.  Four years later when it was time for her to graduate High School he was graduating from College.

SO….for all you young people thinking of starting a family. 

Don’t space your kids 4 years apart.  (The magic number is three.)  Just saying!

“This is a sponsored post. As a member of the Deflecto Design Team I have been provided product in exchange for my creative ideas, views and opinions.”

Shop Your Fav Brands at Scrapbook.com

*Disclosure:  This post uses ads and affiliate links.  If you choose to make a purchase using one of the links, I receive a small commission (at no additional cost to you) that helps offset the costs of maintaining this blog.  Thanks for your support!

Simply Beautiful Handmade Flower

Learn how to make a Simply Beautiful Handmade Flower in a few easy steps.

To make the flower you’ll need:      (*affiliate link)

Disclosure:  This blog uses affiliate links.  If you choose to make a purchase using one of the links, I receive a small commission (at no additional cost to you) that helps offset the costs of maintaining this blog.  Thanks for your support!

Directions:

  1. Punch 3 daisies from each one of the punches for a total of 12 punch outs.
  2. Using the end of a pencil or skewer, round each of the petals up.
  3. Turn the punched shaped over and press down into the center.
  4. Glue two of the largest flowers together slightly off centered.  Add the third flower.
  5. Continue adding and gluing the next size flower and glue on top.  Repeat with the third size.
  6. Pinch the smallest flowers up tight and stagger and glue onto the center of the flower.
  7. Spray the finished flower with Glimmer Mist until you get the desired shade of color.
  8. Once the flower is dry add a small adhesive pearl in the center of the flower.
  9. Create card using Captivating Squares shapes and layers misted with Glimmer Mist

*FTC Disclosure… “This is a sponsored post.  I have been provided product in exchange for my creative ideas.  The views and opinions are my own.”

Glittered Bunny Egg

Are you ready for Spring?

Warm Weather, Pretty Flowers and Sweet Little Bunnies and Easter Eggs.

My project today is a Sweet Glittery Little Bunny made from a Smoothfoam Egg.

Bunny Parts and Supplies 3178 Glittered Bunny Egg 3224

To Make the Glittered you’ll need:        (*affiliate links)

  1. Cut two bunny ears from the smoothfoam sheet
  2. Lightly sand Smoothfoam egg and bunny ears.
  3. Glue ears onto Smoothfoam egg.
  4. Paint with cream paint.  Paint inside of the bunny ears pink.
  5. Cover the entire bunny with a thin coat of mod podge and sprinkle with glitter.
  6. Insert micro brads for the eyes and heart brad for the nose.
  7. Draw small mouth with fine black marker.

This project was created for and sponsored by Smoothfoam.

Shop Your Fav Brands at Scrapbook.com

*Disclosure:  This blog uses ads and affiliate links.  If you choose to make a purchase using one of the links, I receive a small commission (at no additional cost to you) that helps offset the costs of maintaining this blog.  Thanks for your support!