Sparkle your 4th…

Sparkle your 4th…

For the 4th of July, I decided to create a round-up of my past 4 favorite patriotic projects.

Enjoy!

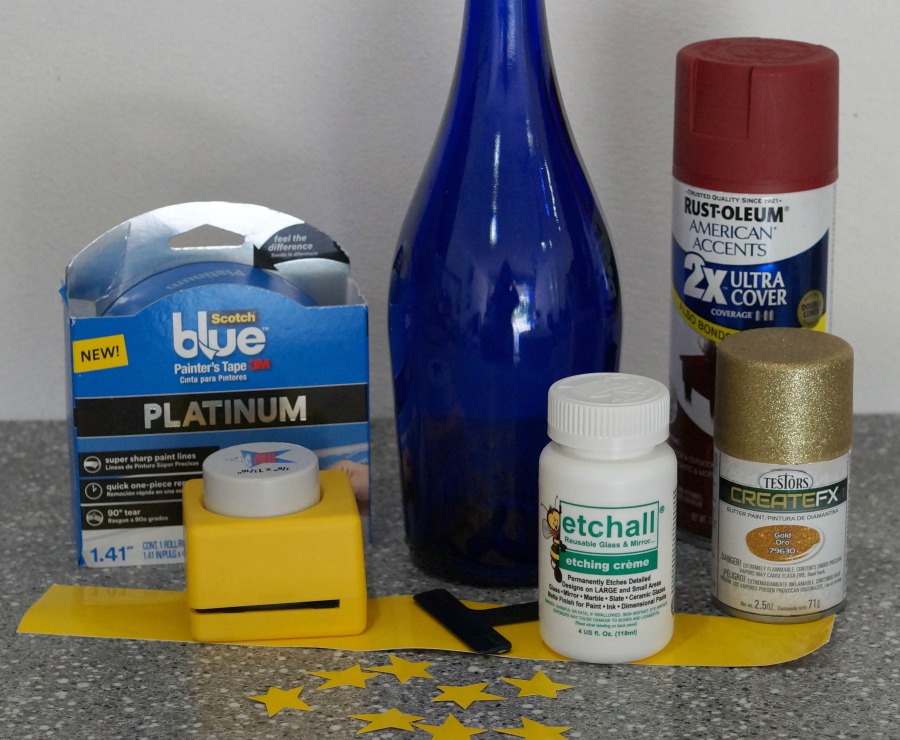
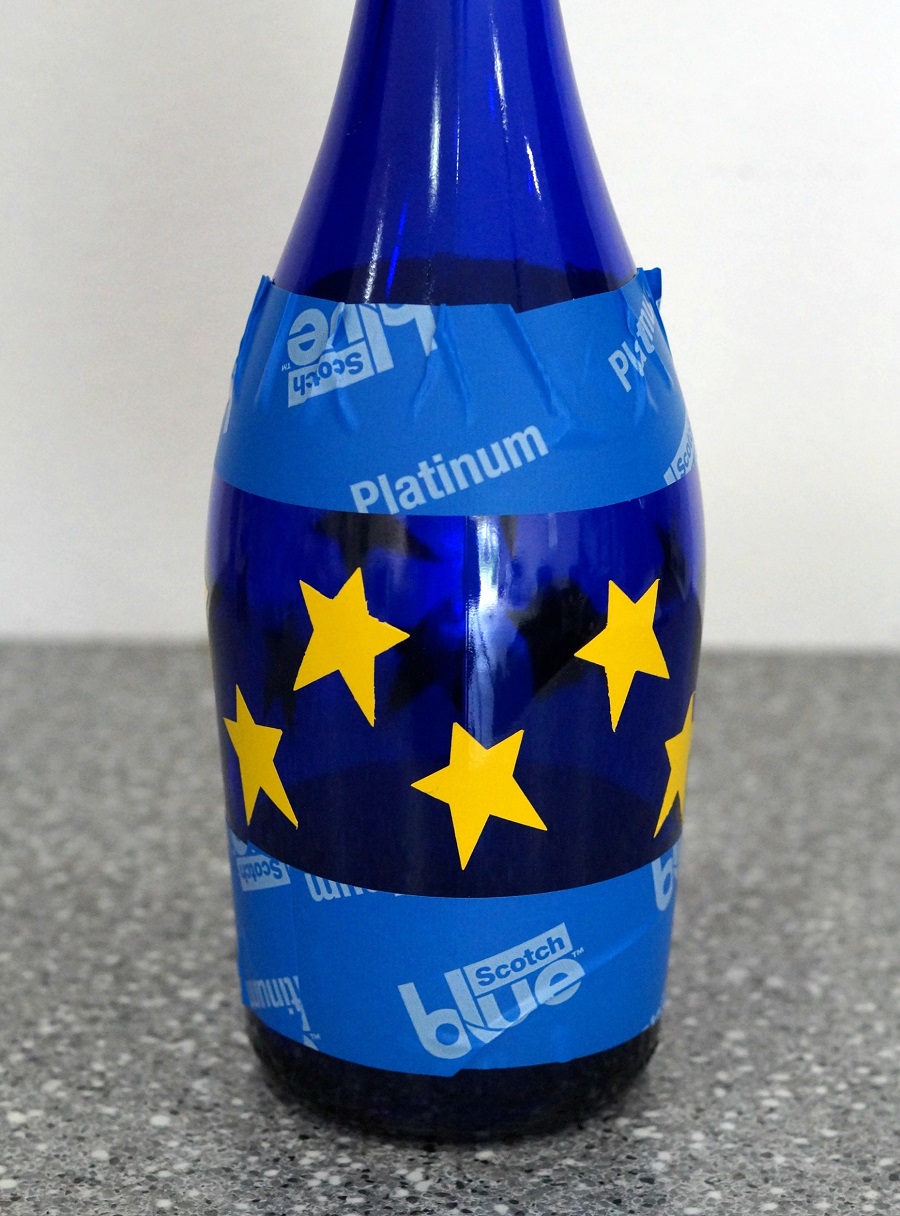
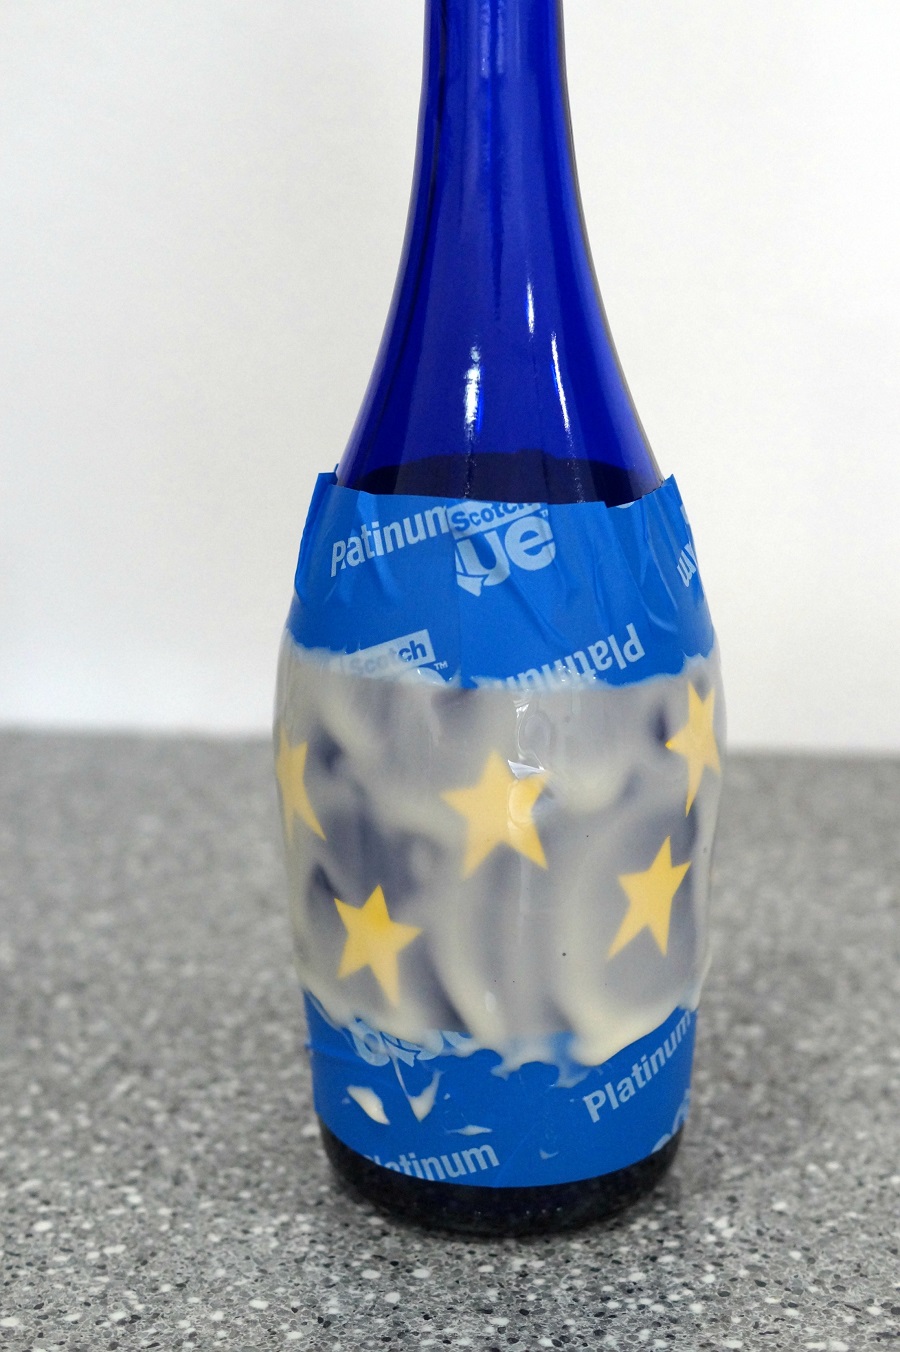
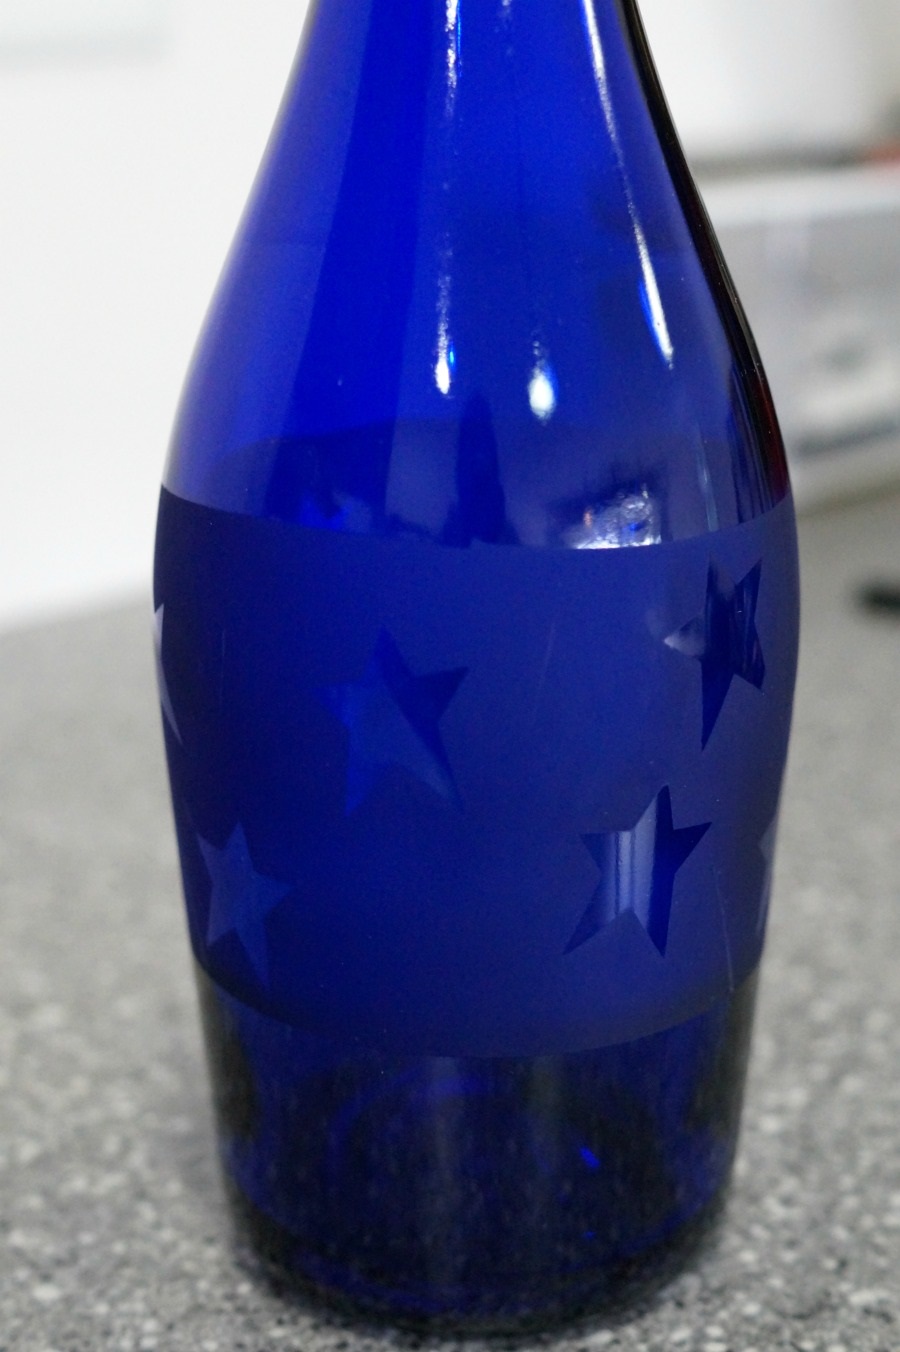
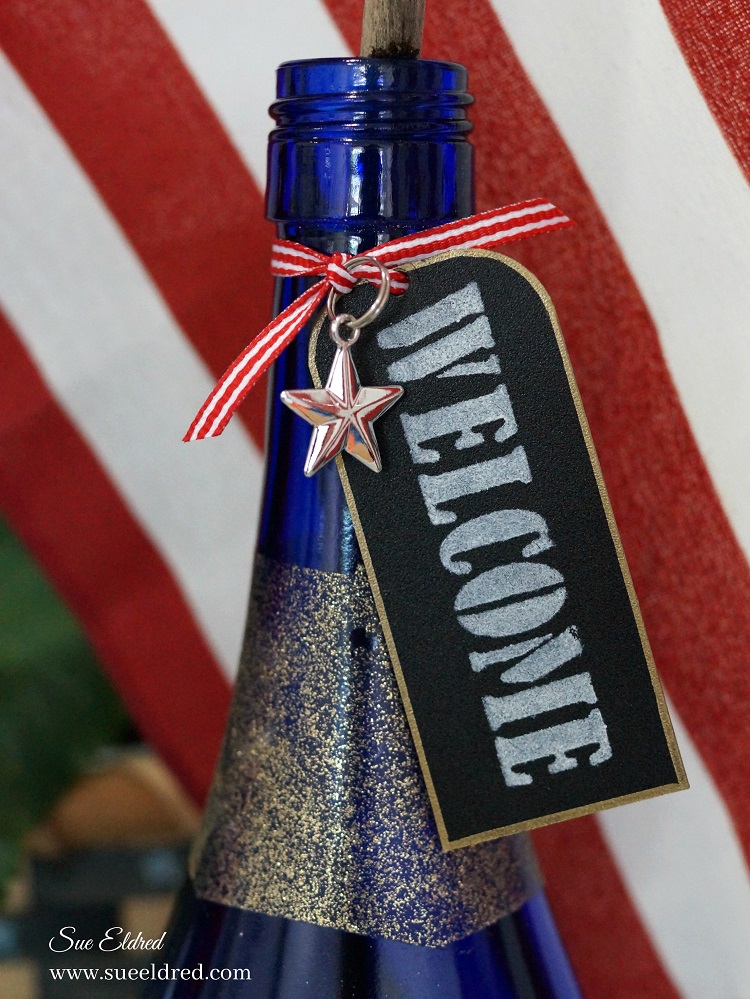
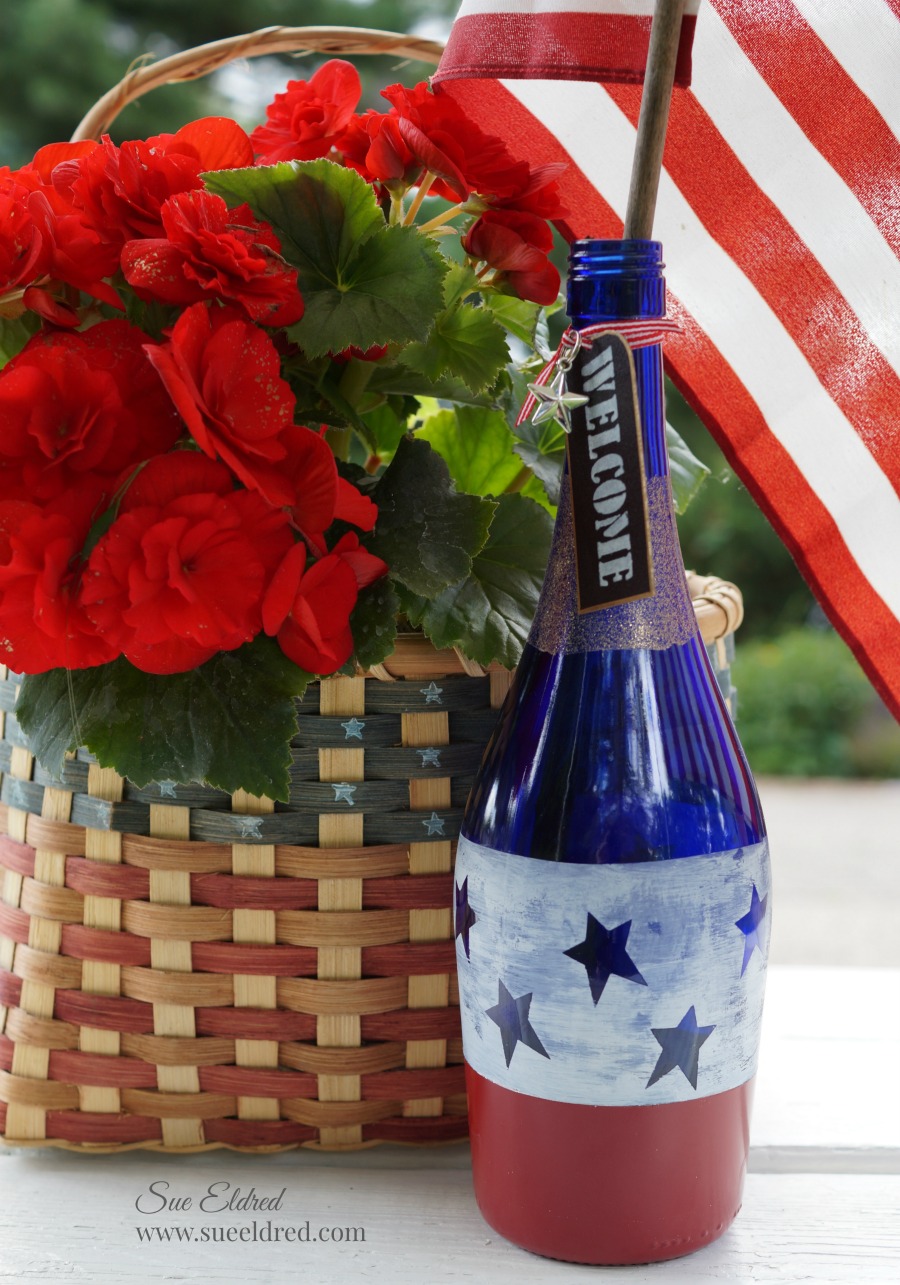
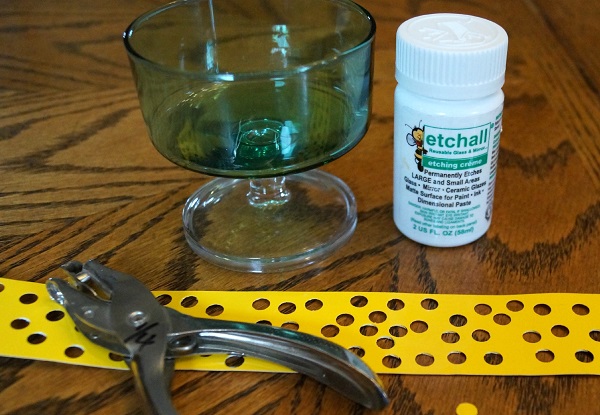
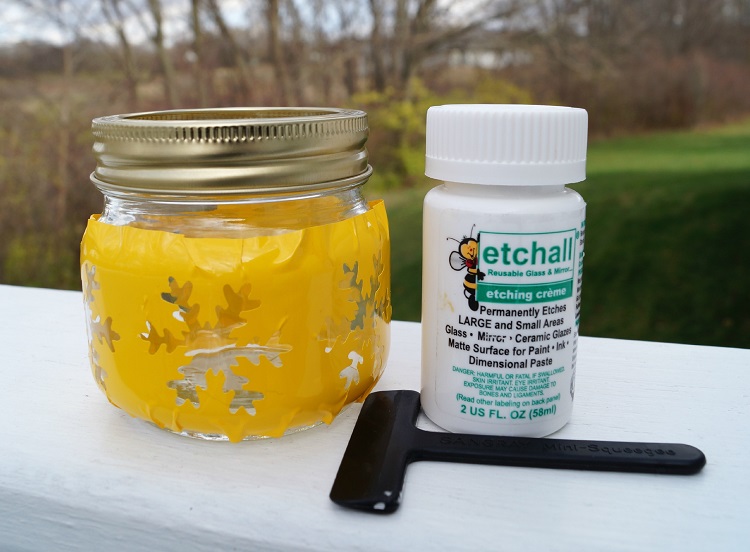
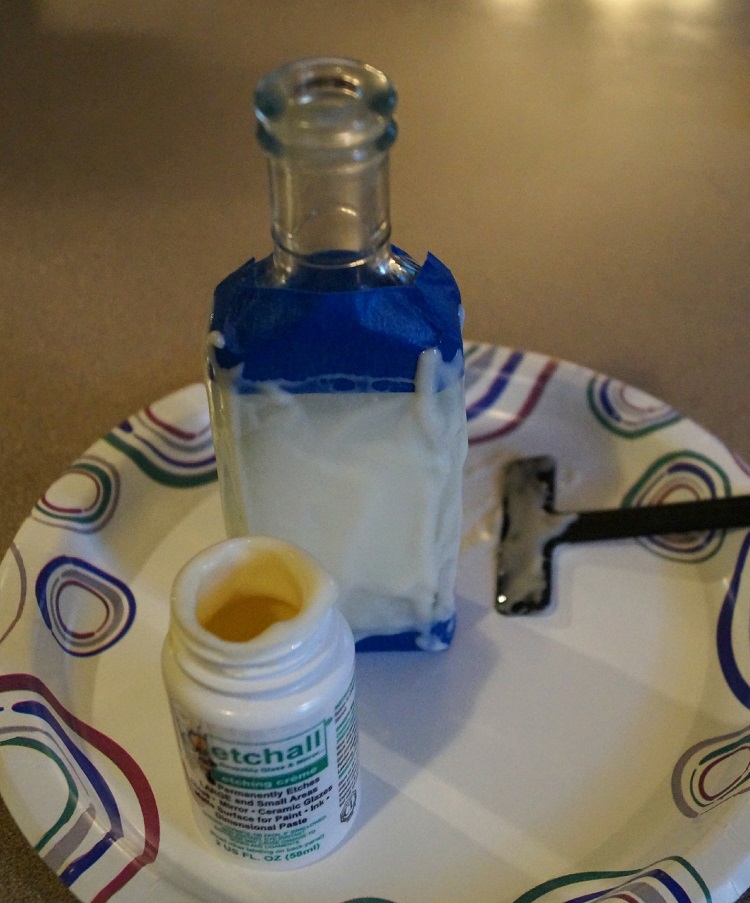
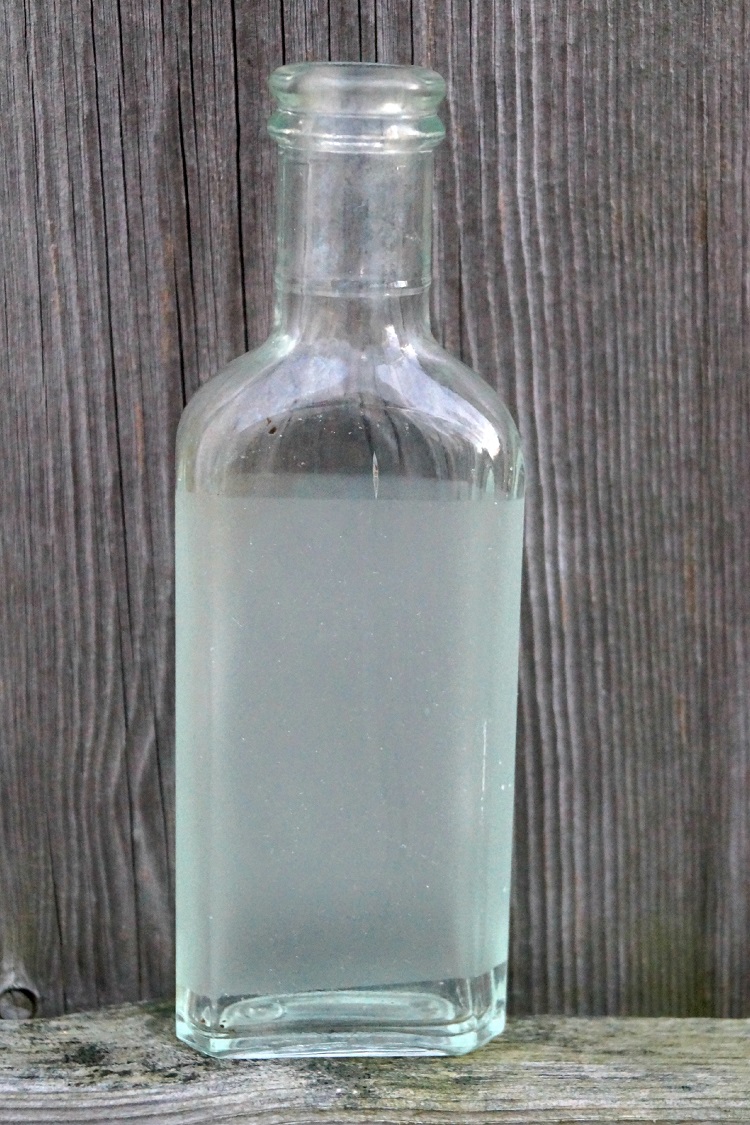
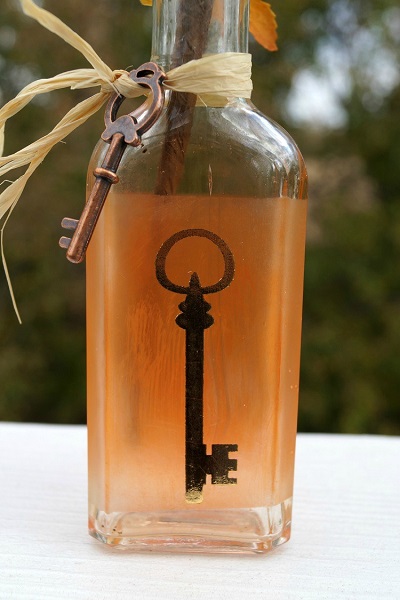
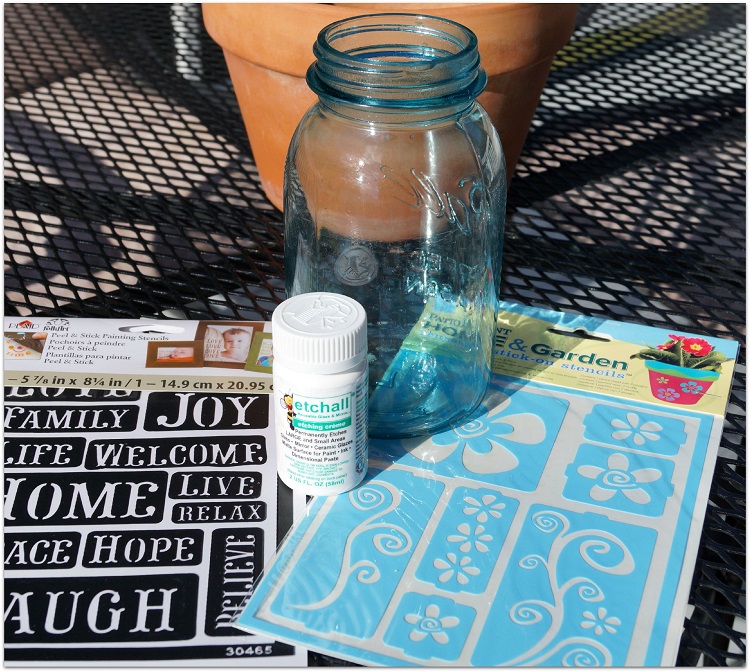
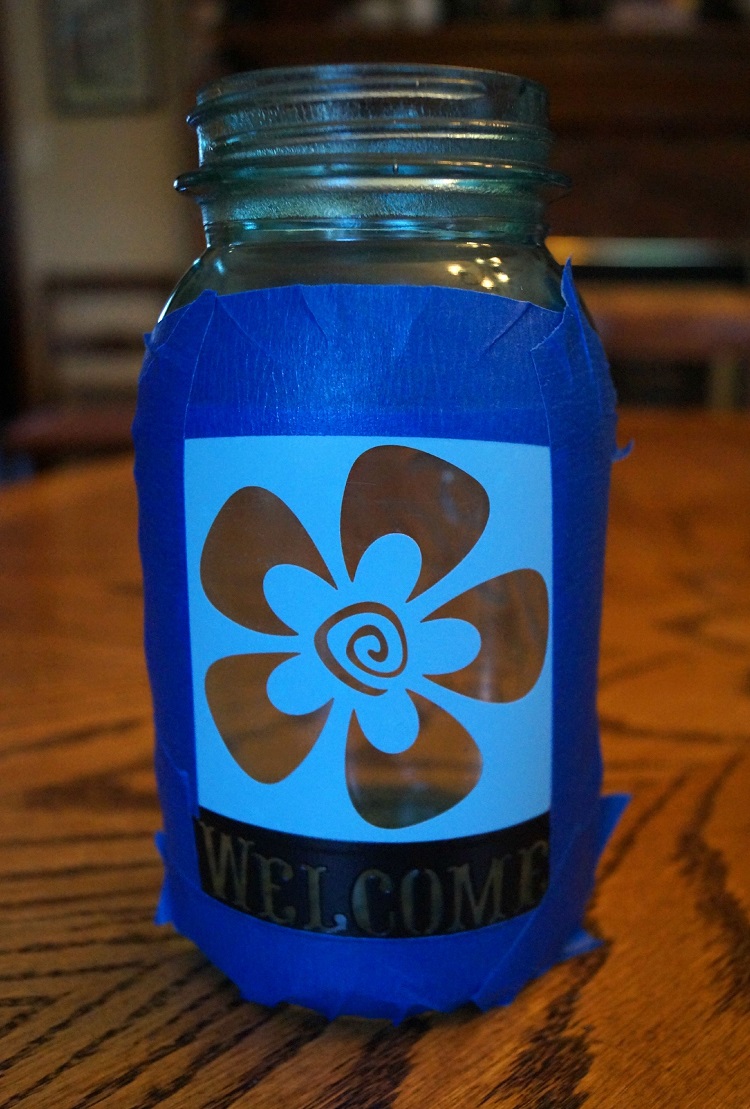
Recycle your old blue wine bottle into a festive display.

Enjoy the party with friends.  (maybe even empty another blue wine bottle)

To make the project… read here.

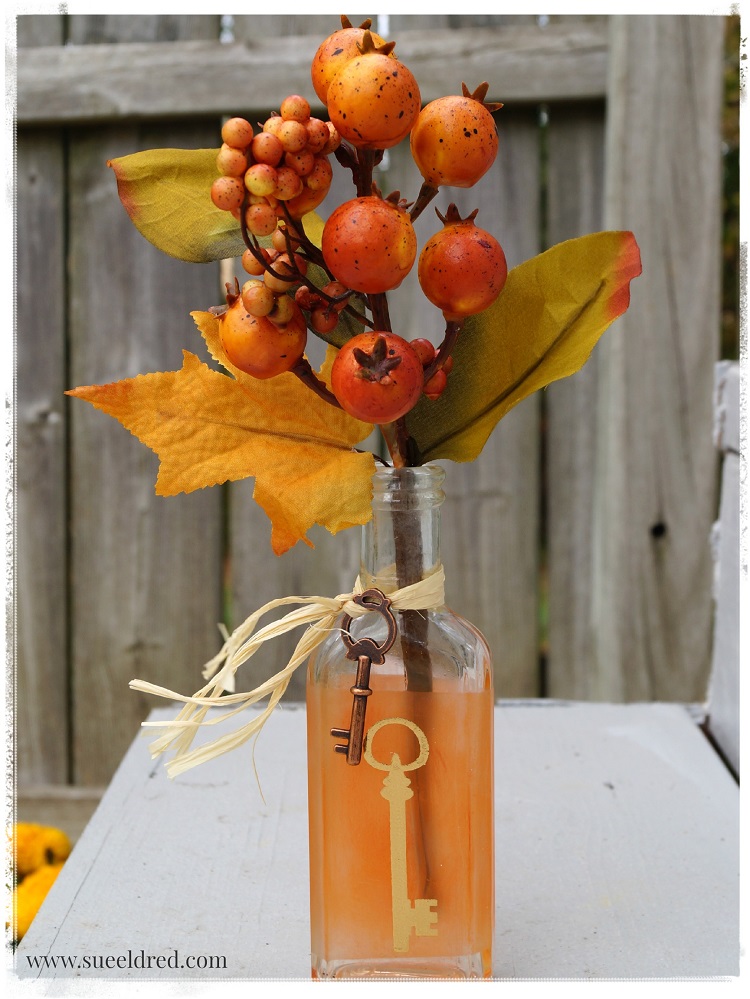
Red White and Blue Table Top Decoration

White picket fences, fireworks and the good old red white and blue. 

A 4th of July Celebration Centerpiece with Fireworks, Flags, Banners and Pinwheels all

rolled into one.     To see how I made it… read more.

Welcome your visitors with an Americana Wreath for your front door.

How to make the Americana Ribbon Wreath

  • I used a 14″ ruled wreath from Smoothfoam.
  • Glue one end of the ribbon down onto the foam wreath and wrap the ribbon tightly around the first section.  Glue second end of the ribbon in place before starting second color. (I used Beacon Fabri-Tac Permanent Adhesive* to glue my ribbon in place.)
  • Using a thin floral wire, wire the small floral stems onto the base of the wreath.
  • Glue larger flowers and leaves onto the wreath over the wire.
  • Add large stemmed butterfly and ribbon to hang.

So many possibilities.

For more information… read more.

Deck out the deck with a fun denim banner made from old jeans.

Got any old worn blue jeans ready to be thrown out?

I started with my old blue jeans and 3″ Iron-on Embroidered Varsity Letters from Joy

in red and blue.

For more pictures and instructions read here.

Shop Dollar Tree for Red White & Blue Party Supplies*                      (*affiliate link)

*Disclosure:  This blog uses affiliate links.  If you choose to make a purchase using one of the links, I receive a small commission (at no additional cost to you) that helps offset the costs of maintaining this blog.  Thanks for your support!


For Creative inspiraton…Make Sure to Follow me.

Shop Your Fav Brands at Scrapbook.com

How to make a Patriotic Red, White and Blue Etched Wine Bottle

Celebrate the holidays with a Red, White and Blue Etched Wine Bottle.

I’m getting ready for a Americana Crafternoon this week-end with a fun group of ladies

and thought I’d make up a few decorations.  As luck would have it, I just happened to

have an empty blue wine bottle.   I thought to myself, that would make a perfect vase.

I added red flowers to a 50 cent Garage Sale-Flag Basket and now I have a festive display.

Shop Dollar Tree for Red White & Blue Party Supplies*                      (*affiliate link)

To make the Red, White and Blue Etched Wine Bottle I used…             (*amazon affiliate links)

Directions:

  1.  Clean and remove the label off a blue glass wine bottle with warm soapy water.  (Dry)


2.  Mask off a 2 ½ to 3 inch section on the center of the wine bottle with blue painter’s tape.  Burnish the edges of the tape with your fingertip, the tape should lay flat against the bottle.

3.  Punch stars out of the etchall etchmask* Remove backing from the stars and stick randomly on the bottle.  Burnish the stars with your fingertips onto the bottle.

4.  Apply a heavy coat of etchall Etching Crème*   onto the bottle using the squeegee.

5.  Let crème sit for 15 minutes.  (You will need to keep an eye on the bottle to make sure etching crème doesn’t run past the blue painter’s tape.)  Scrape excess etching crème from the bottle and return the extra etching crème back into the bottle. It’s reusable.

6.  Rinse bottle with warm water to clean.  Remember to keep crème away from porcelain or ceramic tiles.  Remove tape and stars and dry.  The bottle will have a nice subtle etching.

7.  While I liked the subtle look… I decided I wanted something a little bit brighter for my patriotic bottle.   I dried brushed white acrylic paint over the etched surface.  Wipe off excess paint with a damp cloth for a white washed look.  The paint only sticks to the etched surface.  (How cool it that.)  It really makes the stars pop.

8.  Re-mask the bottle with the blue painter’s tape, this time covering the etched surface.  Paint the bottom of the bottle with the colonial red spray paint.

10.  Mask a small section on the top of the bottle and spray with gold spray paint.

11.  Cut a small black vinyl rectangle and round two of the corners with the corner punch.

12.  Stencil the word “welcome” from the family words stencil onto the black vinyl using a stencil brush and the multi-surface acrylic paint.

13.  Use the gold paint pen to add a thin border around the black vinyl tag.  Punch a small hole on the top of the tag and tie onto the neck of the bottle with ribbon.

Enjoy the party with friends.  (maybe even empty another blue wine bottle)


Don’t Miss a Thing…Make Sure to Follow me.

Shop Your Fav Brands at Scrapbook.com

Disclaimer:  This blog uses ads and affiliate links.  If you choose to make a purchase using one of the links, I receive a small commission (at no additional cost to you) that helps offset the costs of maintaining this blog.  Thanks for your support!


Sue’s Favorite Projects of 2016

best-of-2016

Do you ever wonder which of my projects are my favorite?

Like most DIY people, I try really hard with all (or most all) of my projects…

some of my projects are a hit and some are a miss.

And some are just my favorite…

So… I decided to share them again with you.  (just in case you might have missed one)

Enjoy!

Click on post titles for project instructions

Ad→ CreateForLess.com - Create More, Spend Less

DIY Seashell Lamp

DIY Seashell Lamp 5998

Oh…to be by the ocean listening to the waves and picking up shells.

Lately, I’ve been dreaming of summer vacation and relaxing on the beach.  (it’s my happy place!)

Like most people, I love to walk the beach and collect shells.

During the summer, I like to display my shells in a large clear vase on the mantle.

It reminds me of fun summer family vacations.

Last month, when I received the Lighten Up Kit from Etchall®, I thought…

“wouldn’t it make a cute Seashell Lamp to put on the patio to use on those

warm summer nights?”

I used shells collected during our trips to South Carolina.  (some even from the Isle of Palms)

Lamp Close Up 5992

Here’s what I used to make the DIY Seashell Lamp:        (*affiliate link)

Seashell Lamp Collage 2

The shade measures 4″ x 7″.

Directions:

  1. Clean mason the jar to remove all dirt, fingerprints and oil.  Dry with a coffee filter, paper towel, or lint-free cloth.
  2. Mask off a 1″ area around the mason jar with removable painters tape.
  3. Apply a heavy coat of etchall® etching crème to the masked area using the etchall® squeegee.  Leave etching crème on for 15 minutes.  After etching time has elapsed, use the squeegee to return the crème back into the original container for later re-use.
  4. Rinse etched surface with hot water to remove any remaining crème.  Remember to keep crème away from porcelain or ceramic tiles.
  5. Dry mason jar and apply the “relax” peel and stick stencil onto the middle of the first side.  Mask the sides of the stencil with removable painter’s tape.
  6. Using a stencil brush and the multi surface paint, fill in the open areas of the stencil.
  7. Carefully remove stencil and clean before stenciling on the other three sides of the jar.
  8. Fill Jar with sand and shells.
  9. Using the plastic sleeve template, trace onto a piece of burlap. Cut the burlap leaving a 1/2″ allowance around traced template.  Craft Confession:  I tried using a “stick it adhesive sheet” on the burlap first before cutting it out.  It didn’t work.  (see next step)
  10. Use spray adhesive to coat the back of the burlap.  Apply onto the lampshade and trim.
  11. Glue twine around edge of lampshade.

Optional:  The top of the shade is removable so I spray painted it black.

DIY Seashell Lamp 05959

The Lighten Up Kit is pretty easy to customize.  Lots of possibilities.

It comes with a self-illuminating lampshade with LED lights, template and instructions guide.

It uses 3 AA batteries so it’s portable and can be used almost anywhere.

The DIY Seashell Lamp was created for and sponsored by Etchall®.

Shop Your Fav Brands at Scrapbook.com

*Disclosure  This blog uses ads and affiliate links.  If you choose to make a purchase using one of the links, I receive a small commission (at no additional cost to you) that helps offset the costs of maintaining this blog.  Thanks for your support!

DIY Etching on a Mirror

Etched Mirror 4197

It all started with an inexpensive gold mirror that my daughter didn’t want anymore.

I had spray painted it red and left it like that for a couple of years.  (it was o.k.)

I took it off the shelf, while cleaning the other day, and decided it needed an immediate update.

Of course, I had to stop cleaning.  (when inspiration strikes)

Etched Mirror Collage

This is how I etched my mirror…                                                                       (*affiliate links)

  • I removed the mirror from the frame.  I gave the red frame a light sanding and then painted it with Tattered Angels Decor and DIY Paint, Ebony*.
  • I cut an oval mask using etchall etchmask*  vinyl and centered it on the mirror.  Make sure to burnish the vinyl to get out air bubbles and to make sure the all edges all down.
  • Apply a thick coat of etchall Etching Crème* over the sides of the mirror using the squeegee.  It’s important to get an even coat of etching crème to achieve a consistent even etch.  (remember more is better)
  • Wait 15 minutes.  Scrape excess etching crème from the mirror and return the extra etching crème back into the bottle. (it’s reusable)
  • Rinse mirror with warm water to clean.
  • Remove mask and dry.
  • Return the mirror back into the frame.  Apply the gold “love” rub-on onto the mirror.

Frosted Mirror Close UP 3711

New to Etching?  You might want to check out the video on the Etchall getting started page.

The Etched Mirror project was created for and sponsored by Etchall®.

*Disclosure:  This blog uses ads and affiliate links.  If you choose to make a purchase using one of the links, I receive a small commission (at no additional cost to you) that helps offset the costs of maintaining this blog.  Thanks for your support!

Shop Your Fav Brands at Scrapbook.com

Polka Dot Peppermint Parfait

A Quick and Easy Etched Glass Project

I picked up some sweet green parfait glasses at a estate sale awhile back.

I’ve been wanting to do something special with them and thought they’d look cute

with some polka dots.  (I mean who doesn’t like polka dots?)

The Polka Dot Parfait glass is a project you can make in under a half hour.

*FTC Disclosure… “This is a sponsored post.  I have been provided product and compensation in exchange for my creative ideas.  The views and opinions are my own.”

Here’s what you’ll need:

Shop Your Fav Brands at Scrapbook.com

*Disclosure… This blog uses ads and affiliate links.  If you choose to make a purchase using one of the links, I receive a small commission (at no additional cost to you) that helps offset the costs of maintaining this blog.  Thanks for your support!

etched polka dot parfait with maskEtched Polka Dot Parfait covered with Etching Creme

Directions:

  1. Measure the width of your parfait glass.  Cut the vinyl to fit around glass.
  2. Using a standard hole punch, punch random holes onto the vinyl to create a polka dot pattern.
  3. Wrap the vinyl around the side of the parfait glass.
  4. Make sure to burnish the vinyl to get out air bubbles and to make sure the all edges all down.
  5. Wrap additional areas around the glass with removable painters tape to protect the area from splatters.
  6. Apply a thick coat of Etchall® etching crème over the polka dots using the squeegee.  (more is better)
  7. Wait 15 minutes.  Scrape excess etching crème from the side of the glass and return extra etching crème back into the bottle. (it’s reusable)
  8. Rinse glass with warm water to clean.
  9. Remove Stencil and dry.
  10. Wash glass thoroughly before using.

For a Light and Festive Holiday Treat try adding crushed Candy Canes to vanilla ice cream. 

  • Place ice cream back into freezer to set up.
  • Don’t forget to save some crushed candy canes to sprinkle on top.

Holiday Diamond Art

Etched Snowflake Candy Jar

Quick and Easy Holiday Gift Idea

When it comes to the Holidays I love Quick and Easy Gift Ideas.

For the Snowflake Candy Jar…

I used a small canning jar etched with snowflakes and filled with candy.

It’s a project that I was able to put together in under a half hour.

Snowflake Candy Jar Supplies 1274

To make the Snowflake Candy JAR…                 

  1. Punch a strip of Snowflakes using etchmask™ vinyl and a snowflake punch.
  2. Carefully cover the jar with the vinyl.
  3. Make sure to burnish the vinyl to get out air bubbles and to make sure the all edges all down.
  4. Apply a thick coat of Etchall over the snowflake cut out using the squeegee.
  5. Wait 15 minutes.  Scrape excess etching crème from the side of the jar and return extra etching crème back into the bottle. (it’s reusable)
  6. Rinse jar with warm water to clean.
  7. Remove Stencil and dry.
  8. Add adhesive rhinestones to the center of each snowflake.
  9. Wrap craft stem around the neck of the jar and glue on a red button.

Snowflake Candy Jar Covered 1287

  • Cut a small circle from decorative scrapbook paper and adhere to lid of the jar.
  • Embellish jar with greenery stem, jingle and bow.

Snowflake Candy Jar 1472

   This would make a great Teacher, Hostess, Bunco, or Gift Exchange Gift.

This project was created for and sponsored by Etchall®.


Don’t Miss a Thing…Make Sure to Follow me.

Shop Your Fav Brands at Scrapbook.com

Disclaimer:  This blog uses ads and affiliate links.  If you choose to make a purchase using one of the links, I receive a small commission (at no additional cost to you) that helps offset the costs of maintaining this blog.  Thanks for your support!

Try Amazon Prime 30-Day Free Trial

Etching for Fall

I picked up this very old bottle at a yard sale…

The story with this bottle is that the guy bought a collection of old medicine bottles from the

early 1900’s that came from the old Bartonville State Mental Hospital.

If your not from around here, rumor is, the old State Hospital is haunted.

I believe the show “Ghost Hunters” did an episode there.

So… that and the fact that it was only $2.00 had me intrigued.

The old bottle was in rough shape.

When I tried removing the cork, it pretty much disintegrated on the spot.

tape bottle and etchall creme 9950 Etched Bottle 9970

To breath new life into the old bottle… 

I masked the top and the bottom of the bottle with removable painters tape and added

a thick coat of etchall Etching Creme*.  (*affiliate link)

After waiting 15 minutes, I removed the excess etching crème and put the excess back

in the container.  I rinsed the bottle with warm water and let dry.

(make sure to read the instructions on the bottle of etching crème.)

To give the bottle a little Fall color…

I used a StazOn Ink Pad, Orange Zest* and rubbed the ink over the bottle.

The ink only adheres to the etched area.

To finish the look, I added a rub-on decoration to the front of the bottle with

a little raffia and key around the neck.

A new look for a very old bottle.

This project was created for and sponsored by Etchall®.

Disclaimer:  This blog uses ads and affiliate links.  If you choose to make a purchase using one of the links, I receive a small commission (at no additional cost to you) that helps offset the costs of maintaining this blog.  Thanks for your support!

Join Amazon Kindle Unlimited 30-Day Free Trial

Etched Family Frame

Etched Family Frame 09191

Whenever I get a chance…

Whenever they’re all home together…

I try to get a family picture.

It only seems to happen a few times per year.

When we’re all together, there’s so much excitement, talking and laughter that I  forget.

Like this summer, after swimming and naps….

I set up the tri-pod, gathered the kids and set up the self timer.

(it’s always good for a few laughs)  All 18 eyes were open,

all those who were running away were captured and everyone was looking.

Phew… not an easy task.  But always worth it in the end.

It was starting to get dark, so the picture’s not as clear as I’d like it.

I decided to print it in black and white and put it in a simple black frame.

Family close up 09196

To capture the sentiment of the picture I etched the word “family” on the glass.

Etched Frame Supplies 08943

Etched Family Frame Products Used:               (*affiliate links)

Directions:

  1. Remove glass from frame.  Clean glass to remove all dirt, fingerprints and oil.  Dry with a coffee filter, paper towel, or lint-free cloth.
  2. Apply “Family” stencil to glass.  Burnish the edges of the stencil.  You want to make sure no edges are coming up.
  3. Mask around the stencil with removable painters tape for extra surface protection.
  4. Apply a heavy coat of etchall® etching crème to the masked area of the stencil.
  5. Leave etching crème on design for 15 minutes.  After etching time has elapsed, use the squeegee to return the crème back into the original container for later re-use.
  6. Rinse etched surface with hot water to remove any remaining crème. Remember to keep crème away from porcelain sinks or ceramic tiles.
  7. To make the etched letters stand out more, apply picket fence distress paint over the letters.  Wipe surrounding area of the glass clean.

Poof and he's gone

and for your viewing pleasure…

Shop Your Fav Brands at Scrapbook.com

*Disclaimer:  This post uses ads and affiliate links.  If you choose to make a purchase using one of the links, I receive a small commission (at no additional cost to you) that helps offset the costs of maintaining this blog.  Thanks for your support!

Try Amazon Prime 30-Day Free Trial

How to Etch a Mason Jar…

I love the look of daisies in old blue canning jars.  It just says summertime.

It’s simple, beautiful and it makes me happy.

I recently got the opportunity to work with a new product, etching crème from Etchall®.

While looking around for something to etch, I noticed the daisies sitting on the table.

Hmmm…Wouldn’t that look great with a etched flower and a greeting?

It’s a super simple project.  (just how I like it)

Here’s what you’ll need:                                   (*affiliate link)

Shop Your Fav Brands at Scrapbook.com

Directions:

  1. Clean jar to remove all dirt, fingerprints and oil.  Dry with a coffee filter, paper towel, or lint-free cloth.
  2. Apply Stencils to jar.  Burnish the edges of the stencil.  You’ll want to make sure no edges are coming up.
  3. Mask around the stencil with removable painters tape for extra surface protection.
  4. Apply a heavy coat of etchall® etching crème to the masked area of the stencil.
  5. Leave etching crème on design for 15 minutes.  After etching time has elapsed, use the squeegee to return the crème back into the original container for later re-use.
  6. Rinse etched surface with hot water to remove any remaining crème. Remember to keep crème away from porcelain sinks or ceramic tiles.

Mason Jar with Stencils 8839Mason Jar with Stencils and Masks 08841Mason Jar with Etching Creme 8842

             Step #2                                        Step #3                                      Step #4

The etched flower looks subtle against the water in the blue jar.   

“This is a sponsored post.  As a member of the Etchall Design Team I have been provided product and compensation in exchange for my creative ideas.  The views and opinions are my own.”

Join Amazon Kindle Unlimited 30-Day Free Trial

Disclosure:  This blog uses ads and affiliate links.  If you choose to make a purchase using one of the links, I receive a small commission (at no additional cost to you) that helps offset the costs of maintaining this blog.  Thanks for your support!


Don’t Miss a Thing…Make Sure to Follow me.