How to Make a Snowflake Hair Bow

Snowflake Bow 2047

To make my Snowflake Hair Bow you’ll need:

Snowflake Box Supplies

Supplies Needed:

Putting together the pieces 2070

Directions:

  1. Cut four 4″ pieces of 7/8″ Tranquil Blue Ribbon and four 4″ pieces of the Arabesque Ribbon.
  2. Remove wire from the Arabesque ribbon.  (white sheer)
  3. Cut four 3 1/2″ pieces of 3/8″ Tranquil Blue Ribbon and four 3 1/2″ pieces of Navy Satin.
  4. Thread needle and thread, tie with a knot leaving a long tail.
  5. Lay the 4″ white sheer ribbon over the 7/8″ Tranquil Blue Ribbon, fold the ribbon in half and stitch together with a simple running stitch.
  6. Lay the 3 1/2″ Navy Ribbon over the 3/8″ Tranquil Blue ribbon, fold the ribbon in half and add with a simple running stitch to the first section of ribbon.
  7. Continue stitching ribbon sections together.  (as shown in the picture above)
  8. Gather both ends of the thread, pull the ribbon together and tie with a knot.
  9. Cut eight 4″ of Arabesque sheer ribbon.  Remove wire from ribbon.
  10. Stitch ribbon together like in previous steps.  (see steps 6-8)
  11. Glue the two ribbon sections together with Fabri Tac glue.  (see picture below)
  12. Lightly apply blue ink onto white snowflake brad.  Wipe off excess ink.
  13. Remove prongs from the back of the snowflake brad and glue onto the white button.
  14. Glue button to the center of the bow.
  15. Glue or sew bow onto the metal barrette base.
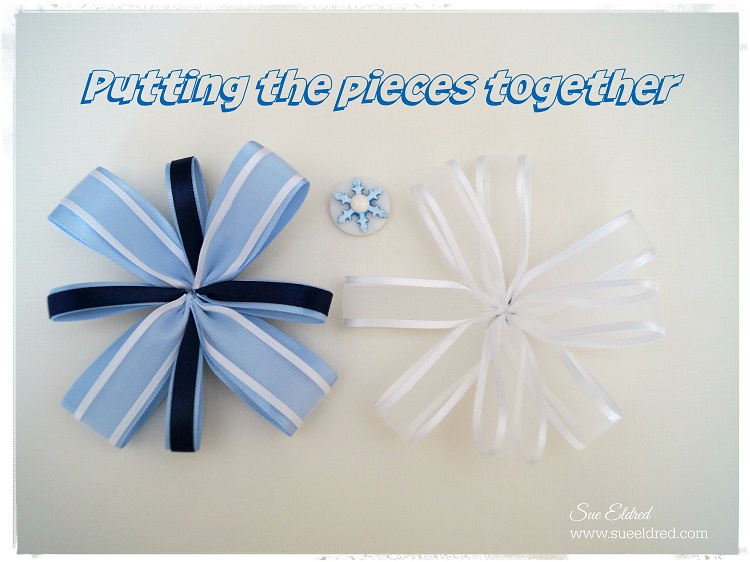
Putting the pieces together 2038

Offray Logo

I would like to thank Offray Ribbon for generously providing the ribbon used in this project.

This project uses Amazon Affiliate links.  If you choose to purchase an item from Amazon from this link, I receive a small commission that helps defray the cost of running this blog.

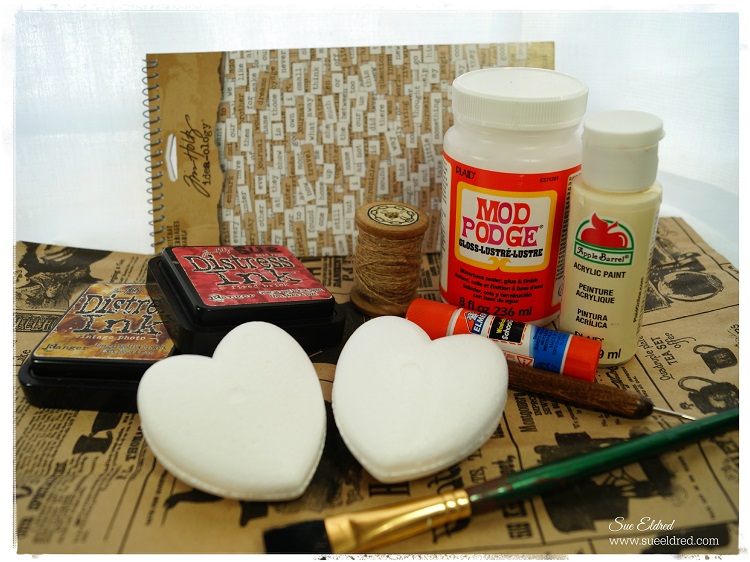
Vintage Inspired Hearts

 When we think Valentine’s Day we think hearts, right?

These DIY vintage hearts would also make a sweet gift for a special friend

or they could be used as a decoration in a vintage inspired wedding centerpiece.

Hearts are not just for Valentine’s Day.  

 How to make Vintage Inspired Hearts                    (*affiliate link)

*Disclosure:  This blog uses affiliate links.  If you choose to make a purchase using one of the links, I receive a small commission (at no additional cost to you) that helps offset the costs of maintaining this blog.  Thanks for your support!


Directions:

  1. Cover Smoothfoam Heart with Newsprint paper using glue stick.
  2. Apply a thin coat of cream acrylic paint over heart.  Wipe off excess.
  3. Add Fired Brick Ink to heart using the ink applicator.  Accent the edges of the heart with the Vintage Photo Ink.
  4. Stick small word stickers onto center of heart.
  5. Apply mod podge over heart for added shine.

To make the heart an ornament:

  1. Poke a small hole into the top of the heart.
  2. Fold a 6″ piece of twine in half, thread bead onto twine.  Knot on both sides of the bead to keep in place.
  3. Add small dab of craft glue into hole and insert loose ends of twine.

“This is a sponsored post.  As a member of the Smoothfoam Design Team, I have been provided product and compensation in exchange for my creative ideas.  The views and opinions are my own.


Vintage Frame Project (aka Plan B)

I woke up pretty darn proud of myself today.  All I had to do was put the final coat of wax

on my project and then “Wow” you with the finished masterpiece.

I even had a catchy title for the post called “When Procrastination Pays Off”.

I even took a picture of the pieces beforehand.

I was confidentially prepared for the win.  (you know, my awesome blog post)

Vintage Frame Project Supplies

Some may call me a procrastinator….

I like to wait until inspiration strikes.

Here’s the way I think…

The other evening, I received some awesome paint from the good people at Plaid.

I had this old frame that I picked at a garage sale last May for a quarter, an old needlepoint

tapestry that I made (um-hum) 25 years or so ago, old sheet music and a coupon for Jo-Ann’s

for framing.  All of a sudden I needed to use that frame.

The original plan was to have Jo-Ann Fabrics frame the tapestry and then see if I could purchase

glass and a mat for the frame.

(Side note:  Just because you have a framing coupon doesn’t mean your Jo-Ann’s have a frame shop)

So…the next stop, the hardware store for a $5 piece of glass.

How hard could it be?  I don’t need professional framing.  I can do it myself.

I guess I should of seen the sweat off the old man’s brow as a sign

that I was in for more than I could chew.

Last night I sanded, painted and distressed.  The frame looked lovely.

Today a coat of clear wax, wait an hour, then buff.

Armed with chipboard, tape, flat head screwdriver, old tapestry and good intentions

I went on to finish my masterpiece.  Only one problem… it didn’t fit.

The needlepoint tapestry was too fat for the frame.  (I didn’t see that one coming.)

So… on to “Plan B”.

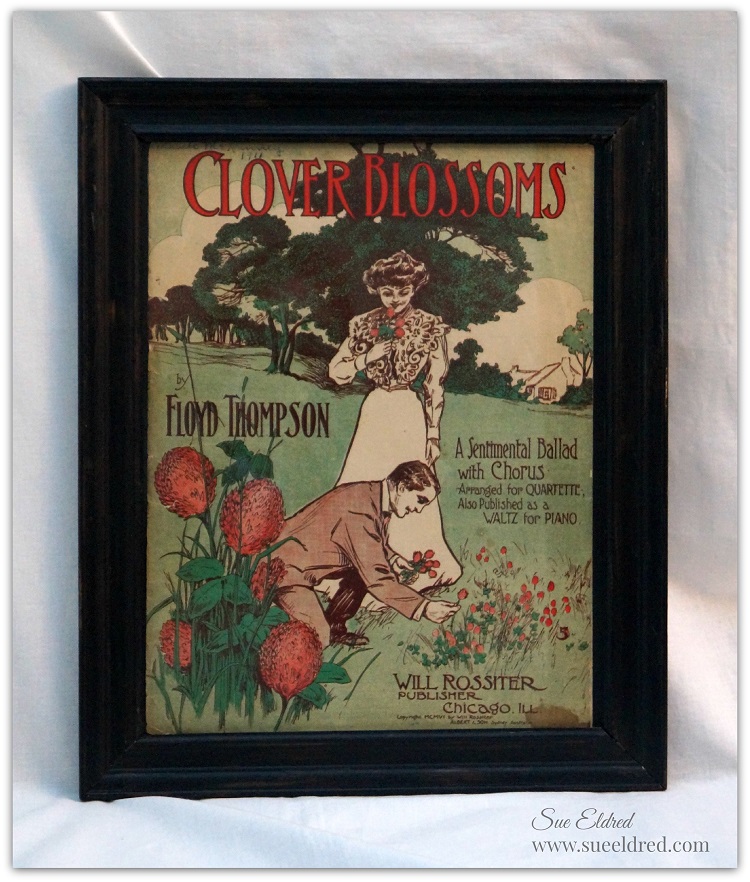
Framed Clover Blossoms

I decided to stick the Vintage Sheet Music in the frame instead.  (maybe it’s really Plan A?)close up of distressed frame

Seriously, I love this chalk paint from Plaid.  (Did you happen to notice the date on the sheet music?)

tapestry

I guess I’ll leave this wonky shaped tapestry for the professionals.  (Michael’s here I come.)

from Drab to Fab: My Perfect Planner

Sue's 2015 Planner 1049

Every year around this time, I start searching for the perfect planner.

My sweet husband even picked up a couple of planners for a Christmas gift.

I’m really picky and he knows my requirements.  They came with the receipt and a disclaimer.

After taking one of the calendars back, I picked up a third one just in case.

I like to keep my options open before committing to something as important as a yearly planner.

After forgetting to pick up hairspray during our last trip to Walmart,

my husband volunteered to take the groceries to the car and pick me up at the door if

I went back and got it.   (after all, it was for him)  Besides it was really cold.

Anyway… on my way back to get the hairspray I ran across a huge display of

very cheap inexpensive planners for only $1.00.  Eureka!

Finally… exactly what I was looking for.

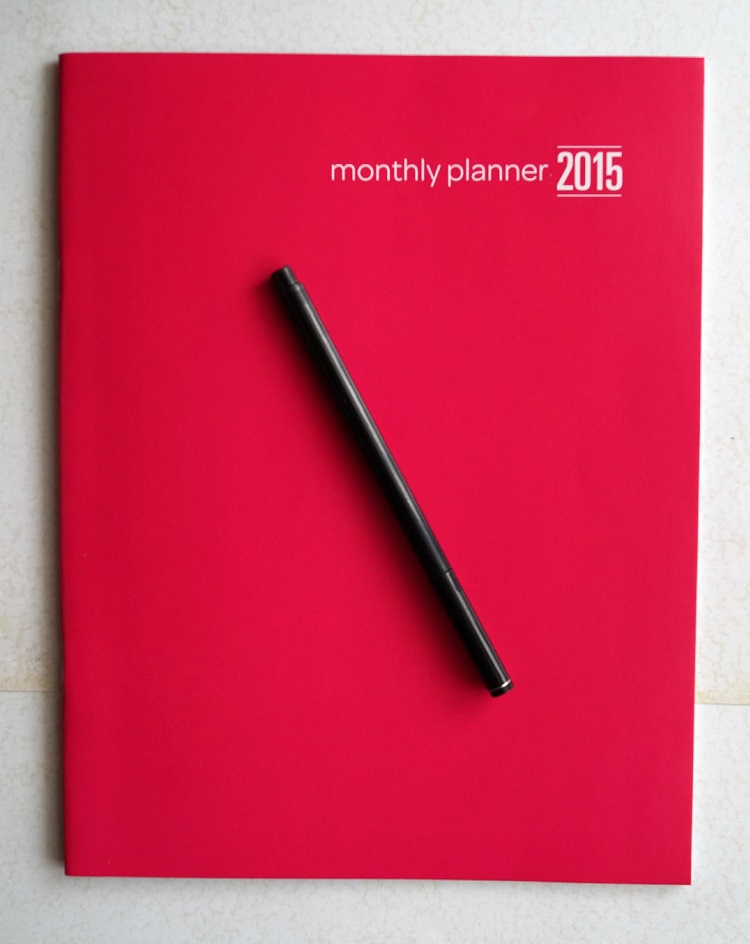
A month at a glance, thin, big enough space for writing, with lines planner.

Plain 2015 Planner

The colors were bright, but, I knew that didn’t matter.  It was perfect for decorating.

And… better yet, it came with a clear protective cover.

With the help of some scrapbook paper and stickers, I just happened to have on hand,

I now have the perfect planner.

From Drab to Fab, Cheap to Designer.  I love it and I couldn’t be happier!

On a Side-note:  I showed my husband my fabulous creation and he wasn’t nearly as

amazed as I thought he would be.  (go figure!)

Joy Tag with a Cool Metal Foil Technique

Impress your friends with an Easy and Elegant Metal Foil Tape project.

I love this technique and thought you might as well.

Start with a small piece of matboard or chipboard approx. 2″ x 2 1/2″ and chipboard letters spelling the word “Joy”.

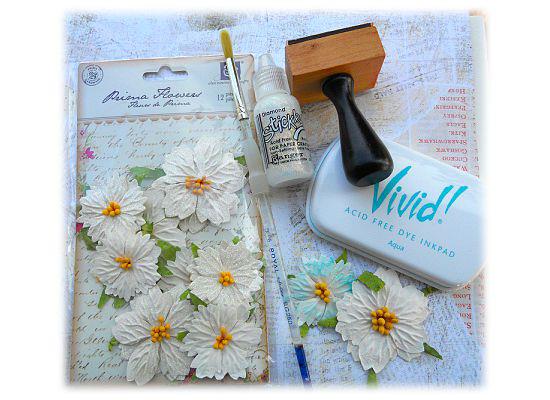
Joy Tag products used:            (*amazon affiliate link)

*Disclosure:  This blog uses affiliate links.  If you choose to make a purchase using one of the links, I receive a small commission (at no additional cost to you) that helps offset the costs of maintaining this blog.  Thanks for your support!

Shop Your Fav Brands at Scrapbook.com

Directions:

1. Glue letters onto the small chipboard with Beacon Adhesives Zip Dry Paper Glue*.
2. Apply Aluminum Foil Tape* over chipboard. I make the chipboard slightly smaller than the tape so that I don’t have any seams.
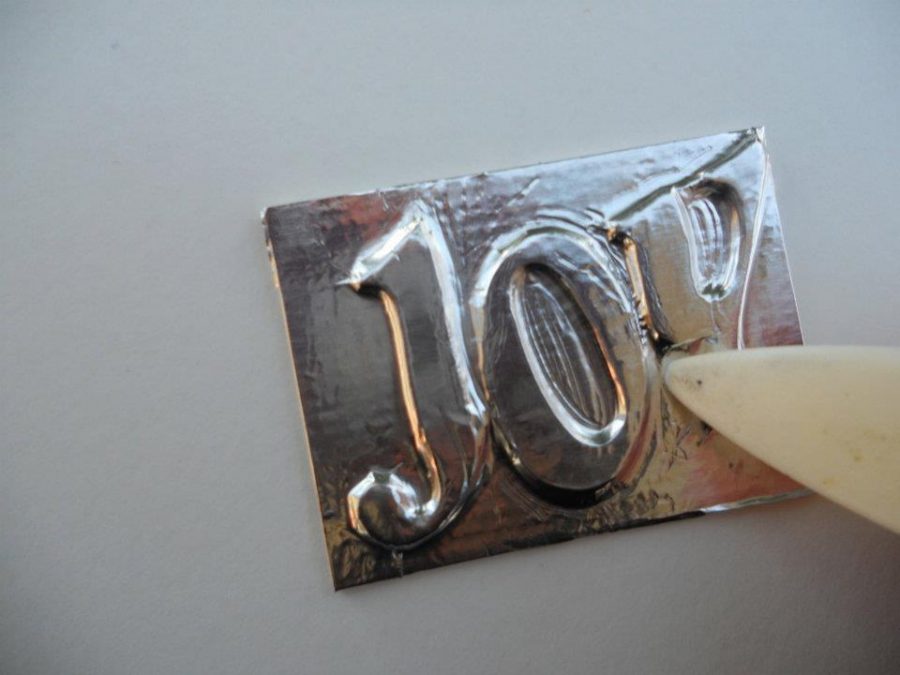
3. Using the bone folder, gently go around each letter to bring out the detail.

4. Paint the background with the paint pen. To give it a snowy affect, when
giving a second coat of paint, dot the paint with the tip instead of brushing.
5. Use the pale blue pen to color the letters. Allow both colors to thoroughly
dry.
6. Using a sanding block, lightly sand the letters and edges of the chipboard.
7. For a finishing touch, paint the letters with stickles glitter glue.

The tag also uses:
Prima Flowers (Holiday Celebration Snow Drop)
Vivid Ink: Aqua
Ink Blending Tool*
Scrapbook Paper
Cardstock
Corner Punch, Rounded*
1/8 Inch Round Hole Punch*
Lace, Silver Ribbon and Small Flat Snowflake Ornament
Silver Greenery

Shop Amazon Scrapbooking Supplies*

Christmas Ornaments from Old Kitchen Hardware

Old Kitchen Hardware

I picked up a bag of old kitchen hardware for 50¢ at a Garage Sale.

I can’t resist a good bargain and knew I might even use them someday.

After disassembling and using them on a couple of projects,

I put the rest in a container high on the shelf for another day.


I ran across them again the other day and had an idea…

How would they look with cream spray paint?

I knew I was onto something and let the idea marinate in my head for a day or two.

This is what I came up with and I’m pretty happy with the results.

Shabby Chic Orn 86

For my Ornament:

  • Paint the base plate from old kitchen hardware with cream spray paint.
  • I added silver around the edge using my finger tip and paint from a  Chisel Point Pen Tip Calligraphy Paint Marker, Silver*    (affiliate link)
  • Remove the small wooden base from a small bottle brush tree.  With small pliers bend the remaining wire tip up into the tree.
  • Cut the back of the bottle brush tree to make it flat.
  • Glue tree in place with Beacon Adhesives Zip Dry.*
  • For a little extra sparkle, I rubbed clear glitter glue into the bristles of the tree.  Glue pearl beads and place directly into tree.
  • On the top of the ornament I used a piece cream twill ribbon with an inexpensive plastic star ornament on a silver jump ring.  Tied it in place with a piece of burlap twine and small cream button.
  • I added a silver jingle bell that I painted and distressed with sandpaper and tied on with a satin ribbon.
  • Place the word sticker onto a thin piece of chipboard, trim around sticker, lightly sand the edges for a distressed look and glue into place.

Berry Ornament 91

Here’s a simpler idea.  I love this one too.

I bet your going to start rummaging through that junk drawer in the garage and see what you can find.

Shop Amazon Scrapbooking Supplies*

*Disclaimer:  This post uses ads and affiliate links.  If you choose to make a purchase using one of the links, I receive a small commission (at no additional cost to you) that helps offset the costs of maintaining this blog.  Thanks for your support!

Updated… A New Look for an Old Snowman

Updated Sock Snowman

Last year at my Holiday Workshop we made cute little snowmen out of socks.

They were a big hit.

But… one thing, I noticed when I pulled mine out again this year,

was that they looked a little misshapen.  More like a kidney bean than a snowman.

That was because I used rice for the entire body.  (the rice settled)

My updated snowmen still uses rice in the bottom, it now has fiberfill in the top

so that it doesn’t loose its shape.

I also decided my Snowman was cold, so I re-purposed an old sock for his sweater.

For more Making More Sock Snowmen Ideas you can find them here.

Here’s What You’ll Need:                    (*affiliate Links)

Here’s how I made my Snowman:

  1. Tea dye a new white sock, crew length or bigger.  Or if you have boys you could use one of their dingy ones.  (It’s better not to use a sock with the grey toe and heel.)
  2. Cut the top of the sock off, right around the heel.  (save that for the hat.)
  3. Turn the sock inside out and attach a rubber-band tightly around the top of the sock.  Because rubber bands wear out with time, I added a good squirt of Fabri-Tac Permanent Adhesive* (*affiliate link) in and around the rubber band.  (I left the rubber band on)
  4. Turn the sock right side out and fill sock about 1/2 way with rice.
  5. Fill the remaining portion of the sock with Fairfield Poly-Fil Premium Polyester Fiber*
  6. Use an additional rubber-band to close the sock.  Again, I re-enforced the rubber band with glue.
  7. Tie a piece of twine around sock to create the head.
  8. I used mini black square brads for his eyes, the tip of a bamboo skewer colored orange for his nose and a simple sewn black thread for his mouth.
  9. I used some paper craft sprays to add color to the toe of the sock.  I tied the tip with a piece of red and white twine and finished with a bow.  Roll the edge to create a cuff.  I glued my hat to the top of my snowman with Fabri-Tac Permanent Adhesive*(*affiliate link)
  10. Dress with Snowman with part of an old sock.  Add a couple of buttons for added detail.  A  fringed piece of fabric works great for the scarf.

Shop Your Fav Brands at Scrapbook.com

Disclaimer:  This blog uses ads and affiliate links.  If you choose to make a purchase using one of the links, I receive a small commission (at no additional cost to you) that helps offset the costs of maintaining this blog.  Thanks for your support!

Give the Gift of Amazon Prime*

Handmade Holiday: Sew Simple Snowflake Pillow

One of my favorite things to do during the holidays (besides eating Christmas cookies)

is to make things to decorate my home.  My snowflake pillow is a simple sewing project

that makes a warm and cozy winter accent.

You can leave this pillow out long after the holidays are over.

For my Snowflake Pillow I used:                     (*affiliate link)

Directions:

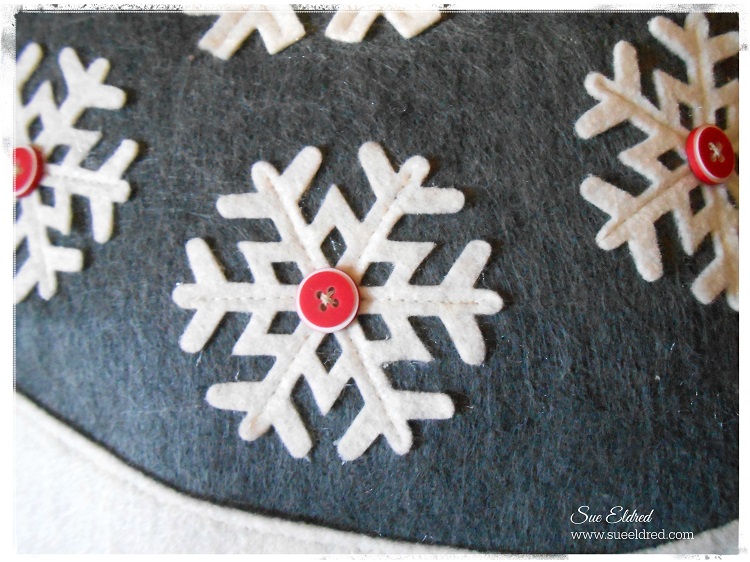
  1. Cut a 4″ x 12″ wavy piece from the cream felt.
  2. Add a small amount of Fabri Tac Glue on the back of the cream felt to keep it in place before sewing.  Place that piece 1/2″ up from the bottom of the grey 13″ piece of felt.
  3. Glue Snowflakes in place.  Hand sew the red buttons in the center.
  4. Machine sew around outer edges of the large cream piece.
  5. Machine sew between each of the snowflake arms.
  6. Turn felt pieces right sides together and sew with a 1/2″ seam allowance.
  7. Leave a 3″ opening at the bottom to add fiberfill.
  8. Turn pillow back around and stuff with fiberfill.
  9. Hand sew the pillow closed.

FYI…You can find die cut snowflakes in my Etsy Shop.

Thanks to the generous folks at Fairfield World for supplying the Poly-Fil.

*Disclaimer:  This post uses ads and affiliate links.  If you choose to make a purchase using one of the links, I receive a small commission (at no additional cost to you) that helps offset the costs of maintaining this blog.  Thanks for your support!

Try Amazon Prime 30-Day Free Trial

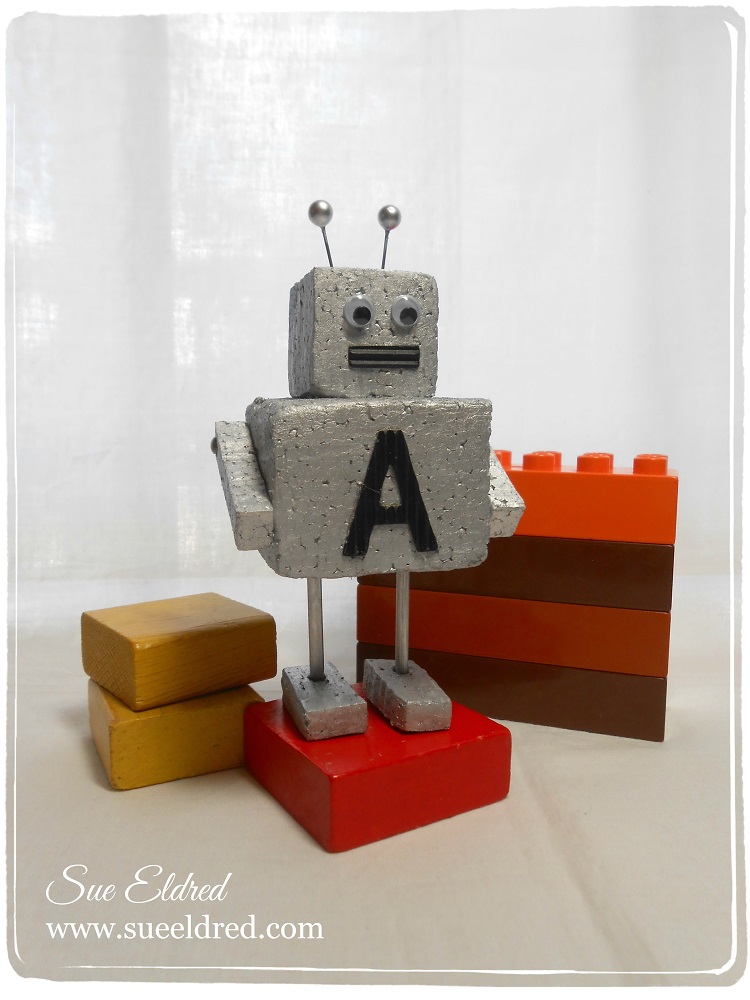
A is for Alex

Sue Eldred's Mini Robot made with Smoothfoam July 2014

I recently got the privilege of attending my sweet nephew Alex’s first birthday.

Since the party was a Robot theme…

I decided to make a Mini Robot out of Smoothfoam to decorate his present.

Supplies Used for make the robot:          (*affiliate link)

  1. Trim out 6 pieces from the Smoothfoam block with the wire cutter as shown for a body, head, arms and feet. Paint all pieces silver and let dry.
  2. Paint a wood skewer silver and cut into two pieces for the legs. Insert between the body and feet with a few drops of glue to secure.
  3. Glue the head and arms to the body.
  4. Adhere the eyes to the head, and a letter sticker for the child’s first name to the body. Place the letter “I” sideways on the head to create the robot’s mouth.
  5. Push two pearl-head pins into the top of the head for antennae, each secured with a drop of glue.

My little Robot stands approx. 4″ tall.

This project was created for and sponsored by Smoothfoam.

Disclaimer:  This blog uses ads and affiliate links.  If you choose to make a purchase using one of the links, I receive a small commission (at no additional cost to you) that helps offset the costs of maintaining this blog.  Thanks for your support!

Join Amazon Kindle Unlimited 30-Day Free Trial

Make Wedding Place Settings with Smoothfoam

The Bride and Groom Place setting  is a cute way to identify where the bride and groom will sit for dinner!

To make the Bride and Groom Place Settings you’ll need…            (*affiliate link)

4″ Smoothfoam ball
Smoothfoam sheet (any size)
Stick ‘n Carve*
Hot Wire Foam Cutter*
Sandpaper, paint brush
Craft paints – black and white
Mod Podge Gloss Finish*
Stickles Glitter Glue, Diamond*
2 wood dowels
Gold Paint Marker*
“Story of Us” stickers

  1. Draw, trace or print the outlines of a dress and bow tie on to the transfer paper, then stick the paper to a sheet of Smoothfoam.
  2. Cut out the images with the foam cutter, through the transfer paper.
  3. Remove the transfer paper and sand the edges of the foam as needed. Paint the bow tie black and paint the dress white.
  4. Cut the Smoothfoam ball in half then paint one half black and paint the other half white.
  5. After the paint is dry, coat each piece with Mod Podge (gloss finish).
  6. Embellish the surface of the dress and ball with glitter glue for extra sparkle.
  7. Cut each dowel to the appropriate size so the markers are the same height as shown. Paint the dowels with a gold paint pen and insert into the foam, connecting each piece to its base.
  8. Embellish each marker with stickers and bling.

Shop Handmade – The Wedding Store

Disclaimer:  This blog uses ads and affiliate links.  If you choose to make a purchase using one of the links, I receive a small commission (at no additional cost to you) that helps offset the costs of maintaining this blog.  Thanks for your support!